


Looping means many things to many players. For some, a looper is simply a handy composition tool, great for devising parts that work well together. Others use looper pedals for textural variation in an otherwise non-looped performance. And some ambitious players create entire concerts from loops.
Today’s looping devices reflect this range of applications. On the simple side, there are compact one-shot, single-track loopers such as TC Electronic’s Ditto and Hotone’s Wally. Single-track looping also appears on digital multi-effectors such as Line 6’s DL4 and TC Electronic’s Flashback 4. On the opposite end of the spectrum are elaborate multitrack loopers such as Boomerang III, Electro-Harmonix’s 45000, and Boss’s RC-300. Checking in between those extremes are such gizmos as Pigtronix’s Infinity Looper and Vox’s Lil’ Looper, both of which offer two tracks of looping for not much more than you’d spend on a single-track model.
There’s much variation from model to model. Some loopers remember your recordings from previous sessions, while others forget everything the instant you unplug. Some include built-in modeling or effects. Others, like Line 6’s JM4 with its prerecorded rhythm-section tracks, emphasize jamming and practicing. It definitely pays to consider your needs in advance and research each looper’s features.
when we breathe out.
(I use “one-shot” to refer to loopers that store only a single loop, though you can overdub onto that loop as much as you like. Other models let you record and play back many loops, but I don’t call them “multitrack” unless they let you combine multiple loops, or toggle between them to create multi-section compositions.)
While I hope you find useful info here, not everything will be relevant to your gear, needs, and tastes. So first, a word about how this lesson is organized:
• Looping Basics covers tips and techniques valid for all looping devices, even the simplest single-shot/single-track models.
• Multitrack Techniques focuses on arranging and performing with advanced loopers, with an emphasis on breaking out of predictable looping.
• Digital Possibilities explores the mischief you can make when looping within a digital system, be it laptop-based or a standalone hardware rig.
Our focus is spontaneous, realtime looping. This lesson doesn’t cover such topics as integrating prerecorded loops into your performances, syncing your looper with other musicians’ time-based devices, or using your looper as a practicing tool.
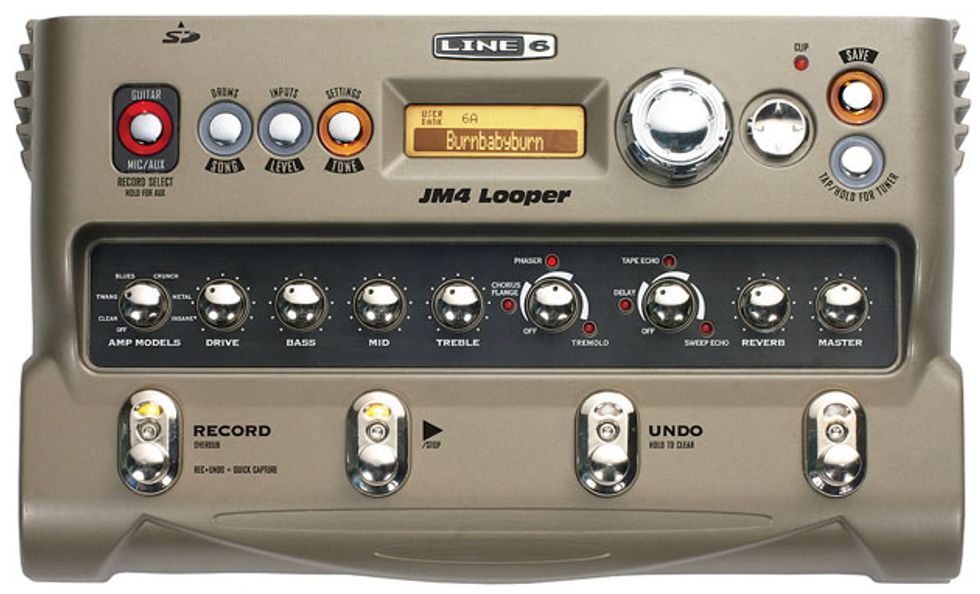
With hundreds of prerecorded backing tracks, Line 6’s JM4 emphasizes practicing and jamming. It’s a single-track model, yet it’s packed with features, including XLR input, amp modeling, effects, tone controls, and a tuner.
Part 1: Looping Basics
Get on the good foot. Do you have trouble consistently creating tight, rhythmically accurate loops? It could be simple performance anxiety. Many of us tend to speed up—and tense up—as we approach a loop point. If we accelerate at the end of a phrase, the loop feels wobbly. If we strike the note immediately following the loop point a bit early, we get a glitch when the premature attack collides with the loop’s start point.If these are problems for you, make a point to relax your body and breathe fully before you click record. Some photographers recommend snapping the shutter on the exhale for increased camera stability, and the technique often works when setting loop points. Our bodies just seem to flail a bit less when we breathe out.
For all our digital dexterity, we guitarists can be terribly clumsy. This may sound silly, but can you consistently tap your foot in time while playing, even when your part doesn’t fall on the downbeat? Can you do the same with your non-dominant foot? Practicing this may help.
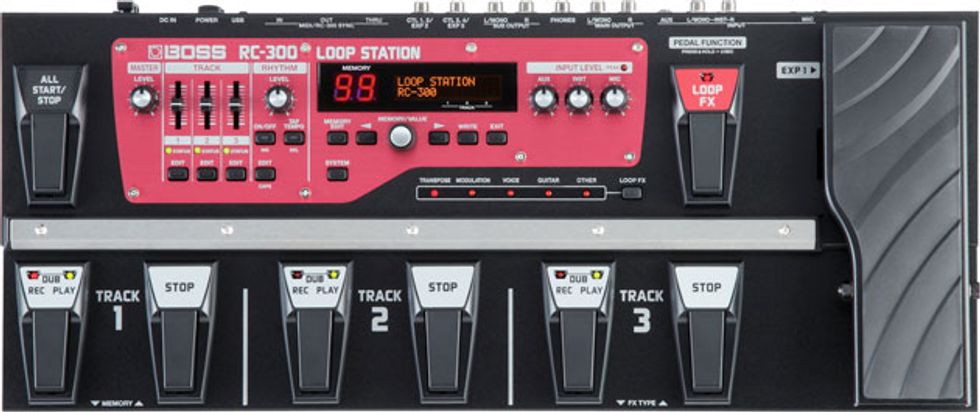
Boss’ RC-300 is a 3-track looper with dedicated transport controls for each loop and an integrated expression pedal. Also onboard: built-in effects, XLR mic input, and track faders.
If your looper lives on a pedalboard, make sure it occupies an ergonomic position. The less distance your foot must travel, the tighter your loops are likely to be. The same goes for altitude: The closer the switch is to the ground, the better your odds of nailing a perfect loop. Is your looper on the raised rear section of a multi-tier board? Try moving it to the front row, nearest your foot.
Also, be aware that the “touch” varies from looper to looper. Some use hard-clicking mechanical switches, while others employ soft-touch relays. Some have small switches, others larger pads. Less obvious is the fact that loopers use varying crossfade techniques to smooth loop points, and one pedal’s algorithm may simply feel more natural than another’s. Yeah, only poor craftspeople blame their tools, but it helps to have the tools that best suit you. If all else fails, try another device.
Spatial smarts. The orchestration techniques required when arranging and mixing songs apply here. For parts to have impact, you must clear away other parts that compete sonically. Try leaving rhythmic “holes” in your loops, places where other parts can peek through. (Think “call and response.”) Before adding a new layer, pause to determine the spots in the phrase that haven’t been filled yet. Avoid the automatic tendency to strike a strong downbeat precisely at the loop point. If you’re accustomed to playing solo or in a small band, it may feel strange to leave so many gaps. But once your looper starts rolling, you’re not really a soloist anymore.
The same applies to your note choices: It’s often good when layers occupy distinct registers. If, for example, you’ve just laid down a darkly thudding sixth-string bass line and are moving on to chords, it may be more effective to voice them delicately on the upper strings than to pound out fat barre chords whose low notes may obscure the bass line. If you concoct a cool part that doesn’t fit the emerging texture, consider transposing it up or down an octave. Also try leaving space within chords. For example, instead of strumming across all six strings, just pluck selected ones.
Ex. 1 features a loop whose rhythmic gaps and contrasting registers help each layer speak clearly.
High-contrast tones. We tend to like our guitar tones as fat and rich as possible, but that’s not always the best approach for looping. It’s usually more important to distinguish each tone, which can mean using tones you might normally avoid. It’s not so much a case of thinking small as thinking focused. Even if you seldom use your tone controls, try rolling off all the treble for that bass line. It may seem dark and dull at first, but it provides sonic space for parts residing in other registers. Likewise, the shrieking sound of a single-coil bridge pickup through a wah might be unbearable on its own, but a perfect choice for, say, a syncopated accent on a fourth overdub. In Ex. 2, a disparate set of tones creates a rich composite texture.
Your other pedals can help individual parts stand out. (This is one of many reasons that loopers usually reside at or near the end of your tone chain.) You may find yourself using stompbox controls in new ways. Extreme tone settings you’d normally avoid might fit as perfectly as the last jigsaw puzzle piece. Careful, though, about slathering on too much distortion, which can muddy the waters. So too can delay effects that trail on after you stop playing, or heavy-feedback phaser and flanger whose sweep points don’t align between loop phrases. Tap-tempo effects can smooth the process.
Double trouble. Unless you play with panning (discussed below in the digital section), literally doubling a part can be a bad idea. Because both parts get bounced to a single digital track, strict doubling is less likely to increase mass and impact than to produce an unattractively thick and blurry texture. On the other hand, doubling at the octave or harmonizing at other intervals can be very effective. Ex. 3 features a brutal bit-crushed riff. Instead of doubling it exactly with another distorted sound, I mirror it an octave above.
Be odd. The advanced section below focuses on making loops less predictable via multiple tracks. But here’s a rhythmic variation trick you can perform even on the simplest looper: Create a loop with an odd number of bars, and then play against it in phrases with an even bar count. In Ex. 4, I loop a three-bar pattern with a rhythmic variation in the third bar, and then play against it in four-bar phrases. The alternate rhythm falls on bar three of the first four-bar phrase, bar two of the second phrase, and bar one of the third. Voila! Even though it’s a static loop, it feels like it’s shifting.
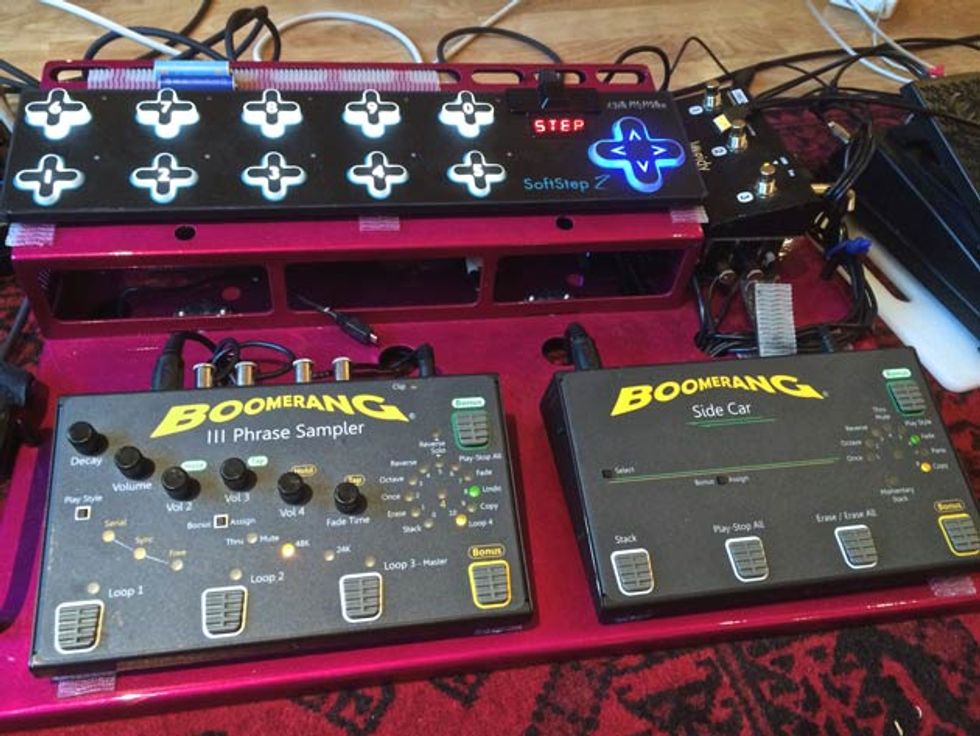
Boomerang III (seen here on my digital pedalboard) boasts four independent tracks. The optional Side Car (sold separately) lets you access most of the device’s functions without reprogramming buttons on the main unit. It’s a powerful and ergonomic looper, but its memory is strictly volatile—once you power down, your recordings are gone.
Get off the one. Sometimes it’s effective to build from a loop that doesn’t start with a strong downbeat accent. That’s especially true if you can fake out listeners about the true location of the downbeat. In Ex. 5, for example, I commence with an offbeat reggae-style skank, which we tend to hear as a downbeat until the groove materializes to set us straight.
Alter the attack. You can add variety and help looped layers gel by varying your note attack. For example, try fading in a chord with your guitar’s volume knob or a volume pedal, or using an EBow for sustained, string-like textures, as in Ex. 6.
Explore the space. Another way to differentiate parts is to mix dry, present sounds with distant, ambient ones. Think in terms of a three-dimensional soundstage, with some parts seemingly close to the listener’s ear and other further away, as in Ex. 7.
Stop the damn looper. Sometimes the most effective looping technique is to turn everything off and play in real time for a bit, which can provide desperately needed dynamics. For example, construct a huge loop, and then pause suddenly for a quiet, clean-toned improv that gradually builds before climaxing with the return of the big loop, as in Ex. 8.
Or think shorter: Simply click off the loop on the last beat or two of a section, aerating the texture before the loop kicks back in (Ex. 9). Extra credit if you fill the gap with an unexpected new sound.
Another fun trick: If your loop starts with a powerful attack, try turning off the loops, playing solo, and then quickly flicking the loop on and off for a surprising “stab” chord, as in Ex. 10. It’s especially startling when you drop an accent somewhere other than on the downbeat.
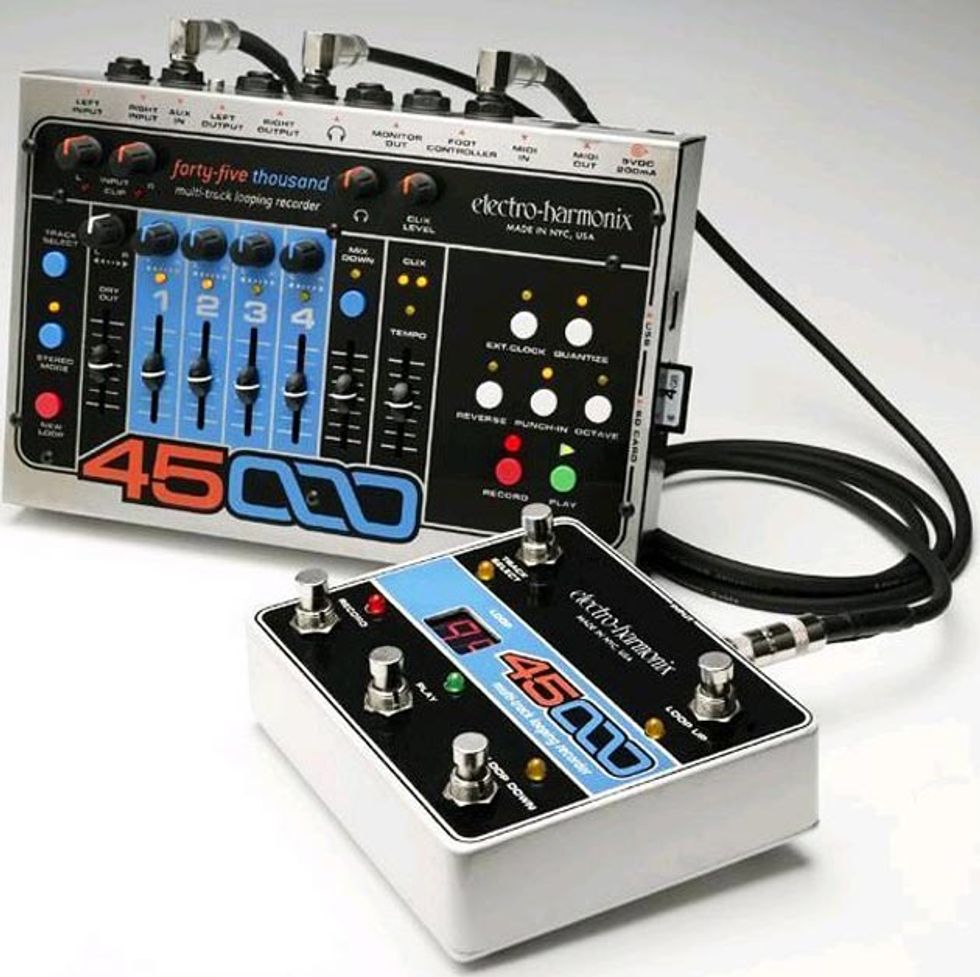
Electro-Harmonix’s 45000 is a full-featured 4-track looper with faders for each track and the ability to store all your work. Its tabletop format makes it a favorite among vocalists and DJs, but when you add the optional foot controller (sold separately), it becomes a brilliant tool for guitarists as well.
Part 2: Multitrack Techniques
The predictability problem. The problem with loops is … they’re loops! Once they’ve cycled around a few times, listeners know what to expect. And that’s not the only predictability problem in looped music. Looped performances tend to fall into a uniform structure:1. Play awesome part.
2. Stack another awesome part. (Repeat as desired.)
3. Marvel at your glorious sound tapestry.
4. End.
Nothing wrong with that—it’s a dramatic and compelling form. But an entire set like that, with every piece steadily ramping up to maximum density before a slow fade or a hard stop? Every song shaped like an isosceles triangle tipped onto its longest side? That’s the opposite of dramatic and compelling.
The good news is, once you move up to a looper with two, three, or four tracks, you have far more ways to defy listener expectations. That’s our focus here.
Dub-wise. If your looper lets you play multiple tracks simultaneously, you can add variation by combining interlocking parts in varying configurations. On my 4-track Boomerang III, for example, I can use one channel as the master, and combine it with one other channel. In other words, I can have Loop A play along with Loop B or Loop C, but not all three together, and not B plus C. Still, that’s seven possible permutations: A alone, B alone, C alone, D alone, A + B, A + C, and A + D. A four-layer loop on a single-track sampler may sound great, but it’s static. On a multitrack, you can practically create an arrangement just by combining those four parts in shifting configurations, dub-style, as in Ex. 11.
Undo me, baby. Multitrack loopers are likelier than single-track ones to have an undo function. With undo, you can create “two loops in one” by working the undo/redo switch. You might, for example, build up a layered loop, and then switch to the stripped-down version behind a solo, as in Ex. 12.
Copy and paste. A fancier variation on the undo/redo trick above: While building a layered texture, pause early in the process to copy the loop-in-progress to a second track, and then finish creating the texture on the original track. Then you can toggle between a complex version of the section and a simpler one.
Rip your riff in two. Sometimes it works to split a part across two tracks—say, the first two bars of an eight-bar phrase on one track, and the other six bars on another. If the first two bars work on their own as a vamp, you can hang out on them for a solo section or breakdown before returning to the full eight-bar phrase, as in Ex. 13.
Big bang B sections. The biggest hurdle when playing song-like structures with loops is transitioning to a new section. Say you’ve built up a fabulous four-layer A section, and now you’re ready to build the big chorus: How do you avoid a massive energy drop when you must start with a single part? Easy—start the B section with a loud, aggressive new tone with so much impact that listeners don’t realize you’re downsizing from four layers to one (Ex. 14).
Erase while you riff. This technique requires coordination, but when it works, it’s great: If you run out of tracks mid-arrangement, but you no longer need one of your parts, try erasing it while playing over another section, freeing it for a new part.
Faded glory. If your looper has a fade function, you can create beautifully trippy endings and transitions by ducking down your loops while playing over them in real time. Having one part fade while another holds steady adds cool variation and complexity, as in Ex. 15.
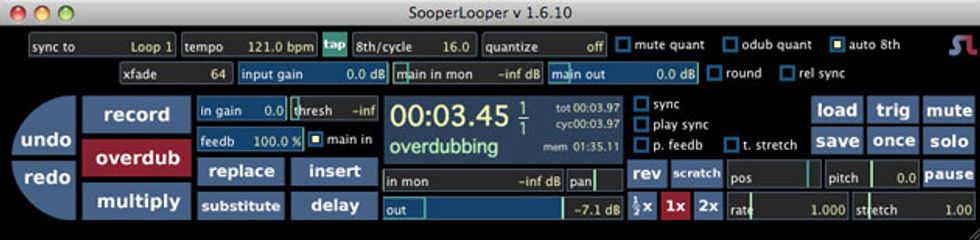
There are several cool software looping programs, but Sooperlooper has the advantage of being free (though donations to support continued development are appreciated).
Part 3: Digital Possibilities
What? Isn’t all looping digital? Nowadays, pretty much, though the technique was born in the 1950s with the tape loop experiments of the so-called musique concrète composers, whose techniques were later adopted by such rock avant-gardists as the Beatles, Zappa, and Brian Eno.But I refer here to using looping within digital guitar setups, be they laptop rigs or hardware digital amp/effectors. Working in that realm opens up even more possibilities—including replacing your hardware looper with a looping plug-in such as Expert Sleepers’ Augustus Loop, the freeware SooperLooper, or Loopback, which is included in Apple’s MainStage software.
Quick-change tones. When you create tones in software, it’s usually easy to switch between preset patches, making it easier to generate high-contrast, quick-change tones. You can switch virtual amps and effects with a single click, as opposed to attempting balletic pedalboard moves. In MainStage (my performing software of choice, though I rely on a hardware looper), you can create unlimited sound snapshots and step between them using a MIDI controller pedal.
That syncing feeling. In digital rigs, it’s easy to set a global tempo for all delay and modulation effects, as opposed to adjusting multiple stompboxes from song to song. Just assign a MIDI footswitch (such as Logidy’s UMI3) as a tap-tempo control. That way, everything can wobble and echo in time, even when you change patches.
Panorama-O-Rama. If you’re recording or performing through a stereo rig and have a stereo sampler, panning can lend spaciousness to dense textures. I often assign a MIDI controller pedal to a pan pot so I can position parts within the “mix.”
Exclusively software effects. Not long ago, there were many cool effects available only in the software realm, such as impulse-response reverbs, granular delays, bit crushers, and beat slicers. Nowadays you sometimes find such effects in stompbox form, but still, migrating to digital opens the door to many mind-blowing software processors. Ex. 16 features a few cool oddballs that, as far as I know, are only accessible in software.
Sampled underfoot. Oh jeez, the trouble you can get into if you add a MIDI pickup such as Fishman’s TriplePlay. That provides access to hundreds, if not thousands, of virtual instruments and sample libraries—including drums.
Drums for days. Triggering drums via MIDI guitar can be tricky. Timing inaccuracies you’d never noticed while playing guitar can become glaringly obvious. Attempting this technique can do wonders for your sense of rhythm, though you may find yourself making fewer drummer jokes after walking a mile or two in those big clown shoes.
Some tips:
• Set your software’s latency as low as possible (the fastest setting before you encounter audio glitches). The exact setting depends on your computer’s processor speed. On a recent model Mac Pro, for example, I can run sessions at a swift 64 samples. At that speed, you can’t really hear a delay between string and sound, though you can often feel it, especially at faster tempos. Getting solid drum grooves requires practice.
• Most MIDI drum kits follow a standard note assignment, with kick assigned to MIDI note C1, snare to C2, hat to F#1/A#1, and so on. However, the lowest note on a standard-tuned guitar is E1, so you must transpose. Most samplers and virtual drum kits let you reassign drum voices to different note triggers, but instead of moving sounds individually, I recommend transposing everything up two octaves so the kick falls on C3 (equivalent to your second string, first fret), snare on D3, etc. DAWs perform this feat in varying ways. In Logic and MainStage, for example, you change the input channel’s MIDI transpose parameter from zero to -24, representing two octaves. That way, when you finger the note C3, the sampler plays the kick assigned to C1, and so on. Now you can play most software drum kits using the same positions and fingerings. Bonus benefit: MIDI pickups tend to track faster on high strings because skinny wires settle into a definitive pitch more quickly than fat strings.
• YouTube videos prove that some keyboardists and guitarists have developed amazing “fake drum” skills. But beware of the “uncanny valley”—a term used in robotics to describe the revulsion we instinctively feel when artificial human features are almost, but not quite, accurate. Most of us would rather interact with a robot that has stylized features than a super-realistic one that’s still clearly a robot. When mimicking a drum kit, sometimes it’s better to simplify—or even just imply—drum parts, rather than attempting to mimic every nuance of a human performance. Not-quite humans are creepy. So are some not-quite-human MIDI drum performances.
The pseudo-drums in Ex. 17 and Ex. 18 aren’t prefab loops—they’re all performed note-for-note in real time and then looped, using the two-octave transposition trick.
Back it up. While some loopers let you create backward loops, the forward/backward status is usually global for all tracks. For example, in order to add a reverse solo to a running loop, you must reverse all the loops, play the solo forward, and then reverse the direction again for all parts. It may be more efficient to use a reverse-delay plug-in, such as Tru-Tape Delay in Apple’s Logic and MainStage, or Psychedelay in Native Instruments’ Guitar Rig. A backward Tru-Tape Delay solo appears 45 seconds into Ex. 19
Steal from EDM. Try integrating electronic dance music techniques, like using synth swells, risers, and stingers to add motion and momentum to otherwise static loops. For example, inserting a synth crescendo a bar or two before switching tracks can make transitions more exciting, as in Ex. 20 at the 01:20 mark.
Loopaholics, unite! I hope you find some of these ideas useful. And if you’ve developed cool looping techniques of your own, please share them with your fellow loopaholics in the comments section. Happy looping … looping … looping …
Three Lilliputian Loopers Reviewed
The rise of the compact, entry-level looper is one of the most exciting pedal trends in recent memory. Increasingly plentiful in the last two years, these devices not only make looping more accessible from a budgetary standpoint, but they’ve demystified a tool and process that has probably looked a bit geeky to a lot of casual and traditional players.
The entry-level loopers showcased here are a little like economy cars. They’re simple, they’re cheap, and in many fundamental ways they’re very similar. Still, each has its merits that will appeal to different kinds of players. These aren’t the only compact loopers out there. Electro-Harmonix recently released the 360 Nano looper, and we’ve reviewed both of TC Electronic’s excellent Ditto loopers. Here’s what’s most appealing about all these units: They don’t require a 30-page manual. And despite their simplicity, they can deliver a wealth of real musical surprises.
Hotone Wally
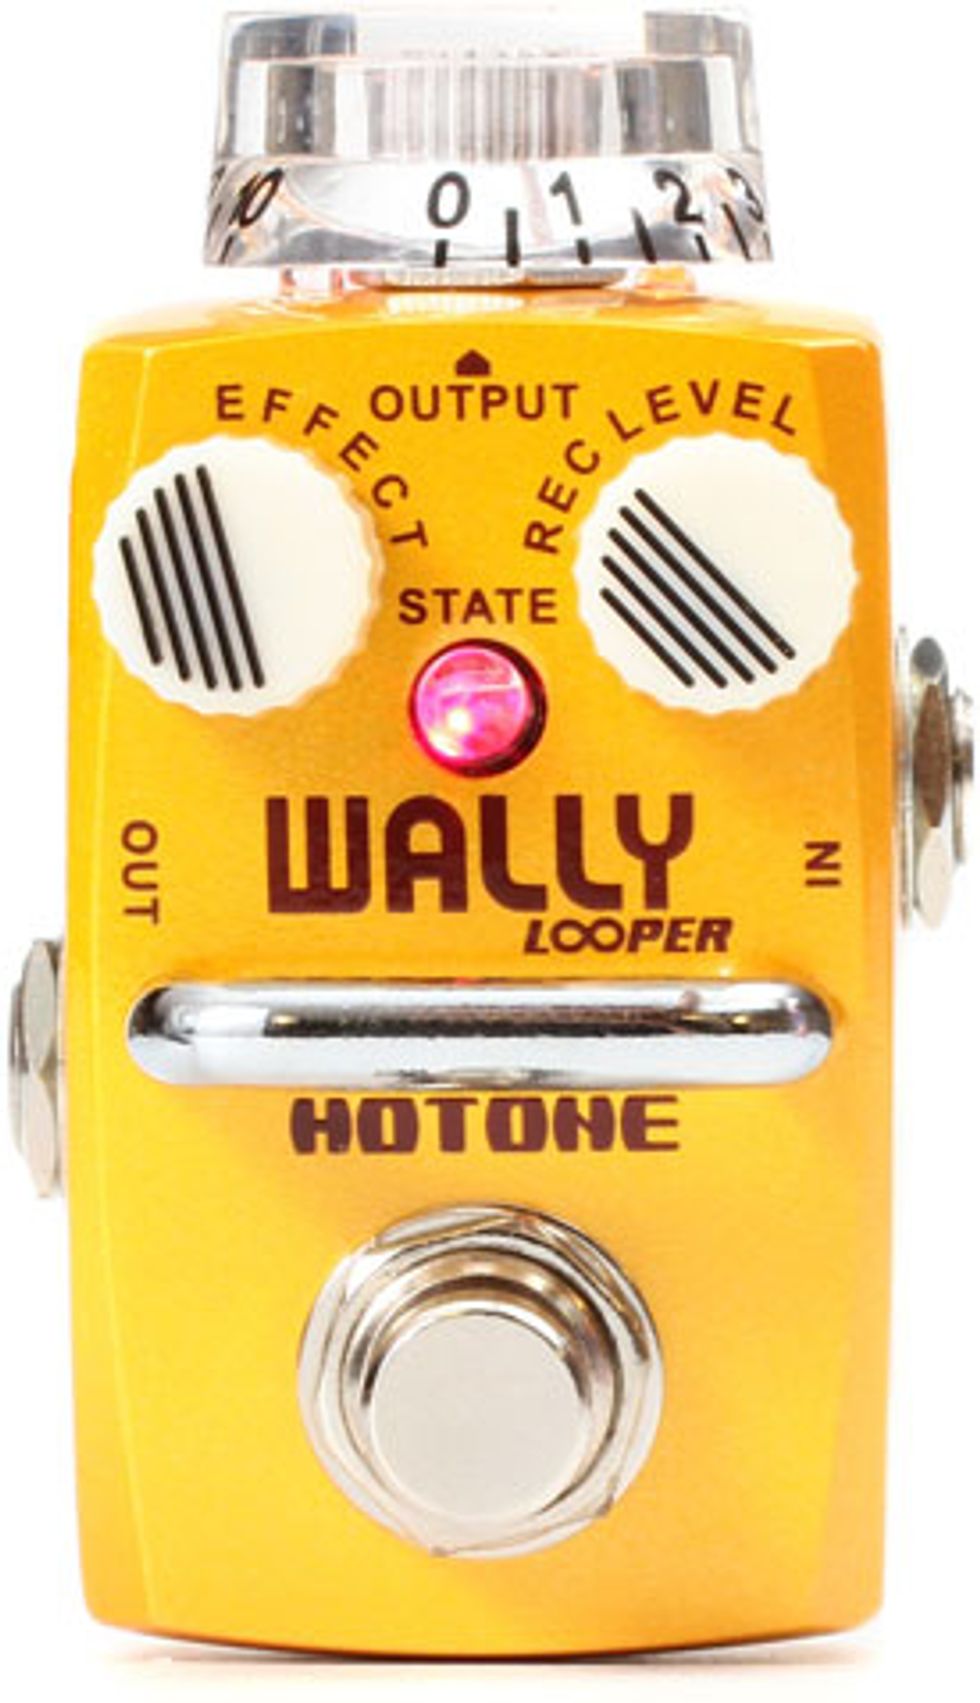
Throw any of Hotone’s tiny stompboxes in a roundup and it will probably take the prize for cutest pedal in the mix. That’s certainly the case with the Wally looper. You could easily mistake this little yellow dude for a Matchbox car and toss it into your kid’s toy bin if you weren’t careful. But you’d be quick to miss the simple functionality of the microscopic looper if you did. The Wally is a breeze to use, relying on conventional one-step-to-record, one-step-to-play, one-step-to-overdub, two-step-to-stop functionality. The only operating challenge intrinsic to the Hotone comes from the top-mount placement of the loop level control, which makes adjustments with your sneaker more difficult.
Switching is immediate and easy to time just right, and you can overdub limitlessly right up to the memory capacity (which tops out at about 15 minutes worth of captured sound). The record level function lets you track layers of varying volume when stacking loops, and if you’re clever, this layering flexibility lets you really control the complexity of a loop composition. But the most interesting function on the Wally is the tempo control, which will slow and lower the pitch of your loop or speed it up and raise the pitch. While its practical applications may be limited, the tempo control lends a cool dose of freaky potential to a looper that’s super-practical in terms of size and function, and uncommonly potent if you’re an experimentalist on a budget. —Charles Saufley
Ratings
Pros:
Super small. Super simple. Built like a little rock.
Cons:
Might be so small you lose it in your gig bag. Hard to adjust looper level on the fly.
Street:
$89
Hotone Wally
hotoneaudio.com
Ease of Use:
![]()
Build/Design:
![]()
Value:
![]()
DigiTech JamMan Express XT

The name JamMan is synonymous with looping, so DigiTech’s contribution to this compact category—the JamMan Express XT—is no real surprise. The original JamMan was a hit, in part, for the quality with which it recorded and played back loops. The Express XT makes no concessions on this front. It converts audio at 24 bit and samples at 44.1 kHz, which means that unless you have the ears of some hyper-auditory alien race, you won’t be griping about fidelity. You won’t complain about operating the Express XT either. Recording, overdubbing, stopping a loop, and clearing a loop are all controlled via the same one-tap, two-tap, and hold actions that have become a standard for simple loopers.
The Express XT is clearly designed with stage use in mind. The loop level knob is big enough to adjust with your foot and offset for easy access. The individual colored LEDs that indicate record, overdub, and play modes are bright and logically arrayed. Other features geared to more experienced loop aficionados include the JamSync function, which lets you sync loops of different lengths from two Express XTs or other JamMan loopers. The stereo I/Os help make the Express XT capable of huge soundscapes—especially when you add a second instrument and amplifier. —Charles Saufley
Ratings
Pros:
Stage- and performance-friendly controls and I/O features. High fidelity. Can run on 9V battery.
Cons:
Short battery life.
Street:
$99
DigiTech JamMan Express XT
digitech.com
Ease of Use:
![]()
Build/Design:
![]()
Value:
![]()
![]()
Boss RC-1 Loop Station
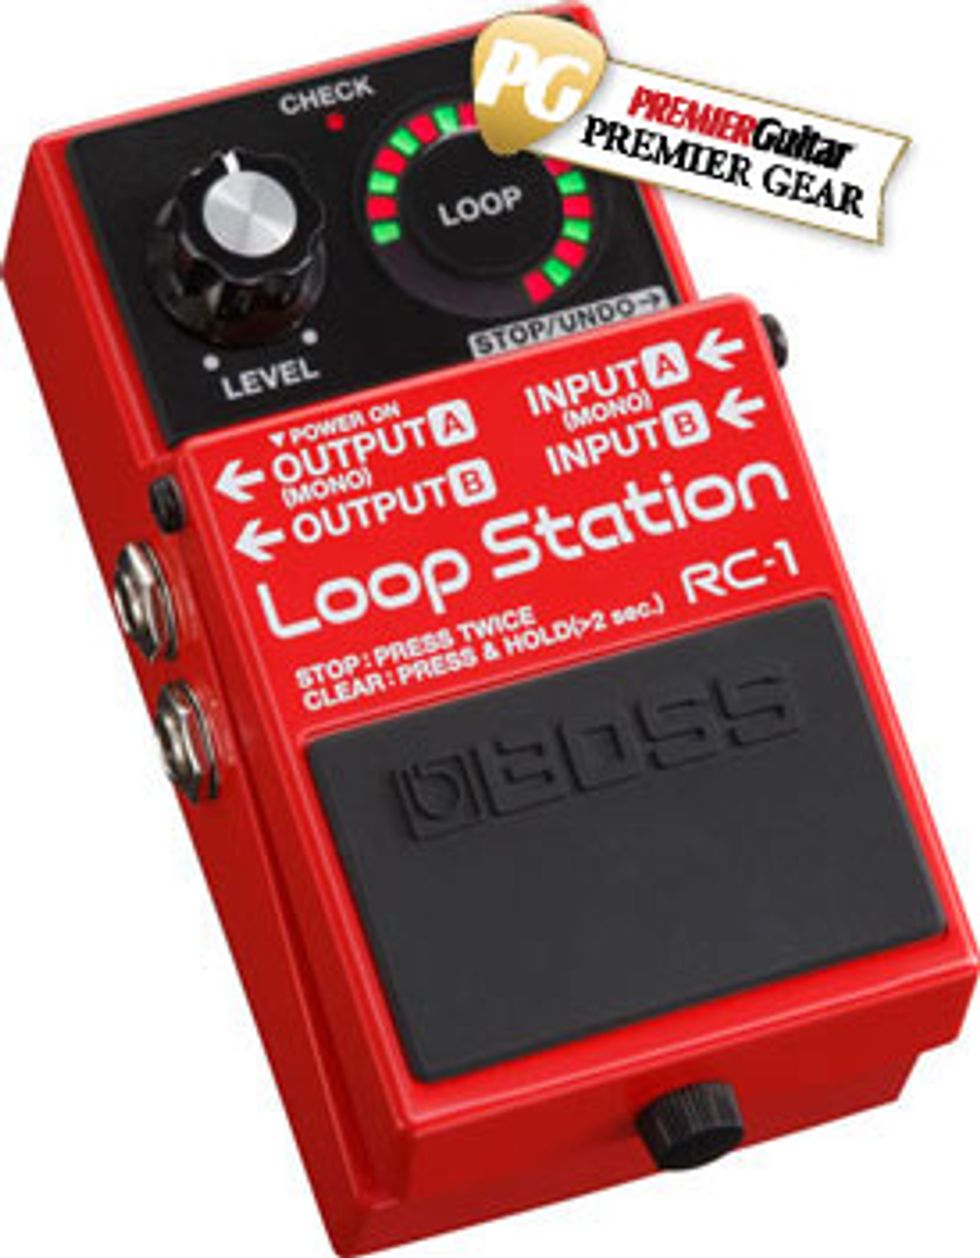
Like DigiTech, Boss is a venerable player in the looping universe. The original LoopStation is among the standard bearers in the category, and it has spawned smaller and simpler cousins of late. The newest and simplest and most affordable is the RC-1. Like most Boss pedals, it feels stout, sturdy, and destined to live on your pedalboard until it’s a filthy beer-and-dust-encrusted vintage specimen. The RC-1 uses Boss’ classic switching mechanism, which can feel just a hair less precise and immediate than other looper switches, though it almost never translates to an ill-timed loop maneuver. A lot of players love the touch of the Boss switch for looping, and it pays to try one out to see how it suits your own sense of touch.
Elsewhere the Boss is brimming with performance-oriented features. The loop level knob is offset so you can make quick adjustments with your foot. And the unique LED light wheel is a clever tool that’s illuminating in two ways: Not only does it indicate mode, but it also offers a visual representation of loop length and start point. The latter function can be a valuable asset when stacking loops amid the cacophony of a band. —Charles Saufley
Ratings
Pros:
Sturdy enclosure. Practical and clever status/loop time light wheel.
Cons:
Some players might find the switching a bit vague.
Street:
$129
Boss RC-1 Loop Station
bossus.com
Ease of Use:
![]()
Build/Design:
![]()
Value:
![]()


