


Bound necks look and feel great, but sometimes binding can come loose. Such delaminating can occur if the binding material shrinks due to aging or if the guitar is exposed to changes in temperature and humidity. Vintage instruments are more susceptible to binding woes, but it can happen to new guitars as well.
On antique guitars, fretboard binding might be made from ivory or bone, while wood and plastic are the most common types of binding materials used today. Both wood and plastic can shrink over time and pull away from the neck. Regardless of what the binding is made of, the repair isn’t difficult if you take your time and approach the job systematically.
To illustrate how to repair fretboard binding, we’ll use a 1975 Guild D-55 that a client recently brought into the shop. Though the guitar had been well cared for, the binding had shrunk, causing it to separate from the edge of the fretboard and split around the 4th fret (Photo 1). If left unrepaired, the loose binding would eventually catch on something (like your hand or sleeve) and pull completely off the neck.
We only need a few items to correct this problem: Titebond II wood glue, a roll of painter’s tape, a sharp X-Acto knife, a small paintbrush or putty knife, and paper towels.
Prep work. The first step is to remove the old glue from the neck and binding. If you don’t do this, the binding won’t fit flush against the neck and can delaminate again.
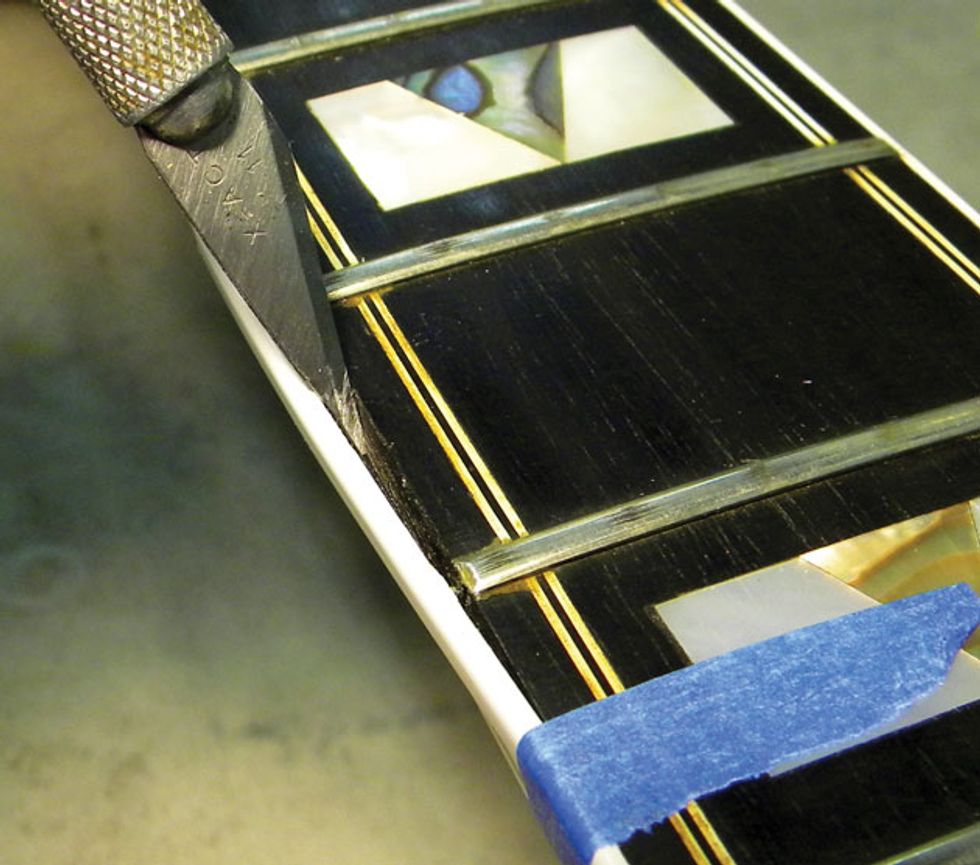
Photo 2
Begin by securing the intact binding with a thin strip of painter’s tape just beyond where it has separated from the neck (Photo 2). This will prevent any further delaminating as you make the repair.
Now use the X-Acto knife to gently scrape off the old glue from the binding and the edge of the fretboard. Be very careful as you do this. If you work too fast, you might chip the finish on the neck or, even worse, cut into the binding or fretboard. The goal is to clean the gluing surfaces of the fretboard and binding without nicking or damaging them. When the edge of the fretboard and the binding are clean and free of debris, you’re ready to apply some wood glue.
But before you reach for the Titebond, a word of caution: Extreme change in humidity is a primary cause of loose binding. When a guitar dries out, the wood and binding will shrink, causing the latter to crack and delaminate. If your guitar has dried out, do not re-glue the binding until the instrument has been re-humidified. Using a room humidifier or dedicated guitar-humidifying device, bring the humidity level to between 40 to 50 percent. (For more details on this procedure, read “Fighting the Humidity Battle.”) This may take several days, but it’s better to be patient and do the job right the first time.
Time to glue. I’ve seen several different types of glue used to repair binding, including epoxy, hide, and super glue. Epoxy and super glues both work well, but they’re more difficult to clean up after they dry. If you use too much of either, you have to sand off the excess and that can create a big mess! At my shop, we prefer to use water-based wood glues, like Titebond II, because they’re easy to clean up using a damp paper towel. Titebond is also very strong—perfect for binding repair.
Before you apply any glue, cut several thin strips of painter’s tape and keep them nearby. These strips will hold the binding onto the fretboard as the glue dries. For this job, I prepared eight strips, but, of course, the number you’ll need will depend on how long the section of binding is that needs to be re-glued. Be sure to use low-tack painter’s tape, rather than other tape you might have around the house. Because painter’s tape is formulated for easy removal, it’s unlikely to pull off the finish around the binding when you remove the tape after the glue has dried.
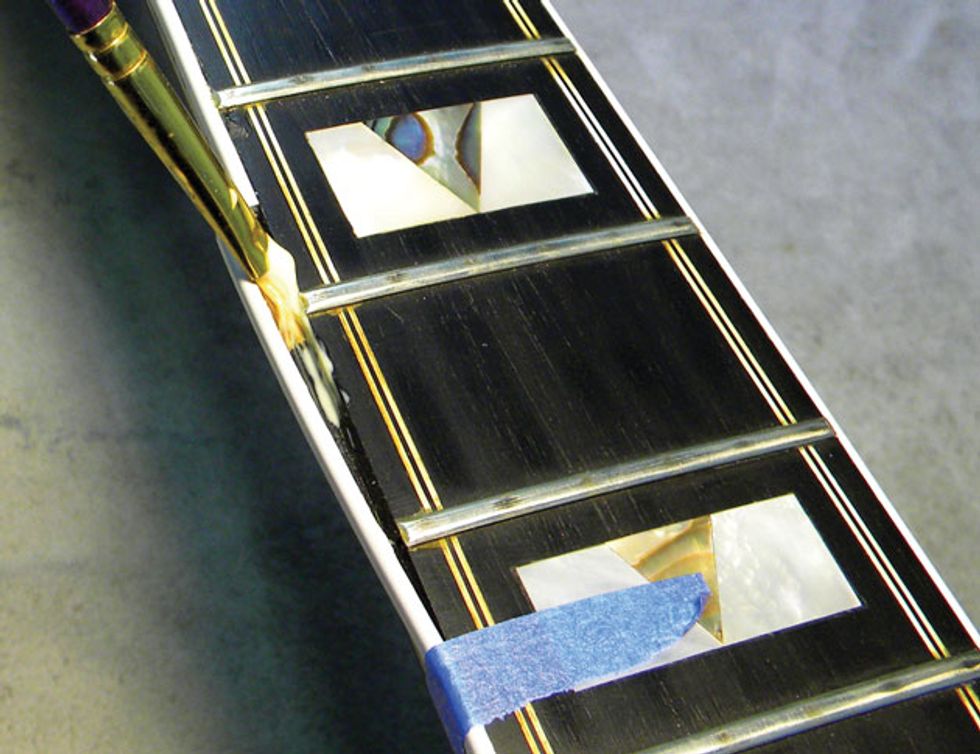
Photo 3
Apply the wood glue along the edge of the fretboard using either a small paintbrush (Photo 3) or a putty knife. If you use the latter, wield it gently to avoid accidentally scraping the finish or wood.
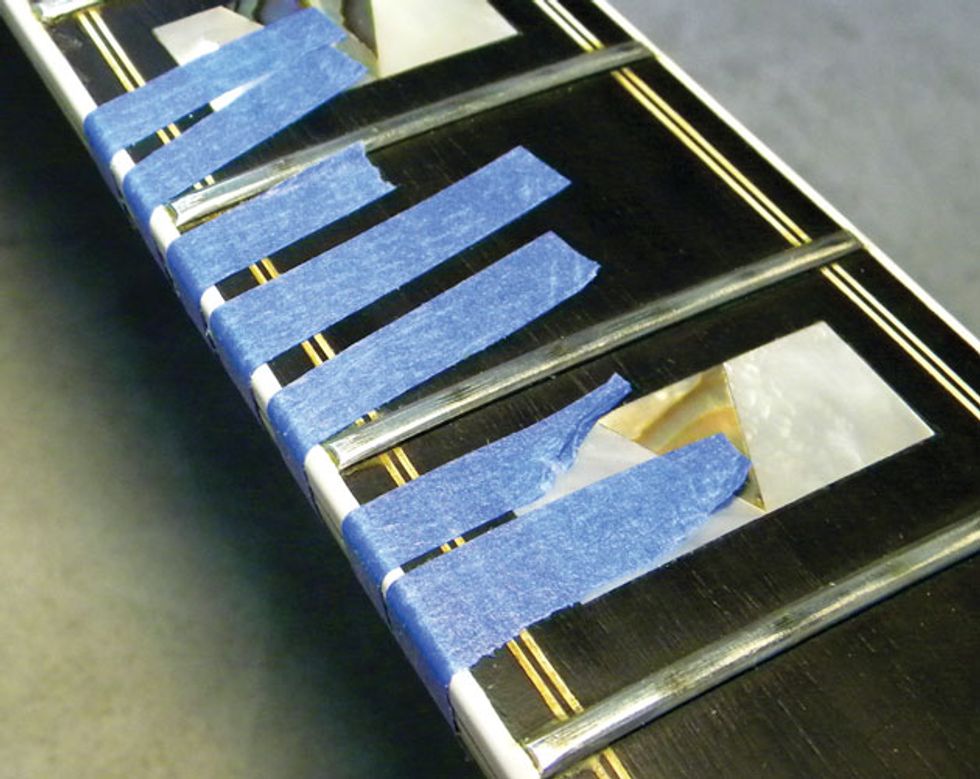
Photo 4
Once the edge of the fretboard is covered with glue, press the binding into place. Use a damp paper towel to wipe up any “squeeze out” or excess glue. Make sure the towel is only lightly damp. You don’t want any water seeping back into the glue joint. Now place the thin strips of painter’s tape over the binding to hold it flush to the fretboard and neck (Photo 4).
Tip: Make sure the binding stays in proper alignment with its neighbor and doesn’t slip out of place. Misaligned binding will leave a gap on the underside of the neck or a ridge where it’s raised above the top of the fretboard. Both these mistakes can be corrected, but you’ll waste a lot of time fixing them and the binding won’t look right.
Allow the glue to dry overnight. Titebond II will dry in about four to six hours, but there’s no harm in waiting a day to make sure the glue is fully set and completely dry. This is especially true if you re-glued the binding on a humid day.
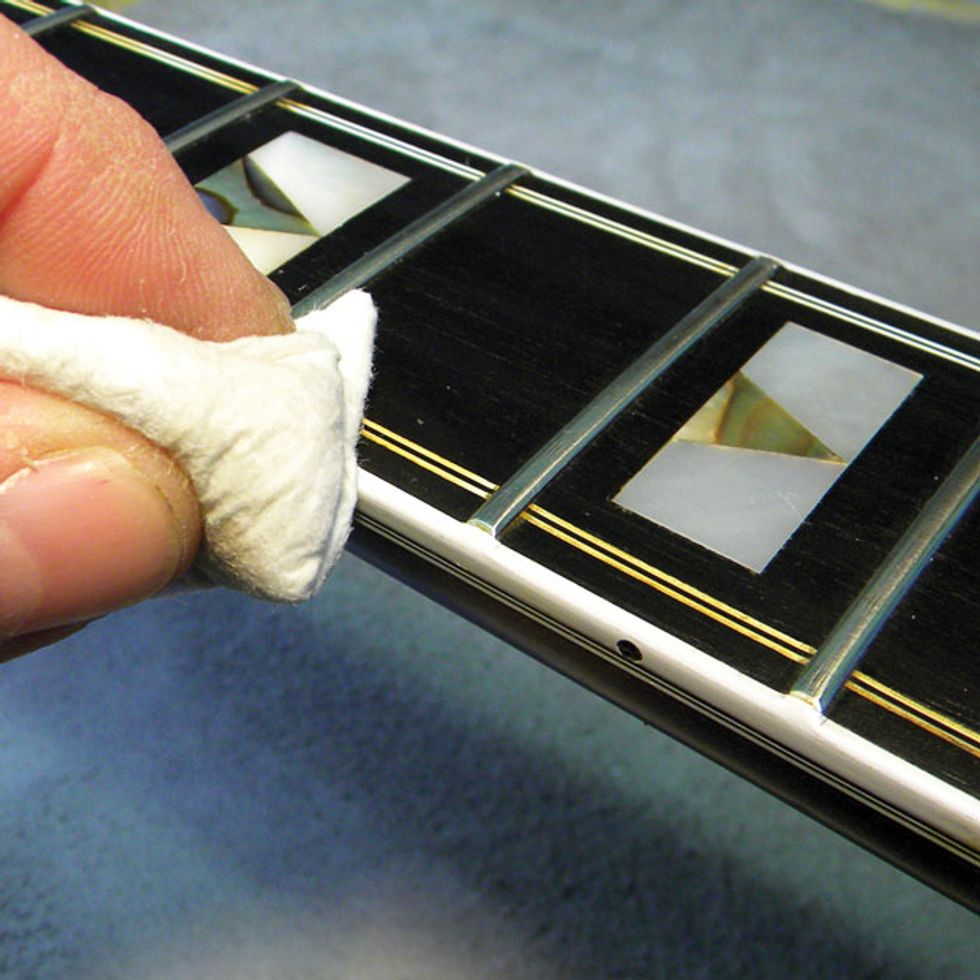
Photo 5
Final clean up. After the glue has dried overnight, remove the tape and check your work. Sometimes painter’s tape will leave a bit of sticky residue, but no worries: You can clean that off with a damp paper towel (Photo 5). If that doesn’t work you can use a fretboard conditioner like Planet Waves Hydrate to remove the residue. For this final cleanup, do not use a razor blade or scraper of any kind, because that could damage the wood, binding, or finish. A damp paper towel is all you need.
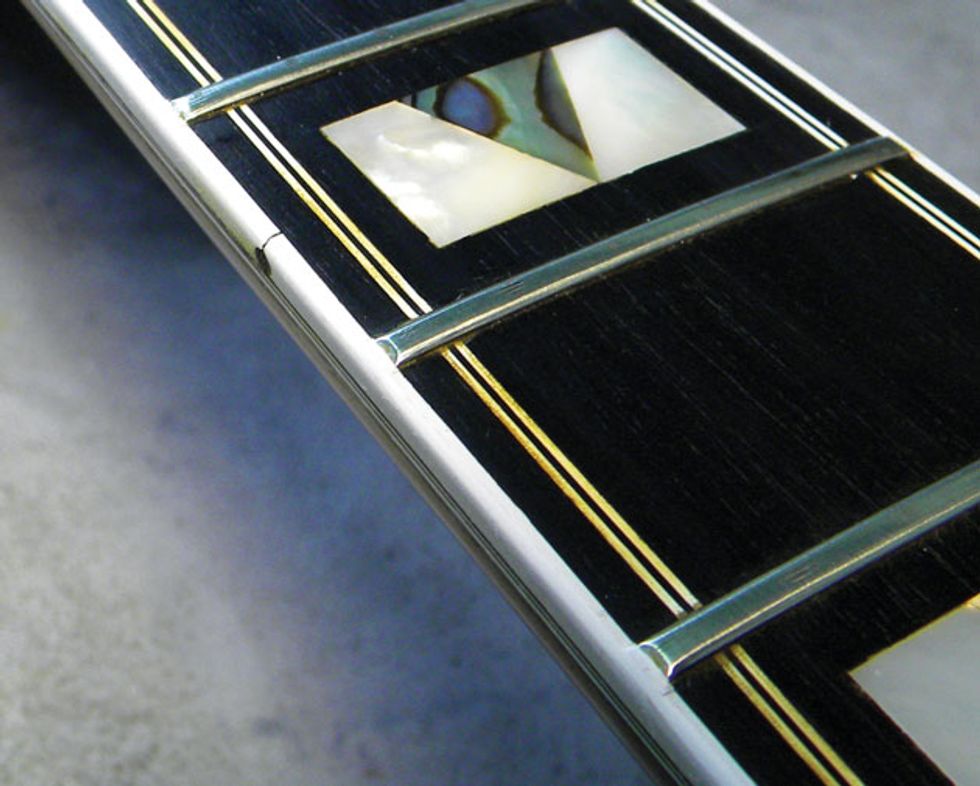
Photo 6


![Rig Rundown: Russian Circles’ Mike Sullivan [2025]](https://www.premierguitar.com/media-library/youtube.jpg?id=62303631&width=1245&height=700&quality=70&coordinates=0%2C0%2C0%2C0)


