There’s no two ways about it: If you’re serious about guitar and bass, at one time or another you’ve been completely stumped by gear jargon. The big problem with this isn’t just that you feel lost or stupid in a conversation with more experienced players. The worst part is that you might end up shelling out hard-earned money on stuff you might not have bought if only you knew better.
When you’re just starting out, the confusion arises from terms road warriors toss around willy-nilly like everyday figures of speech. But it can also be the stuff left unsaid that’s confusing. For instance, how many newbies realize a lot of the nice-looking, reasonably priced acoustic guitars they’re considering buying aren’t made of solid wood? It says “spruce and mahogany” in the description—what gives?
But guess what, it’s no different for more seasoned players, either. Unless you’re an accomplished builder and electronics whiz, even long-timers reach a point where buzzwords, seemingly obvious designations, and/or complicated concepts boiled down to easy-to-digest labels whisk over your head like calculus terms lobbed at a third grader. Proof? Even many bona fide tube-amp snobs couldn’t tell you what truly constitutes a “class A” power section.
All of this complexity and vagueness can make shopping for new gear an overwhelming, stressful proposition—and that’s not even taking into account the fact that language used to describe gear we see for sale in online stores, on eBay, or in classified ads can either accidentally or purposely take advantage of existing ambiguity.
Our aim here is to demystify commonly used terms to help you get the gear you need and want. And the key to this isn’t just knowing the terms—knowing a term doesn’t mean you know how it affects you as a player or shopper. The goal of this article is to put some of the jargon in context. Think of it as an expanded glossary of selected terms, with definitions mixed in with discussion. It’s by no means comprehensive—that would be a truly mammoth undertaking. Instead, we’ve focused on terms that come up most often for the average buyer of guitar and bass gear, and we’ve organized them alphabetically in sections for guitars and basses, effects, and amps.
Click next to start learning or dive into your topic of choice:
Guitars
Pickups
Effects
Amps
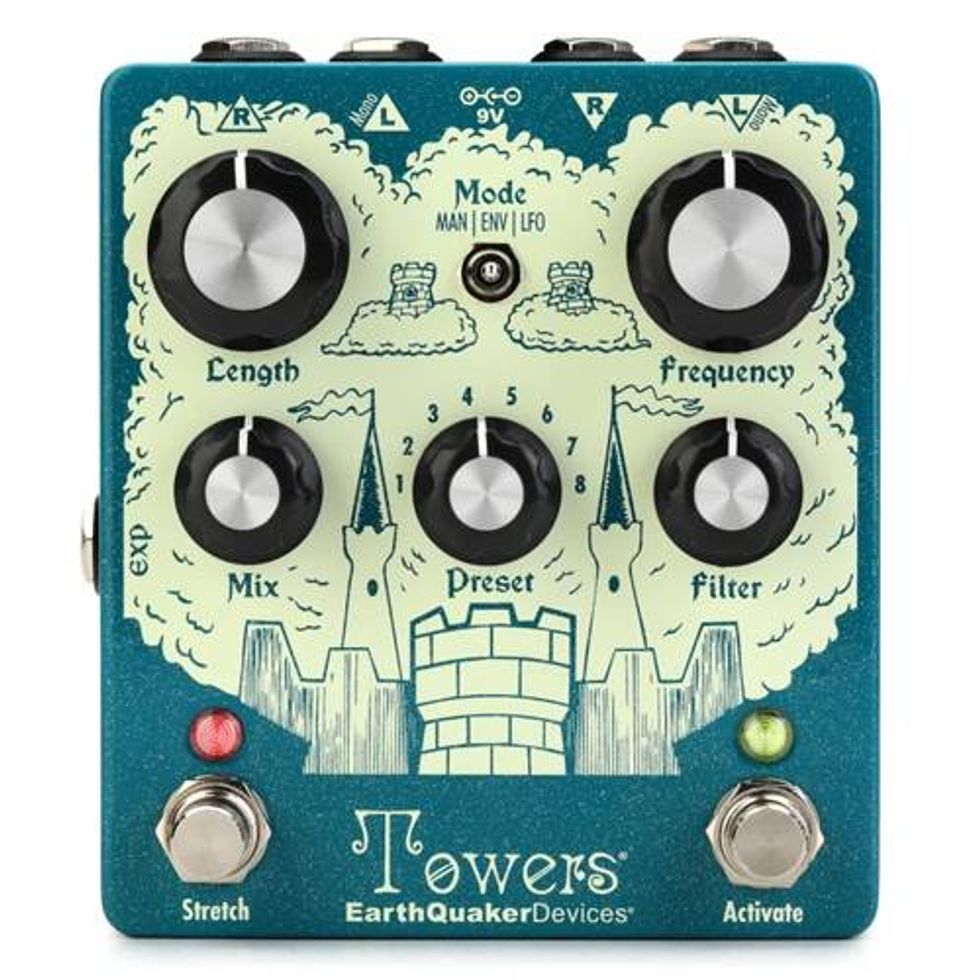
Neck joints come in three basic varieties: The bolt-on joint popularized by Fender guitars and basses (top), the set-neck approach seen on this Jol Dantzig solidbody (bottom)—as well as most Gibson electrics, and the majority of acoustics—and the neck-through architecture of shred guitars like this Allen Eden 1987 (right).
Photo on bottom left taken by Jol Dantzig
Guitars
Bolt-on vs. set-neck vs. neck-through: For hundreds of years, all guitars had “set necks”—i.e., necks glued to the body using various methods of wood joinery. Fast-forward to modern times: One of Leo Fender’s most lasting legacies was popularizing the bolt-on neck. He went this route because he wanted necks to be easy to replace on the go, but the decision also ended up contributing to his instruments’ twangy tone.In contrast to both set and bolt-on designs, “neck-through” instruments don’t really have neck joints at all: The block of wood forming the neck is extended to form the center of the body, which is usually fleshed out with adjoining “wing” segments. This approach can be found on both solid and semi-hollow guitars and basses.
Each neck-joint type contributes to tone in subtle but audible ways. In theory, set and “through” necks offer better coupling and therefore better overall resonance and sustain. Because neck-through guitars don’t require a bulky neck-body joint, they can also be made to facilitate easier access to high notes. Then again, bolt-on necks are not only replaceable in the event of a break (or if you want a different neck profile, or want to convert your guitar to, say, a baritone), but they can also be adjusted for optimal positioning with specialized hardware setups on the body. For instance, many Fender Jazzmaster players place a small shim in the neck-heel cavity to alter string angle and improve string stability at the bridge.
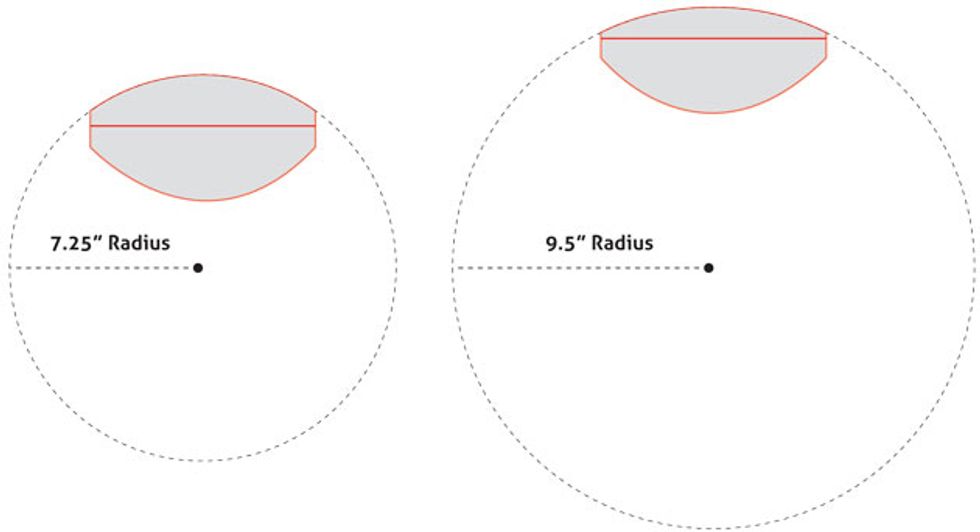
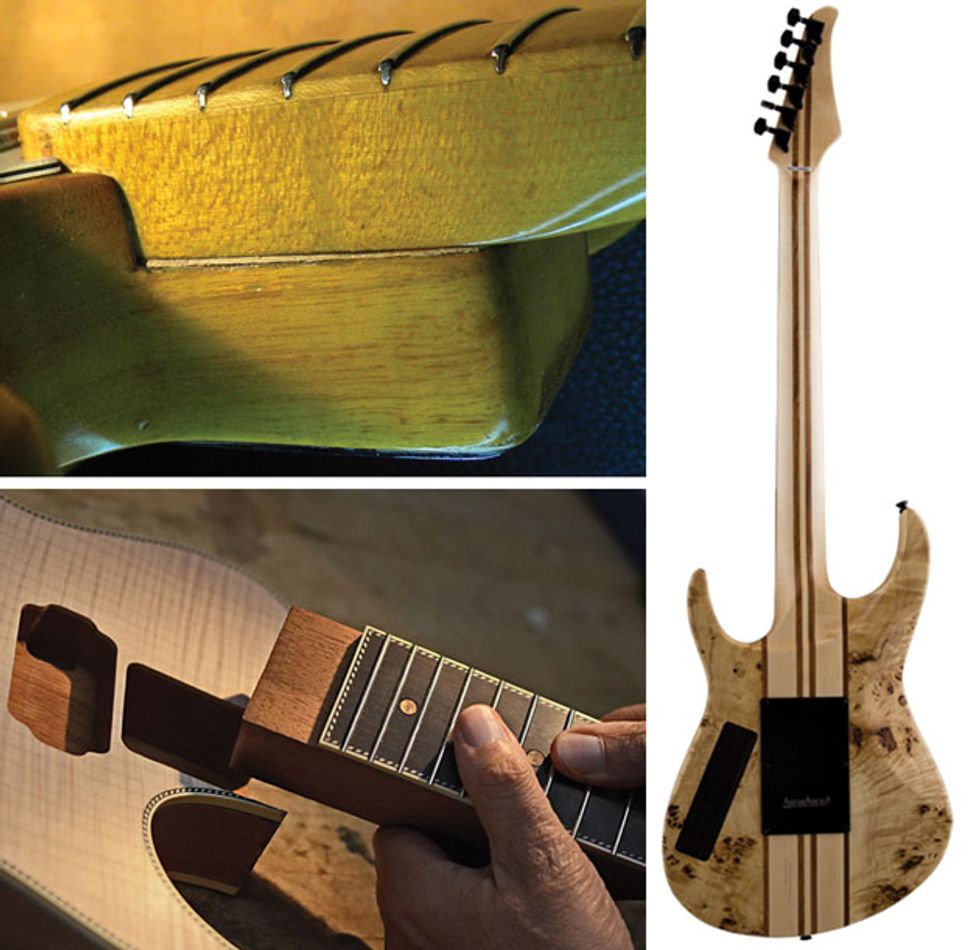
As depicted in this illustrated view of the heel end of a neck, fretboard radius refers to the side-to-side curve of the neck’s playing surface. It affects the feel and responsiveness of your guitar.
Fretboard radius refers to the curve of the fretboard under your fingertips. It determines how round or flat the fretboard feels (it might help to envision the entire fretboard as a strip on the outer surface of a large cylinder running from the nut to the final fret). The lower the radius number, the rounder the fretboard. Classic Fenders came with a very round 7 1/4" radius, while the company’s current standard is 9 1/2". Meanwhile, most Gibson electrics have a radius of 12". In the 1980s, the budding shred movement spurred the popularity of flatter fretboards, with radiuses of 14" to 16".
In theory, rounder fretboards (those with smaller radiuses) are easier to play in the first few frets, especially if your fingers aren’t that long. The disadvantages come as you move up the neck, especially if you like to bend strings in your solos, because the strings tend to bottom-out on the upward-arching frets in the middle of the fretboard (and thus stop ringing out) as you push them out of their normal position. Compound-radius fretboards aim to solve this with a radius that’s rounder near the nut, but then gradually increases to a larger measurement as you go higher up the neck. Compound-radius necks typically go from 10" to 16".
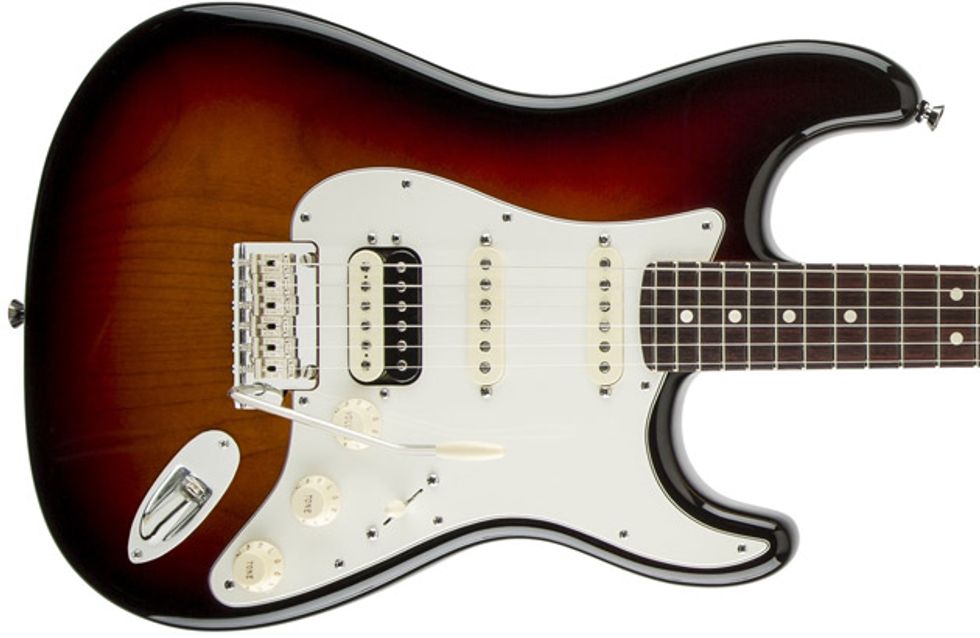
Although Fender’s original and modern vintage-style Stratocaster vibrato bridges have six fulcrum points, most modern fulcrum trems have two pivot points, like the bridge on this American Standard Strat HSS Shawbucker.
Fulcrum tremolo: A bridge that rests on two pivot points and enables the player to create a vibrato effect that alters pitch downward or (depending on how the bridge is set up) downward and upward. (Note: Thanks to Leo Fender’s original nomenclature, many players, retailers, and manufacturers refer to vibrato bridges as “tremolos,” but technically this is not the correct term, since tremolo refers to altering volume up and down.) One famous example of a fulcrum design is the Floyd Rose locking system used by many metal and shred players, but the design is also used in nonlocking versions, including those found on American Standard Stratocasters and many others.
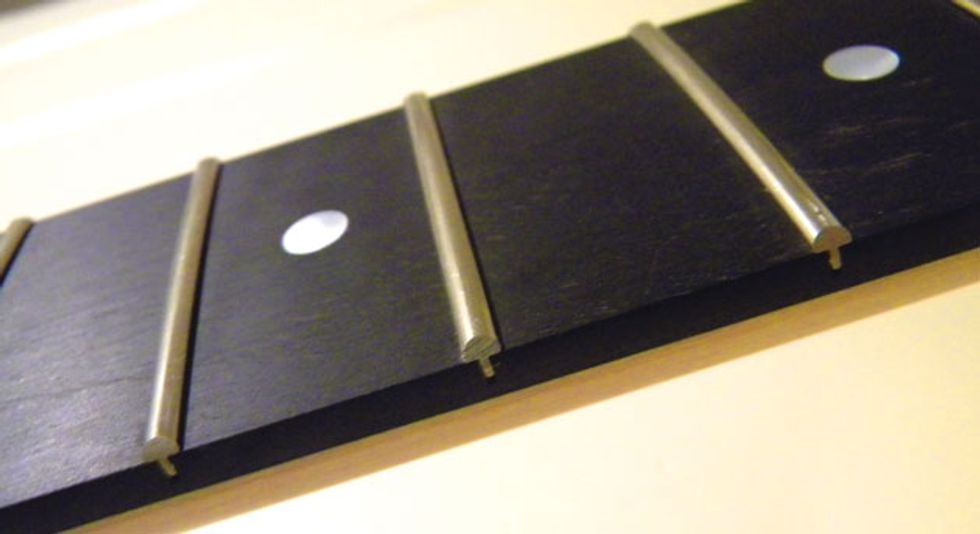
Fretwire comes in a variety of sizes, from the narrow wire on early Fenders to the medium-jumbo wire on most Gibsons and the high-and-wide wire on some shred guitars.
Fretwire: Few things contribute to a guitar’s feel and note intonation as much as the frets. After all, this is where the strings actually make contact when you finger a note. The fretboard wood underneath is just a foundation for the frets—the strings aren’t necessarily supposed to touch it. Frets come in a variety of widths, heights, and shapes, ranging from the narrow 6230 (.080" wide x .037" high) of vintage Fenders to the wide-and-low “medium jumbo” 6130 (.106" x .036") used on classic Gibsons, to the high-and-wide 6100 (.118" x .058") popular with metal players. Generally speaking, thinner frets are thought to offer more accurate intonation because the string sits on a smaller surface. On the other hand, larger frets make bending easier, and many players think they feel “faster.”
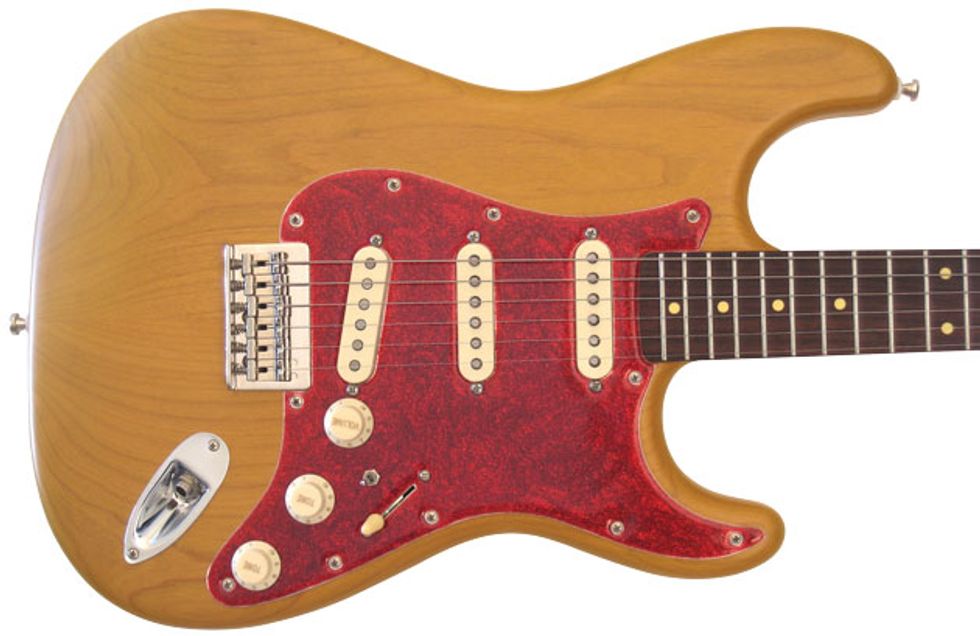
Because most Strats have a vibrato bridge, nonvibrato versions like this are usually referred to as “hardtail Strats.”
Hardtail: Technically, the term “hardtail” can refer to any nonvibrato electric-guitar bridge, but it’s more often used to designate a nonvibrato version of a model that normally has a vibrato bridge (e.g., “a hardtail Stratocaster”). Standard Telecasters and Les Pauls theoretically have hardtail bridges, but we don’t usually mention it. See also Stop-tail.
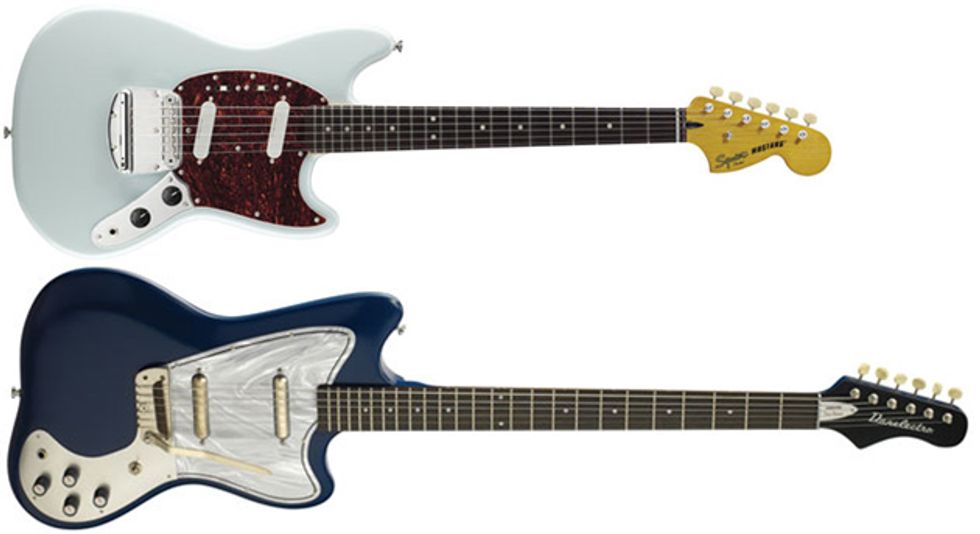
Scale length can be an important consideration for those with smaller hands, but it also affects feel and tone. The Squier Vintage Modified Mustang here would be comfy for younger or more petite players because of its 24" scale, while the 27 3/4"-scale Danelectro Dead-On ’67 baritone would feel gargantuan.
Scale length refers to the distance between an instrument’s nut and string saddles. The most common range for electric guitar is between the 24 3/4" scale of most Gibsons and the 25 1/2" of the most popular Fenders (i.e., Strats, Teles, and Jazzmasters). However, in a successful effort to imbue his guitars with a feel and response somewhere in between these two, Paul Reed Smith made his classic models with a 25" scale. Meanwhile, bass-guitar scales usually range from 34" to 36".
However, guitars and basses are available in both shorter and longer scales. Notable examples include the Fender Mustang (originally available in both 22 1/2" and 24" versions, though the latter became standard), the Gibson Byrdland (23 1/2"), Ibanez’s 30"-scale TMB30 bass, Danelectro’s 27 3/4"- and 29 3/4"-scale baritone 6-strings, and Kiesel’s DCM7 Multiscale 7-string—which goes from 25 1/2" on the treble side of the neck to 27" on the bass side.
Although the differences between these various scale lengths might seem small, the differences in tone, feel, playability, and intonation can be significant. With a longer scale, the frets are farther apart, which requires a greater finger reach. The strings also feel more taut on longer-scale instruments, but while this demands more effort when string bending, it also contributes to stronger attack and snappiness in the overall sound—something many players prefer. Longer scales also enable more clarity and accurate intonation of notes in lower tunings like those used on baritone guitars or in drop-tuned metal. Conversely, many players swear by shorter scales because of their slinkier, more elastic string feel and/or how they comport with more diminutive frames or hands.
Solid woods vs. laminates: When shopping for an acoustic guitar, it’s important to realize the various pieces of the body (the top, sides, and back) can be made of solid pieces of wood or thinly sliced pieces of wood glued together as laminates. Entry-level and moderately priced acoustics are almost always made of laminates or a combination of a solid top and laminated back and sides. To the untrained eye, it’s almost impossible to visually discern the difference between solid and laminated guitars. Even trickier, the product descriptions for laminated guitars do not usually mention the word “laminated.” If an acoustic guitar’s description doesn’t explicitly state it’s made of solid woods, you can safely assume it features laminated woods as a cost-cutting measure.
So which is better? Solid-wood guitars usually have a more multidimensional and characterful sound—and the tones usually develop to be even richer over the years as the wood ages. Structurally, laminated acoustics can be less affected by temperature and humidity changes, and this sturdiness can enable them to stand up better to the rigors of the road. Many experienced players also find that select laminated guitars (or, more often, those with a mix of solid and laminated woods) can sound quite good, though they don’t develop the more open sound that solid acoustics do over time.
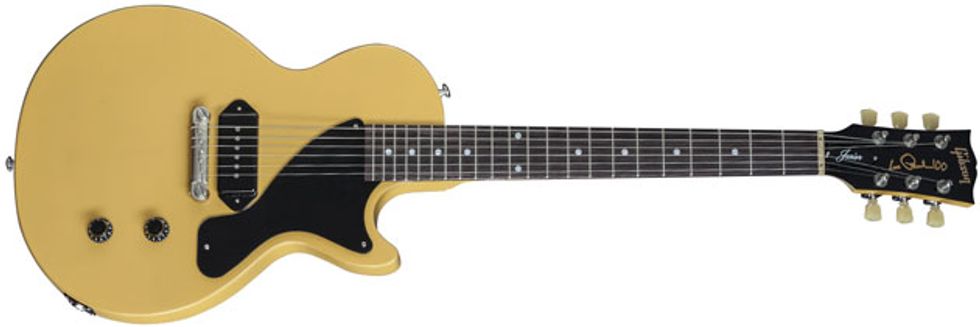
“Stop-tail” guitars have one or two pieces of bridge hardware: Either a single “wraparound” bridge (like on this Gibson Les Paul Junior), or an adjustable bridge (closest to the bridge pickup on this Les Paul Standard) and a tailpiece that anchors the strings.
Stop-tail: An electric-guitar bridge system usually comprising two pieces—an adjustable fixed bridge (such as the Tune-o-matic bridge on most Gibsons, which features movable saddles for setting individual string intonation) and a “stopbar” tailpiece, through which the strings are anchored and threaded. One-piece versions of the stoptail called wraparound bridges have a single piece that strings are both threaded through and anchored by. See also Hardtail.
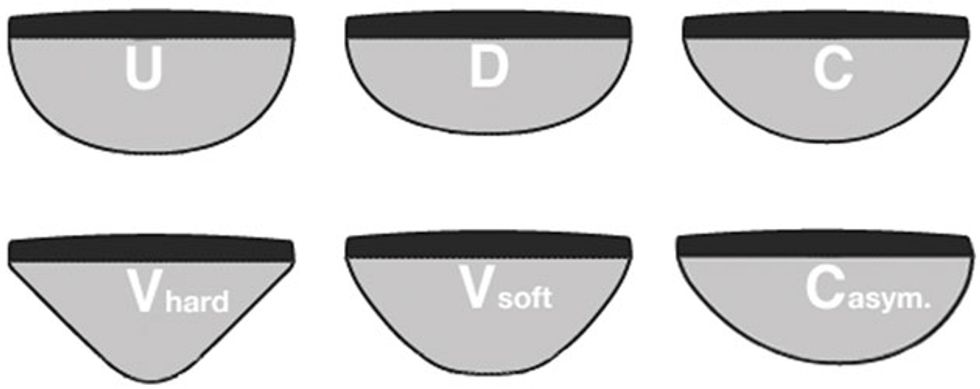
The shape of the back of a bass or guitar neck is referred to as its “profile.” Common contours include C-, D-,
and V-shaped designs.
Neck shape (or profile): Neck shape should really be called “back of the neck” shape, and it’s just one factor—alongside nut width and fretboard radius—contributing to an instrument’s feel. Manufacturers often use terms like C-, D-, and V-shaped to denote the profile of the neck when viewed from the heel end. C is most common, while deeper profiles like D and V fill the hand more. While some consider a thinner profile to be “faster,” a larger neck can actually be easier to play because it provides leverage for your fingers.
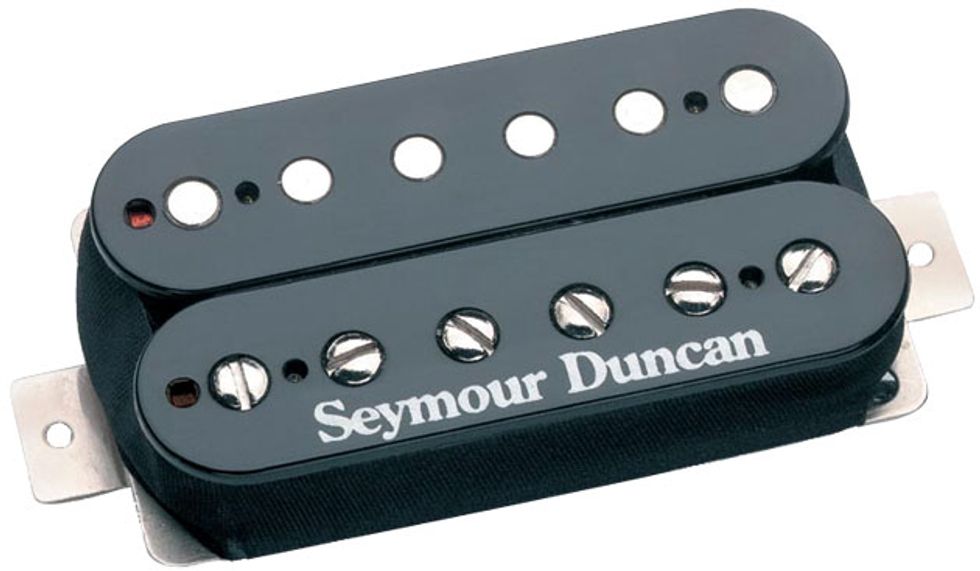
Humbuckers like this Seymour Duncan SH-16 ’59/Custom Hybrid are basically two side-by-side single-coil pickups wired together to reduce extraneous noise and offer a more powerful sound.
Pickups
Acoustic transducers: A transducer is a device that turns direct vibrations into an electrical audio signal. Any contact pickup, including the under-saddle piezo pickups found on many acoustic guitars, fits this category.Active vs. passive: Standard magnetic pickups such as those on the earliest electric guitars on up to the majority of electrics today are passive devices. Their magnets react to the string vibration to create a very low-voltage electrical signal, which must be boosted with a preamp (like the first section of your guitar amp) before it’s strong enough to push a power amp and speakers.
In contrast, active pickups have internal preamps, which use an onboard power source (often a 9V battery) to both boost output and lower impedance. This can have several advantages: First, the signal degrades less over a long cable run, there’s less interference, and you can push your amp’s input harder for more overdrive. However, active pickups also have their own sound, which some people love and others don’t. They’re more popular among bass players and metal guitarists, though they’ve also been in David Gilmour’s guitars for many years.
Coil-splitting vs. coil-tapping: Coil-splitting is when only one of a humbucker’s two coils (or sides) is used on its own to offer a true single-coil sound. Coil-tapping is when a signal is taken from a point somewhere within the vertical windings of both of the humbucker’s coils to offer a single-coil-like sound. In other words, it’s still using both coils/sides, but it’s feeding only part of the full, dual-coil array to the output. See also Humbucker.
Humbucker: See also Single-coil. Essentially, a humbucker is two single-coil pickups (the earliest pickup design) wired together to eliminate (or buck) the extraneous noise (hum) often present in single-coils due to electrical interference from nearby lights, computers, power sources, etc. Another sonic characteristic of humbuckers is that they typically offer a fuller, more powerful and/or aggressive sound that many players prefer for hard rock, metal, or meatier blues and jazz tones. Humbuckers typically look like two side-by-side single-coils, but they can also have a stacked-coil form factor in order to fit standard single-coil pickup cavities or pickguard routes.
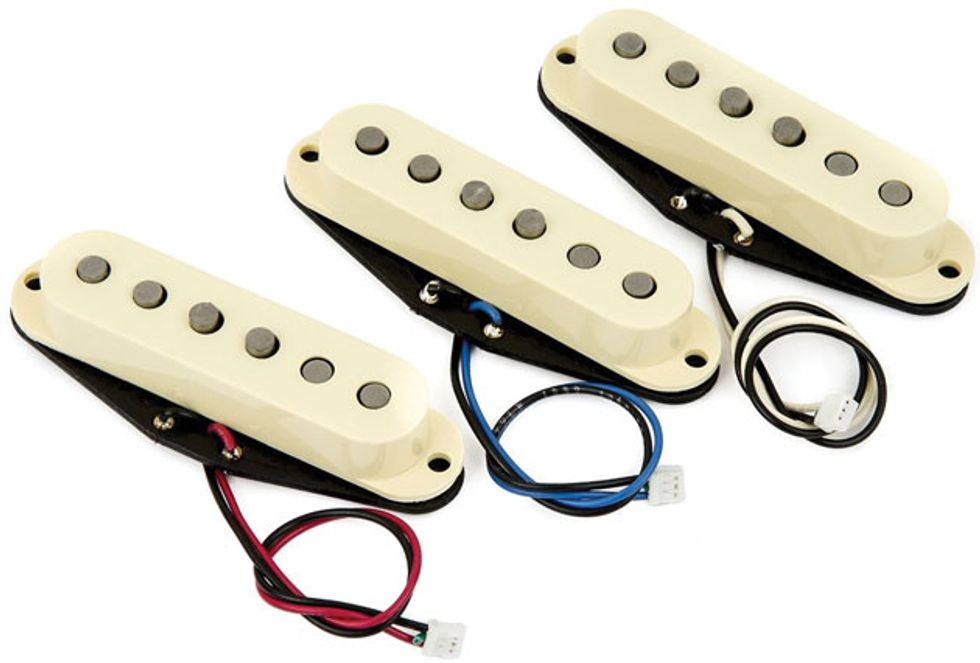
Although Stratocaster-style pickups like the Fender Texas Specials shown here are probably the most popular single-coils, there’s a huge variety of single-coils with widely varying tonal characteristics on the market.
Magnets used in the construction of electric-guitar pickups play an important part in their overall tone. They come in several varieties.
Ceramic magnets are made from ferrites (iron oxides). In general, ceramic pickups are known for their high output and aggressive tone, making them especially popular for metal.
Alnico is an alloy of aluminum, nickel, and cobalt, and pickup designers use various alloys with differing amounts of each element to achieve varied tonal characteristics. Compared to ceramic magnets, alnicos tend to sound sweeter and smoother, with lower output. For guitar pickups, the two most popular alloys are alnico 2 and alnico 5. You’ll also find pickups with alnico 3 magnets. Alnico 2 contributes to the signature tone of Gibson’s famous PAF humbucker (and countless other pickups), while alnico 5 tends to sound a little more aggressive. Interestingly, alnico 3 doesn’t fall somewhere in between: With less cobalt in the magnet, these are actually the mellowest member of the family.
Note that while most pickups use separate magnetic pole pieces (the exposed, smooth-topped circles visible on top of most pickups) wrapped in wire, some use a bar magnet, with either no pole pieces or with steel poles contacting a magnet on the underside of the pickup. A famous example of the latter is the P-90.
Single-coil: See also Humbucker above. Technically, a single-coil pickup is just that—a pickup with one coil of wire wound around a magnetic bar or set of pole pieces. They come in many forms—from narrow Strat-style to the fatter Telecaster bridge pickup, the even bigger P-90 (known for giving a Les Paul Junior its distinctive bark), the Jazzmaster’s bright-sounding rectangular pickups, and the metal-encased lipstick pickups made famous by Danelectro— and though each has quite a distinctive sound, in general they tend to offer brighter tones that often translate intricate picking nuances better than a humbucker.
Starting in the 1970s, however, the idea that form factor and sound were synonymous began to change. Today you’ll find plenty of sonic variation in each shape: Strat pickups wound to sound like Tele pickups, or Tele pickups with P-90-style steel pole pieces. Making things more complicated is the explosion of hum-cancelling (stacked-humbucker) pickups designed as drop-in replacements for traditional single-coils.
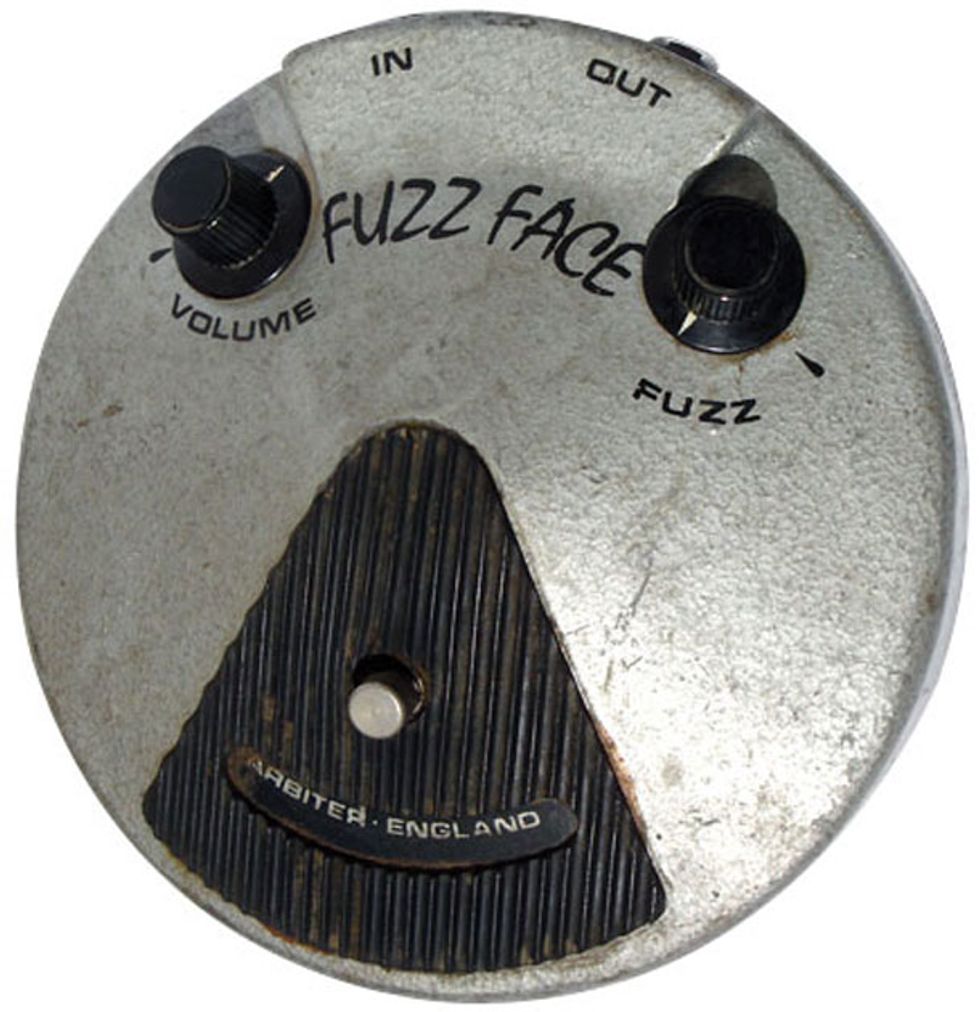
Early Fuzz Faces, like the Dallas-Arbiter version favored by Hendrix, featured germanium transistors—though later designs also featured the more ragged-sounding silicon transistor. Photo by Starman1984
Effects
Analog dry-through: A feature found on some digital effects that lets you mix unprocessed analog signal with the processed digital signal in an effort to preserve more of the character of the guitar’s uneffected tone.Bucket-brigade device (BBD): A type of analog circuit developed in the late 1960s that uses a series of identical capacitors to store and then pass along your guitar signal to create a delay or echo effect. (The name derives from the fact that it’s the electronic equivalent of a bunch of imaginary firemen passing buckets of water to reach the flames.) After being virtually replaced by digital delay processors in the 1980s, bucket-brigade devices have made a huge comeback in recent years with players who prize them for a sound they often describe as being “warmer” than digitally derived echo. Modern BBD circuits also allow for much longer delay times than their ancestors.
Buffered vs. true-bypass: Buffers are circuits that isolate one part of the signal from another to prevent audio degradation. You’ll find them in stompboxes and in the effects loops on many amps, and their mission is to prevent effects from loading down your signal and sapping your sound of high-end presence and clarity. When an effect is turned off, the buffer remains on to prevent the bypassed unit from sucking your tone down the drain. However, this means that the effect is always in your signal path.
Conversely, true-bypass refers to a circuit in which, when the effect is off, it is completely switched out of the signal path with a passive mechanical switch. The advantage is that your guitar is no longer going through the stompbox’s processing circuitry in any way, which in theory should sound more natural. However, if you have a crowded pedalboard there can be disadvantages here too, because your guitar will pass through more treble-sapping cabling without having anything to help boost it along its way. Outboard loop switchers can help alleviate this problem, as can outboard buffer pedals or line drivers. If you use only one or two stompboxes and keep your patch cables short, signal degradation won’t be much of a problem with true-bypass pedals.
Digital control with analog signal is a feature where software operates analog hardware. The advantage is that the signal path remains in the analog domain, while letting you program the controls and store presets as you would on a digital device.
Digital vs. analog: Analog audio devices—which can use tubes, solid-state integrated-circuit (IC) chips, or both—act directly on the signal voltage generated by your instrument.
Digital devices are essentially little audio computers, so they must convert your analog guitar signal into binary digital code (known as analog-to-digital conversion) before they can process it. They must then convert the processed signal back to the analog domain (digital-to-analog conversion).
Once in the digital domain, the sound is broken up into small data packets called samples, and in general, the more samples per second (a specification called sample rate) and the larger the sample packet (bit depth), the better the sound fidelity. You can usually find this information in a digital device’s spec listing.
Germanium vs. silicon fuzz: The element germanium was the standard for audio transistors when the first pedal effects appeared in the 1960s. But in an effort to build more consistent and stable devices, designers eventually switched to silicon. Which is better? If you want that round yet gnarly sound that Jimi Hendrix got with his early Fuzz Face pedals, then a germanium fuzz is likely your ticket. That said, many later Fuzz Faces (and other fuzz stomps) used silicon transistors, which tend to yield more overall gain and a brighter, more cutting sound.
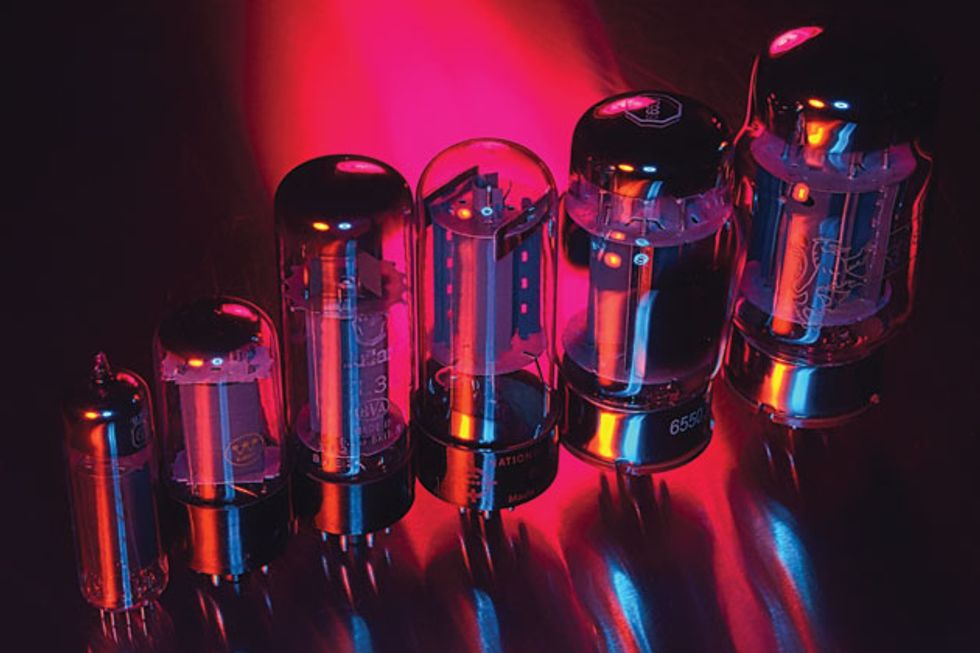
Although “all-tube” amps—i.e., those with vacuum tubes like the ones pictured here driving both their preamp and power-amp sections—are most popular among guitarists, the term “all-tube” is a loaded one that bears closer scrutiny and perhaps less militant adherence. Photo by Andy Ellis
Amplifiers
“All-tube”: Once upon a time, most electronics—even computers—were “all tube,” meaning the electrical current in the circuits was regulated by various types of vacuum tubes. Today, a good definition for “all tube” would be an amp in which tubes are primarily responsible for shaping the sound. However, some amps fitting this description do use solid-state parts—for example, as rectifiers, to buffer effects loops, feed reverb circuits, and other tasks where they don’t really affect the core tone.But you could say the line between “all-tube” and a “hybrid” of tube and solid-state circuitry has been fuzzy for a while. In the 1980s, Marshall added diodes to its otherwise all-tube JCM800, which is now regarded as an iconic hard-rock amp. Another example: the solid-state graphic EQ found in classic Mesa/Boogies.
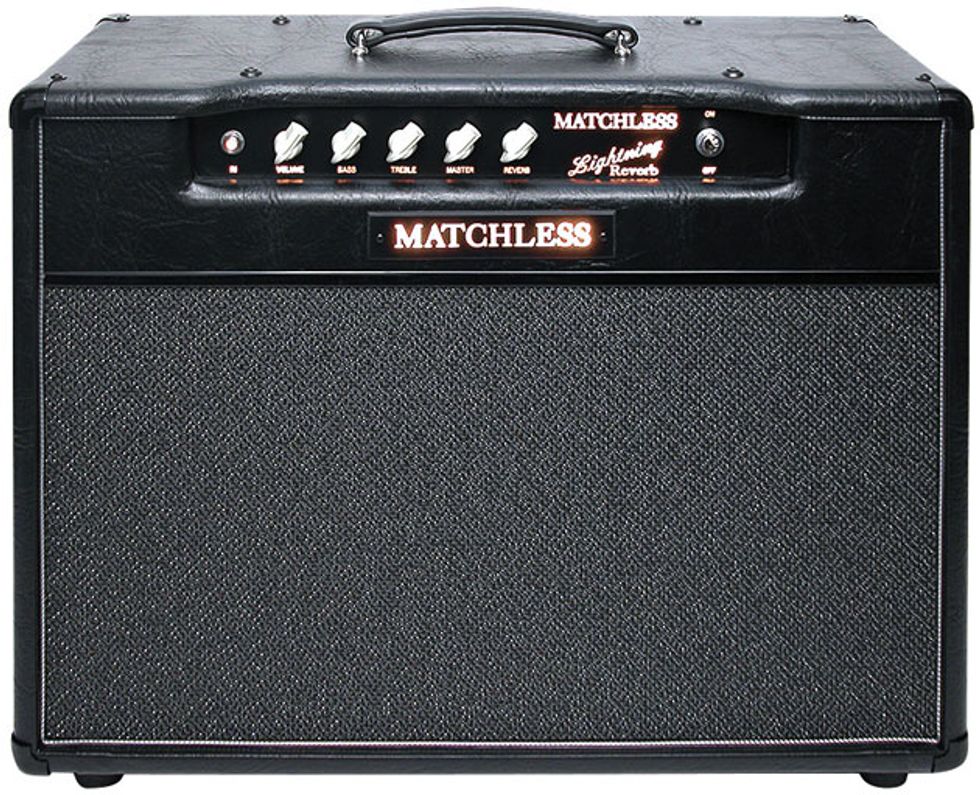
Matchless amps such as the Lightning Reverb shown here are a well-known example of an amp with
a cathode-bias power section.
Bias: If a tube amp uses a fixed-bias setup (see below), biasing can refer to the process of setting the initial current draw of an amp’s output tubes (kind of like setting the idle on a car motor), or more generally to the type of biasing used in an amp with a tube power section (the portion that sends the signal to the speakers). In guitar amps, there are two bias types:
Cathode bias amps, sometimes referred to as “self-biasing,” let the tubes themselves set their own current draw via a resistor and capacitor connected between the cathode and ground. Examples of amps that use a cathode-biased output section include the Matchless Lightning, Carr Super Deluxe, tweed Fender Deluxes, and countless others, as well as all single-ended amps. See also Fixed bias.
Meanwhile, fixed biasamps have a set (or fixed) amount of negative voltage applied to the grid of a power tube. Ironically, “fixed bias” is actually adjustable (either with a potentiometer that adjusts the resistance from the bias supply, or by replacing one or more resistors in the circuit). In fact, when you replace power tubes in a fixed-bias amp, you should have a qualified amp tech adjust the bias for optimal current draw with the new tubes. Correct biasing not only affects the amp’s tone, it also prevents them from running too hot (which burns them out) or too cold (which can cause ugly distortion and other sonic yuck).
All other too-technical-for-this-article amp details being equal, cathode-bias amps generally produce less power and less capability for clean, undistorted volume (aka headroom), but a “warmer,” rounder, often more responsive tone. It’s also worth pointing out that fixed-bias amps can be reconfigured for cathode biasing and vice versa.
Class-A and class-AB refer to the operating conditions of an amp’s power section (be it tube or solid-state). There are other classes (B, C, and so on), but these aren’t typically used in guitar amplification. As in politics, class distinctions can get complicated but we’ll try to sum it up simply: With a tube amp operating in class A, the output tubes are set to remain halfway between cutoff (no sound) and saturation (distortion). They draw current at all times—even when there’s no signal feeding them. Single-ended amps operate in class A. Push-pull amps can also operate in class A (though there’s plenty of debate about whether all amps called “class A” actually are). Class-A amps tend to sound rawer, but other factors also contribute to this quality. In class AB, the bias point is set so that current flows are more than half but less than the full 360 degrees of the input cycle. This is more efficient and can produce more power from the same types of output tubes. Most push-pull amps operate in class AB. See also Push-pull and Single-ended.
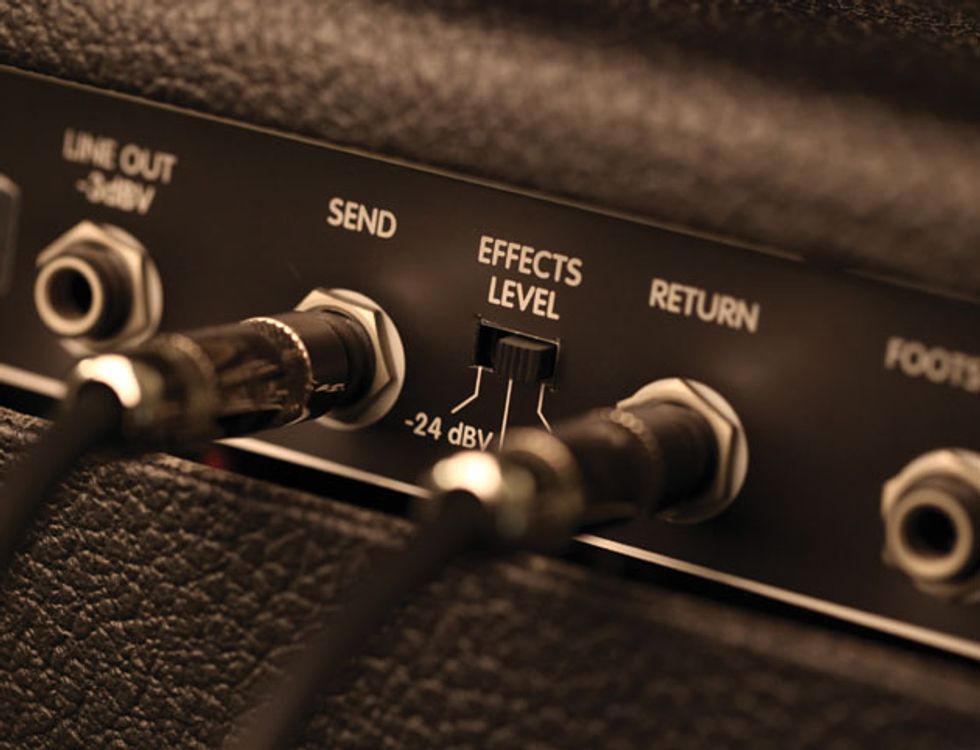
Some amps come with an effects loop, which many players prefer to route delay and other time-based effect units through for a more pristine sound.
Effects loop:A set of 1/4" jacks that allow effects to be added somewhere after the amplifier’s input or preamp stage, thereby letting the amp’s gain and tone controls shape the sound before it hits the pedals or rack effects patched into the loop. There are two types of effects loops, and both tend to works best for time-based effects like reverb, delay, chorus, etc. Gain effects (overdrive, distortion, fuzz, and compression) generally work better in front of the amp’s input.
In a series effects loop, the signal is sent out of the amp, through the connected outboard effects, and then back into the amp, where it continues to the output section. In a parallel effects loop, the audio signal branches into two separate paths. One path passes the signal through the connected outboard effects, while the other path stays in the amp, unprocessed. The effected signal can then be added in with the uneffected (or dry) signal in varying amounts—from barely detectable to highly effected—using a wet-dry mix knob. Parallel loops are more complex to build and therefore tend to add to the cost of an amp. Further, they don’t always sound better than simpler (and more common) series loops.
Headroom: The amount of volume available in an amp before clipping (or distortion) sets in. In the simplest terms, the higher the headroom, the louder the “clean” sound.
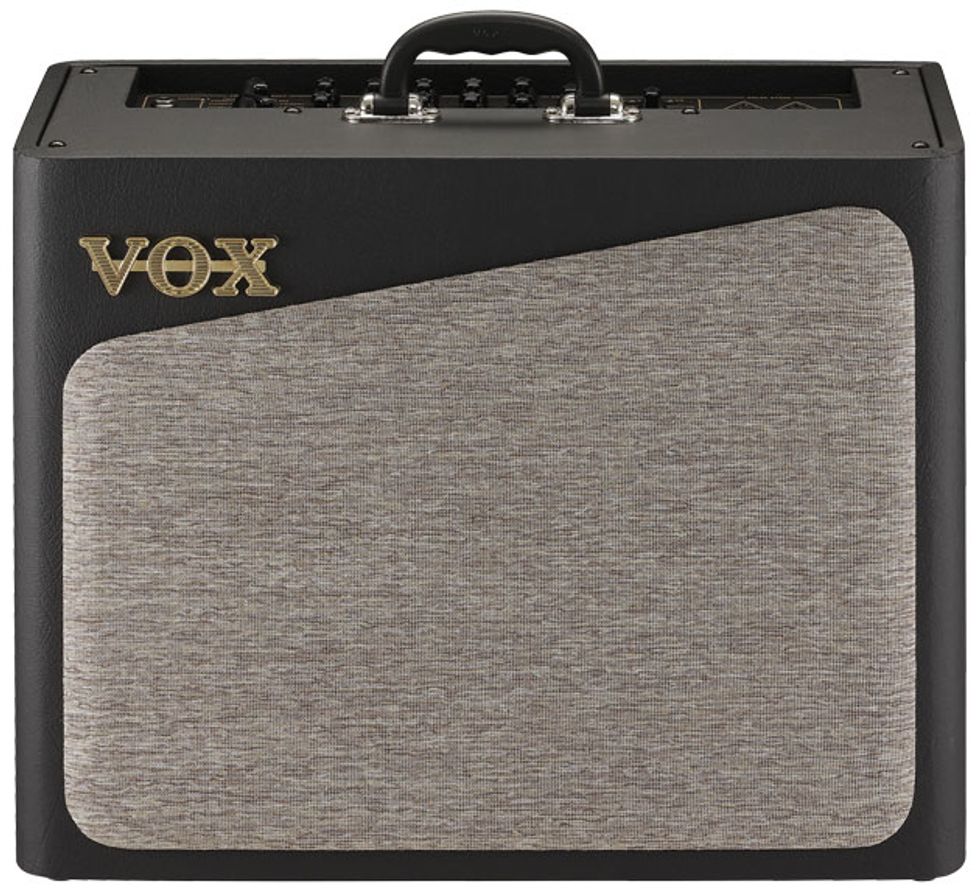
Vox’s recent AV series is an example of hybrid amps that pair 12AX7 preamp tubes with a solid-state power amp.
Hybrid amps combine tube and solid-state technology. After selling Fender to CBS, Leo Fender co-founded Music Man, which made well-regarded amps with solid-state (i.e., tube-less) tone-shaping sections (preamps) and vacuum-tube-driven power sections. Since then, many manufacturers have also experimented with this approach, as well as combining tube-driven preamps with solid-state power amps.
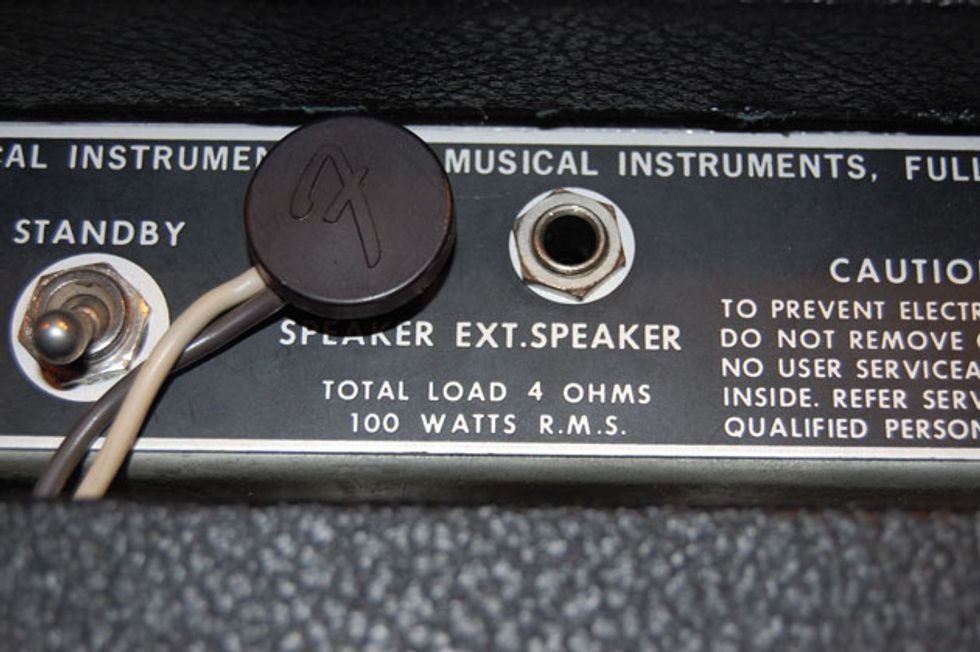
Both for the sake of your tone and the safety of your gear, it’s important to make sure the impedance load of the speakers connected to your amp matches the ohm rating specified on the jack.
Impedance: The resistance (measured in ohms) in an electronic circuit. It plays an important role in every aspect of your tone: Your guitar has an output impedance, and your effects and amps have input, output, and internal impedances. But while you can probably live happily without worrying about the impedance of any of these, there’s one area where it’s essential to be aware of impedances—when connecting your amplifier to speakers. Your amp’s speaker-output impedance should match the impedance of the speaker(s) it’s connected to. Worst-case scenario, an impedance mismatch can cause serious damage to your amp. Here are a few things to keep in mind:
Your amp’s output-transformer impedance needs to match the total impedance of all the speakers connected to it—not simply the ohm rating listed on one of the speaker labels. Anytime there’s more than one speaker, you need to do a few calculations.
To keep things simple, let’s say you have two 8-ohm speakers:
If you connect them in series, the impedances are simply added together. (In a series connection, the amp feeds the positive lead of one speaker, that speaker’s negative lead then feeds the positive lead of the second speaker, and the second speaker’s negative lead feeds the amp). Your total: 16 ohms.
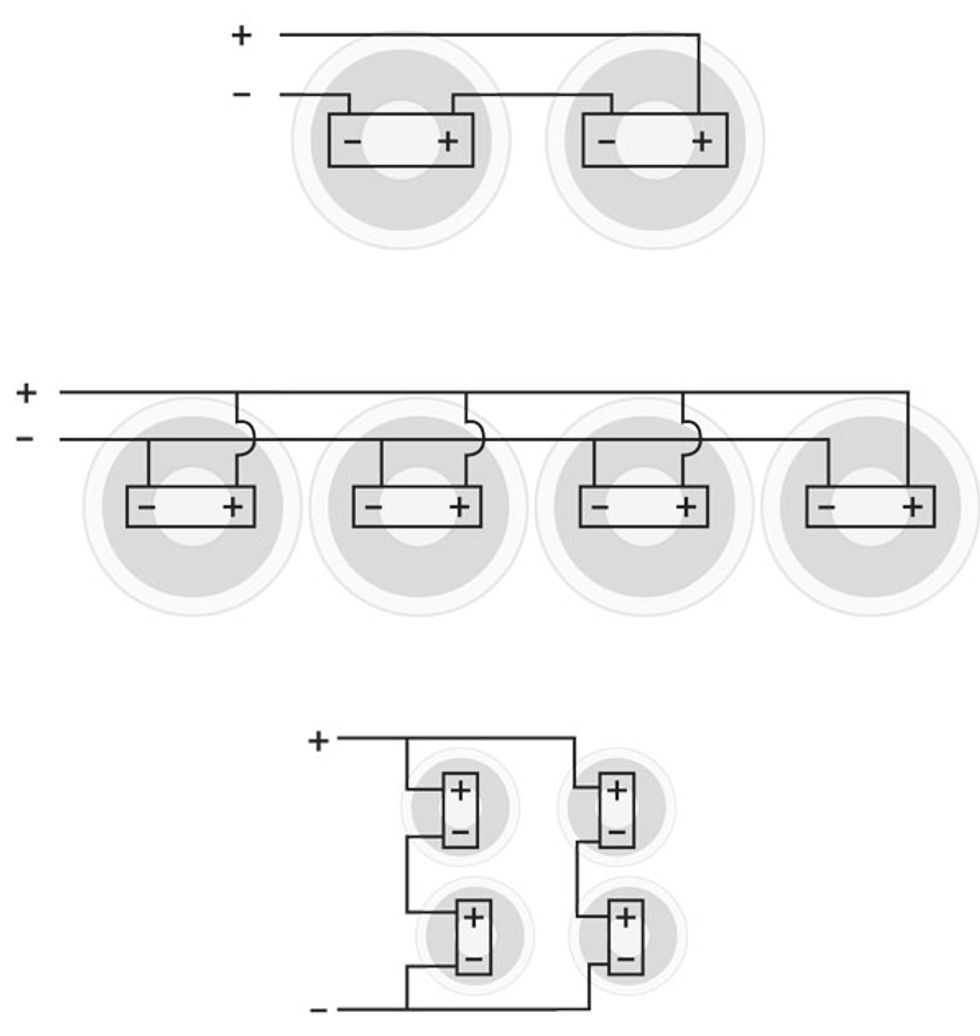
Three common speaker-wiring scenarios for guitarists and bassists: Two speakers in series, four speakers in parallel, and four speakers in series-parallel.
If you connect them in parallel—both speakers getting the amp’s positive and negative leads—the math gets more complex, but it’s easy enough when the speakers have the same impedance: Simply divide the single-speaker impedance rating by the number of speakers. In this example, each of our speakers is 8 ohms, and we’ve got two speakers, so 8 divided by 2 results in a total load of 4 ohms.
What happens if you have four 8-ohm speakers? All four in parallel would be 8/4 = 2 ohms. That’s uncommon but not unheard of. All four in series would be 32 ohms—which is pretty much unheard of. Most 4x12 cabs have their speakers wire in series-parallel. In other words, the four speakers are wired as two sets of two speakers, and within each pair, the two speakers are wired in series—and then each set of speakers is wired in parallel. Let’s break down the math: When each of the 8-ohm pairs is connected in series, you end up with two 16-ohm loads (remember, we add series-wired impedances). Then, when we connect the two 16-ohm pairs in parallel we count each pair as if it were a single speaker, and therefore divide by two: 16/2 = 8 ohms.
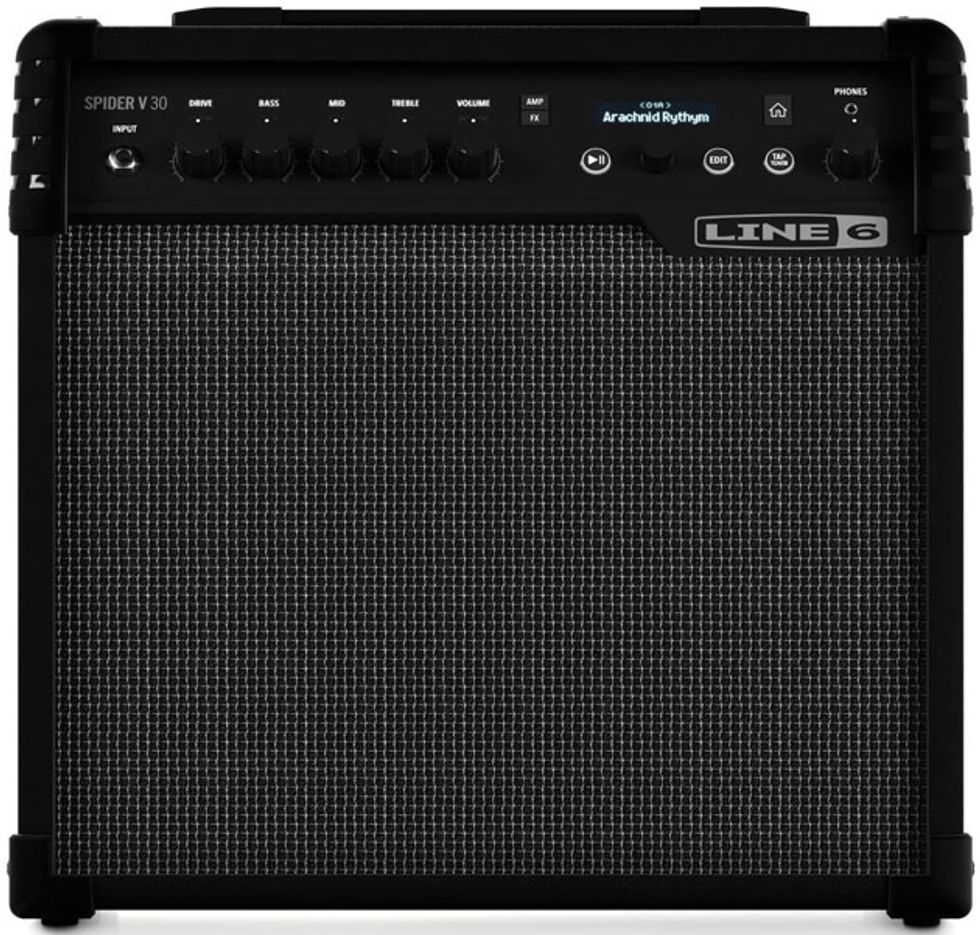
The new Spider V 30 is one of the latest models in Line 6’s long line of impressive modeling amps.
Modeling: In terms of guitar tone, modeling usually refers to a manufacturer’s software-based emulation of a physical device such as an amplifier, effects unit, speaker cabinet, microphone, or even the guitar or bass itself. With modeling, the software isn’t just programmed to sound like the real thing; it’s supposed to respond in real time like the device it’s modeled after. See also Profiling.
Negative feedback refers to a signal taken from the output and fed back through to one side of the phase splitter, thereby cancelling out sound waves that can cause unwanted distortion. “Unwanted” is the operative word here—if you’re looking for very clean sounds, an amp with a negative-feedback circuit might be the way to go. But there are some very famous amps—including many based on classic Vox designs—where negative feedback is intentionally decreased to add grit and harmonic complexity. Some amps have no negative feedback at all. Others allow you to adjust negative feedback either in total or at certain frequencies. The latter is the basis of the presence knob on the tweed Fender Bassman and Marshall amps.
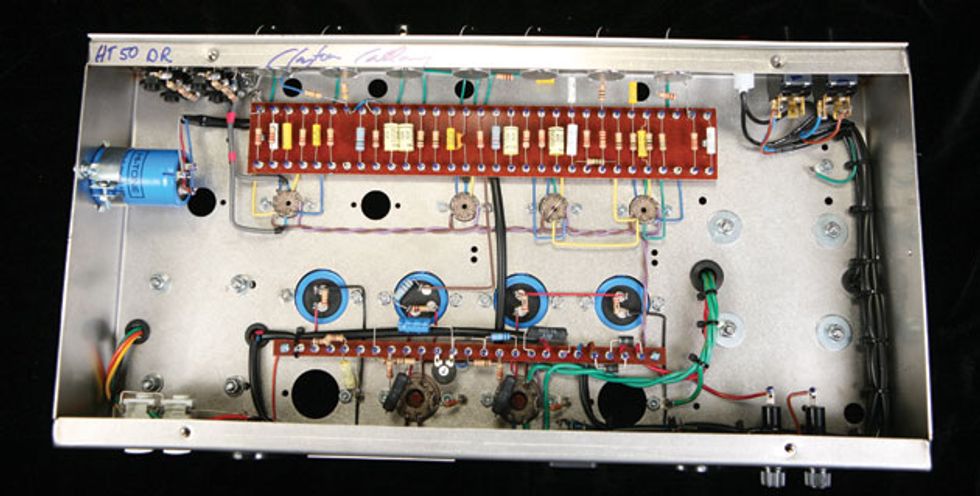
As opposed to the printed green circuit boards we’re used to seeing in all sorts of modern electronics, this Carr Skylark’s wiring on an old-school turret board is an example of what guitarists mean when they say an amp is “point-to-point” wired.
Point-to-point is a method for wiring electric components directly to one another. For example, an amp’s input jack might be connected directly to a resistor that’s soldered onto the first tube’s socket. It’s a misnomer that all vintage or handbuilt amps are point-to-point. In fact, most have tag or turret boards, which are connected to inputs, tubes, and controls with wires. However, these old-school boards do allow techs to replace individual components and make other changes quite easily. See also Printed circuit board (PCB).
Printed circuit board (PCB): A circuit board made of epoxy with pre-etched conductive tracks for connecting components. PCBs are the standard for almost all mass-produced electronics today (including tube amps), and a well-designed PCB offers no sonic disadvantages over handwiring. They are, however, much harder to service and/or modify. See also Point-to-point.
Profiling is a software-based capability that allows one to capture (via a microphone) and analyze the characteristics of a specific device that one has access to (usually an amplifier) in order to create an accurate digital model of that device. See also Modeling.
or fuzz pedal.
Push-pull: A power amplifier output section in which signal from the preamp is split into opposite polarities by a phase inverter (aka phase splitter). Each side of the phase inverter feeds one half of the power-tube complement—i.e., in an amp with two power tubes, one will have the positive side and one the negative. Each tube then feeds the output transformer, where the signal is summed to produce sound. Push-pull designs are more complex, but they’re also more flexible, require less expensive output transformers, and can produce more power. Push-pull is by far the most common design for mid- to high-power guitar amps. See also Class-A and class-AB, and Single-ended.
Rectifier: A device that converts alternating electrical current from the wall socket into the direct current needed in your amp. Rectifiers can be either tube or solid-state, and the correct type of rectifier depends on your amp’s power transformer (important if you’re replacing yours). Rectifier tubes don’t carry signal, but because they control the voltage going through the amp, they can have a noticeable impact on the tone, which is why players sometimes experiment with different brands and vintages of rectifier tubes. All other things being equal, solid-state rectifiers typically produce a tighter, more powerful sound, with less “sag,” give, or compression in responsiveness than tube rectifiers.
Single-ended: A power amplifier output section in which the entire sound wave from the preamp is amplified at a single polarity (see also Push-pull). Because it involves fewer parts, the single-ended design was especially popular for small practice tube amps. These days, it can also be found in some high-end boutique models. Many players love the overdriven sound of a single-ended amp, which can be lush with even-order harmonics. That said, single-ended amps are generally less powerful than their push-pull counterparts. Most single-ended amps operate in class A and have one power tube, but some designs can use more tubes (in parallel) to increase power. See also Class-A and class-AB.
Tone stack: The term derives from the way tone circuits appear on a schematic, and simply refers to the arrangement of resistors, capacitors, and potentiometers in a tone circuit. The most common tone stack for amps is known as FMV (Fender, Marshall, Vox) but there are many others, as well as many variations within the FMV family.
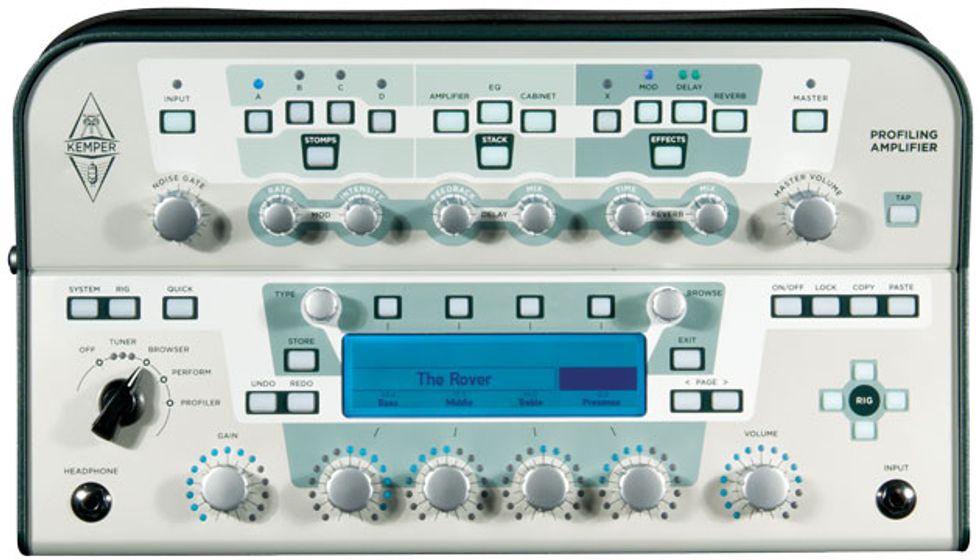
The 2011 debut of Kemper’s Profiling Amplifier rocked the gear world by giving players a method by which to digitally capture and model the tonal characteristics of amps they had access to.
The FMV usually has controls for treble and bass, with either a control or a fixed resistor setting the midrange. It’s flexible, but also considered to be “lossy” because it causes a drop in gain (though the Bassman and Marshall versions mitigate this loss by using a design known as a cathode follower).
A so-called “tweed” tone stack (based on the tweed Fender Deluxe) uses a single tone control that shapes the highs and upper midrange. It’s less flexible than the FMV and has more effect on the amp’s overall gain, but it’s also less lossy. Ampeg and others use a James (sometimes referred to as Baxandall) tone stack. It’s flexible, with relatively little signal loss. The “brownface” tone stack Fender used between the tweed and blackface eras is also becoming popular with boutique builders.
All this said, your amp’s tone stack isn’t the only element shaping its sound, especially in a tube amp. The way tube stages are arranged, connected to one another (coupled), and even the way they’re biased impacts the sound. The Matchless DC-30, for example, has a channel with no tone stack. Instead, its six-position tone switch changes the coupling capacitors between the preamp and power amp.
Tube vs. solid-state: Refers to the types of components used to amplify and shape the signal in an audio circuit. Both tubes and solid-state op amps can be used as voltage amplifiers—the devices that boost and shape your guitar’s signal. So which is better?
While most players will agree tube and solid-state devices sound and feel different, the pros and cons are too complex for generalizations. Tubes are cherished for their overdrive but they also seem to add pleasing harmonic complexity to clean sounds, especially if they’re pushed almost to overdrive. By the same token, while solid-state amps have a reputation for sounding too clean and “sterile,” many classic guitar sounds are the product of a tube amp driven by a solid-state overdrive, distortion, or fuzz pedal. There are great sounding solid-state amps, too—including many that use field-effect transistors (FETs) to emulate tubes. There are also lackluster, even horrible-sounding tube amps, both vintage and modern. Further, solid-state amps generally require less servicing, are less expensive, and usually weigh less.