
Theory: Beginner
Lesson Overview:
• Increase control of your fretting hand to shape and improve your vibrato.
• From subtle intonation adjustments to wide, authoritative statements, learn different strategies for using vibrato.
• Explore ways to unlock your creative potential in any situation.
Click here to download a printable PDF of this lesson's notation.
Ask 10 guitarists what constitutes great vibrato and you’ll get 10 different answers. Because there are several different ways to vary the pitch, one size does not fit all. In the early days of guitar, the classical approach to vibrato was to create subtle pitch variations with a quick rocking motion of the fingertips. By alternately moving toward the headstock and soundhole, the player stretched the nylon string sharp and flat. It works with steel strings too. Try this: Hook up a tuner and watch how the pitch changes when you move your fingertip from left to right, perpendicular to the fret. Your finger should move with the palm, not independently. It’s a very expressive technique that can be used in a variety of situations (Ex. 1).
Click here for Ex. 1
This kind of vibrato also serves as my preferred method for a quick recovery when playing in a band, or even on a solo guitar gig, if a note or interval is not quite in tune. Considering the compromises of guitar tuning in general, I can fluctuate the pitch just enough to even out the intonation while imparting some expression.
YouTube It
During an early NPR Tiny Desk performance, classical guitarist David Russell demonstrates some extremely expressive vibrato during the first few notes of Augustin Barrios’ “Una Limosna por el Amor de Dios.”
The Blues Had a Baby
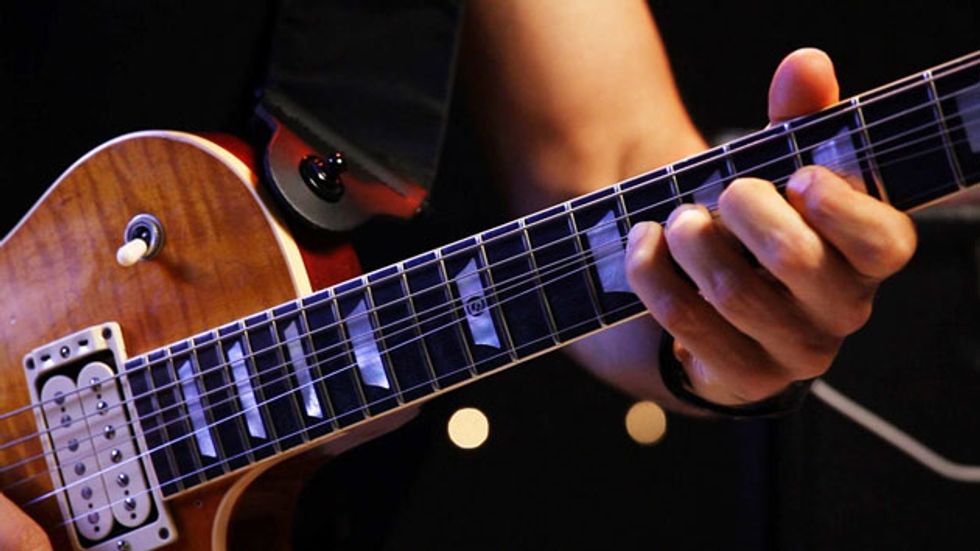
With the invention of the electric guitar and lighter strings, the shift to creating vibrato by pushing the string across the fret was a natural progression, and it remains the most widespread approach. The mechanics are simple: You apply a rotating motion to the string to slide it over the fretwire. However, the power for this back and forth motion does not come from the finger. Instead, it comes from the wrist (think of B.B. King), and less commonly, the forearm in an up-down motion (think of Eric Clapton). Your fingers simply keep the string in contact with the fret while your wrist or arm does the work.
YouTube It
Here’s a performance of Clapton’s “River of Tears” from a tour of Japan. Pay close attention to Clapton’s vibrato starting at :47. Notice how his hand just seems to float around the guitar with all the energy coming from his arm, rather than his fingers.
To gain power from the wrist, the side of your hand closest to the little finger flicks either upward or downward in a rotary motion. Directionally, the neck itself limits us to an upward motion on the 1st string and a downward motion on the 6th string. On the remaining four strings, my preference is for the direction to be consistently towards the center of the fretboard, which neatly keeps the unwound 1st, 2nd, and 3rd strings in an upward motion and the 4th, 5th, and 6th strings in a downward motion. Experiment to find what works for you.
Let It Go
In either approach, the fretting hand has a role to play in terms of tone. I find I get more power and resonance by letting go of the neck so the finger forms the sole point of contact with it. Not only does this let me control the range of vibrato—from narrow to wide—but freeing the rest of the neck to vibrate encourages an open, singing sound.
What to Avoid
Although I have greatly exaggerated the effect to make it obvious, Ex. 2 is an extreme version of what often plagues aspiring players. The vibrato is too wide and this makes things sound out of tune. And sudden speed changes with no regard for a regular rhythmic quality makes the vibrato sound ragged and uneven.
Click here for Ex. 2
Do This Instead
Exploring the full range of possibilities will lead to the greatest number of options for vibrato. An overview of just a few approaches could include:
- Fast and narrow
- Slow and narrow
- Medium speed and medium depth
- Medium speed and wide
- Fast and wide
- Any combination of the above
Left to my own devices, my tendency is to execute vibrato with medium depth and medium speed (Ex. 3).
Click here for Ex. 3
Gaining Control
Although I generally like to apply vibrato from the start, it can be effective to practice easing into it on a stationary note, as in Ex. 4. Here, I sound the note first and then begin the vibrato a moment later. This allows you to clearly hear the fundamental pitch, and then contrast it to the specific speed and depth of vibrato. Allowing a bit of space between the attack and the onset of the vibrato lets you impart a bit of variation to the note on the back half of its sustain. A great example is Carlos Santana’s solo on “Samba Pa Ti.”
Click here for Ex. 4
Once things start to feel familiar, try a subtle and narrow vibrato right from the start, as illustrated in Ex. 5. It’s there, but not quite so wide and obvious as other musical contexts might call for.
Click here for Ex. 5
Whisper or Shout?
Things don’t have to always call attention to themselves. Some vibratos may be so subtle that they are more felt than heard (especially in a track with other instruments), and it’s helpful to liken your vibrato to a sense of touch, dynamics, and sheer volume. How much attention do you want to call to a note? Generally speaking, the wider and/or faster the vibrato, the more attention it captures.
The slow and narrow approach of Ex. 6 can be especially effective when soloing over minor blues changes, contrasted by the wider approach of Ex. 7. Don’t discount how your gear choice impacts the vibe, too. On the former I played a Strat through the bright channel of a ’62 Fender Tremolux. For the latter, I ran a goldtop Les Paul through a Vox AC30 for a larger, more authoritative tone. Not surprisingly, the vibratos on the latter became not only wider, but bolder.
Click here for Ex. 6
Click here for Ex. 7
If you really want to unlock the secrets of a guitarist’s vibrato or compare it to another player’s approach, take one of your favorite guitar records and reduce the speed enough to hear exactly what’s going on. There was a time I was actively learning as many solos as I could from all three Kings, Clapton, Michael Bloomfield, SRV, and Hendrix. When I slowed the solos and riffs down enough to internalize all the subtleties, I discovered this learning experience was as effective as any guitar lesson … plus it teaches you tons about context. I love Mick Taylor’s vibrato, but it’s very different from Django Reinhardt. Using the right one at the right time is everything.
B.B.’s Hummingbird
Ex. 8 demonstrates a faster and increasingly wider vibrato that’s inspired by B.B. King. Although this one makes use of the first finger playing B on the 2nd string, 12th fret, remember to practice your vibrato with each individual finger, because sometimes you’ll fret a note with the second or third finger and want to apply some vibrato with that digit. The more flexibility you have, the better, and getting it consistent with any finger is a lifelong process.
Click here for Ex. 8
Shades of Hendrix
Another powerful tool is setting two strings into motion, and with so many beautiful vibratos on Jimi Hendrix’s Electric Ladyland album, the double-stop fourths he slides into halfway through “1983 (A Merman I Should Turn to Be)” may well have changed my life. The mechanics are the same as before: Let the wrist provide the power. Ex. 9 demonstrates a Hendrix-y kind of approach. Of course, at the end of the day, most of us play in group contexts, and it’s good to focus on how your vibrato sounds not just in a room by yourself, but in a mix with other players. So listen to your vibrato in both contexts.
Click here for Ex. 9
The Bends (Not the Radiohead Album)
Applying vibrato at the top of a bend is yet another powerful tool. Just as before, focus first on hitting your target note, then ease into the vibrato (Ex. 10). For demonstration purposes, I’ve put a vibrato on top of both bends in the example. In the real world, I’d never shake every note. With this kind of vibrato, the hand remains around the neck because the thumb is needed for strength and stability in the bend.
Click here for Ex. 10
When you’re ready to launch right into using vibrato on top of bends, as in Ex. 11, pay special attention to pitch. Deliberately overshooting to arrive just a little bit sharp allows the string to settle into perfect tuning on the release. You’ll want the pitch centered on the target note.
Click here for Ex. 11
The Vibrato Arm
Finally, with the invention of vibrato units on guitars, the vibrato bar itself became a contender. It may be used in many ways from gentle to aggressive (hello, Jeff Beck!), but for now I’ll leave you with the delicate, gentle motion. Depending on whether your bridge is floating or set flush to the body, you can pull up on the bar to raise the pitch or press down on the bar to lower it. In either case, just like before, the full range of possibilities are worth exploring. Ex. 12 has two different audio clips. One is a bit wider and more obvious. Think of them as a shimmer versus a wave. Both were played on a Strat through the brilliant channel of a ’63 AC30. The only thing that changed was the depth and pressure of my hand on the bar.