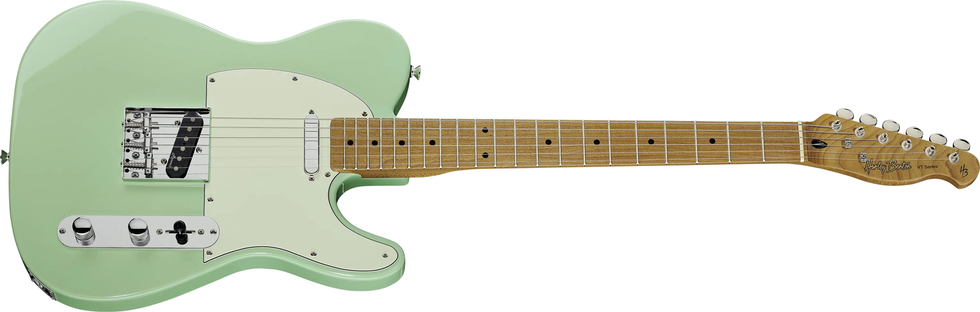
Hello, and welcome back to another month of Mod Garage! After selecting a pickup and the individual parts for the wiring last time, it’s time to put it all together and finish the body of our Esquire-style project guitar.
Let’s start with wiring up the pickup. Remember how we installed a piece of copper foil for string grounding, replacing the piece of wire that’s typically used for this? This method has more benefits besides preventing feedback gremlins on the bridge pickup, which is why I use it in every Telecaster-style guitar. You usually have three wires running from the bridge pickup into the electronic compartment: hot and ground from the pickup, plus the wire from the string grounding. If you use any kind of 4-way series switching, that becomes four wires, but with a little trick, we can reduce it to only two. Each piece of wire means a little bit more resistance and capacitance, which drains some high-end to ground. Therefore, the less wire we use, the sharper our tone will be. The rule of thumb with wiring is this: As long as necessary and as short as possible. We’ll replace some more wires when we get to the output jack, but this time, let’s focus on the pickup.
Snip the ground wire of the pickup (usually the black one) so that only a short piece remains on the pickup. Solder this short piece from the pickup to the copper foil, then solder the snipped-off segment of wire to the same spot on the foil. Now, route this wire together with the hot wire from the pickup (usually white, yellow, or red) into the electronic compartment, and voilà: only two wires instead of three! This only works when you don’t have any series connections in your wiring, which is the case here.
The string-grounding wire and the ground wire from the pickup are both connected to ground, so this little trick is easy to perform. To delete another wire from the electronics, twist the ground together with another piece of wire, and solder it to the ground lug of the output jack. The typical arrangement would be to solder all the wires to ground (usually the back of a pot), then run another ground wire from the output jack to the back of a pot. This way, you only have one wire that connects to ground, grounding the output jack, the pickup, and the strings at the same time. Besides saving some wire (and, therefore, tone), the wiring will look more tidy and less crowded. It’s a neat little trick you can use to take your wiring from standard to “custom-shop grade.”
Next, let’s talk about our three individual switching positions and what they do:
1. Pickup with volume and tone control
This is the standard position you know from Teles, and it’s the normal playing position for this wiring. The pickup is routed through the volume and tone pots (more about this shortly). I decided to place this one in the middle position of the 3-way switch, which normally is the bridge and neck (in parallel) position on a 2-pickup Telecaster.
2. Pickup connected directly to output jack; controls bypassed
This switch position completely bypasses the volume and tone pots, making it perfect for any lead or solo part because it delivers a bit more output. Because of the bypassing, you can use this setup in a kind of preset configuration—for example, you can dial in a rhythm tone with the volume and tone pots rolled back in the first position, switch to this second, bypassed position for leads, and jump back to your rhythm position when you’re ready. This preset trick has a long history at Fender; it was first imagined by Leo Fender himself. I wired this bypassed configuration in the first switching position, which on a standard Telecaster would be your bridge pickup with volume and tone.
3. Pickup with an additional capacitor and volume control; tone control bypassed
This is often called “Eldred wiring,” named after Fender Custom Shop veteran Mike Eldred. He came up with this specific wiring for his personal Esquire, and it was an instant success. (Nowadays, Eldred is building guitars with his own company, El Cabron Guitars.) By adding a small capacitor and removing the tone control, this switching position adds a kind of vowel-shaped vocal quality to the tone, with a scooped and hollow midrange that sounds nice and warm. This specific sound is sometimes described as the “cocked-wah tone.” This tone, together with some swells from the still-engaged volume pot, can completely substitute for a wah pedal if you master the playing technique—for excellent examples, see guitarists like Greg Koch and Jim Campilongo. It’s also great for mimicking a Telecaster’s neck pickup tone. I placed this setup on the third switching position, which on a standard Tele is typically the neck pickup only, with volume and tone.
Next, here’s a short rundown of the individual parts I decided to use and why:
- Two 250k mil-spec audio pots with a 60/40 taper ratio, U.S. inch, solid shaft. These are the standard for Esquire/Nocaster guitars from the ’50s, offering a perfect, even taper.
- Duesenberg 3-way switch, which is simply a pleasure to engage; you can really feel the individual switching positions.
- Custom-made, vintage-style output jack with a Pertinax disc (of course, you can use any good quality output jack of your choice).
- Silver mica treble bleed network for the volume pot. I decided to go with a 470pF, “cap-only” version here, which yields a very even high end when rolling back the volume.
- 3300pF film cap for the tone control. This transforms our standard tone control into a warmth control, making it much more useful. You can use any cap you want here; if you feel that a standard .022uF, or even a .047uF, will work for you, go for it.
- 2200pF film cap for the Eldred wiring, for a more decent cocked-wah tone. If you desire a more dramatic response, go up to 3300 or 4700pF; if you want a less severe effect, go down to 1500pF. Eldred himself preferred 4700pF, which is the standard for this mod. I decided to use 2200pF because it sounds more like a neck pickup, which makes a great addition for warm rhythm tones.
- Seven-stranded reissue vintage cloth wire. I really love to work with this wire, and it’s the same material that was used in the ’50s by Fender.
These picks reflect my preferences for this project, but you can customize any of them to your liking.
Here we go with the wiring:
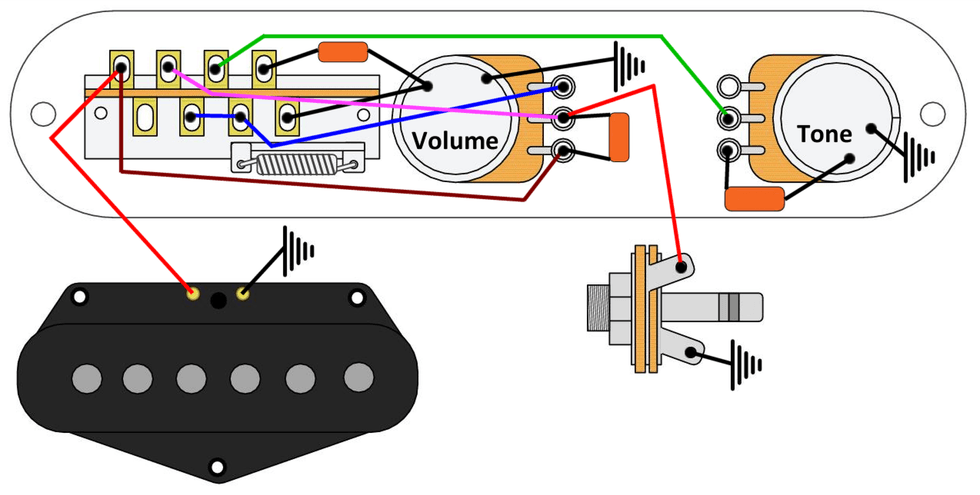
As usual, I simplified all ground connections so the diagram doesn’t look like a bird’s nest. The grounding scheme was described in detail above; you don’t need any ground wires between the pots as long as you’re using a metal control plate. If you use one made of wood, plastic, etc., you’ll need to run an additional ground wire from pot to pot.
As you can see, there’s no lug connected to ground on the volume pot, which is the key element for our second position’s true bypass feature. Make sure you don’t add one out of habit.
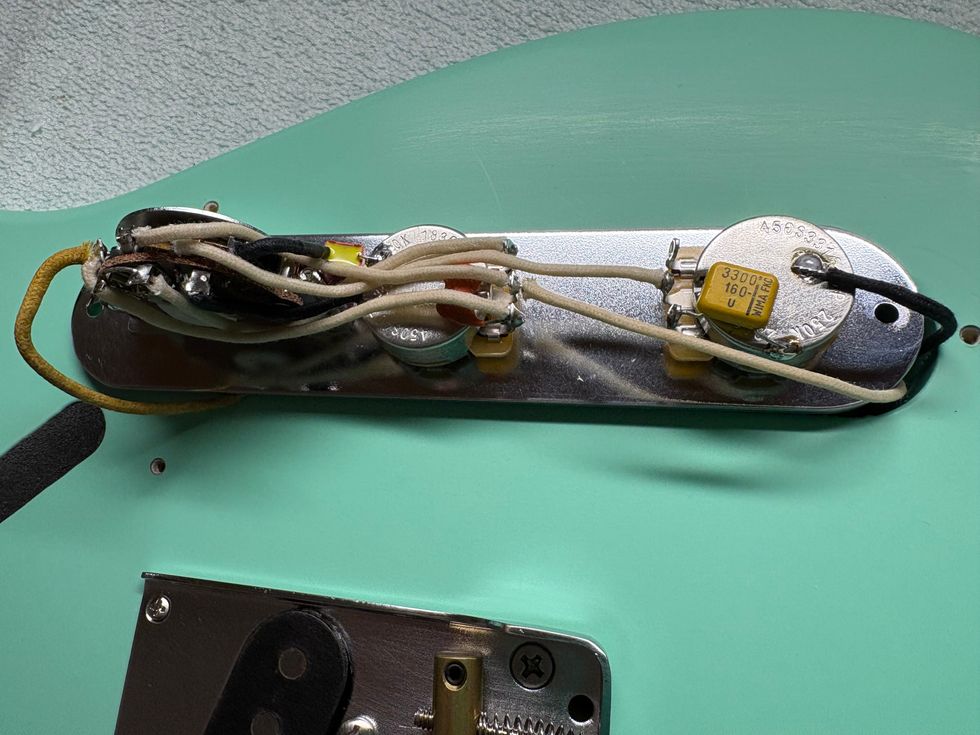
Here’s a photo of the finished wiring on the control plate that will go into our Harley Benton guitar. As you can see, there are only three external wires connecting to the control plate: ground and hot from the output jack, plus hot from the pickup.
At this point, we’ve finished work on the body of our guitar, and I’m feeling pretty happy with how it came out. We didn’t spend any additional money this month, so our remaining $196 budget is still untouched for future investments. Next month, we’ll start to work on our guitar’s neck, so stay tuned.
Until then ... keep on modding!