Get custom-shop options on a bargain budget by making it yourself.
After playing and collecting pedals for a while, many players decide that off-the-shelf pedalboards don't quite offer all of the options they'd prefer for organizing and getting the most out of their stompboxes. Some of us want little more than a platform with space for our effects and a power supply, while others are at the opposite end of the spectrum and can't live without various jacks and specialized connections being built right into the pedalboard.
For this DIY piece, I wanted to solve the problem I'm facing: I have a growing pedal collection, but after using some of the pre-assembled products on the market for a while I decided they weren't quite cutting it. I wanted something closer to a custom pedalboard—minus the elevated price tag. After scoping out the range of custom options offered by various companies, I decided to make something with all the features I wanted. It's a bit more involved than duct-taping everything to an IKEA shelf, but it's definitely not as involved as some of the space-age control centers on the market. I was careful to keep costs as low as possible, though. in fact, I was able to keep the price around $100.
Tools & Supplies
- Appropriate lengths of 1/2" oak and 3/4" cabinet-grade birch
- Table Saw (with taper angle attachment and 80-tooth blade)
- Mitre Saw
- Router (with 1/2" straight bit)
- Medium-sized Phillips screwdriver (or similar-sized bit for a power drill)
- (6) 1/2" self-tapping wood screws (1/8" diameter with fine threads)
- (24) 1" self-tapping wood screws (1/8" diameter with fi ne threads)
- (10) 1 1/4" self-tapping wood screws (1/8" diameter with fi ne threads)
- Kreg Jig
- Marinco 5278BL power inlet
- (2) solderless Neutrik conenctors
- 7/8" hole saw
- 1 3/4" hole saw
- Power drill
- 1/8" drill bit
- Wire strippers
- Electrical tape
- IEC power cord
- 2" industrial-strength Velcro
- 220-grit sandpaper
A couple of notes about things we're not covering here: I won't go into the theory of wiring up your board (effect order, switching options, etc.)—that's a whole other topic. Here we're covering the basics of getting a signal and power to and from your board. Also, though most players need a pedalboard case because they drag their boards all over the place, we'll refer you to the fine folks at blackbirdpedalboards.com, stompin-ground. com, nycpedalboards.com and other outlets with a multitude of sizes, options, and materials for you to choose from once you've decided on the final size and shape of your board.
All right—let's get to it!
Step 1
Lay out your pedals on the floor in ideal performing position and use a tape measure to determine what size of board will fit them. I decided on 24" x 16". I wanted my board to have an angled surface so I can comfortably reach two rows of pedals, so we'll also make the surface angle from 4" high in back down to 1 1/2" high along the front edge. This will also let me mount a power supply underneath.
Step 2
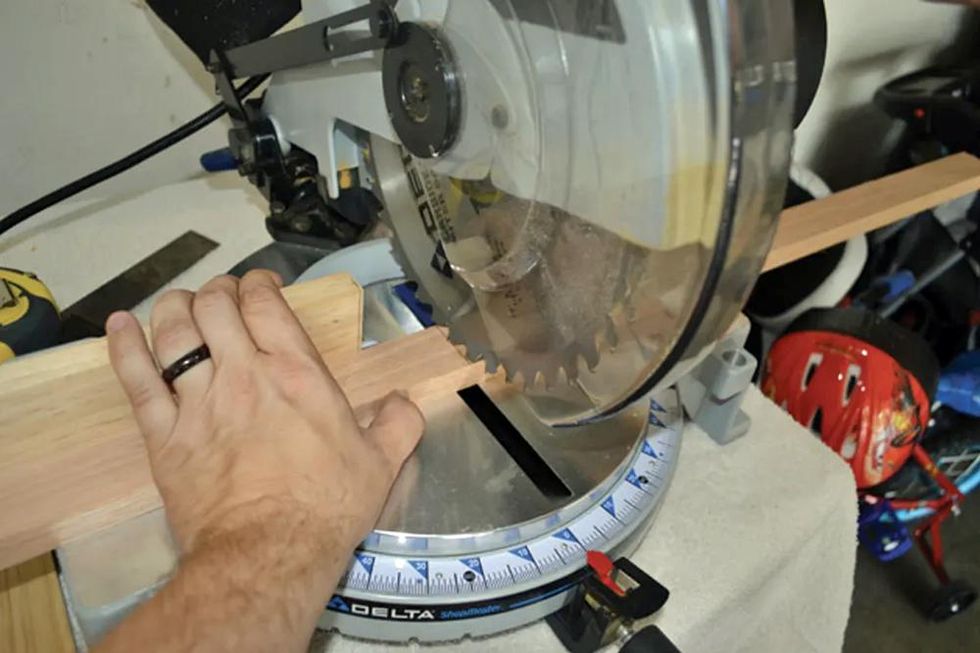
Next, we need a basic frame. I used a miter saw to cut the four sides to the appropriate lengths. I chose 1/2" oak for the sides, and 3/4" cabinet-grade birch for the top.
Step 3
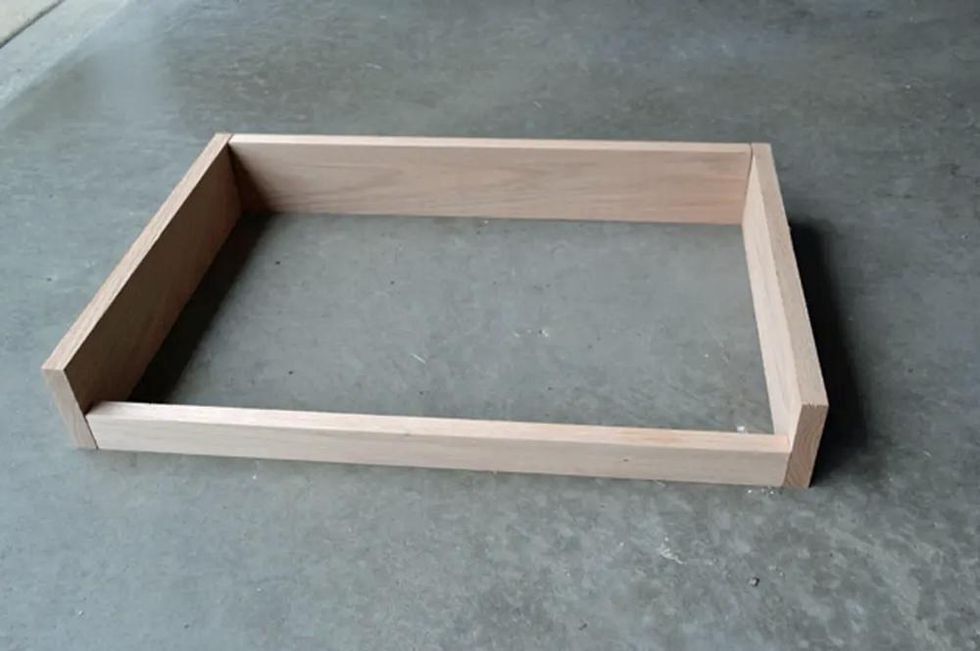
I determined that a 7-degree cut on each of the pedalboard's side pieces would provide the optimum surface incline.
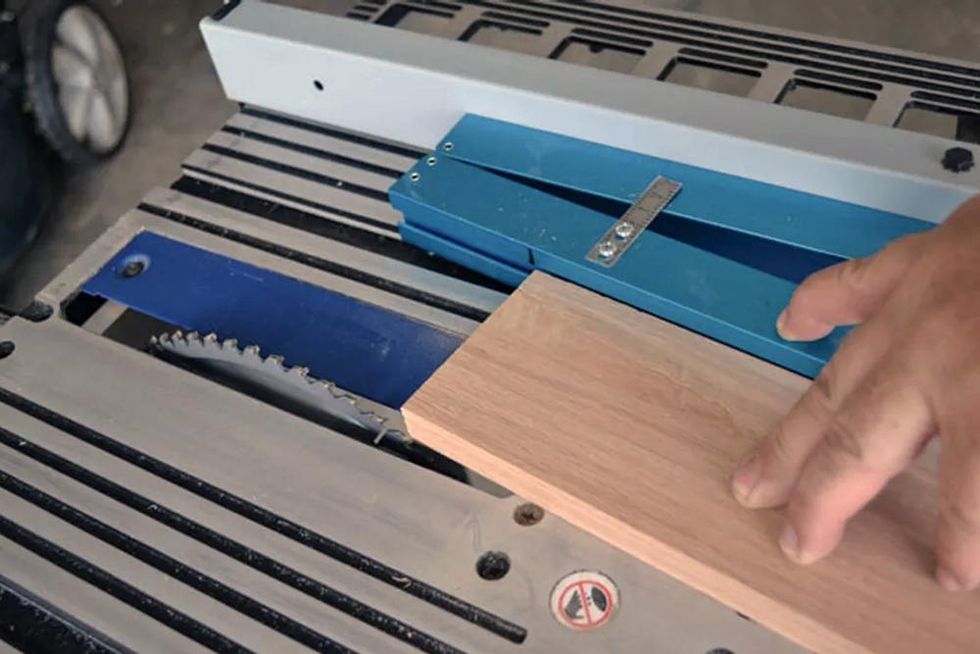
To cut the sides flat and even so they'd make complete contact with the underside of the top, I used a table saw and the blue taper-angle attachment in the top portion of this photo. A blade with a higher number of teeth reduces the chance of rough or damaged edges, so I used an 80-tooth blade.
Step 4
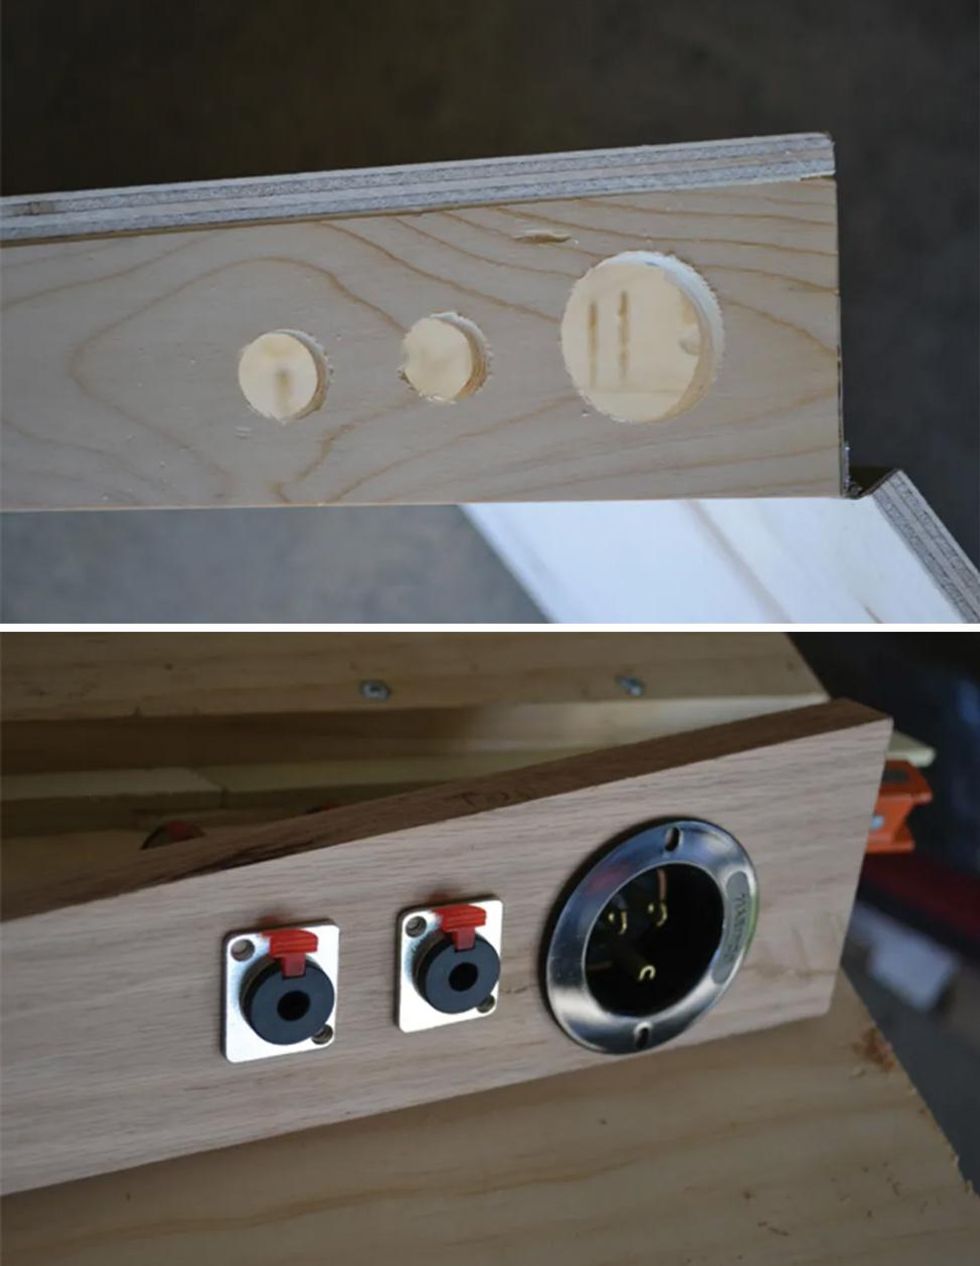
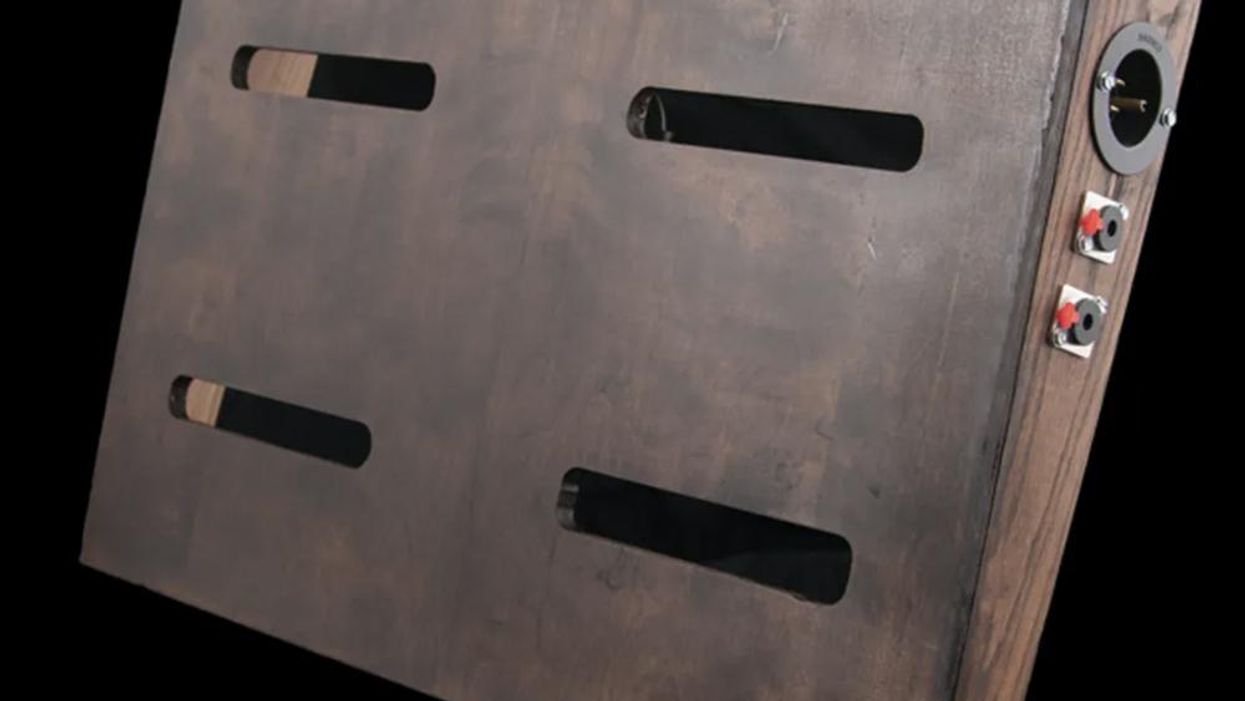
I cut the holes for the power inlet and neutrik connectors in the board's right side piece. I used a 7/8" hole saw for the smaller holes, and a 1 3/8" hole saw for the larger one. If you prefer adding more jacks for, say, an effects loop or a parallel acoustic setup, add the appropriate number of connectors using the same tools.
Step 5
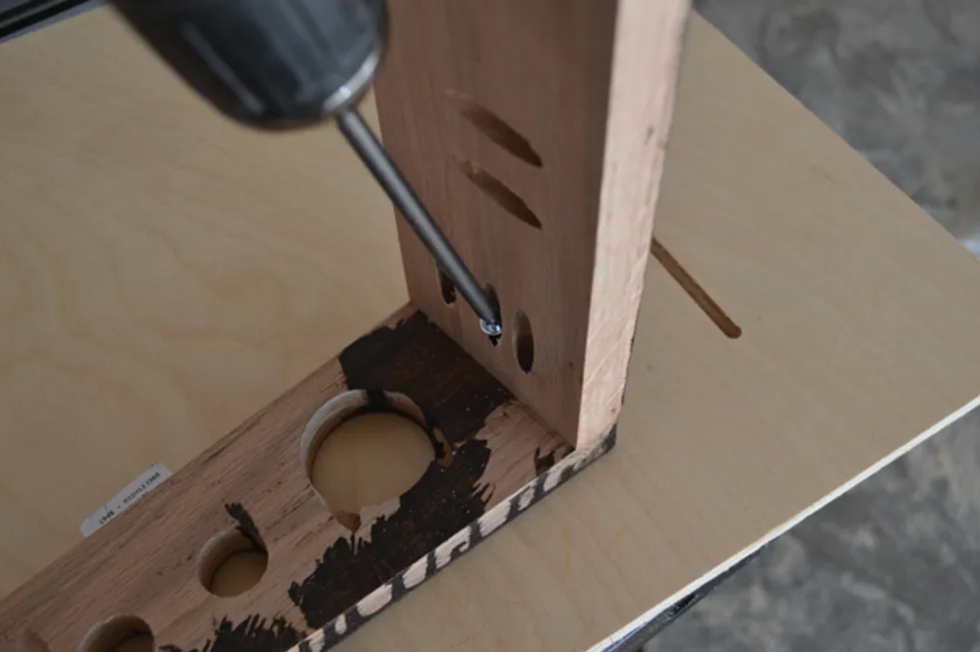
To assemble the frame, we need holes for the screws. I used a kreg jig to pre-drill all the holes with a 3/8" drill bit. for a secure fit, I used two 1 1/4" screws for the front two edges, and three for each of the back corners. be sure to use fine-threaded screws, which prevent splintering and hold things together much tighter. While you're tightening the screws, make sure everything is square and level so it won't rock back and forth during use—the last thing you need to worry about while performing is whether you're stomping too hard.
Step 6
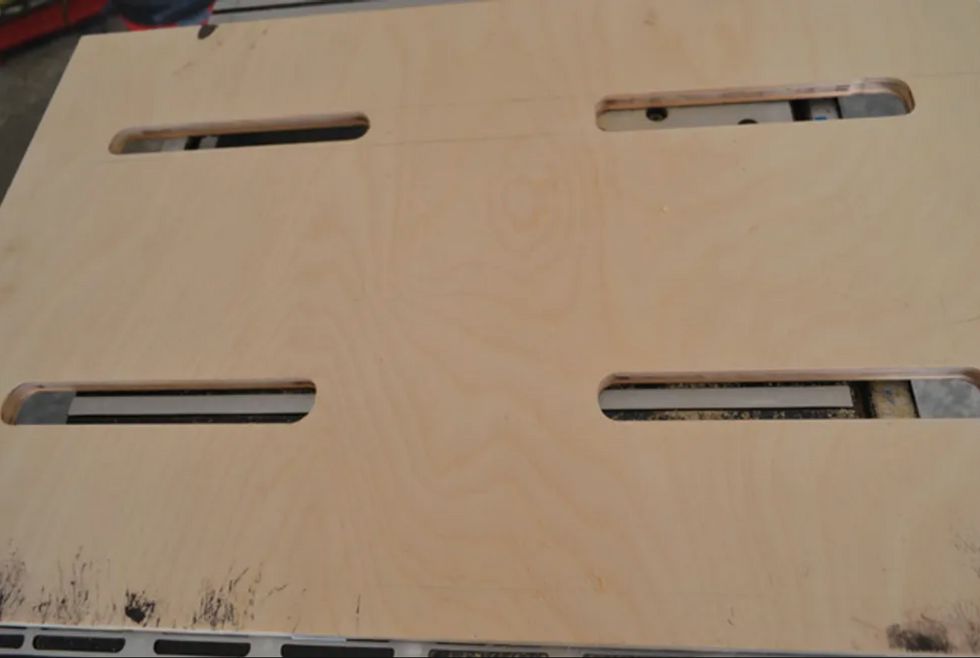
In order for the signal and power cables to pass efficiently throughout the board, I opted for a slotted pattern on the top piece. I used a 1/2" straight bit in my router to cut each channel. Each slot was 7" long, and I left 6" of wood between each pair. Be careful about placing the slots too close together—it can weaken the top of the pedalboard.
Step 7
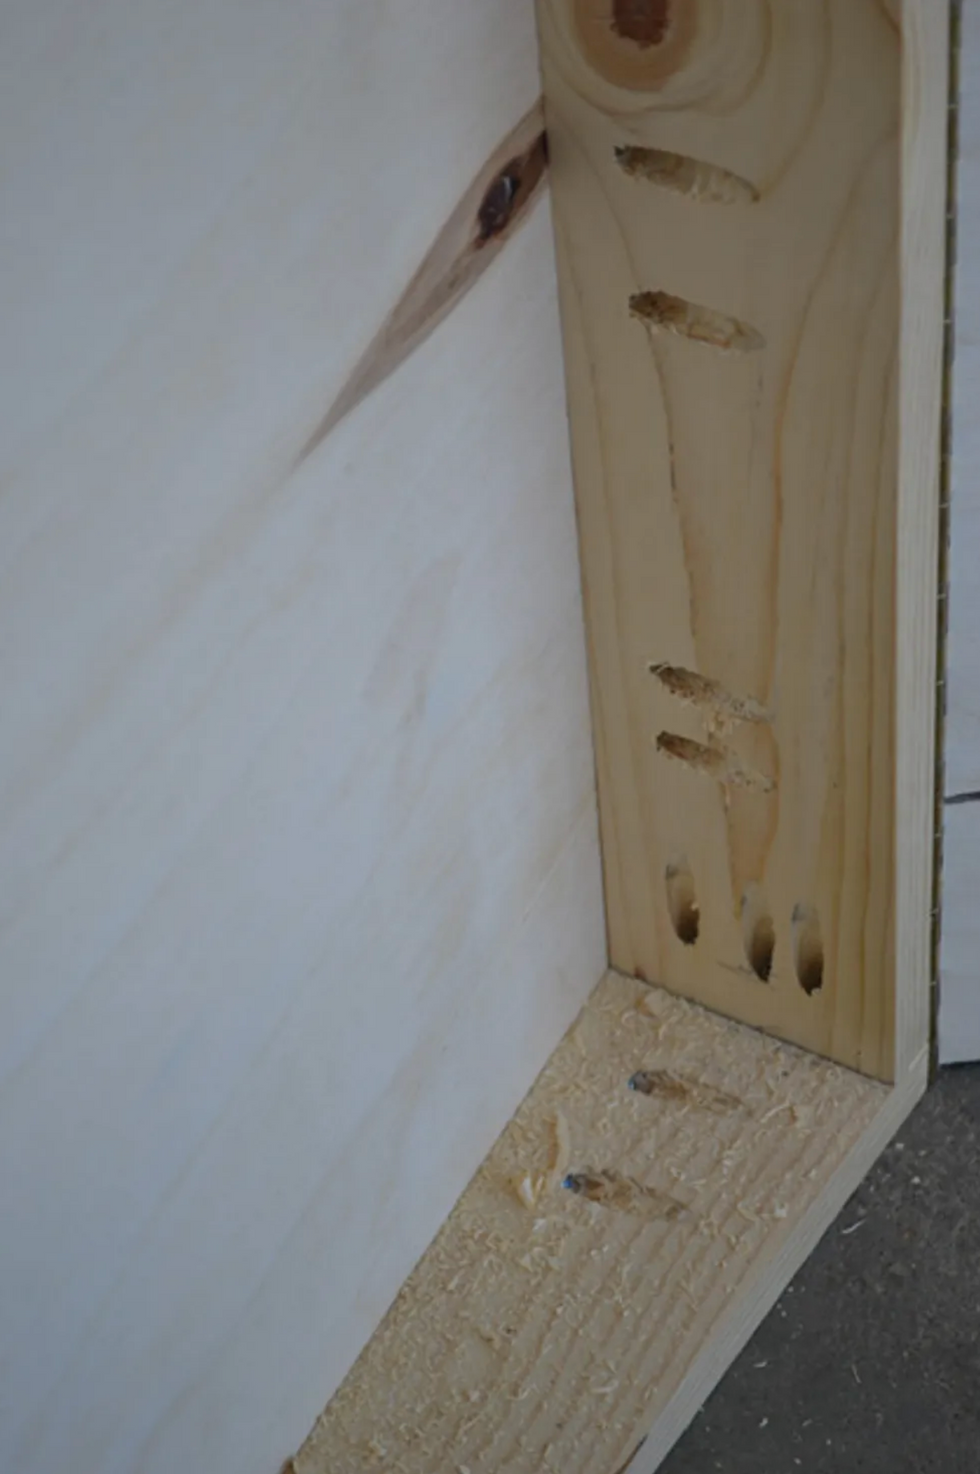
To attach the top piece, I used the Kreg jig and a 3/8" drill bit to pre-drill three pairs of holes along each surface. I spaced them 7" apart along the front and back, and 3" apart along the sides. The top of my board is 1/2" thick, so I used 1" wood screws that wouldn't puncture the top surface. Using screws rather than glue makes it so I can easily remove the top if I ever want to replace or repair anything.
Step 8
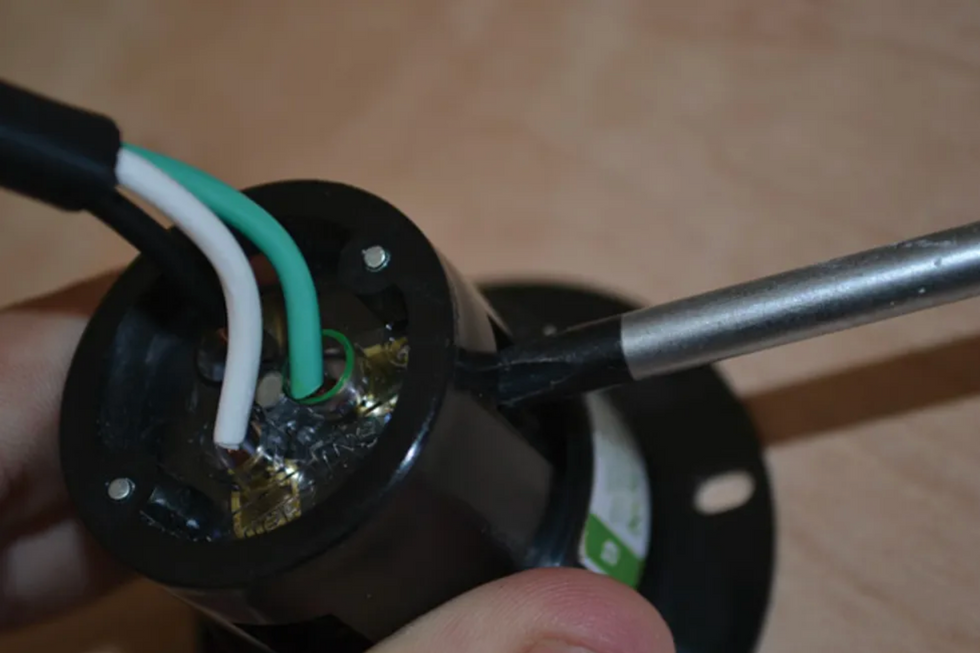
Now it's time to wire up the hardware connectors. I didn't want to risk a bad connection with the power jack, so I used a Marinco 5278BL flanged inlet, which lets you connect wires with screws rather than solder. (You can find this part, as well as the solderless connectors, at pedalboardshop.com.)
To begin, snip the male end from a regular IEC power cord. Inside you'll see three wires with black, green, and white insulation. Strip about 1/2" of the insulation from each wire, then match the wires with the corresponding inlet connectors. Finally, tighten each screw and wrap any exposed wire with electrical tape.
Step 9
Before attaching the hardware, apply whatever finish you prefer. I used a dark polyurethane stain. Don't be afraid to do a few coats to achieve the desired hue, just make sure you wipe the board thoroughly between each one. After the stain has dried, be sure to sand the top surface of your board so that whatever you use to attach the pedals—be it Velcro or a specialized product like Godlyke's Power-grip—has a nice surface to bond to.
Step 10
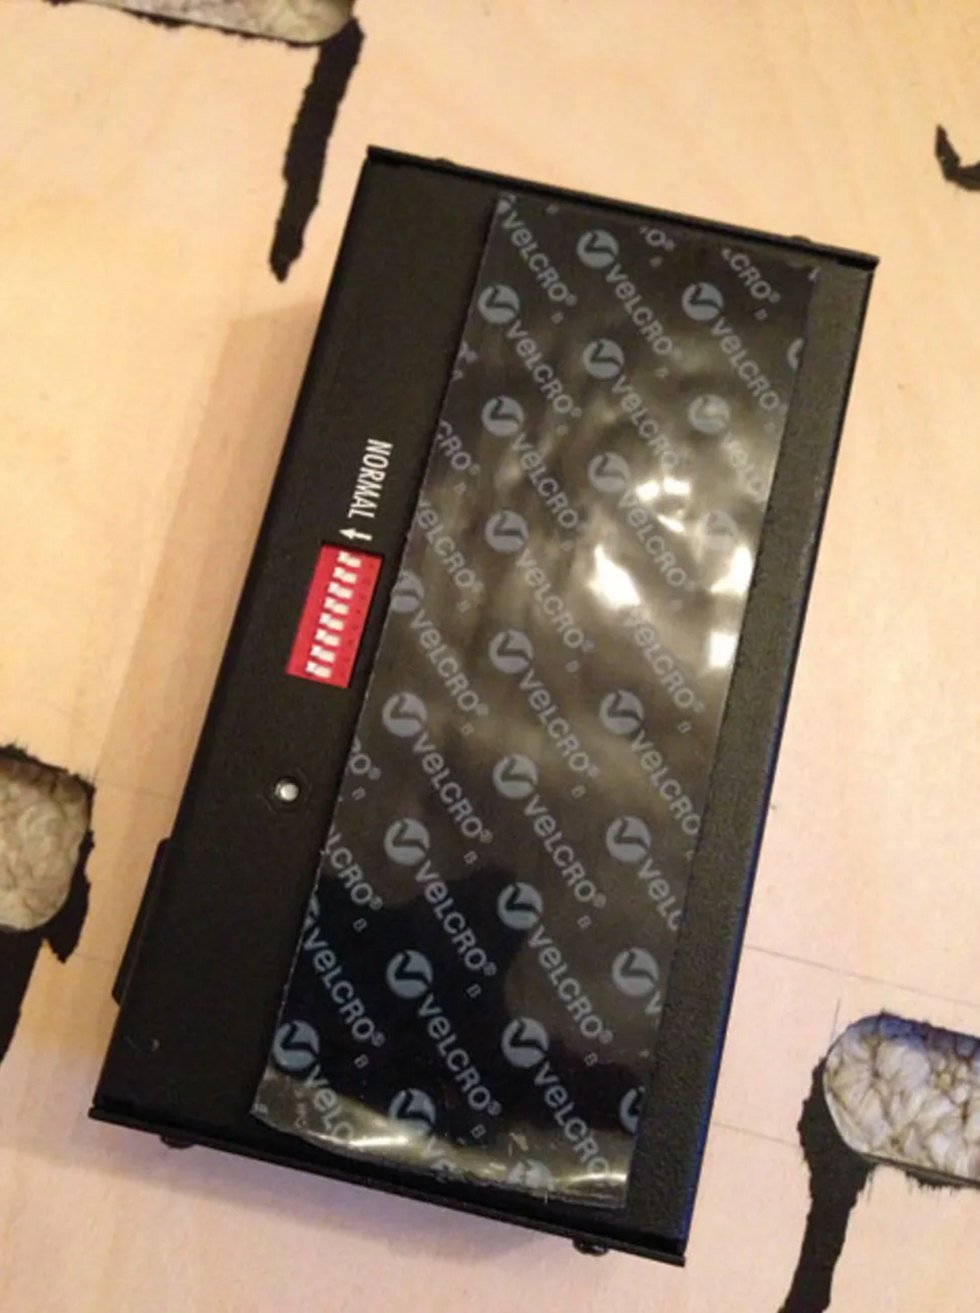
To facilitate a power supply upgrade or replacement in the future, I used a 2" strip of industrial-strength Velcro to attach the power supply to the underside of the top piece.
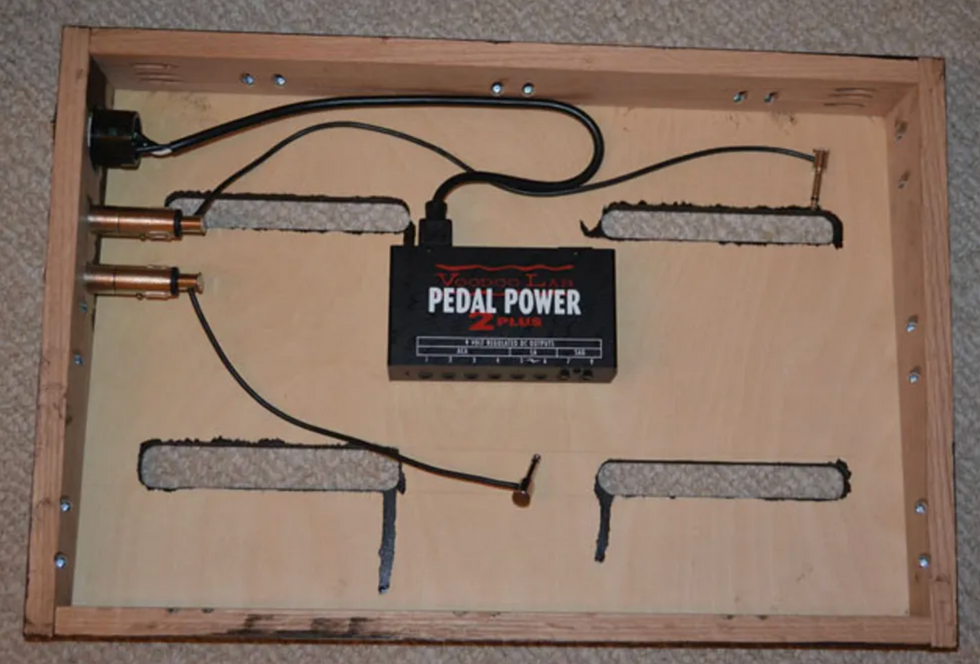
Mount the power supply and install the wired inlet and solderless connectors with 1/2" wood screws.
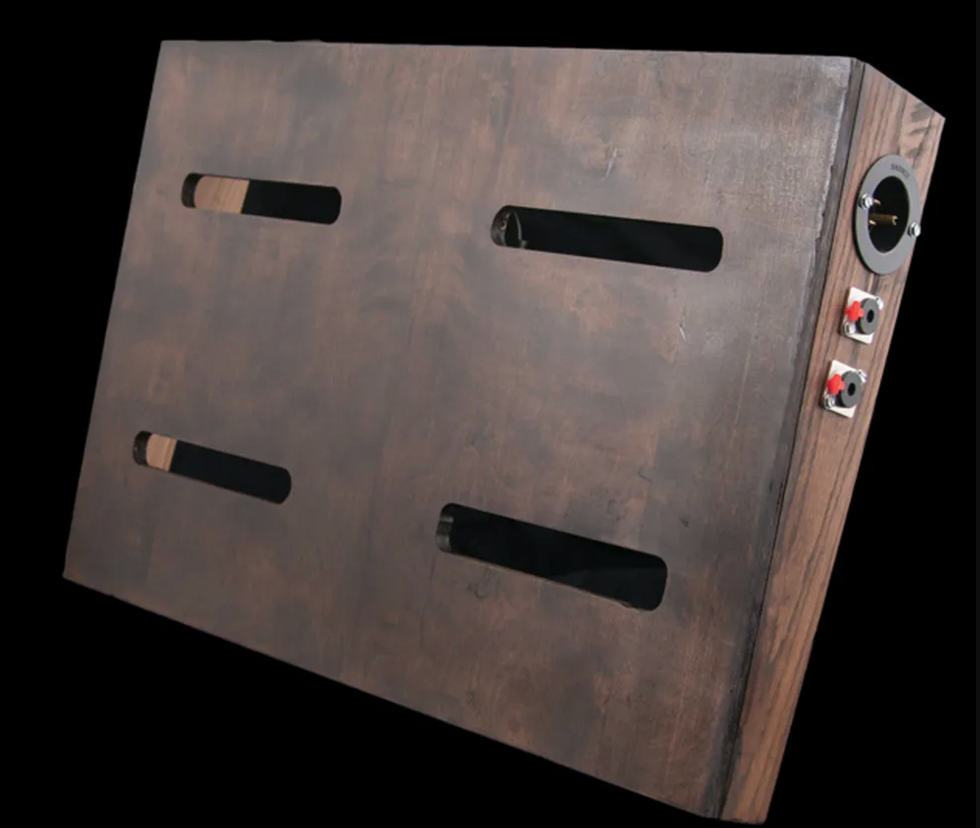
Use fine-grit (at least 220) sandpaper to sand the surface nice and smooth so the Velcro adheres sufficiently.
That's it! Once you've attached your pedals and wired up your power and signal cables, you're ready to plug in and go—enjoy!
Special thanks to Mason Marangella from Vertex Effects, David Quinones from Blackbird Pedalboards, Luke Summers from Agape Custom Shop, and Michael Helweg from Helweg Pedalboards.
[Updated 7/27/21]
- How to Build a Flight-Friendly Pedalboard - Premier Guitar ›
- DIY: How to Make a 9V Power Supply Out of a Drill Battery - Premier ... ›
- 10 DIY Patch Kits to Streamline Your Board - Premier Guitar ›
- Powering Your Board - Premier Guitar ›
- The Stompbox-Builder’s Secret Weapon - Premier Guitar ›
- DIY: How to Make a 9V Power Supply Out of a Drill Battery - Premier Guitar ›
- Reader Pedalboards 2022, Part 1 - Premier Guitar ›
- Tools for the Task: Pedalboard Power Supplies - Premier Guitar ›
- Learn How to Swap Diodes to Improve Your Overdrive - Premier Guitar ›
- DIY: How to Level, Crown & Dress Guitar Frets - Premier Guitar ›
- DIY 101: How to Build a Delay Pedal Kit - Premier Guitar ›
- Discover the Power of J. Rockett Archer Select: Review - Premier Guitar ›
- Way Huge Stone Burner Fuzz Pedal Review ›
- EarthQuaker Devices Zoar Dynamic Audio Grinder Review ›
- Are Pedals Necessary for True Guitar Freedom? ›
- JAM Pedals Harmonious Monk mk.2 Review ›
- Reader Pedalboards 2024: Fuzzy to Checkered Guitar Pedals ›
- EHX Pico Attack Decay, Oceans 3-Verb, Canyon, Deep Freeze ›
- Beetronics Nectar Guitar Pedal Review ›
- Want to Build Pedals? Here's the Ultimate Kit Roundup ›
- Mojo Hand FX Stylus Modulation Pedal ›
- Death By Audio Octave Clang V2 Review ›
“Practice Loud”! How Duane Denison Preps for a New Jesus Lizard Record
After 26 years, the seminal noisy rockers return to the studio to create Rack, a master class of pummeling, machine-like grooves, raving vocals, and knotty, dissonant, and incisive guitar mayhem.
The last time the Jesus Lizard released an album, the world was different. The year was 1998: Most people counted themselves lucky to have a cell phone, Seinfeld finished its final season, Total Request Live was just hitting MTV, and among the year’s No. 1 albums were Dave Matthews Band’s Before These Crowded Streets, Beastie Boys’ Hello Nasty, The Miseducation of Lauryn Hill, Korn’s Follow the Leader, and the Armageddonsoundtrack. These were the early days of mp3 culture—Napster didn’t come along until 1999—so if you wanted to hear those albums, you’d have to go to the store and buy a copy.
The Jesus Lizard’s sixth album, Blue, served as the band’s final statement from the frontlines of noisy rock for the next 26 years. By the time of their dissolution in 1999, they’d earned a reputation for extreme performances chock full of hard-hitting, machine-like grooves delivered by bassist David Wm. Sims and, at their conclusion, drummer Mac McNeilly, at times aided and at other times punctured by the frontline of guitarist Duane Denison’s incisive, dissonant riffing, and presided over by the cantankerous howl of vocalist David Yow. In the years since, performative, thrilling bands such as Pissed Jeans, METZ, and Idles have built upon the Lizard’s musical foundation.
Denison has kept himself plenty busy over the last couple decades, forming the avant-rock supergroup Tomahawk—with vocalist Mike Patton, bassist Trevor Dunn (both from Mr. Bungle), and drummer John Stanier of Helmet—and alongside various other projects including Th’ Legendary Shack Shakers and Hank Williams III. The Jesus Lizard eventually reunited, but until now have only celebrated their catalog, never releasing new jams.
The Jesus Lizard, from left: bassist David Wm. Sims, singer David Yow, drummer Mac McNeilly, and guitarist Duane Denison.
Photo by Joshua Black Wilkins
Back in 2018, Denison, hanging in a hotel room with Yow, played a riff on his unplugged electric guitar that caught the singer’s ear. That song, called “West Side,” will remain unreleased for now, but Denison explains: “He said, ‘Wow, that’s really good. What is that?’ And I said, ‘It’s just some new thing. Why don’t we do an album?’” From those unassuming beginnings, the Jesus Lizard’s creative juices started flowing.
So, how does a band—especially one who so indelibly captured the ineffable energy of live rock performance—prepare to get a new record together 26 years after their last? Back in their earlier days, the members all lived together in a band house, collectively tending to the creative fire when inspiration struck. All these years later, they reside in different cities, so their process requires sending files back and forth and only meeting up for occasional demo sessions over the course of “three or four years.”
“When the time comes to get more in performance mode, I have a practice space. I go there by myself and crank it up. I turn that amp up and turn the metronome up and play loud.” —Duane Denison
the Jesus Lizard "Alexis Feels Sick"
Distance creates an obstacle to striking while the proverbial iron is hot, but Denison has a method to keep things energized: “Practice loud.” The guitarist professes the importance of practice, in general, and especially with a metronome. “We keep very detailed records of what the beats per minute of these songs are,” he explains. “To me, the way to do it is to run it to a Bluetooth speaker and crank it, and then crank your amp. I play a little at home, but when the time comes to get more in performance mode, I have a practice space. I go there by myself and crank it up. I turn that amp up and turn the metronome up and play loud.”
It’s a proven solution. On Rack—recorded at Patrick Carney’s Audio Eagle studio with producer Paul Allen—the band sound as vigorous as ever, proving they’ve not only remained in step with their younger selves, but they may have surpassed it with faders cranked. “Duane’s approach, both as a guitarist and writer, has an angular and menacing fingerprint that is his own unique style,” explains Allen. “The conviction in his playing that he is known for from his recordings in the ’80s and ’90s is still 100-percent intact and still driving full throttle today.”
“I try to be really, really precise,” he says. “I think we all do when it comes to the basic tracks, especially the rhythm parts. The band has always been this machine-like thing.” Together, they build a tension with Yow’s careening voice. “The vocals tend to be all over the place—in and out of tune, in and out of time,” he points out. “You’ve got this very free thing moving around in the foreground, and then you’ve got this very precise, detailed band playing behind it. That’s why it works.”
Before Rack, the Jesus Lizard hadn’t released a new record since 1998’s Blue.
Denison’s guitar also serves as the foreground foil to Yow’s unhinged raving, as on “Alexis Feels Sick,” where they form a demented harmony, or on the midnight creep of “What If,” where his vibrato-laden melodies bolster the singer’s unsettled, maniacal display. As precise as his riffs might be, his playing doesn’t stay strictly on the grid. On the slow, skulking “Armistice Day,” his percussive chording goes off the rails, giving way to a solo that slices that groove like a chef’s knife through warm butter as he reorganizes rock ’n’ roll histrionics into his own cut-up vocabulary.
“During recording sessions, his first solo takes are usually what we decide to keep,” explains Allen. “Listen to Duane’s guitar solos on Jack White’s ‘Morning, Noon, and Night,’ Tomahawk’s ‘Fatback,’ and ‘Grind’ off Rack. There’s a common ‘contained chaos’ thread among them that sounds like a harmonic Rubik’s cube that could only be solved by Duane.”
“Duane’s approach, both as a guitarist and writer, has an angular and menacing fingerprint that is his own unique style.” —Rack producer Paul Allen
To encapsulate just the right amount of intensity, “I don’t over practice everything,” the guitarist says. Instead, once he’s created a part, “I set it aside and don’t wear it out.” On Rack, it’s obvious not a single kilowatt of musical energy was lost in the rehearsal process.
Denison issues his noisy masterclass with assertive, overdriven tones supporting his dissonant voicings like barbed wire on top of an electric fence. The occasional application of slapback delay adds a threatening aura to his exacting riffage. His tones were just as carefully crafted as the parts he plays, and he relied mostly on his signature Electrical Guitar Company Chessie for the sessions, though a Fender Uptown Strat also appears, as well as a Taylor T5Z, which he chose for its “cleaner, hyper-articulated sound” on “Swan the Dog.” Though he’s been spotted at recent Jesus Lizard shows with a brand-new Powers Electric—he points out he played a demo model and says, “I just couldn’t let go of it,” so he ordered his own—that wasn’t until tracking was complete.
Duane Denison's Gear
Denison wields his Powers Electric at the Blue Room in Nashville last June.
Photo by Doug Coombe
Guitars
- Electrical Guitar Company Chessie
- Fender Uptown Strat
- Taylor T5Z
- Gibson ES-135
- Powers Electric
Amps
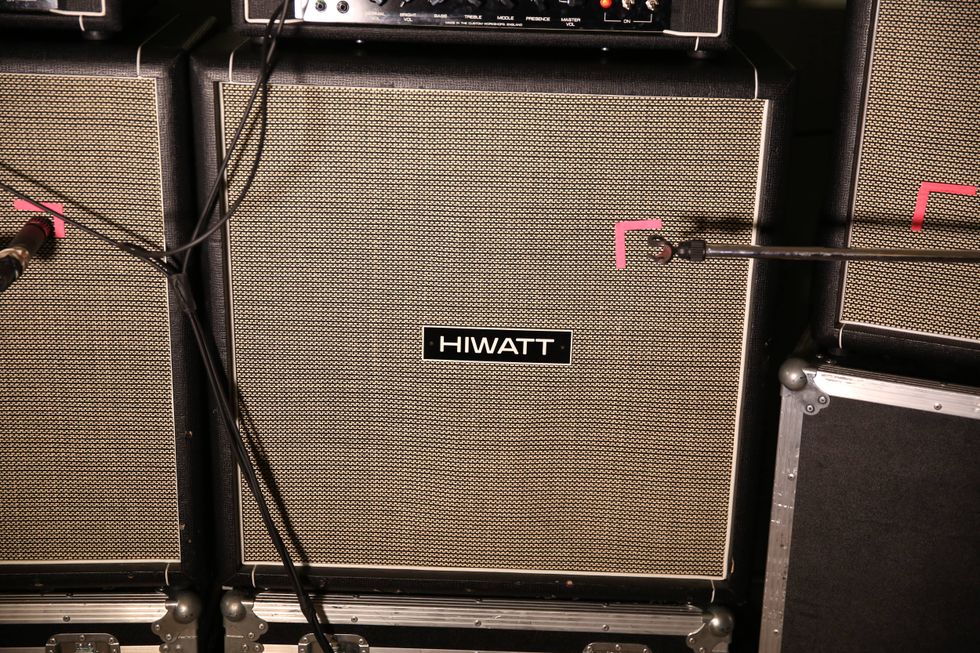
- Hiwatt Little J
- Hiwatt 2x12 cab with Fane F75 speakers
- Fender Super-Sonic combo
- Early ’60s Fender Bassman
- Marshall 1987X Plexi Reissue
- Victory Super Sheriff head
- Blackstar HT Stage 60—2 combos in stereo with Celestion Neo Creamback speakers and Mullard tubes
Effects
- Line 6 Helix
- Mantic Flex Pro
- TC Electronic G-Force
- Menatone Red Snapper
Strings and Picks
- Stringjoy Orbiters .0105 and .011 sets
- Dunlop celluloid white medium
- Sun Studios yellow picks
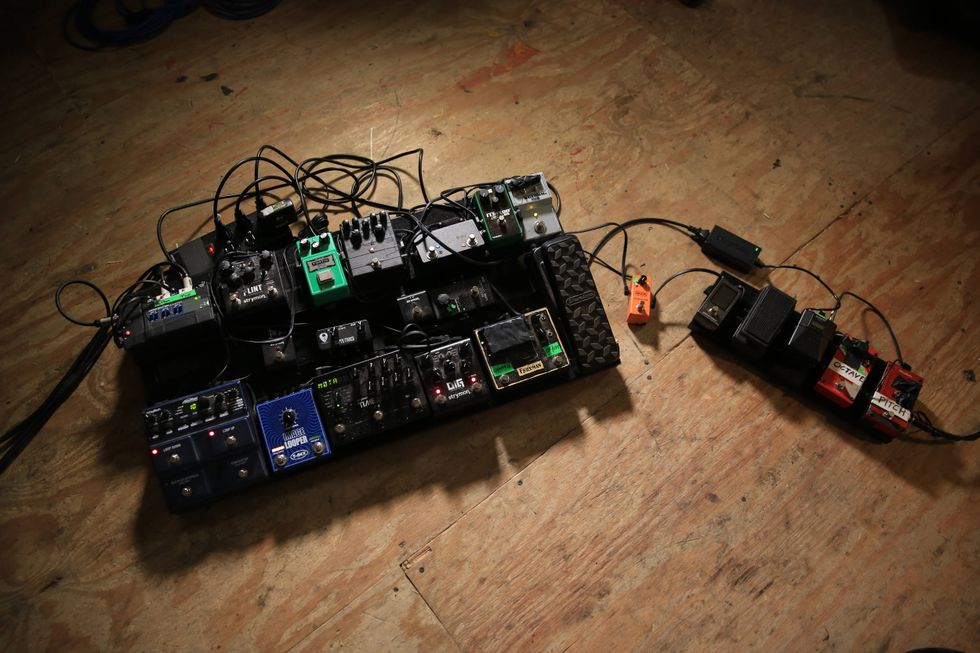
He ran through various amps—Marshalls, a Fender Bassman, two Fender Super-Sonic combos, and a Hiwatt Little J—at Audio Eagle. Live, if he’s not on backline gear, you’ll catch him mostly using 60-watt Blackstar HT Stage 60s loaded with Celestion Neo Creambacks. And while some boxes were stomped, he got most of his effects from a Line 6 Helix. “All of those sounds [in the Helix] are modeled on analog sounds, and you can tweak them endlessly,” he explains. “It’s just so practical and easy.”
The tools have only changed slightly since the band’s earlier days, when he favored Travis Beans and Hiwatts. Though he’s started to prefer higher gain sounds, Allen points out that “his guitar sound has always had teeth with a slightly bright sheen, and still does.”
“Honestly, I don’t think my tone has changed much over the past 30-something years,” Denison says. “I tend to favor a brighter, sharper sound with articulation. Someone sent me a video I had never seen of myself playing in the ’80s. I had a band called Cargo Cult in Austin, Texas. What struck me about it is it didn’t sound terribly different than what I sound like right now as far as the guitar sound and the approach. I don’t know what that tells you—I’m consistent?”
YouTube It
The Jesus Lizard take off at Nashville’s Blue Room this past June with “Hide & Seek” from Rack.
What are Sadler’s favorite Oasis jams? And if he ever shares a bill with Oasis and they ask him onstage, what song does he want to join in on?
Once the news of the Oasis reunion got out, Sadler Vaden hit YouTube hard on the tour bus, driving his bandmates crazy. The Jason Isbell and the 400 Unit guitarist has been a Noel Gallagher mega-fan since he was a teenager, so he joined us to wax poetic about Oasis’ hooks, Noel’s guitar sound, and the band’s symphonic melodies. What are Sadler’s favorite Oasis jams? And if he ever shares a bill with Oasis and they ask him onstage, what song does he want to join in on?
Check out the Epiphone Noel Gallagher Riviera Dark Wine Red at epiphone.com
EBS introduces the Solder-Free Flat Patch Cable Kit, featuring dual anchor screws for secure fastening and reliable audio signal.
EBS is proud to announce its adjustable flat patch cable kit. It's solder-free and leverages a unique design that solves common problems with connection reliability thanks to its dual anchor screws and its flat cable design. These two anchor screws are specially designed to create a secure fastening in the exterior coating of the rectangular flat cable. This helps prevent slipping and provides a reliable audio signal and a neat pedal board and also provide unparalleled grounding.
The EBS Solder-Free Flat Patch Cable is designed to be easy to assemble. Use the included Allen Key to tighten the screws and the cutter to cut the cable in desired lengths to ensure consistent quality and easy assembling.
The EBS Solder-Free Flat Patch Cable Kit comes in two sizes. Either 10 connector housings with 2,5 m (8.2 ft) cable or 6 connectors housings with 1,5 m (4.92 ft) cable. Tools included.
Use the EBS Solder-free Flat Patch Cable Kit to make cables to wire your entire pedalboard or to create custom-length cables to use in combination with any of the EBS soldered Flat Patch Cables.
Estimated Price:
MAP Solder-free Flat Patch Cable Kit 6 pcs: $ 59,99
MAP Solder-free Flat Patch Cable Kit 10 pcs: $ 79,99
MSRP Solder-free Flat Patch Cable Kit 6 pcs: 44,95 €
MSRP Solder-free Flat Patch Cable Kit 10 pcs: 64,95 €
For more information, please visit ebssweden.com.
Floyd Rose introduces new USA-made Original saddle sets in various configurations, crafted from premium hardened tool steel with precision CNC machining. Available in chrome and black finishes now.
The new facility offers immediate availability of the legendary Floyd Rose Original saddles in multiple radius configurations for the first time. Engineered to perfectly match specific fretboard curvatures, these saddle sets provide a range of radius options without the need for individual saddle shims. Alongside the classic 12” radius, Floyd Rose has unveiled 8”, 10”, 14”, 16”, and 17” radii saddle sets. Crafted from premium hardened tool steel with precision CNC machining and finished with durable, smooth plating, these saddles are built to withstand the demands of intense performances. Chrome and black sets of USA-made Floyd Rose Original Saddles in various radii are available now at the company’s website, followed by gold and black nickel finishes in the 4th quarter of 2024.
The new Floyd Rose manufacturing center in North Carolina was designed to meet growing demand while ensuring the highest quality available using modern high-tech processes. Bringing production in-house enhances control over every aspect of the process including engineering, material selection, quality control, and scheduling. The facility features four Haas VF-seriesCNC machines, delivering precision machining fine-tuned for high efficiency and clean surface finishes. Alongside machining, the company has established a state-of-the-art metal finishing department and acquired stamping equipment with new capabilities added monthly.
At the heart of the Floyd Rose USA manufacturing center is a dedicated team of engineers and technicians who excel in their craft and are deeply passionate about the legendary product line. With decades of collective experience, the company’s experts meticulously craft each component to exacting standards.
“We are ecstatic to be making these new Original saddles in the USA, giving us better control over quality and production times while offering more robust options like these new radii,” said Andrew Papiccio, longtime president of AP International Music Supply / Floyd Rose and an original owner of Kramer Guitars. "With this new state-of-the-art facility, we are poised todeliver unparalleled quality and performance to musicians worldwide. As we integrate newproducts into this facility, we are expanding our commitment to ‘Made in America’ craftsmanship.”
The company plans to ramp up production of parts and innovations at their USA factory forFloyd Rose and their new AxLabs Hardware division.
For more information, please visit floydrose.com.