 |
 |
 |
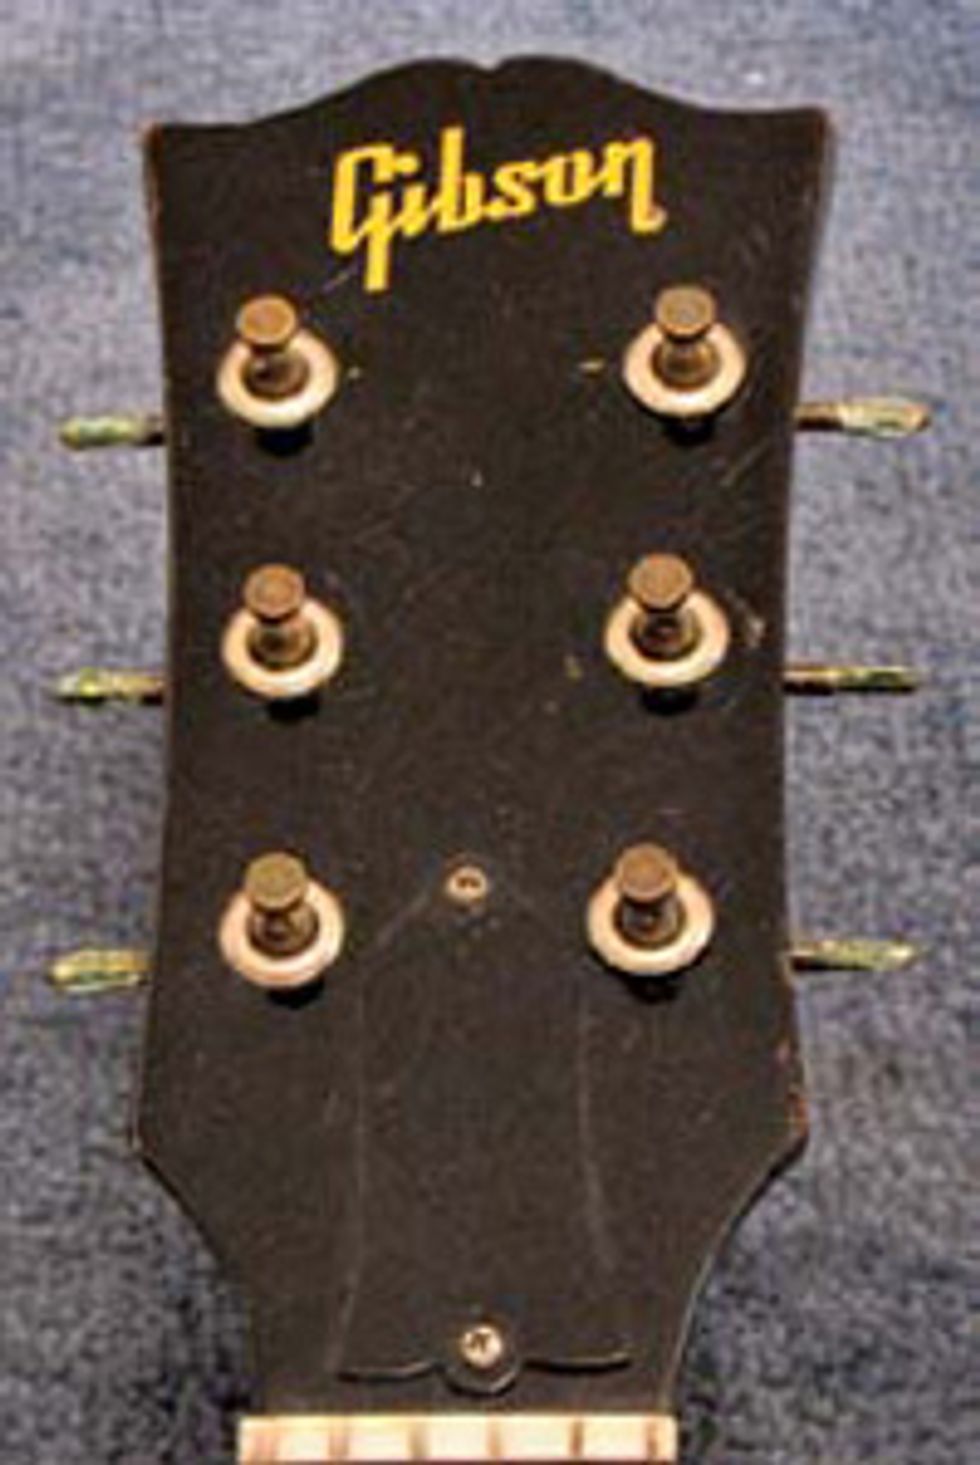
During the 1950s and ’60s, Gibson used Kluson tuners almost exclusively. There were different marking variations used throughout the years, but for the most part, the Kluson tuners’ overall appearance remained the same. (Gibson did offer Grover tuners as a special order option beginning in 1959.) The style of tuners we will be resurrecting on this guitar are referred to as “3-on-a-plate” Kluson tuners.
Tuner Removal and Prep
The tuners were carefully removed from the headstock while keeping an eye on the press-in bushings, as they seem to find a way of falling out at times. This is a good moment to remind you to keep your bench top clean—you might need to crawl around with a fine-tooth comb to retrieve one of these bushings.
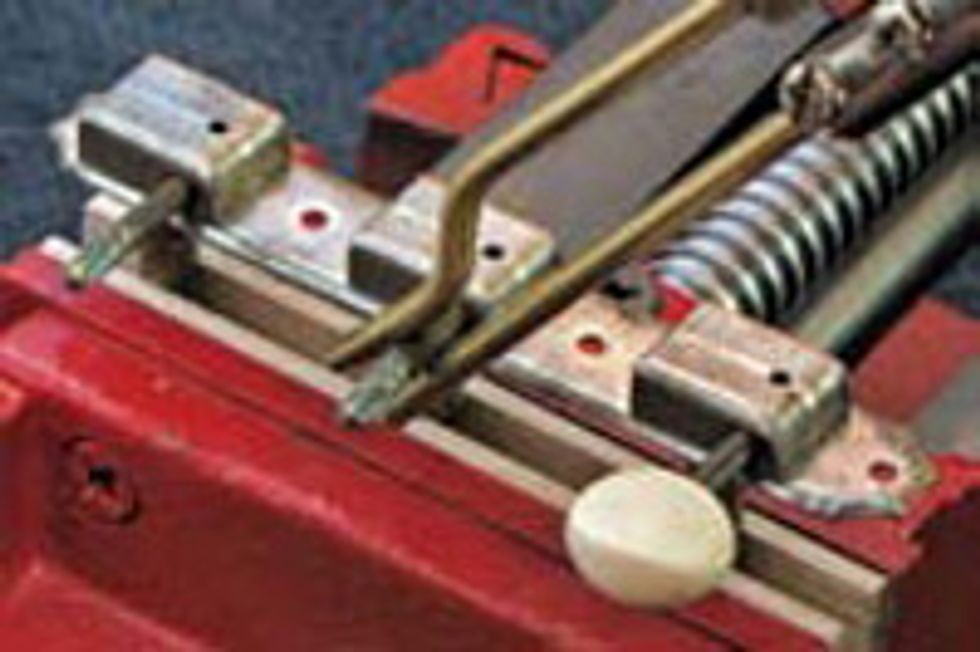
With the tuners off, I modified my Angle Vise by adding maple baseplates to the jaws, to avoid compression damage once the string posts were clamped in. Some 1/8"-thick maple bridge plate stock (item no. 1121 online at stewmac.com) works well for cutting out two sections of 8" wide x 7/16" tall baseplates. You can attach these to the jaws with double-stick tape. With the string post clamped securely into the vice, I positioned the knob shafts so I had clear access to work on them.
Since the tuner knobs were already gone, I was able to avoid the steps of using heat and removing the knobs with pliers. All I really needed to do was thoroughly clean the tuner shaft with a bristle brush and razor blade before installing the knobs. I really recommend the file cleaning brush for this task (Stew Mac item number 0825), as it provides you with a lot of control. While cleaning, I was careful not to go past the portion where the knobs end, so the exposed section of the shafts would look original and unaltered.
Aging the Knobs
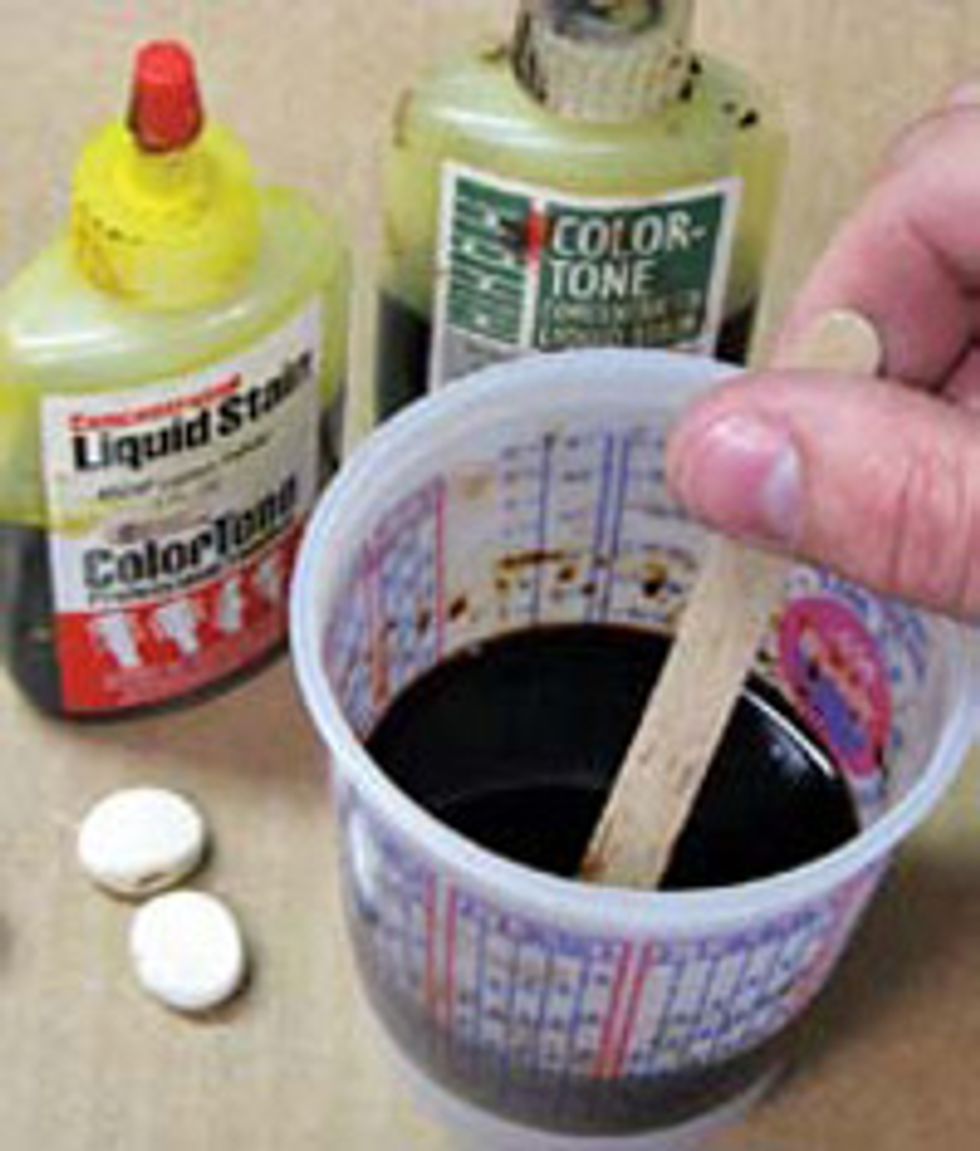
Stewart MacDonald has a wide variety of vintage-style replacement knobs. Their 11/16" x 9/16" oval plastic knobs are the perfect replacement for deteriorating vintage tuner knobs. For this project, I chose Stew Mac item number 0113 in white, and aged the knobs using my own mix to really help the color tone and sheen match the guitar. The instrument certainly didn’t look brand new, so I detailed the knobs accordingly.
For the detailing mix, I used 1 ounce of acetone to 1 ounce of water (an equal part ratio) in an E-Z Mix disposable mixing cup. The water dilutes the strength of the acetone so that when the knobs are submerged, the plastic will not react and simply liquefy. For the vintage tint, I added 13 drops of red mahogany and 14 drops of lemon yellow ColorTone liquid stain to the 2 ounces of acetone and water. I then put the six knobs into the mix for two sets of 10 minutes, gently stirring with a popsicle stick, and included five minutes of air drying while gently burnishing in the toner with a lint-free cloth in between. Always remember to be safe when working with chemicals by using proper protection and ventilation.
By submerging the knobs in timed increments, I was able to control the degrees of tint and enhanced, aged-looking fingerprints I was looking for. (If you peer very closely at a new, untainted knob, you will see a variety of what I call “fingerprints.” Those fingerprints can be enhanced with this diluted form of acetone while melting in the toner, giving the knobs that real vintage look.) This idea originated from the days when I saw my father restoring and building concertinas and accordions. He would soften the celluloid plastic so it could be bent and shaped to the instrument’s wooden frame.
Installing the Knobs
After the knobs were ready, I used a Radio Shack soldering gun on the 150-watt setting to heat up the tuner knob shafts (Weller soldering guns also work well for this procedure). A standard soldering pen or iron will work for this job as well, but you should use a heat sink and a moist cloth to avoid damaging the gears from excessive heat.
The key element to using the gun is a custom tip I designed and made for this specific job out of 5/32" brass rod. Both legs of the inside surface of the tip are beveled at an 1/8" length so that the tip legs can slide over the tuner shaft. The legs set themselves and lock to the pre-radiused notch, completing the connection. Heat is then evenly transferred through the tuner shaft, and in seconds the knob goes on like butter. Use some Tri-Flow to lubricate the tuning gears and you’re done!
The following tools and supplies used in this repair are available from Stewart McDonald:
- Guitar Tech screwdriver set
- Stew Mac steel Angle Vise
- Maple bridge plate stock, 4" x 8" x 1/8"
- Double-stick tape
- White vintage-style tuner knobs
- Red mahogany ColorTone Liquid Stain
- Lemon yellow ColorTone Liquid Stain
- Mixing cups
- Tri-Flow
John Brown
John Brown, of Brown’s Guitar Factory, is the inventor of the Fretted/Less bass. He owns and operates a full guitar manufacturing and repair/restoration facility, which is staffed by a team of talented luthiers. He is also the designer of guitar-making/repair tools and accessories that are used today by instrument builders throughout the world. For details, visit brownsguitarfactory.com or shoot a note to info@brownsguitarfactory.com.