This lesson includes some straightforward yet fiendishly tricky exercises. Practicing them will break motor memory habits, uncover new melodic ideas, and strengthen your weakest fretting-hand fingers. They’ll also help you overcome one of guitar’s innate technical problems: the fact that some melodic intervals are harder to play than others.
Brute Fourth
Each guitar string is a fourth (five half-steps) higher than the one below it, except between the 2nd and 3rd strings, which are a major third (four half-steps) apart. When we play melodies across multiple strings, thirds, fifths, and sixths are usually easier to play than fourths and sevenths. (We’ve touched on this topic in a blues-scale context, but here we go deeper using diatonic scales.)
That might sound odd to non-guitarist musicians: Why should leaping five half-steps be any harder that leaping four or six half-steps? Because fourths and sevenths often require you to play two consecutive notes with the same finger on different strings. With thirds and fifths, you can usually sustain one note while shifting a finger into place on an adjacent string. With fourths, you often can’t make your move until the first note stops ringing. Sevenths can be more extreme, because you must usually skip a string between the notes. It can feel like spatulas would serve you better than fingers.
If you could somehow make a database of every guitar solo, there would be far fewer fourths and sevenths than in the sax solo database. Put another way, integrating more fourths and sevenths into your melodies can create fresh ideas.
May the Fourth Be with You
One way to get more comfortable with fourths is to practice scales with fourths-based patterns, as in Ex. 1. It’s based on an A major scale (A–B–C#–D–E–F#–G#), with the root (A) followed by the note a fourth above (D), then the second scale degree (B) followed by the note a fourth above (E), and so on.
Click here for Ex. 1
Check out the tablature. Notice how many times the same number appears twice in a row. The fingering indications in the standard notation tell the same story. In each instance you must play the interval across strings using a single finger, and every fretting-hand finger gets to share the burden. (You can finger this exercise numerous ways, but at least try the given fingering.)
Play this as legato (smoothly) as possible, with minimal gaps between notes. But make sure that no two notes ring simultaneously. Imagine that you’re singing this (even though it’s a damned awkward vocal line). Speed doesn’t matter—just strive for smooth connections.
As you play the fourths, don’t lose contact with the strings. When ascending, finger the first note in each fourth interval with the tip of your finger, and then “roll” into the higher note without lifting your finger, as seen in Photo 1. Besides permitting the fastest possible transition, this technique damps each note just before you strike the next one, preventing unwanted bleed-over.
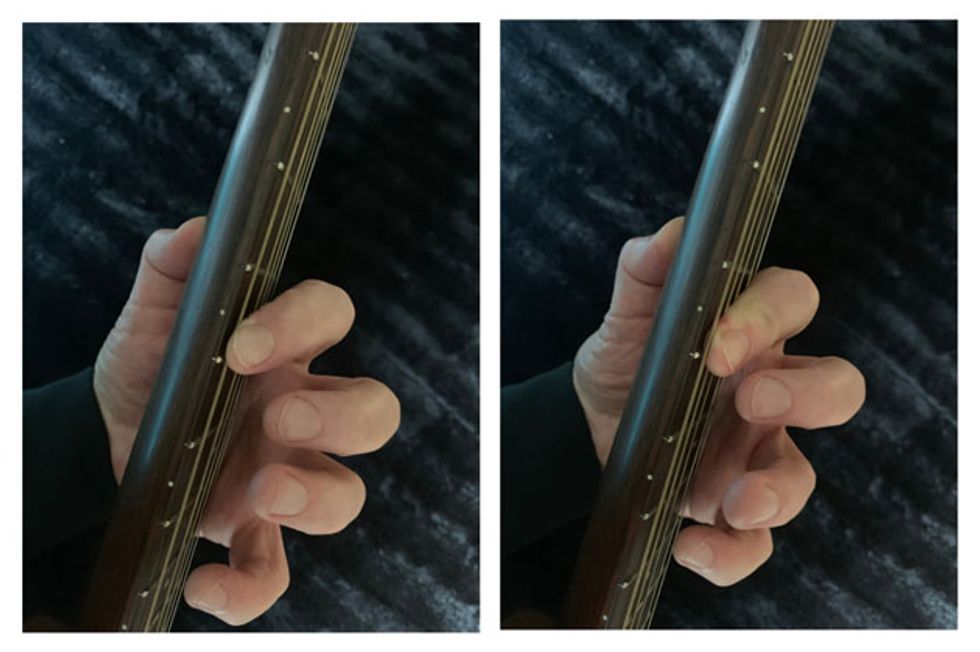
Photo 1
Once you get the basic idea, apply these techniques to any diatonic scale. I could be a pedantic dick and say, “Master this in all five positions for all 24 major and minor keys.” But it’s probably more realistic to run through this for a few minutes during each practice session, choosing a different scale each day. Immediately after, try some freestyle melodic playing, making an effort to incorporate some fourths.
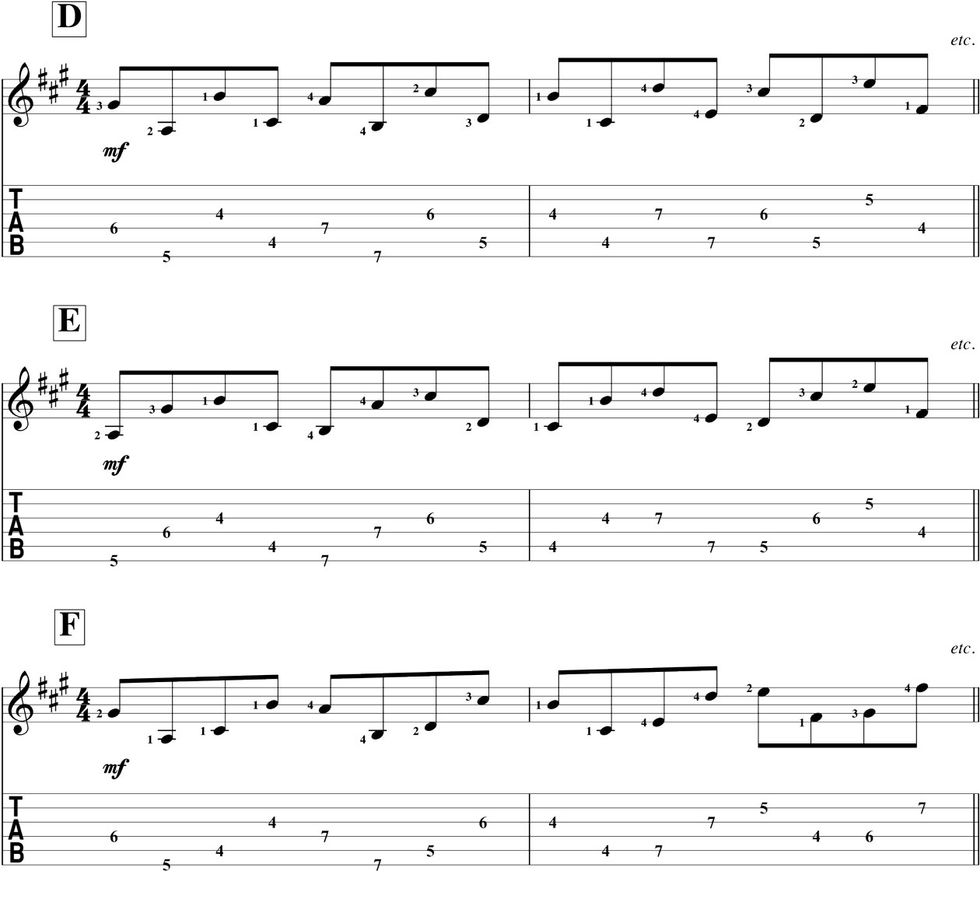
You can concoct endless exercise variations by altering the scale pattern. Ex. 2 shows six of many possibilities.
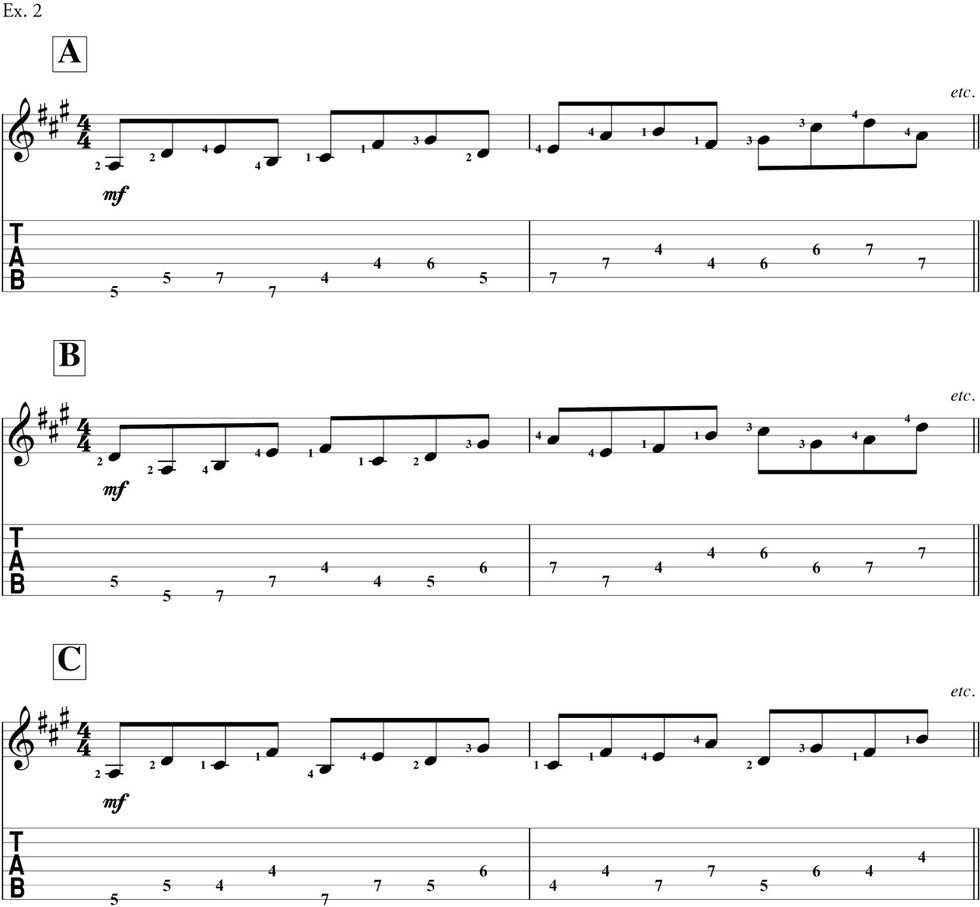

Pattern A is like the original exercise, except that you play the pairs of fourths in alternately ascending and descending order. Pattern B is the same, but starting with a descending pair rather than an ascending one.
Pattern C is “two steps forward, one step backward.” You play the root (A) and the fourth above it (D), then leap up to the third scale degree (C#) and the fourth above it (F#), before dropping back to the second degree (B) and its fourth (E). Continue the pattern from there. Pattern D is the same as pattern C, except it starts with a descending fourth rather than an ascending one.
Pattern E combines the two preceding ideas: You alternate ascending and descending fourths as in patterns A and B, while employing the “two steps up, one step back” motion of patterns C and D. Pattern F is the same as pattern E, but starting with a descending interval.
There’s nothing special about these particular patterns. They simply illustrate how you can create new variations to keep the exercises fresh and challenging.
Is There a Seventh Heaven?
Now let’s try some sevenths. Playing these is like playing fourths, except you must skip a string between the intervals.
Click here for Ex. 3
These may feel easier or harder than fourths, depending on your fingers. If they’re long and double-jointed, you can probably use the rolling technique described above. With shorter, stiffer fingers, you may need to leap. Either way, maintain contact with the strings so notes end when you intend them to, and you don’t inadvertently strike the string between the two target strings.
Ex. 4 does for the sevenths exercise what Ex. 2 did for the fourths. The six patterns show several variations.
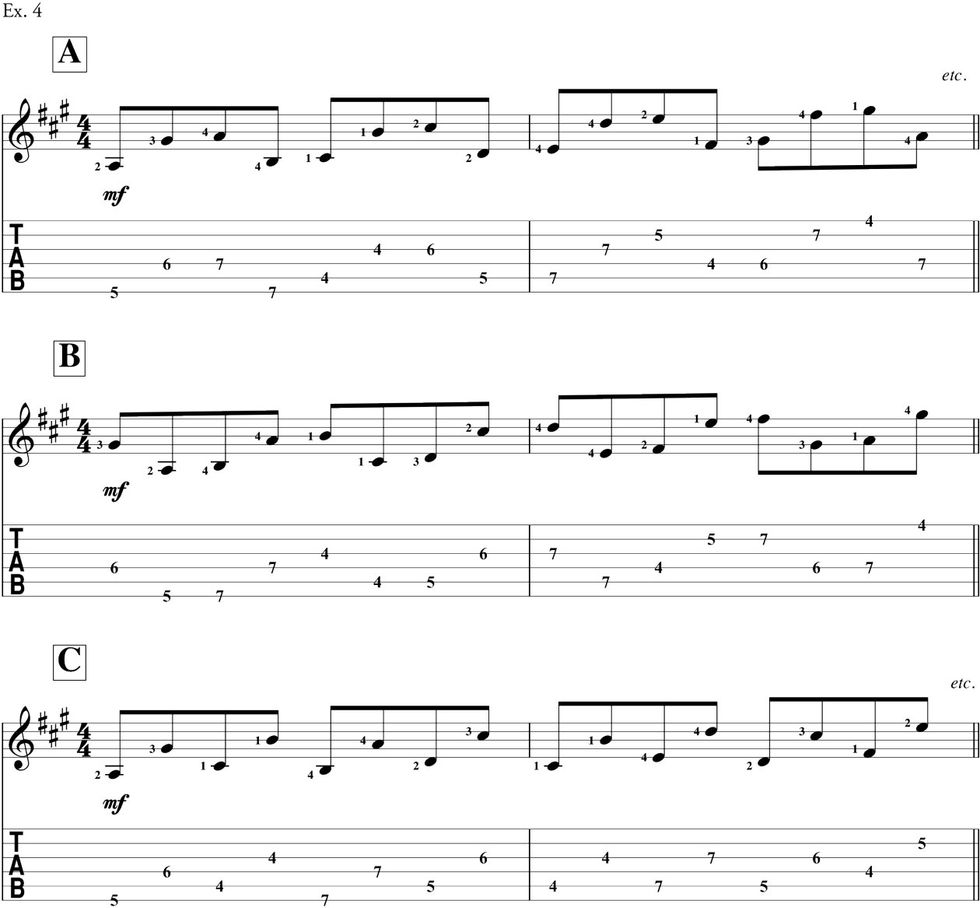
These exercises have two strikes against them: They’re hard, and they’re kind of boring. That’s all the more reason to practice them in moderation, and intersperse your practice with freestyle playing, loosely integrating these techniques. The challenge is substantial—but not nearly as substantial as the rewards.