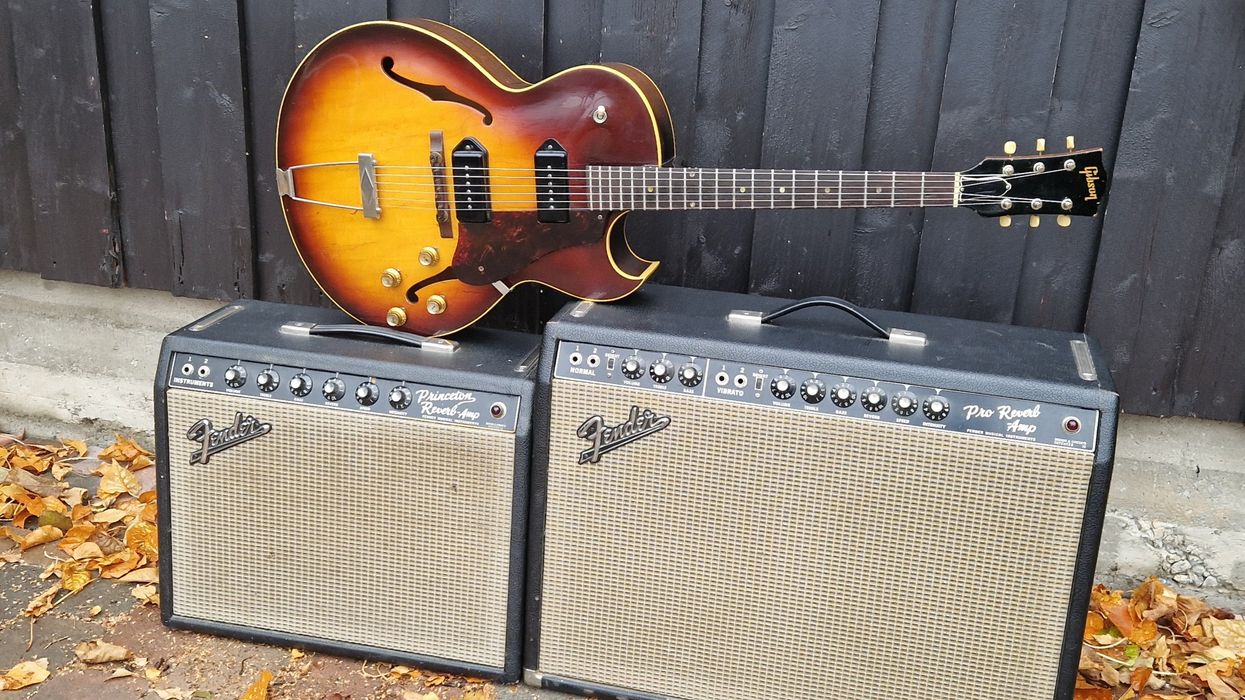
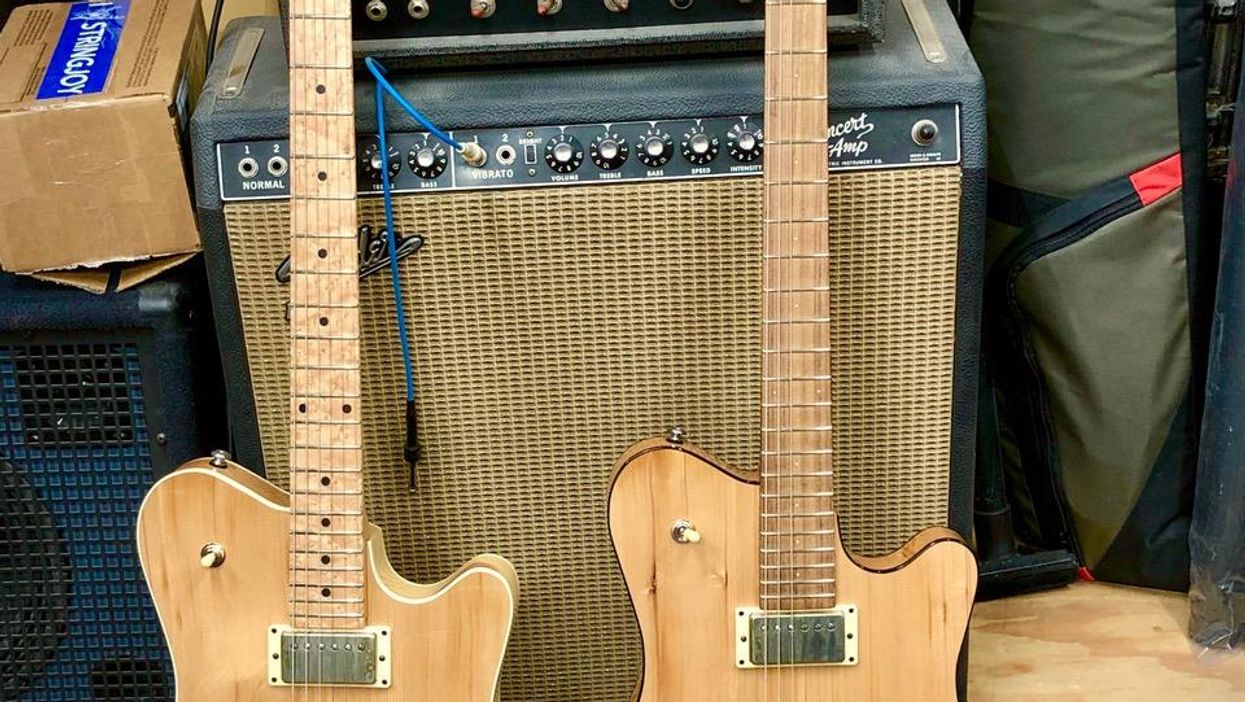
Photo by Jens MosbergvikSilver & Black How to Make Any Guitar Sing with Your Fender Amp Jens MosbergvikApr 09, 2024
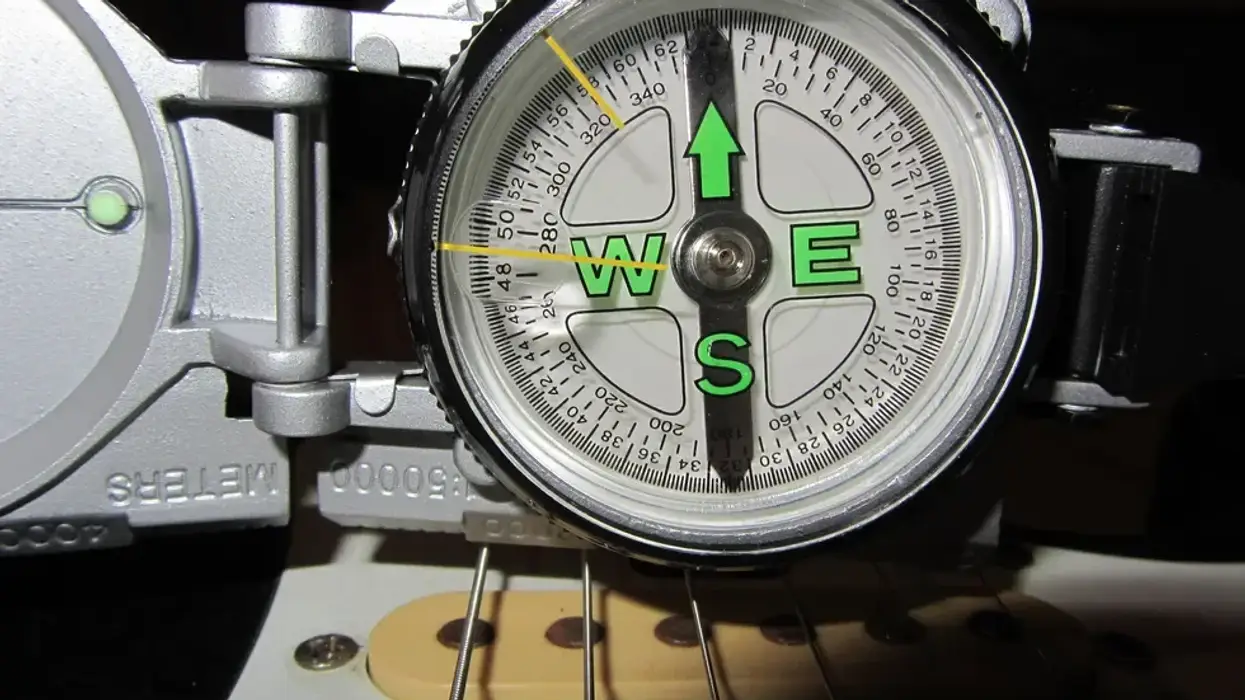
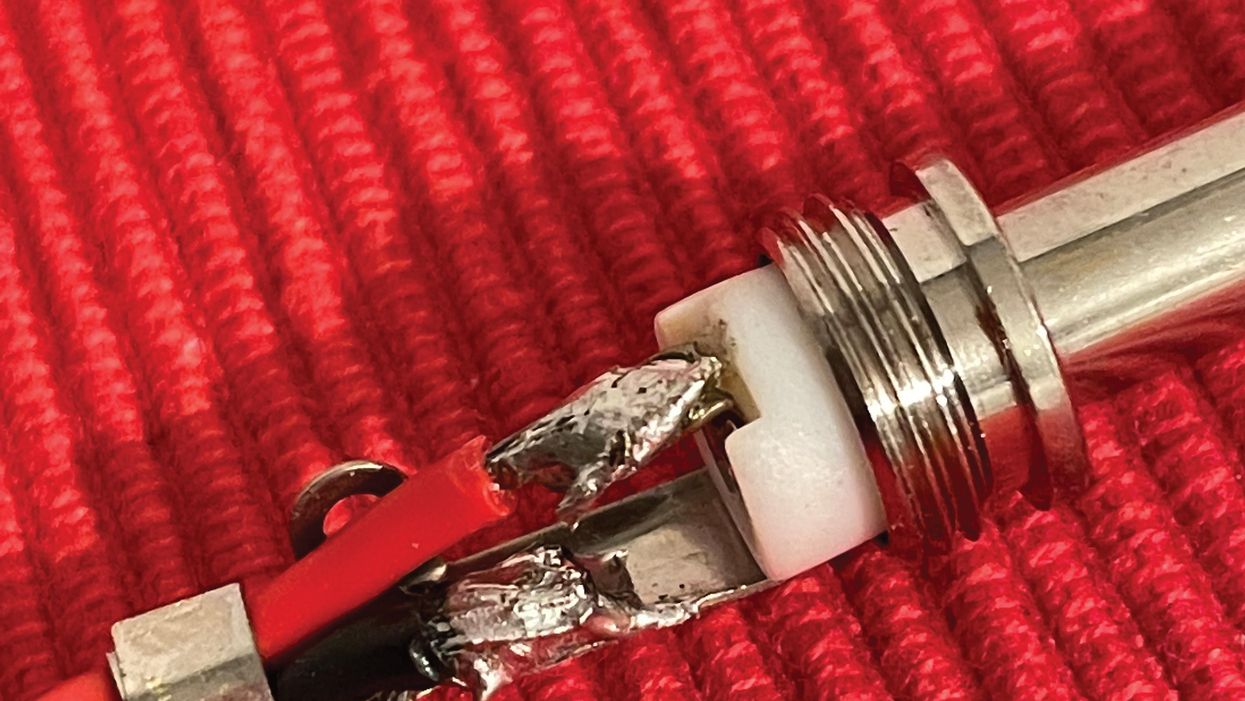
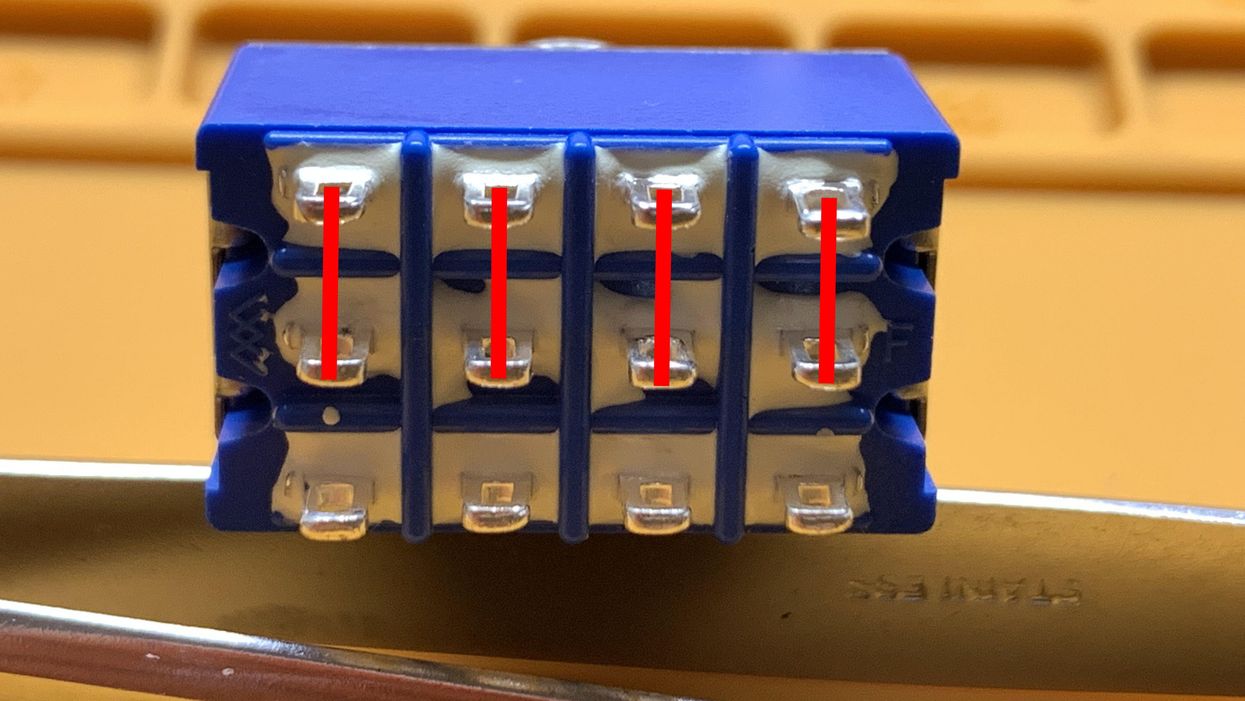
photos courtesy of singlecoil.comMod Garage How to Build Your Own DCR Measuring Tool Dirk WackerApr 22, 2022
Reader Guitar of the Month Reader Guitar of the Month: Karmatar A pedal builder collaborates with his pal, guitar tech John Taggart, on a chambered guitar with a built-in overdrive.Premier Guitar StaffNov 01, 2021
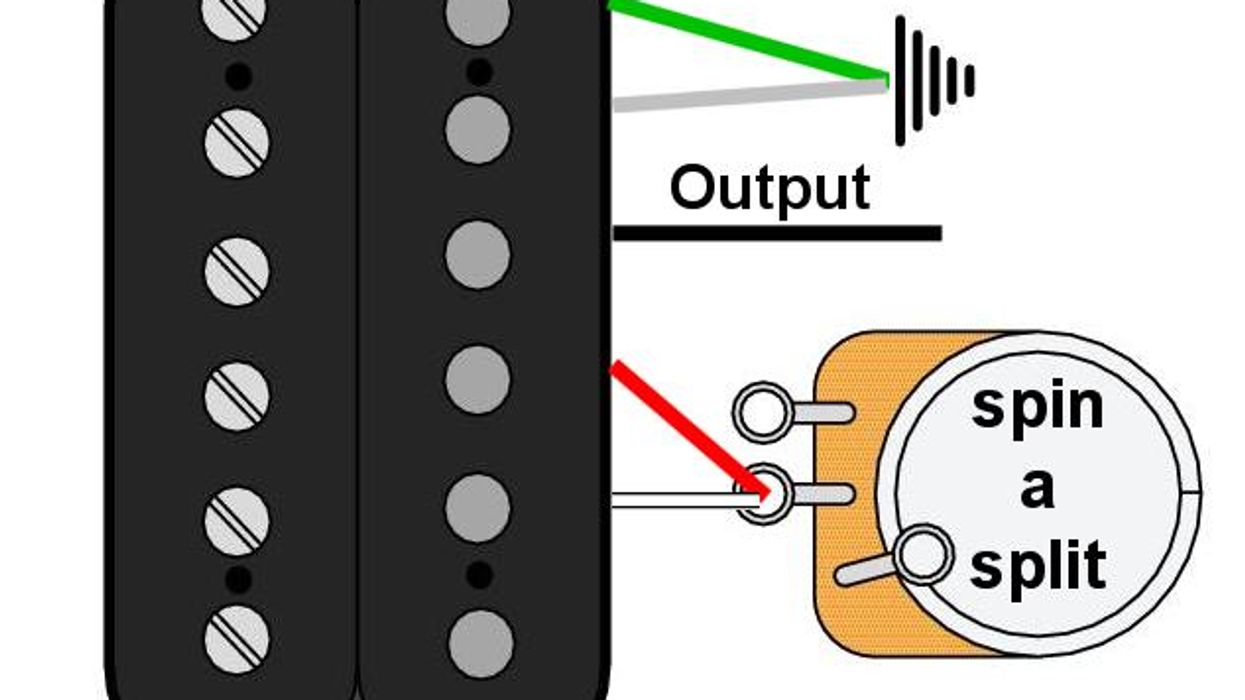
Mod Garage Multi-Phase Switching—The Final Frontier We've discussed full out-of-phase and half out-of-phase pickup switching. Here's a wiring for those who want it all in one switch.Dirk WackerJun 25, 2021
Mod Garage Ultra-Flexible Wiring for Your Duo-Sonic Four rad add-ons and a whopping six pickup combinations for the Fender offset.Dirk WackerJan 15, 2021
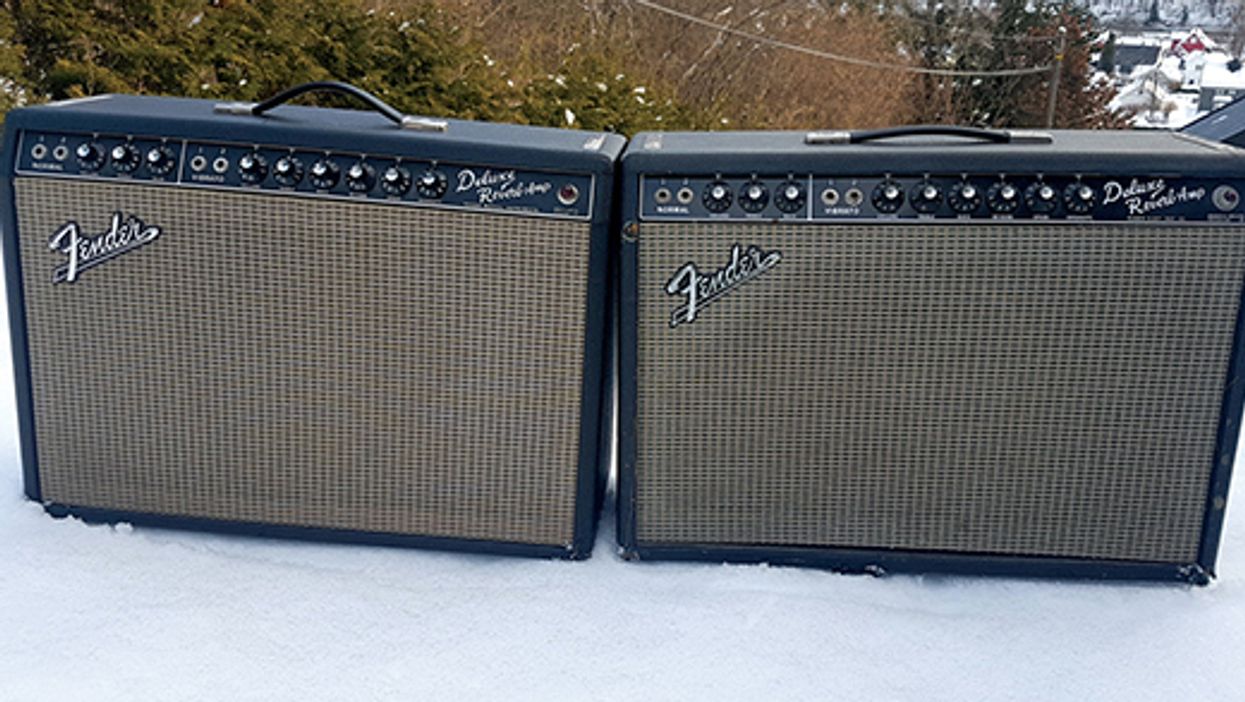
Gear The Saga of the Linda Ronstadt Deluxe How a not-so-special silver-panel amp was transformed into solid gold.Jens MosbergvikNov 15, 2020
Electric Guitars DIY Relic’ing Tuners, Part 2 The Mod Garage guitar-aging series continues. Try these easy steps to get a vintage look on your plastic tuners.Dirk WackerOct 23, 2020
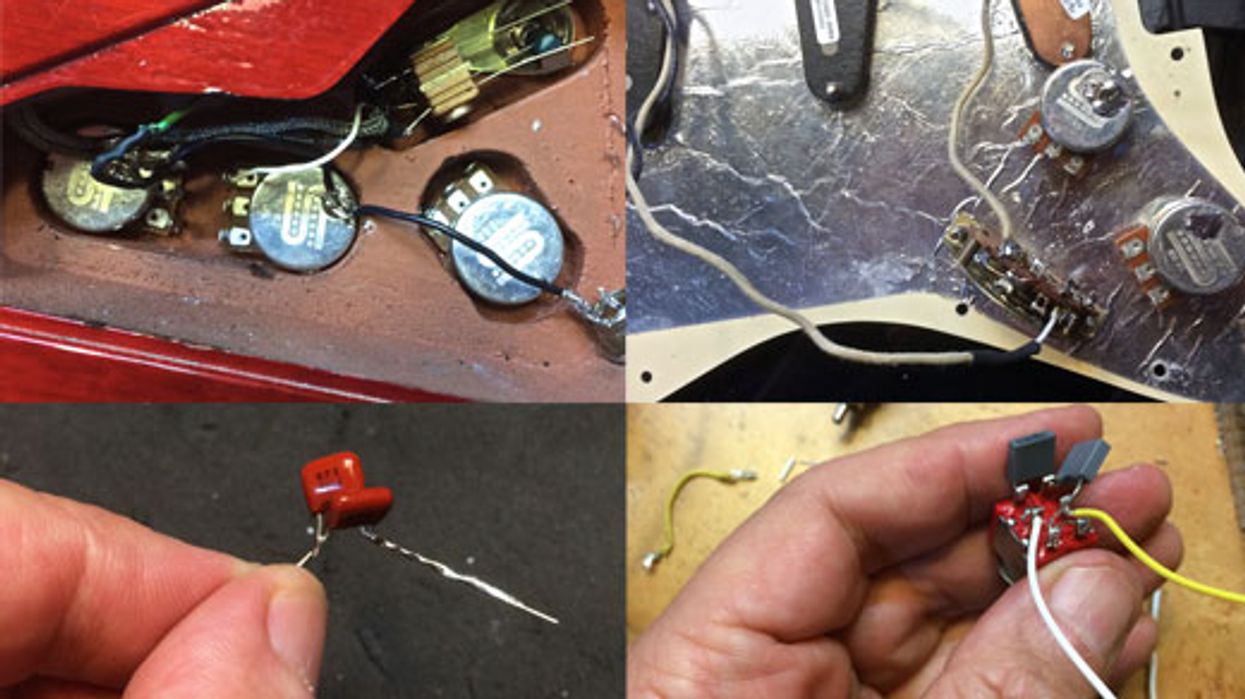
Mod Garage Mod Garage: Deep Diving into Treble-Bleed Networks Does it bug you to lose treble when you roll back the guitar volume? Here are three solutions to that problem.Dirk WackerJan 22, 2019
Mod Garage Mod Garage: How to Shield Single-Coil Pickups Here’s the secret for reducing unwanted hum and noise without losing sparkle and highs.Dirk WackerOct 13, 2017
Ask Amp Man Ask Amp Man: Beefing Up a Vintage Fender Vibrolux Reverb Can you turn a vintage Fender Vibrolux Reverb into a mini Super Reverb?Jeff BoberMay 27, 2015
Guitar Shop 101 3 Simple Ways to Upgrade Your Strat Replacing key components—such as the pickups, string nut, and tuners—can turn a workhorse guitar into a killer axe!John LeVanApr 15, 2013
Mod Garage Fender Esquire Basics I admit that the Fender Esquire is one of my favorite guitars ever, and I find its sound and simplicity very appealing.Dirk WackerApr 06, 2012