For years, folks have been debating the pros and cons of shielding single-coil pickups. You may have tried this yourself, only to have been disappointed at the loss of high end. But here's the good news: There is a way to reduce unwanted noise without losing the clarity and sparkle we crave from great single-coil pickups, and I'll show you how to do it now.
The Challenge
We all know the problem, right? Single-coils have a clear, bell-like tone with a lot of highs, but they are very prone to pick up hum and noise, and this can be a nightmare in the studio or onstage. If you want to keep your original single-coil pickups—and not swap them out for humbuckers—you can mod your guitar in three steps to banish the noise. But first, you'll want to complete two preliminary stages.
Shield the pickguard and guitar cavity. The web is full of great DIY instructions for doing this, so I won't rehash that info here. But I will add one thing: In my experience, copper foil is superior to aluminum foil or tape, as well as all forms of shielding paint. And remember, it's crucial that all shielding materials are connected to ground. Otherwise they're mostly useless.
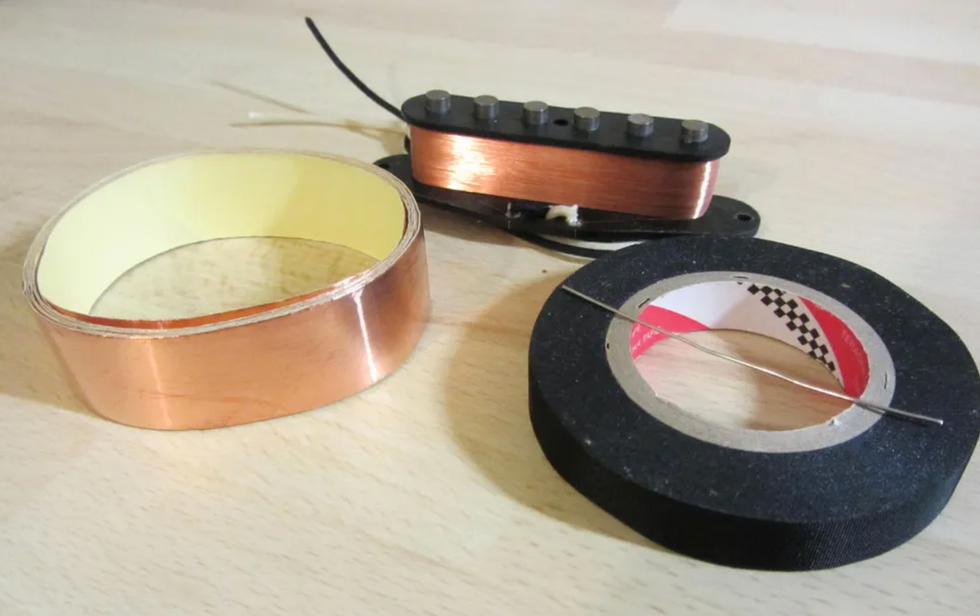
Photo 1 — Courtesy of singlecoil.com
Replace standard wire with shielded wire. This is a simple swap: Substitute shielded wire for all the standard wire in your guitar. Keep in mind that the braided shield of all the new wire must be connected to ground. (You can also replace the two standard wires on your single-coil pickups with shielded wire, and in a moment, I'll explain when and how to do this.)
Okay, now we're ready to shield the pickups. It's not a complicated task and you don't need much in the way of materials, but you must do it correctly. If you don't, all the marvelous high end of a single-coil goes down the toilet. Every week I get at least one emergency call from someone who tried to shield a Strat's pickups and wound up with a dull and lifeless-sounding guitar. It's a hassle to undo the mistake, so let's get it right from the get-go. Ready?
Every week I get at least one emergency call from someone who tried to shield a Strat's pickups and wound up with a dull and lifeless-sounding guitar.
We'll start with the materials. As shown in Photo 1, you'll need conductive, self-adhesive copper tape, self-adhesive pickup-coil tape, a piece of solid-core wire, and some alcohol or naphtha. These items don't cost much, and you can buy the copper tape and pickup-coil tape on eBay or from luthier and pickup-building suppliers. For this project, our guinea pig is a standard Stratocaster pickup. For this type of pickup, the ideal width for the tape is 3/4" (approximately 19.1 mm).
Step 1: Protect the pickup's windings.
This is where the pickup-coil tape comes in. When you look at a standard Strat pickup without its plastic cover, you'll see the windings are unprotected. If you left them this way, you'd be affixing the copper tape directly to the windings. But even the back of the copper tape is conductive, so if there's any damage to the thin coating on the windings, the resulting contact will short out the pickup. Older pickups are particularly vulnerable to this, so to avoid the problem, we'll carefully wrap the pickup-coil tape around the windings to completely cover them.
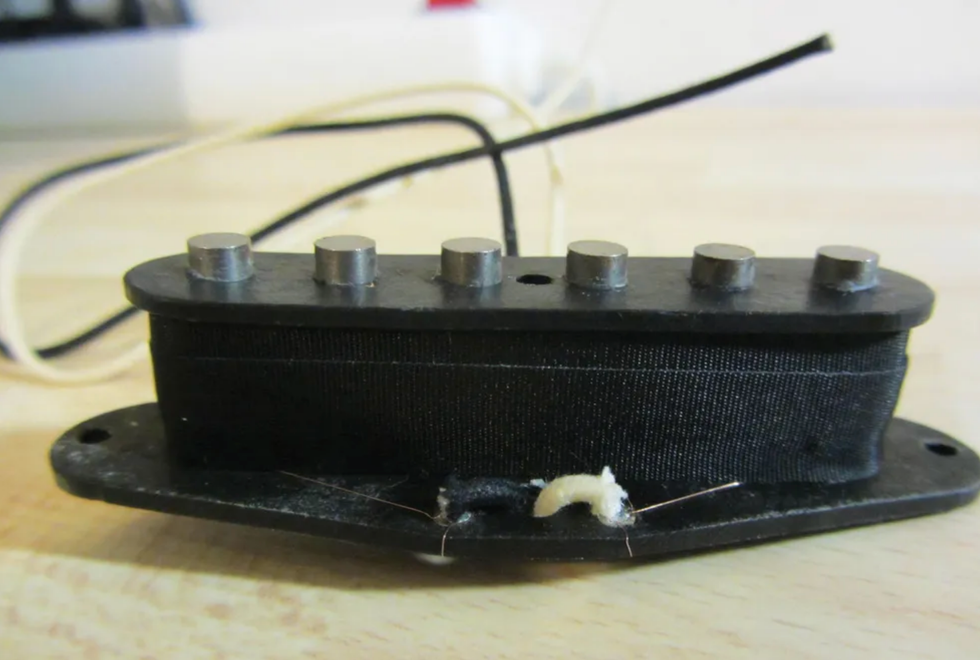
Photo 2 — Courtesy of singlecoil.com
In most cases, you'll need two wraps to accomplish this. Don't worry if one wrap overlaps the other, and be particularly careful to cover everything at the base of the pickup—an area that's often overlooked. You don't want any of the copper windings peeking through, so to be on the safe side, I like to partially cover the base with tape. Using a pair of small scissors, I'll cut a thin strip of tape, then fold it down and press it onto the base, all around the windings. By the way, if you ever need to remove this special pickup-coil tape, you can easily do this without damaging the pickup. Photo 2 shows what the pickup looks like after it has been wrapped.
Step 2: Surround the pickup with copper tape.
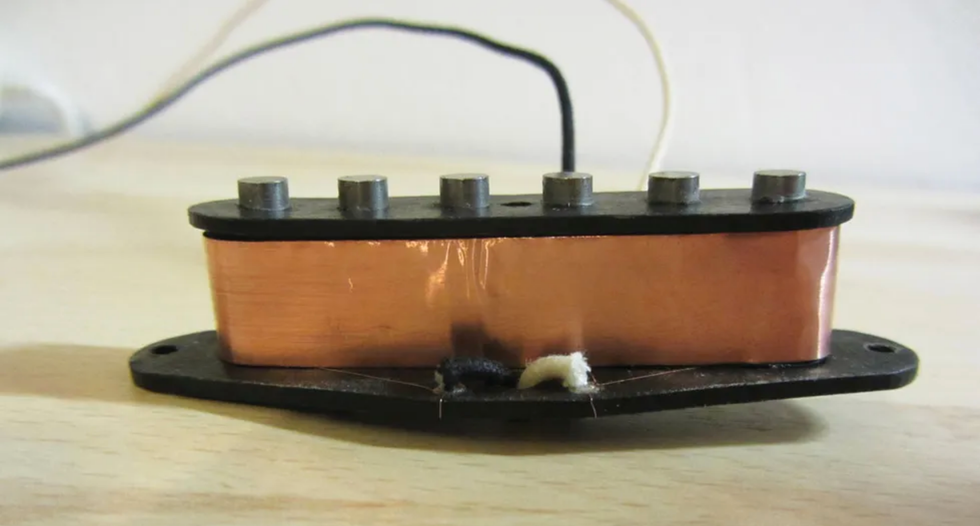
Photo 3 — Courtesy of singlecoil.com
The copper tape's 3/4" width is perfect for surrounding the pickup because you only need one wrap to accomplish this (Photo 3). But it's essential that the two ends of the tape don't touch each other. This means no overlap and, of course, no solder connecting the two ends of the copper tape.
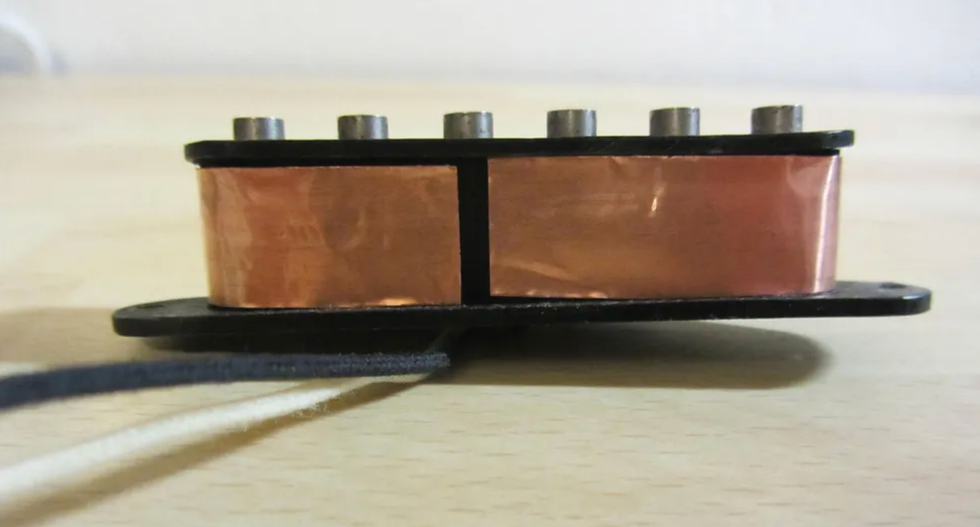
Photo 4 — Courtesy of singlecoil.com
It's crucial to have a little gap between the two ends of the tape to keep all the high end alive (Photo 4). Not having the gap is exactly why so many shielded pickups lose all their highs, and in a moment, I'll explain the reason.
Note: Be sure the gap isn't right where the pickup's two wires are attached, because in the next step, we'll need that space to connect the copper wrap to ground. Otherwise, it's not important where the gap is or how wide it is. I like to place the gap on the opposite side of the pickup from where its two wires are attached.
Why is this little gap so important? If you close the copper-tape wrap so the two ends make contact, the loss of all high end is unavoidable. You'll often read this is because the capacitance of the pickup's winding increases against ground. While this is electrically true, it is not the reason for the loss of high end. The real reason for the high-end loss are eddy currents in the metal film, which act like a shading coil in a transformer. The gap breaks the eddy currents and the loss of high end is minimal—and in most cases, not even audible.
Step 3: Connect the copper tape to the pickup's ground.
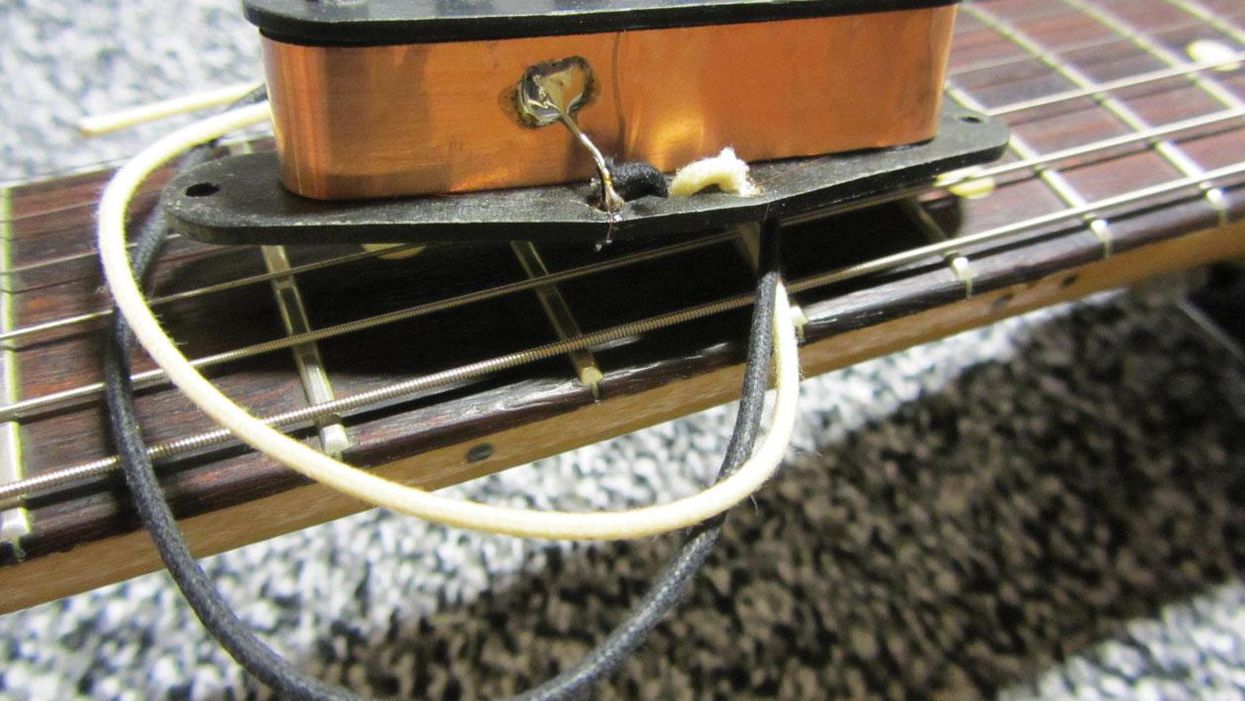
In this last step, we engage the shielding function. This is also the point to decide if you want to swap the two standard pickup wires for a shielded cable. If you elect to do this, simply connect the braided part to where the black wire was originally connected, and the hot of the shielded wire to the white wire's former location.
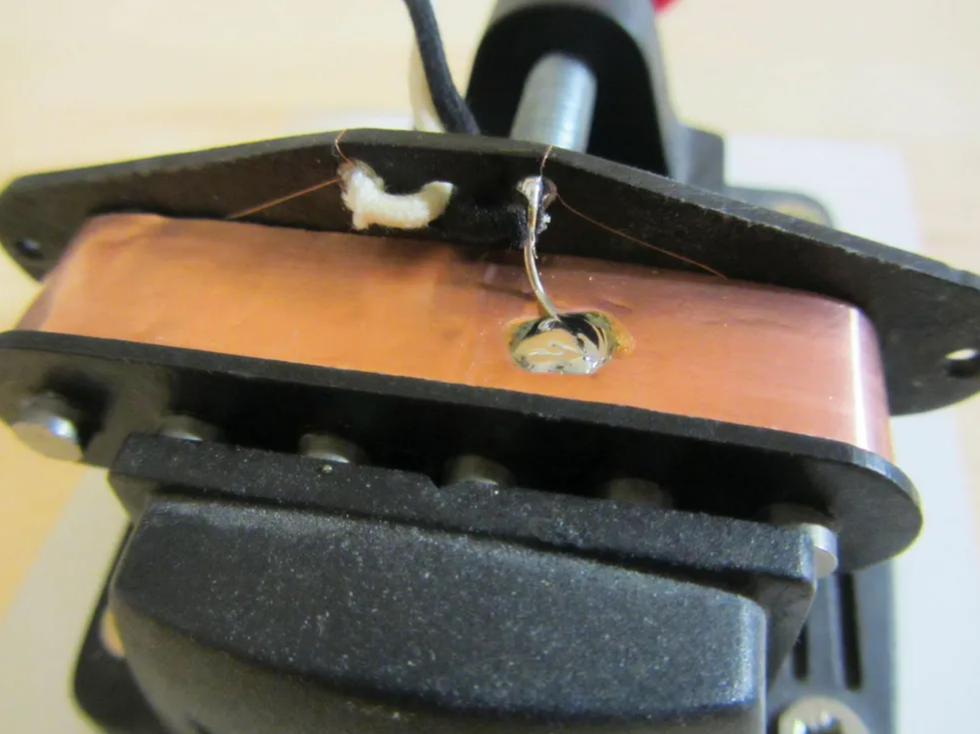
Photo 5 — Courtesy of singlecoil.com
Take a piece of solid core wire and solder it to the spot where the black pickup wire connects to the base. Next, use some alcohol or naphtha to clean the area on the copper tape where you plan to solder the solid wire. This cleaning makes the soldering process much easier because the solder sticks perfectly to the copper. After the area dries, solder the wire to the copper tape (Photo 5).
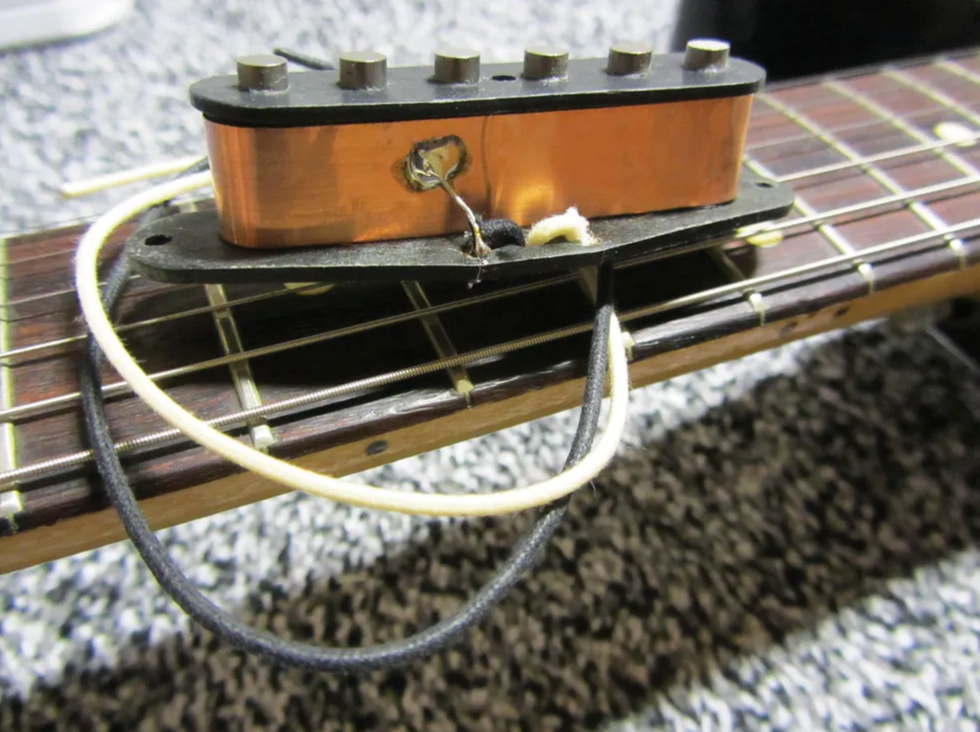
Photo 6 — Courtesy of singlecoil.com
Note: Be sure the wire is long enough that you can bend it toward the copper foil (Photo 6) to allow the plastic cover to fit over the pickup.
Congratulations—you're done! In a future installment of Mod Garage, we'll apply everything we worked out today to shielding plastic pickup covers. Again, we'll do it the right way so you don't lose any high end.
But next time, we'll continue our study of pickup parameters by bringing phase and polarity together. Until then ... keep on shielding!
[Updated 8/16/21]


