A digital multimeter (Photo 1) is the perfect tool for testing many components on a guitar or bass. We use them in the shop for testing pickups, output jacks, switches, and batteries, and you can also use them for testing cables and wiring harnesses. Best of all, you don’t need to spend a fortune to get a good multimeter. I still use the one I bought at Radio Shack 23 years ago, and such luthier supply companies as Allparts and Stewart-MacDonald have excellent multimeters designed for working on a guitar, priced from $25 to $35.
Let’s explore five ways to use a multimeter:
• Testing pickups (impedance and functionality).
• Mapping out a switch.
• Testing a guitar cable.
• Identifying the lugs on a TRS output jack.
• Checking battery life.
Testing pickups. On many occasions I’ve used a multimeter before buying a used pickup. I learned the importance of this the hard way when I bought a used pickup at a guitar show, only to discover it didn’t work when I got it home. If I’d brought a multimeter with me, I could have tested the pickup on the spot and saved some money.
It’s a simple process to test a pickup. Set the multimeter to the ohm setting and touch its red test lead to the pickup’s primary lead (hot) and touch the black test lead to the pickup’s ground wire.
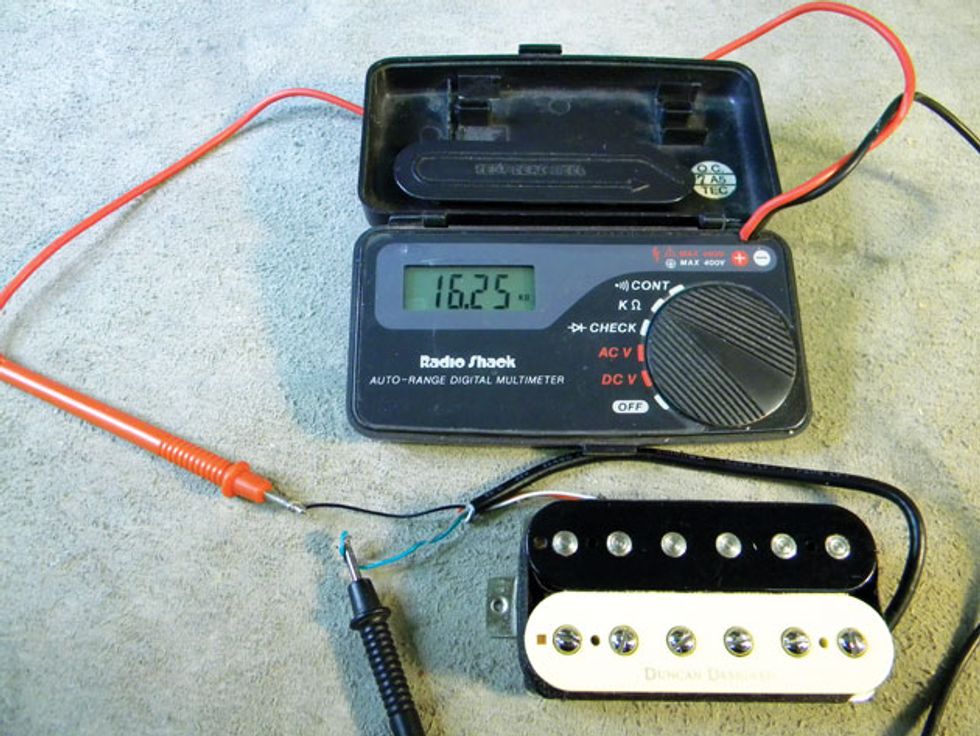
Photo 2
If you’re testing a humbucker with four conductors, make sure that the wires are properly attached to each other. For example, before you try to measure the impedance on a Seymour Duncan humbucker (Photo 2), make sure that the red and white leads are connected to each other and isolated from any other connection, and the green and bare leads are also connected to each other. Touch the red test lead from the multimeter to the black wire—the pickup’s primary lead. Touch the multimeter’s black test lead to the green and bare ground wires on the pickup. This should give you an accurate impedance measurement.
To make sense of a particular model pickup’s reading, check with the manufacturer for its exact impedance. If the impedance measurement you take is significantly lower than the manufacturer’s rating, then you know there’s something wrong with the pickup.
only to find you have no signal?
A multimeter can tell you a lot about a pickup before you wire it up. For example, humbuckers typically measure at around 8k ohms for a vintage-style pickup to as much as 25k for a high-output pickup. The 16.25k reading we see in Photo 2 indicates this is a hot humbucker. Single-coil pickups can range from 6k (vintage) up to 16k (high-output).
Mapping out a switch. If you don’t have a diagram to follow, wiring a new switch can be frustrating. An easy way to save time when tackling a wiring project is to use your multimeter to map out the switch. Simply set your multimeter to the continuity setting, which is marked with a speaker or soundwave icon. This setting will produce an audible tone to let you know when a circuit is closed.
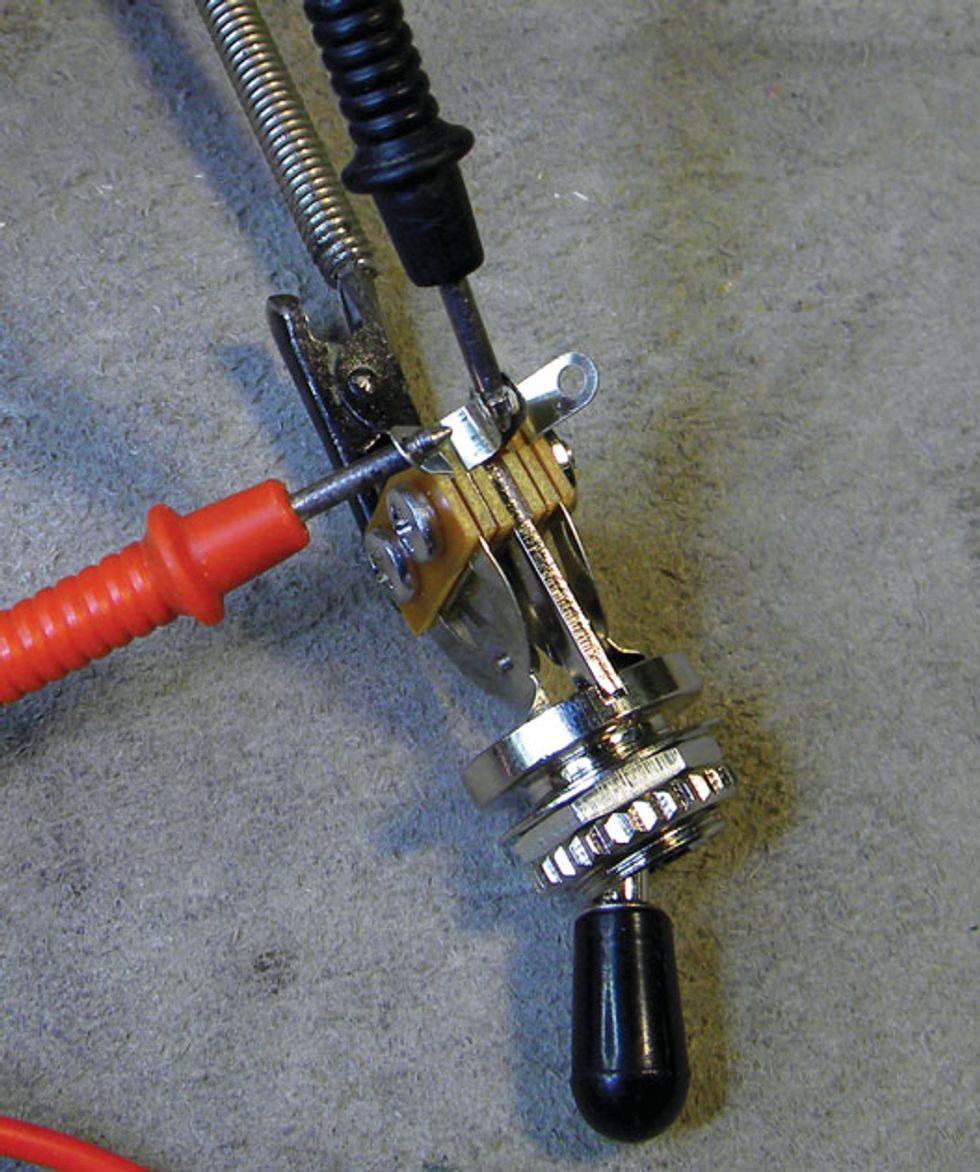
Photo 3
On a 3-way toggle switch, for example, touch either one of the side lugs with one of the test leads from the multimeter, then touch the middle lug—that’s typically the output—with the other test lead (Photo 3). If you hear a tone, then you know the switch is on in that position. If there’s no tone in that position, the switch is off.
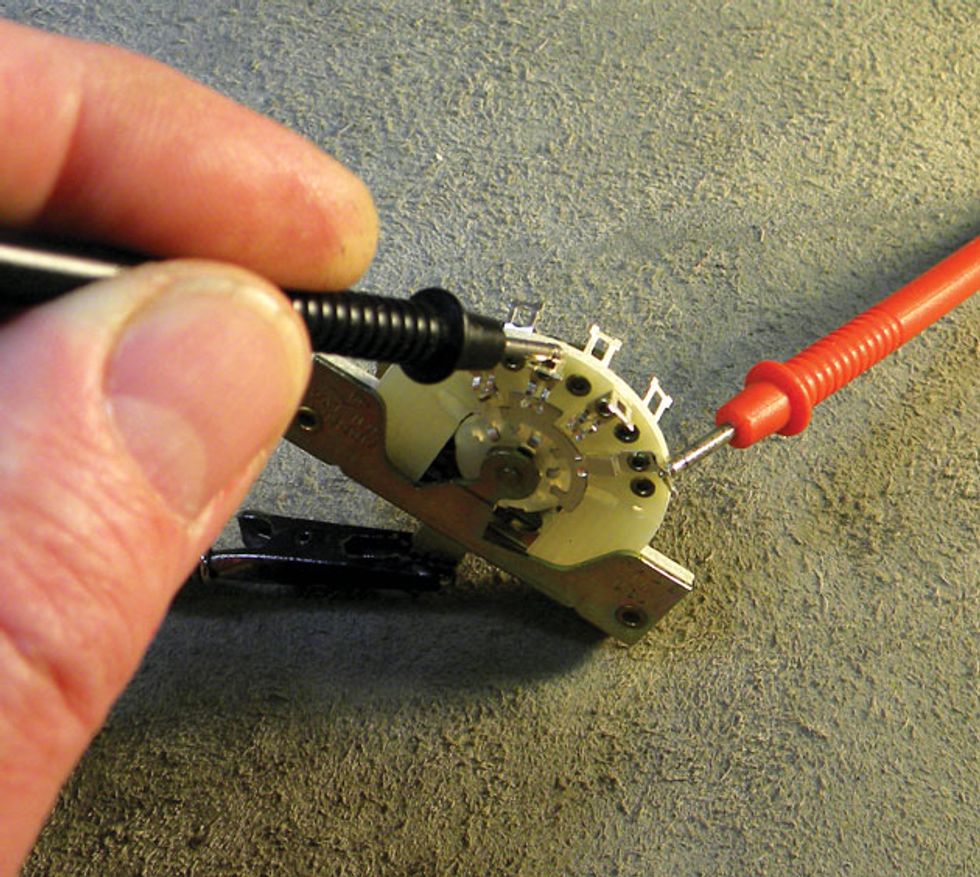
Photo 4
It’s a similar process for a Strat-style 5-way blade switch (Photo 4). Touch the last lug on the switch—this will be the output lug—with one of the test leads from the multimeter. Then touch each of the other lugs with the other test lead and listen for the tone. By carefully working through each switch position, you’ll be able to locate its corresponding input lug. As you map a switch’s connections, draw a diagram so you’ll have something to refer to in the future.
Testing a guitar cable. Have you ever arrived at a gig or rehearsal only to find you have no signal? The worst part is not knowing where the problem lies. Is the amp blown? Does the guitar have a loose output jack? Chances are it’s the guitar cable—that’s the place to start troubleshooting. The good news is, it’s quick and easy to test your cable with a multimeter.
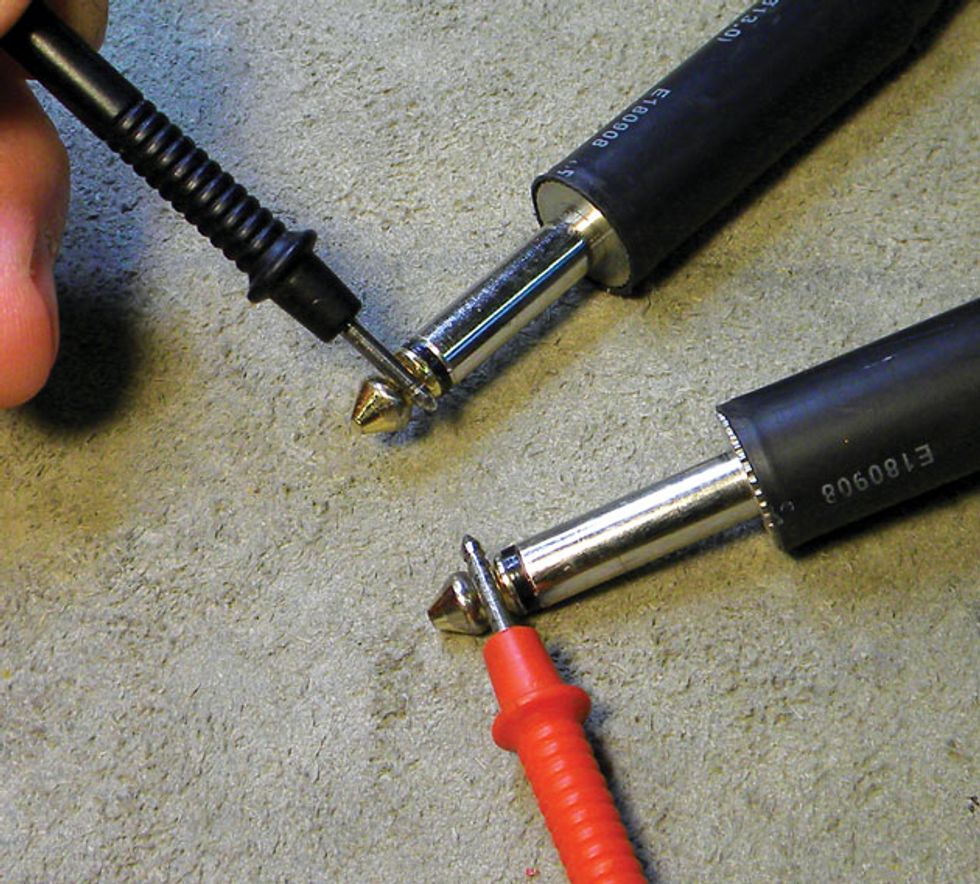
Photo 5
Set your multimeter to test continuity, then touch the tip of both cable plugs with the test leads (Photo 5). If you hear a solid tone, you have a connection. But don’t stop there: Move the cable around a little to see if it has a short, and test it again. If after shaking the cable and testing it several more times you continue to get a solid tone, you can assume the cable is good. However, if the test tone is intermittent you’ll know there’s a problem. You should also test the ground on the cable. Simply touch the shaft of both plugs with the test leads and listen for a solid tone.
Testing a TRS jack. The output jacks on passive guitars are pretty simple—they have one lug for the primary lead and one for the ground. However, output jacks for an active system have three lugs. Called a tip/ring/sleeve (TRS) jack, these are common in electric guitars with active pickups or onboard circuitry, and are found in most acoustic guitars equipped with an internal preamp. The tip is for the primary lead, the sleeve is for a battery switch that turns the battery on when a cable is plugged into it, and there’s also a ground to complete the circuit for the electronics.
Sometimes the lugs for the tip and sleeve are different lengths, which makes them easier to identify, but many TRS jacks have the same length lugs with no markings to let you know which one is for the battery and which one is for the primary lead. This can be problematic if you’re installing a new pickup system into an acoustic guitar, adding active electronics to a solidbody, or troubleshooting an existing setup. But once again, the multimeter makes it easy to sort this out.
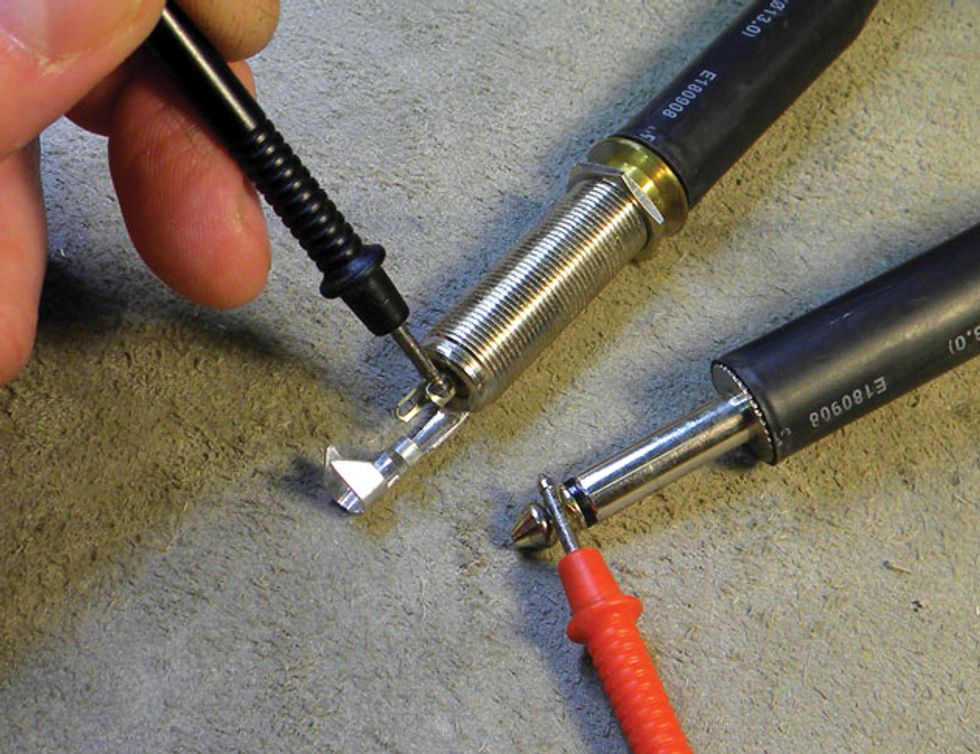
Photo 6
First plug a guitar cable into the output jack and switch your multimeter to the continuity setting. Touch one of the test leads to the tip of the guitar cable’s exposed plug and touch the other test lead to one of the lugs on the TRS output jack (Photo 6). Listen for a tone to identify which lug makes the connection. The lug that gives you a tone while you’re touching the plug tip is where you’ll attach the primary lead from a pickup or preamp.
Next, while still touching the plug’s tip with the test lead, touch the other lug on the jack. There should be no tone. Keep your test lead on that lug and move the other test lead from the plug’s tip to its shaft. You should hear a tone. This identifies the lug you’re currently touching as the battery switch for the active electronics in your guitar.
Testing batteries. Given the amount of battery-operated gear most guitarists have in their rig, it can be a challenge to stay on top of available battery power. You don’t want to arrive at a gig with a dying battery in a stomp, but you certainly don’t want to swap out all the batteries in your gear before every show. Some may still have plenty of life in them, so why not do a battery check to get the facts? (Of course, once you reach a certain number of pedals, it makes economic and ecological sense to get a powered pedalboard and be done with batteries.)
In the early days of rock ’n’ roll, guitarists would test a 9-volt battery by touching its terminals to their tongues—not a very accurate (or sanitary) approach. If you received a mild shock, the battery was deemed gig-worthy. The best way to test a battery is with a multimeter. With it, you can test just about any type of battery: AA, 9-volt, lithium, or even a disc battery.
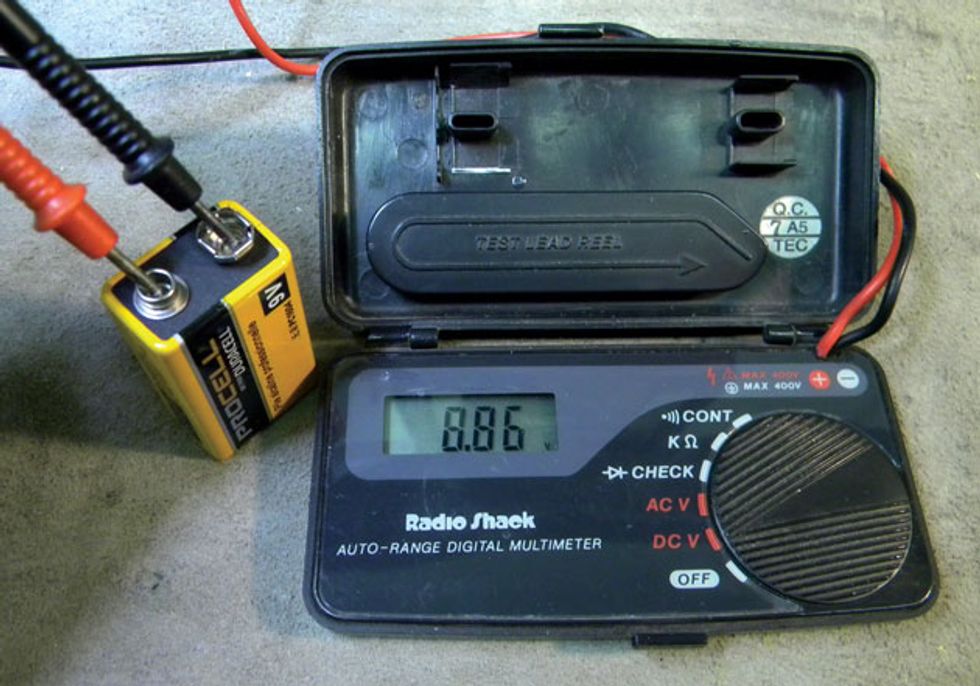
Photo 7
Set the multimeter to the DC V setting (and if your multimeter offers it, to the appropriate voltage range). Now touch the red test lead to the plus battery terminal and the black test lead to the minus terminal. The multimeter will display the battery’s voltage (Photo 7). If you’re testing a 9-volt battery and the display on the multimeter reads less than 9 volts, the battery is weak. If the battery measures 9 volts or more, you’re good to go.