
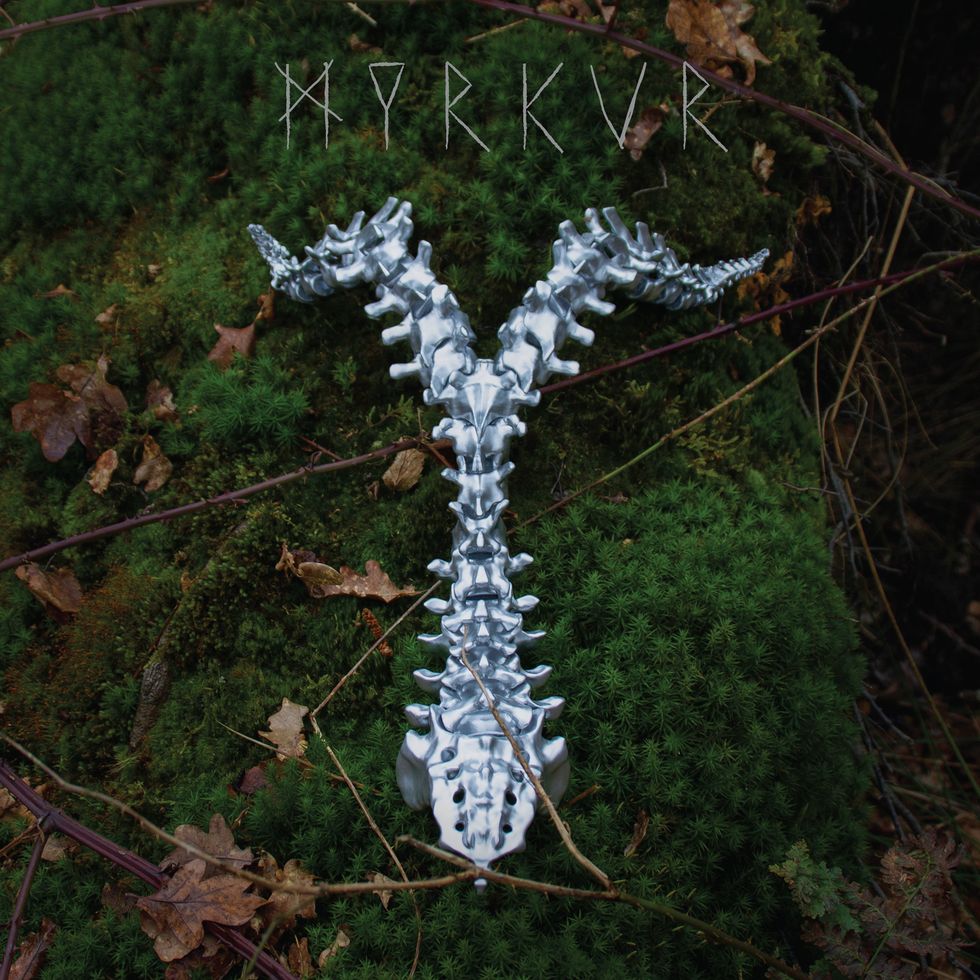
Too many album covers have little to do with the music inside. That’s not the case with Spine, the latest release from Myrkur, the performance moniker of Danish singer-songwriter/multi-instrumentalist Amalie Bruun. On the cover, a metallic fossil of some mythical creature lies on top of a mossy forest floor. It could be the remnants of the alien from Predator, or one of the “Great Old Ones” that H.P. Lovecraft wrote of that preceded humanity by millennia on Earth. The surreal juxtaposition of these elements encapsulates Myrkur’s ethereal style, which mixes such disparate influences as Scandinavian metal and Celtic ambient.
Myrkur has often been described as a one-woman band. And while Bruun does write all of the music and lyrics, Spine was very much a collaborative effort between Bruun, guitarist Will Hayes, producer Randall Dunn, and technical assistant Úlfur Hannson, who did most of the synthesizer programming, sound design, and string arrangements. Bruun, whose inspiration for the album was drawn from her experience as a new mother, elaborates on the challenges that the collaboration created for her: “I had to grow with the assignment. That is not natural to me. I am a complete control freak. Myrkur is such a strong vision, and so personal. Then after I became a mom, I had to realize I have no control the way I thought I did.”
MYRKUR - Valkyriernes Sang (Official Audio)
Bruun and Hayes were introduced to each other by Dunn back in 2017, when Bruun was working on her third album, Mareridt. Hayes was a session musician in the band that Dunn had arranged for Bruun, when her plans to put together a group of Danish musicians in Copenhagen fell through. Where on Mareridt and Bruun’s two albums preceding it, she contributed parts on nearly every instrument, on Spine, she ceded all of the guitar work to Hayes.
On Spine, Hayes worked with Bruun and producer Randall Dunn to fine-tune his tone for each song.
“The process was similar on both albums,” Hayes describes. “Amalie’s songs were fully written, so the chord changes, vocal parts, and lyrics were all there, with riffs and additional instrumental ideas included in the demos.” His responsibilities in both cases were to “learn the music and come in with ideas about how to activate what’s there, and bring out the depth of the songwriting.
“Mareridt feels more metallic and jagged, and a very Northwest sound,” Hayes elaborates. “On Spine, the songwriting is more in focus, and the ‘metal band’ features are more of a faint transmission coming through, overlapping with other elements. With the guitars, it’s more about how they’re layered with synths in the production. The sound is holographic.”
“I had to grow with the assignment. That is not natural to me. I am a complete control freak.”—Amalie Bruun
The music that came from the demos for Spine—three of which had, as Bruun calls it, “emotional and spiritual involvement” from Smashing Pumpkins frontman Billy Corgan—were expanded tremendously in the studio. (Corgan produced Daggers, the second album she released with her past project, Ex Cops.) After Bruun would leave the studio for the day, Dunn, Hayes, and Hansson would work on the various layers to present in the final product. These included strings, synth programming, and vocal harmonies.
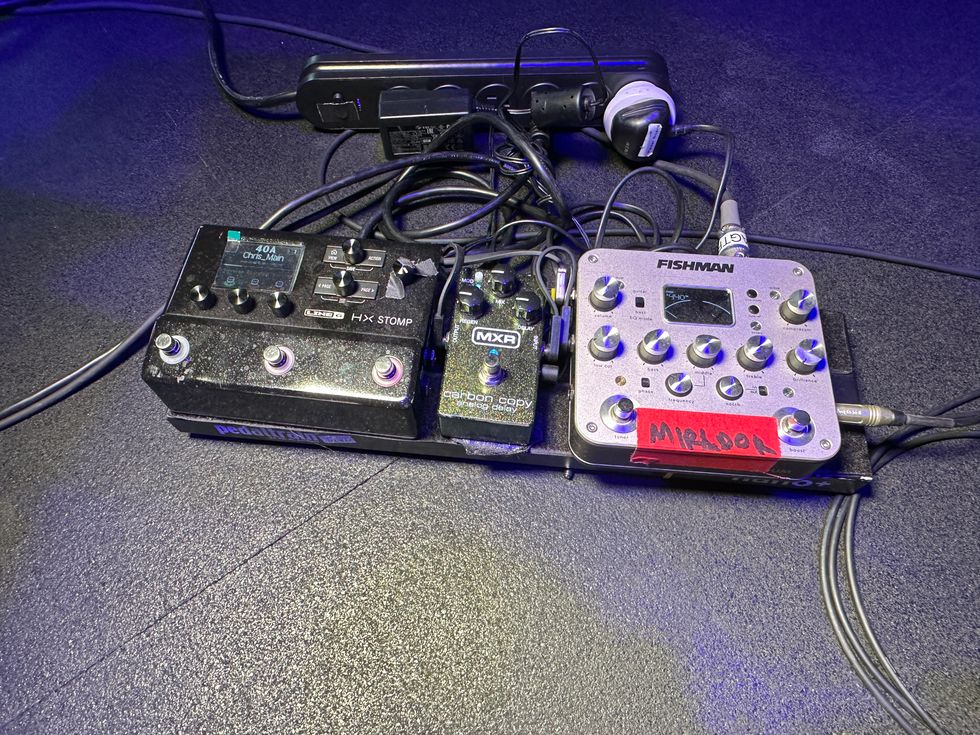
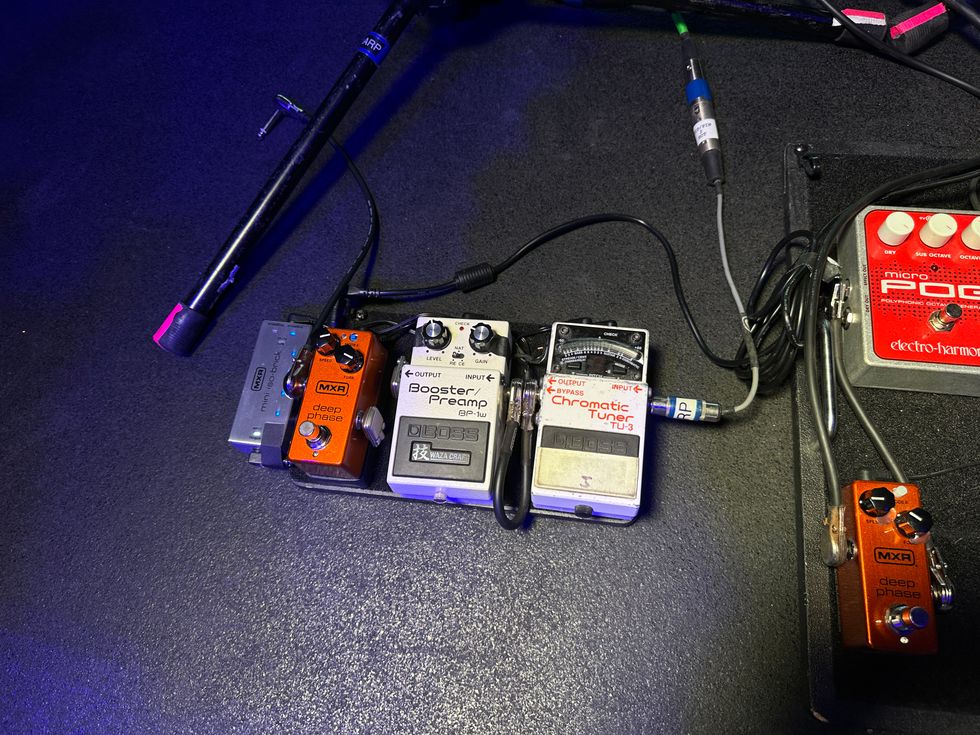
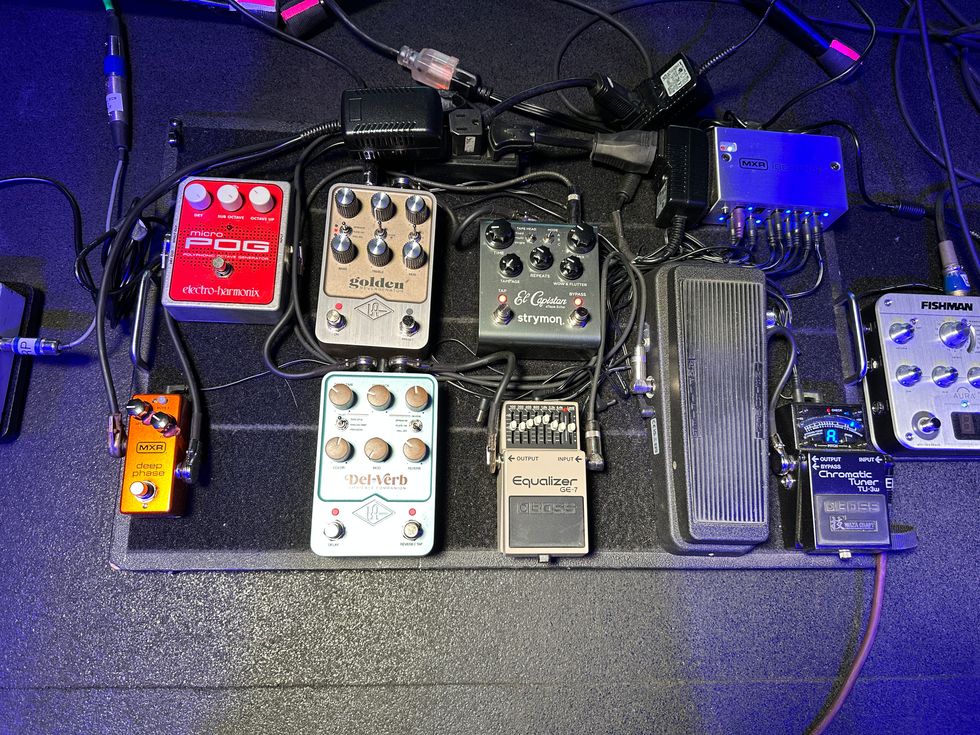
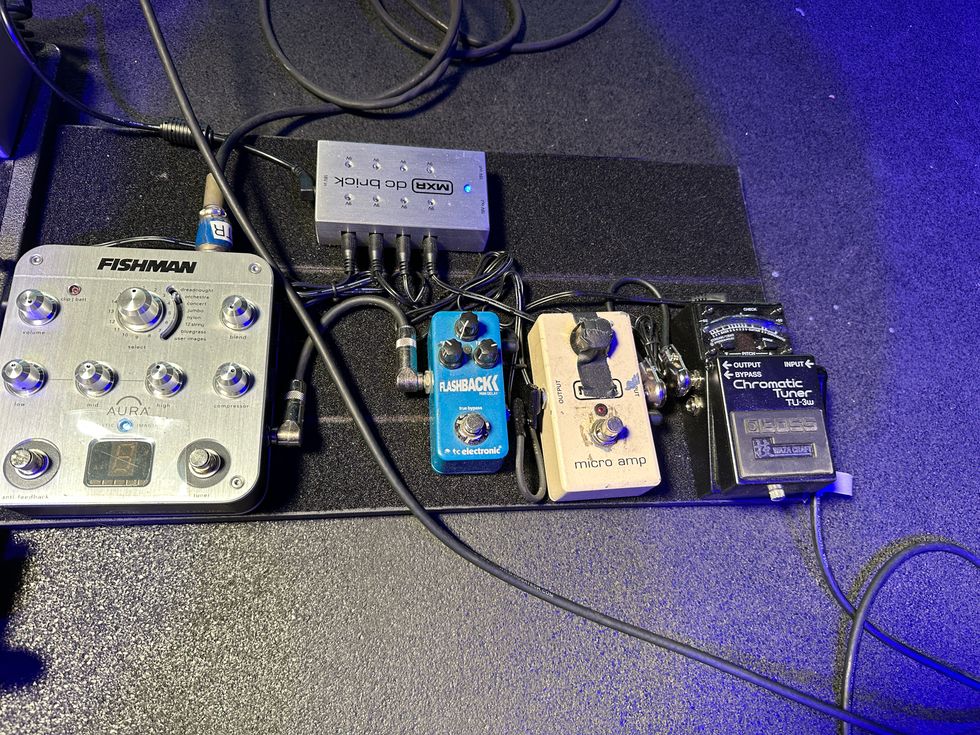
WIll Hayes' Gear
On his solo projects, Hayes has experimented with audio-to-MIDI conversion, where he generates MIDI with his guitar.
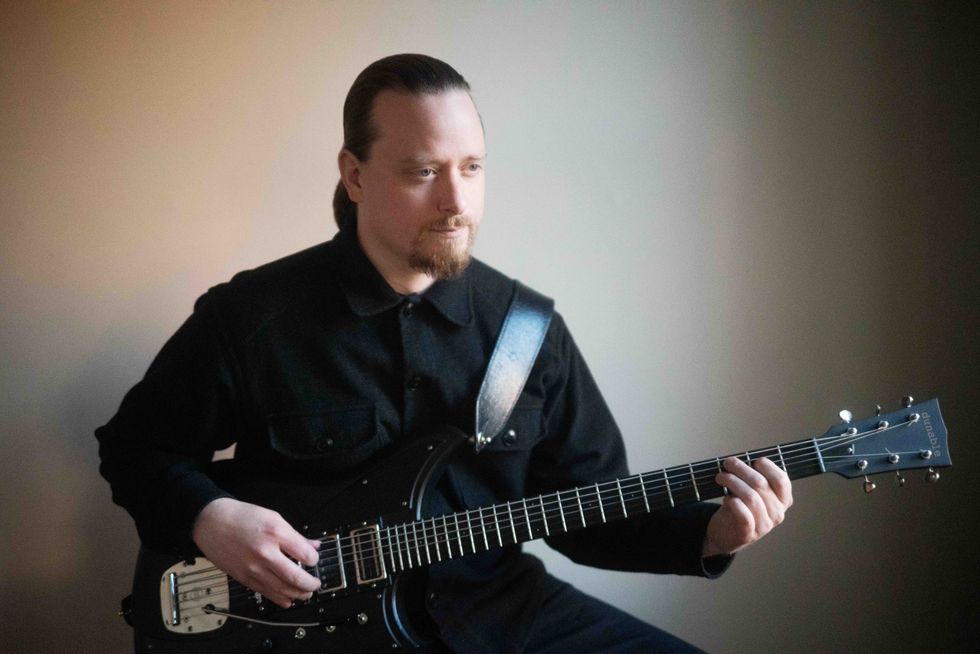
Photo by Cassandra Croft
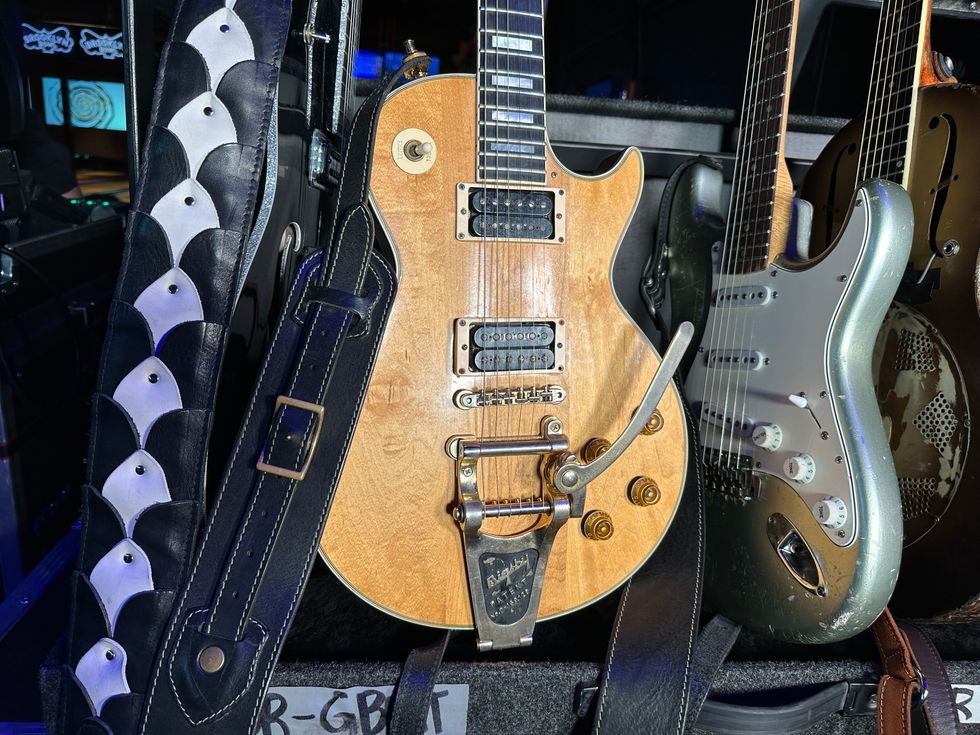
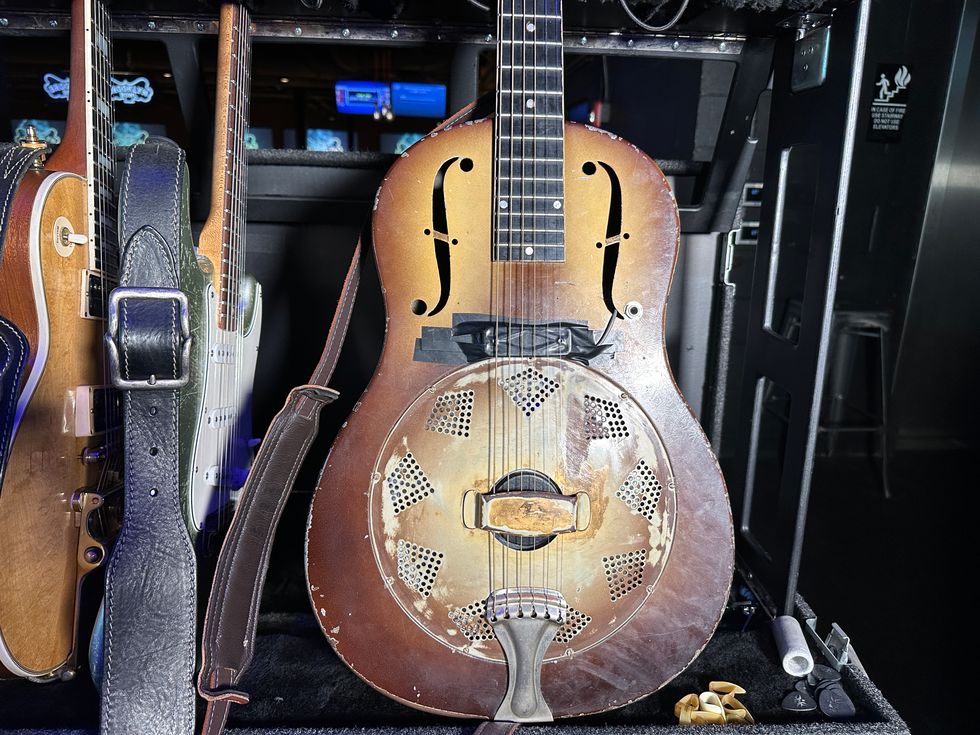
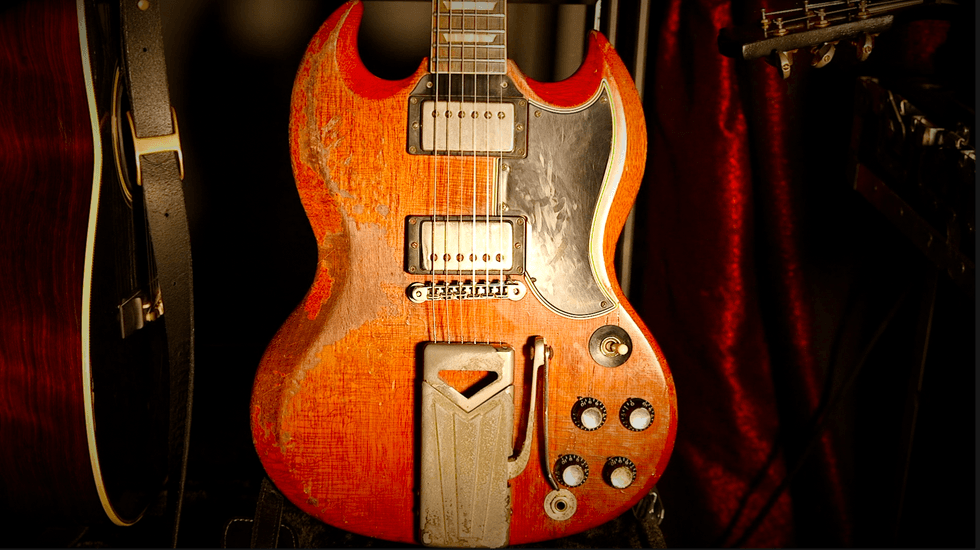
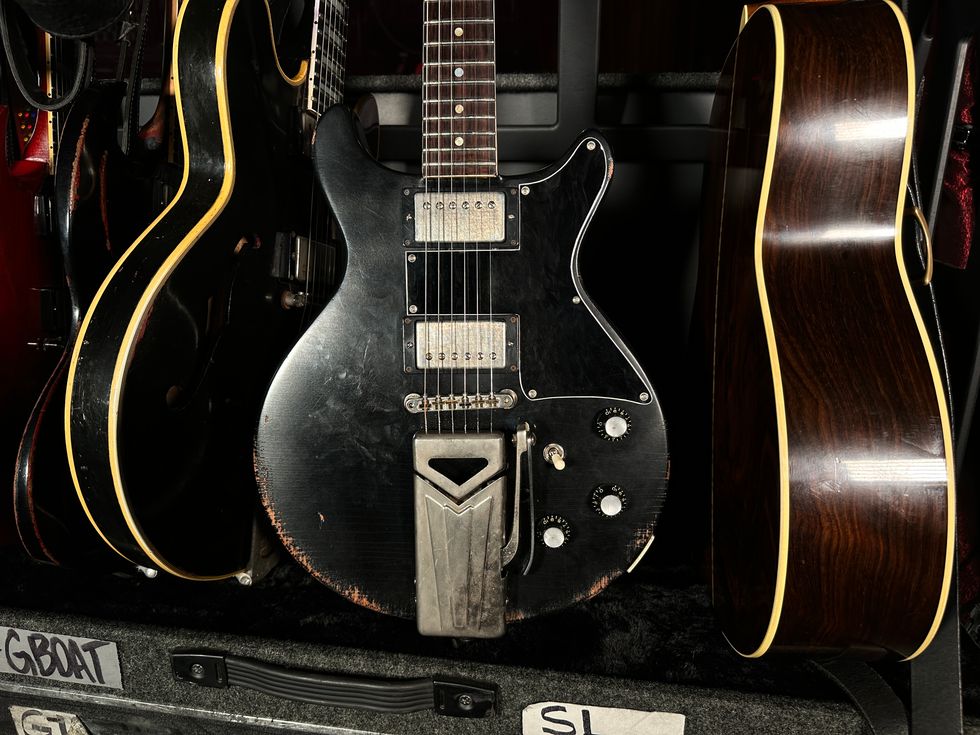
Guitars
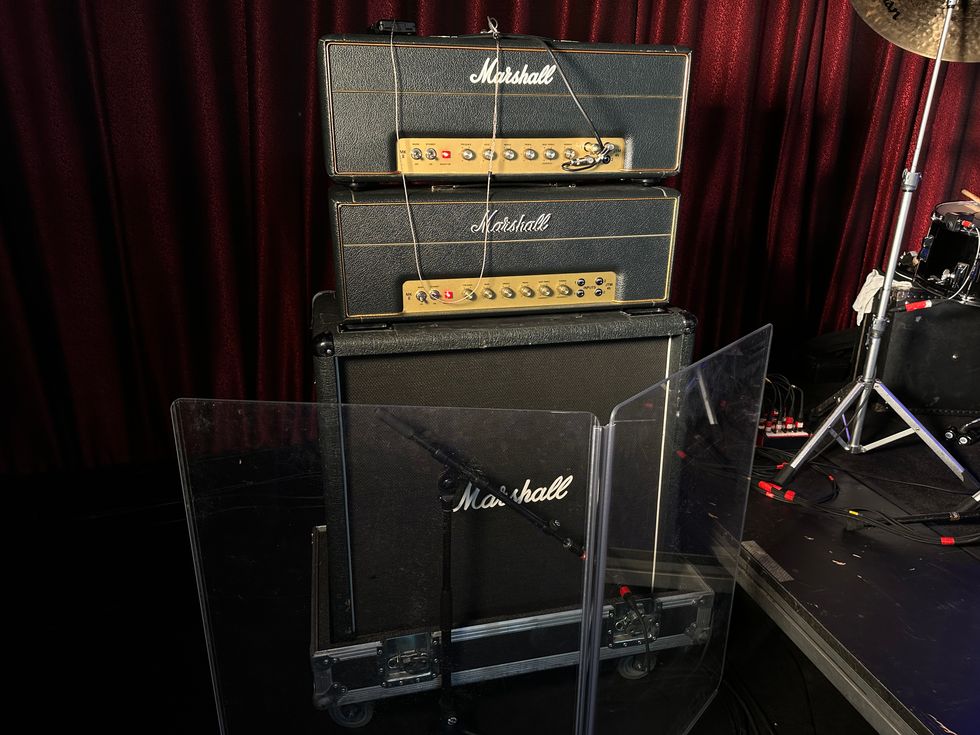
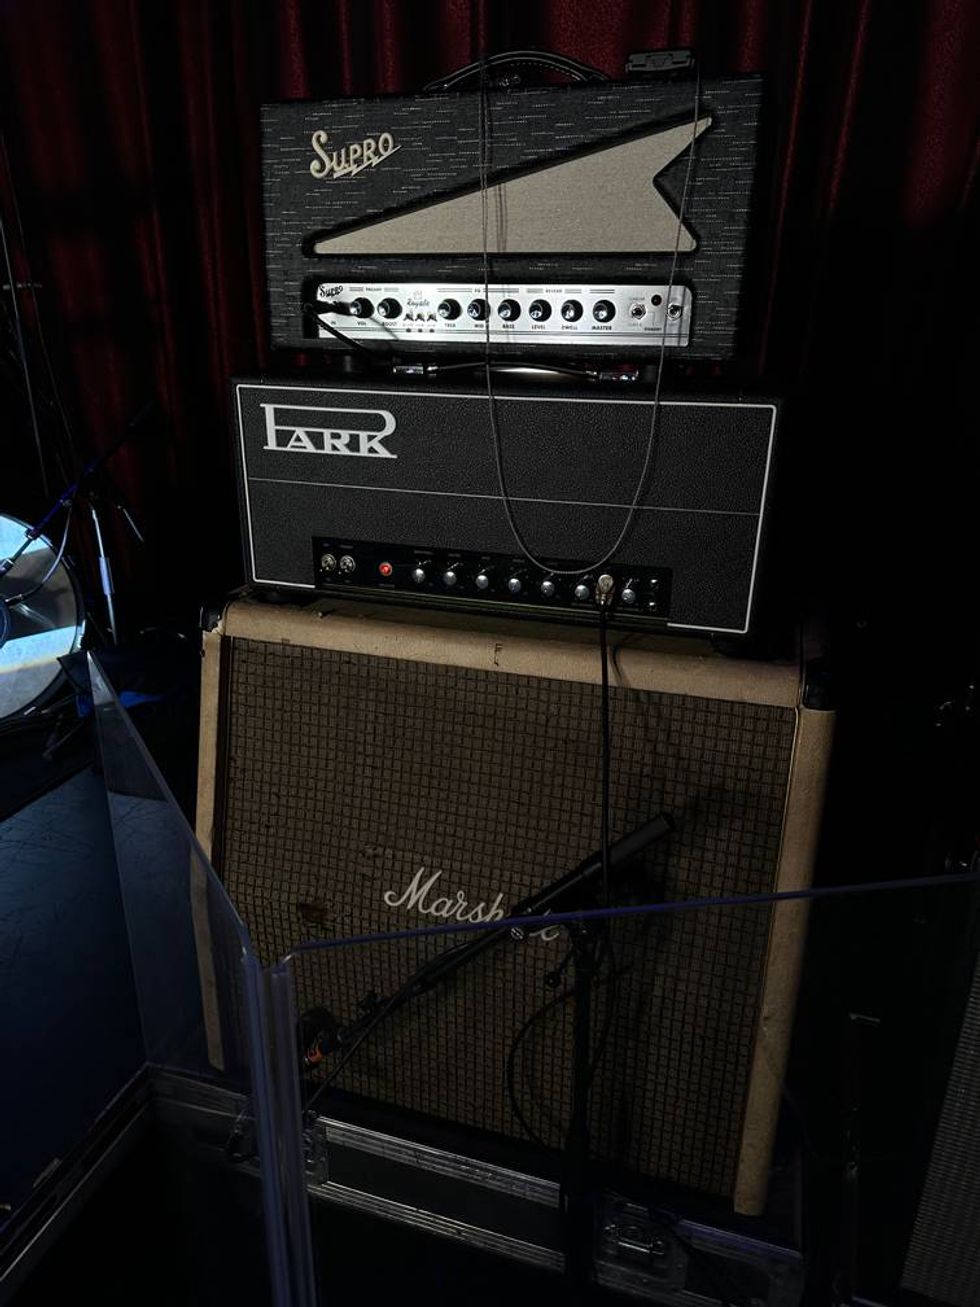
Amps
- Sunn Model T with Hiwatt cabinet (Royer ribbon mics)
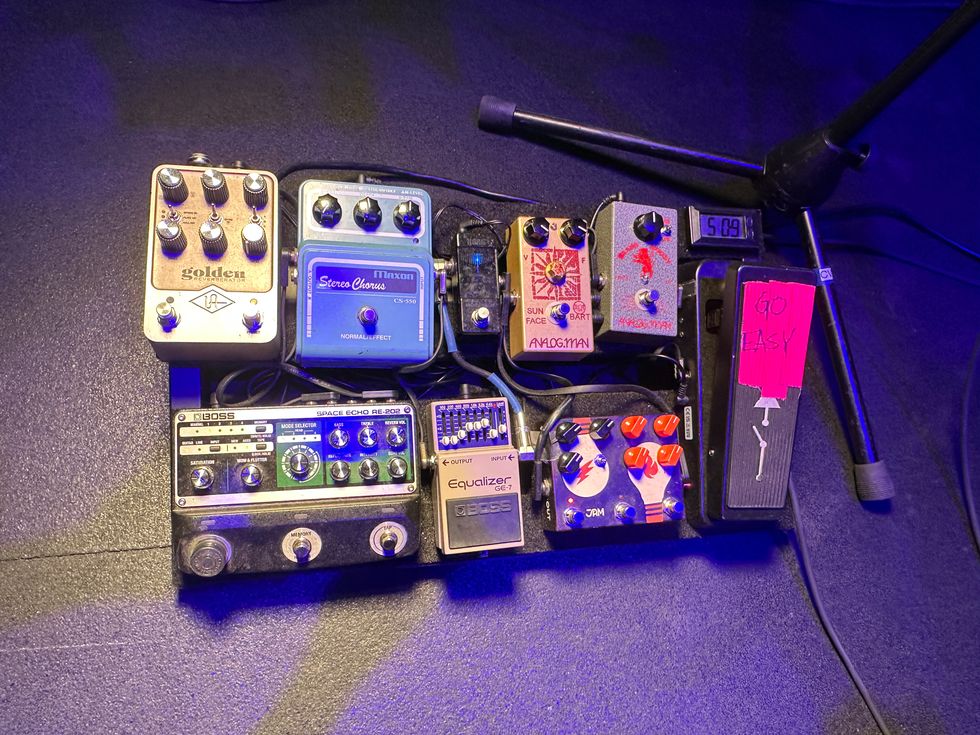
Effects
- Klon clone
- Vintage Eventide H3000 Ultra-Harmonizer
- Hologram Electronics Microcosm
- Universal Audio A/DA Flanger
- OTO Machines BAM Space Generator Reverb
- The GigRig Wetter Box
- Lehle Mono Volume Pedal
- Lehle Dual Expression Pedal
- Fairfield Circuitry Shallow Water K-Field Modulator
Strings & Picks
- Ernie Ball 6-String Baritone Slinky Nickel Wound (.013–.072)
- Dunlop Gator Grip .71 mm
Hayes explains, “I feel like the secret to this record is that it’s a singer-songwriter record, but with this whole landscape surrounding it. A lot of the guitars are very austere and a lot of the layering and the instrumentation is fitting together in a way that gives things a depth of field.”
Spine’s first three tracks immediately establish an interconnected atmosphere while still being distinct from one another. “Bålfærd” features a drone from a hurdy-gurdy, emanating behind vocals, acoustic strums, and synthesizer washes. “Like Humans” leads with malevolent harmony and martial drums before an anthemic chorus. “Mothlike” is another early highlight: Voice and synthesizer establish a dance-club-like groove—think refreshed Annie Lennox and Dave Stewart—morphing in and out of a wall of distortion, Bruun’s screams, and a brief but epic guitar solo from Arjan Miranda, who guested on Dunn’s invitation. “Arjan has lived and breathed NWOBHM [new wave of British heavy metal] and Mercyful Fate,” says Hayes, “and that’s totally the type of old-school solo that was called for on that song.”
“It’s less about conscious genre-mixing, and it’s more associative.”—Will Hayes
For Hayes’ parts, he shares, “The influences varied song to song and sometimes by part. For instance, the flanged-out riff during the chorus of ‘Blazing Sky?’ The idea was to have a cold liquid part there, so Cocteau Twins naturally became a reference we agreed on. It’s less about conscious genre-mixing, and it’s more associative: For the different roles a guitar part might play in the arrangement, there are different stylistic influences to plug in.”
After being laid off from a warehouse job, Hayes applied to the Cornish College of the Arts in Seattle, where he went on to study classical composition.
Photo by Abby Williamson
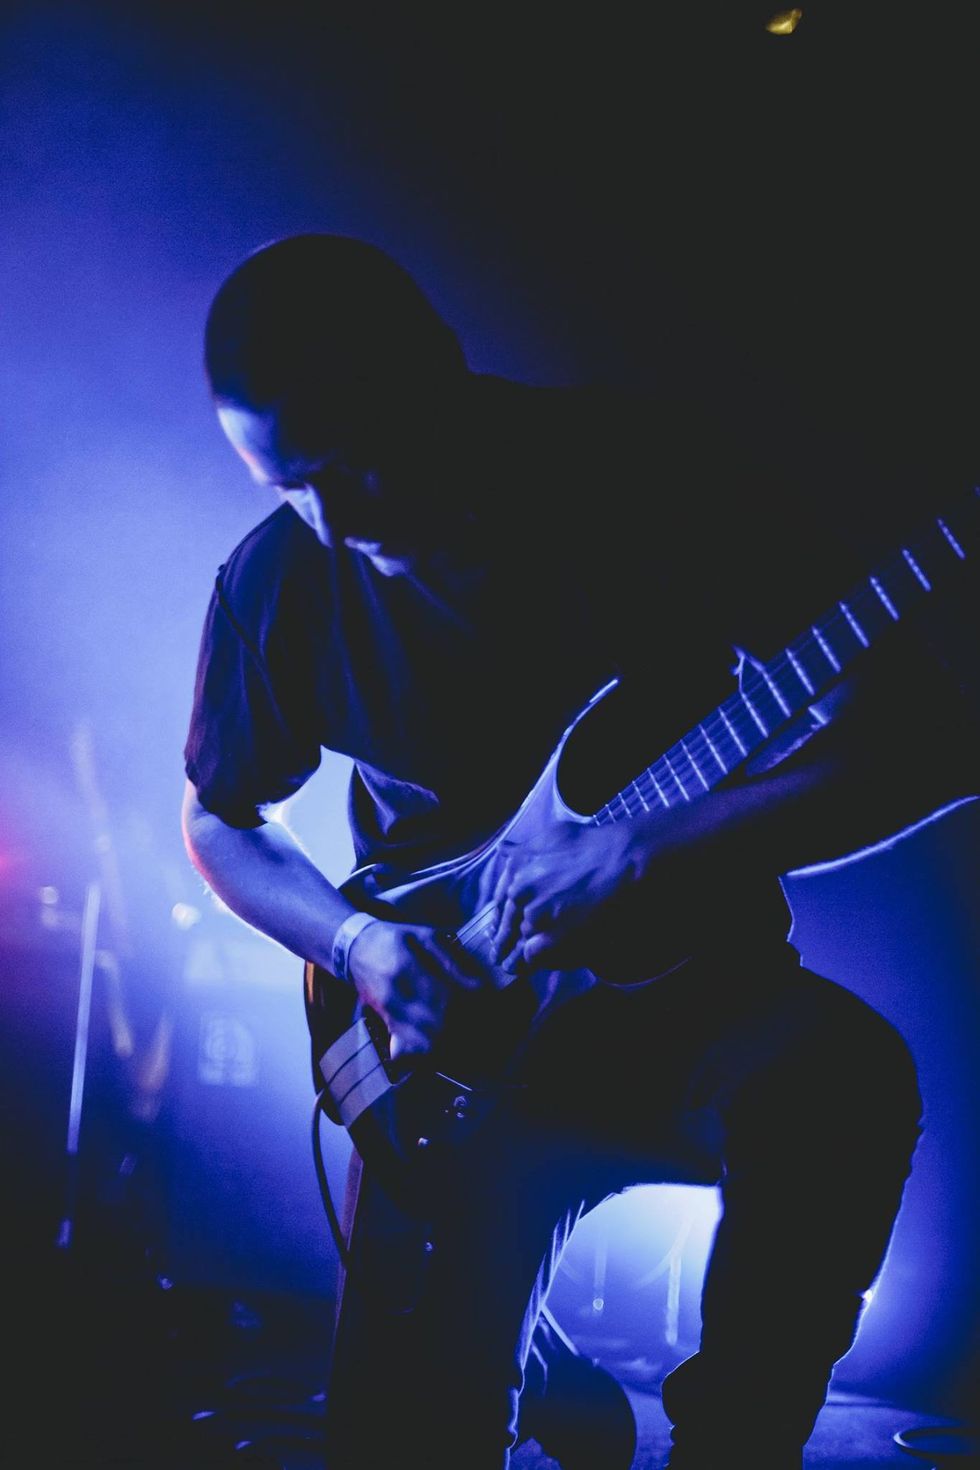
Hayes’ guitar work acts as a foil to Bruun’s enchanting, mythological-siren-like vocal, providing an unexpectedly ideal complement with heavy, overdriven, churning chordal textures, carefully articulated lines, and at times aggressive tremolo picking. Among his approaches to black metal in general is a knowledge of how to implement the third, which he says can simulate the sound of a bowed instrument. “When you’re tremolo picking across whole chords, there’s a blurriness to that and an aleatoric nature to how you can activate the chord and stretch the rhythmic particles to act as texture, which can morph and be impressionistic.”
Hayes grew up listening to metal, learning to play guitar by mastering Slayer and Megadeth riffs, eventually gravitating towards “more extreme bands” such as Sepultura, Sarcófago, Morbid Angel, Celtic Frost, Bathory, and Mayhem. He began writing his own music as a teenager, and when he was laid off from a warehouse job at the age of 19, he decided to take a step towards a career in music. He applied to Cornish College of the Arts in Seattle, and was accepted. There, he studied classical composing.
Absorbing his professor Wayne Horvitz’s lessons and music, he says, was “really pivotal for me. I learned a lot from him about how to use harmony and tonal ambiguity to evoke complex emotions, and he helped me break out of some writing tropes I had picked up from metal. Also, [I was influenced by] his estranged approach to American music, and methods of combining composition with improvisation.” Horvitz, who played with John Zorn’s Naked City, was a part of the Downtown scene of improvisers in the ’80s in New York City. “Through that entry point,” says Hayes, “I got really interested in free improvisation, and learning about other musicians he played with.”
Through his studies, Hayes was exposed to avant-garde and 20th-century classical music: Morton Feldman, Maurice Ravel, and Arnold Schoenberg; and medieval and Renaissance music, by Johannes Ockeghem, Josquin des Prez, and Hildegard of Bingen. Today, he names Ornette Coleman’s album Skies of America, Charles Ives’ “Three Places in New England, III. The Housatonic at Stockbridge,” Nico’s “The Falconer,” and Glen Campbell’s “Wichita Lineman” as some of his favorite music. “I’m really drawn to extremes on all sides,” he explains, “and to artists and pockets of music that are idiosyncratic and culturally, or counter-culturally, severe.
“Transilvanian Hunger by Darkthrone is one of my favorites,” he continues. “There’s nothing else that really sounds like that, even within their catalog. It’s not really even a metal record; it sounds more like folk music from the center of the Earth or something.”
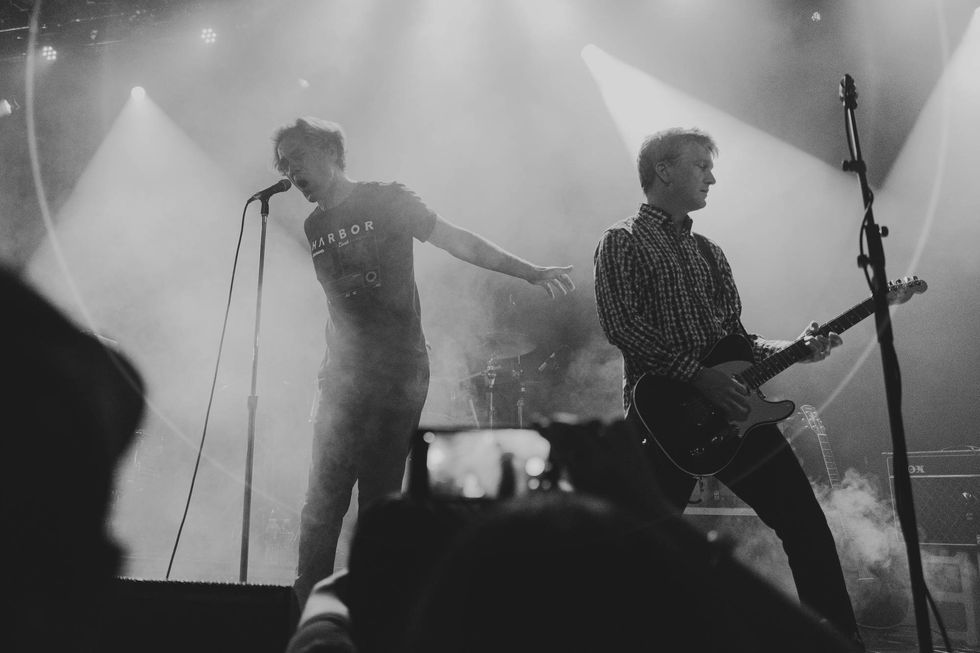
Hayes, who first met Bruun in 2017 for the recording of her album Mareridt, performed all of the guitar parts on Spine.
The main guitar Hayes played on the album was a customized Dunable Yeti. He requested a baritone version, with a custom pickup configuration: three split-coil humbuckers, each with a 3-way switch, for “optimal tone-sculpting. I wanted a guitar with a wide range, and a versatile instrument I could use for low metal and also for clean, cold baritone stuff, like the Cure or Glen Campbell-style deep baritone sounds. It’s really become my axe that I use for everything.”
To develop the guitar parts for Spine, Bruun and Dunn would confer on which tone they wanted, and then present a few options to Hayes. “Randall’s use of gear is always to accomplish specific creative goals, and evoke something emotional,” Hayes observes. Sometimes the process of arriving at those goals would begin with a piece of gear or an effect chain, and the guitar part would serve as a means to “activating the gear.”
“It’s a way to morph different styles of playing into one another, and exciting collisions occur when you’re writing or improvising.”—Will Hayes
Among Hayes’ pedals are a Klon clone, a vintage Eventide H3000 Ultra-Harmonizer, and a Hologram Electronics Microcosm granular looper and glitch pedal. He likes to get experimental when working with them and others in his collection. “I’ve gotten really into parallel signal chains in my pedal rig, and crossfading between them expressively. For instance, having a clean channel and a distorted channel, each with their own color and modulation options. And then I have this mixer pedal called a Wetter Box by GigRig, which takes an expression pedal, so I can mix between signal A and signal B in real time with my foot. It’s a way to morph different styles of playing into one another, and exciting collisions occur when you’re writing or improvising.”
Another method he uses along these lines is crossfading higher and lower octave chains, each with their own distinct modulation and rhythmic effect. He currently uses the Microcosm on his higher octave chain. “It samples what you’re playing and explodes it into a cloud of granulated fragments.”
Alongside Myrkur and his other session work, Hayes also performs as a solo artist, and creates music and sound design for film, dance, and theater projects. In his solo work, he’s explored audio-to-MIDI conversion, using the Virtual Studio Technology plugin MIDI Guitar 2 and the Fishman TriplePlay. The technology, which enables him to program synths, samplers, and arpeggiators using the MIDI generated by his guitar, now plays a significant role in his sound design and electronic music. “It’s funny, the way these products are marketed doesn’t seem to fully illuminate the creative potential of the technology,” he shares. “It can get really deep, especially through designing original sound. I’m excited to see MIDI employed creatively by more and more guitarists.”
“To me, the pioneering extreme bands were groups of kids who were spiritually searching.”—Will Hayes
And while Hayes clearly exhibits that adventurous nature in both production and artistic tastes, it’s clear that metal, the genre that got him into music in the first place, still speaks to him above all else. “There’s something really exciting about an overt expression of evil [in metal]. To me, the pioneering extreme bands were groups of kids who were spiritually searching. Making a song where you’re basically saying, ‘This is the most evil thing that can happen,’ is like its own moralistic backstop against real evil.”
He continues, “I’ve noticed for many musicians and producers in creative music right now, metal is a bit of a lingua franca. There is power to this music that really doesn’t exist anywhere else, so for people who have spent their lives seeking out transformative sonic experiences, it’s no surprise that the canon of extreme metal is so important.”