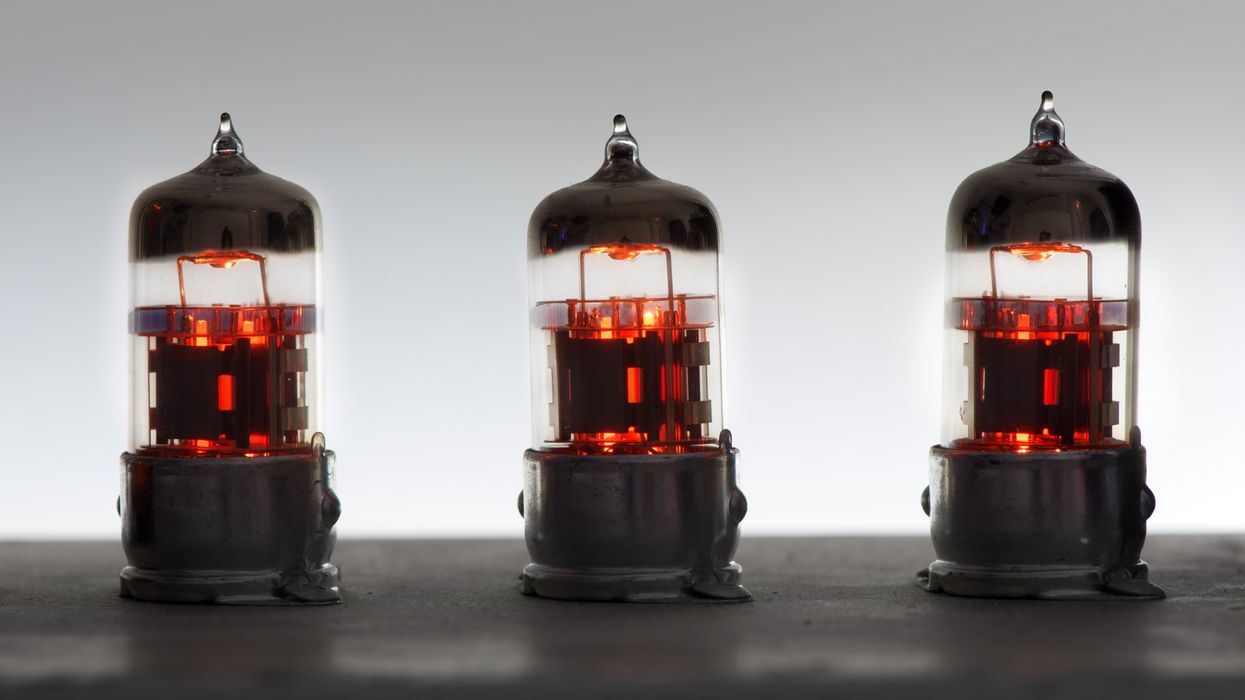
Take a deep look inside this ubiquitous little workhorse, and consider a few easy mods that can make it sound and perform even better.
There are a lot of mods that can be done on a Blues Junior—the affordable, lightweight, and smallest member of Fender’s 12" combo family. These include replacing tone caps, swapping out the transformer, electrolytic cap upgrades, reverb tank mods, and more. Just google “Fender Blues Junior Mods” and prepare to be overwhelmed.
But how many of these mods are really necessary? It’s fair to assume that if you own a Blues Junior you were attracted to both its price of $749 street and at least some elements of its sound, which falls into the range of classic Fender voices, with clarity and punch. So, as PG’s “Silver and Black” columnist and resident guru of fenderguru.com, let me wade through some of the popular mods and make some recommendations about a few I think are actually beneficial, affordable, and easy to accomplish—resulting in more punch, volume, and warmth in your tone. Specifically, I’m talking about using extension cabinets, adjusting the bias by changing the resistors, replacing those electrolytic caps, and adding a resistor to tame and darken the reverb.
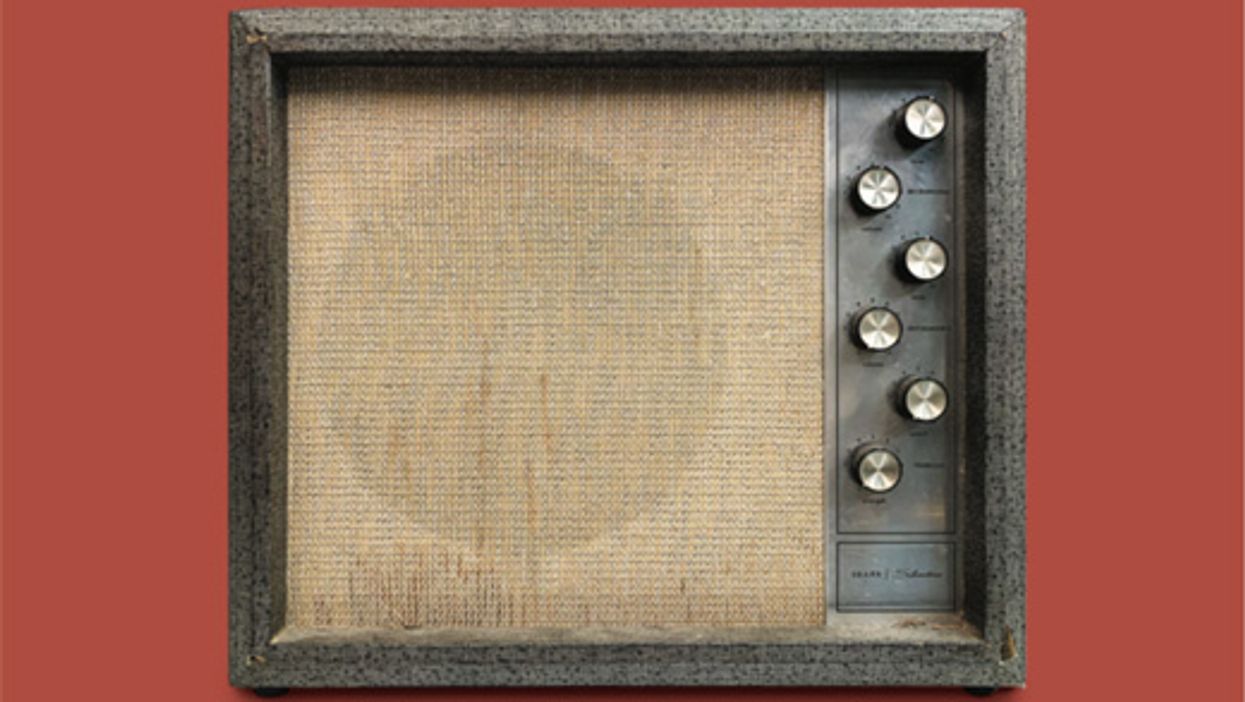
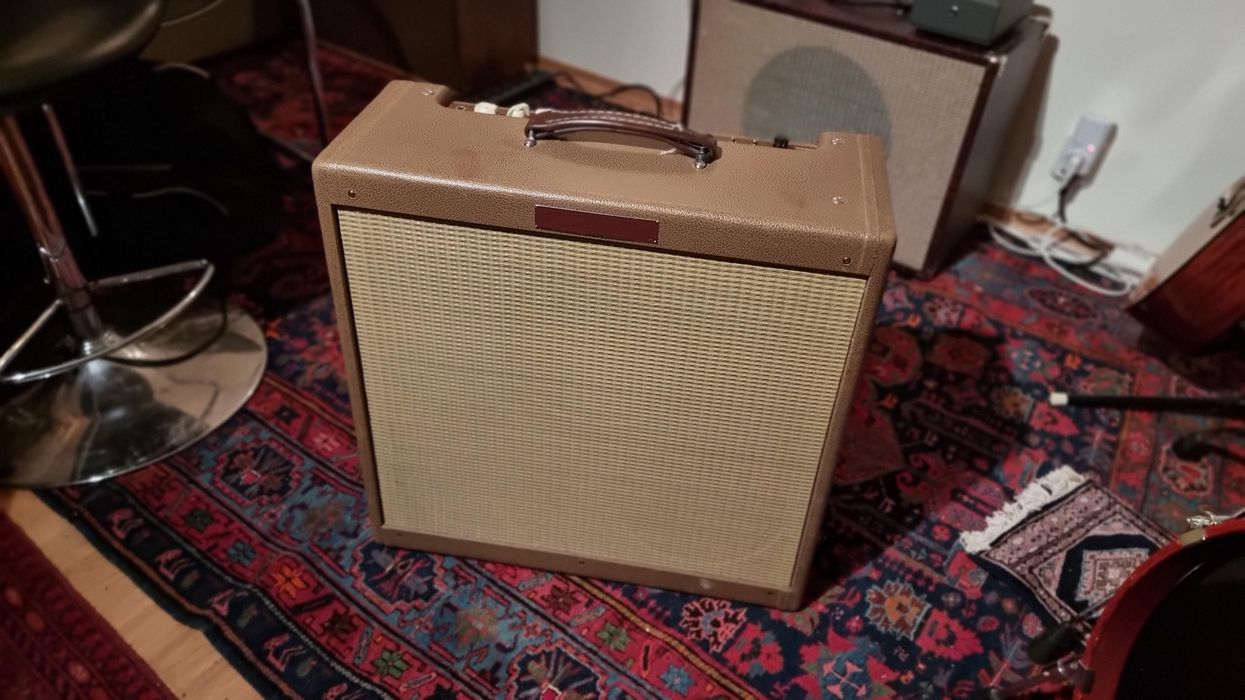
Before we get there, however, let’s take a look under the hood of this humble working-player’s Fender. The 15-watt, all-tube Blues Junior was introduced in 1995. It weighs only 30 pounds and measures 16" x 18" x 9", making it smaller and lighter than a Princeton, although it holds a larger 12" speaker.
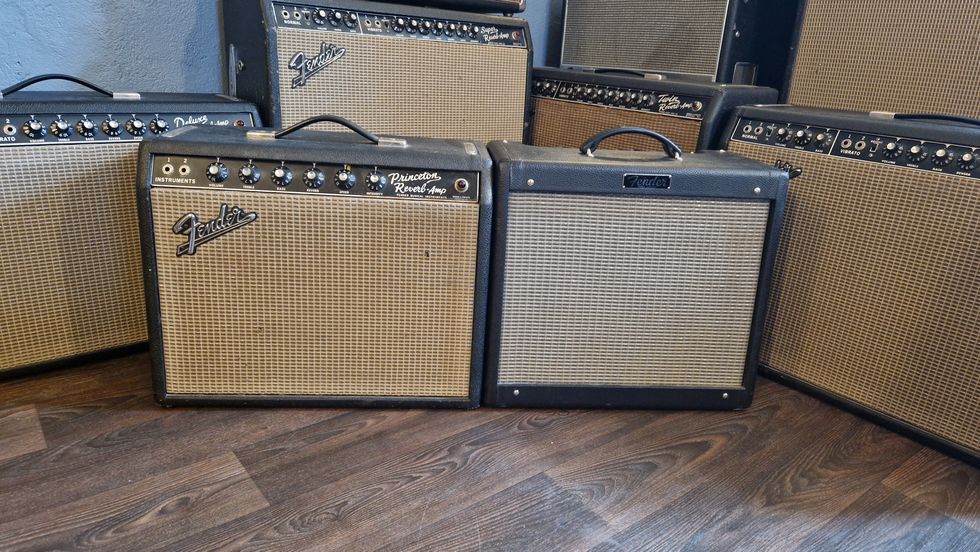
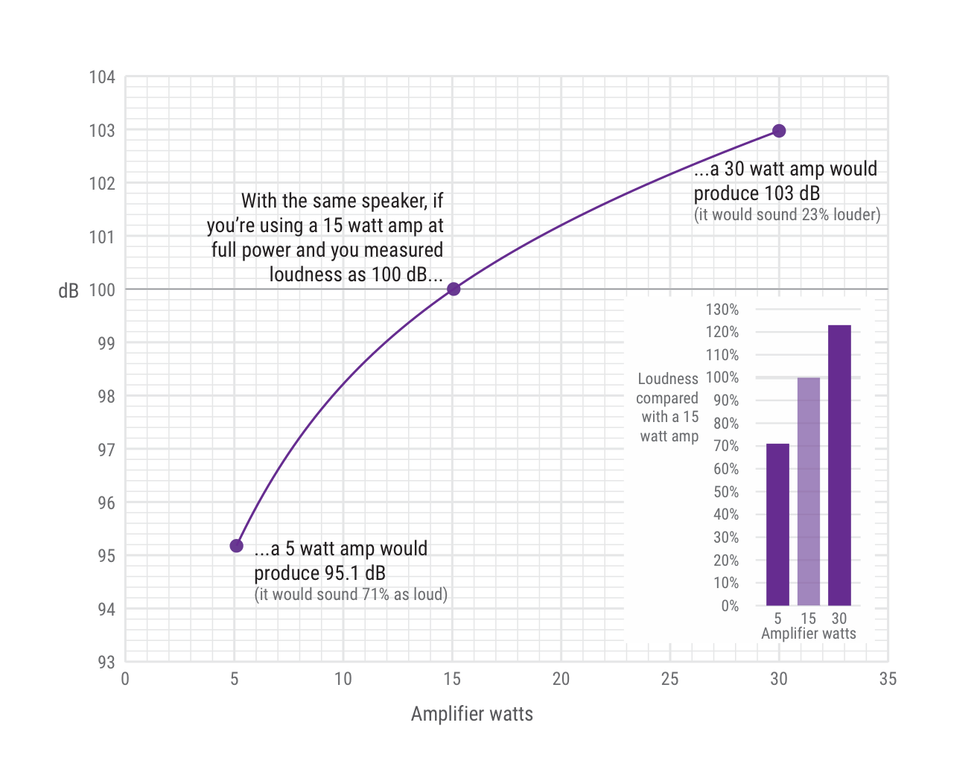
Although smaller than the Princeton, the Fender Blues Junior has a larger speaker and more wattage, with a 12" speaker compared to the Princeton’s 10", and 12 watts compared to the Junior’s 15.
How Low Can We Go?
The Blues Junior was introduced before the trendy low-wattage-amp era began, and even in the digital era, players still appreciate the Junior’s printed circuit board (PCB), manual knobs, and tubes in its preamp and power amp sections. There have been many revisions over the years, including minor changes in circuitry and components, different speakers, and the addition of a fat switch that boosts the mids and pushes the preamp stage into quicker distortion.
There are three models in the current Blues Junior IV lineup. The black Tolex amp has a Celestion A type speaker, the racing green model has a Jensen C12Q, and the lacquered tweed model comes with a Jensen C12N. They all share the same circuitry. There’s also a tube in the phase inverter, while there is a transistor-driven reverb and diode rectifier. The early Blues Juniors with green circuit boards were made in the U.S., until Fender moved production to Mexico in 2001. The Mexico-made amps have a cream-colored circuit board.
PCB amps are a little more complicated to work on than handwired amps. You must be gentle and careful with wire cutters and soldering irons to not damage the small connections. It is easy to break the board’s connection traces and pins, or accidentally touch a high voltage point in the circuit. Be careful should you venture inside.
The Tale of the Tubes
So, what can we draw from inspecting the amp and reading the schematic of a Blues Junior? The control panel has volume, master, treble, middle, bass, reverb, and fat switch controls. Reading the schematic, I find that the tube layout and circuit functions are:
V1 12AX7: The first half of the tube handles preamp gain stage one before the volume and fat functions, and the second half powers preamp gain stage two, after volume and before the EQ/tone stack.
V2 12AX7: The first half powers preamp gain stage three, after the EQ/tone stack and before the master volume, and then the phase inverter. The second half of the tube’s output is not in use.
V3 12AX7: The first half juices the phase inverter’s phase one; the second half handles the phase inverter’s phase two.
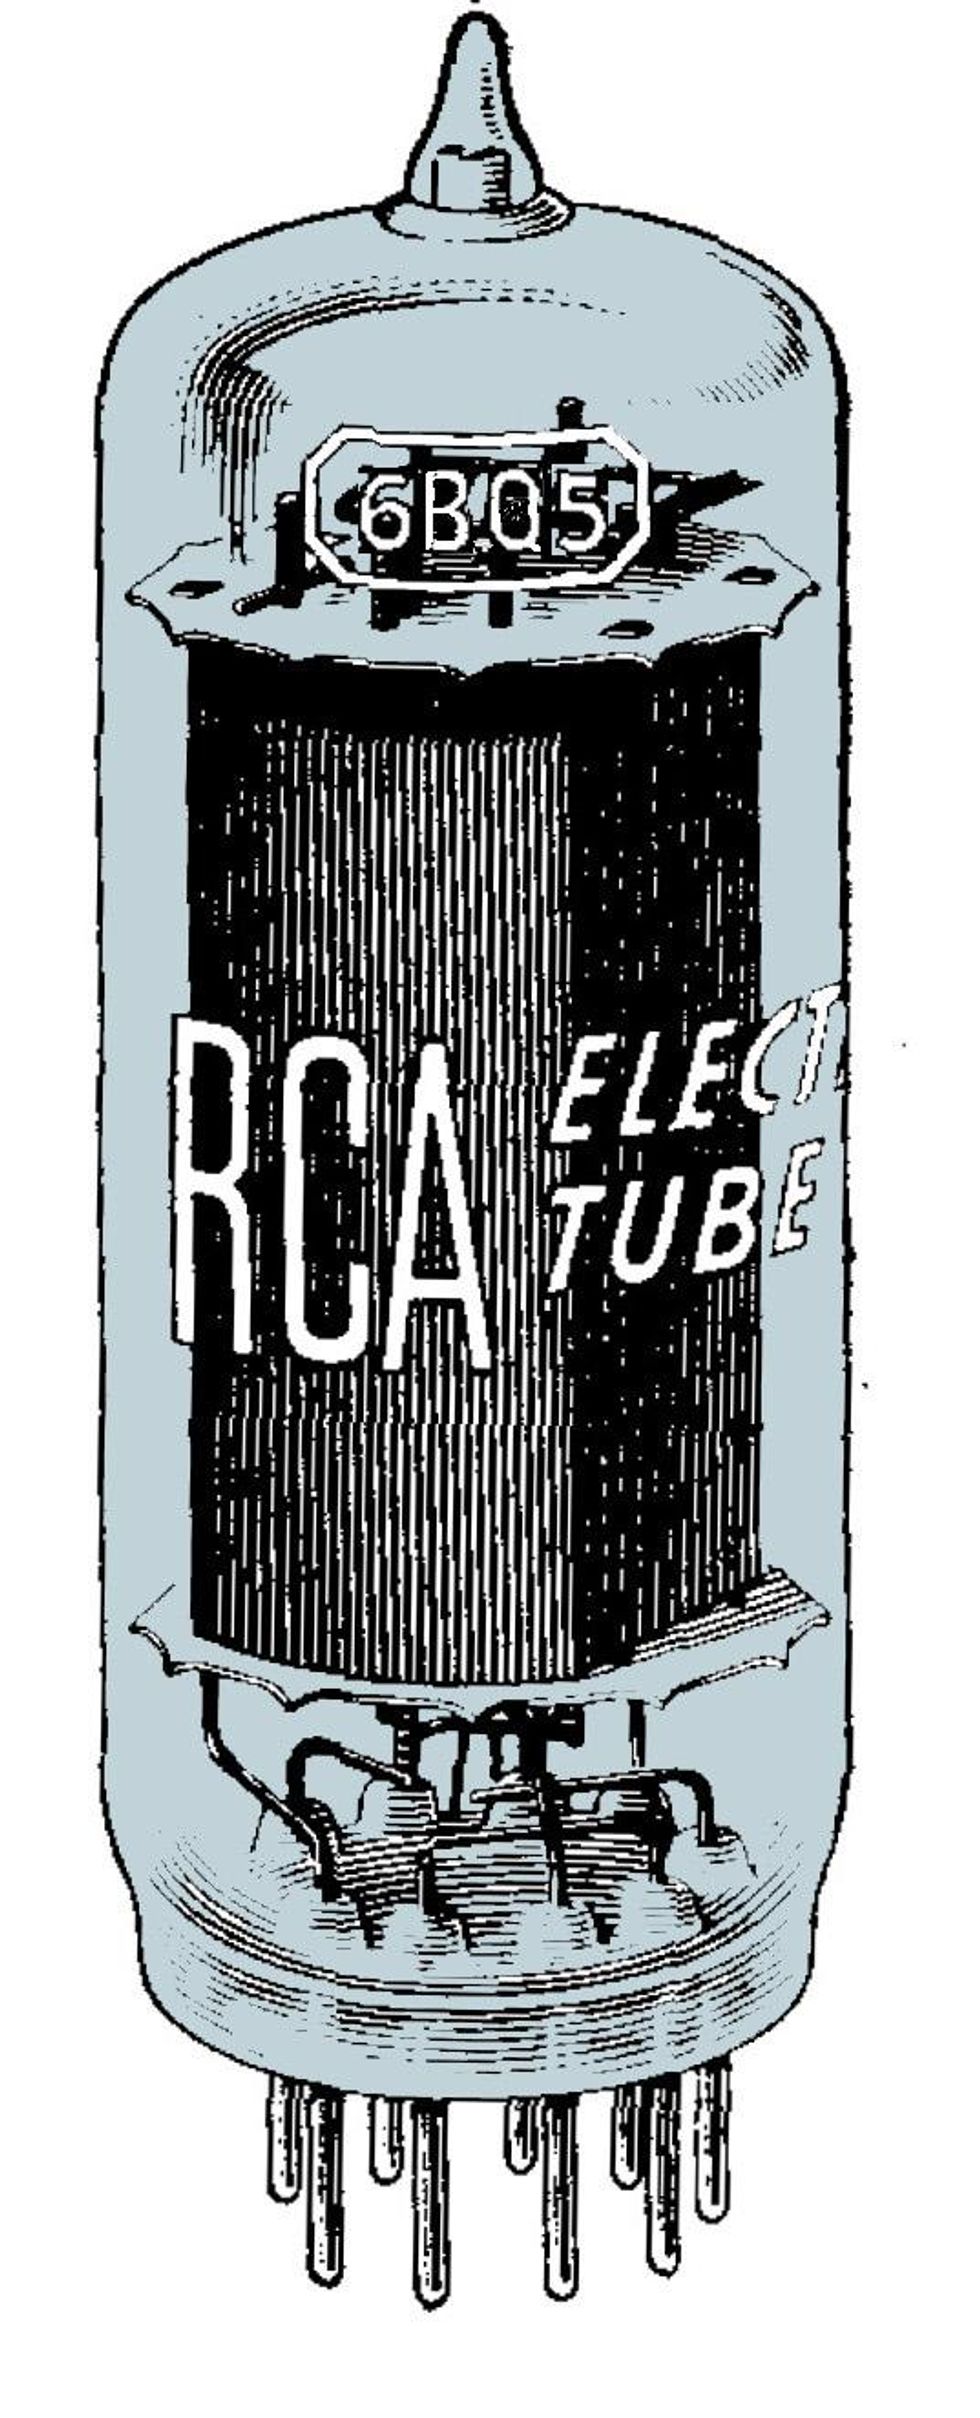
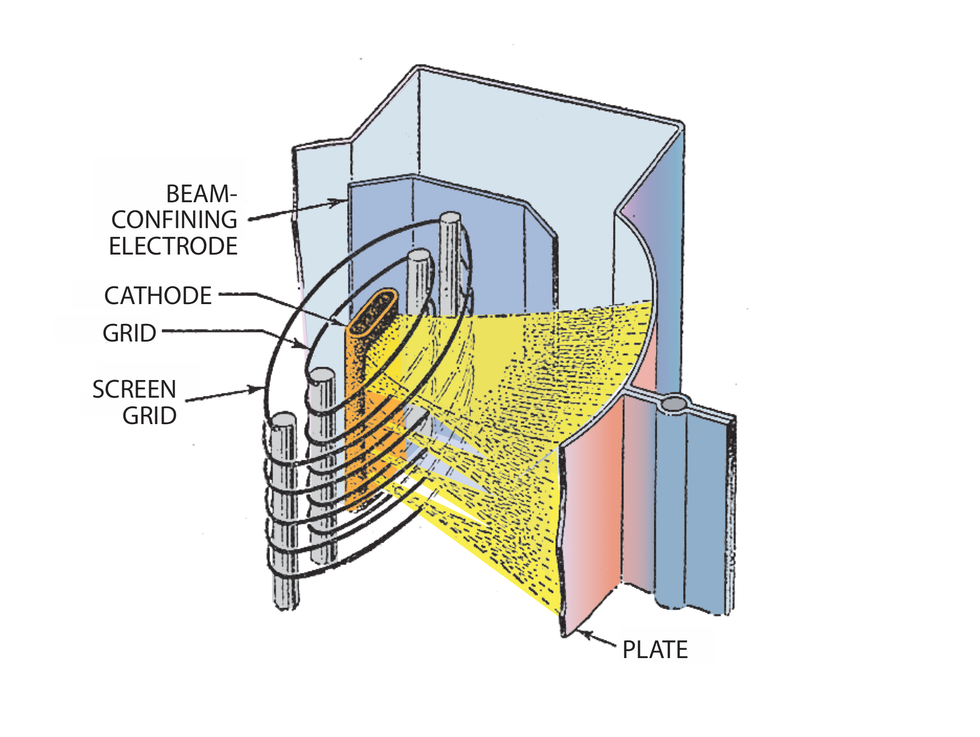
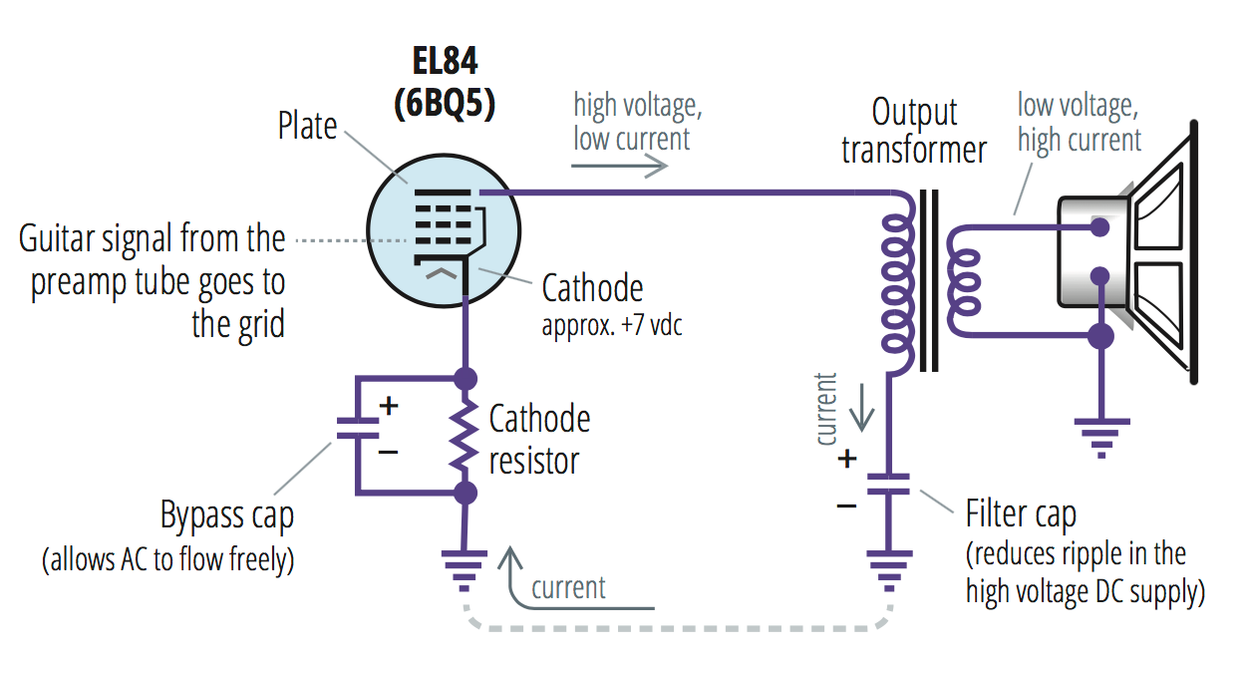
V4 and V5: That’s the home of the EL84 power tubes.
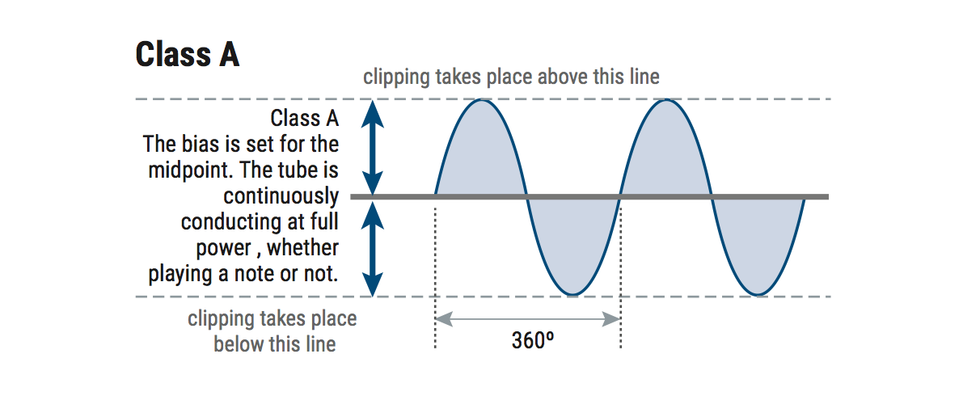
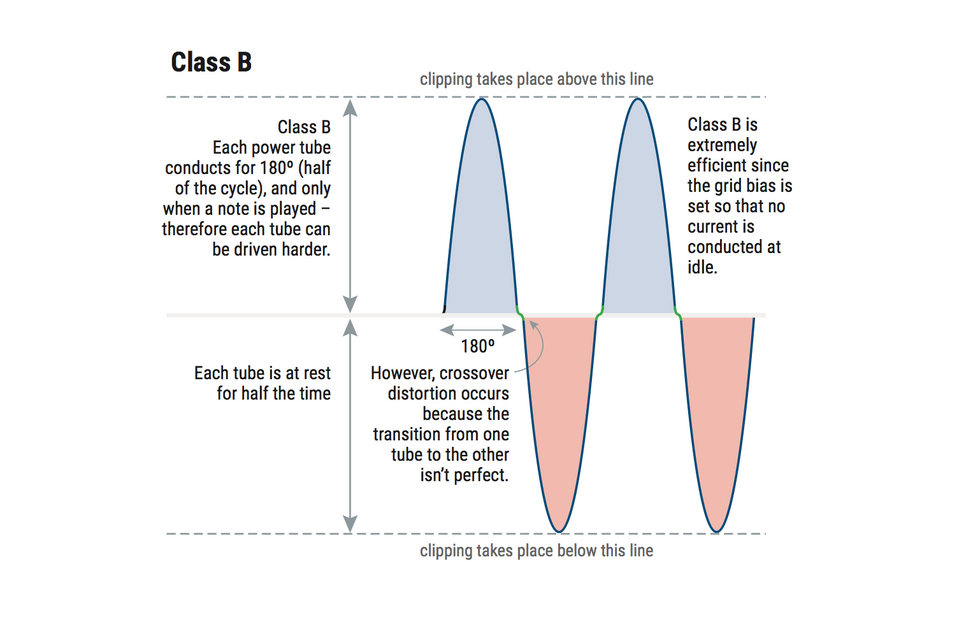
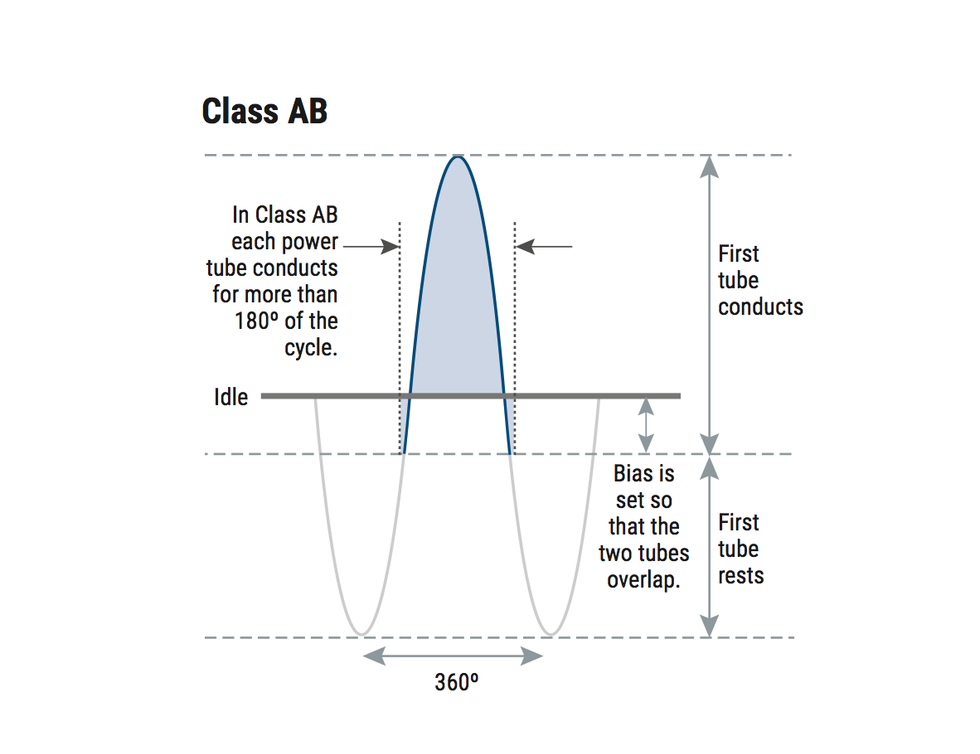
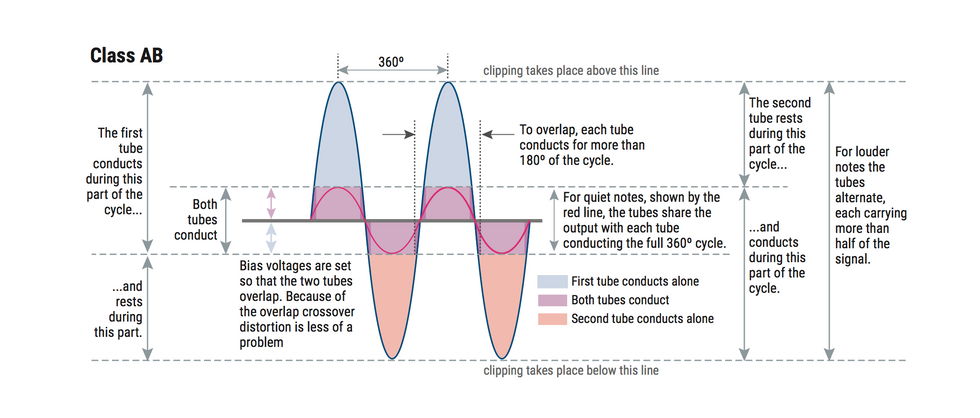
Just like the Princeton Reverb, there are three gain stages in the preamp circuit. The power amp circuit design is also based on a classic Fender black- and silver-panel-era recipe. It has dual EL84 power tubes in a push-pull Class AB configuration with fixed bias and a negative feedback loop. This means we should expect a nice, clean black-panel-style tone before the amp breaks up.
Before the power tubes sits a proper, high-performing, long-tail phase inverter based on the two available amplifier functions in the single V3 12AX7 tube. All Class AB push-pull amps need a phase inverter that splits one sine wave signal into two signals with opposite phase that are fed into each power tube. The Princeton Reverb has a weaker phase inverter than the Blues Junior, and the Blues Junior has a bigger loudspeaker but a smaller speaker cabinet, which we will get back to in a moment.
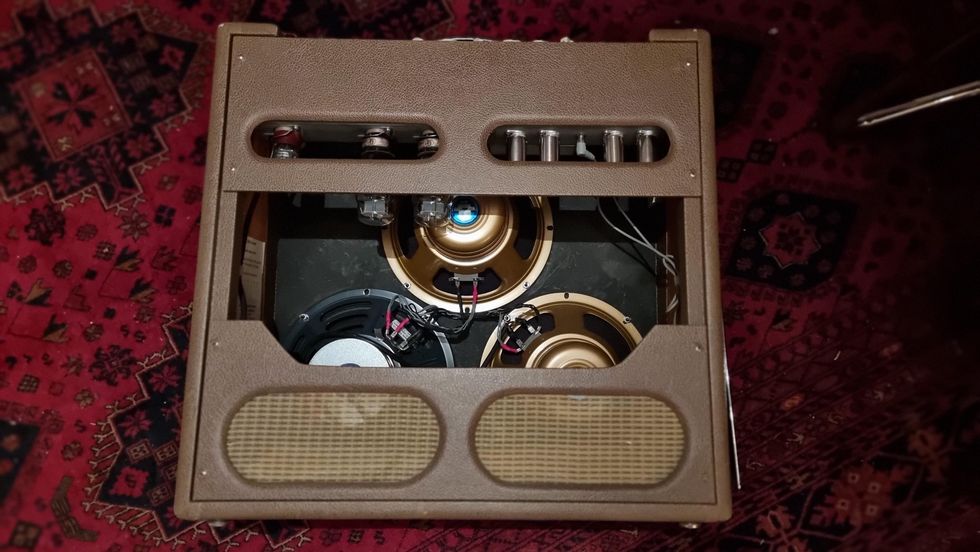
The small cabinet is the most significant bottleneck with the Blues Junior. At home, it works well for me, but onstage it gets too boxy and thin. The 12" speaker doesn’t have room to breathe in that small cabinet and would benefit greatly from a bigger space. You can change the tone by swapping the loudspeaker, but you won’t get more punch and bass response.
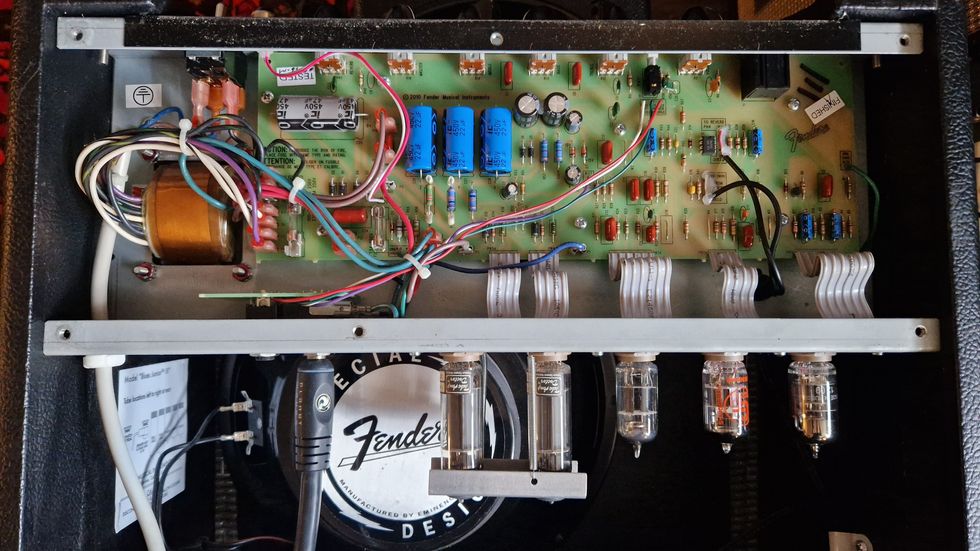
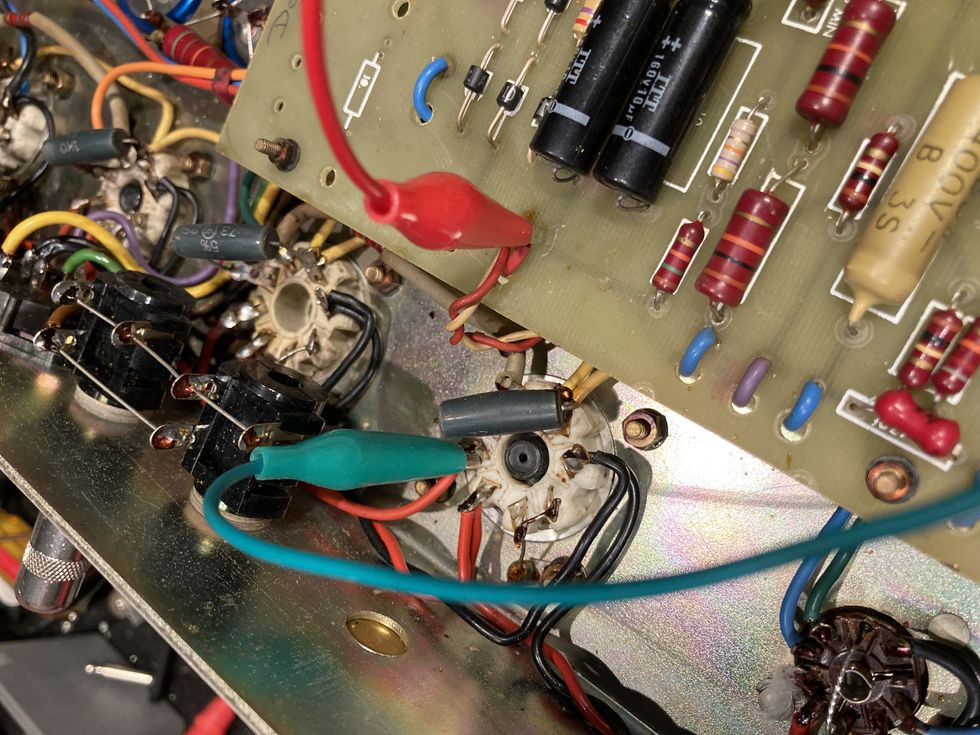
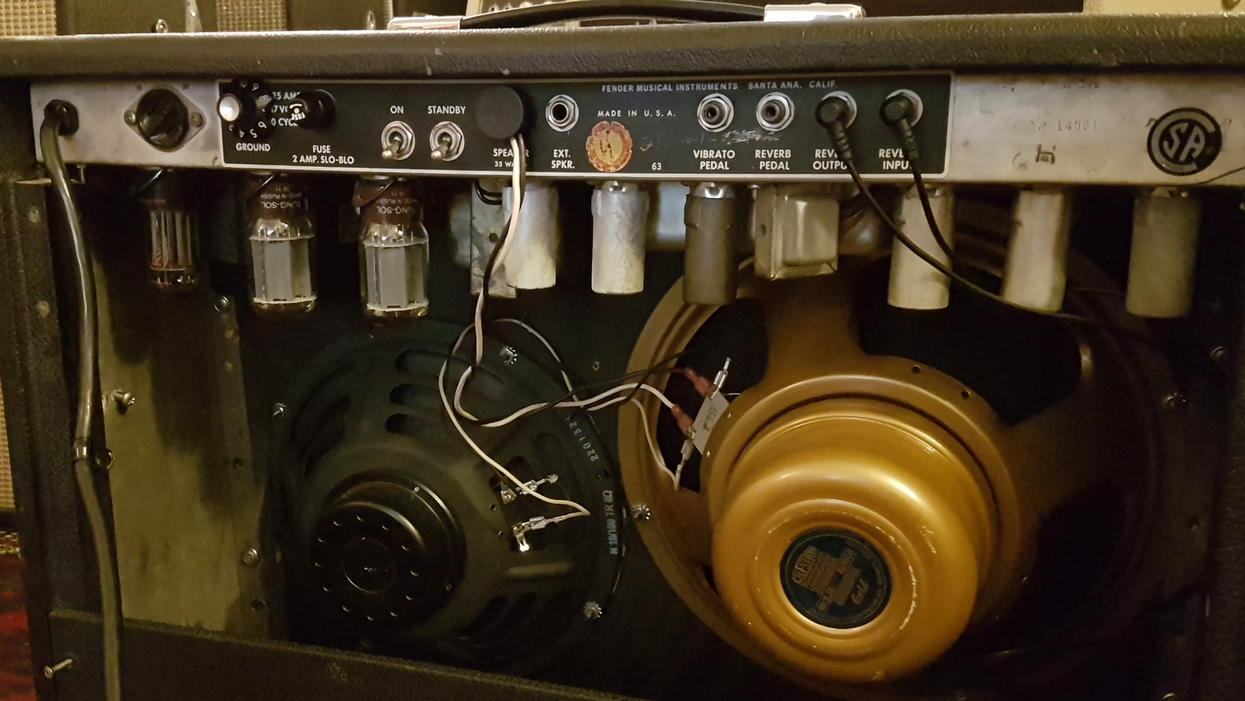
Here’s an interior look at Jens’ own Fender Blues Junior. Space is of the essence in this mighty mite of an amp.
Extended and Amended
Bigger extension cabinets are by far the easiest way to increase the spread and punch of a Blues Junior. Good speaker combinations are closed or semi-closed 1x12, 1x15, or 2x10 cabs. The Blues Junior expects an 8-ohm speaker load but will handle anything between 4 and 16 ohms. Since 8 ohms give you the most headroom, I recommend disabling the built-in speaker entirely and sending all the power to the bigger extension cabinet for a bigger tone.
If a bigger extension cabinet isn’t enough, you could consider upgrading the output transformer to a larger one. Some will argue that the Junior’s small output transformer is a weak point, limiting fullness and bass response. I, however, think the modest power transformer is properly sized for this small amp. It is, after all, supposed to be a low-wattage amp with early breakup. A bigger OT is not the right medicine in such a small combo, in my opinion, unless you’re always driving an extension cabinet.
Fixing the Fixed Bias
Before we leave the power amp section, I must mention that the Blues Junior is famously known for having a too-hot fixed bias setting on the EL84s. Juniors benefit from a cooler bias, which also increases tube lifetime. Since there is no available bias pot, you have to adjust the bias by changing the values of the two resistors—a 22k/R31 and 33k/R37, or a R52 and R51 in more recent models. This is especially helpful if your amp wears out EL84 tubes fast. The good news is that Fender has improved the latest model IV with a cooler bias setting.
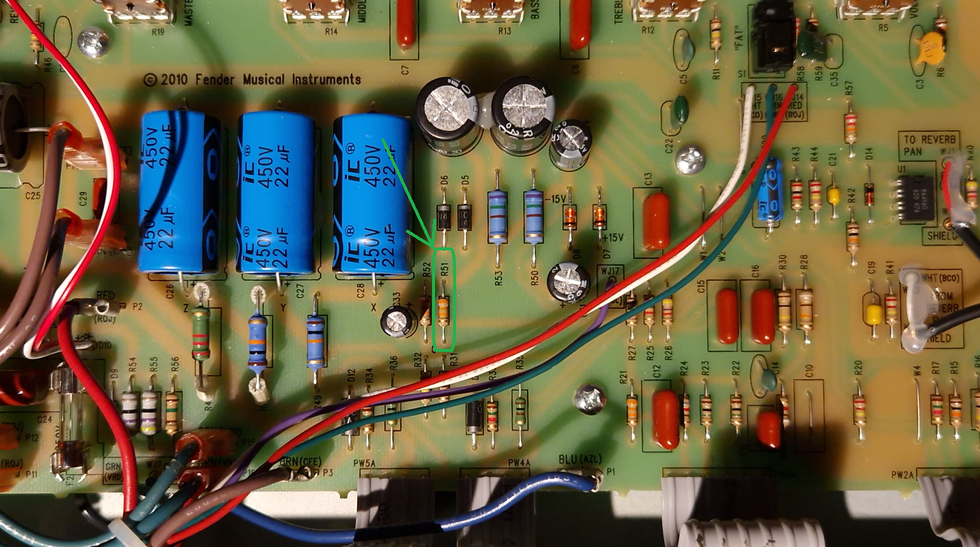
This photo shows the location of the R51 resistor in the Blues Junior circuit, important in recontouring the bias.
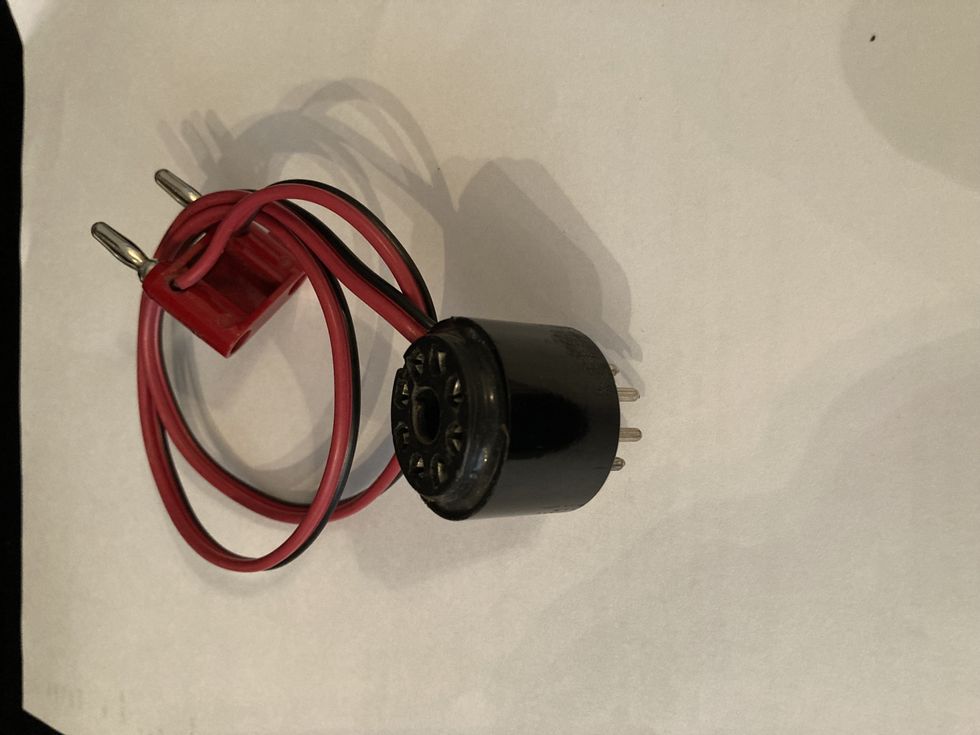
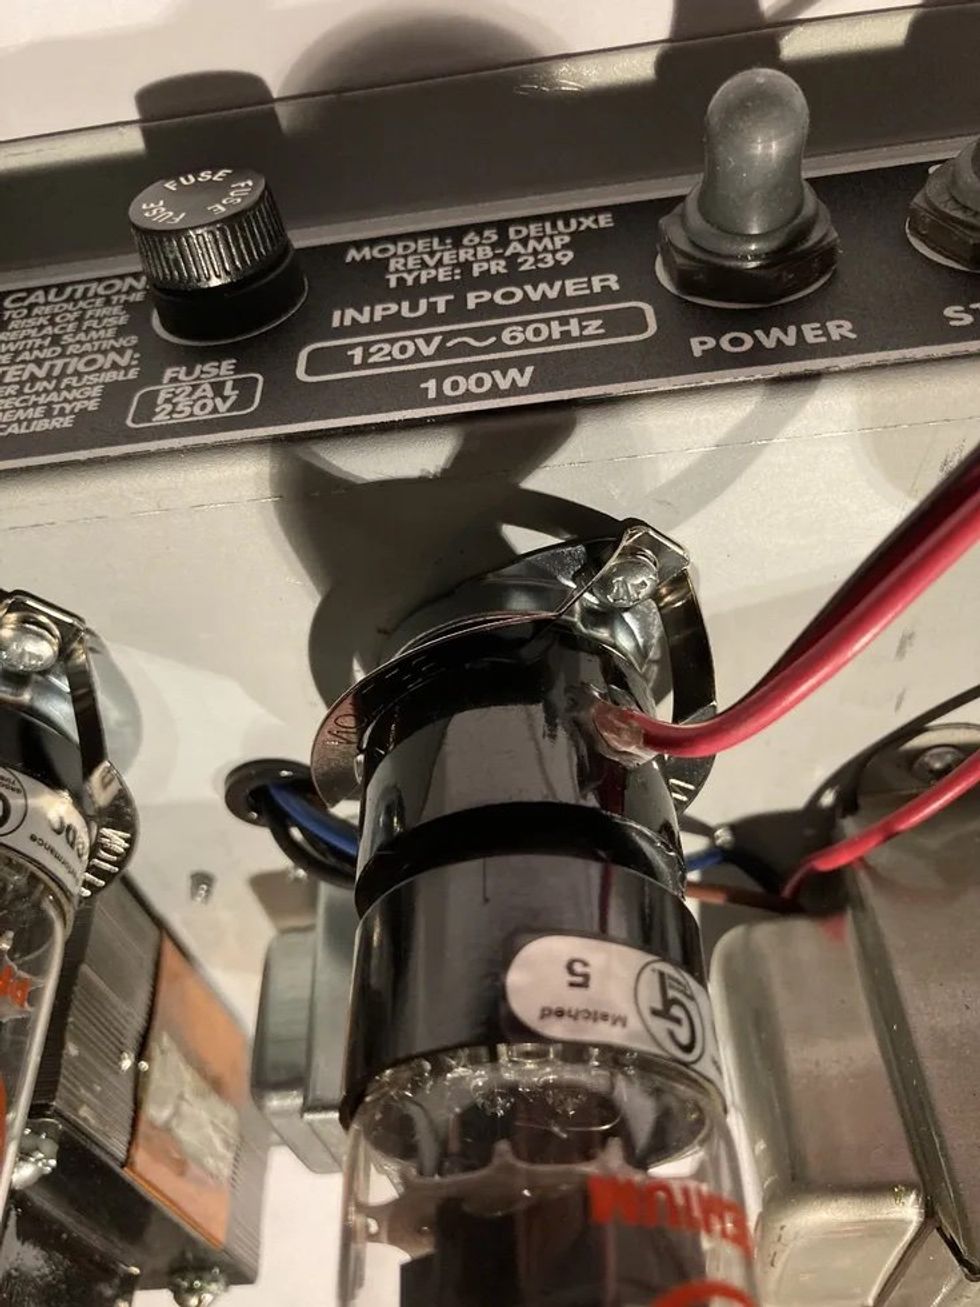
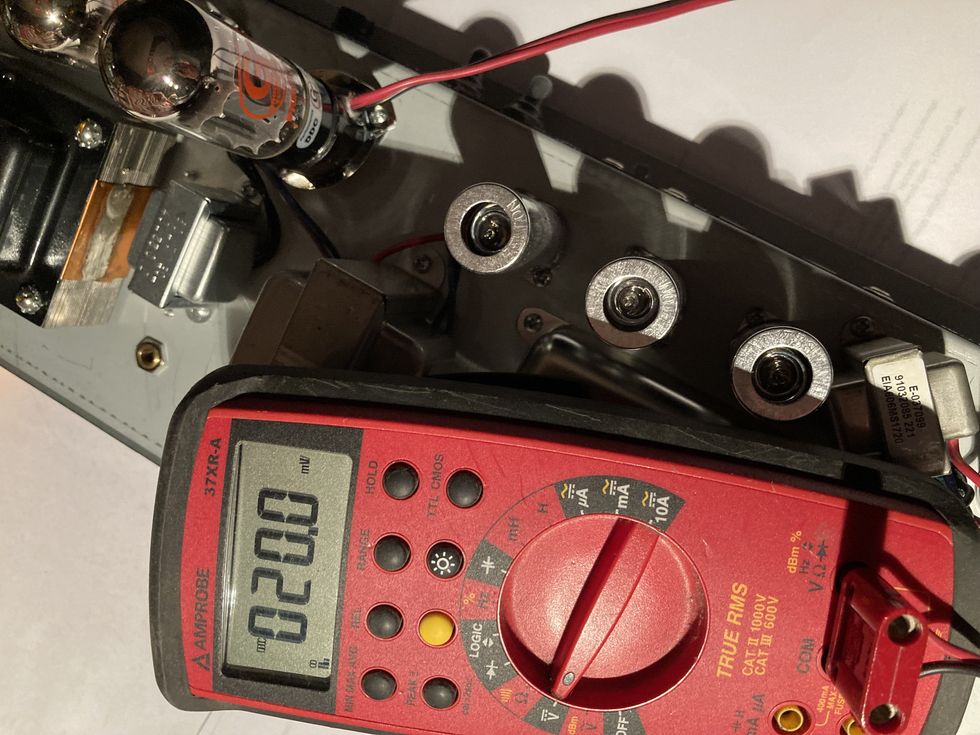
So, you’ll need to reduce the amp’s bias current to between 25 mA and 30 mA, from the factory-set 42 mA. (You’ll need a bias probe to measure the bias. To learn more about using a bias probe, see Jeff Bober’s story “Amp Man Returns, to Explain Tube Bias” in Premier Guitar’s June 2023 issue or online at premierguitar.com.) The simplest way to accomplish this via reducing the value of a resistor is to add another resistor in parallel. You simply solder a resistor on top of the existing one on the front side of the circuit. Twist the legs of the new resistor around the old ones a couple of times so it stays in place. That way, you don’t have to remove the original resistor. Then, warm up and apply the soldering tin to the legs. It’s that easy. I recommend adding a 220k resistor in parallel with the original 33k to see where that leads you. If you need to reduce more, use a smaller resistor or add another one in parallel until you are between 25 mA and 30 mA.
As far as tubes go, the circuit design will allow lower gain tubes—such as a 5751 or a 12AU7—in the preamp V1 and V2 positions. But you’d lose volume and break-up. I find that the amp’s sweet spot, meaning the transition between clean and distortion, is already pretty much where I want it, and I like the usable range between the volume and master volume controls, so I would advise against inserting low-gain tubes.
The tone stack and EQ balance is well-designed, too, with a nice, usable range in the bass, mid, and treble controls. The Junior can do both sparkling cleans and crunchy distortion. The mid control offers more mids than the scooped Princeton. With the mid knob set at max, I’m able to get some British-style distortion. If you think that your Blues Junior sounds a little glassy, you should experiment with other loudspeakers. Inserting a broken-in Celestion Greenback or a Jensen P12Q would easily make cranked tones smoother or the clean sound more authentic-vintage Fender. The Blues Junior III I’ve been playing lately comes with a Fender-labeled speaker made by Eminence—a good, all-round speaker with nice sparkle and a firm bottom end.
Doffing the Caps
Next up: a highly recommended maintenance mod. Electrolytic filter caps are important components in terms of noise, loudness, and clean headroom. The cheap, low-quality caps that come in blue or grey are a well-known problem with the Hot Rod Deluxe and Blues Junior. The good news is, they are quite easy to swap out. I recommend replacing these if you hear any 50Hz hum or see any signs of cap leakage. There are several cap replacement kits available online for the Blues Junior, running from about $60 to $100.
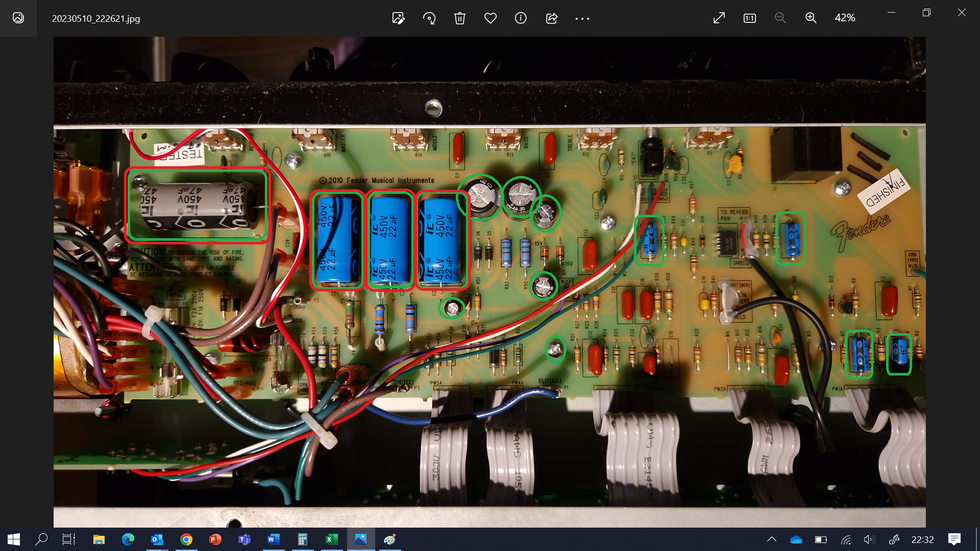
Note the 14 circled electrolytic capacitors in this photo. Filter cap replacement kits are affordable and widely available online.
Start by replacing the four largest capacitors: three with a value of 22 uF and one with a 47 uF value. Again, it’s simple. Just clip the legs off the factory-installed capacitors as close to the caps’ bodies as possible, and remove them. Then, twist the new caps’ legs around the old ones and solder them in place. Just be careful with both your clippers and soldering iron around the PCB. If that doesn’t get the results you want, replace the smaller caps, too.
Moving on to the reverb, I can understand the cost-efficiency decision that Fender made with the simplified, transistor-based circuitry. Not having a tube-and-transformer-based reverb lowers expense and weight, and there are fewer things that can fail. Luckily, there is a proper spring reverb tank in the back of the amp. In fact, the Blues Junior I, II, and III are famously known for having too much reverb. Anything above 2.5 on the reverb dial and the amp swims in overwhelming and bright ’verb.
Another recommended, and cheap, mod is to add an 82k resistor in parallel with the original 220k/330k in the reverb circuit, to tame and darken the reverb. This goes parallel to the R44 (220k) resistor on the made-in-Mexico board or the R50 (330k) resistor on the made-in-U.S. green PCB. Once again, an easy fix. As in the bias adjustment mod we covered earlier, we solder a new 82k resistor on top of the existing 220k on the front side of the circuit. How? By twisting the leg of the new resistor around the old one a couple of times so that it stays in place, and then applying the soldering tin. Voilà!
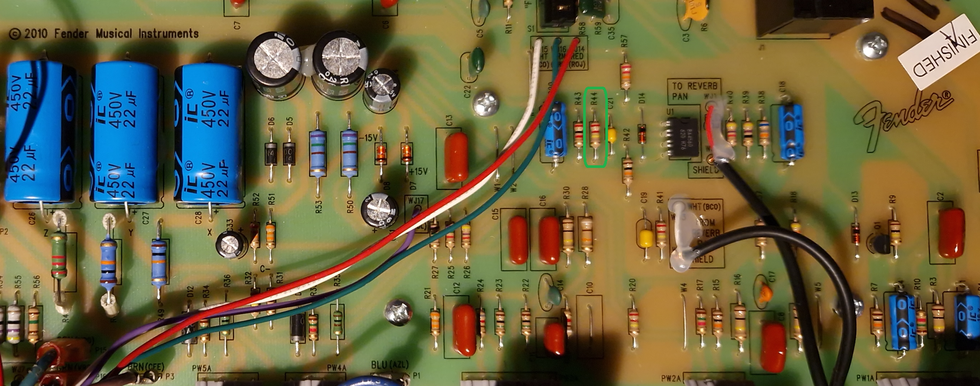
To restore the Junior’s classic Fender reverb sound, a new resistor should be wired in place atop the R44 factory resistor, circled in green.
With this mod, the reverb sounds more like the classic black- and silver-panel ’verbs, but with a wider knob-control span. I have read that the early made-in-the-States models have a darker reverb tone and might not require this move. But if you do this and find change isn’t enough, you may want to experiment with replacement reverb tanks with different decays.
So, that’s my take on this popular little warrior tube amp, and some easy mods. Even without changing the circuitry at all, with the Blues Junior, for a little money you get a lot of vintage Fender tone with a modern twist.
- Recording Dojo: How to Get Big Sounds from Little Amps ›
- Tube Amp Troubleshooting 101 ›
- Ask Amp Man: Diagnosing an Ailing Blues Junior ›
- DIY: How to Level, Crown & Dress Guitar Frets - Premier Guitar ›
“Practice Loud”! How Duane Denison Preps for a New Jesus Lizard Record
After 26 years, the seminal noisy rockers return to the studio to create Rack, a master class of pummeling, machine-like grooves, raving vocals, and knotty, dissonant, and incisive guitar mayhem.
The last time the Jesus Lizard released an album, the world was different. The year was 1998: Most people counted themselves lucky to have a cell phone, Seinfeld finished its final season, Total Request Live was just hitting MTV, and among the year’s No. 1 albums were Dave Matthews Band’s Before These Crowded Streets, Beastie Boys’ Hello Nasty, The Miseducation of Lauryn Hill, Korn’s Follow the Leader, and the Armageddonsoundtrack. These were the early days of mp3 culture—Napster didn’t come along until 1999—so if you wanted to hear those albums, you’d have to go to the store and buy a copy.
The Jesus Lizard’s sixth album, Blue, served as the band’s final statement from the frontlines of noisy rock for the next 26 years. By the time of their dissolution in 1999, they’d earned a reputation for extreme performances chock full of hard-hitting, machine-like grooves delivered by bassist David Wm. Sims and, at their conclusion, drummer Mac McNeilly, at times aided and at other times punctured by the frontline of guitarist Duane Denison’s incisive, dissonant riffing, and presided over by the cantankerous howl of vocalist David Yow. In the years since, performative, thrilling bands such as Pissed Jeans, METZ, and Idles have built upon the Lizard’s musical foundation.
Denison has kept himself plenty busy over the last couple decades, forming the avant-rock supergroup Tomahawk—with vocalist Mike Patton, bassist Trevor Dunn (both from Mr. Bungle), and drummer John Stanier of Helmet—and alongside various other projects including Th’ Legendary Shack Shakers and Hank Williams III. The Jesus Lizard eventually reunited, but until now have only celebrated their catalog, never releasing new jams.
The Jesus Lizard, from left: bassist David Wm. Sims, singer David Yow, drummer Mac McNeilly, and guitarist Duane Denison.
Photo by Joshua Black Wilkins
Back in 2018, Denison, hanging in a hotel room with Yow, played a riff on his unplugged electric guitar that caught the singer’s ear. That song, called “West Side,” will remain unreleased for now, but Denison explains: “He said, ‘Wow, that’s really good. What is that?’ And I said, ‘It’s just some new thing. Why don’t we do an album?’” From those unassuming beginnings, the Jesus Lizard’s creative juices started flowing.
So, how does a band—especially one who so indelibly captured the ineffable energy of live rock performance—prepare to get a new record together 26 years after their last? Back in their earlier days, the members all lived together in a band house, collectively tending to the creative fire when inspiration struck. All these years later, they reside in different cities, so their process requires sending files back and forth and only meeting up for occasional demo sessions over the course of “three or four years.”
“When the time comes to get more in performance mode, I have a practice space. I go there by myself and crank it up. I turn that amp up and turn the metronome up and play loud.” —Duane Denison
the Jesus Lizard "Alexis Feels Sick"
Distance creates an obstacle to striking while the proverbial iron is hot, but Denison has a method to keep things energized: “Practice loud.” The guitarist professes the importance of practice, in general, and especially with a metronome. “We keep very detailed records of what the beats per minute of these songs are,” he explains. “To me, the way to do it is to run it to a Bluetooth speaker and crank it, and then crank your amp. I play a little at home, but when the time comes to get more in performance mode, I have a practice space. I go there by myself and crank it up. I turn that amp up and turn the metronome up and play loud.”
It’s a proven solution. On Rack—recorded at Patrick Carney’s Audio Eagle studio with producer Paul Allen—the band sound as vigorous as ever, proving they’ve not only remained in step with their younger selves, but they may have surpassed it with faders cranked. “Duane’s approach, both as a guitarist and writer, has an angular and menacing fingerprint that is his own unique style,” explains Allen. “The conviction in his playing that he is known for from his recordings in the ’80s and ’90s is still 100-percent intact and still driving full throttle today.”
“I try to be really, really precise,” he says. “I think we all do when it comes to the basic tracks, especially the rhythm parts. The band has always been this machine-like thing.” Together, they build a tension with Yow’s careening voice. “The vocals tend to be all over the place—in and out of tune, in and out of time,” he points out. “You’ve got this very free thing moving around in the foreground, and then you’ve got this very precise, detailed band playing behind it. That’s why it works.”
Before Rack, the Jesus Lizard hadn’t released a new record since 1998’s Blue.
Denison’s guitar also serves as the foreground foil to Yow’s unhinged raving, as on “Alexis Feels Sick,” where they form a demented harmony, or on the midnight creep of “What If,” where his vibrato-laden melodies bolster the singer’s unsettled, maniacal display. As precise as his riffs might be, his playing doesn’t stay strictly on the grid. On the slow, skulking “Armistice Day,” his percussive chording goes off the rails, giving way to a solo that slices that groove like a chef’s knife through warm butter as he reorganizes rock ’n’ roll histrionics into his own cut-up vocabulary.
“During recording sessions, his first solo takes are usually what we decide to keep,” explains Allen. “Listen to Duane’s guitar solos on Jack White’s ‘Morning, Noon, and Night,’ Tomahawk’s ‘Fatback,’ and ‘Grind’ off Rack. There’s a common ‘contained chaos’ thread among them that sounds like a harmonic Rubik’s cube that could only be solved by Duane.”
“Duane’s approach, both as a guitarist and writer, has an angular and menacing fingerprint that is his own unique style.” —Rack producer Paul Allen
To encapsulate just the right amount of intensity, “I don’t over practice everything,” the guitarist says. Instead, once he’s created a part, “I set it aside and don’t wear it out.” On Rack, it’s obvious not a single kilowatt of musical energy was lost in the rehearsal process.
Denison issues his noisy masterclass with assertive, overdriven tones supporting his dissonant voicings like barbed wire on top of an electric fence. The occasional application of slapback delay adds a threatening aura to his exacting riffage. His tones were just as carefully crafted as the parts he plays, and he relied mostly on his signature Electrical Guitar Company Chessie for the sessions, though a Fender Uptown Strat also appears, as well as a Taylor T5Z, which he chose for its “cleaner, hyper-articulated sound” on “Swan the Dog.” Though he’s been spotted at recent Jesus Lizard shows with a brand-new Powers Electric—he points out he played a demo model and says, “I just couldn’t let go of it,” so he ordered his own—that wasn’t until tracking was complete.
Duane Denison's Gear
Denison wields his Powers Electric at the Blue Room in Nashville last June.
Photo by Doug Coombe
Guitars
- Electrical Guitar Company Chessie
- Fender Uptown Strat
- Taylor T5Z
- Gibson ES-135
- Powers Electric
Amps
- Hiwatt Little J
- Hiwatt 2x12 cab with Fane F75 speakers
- Fender Super-Sonic combo
- Early ’60s Fender Bassman
- Marshall 1987X Plexi Reissue
- Victory Super Sheriff head
- Blackstar HT Stage 60—2 combos in stereo with Celestion Neo Creamback speakers and Mullard tubes
Effects
- Line 6 Helix
- Mantic Flex Pro
- TC Electronic G-Force
- Menatone Red Snapper
Strings and Picks
- Stringjoy Orbiters .0105 and .011 sets
- Dunlop celluloid white medium
- Sun Studios yellow picks
He ran through various amps—Marshalls, a Fender Bassman, two Fender Super-Sonic combos, and a Hiwatt Little J—at Audio Eagle. Live, if he’s not on backline gear, you’ll catch him mostly using 60-watt Blackstar HT Stage 60s loaded with Celestion Neo Creambacks. And while some boxes were stomped, he got most of his effects from a Line 6 Helix. “All of those sounds [in the Helix] are modeled on analog sounds, and you can tweak them endlessly,” he explains. “It’s just so practical and easy.”
The tools have only changed slightly since the band’s earlier days, when he favored Travis Beans and Hiwatts. Though he’s started to prefer higher gain sounds, Allen points out that “his guitar sound has always had teeth with a slightly bright sheen, and still does.”
“Honestly, I don’t think my tone has changed much over the past 30-something years,” Denison says. “I tend to favor a brighter, sharper sound with articulation. Someone sent me a video I had never seen of myself playing in the ’80s. I had a band called Cargo Cult in Austin, Texas. What struck me about it is it didn’t sound terribly different than what I sound like right now as far as the guitar sound and the approach. I don’t know what that tells you—I’m consistent?”
YouTube It
The Jesus Lizard take off at Nashville’s Blue Room this past June with “Hide & Seek” from Rack.
Beetronics FX Tuna Fuzz pedal offers vintage-style fuzz in a quirky tuna can enclosure.
With a single "Stinker" knob for volume control and adjustable fuzz gain from your guitar's volume knob, this pedal is both unique and versatile.
"The unique tuna can format embodies the creative spirit that has always been the heart of Beetronics, but don’t let the unusual package fool you: the Tuna Fuzz is a serious pedal with great tone. It offers a preset level of vintage-style fuzz in a super simple single-knob format. Its “Stinker” knob controls the amount of volume boost. You can control the amount of fuzz with your guitar’s volume knob, and the Tuna Fuzz cleans up amazingly well when you roll back the volume on your guitar. To top it off, Beetronics has added a cool Tunabee design on the PCB, visible through the plastic back cover."
The Tuna Fuzz draws inspiration from Beetronics founder Filipe's early days of tinkering, when limitedfunds led him to repurpose tuna cans as pedal enclosures. Filipe even shared his ingenuity by teachingclasses in Brazil, showing kids how to build pedals using these unconventional housings. Although Filipe eventually stopped making pedals with tuna cans, the early units were a hit on social media whenever photos were posted.
Tuna Fuzz features include:
- Single knob control – “Stinker” – for controlling output volume
- Preset fuzz gain, adjustable from your guitar’s volume knob
- 9-volt DC operation using standard external power supply – no battery compartment
- True bypass switching
One of the goals of this project was to offer an affordable price so that everyone could own a Beetronicspedal. For that reason, the pedal will be sold exclusively on beetronicsfx.com for a sweet $99.99.
For more information, please visit beetronicsfx.com.
What are Sadler’s favorite Oasis jams? And if he ever shares a bill with Oasis and they ask him onstage, what song does he want to join in on?
Once the news of the Oasis reunion got out, Sadler Vaden hit YouTube hard on the tour bus, driving his bandmates crazy. The Jason Isbell and the 400 Unit guitarist has been a Noel Gallagher mega-fan since he was a teenager, so he joined us to wax poetic about Oasis’ hooks, Noel’s guitar sound, and the band’s symphonic melodies. What are Sadler’s favorite Oasis jams? And if he ever shares a bill with Oasis and they ask him onstage, what song does he want to join in on?
Check out the Epiphone Noel Gallagher Riviera Dark Wine Red at epiphone.com
EBS introduces the Solder-Free Flat Patch Cable Kit, featuring dual anchor screws for secure fastening and reliable audio signal.
EBS is proud to announce its adjustable flat patch cable kit. It's solder-free and leverages a unique design that solves common problems with connection reliability thanks to its dual anchor screws and its flat cable design. These two anchor screws are specially designed to create a secure fastening in the exterior coating of the rectangular flat cable. This helps prevent slipping and provides a reliable audio signal and a neat pedal board and also provide unparalleled grounding.
The EBS Solder-Free Flat Patch Cable is designed to be easy to assemble. Use the included Allen Key to tighten the screws and the cutter to cut the cable in desired lengths to ensure consistent quality and easy assembling.
The EBS Solder-Free Flat Patch Cable Kit comes in two sizes. Either 10 connector housings with 2,5 m (8.2 ft) cable or 6 connectors housings with 1,5 m (4.92 ft) cable. Tools included.
Use the EBS Solder-free Flat Patch Cable Kit to make cables to wire your entire pedalboard or to create custom-length cables to use in combination with any of the EBS soldered Flat Patch Cables.
Estimated Price:
MAP Solder-free Flat Patch Cable Kit 6 pcs: $ 59,99
MAP Solder-free Flat Patch Cable Kit 10 pcs: $ 79,99
MSRP Solder-free Flat Patch Cable Kit 6 pcs: 44,95 €
MSRP Solder-free Flat Patch Cable Kit 10 pcs: 64,95 €
For more information, please visit ebssweden.com.