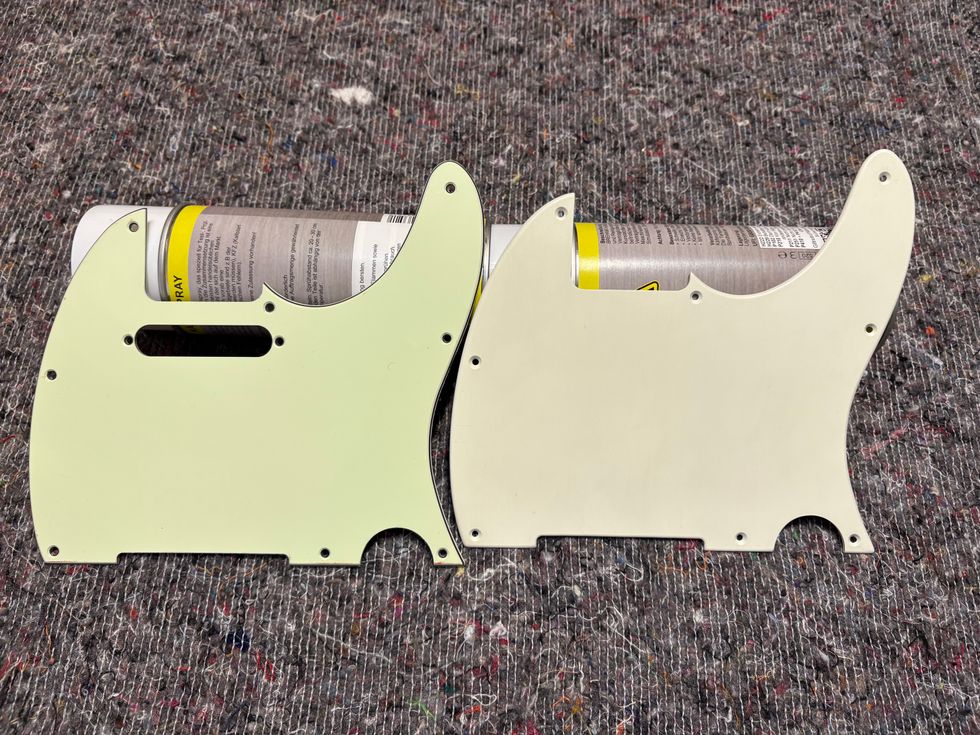
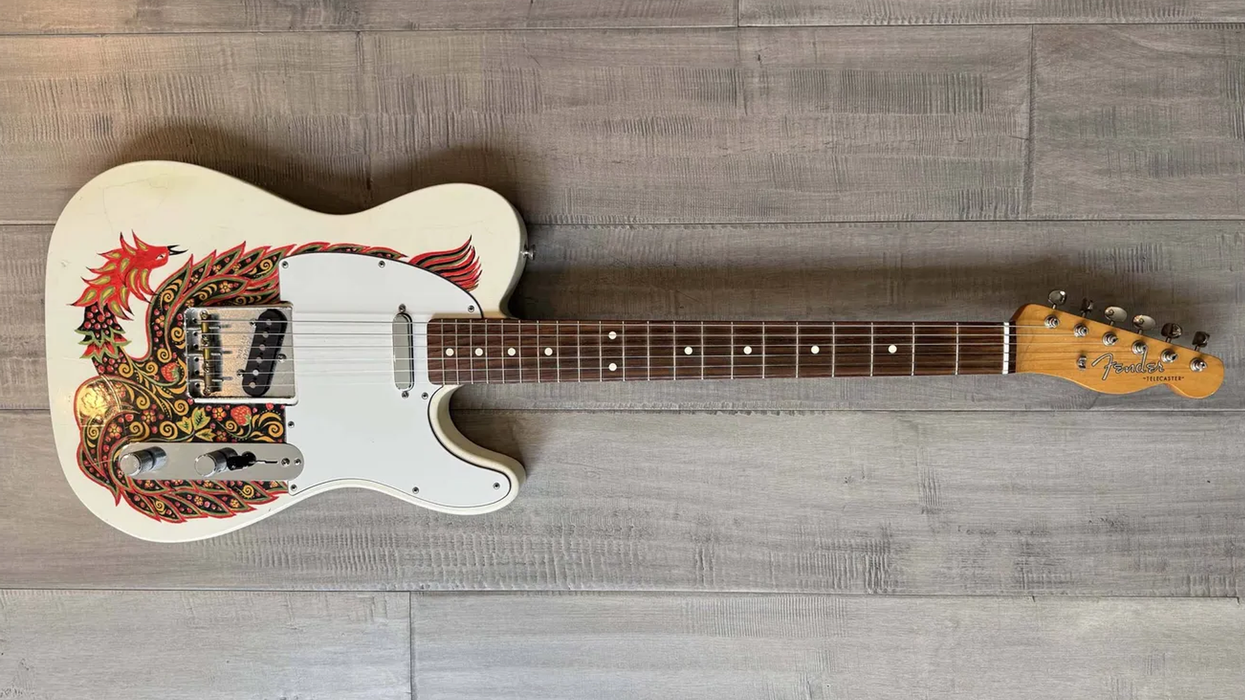
Make your life on the workbench easier with a couple inexpensive gizmos.
Hello and welcome back to Mod Garage. In this column, we will have a deeper look at servicing a Stratocaster and some hacks from the shop to make this task much easier and faster.
In general, Leo Fender’s credo was that “the design of each element should be thought out in order to be easy to make and easy to repair.” His approach was to build high-quality instruments while maintaining low manufacturing costs with mass production. When thinking about the design of the Stratocaster, there are at least two elements where one can have some doubts about the easy-to-repair approach, at least from today’s perspective: pickguards you can’t take off without removing the strings and truss rods you can’t access without removing the pickguard.
Within the historical context of Leo Fender’s time, I think he would say that he did everything right. Right from the start, the Fender company cared a lot about setting up their guitars before they were shipped out. The setup was meant to be set-it-and-forget-it, so truss rod access was not very important—accessing it from the neck heel was the design following function.
I’m not sure if this was really easier to build this way compared to accessing it from the headstock, but it was the method that offered better headstock stability and longevity. Nine out of 10 Stratocaster headstock repairs I see in the shop are guitars with truss-rod access from the headstock. Because of its design, this is a weak spot in the wood, so drilling a hole to access the truss rod will weaken it more. In old Fender papers I found an interesting bulletin that the neck was never meant to be repaired or refretted. Instead, a customer was simply meant to change the complete bolt-on neck.
Back in the ’50s, things like replacement pickups, mods, push-pull pots, multi-stage pickup switches, and the like were not yet invented, so there was no need to design the Stratocaster pickguard for easy access. It would only have to be removed for a serious repair, which shouldn’t have happened very often.
Times have changed noticeably, and today it is usual to perform a setup regularly to compensate for changing weather conditions, different string gauges, and so on. And trying new pickups, tone caps, mods, etc. is a kind of popular sport among most guitarists—set-it-and-forget-it was forgotten long ago!
“Back in the ’50s, things like replacement pickups, mods, push-pull pots, multi-stage pickup switches, and the like were not yet invented, so there was no need to design the Stratocaster pickguard for easy access.”
The design of the Stratocaster hasn’t changed much since the mid ’50s. Of course, standard procedure is now to have truss-rod access from the headstock, so at least the setup thing is finally solved. But Stratocasters with access to the pickguard from behind is something that would make a lot of things much simpler. Let’s see what can be done to make things easier and, of course, faster when you do have to remove your guitar’s neck or loosen the strings to get to the pickguard.
The gold standard way of servicing a Stratocaster is to remove the old strings so you have full access to the pickguard. This is especially perfect when you want to do some work under the hood of the pickguard like changing a pot, pickup, or any other electronics work. You can test everything before you put on the new strings and there is no additional work to consider. For setups this is a great starting point—you can roughly pre-adjust the neck to your preferences, but for the final setup, there is no way around putting on the new set of strings. Here are two of my favorite hacks in the shop to save some time and nerves.
The IKEA Hack
You all know these plastic kitchen sealing clips for resealing opened bags and packages. I like the IKEA model because they’re super sturdy, well-made, and will last a very long time. Take one of these clips—we will need the large version—open it, and cut six small grooves in it using a round needle file or any other similar tool for this. Try to come close to the string spacing behind the nut with your grooves. I usually take a black sharpie to mark the spacing on the plastic clip before using the file.
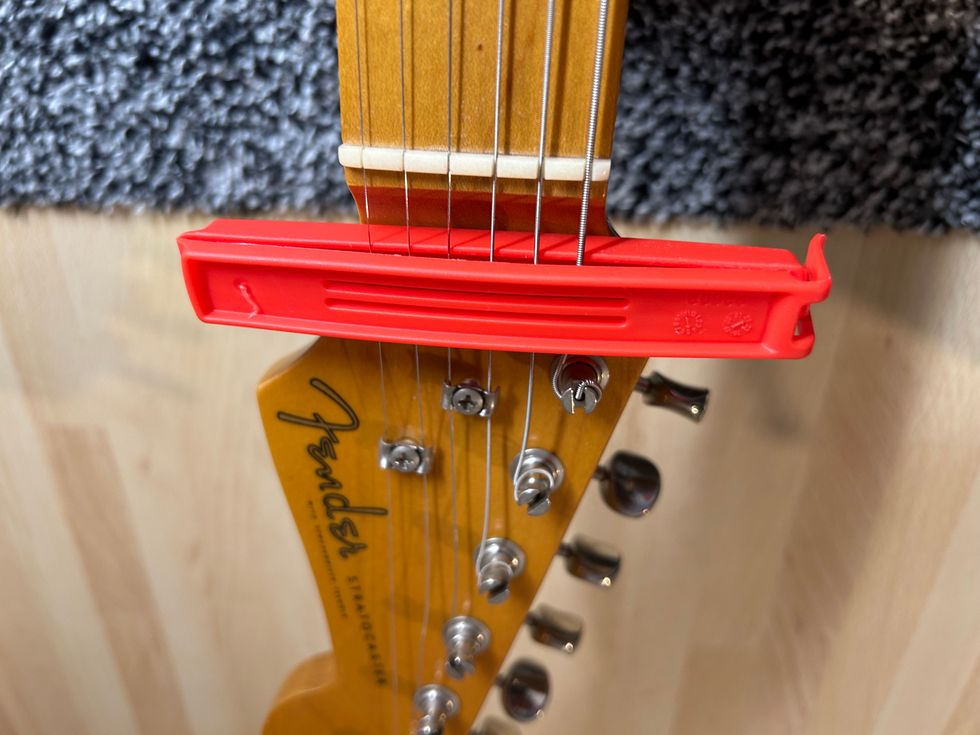
Photo courtesy of SINGLECOIL
After you’re finished, loosen the strings but don’t take them out of the tuner posts. Slide the opened clip under the strings behind the nut, put each string in one of the grooves, and close the clip. Now, you can pull the strings out of their posts and put them aside to have full access to the pickguard and the neck-heel truss rod. Because the modified clip will hold the strings in place, they will not tangle up into a bird’s nest of strings. For vintage-Kluson-style tuners or locking tuners, it can be very easy to pull the strings out of the posts and back in. For other types, you’ll need a little bit more patience to get the strings back in place, but it’s worth the effort.
The Old-Style Capo Hack
My first capo that I got when I was around 10 years old or so is still alive and employed in my shop. It’s a Dunlop 11C toggle-action capo that is still in production, and I bet a lot of you started with this capo, too. I use the curved version that my parents bought by accident for my classical guitar because they didn’t know about flat and curved fretboards. This one works great on all electric guitars.
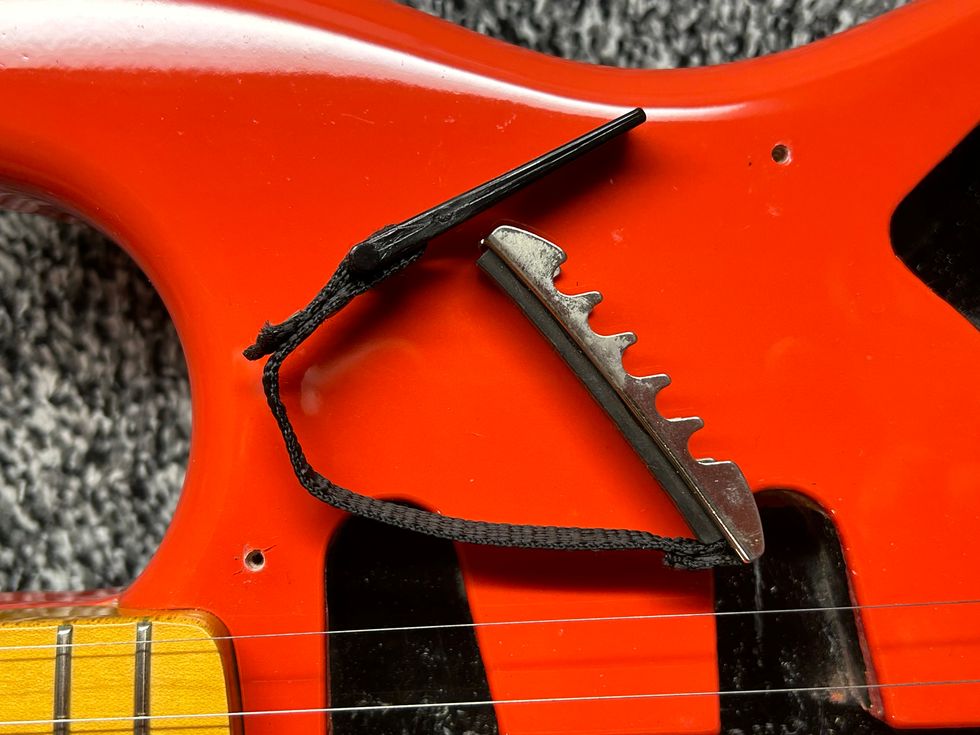
Photo courtesy of SINGLECOIL
Loosen all the strings slightly so they will not slip out of their posts. Put the capo on the first fret and close it. The strings can no longer slip out of the nut, the string trees, and the posts of the tuners.
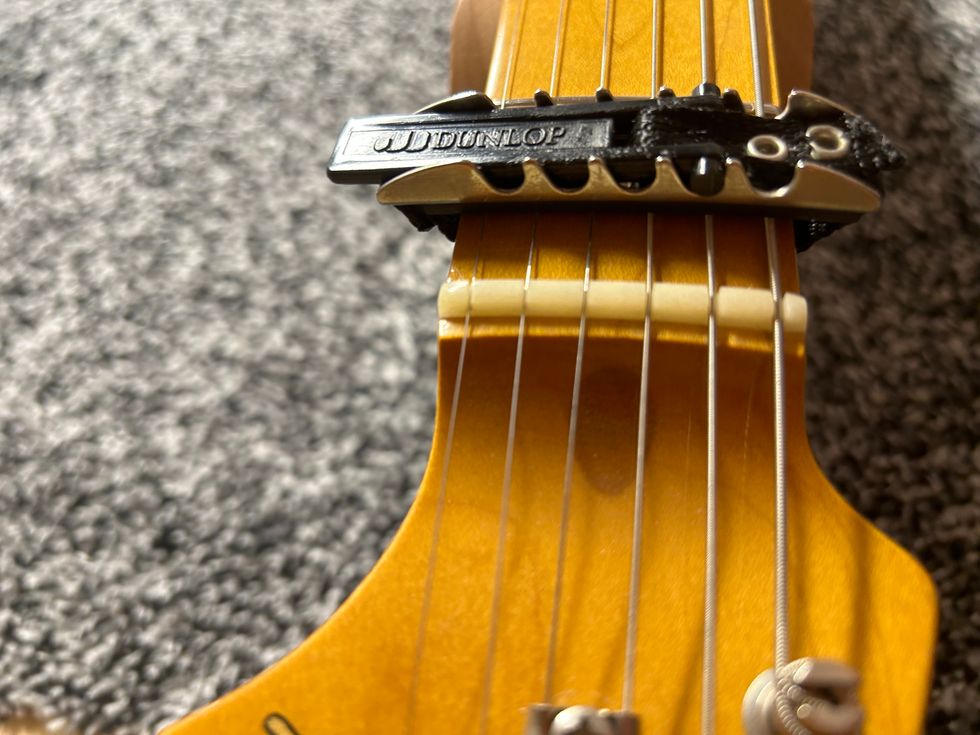
Photo courtesy of SINGLECOIL
Now, when you remove the neck, the capo will hold the strings in place. Putting the neck back on will be very easy: Fasten the screws, take off the capo, and tune the strings to pitch.
You see, there are at least two alternative ways to avoid changing the strings, especially if they are as good as new with only a few playing hours upon them. Often, little gizmos make a big difference.
Next month we will dive down into Epiphone history and see what they electronically cooked up in the mid ’60s, so stay tuned.
Until then ... keep modding!
- Fender Acoustasonic Telecaster Electric Guitar Review ›
- Reader Guitar of the Month: Sundial Fender Stratocaster ›
- Trash or Treasure: Fender Tex-Mex Stratocaster ›
Advanced
Intermediate
- Learn how to incorporate open strings all the way up the fretboard.
- Build velocity in your playing without practicing speed exercises.
- Discover an easy way to steal licks from the pros using YouTube.
It’s universally known in the guitar community that Brad Paisley isn’t just some guy that strums a guitar and sings country songs. He’s widely respected as one of the best players in the country music scene and takes an unusual approach to achieve the sonic insanity that spills out of his guitar. From Telecasters, G-benders, and cranked Dr. Z amps to instrumental records and wild guitar solos getting mainstream country radio airtime, Paisley has solidified his place in the discussion of all-time greats, and not just in the country world. In this lesson, we’ll dive into one of the cornerstones of Brad’s playing that makes him so unique: open strings.
A couple of prefaces:
Most of the licks in this lesson are exponentially easier when hybrid picked.
And in case you didn’t know, YouTube allows you to alter the speed of videos. This is a massive tool to take advantage of when learning licks, practicing them, and getting them up to speed. Simply click the Settings button in the bottom right corner of the video player and select Playback Speed. This will allow you to speed up or slow down the video to your liking without any changes to pitch. Transients will become an issue the farther away from the original speed you go, but not enough to keep you from slowing a solo down 50 percent to really learn and nail the nuances.
We’ll start by just dipping a toe in the water for Ex. 1, looking at a small part of the solo from Brad’s song “Ticks.” This section is found at the 3:06 mark of the video below. Brad really likes to use open strings to provide color to licks, usually with the note falling outside of the established scale. This little nugget is entirely in the E major scale (E–F#–G#–A–B–C#–D#) with exception of the open 3rd string. The use of the open string throws a b3 into the mix, while making it feel faster with little added effort. If you were to play this lick at half speed, the open G string does not sound great—but that’s the whole idea behind what Brad is able to do with open string licks. At tempo, the open string sounds like a natural inflection and the lick has more velocity than if it were omitted.
Ex. 1
Ticks
In Ex. 2 we’re still looking at the “Ticks” solo but focusing on the back half. This entire section of the solo is a smorgasbord of open strings. The first phrase uses sliding and open strings to create an almost bouncy and circus feel. The use of the open G string allows Brad to travel up the fretboard with some very interesting flair. Then he uses the open 1st string in measure 2 to create momentum again, but in this instance, the open-string pull-offs fall inside the E major scale rather than acting as color tones. It’s much easier to connect this section of the lick to the previous by using the third finger to execute the bend and the fourth finger to start the new descending phrase. Lastly, Brad takes the solo home with a simple descending three-note-per-string pull-off lick that combines inside and outside notes.
Ex. 2
If you’ve ever listened to Paisley’s “Time Warp,” you know that it’s a gold mine of licks to steal. In Ex. 3, I’m focusing on a lick Brad plays on the “Live on Letterman” version, which occurs after the piano solo at the 1:23 mark in the video below. It’s worth noting that this is not the same line featured on the album version from Time Well Wasted. This lick is a perfect example of how Brad uses open strings to create velocity and really get going downhill at breakneck speeds. The lick is not overly complicated, but it is extremely fast, especially if you are new to hybrid picking. I’m playing it at roughly 75 percent speed so that the notes are intelligible and not just a blur. The lick is mostly based in the A Aeolian mode (A–B–C–D–E–F–G), with flatted second being the exception.
Ex. 3
Brad Paisley - Time Warp (Live on Letterman)
In this example (Ex. 4), we tackle a fantastic phrase from the solo to “Water.” The lick I’m breaking down falls around the 1:43 mark in the YouTube video. What’s so interesting is that while the song is in F major, Brad utilizes the open A, D, and G strings to navigate the fretboard vertically and create energy. My favorite thing about the descending pull-off section of this lick is that it’s a tame bluegrass-style lick in G, but it’s the placement of the lick over the chord changes that makes it sound interesting.
Ex. 4
Brad Paisley - Water
Ex. 5 is where things get really exciting. It’s from a live performance of “Water” during the 2010 ACM awards. At the 3:40 mark Brad uses an open-string lick to build tension and work his way up the fretboard that caught my attention. As before, it sounds monstrous at tempo but really doesn’t make a ton of sense when slowed down. It’s a fairly simple pull-off lick that isn’t too difficult if you’re already used to hybrid picking, but it creates a ton of movement and excitement when sped up. I’m guilty of stealing both this lick and the idea behind it for “wow” moments in solos.
Ex. 5
Brad Paisley - Water (live ACM Awards 2010)
It’s undeniable how freakishly good of a guitar player Brad Paisley is (try grabbing some of the monster licks from the outro of “Water”). Because of how many tricks he has up his sleeve, he’s nearly impossible to replicate, but that doesn’t mean there isn’t something that everyone can take from Paisley’s bag of tricks. Use this concept of using open strings in unconventional places to add spice, speed, and mystique to your playing.
The Tone King Imperial Preamp Pedal delivers legendary vintage American tube tone with modern control. Featuring two channels mirroring '50s tweed and '60s blackface tones, built-in zero watt poweramp, stereo convolution spring reverb and tremolo, and low-latency impulse response technology. MIDI programmable with up to 128 presets for instant recall.
The Imperial All-Tube Preamp pedal delivers Tone King’s legendary MKII amplifier's '50s tweed, '60s blackface, and vintage British rock tones in a compact, pedalboard-friendly format. It features the exact preamp section and phase inverter circuitry of the Imperial MKII amp, as well as Reverb, Tremolo and Attenuation, resulting in a pedal that sings with harmonic richness and blooming touch response. Powered by three 12AX7 preamp tubes running at high voltage, this preamp delivers the amp's sound, responsiveness, and exquisite interaction with your pickups and effects. The onboard, low-latency impulse response (IR) loader (per channel), Headphones, easy integration and expansion with your existing gear, and MIDI capabilities, takes these iconic tones into the new era of guitar playing.
Legendary Vintage Tube Amp Tones
The Imperial Preamp Pedal features two distinct channels, each mirroring the '50s and '60s flavors of the Imperial MKII.
- The Rhythm Channel evokes the essence of a classic '60s blackface combo's pristine cleans with a touch-sensitive response that transitions smoothly into overdrive.
- The Lead Channel is inspired by the iconic tweed amps of the '50s’ with the ability to glide between warm articulate cleans and aggressive midrange bark. This channel's Mid-Bite control adds a further layer of tone shaping, focusing the low-end, while adding high-end presence and gain for a British-flavored rock crunch.
Built-In Zero Watt Poweramp - Phase Inverter
The Imperial Pre-Amp Pedal includes the exact phase inverter circuitry of the actual Imperial MKII amp, utilizing one of its three 12AX7 tubes. This built-in “0 watt poweramp” authentically provides the harmonic and dynamic content of the Tone King poweramp section. This revolutionary design is the cornerstone that delivers the ENTIRE Imperial MKII experience right on your pedal board.
Stereo Convolution Spring Reverb & Stereo Tremolo
Like its namesake amp, the Imperial Preamp boasts foot-switchable spring reverb and tremolo (digital on the preamp pedal) which are assignable to each channel. A signature of the Tone King Imperial MKII tube amplifier, these era-correct effects add dimension and movement while transporting you to a golden age of electric guitar tone.
Impulse Response (IR) Cabinet & Power Amp Sim
The Imperial Preamp pedal's low latency IR and power amp simulation technology delivers its tube tones directly to the front of house or your interface. That’s especially evident in the 15 included OwnHammer-made IRs. Each channel has three of our favorites, preloaded, and selectable via dual 3-way toggle switches.
OH 112 Imperial TK1660: Tone King 1660 speaker in a Tone King Imperial 1x12 combo. Captured using a Shure SM57, a Neumann U87, and a Royer 121 through '70s API 312 preamps.
OH 212 Class A Blue: Celestion Blues from 1963 in a Vox AC30 2x12 combo. Captured using a Shure SM57, a Neumann U87, and a Royer 121 through '70s API 312 preamps.
OH 412 Basketweave M25: Celestion G12M-25 speakers from 1971 in a basket-weave 1960B 4x12 cabinet. Captured using a Shure SM57, Telefunken MD421, and Royer 121.
There are 12 additional IRs to choose from in the included Tone King Editor software (powered by Synergy) which are easy to swap in and out of the pedal's six available slots. You can also disengage the onboard IR loader entirely to use the preamp with an external IR loader or powered cabinet.
Tone King Editor Software
You can assign the Reverb, Tremolo and IR to each of the channels right on the pedal itself, making it a powerful and easy-to-use sonic tool. Tone King offers an Editor software, powered by Synergy, which takes the Pre-Amp's capabilities to another level, allowing you to fine-tune all of the preamp's digitally controlled parameters and save them in up to 128 MIDI presets
- Control the independent power amp simulation HF Comp and Low-Pass filters
- Access all 15 included OwnHammer IRs• Easily load your own IRs and manage your IR library
- Assign any of your IRs to the pedal's six available slots (three per channel)• Control your reverb, reverb tails, tremolo and effects loop bypass settings• Save these settings to up to 128 presets for instant recall via MIDI
The Tone King Editor software also unlocks all of the Imperial Preamp's modern control. Fully MIDI-capable, you can save your presets and access them instantly with a MIDI pedalboard controller or the laptop running your entire show. It is the perfect marriage of modern control and classic tube tone.
Expanding Your Rig's Capabilities
The Imperial Preamp Pedal is the perfect DI recording and performing solution. But that's just scratching the surface.
Add Channels to Your Current Guitar Amplifier
A standout feature of the Imperial preamp pedal is its ability to easily integrate with your existing amplifiers (must have a series effects loop). A straightforward 3-cable connection is all it takes, and you can instantly alternate between the Imperial Preamp as your amp's front end or your amp's preamp channels.
Networking with Other Effects-Loop-Equipped Preamp Pedals
Create the ultimate pedalboard-based rig with other preamp pedals (with effects loops). Using the same 3-cable method, you get both Imperial channels, your other preamp’s tones, the Imperial's stereo effects loop, and its onboard IRs. Additionally, you can assign the Imperial's spring reverb and tremolo effects to your other preamp channels.
Classic American Tube Tone for Every Stage & Studio
Whether you're a gigging musician, a recording artist, or simply a tone enthusiast, the Tone King Imperial Preamp pedal offers endless possibilities. Use it as a standalone preamp for recording or for silent stages and practice, add its two channels to your existing amplifier, pair it with a power amp and cabinet to move some air, or combine it with other preamp pedals for an even wider range of pedalboard-based tones.
Tone King Imperial Preamp Pedal is the ultimate marriage of legendary, vintage American tube tone and modern control.
For more information, please visit toneking.com
Features
- Two Channel High-Voltage preamp – DI
- 3 x 12AX7 preamp tubes running at proper high voltages
- Built-In zero watt poweramp - phase inverter circuit
- Two channels with independent Volume and Attenuation controls
- Rhythm Channel (top)
- '60s-era American blackface combo tone
- Bass and Treble controls
- Lead Channel (Bottom)
- '50s-era American tweed combo and British rock tones
- Tone and Mid-Bite controls
- Spring Reverb (convolution)
- Reverb and Dwell controls
- Independently assignable to each channel
- Tremolo (digital)
- Depth and Speed controls
- Independently assignable to each channel
- Stereo, Series FX loop (bypassable)
- MIDI programmable
- Save up to 128 presets for instant recall via an external MIDI switcher
- Presets save:
- Channel selection
- Master bypass settingo IR selection
- IR bypass setting
- Effects loop bypass setting
- Reverb bypass and tails settings
- Tremolo bypass settings
- Onboard Impulse Response (IR) Technology
- Low-latency Impulse Response cabinet simulation (bypassable)
- 3-position CAB/IR select switch per channel (programmable via software)
- Included OwnHammer IRs
- Poweramp simulation with software editable HF Comp and Low-Pass filters (per channel)
- Connections:
- Dual stereo balanced XLR outputs with Ground Lift Switch
- ¼" Headphone output
- Effects Send and Stereo Return Jacks
- MIDI 5-pin standard connector
- USB-C connector for use with the included Tone King Editor software editor
- To Amp In, From Amp Send and From Amp Return Jacks – for adding Imperial channels to your amp or preamp
- Included
- 6’ USB Cable
- Universal 12V Power Supply
- Dimensions: 7.2” (W) x 5.7” (D) x 2.75” (H)
- Weight: 1.9 lbs.
With a bit of downtime back in Nashville, co-shredders-in-chief Megan and Rebecca Lovell joined Shred With Shifty to deconstruct their face-melting leads on “Summertime Sunset,” off of their 2022 record Blood Harmony.
The Georgia-born, Nashville-based roots-rock outfit Larkin Poe have had a busy year. Last summer, they toured across the U.S. supporting Slash, and released their seventh studio album, Bloom, on January 22. With a bit of downtime back in Nashville, co-shredders-in-chief Megan and Rebecca Lovell joined Shred With Shifty to deconstruct their face-melting leads on “Summertime Sunset,” off of their 2022 record Blood Harmony.
The Lovells grew up reading sheet music and learning violin via the Suzuki method—there was little room for going off the beaten path until they fell in love with Jerry Douglas’ dobro playing on Alison Krauss records. Rebecca took up the mandolin, while Megan went for the dobro and the slide side of things. It took a while for them to get comfortable turning up from their bluegrass roots, but eventually they built Larkin Poe’s amplified, blues-rock sound.
First up, Rebecca, playing a pristine ’60s SG, shows how she put together her stinging, fuzzy solo by “hunting and pecking out” melodies in her mind, building up the chops to follow her intuition. Then Megan, playing a Rickenbacker-inspired lap steel of her own design through a Rodenberg TB Drive, details her dizzyingly fast slide acrobatics, and her particular “rake” technique that she copped from Jerry Douglas and Derek Trucks.
Tune in to hear them talk about how to sustain family relationships while going professional, keeping music community-minded, and whether or not they’ll go back to bluegrass.
If you’re able to help, here are some charities aimed at assisting musicians affected by the fires in L.A:
https://guitarcenterfoundation.org
https://www.cciarts.org/relief.html
https://www.musiciansfoundation.org
https://fireaidla.org
https://www.musicares.org
https://www.sweetrelief.org
Credits
Producer: Jason Shadrick
Executive Producers: Brady Sadler and Jake Brennan for Double Elvis
Engineering Support by Matt Tahaney and Matt Beaudion
Video Editor: Addison Sauvan
Graphic Design: Megan Pralle
Special thanks to Chris Peterson, Greg Nacron, and the entire Volume.com crew.
An ’80s legend returns in a modern stompbox that lives up to the hype.
A well-designed recreation of one of the most classic tone tools of the ’80s. Sounds exactly like the tones you know from the original. Looks very cool.
If you don’t like ’80s sounds, this isn’t for you.
$229
MXR Rockman X100
Was Tom Scholz’s Rockman the high-water mark of guitar-tone convenience? The very fact that this headphone amp, intended primarily as a consumer-grade practice tool, ended up on some of the biggest rock records of the ’80s definitely makes a case. And much like Sony’s Walkman revolutionized the personal listening experience, it’s easy to argue the Rockman line of headphone amps did the same for guitarists.
MXR Rockman X100 Recreates Tom Scholz's Iconic Boston Guitar Sound | First Look
But just as decades of advances in listening technology make the Walkman now seem clunky and dated, modern guitar tech makes the Rockman look like old news. Multi-effects units, modelers, and portable interfaces all surpass the convenience of the Rockman in form factor as well as in sheer number of sonic options. But while there are any number of ways to dial up an ’80s-style guitar tone these days, nothing’s better than the real thing. The Rockman’s analog tones are still as legit as it gets. Though Dunlop continues to produce the Guitar Ace, Metal Ace, and Bass Ace headphone amps (for a cool $99 street), a pedal version with the functionality of the original would be the ultimate modern package for ’80s fetishists, right? Enter the MXR Rockman X100.
With Tones Like These, Who Needs Options
After the release of the original Rockman, Scholz continued to develop the product, spawning a whole line. But for its pedal resurrection, the MXR team set their sights on the Rockman X100, which used hard-clipping LED diodes for its two distorted settings. The new stompbox version recreates all four modes from the original: cln2 is the default setting, cln1 in the second position is EQ’d with a mid-boost, edge delivers moderate clipping, and dist is high-gain. All are switchable via a small LED-lit mode button, and a control input allows for external mode switching. Another button activates an analog chorus circuit using MN3007 bucket brigade chips, as in the original.
To drive home the ’80s aesthetic, MXR used sliders for volume and input gain controls. Volume determines output, while input gain is tied to compression. Higher input gain means more compression, which is tuned for slower release on the two clean modes, and a fast release on both dirty modes. The X100 works in both mono and stereo, but to change between them, you have to pop off the back to access an internal switch. Just make sure a TRS cable is used for stereo mode, or else the output will be muted while the pedal is bypassed.
The only things I noticed that are missing from the original’s simple set of features is the headphone output and the echo settings. I don’t know how many players would find value in the headphone jack, and considering that would add circuitry, it’s probably best for cost and space savings that it was excluded. As for the echo, you can argue that it’s canon, but I find it to be the least essential feature and don’t miss it, personally.
(Much) More Than a Feeling
Since I do not have an original Scholz X100 sitting on my desk, I’m using YouTube videos and records—Def Leppard’s Hysteria, Huey Lewis and the News’ Sports, and Joe Satriani’s Surfing with the Alien, for example—as my reference points. Those are high bars to clear, and the MXR gets there.
The default cln2 setting delivers instant gratification, with a full-bodied, sparkly tone, no matter what guitar I played through it. And though it provides loads of ’80s fun, it’s much more versatile than that, offering a great all-round clean tone that requires no additional processing. Though it might seem odd that cln2 is the default, switching to cln1’s thinner, more mid-focused sound makes the design decision clear. I can imagine situations where I’d need to cut through a mix and cln1 would be preferred, but I found myself sticking with the default mode for all my clean needs.
The distorted modes are differentiated mostly by how much gain they offer. Edge tones live just beyond the point of overdrive, and the input gain control adds a range of extra texture. The dist mode is full-on, pick-squeal-inducing high-gain saturation, with loads of everlasting sustain. These modes lean into the aesthetic much harder than the clean modes, making it a less versatile tool, but for ’80s rock excess, I can’t imagine a better option.
On a couple recording sessions, I plugged the X100 right into an interface and board to deliver spanky direct clean tones as well as tight, saturated distortion. In doing so, I discovered that direct recording is my preferred use for the X100. That’s not to say it doesn’t sound great through an amp—it does. But plugging into a front end of an amp yields less classic and authentic Rockman sounds, as the amplifier’s preamp colors the tone. Plugged through a few Fenders, I found that the treble needed taming, a problem I didn’t have when forgoing the amp. For live playing, I might explore plugging the X100 into the return input on an amp’s effects loop or right into a powered speaker to deliver an unadulterated Rockman sound more in line with the original.
The Verdict
MXR nailed it with the Rockman X100 pedal by focusing on the limited options of the original unit and getting them just right. For $229, you not only get a great ’80s rock tone, you get what is arguably the ’80s rock tone, with no other gear required, unless you want to add a little ’80s-vintage reverb too. As a performance tool, it’s probably best to think less like you’re using a pedal and more like you’re using the original in a different form, which is to say that plugging straight into an amp isn’t the only way to get the sound you want—and, in fact, it’s probably not even the best way. For recording, it’s a perfect tool. PG