The Acoustasonic Tele produces solid electric, acoustic, and mixed tones for the gigging musician.
Guitarists are a finicky bunch. We argue endlessly about
things like solid-state versus tube amps, digital modeling
versus actual tubes, true-bypass pedals versus not, and
directional cables versus standard models, etc. The list
goes on and on. Most of the aforementioned clashes take
place between electric guitarists, but acoustic players certainly
have their sticky points, too. One thing they’ll usually
agree on is a skepticism about modeling in any form.
Download Example 1 Image 1, fast fingerpicking | |
Download Example 2 Image 2 combined with neck pickup, low chord work | |
Download Example 3 Image 4, slight reverb added | |
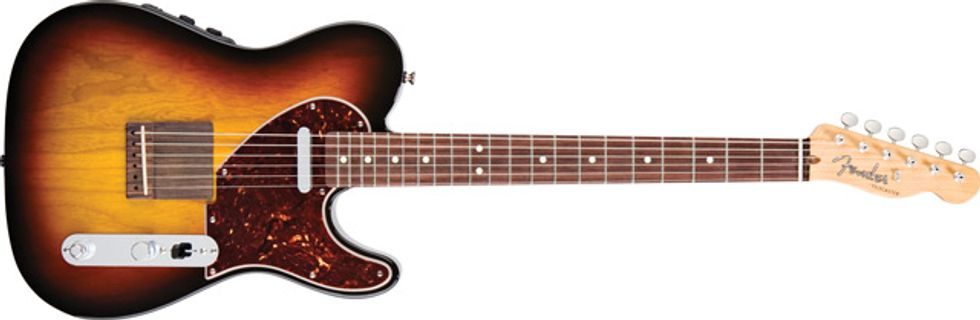
So, as the old saying goes, if you can’t beat ’em, join ’em. At least that’s what Fender seems to be saying with their new Fender Acoustasonic Telecaster. Only in this case, Fender is literally joining the two ideas together. The Acoustasonic combines several acoustic and electric traits, with the intent of delivering convincing acoustic and electric tones that you can use either individually or together.
Split Personality
My first impression after picking up the Acoustasonic Tele was that it’s very light, despite being made of ash—which tends to be a weightier tone wood. Fender has chambered the body and inserted a center block made of spruce, which lightens the load. Spruce is, of course, perhaps the preeminent tonewood for acoustic guitar tops. It’s rather lightweight and has powerful projection qualities. The sunburst-finished body is topped with a rosewood bridge shaped roughly like a Tele’s standard bridge assembly. Taking sustain issues into consideration, Fender designed the body and bridge combination to take advantage of a string-through setup. The 21-fret maple neck has a modern C shape and is capped with a rosewood fretboard that has a nice, deep hue.
A Fishman undersaddle piezo pickup is embedded underneath the compensated plastic saddle, and it’s controlled by a Fishman Aura preamp. Like a standard acoustic- electric, the preamp controls—Volume and Tone knobs and a four-way Image switch—are conveniently located on the upper bout. The guitar’s top features a three-position selector, a master volume knob, and a concentric knob that controls the magnetic neck pickup’s tone and volume. In its leftmost position, the selector switch activates the neck pickup only, in its rightmost position it activates the piezo and Aura preamp, and in the middle it’s both. The battery compartment around back has a small DIP switch to flip between mono and stereo output, which means you can use a standard cable to route acoustic and electric tones through one amp, or use the included Y-cable to send the Aura tones to an acoustic amp (or a PA) and the neck pickup tones to a dedicated electric amp.
Traditional Tele neck-pickup tones can be found by flipping to the neck pickup, which is a Fender Twisted Tele model. According to the company, this pickup was designed to address common complaints regarding conventional Telecaster neck pickups, which sometimes sound weaker than the typical Tele bridge pickup. The concentric volume-and-tone knob is a really great feature, because it allows you to mix in just the right amount of electric guitar tone with the acoustic sound when you’re using both.
Super Sonics
Since the Acoustasonic is tailored to cover a wide variety of tones, I chose to play it through a Quidley 22 head and matching 2x12 cabinet—an amp that handles clean tones very evenly and honestly. First, I soloed the piezo and set its tone and volume controls at noon. The Image switch allows you to select between four digital emulations of popular acoustic sounds: dark folk, bright folk, dreadnought, and jumbo. Dark folk sounded surprisingly crisp and clean when I picked through a basic E major chord. It really took me by surprise, because I’ve played high-end acoustic guitars that didn’t sound that even and full when amplified with a pickup. Flipping to bright folk brought a major bass boost, with a slight roll off in the upper frequencies. It sounded really good, albeit scooped in the midrange. I was a little dumbfounded, because that position was supposed to be brighter, but the dark folk position seemed to have more high-end sheen. Regardless, both were impressive. I’m a big fan of acoustic tones that sit well in the mix while another instrument (such as brass or woodwind) takes the lead, and the second position was perfect for that—and it was even better for jazz progressions when you dialed the tone back to 9 o’clock.
The third Image setting kicked in even more mids while keeping the same amount of bass. It was certainly the most prominent and aggressive sounding, perfect for rock riffing. The final position, the jumbo acoustic image, evened out the frequencies. For players who like to thicken up their electric riffs with an acoustic sandwiched between (think Ace Frehley’s “Ozone”), this setting is ideal. After playing with each setting for a while, I realized it could be tempting to go overboard with higher tone settings. I had to keep the control set rather low to help the instrument sit in the mix more comfortably. Once the tone gets up near the 2 and 3 o’clock range, some unpleasant harshness appears in the upper frequencies. Luckily, the tone control is extremely responsive, so it was easy to pull back when I had to.
Things really started to get interesting when I mixed the piezo with the magnetic neck pickup. The Twisted Tele is a fantastic pickup. It can feel a little strange if you’re used to the subdued tones of some traditional Tele neck pickups. It’s extremely usable and versatile, and its output blends nicely with the piezo to yield a fantastic, three-dimensional tone. It’s almost like when you have a nice piece of gear that you’re really happy with, but then you throw a booster in the chain and fall in love with it all over again. And I’ll admit that I was suspicious of the notion of blending a Tele neck pickup with an acoustic tone, but the Acoustasonic quashed my misgivings. The magnetic pickup frequencies never fought the piezos, they always seemed to complement them—and extremely well, I might add. The voicing that Fender and Fishman engineered is exemplary, with a near perfect balance.
That said, moderation is the key to crafting a great tone with this guitar. Too much high end or midrange can cause some really disagreeable tones, so keep your amp’s presence at a moderate level to stay in the realm of smooth, controllable timbres.
The Final Mojo
The Fender Acoustasonic Tele, quite frankly, has a ton going for it. First, the acoustic tones are all usable and sound great. Each has its own unique strength, making the Acoustasonic Tele a fantastic choice for the studio pro or the touring musician. Second, the ability to expand your musical possibilities with the blending options makes it a blast to play. Any instrument that gives me song ideas just from strumming around on it is a good instrument in my book. And finally, the Acoustasonic’s affordability puts it well within reach of most players. It’s a difficult task to meld the electric and acoustic worlds, but Fender has found a great balance with this guitar.
Buy if...
you’re looking for a solid, well-rounded guitar with acoustic emulated tones that stand out from the pack.
Skip if...
you need a piezo-equipped guitar that also features a magnetic bridge pickup.
Rating...
Street $999 - Fender - fender.com |
- Fender Acoustasonic Jazzmaster Review - Premier Guitar | The best guitar and bass reviews, videos, and interviews on the web. ›
- First Look: Fender Player Plus Nashville Telecaster - Premier Guitar ›
- Fender Announces New Hybrid Acoustasonic Player Telecaster - Premier Guitar ›
- Fender Launches the All-Mahogany American Acoustasonic - Premier Guitar ›
- Fender Announces Limited-Edition Suona Collection - Premier Guitar ›
- Fender Unveils New Joe Strummer Signature Guitar ›
- Two Stratocaster Service Hacks You Can Use ›
- New Fender Player II Series: Elevate Your Sound - Premier Guitar ›
- Buy Certified Pre-Owned Fender Guitars on Reverb - Premier Guitar ›
- Experience the Evolution: Fender Player II Demos - Premier Guitar ›
- Blu DeTiger Reveals First Signature Bass with Fender - Premier Guitar ›
- Fender's Ultra II Line Features Ultra-Modern Updates - Premier Guitar ›
- L.R. Baggs Acoustic-Electric AEG-1 Reviewed - Premier Guitar ›
- Fender Telecaster Wiring Improvements - Premier Guitar ›
- Fender Unveils 2025 NAMM Special: New Releases Galore! - Premier Guitar ›
- A Modern Tele Inspired by Old-World Acoustic Instruments - Premier Guitar ›
- Fender Mike Campbell 'Red Dog' Telecaster Collection ›
Classic counterpoint techniques that work for surf.
Intermediate
Intermediate
• Learn some time-honored guidelines of classical composition.
• Apply revered rules to more modern styles.
• Create interesting and complex surf lines.The term counterpoint scares many people who think it is a carefully devised process that strips you of creative freedom. This is partly true, because some individuals have pushed the practice of counterpoint as strict rules at some point without explaining its purpose. I disagree with the view that music theory is a rule. Counterpoint, like serialism or any other principle of harmony, is simply a recipe for an expected result. These music theory recipes are not baking recipes where exact measurements must be made; music theory is more like cooking, which is more malleable and open to in-the-moment modifications.
Species Counterpoint
Why was counterpoint invented? Counterpoint has two primary goals: first, to ensure parts are singable, and second, to keep each “voice” independent. Let’s discuss the intervals aspect first. Some intervals are challenging to sing. Tritones, for instance, are not easy for even professional singers to hear and sing when sight reading. Even when time is spent with a piece, getting used to tritones takes a bit of digestion. (This is the main reason tritones were avoided for so long in music. Music was primarily vocal-based for quite some time, such as in 16th century Italian composer Giovanni Palestrina’s music. Carelessly placing tritones would make the music very difficult to sing.) With guitar, we don’t have to hear the notes before we play. We should, but it’s not required (and sometimes that’s what gets us in trouble). The species counterpoint recipe is designed to avoid certain dissonant intervals that are not approached by step. In other words, we don’t jump to or from a dissonance.
When music changed and new instruments became available, the recipes of species counterpoint changed, which makes sense as the limitations of hearing a note weren’t as much of an issue. As baroque composer and theorist Johann Joseph Fuchs proposed, the series counterpoint method is a recipe that places us in a particular time in history. By understanding and using the recipe of series counterpoint, we can connect with the rich musical tradition of the past.
Independence
During this same period, one of the main ingredients of music was that each “voice” (soprano, alto, tenor, bass) was to remain independent. You should be able to hear the journey of each voice on its own. The recipes for counterpoint ensure we maintain independence. Playing two 5ths in succession or two octaves in succession sounds unified and thus makes us lose independence. Using counterpoint, we can ensure that we don’t weave in and out of independent and unified sounds. In the era of early counterpoint, say the Palestrina era, composers didn’t think in terms of a predetermined chord progression. They thought about each line and made sure they merged in harmony. The music was written horizontally to ensure the lines didn’t crash or lose independence. This is considerably different from how we often make music in the rock genres of the 20th century. Bach started incorporating the thought of a “vertical” chord progression. Even before the 20th century, the recipes for counterpoint had evolved. But the evolution didn’t make the earlier recipes irrelevant; it added more options to our recipe book.
Voice Leading
Another critical thing about counterpoint is the movement from one note to another. This is similar to the earlier discussion about intervals that are hard to sing. Voice leading is a crucial aspect of counterpoint. It’s the art of connecting one note to another, whether in a single line or with chords. It ensures that our musical lines flow smoothly, guiding the listener’s ear through the composition. Writing a herky-jerky line that jumps all over the place makes it hard to sing. The art of voice leading is writing lines to feel and sound like they unfold and take us on a ride, but not a ride on a road ridden with potholes—think of a newly paved road on a highway. Counterpoint instills in us how to create even motion. So, when you want to create unrest and a feeling of a jerky experience, you’re applying intentionally.
Power of Suggestion
Counterpoint rules are not strict guidelines but rather flexible recipes or suggestions. Composers have always been free to write what they wanted (well, aside from political and religious oppression), using counterpoint to enhance their compositions, and many composers have experimented with expanding the counterpoint recipes. There are times when we need an expected result. This is when you can use tools to help you achieve that outcome. Although counterpoint was most popular in eras that have long since passed, it still holds significant value in our modern music industry. Its recipes, while evolving, continue to provide a solid foundation for contemporary music composition.
Broken Traditions
At some point, composers grew weary of the sounds they had heard for many years and started expanding. They stopped caring about losing the independence of voices and used parallel 5ths and octaves. Sometimes, they stopped caring about voice leading and wrote pointillistic music. Composers even started composing with noise (such as John Cage), or experimenting with electronic means of composition (Delia Derbyshire and Karlheinz Stockhausen). However, counterpoint still existed, and many of these composers, even though they strayed from some of the recipes, still deeply understood its structure, such as Arnold Schoenberg, who invented a system to avoid tonal harmony.
Lesson
I will give you more than just a dry recipe for species counterpoint in this lesson. Instead, I’ll focus on key elements that can be directly applied to your rock and pop compositions, making your music more dynamic and interesting. For each of these examples, I will live in the land of surf music, one of my favorite genres.
Imitation
In fugues, which are species counterpoint-based, we use something called imitation. Imagine we have two guitarists. Guitarist 1 plays a riff or melodic phrase, and then Guitarist 2 plays that same riff right after Guitarist 1 finishes. Guitar 2 is imitating Guitar 1. However, we can adjust the octave and pitches on which the imitation starts to add more variety to its performance.
For Ex. 1, I created a three-measure phrase for guitar 1 that I will imitate in measure two with Guitar 2. Guitar 2 is an exact copycat of Guitar 1, but they don’t play the part at the same time.
Ex. 2: For this example, I will drop the imitation for Guitar 2 an octave lower.
Ex. 3 is where the fun begins. As I mentioned earlier, we can start on different pitches for our imitation. If the theme (measures one through three) implies a key signature (we’re using the key of E minor for each of these examples to keep it simple), we can imply another key for the imitation but keep the same interval relationship and shape of the theme. We will outline the V chord (Bm) for measures four through six. The result is a conversation between two instruments that can move through a chord progression in a song or a couple of key centers for variety. We can use the same idea with guitar and bass or any other combination of instruments.
In counterpoint, we call the first riff or melodic phrase the “theme.” You may wonder what Guitar 1 is supposed to do while Guitar 2 (or in my recorded examples, bass) imitates the first riff. We have two options: One is to play free—you devise a harmony that works on top of the riff, but you don’t have to play this harmony on every imitation. It’s just an accompaniment that happens at that given time, as in Ex. 4a. Ex. 4b uses the same free accompaniment but moves bars four through six to B minor.
The second option is a countertheme. You can write a second riff that plays every time the imitation plays. The theme and countertheme are interconnected. They swap parts back and forth, as we see in Ex. 5a. Ex. 5b uses the same free accompaniment but moves bars four, five, and six to the key of B minor.
We already have a fruit-bearing tree. This technique prolongs material, using the same parts to lengthen and ornament the music you’re making. Johann Sebastian Bach was a master of this, and I highly recommend studying his music if you like imitation, canons, and fugues.
Consonance and Dissonance
Okay, now that you understand the basic concepts of imitation, theme, and countertheme, it’s time to start digging deeper into the concepts of harmony and voice leading. For counterpoint, we have two categories for interval organization. Consonant intervals are unisons, 3rds, 5ths, 6ths, and octaves. We also have dissonant intervals, such as 2nds, 4ths, and 7ths. Ex. 6 features consonant intervals, Ex. 7, dissonant.
In counterpoint, we only use dissonant intervals step by step. We never jump into them or leave them by leap. Jumping into dissonances can be off-putting. Yes, there are times when you want that sound, but there is a difference between knowing how to use dissonance and using dissonance that isn’t working. Ex. 8 is an example of jumping into dissonance. Many guitarists don’t know how to deal with dissonance when soloing, and songwriters sometimes can’t hear poorly approached dissonance when writing melodies. I know … it sure sounds like I’m talking about rules here! But really, it’s about using tools to achieve a desired result or fixing issues rather than strict regulations.
Strong Beats
In classical music, beat 1 is the strongest in the bar, followed by beat 3, the second strongest. Beats 2 and 4 are the strong beats in jazz. We will focus on beat 1 as the strong beat right now. It’s generally essential that beat 1 of each measure is consonant. The recipe states not to use dissonance on strong beats. There is more tolerance for dissonance on weak beats (2 and 4).
This means we must have an overview of our lines and how they meet at each bar on beat 1 (and beat 3). Beats 1 and 3 should be consonant using a unison, 3rd, 5th, 6th, or octave. Using species counterpoint allows us to tell a functional harmony story more clearly, making the story more apparent to the listener.
The Dreaded Parallel Perfect Intervals
If your head isn’t already spinning, get ready. Earlier, I mentioned that we want to maintain independence with each line in the counterpoint. We don’t want to hear them collapse into each other. Unisons, perfect 5ths, and octaves are perfect intervals. They are the most unified-sounding intervals, which means you lose the most independence when using them. Using two back-to-back octaves is a parallel motion of a perfect interval. This means the line’s independence is wholly lost, which we want to avoid in counterpoint. For this reason, we avoid placing parallel perfect 5ths and octaves successive to each other and adjacent strong beats. Check out Ex. 9 to hear parallel octaves and Ex. 10 for parallel 5ths. Bear in mind, of course, that some genres and periods completely disregard this, such as minimalism.
Shapes of Things
We have most of the basics laid out, except one more topic regarding the independence of lines. We want to maintain the independence of the line with interval choice rather than the direction of each line. When we think of musical lines, we want each line to have its own journey but not unfavorably crash into the other. To achieve this, we want each line to have a different shape and follow each other in parallel motion. We have options for variety.
1. Parallel motion: Each line moves in the same direction with perfect intervals (Ex. 11).
2. Similar motion: Each line moves in the same direction with constant intervals (Ex. 12).
3. Oblique motion: When one voice stays in the same position, the other voice moves (Ex. 13).
4. Contrary motion: When both lines move in opposite directions, offering the most independence (Ex. 14).
The idea is to have a variety of shapes to maintain independence of direction.
Final Thoughts
I know this is a lot to take in. Studying counterpoint is no small task. But I hope that this introductory lesson into the concepts of counterpoint illuminates its power as both a creative tool and a troubleshooting device for composing and building solos. Understanding counterpoint means only sometimes considering it in the composition process. You can write as you always do, but if something doesn’t sound right, it’s much easier and faster to diagnose and fix the problem. There are times when composing with counterpoint in mind can be a fantastic tool. It’s up to you to decide when to use the creative recipe.
See and hear Taylor’s Legacy Collection guitars played by his successor, Andy Powers.
Last year, Taylor Guitars capped its 50th Anniversary by introducing a new guitar collection celebrating the contributions of co-founders Bob Taylor and Kurt Listug to the guitar world. The Legacy Collection revives five of Bob Taylor’s classic acoustic models, curated by the legendary luthier and innovator himself. “To imagine that we’re doing guitars that harken to our past, our present and our future all at the same time,” Bob says, “I really like that.”
In developing the collection, Bob preserved the essence of his originals while integrating performance and playability upgrades introduced during his tenure as designer-in-chief. “It’s an up-to-date version of what those guitars would be,” Bob explains, “but with the same sound.”
Visually, these guitars feel classic—clean, understated and unmistakably Taylor. While Bob’s original aesthetic preferences are showcased in his Legacy models, the nod to the past runs deeper than trade dress.
From his earliest builds, Bob favored slim-profile necks because he found them easier to play. That preference set a design precedent that established Taylor’s reputation for smooth-playing, comfortable necks. Legacy models feature slim mahogany necks built with Taylor's patented New Technology (NT) design. “My first neck was a bolted-on neck but not an NT neck,” Bob says. “These are NT necks because it’s a better neck.” Introduced in 1999, the NT neck allowed for unprecedented micro-adjustability while offering a consistent, hand-friendly Taylor playing experience.
What makes this collection unique within the Taylor line is Bob’s use of his X-bracing architecture, favoring his time-tested internal voicing framework over more recent Taylor bracing innovations to evoke a distinctive tone profile. Since Andy Powers—Taylor’s current Chief Guitar Designer, President and CEO—debuted his patented V-Class bracing in 2018, V-Class has become a staple in Taylor’s premium-performance guitars. Still, Bob’s X-bracing pattern produces a richly textured sound with pleasing volume, balance and clarity that long defined the Taylor voice. All Legacy models feature LR Baggs VTC Element electronics, which Bob says “harkens back to those days.”
The team at Taylor thought the best way to demonstrate the sound of the Legacy guitars was to ask Andy Powers, Bob’s successor, to play them. A world-class luthier and musician, Andy has spent the past 14 years leading Taylor’s guitar innovation. In addition to V-Class bracing, his contributions include the Grand Pacific body style, the ultra-refined Builder’s Edition Collection, and most recently, the stunning Gold Label Collection.
Below you’ll find a series of videos that feature Powers playing each Legacy model along with information about the guitars.
Legacy 800 Series Models
First launched in 1975, the 800 Series was Taylor’s first official guitar series. Today, it remains home to some of the brand’s most acclaimed instruments, including the flagship 814ce, Builder’s Edition 814ce and new Gold Label 814e.
The Legacy 800 Series features the 810e Dreadnought and two Jumbos: the 6-string 815e and 12-string 855e. Each model serves up a refined version of the Dreadnought and Jumbo body shapes Bob inherited from Sam Radding—the original owner of the American Dream music shop where Bob and Kurt first met. “I was making my guitars in the molds that Sam had made at American Dream,” Bob recalls. “There was a Jumbo and a Dreadnought. That’s all we had.”
All three Legacy 800 Series guitars feature one of Bob’s favorite tonewood combos. Solid Indian rosewood back and sides are paired with a Sitka spruce top, yielding warm lows, clear trebles and a scooped midrange.
Aesthetic appointments include a three-ring abalone rosette, mother-of-pearl Large Diamond inlays, white binding around the body and fretboard, and Bob’s “straight-ear” peghead design. Both Jumbo models also showcase a mustache-style ebony bridge—a nod to Bob’s early Jumbo builds.
Legacy 810e
The 810 Dreadnought holds a special place in Bob Taylor’s heart. “My first 810, the one I made for myself, was a thrilling guitar for me to make,” he says. “It’s the one and only guitar I played. It didn’t matter how many guitars we made at Taylor, that’s the one I took out and played.” The Legacy 810e brings back that bold, room-filling Dreadnought voice along with the easy playability expected from a Taylor.
Taylor Guitars | Legacy 810e | Playthrough Demo
Legacy 855e
Taylor’s first 12-strings found an audience in 1970s Los Angeles. “I was making guitars that would find their way to McCabe’s in Santa Monica and Westwood Music,” Bob says, “and these guitars were easy to play. Twelve-strings were a popular sound in that music. It was a modern country/folk/rock music genre that was accepting our guitars because they were easy to play. They also liked the sound of them because our guitars were easier to record.” The Legacy 855e, with its resonant Jumbo body, slim neck and gorgeous octave sparkle, carries that tradition forward.
Taylor Guitars | Legacy 855e | Playthrough Demo
Legacy 815e
The Legacy 815e revives Taylor’s original Jumbo 6-string, delivering a big, lush sound with beautifully blooming overtones.
Legacy Grand Auditoriums
In the early 1990s, Bob Taylor heard a consistent refrain from dealers: “Not everybody wants a dreadnought guitar anymore.” Players were asking for something with comparable volume but different proportions—something more comfortable, yet still powerful. This feedback inspired Bob to design a new body style with more elegant curves, more accommodating proportions and a balanced tonal response. The result was the Grand Auditorium, which Taylor introduced in 1994 to celebrate its 20th anniversary.
Thanks to its musical versatility and easy playability, Bob’s Grand Auditorium attracted a wide variety of players. “We came into our own with our Grand Auditorium,” he says. “People were describing it as ‘all around.’ It’s a good strummer and good for fingerstyle, but it’s not totally geared toward strumming or totally geared toward fingerstyle.” Also referred to as the “Swiss-Army Knife” of guitars or the “Goldilocks” guitar, the GA quickly became a favorite among guitarists across playing styles, musical genres and different playing applications including recording and live performance. “That guitar made studio work successful,” Bob says. It gained a wider fanbase with the debut of the “ce” version, which introduced a Venetian cutaway and onboard electronics. “That became one of our hallmarks,” says Bob. “If you want to plug in your guitar, buy a Taylor.”
Today, the Grand Auditorium is Taylor’s best-selling body shape.
The Legacy Collection features two cedar-top Grand Auditoriums inspired by past favorites: the mahogany/cedar 514ce and rosewood/cedar 714ce. Both models incorporate Bob’s original X-bracing pattern for a tonal character reminiscent of their 1990s and 2000s counterparts. Shared aesthetic details include a green abalone three-ring rosette, ebony bridge pins with green abalone dots, a faux-tortoiseshell pickguard and Taylor gold tuning machines.
Taylor Guitars | Legacy 815e | Playthrough Demo
Legacy 514ce
The Legacy 514ce features solid mahogany back and sides paired with a Western Red cedar top, yielding a punchy midrange and dry, woody sonic personality that pairs beautifully with cedar’s soft-touch sensitivity and warmth. It’s a standout choice for fingerstyle players and light strummers who crave nuance and depth. Distinct visual details include faux-tortoise body and fretboard binding, black-and-white top trim, and mother-of-pearl small diamond fretboard inlays.
Taylor Guitars | Legacy 514ce | Playthrough Demo
Legacy 714ce
The Legacy 714ce also features a cedar top, this time matched with solid Indian rosewood back and sides. The result is a richly textured sound with deep lows, clear trebles and a warm, mellow response. Inspiring as it is, this specific wood pairing isn’t currently offered in any other standard Taylor model. Additional aesthetic details include green abalone dot fretboard inlays, black body and fretboard binding, and black-and-white “pinstripe” body purfling.
While the Legacy Collection spotlights Taylor’s past, newer models from the Gold Label, Builder’s Edition and Somos Collections show the company’s legacy is always evolving. Explore the Legacy Collection at taylorguitars.com or visit your local authorized Taylor dealer.
Taylor Guitars | Legacy 714ce | Playthrough Demo
The Oceans Abyss expands on Electro-Harmonix’s highly acclaimed reverb technology to deliver a truly immersive effects workstation. The pedal is centered around dual reverb engines that are independently programmable with full-stereo algorithms including Hall, Spring, Shimmer and more. Place these reverbs into a customizable signal path with additional FX blocks like Delay, Chorus, Tremolo, or Bit Crusher for a completely unique soundscape building experience.
Electro-Harmonix has paved the way for powerful, accessible reverbs since the release of the original Holy Grail and now we’ve pushed the envelope deeper with the fully-equipped Oceans Abyss. Featuring a customizable signal path with up to 8 effects blocks, the Oceans Abyss can be configured as individual reverb, modulation, EQ, delay, bit crusher, saturation or volume effects, or as countless combinations for incredibly creative effect shaping. From a simple Spring reverb to a lush stereo field featuring stereo hall and shimmer reverbs, chorus, delay, overdrive, and tremolo, you can go from surf to shoegaze instantly, without breaking a sweat.
Deep parameter editing is accessible via the high-visibility OLED display with multiple graphical views and easy-to-read designs. Expression/CV control over nearly every parameter gives artful control of your effects and dynamics. Fully-stereo I/O plus an FX Loop allows for use with any instrument, recording set up, or live rig. 128 programmable presets via onboard footswitching or MIDI ensure perfect recall in all performance situations. MIDI IN/OUT ports with MIDI IN support of PC, CC, and Tempo Clock expand the already immense talents of the Oceans Abyss. Connect with UBS-C to Windows or Mac for effects editing, preset management, and more with the free EHXport™ app (coming soon).
- Two Stereo Reverbs available at once, each fully pannable in the stereo field
- 10 reverb types to choose from: Room, Hall, Spring, Plate, Reverse, Dynamic, Auto-Infinite, Shimmer, Polyphonic, Resonant
- Additional FX blocks: Delay (Digital, Analog and Tape emulations), Tremolo, Chorus, Flanger, Phaser, Graphic EQ, Saturation, Bit Crusher, External FX Loop, Volume
- Create custom signal path routing with up to 8 effects blocks. Two blocks may be re-verb, the rest may be any of the additional FX blocks.
- Infinite reverb sustain with the press of a footswitch
- Stereo Audio I/O
- Stereo FX Loop routing on TRS Jacks
- Dual action footswitches allow for momentary or latching use
- Easily enable or disable tails
- 128 fully customizable presets
- All controls can be saved to presets
- Dive deep into global and preset settings to set up Oceans Abyss for your specific needs
- Illuminated slide pots and buttons
- High-visibility OLED graphical display
- Multiple graphical views: Signal Path, Performance, Settings, Physical, Explorer
- Easy-to-navigate menu system
- Ergonomic NavCoder knob allows rotary and directional navigation through menus
- EXPRESSION / CV input to control nearly any parameter in any FX block
- Footswitch input allows for adding up to three external footswitches, each assigna-ble to a number of functions
- MIDI In and Out. MIDI IN supports PC, CC (over nearly every available parameter), and Tempo Clock
- USB-C port to connect to Windows or Mac and interface with EHXport™ app (coming soon)
- 96kHz / 24-bit sample rate conversion
- Supplied with 9.6VDC / 500mA power supply
Our columnist’s silver-panel Fender Bandmaster.
How this longstanding, classic tube amp design evolved from its introduction in 1953.
I have a silver-panel Bandmaster Reverb that I don’t think I’ve talked about enough in this column. It’s one of the most versatile and flexible amps I own, so I use it for everything. It’s portable, has tube-driven reverb and tremolo, and has a full set of EQ knobs including the critical bright switch, which we discussed the importance of earlier this year (“How to ‘Trebleshoot’ a Vintage Fender Amp,” March 2025). The amp is not only pedal-friendly; the flexible 4-ohm output impedance will handle almost all speaker configurations and sound any way you’d like. Let’s take a deeper look at the Fender Bandmaster amp and walk through its development through the years.
The first Bandmaster was introduced in 1953 as a wide-panel tweed amp with Fender’s 5C7 circuit. This rare combo was loaded with a single 15" Jensen P15N and powered by dual 6L6GC tubes in push-pull configuration to produce a modest 25 watts. The 6L6GCs were cathode biased and along with the 5U4GB rectifier tube contributed to a forgiving sag, early breakup, and a midrange-y voice.
Fender made several changes when they launched that amp’s successor in 1955, the more widely known 5E7 narrow-panel Bandmaster, a well-proven amp that has come back as a reissue model. It was still a dual-channel amp—instrument and microphone—but the newer 5E7 model had a fixed bias and a negative feedback loop, providing a louder, firmer, and cleaner tone. Most importantly, the single 15" speaker was replaced by three 10" speakers, making it very similar to the narrow-panel tweed Bassman, the granddaddy of all Marshall amps. This Bandmaster had three speakers instead of the Bassman’s four, and it delivered 25–30 watts instead of 40. It offered early breakup with a midrange-y, big and full tone.
For those not acquainted with tweed amps, the volume and EQ knobs behave differently than on silver- and black-panel Fender amps. The volume pot can act like a distortion control, while the EQ knobs control the volume, and many players I’ve talked to have not really unlocked this secret. This works because, in these circuits, the volume pot sits right before the preamp tube, which allows it to push the tube into full distortion. Since the EQ pots are located right after and are capable of reducing the volume, you’re able to distort the preamp at low volume settings.
“Things became more standardized in 1964 with the arrival of the black-panel AB763 Bandmaster, an amp I have worked on a lot and appreciate for its robustness, simplicity, and versatility.”
In 1960, a short-lived and rare Bandmaster dressed in brown tolex and a black faceplate appeared with the 5G7 circuit. From here on, all Bandmasters had the modern top-mounted chassis. With this circuit, the Bandmaster started to both look and sound more like a black-panel amp. It kept the 3x10" speakers but got a diode rectifier and bigger transformers resulting in a 45-watt output. Tremolo was introduced for the first time, and both channels were now intended for guitar.
The following year, a blonde 6G7 Bandmaster followed as a smaller amp head paired with a 1x12 extension cabinet. It had the timeless early blonde looks with cream tolex, brown faceplate, oxblood grill cloth, large Fender logo, and white knobs. But halfway into the blonde era, towards 1964, things turned strange and rather confusing. There were suddenly two 12" speakers, black knobs, a wheat-colored grill cloth, a more slim black-panel-style Fender logo, a black faceplate, and all in various combinations close to the transition into ’64.
Things became more standardized in 1964 with the arrival of the black-panel AB763 Bandmaster, an amp I have worked on a lot and appreciate for its robustness, simplicity, and versatility. It offers a pure, clean, scooped black-panel tone that’s somewhere between a Vibrolux Reverb and Pro Reverb, which share the medium-sized 125A6A output transformer and dual 6L6GC tubes. With its medium/high power and flexible 4-ohm output impedance, it can drive all kinds of speaker cabinets—as long as you stay between 2 and 8 ohms, you are safe.
For a short time in 1967–68, there was a transitional Bandmaster with aluminum trim and black-panel innards before the all-new silver-panel Bandmaster Reverb replaced it in 1968. The small-head cabinet had grown in size and, unfortunately, weight to accommodate the reverb tank. The amp got a 5U4GB rectifier tube along with a few general silver-panel changes to the circuit. Several silver-panel models existed with minor differences until a 70-watt beast version came along in 1977 with master volume.
To my own 1968 Bandmaster Reverb, I have done a few adjustments. First, I made a custom baffle to hold two 8" speakers. I installed a pair of WGS G8C speakers that fit perfectly on the baffle board without colliding with the reverb tank or transformers. Sometimes, I use only one of the 8" speakers for bedroom volume levels. Second, I reversed the bias circuitry to standard AB763 specs, making it easier to adjust bias correctly on both power tubes. If you are into sparkling clean and funky Strat sounds, you would love this little 2x8" combo.