
Welcome to another Dojo. Last month I explained in detail how to set up and use sidechain compression techniques to get that classic pop/EDM pumping sound on your rhythm guitar parts and other instruments in your mix. This time, we’ll use the same setup techniques but, instead of sidechaining a compressor, I’m going to show you the benefits of using a gate.
What is a gate? It’s an audio circuit design (hardware or software) that operates relative to a set threshold, much like a compressor. The key difference is that while a compressor reduces the dynamic range (volume) when the audio signal goes above the threshold, a gate reduces the volume of an audio signal when it goes below the threshold and cuts it off completely.
For those of you who play rock, prog, extreme metal, or anything that uses massive gain, you most likely use a noise gate to tame the excessive pedal/amp noise (and possibly even feedback) that would otherwise run harum-scarum over every second of silence—in between each palm mute, pick stroke, etc. The net result is super tight and punchy guitars that can stop on a dime.
The net result of using a gate instead of a compressor is that the guitar solo track will open up instead of closing down.
Let’s get crazy from the start. Take a song you’ve recorded that has multiple instruments (full band with vocals or similar). Next, create a new guitar track and record yourself playing a wicked solo for the entire song. (I was guilty of this when I first learned the pentatonic scale.) Make it as wild as you want and add lots of signal processing as well. Unleash your inner guitar demon.
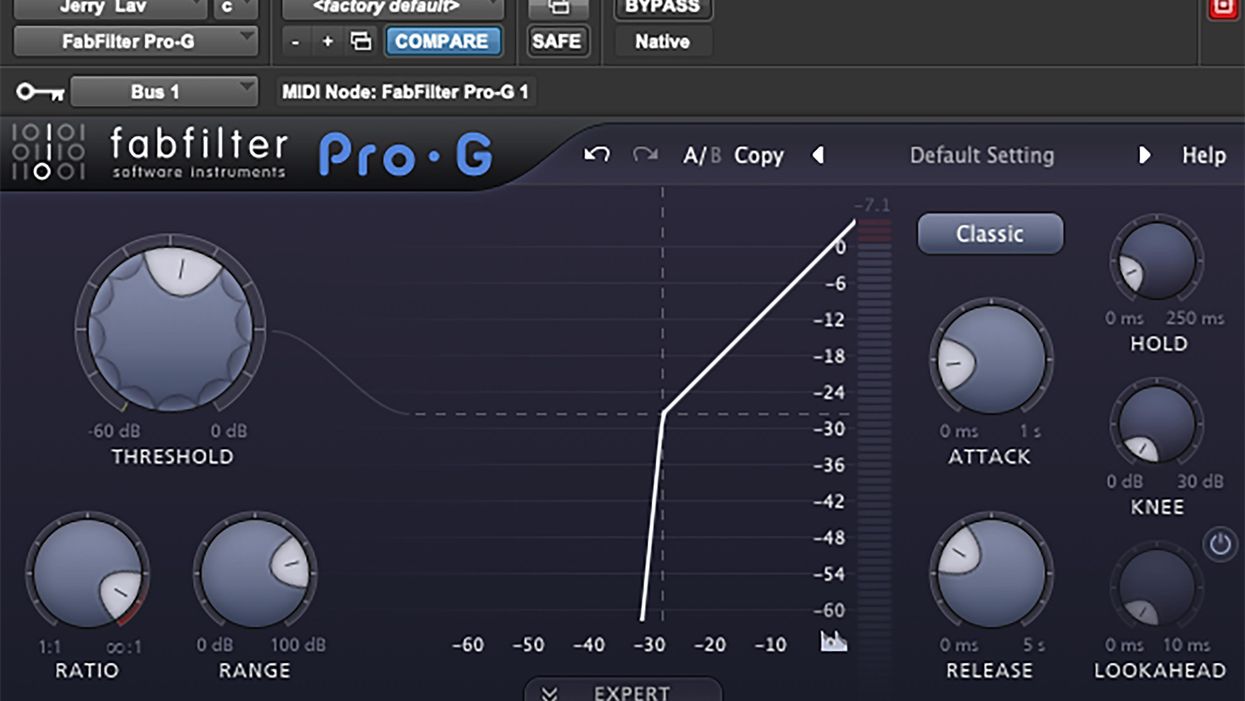
Once you’ve accepted your award for “longest guitar solo,” place a gate plug-in on the track. I’m going to use FabFilter Pro-G ($179 Street), but another great choice is Waves C1 Compressor/Gate ($29 Street).
Now, we can get into some uncharted waters. Choose a track (like the snare drum, chorus BGV parts, or a cool rhythm part) and route the output of that track to the gate’s input on your new guitar-solo-from-hell track. Every DAW has slightly different ways to do sidechaining, so like last month (see August’s column “Try Sidechaining for Greater Expression”), I’m going to use Pro Tools and follow the exact same procedure—the only difference is that this time it’s a gate and not a compressor. I’m also reposting the same link as well, with instructions for non-Pro Tools users courtesy of the Fab Filter website support page that gives directions for Studio One, Logic, Cubase, and Ableton.
The net result of using a gate instead of a compressor is that the guitar solo track will open up instead of closing down. For example, every time the snare drum hits, you will briefly hear wherever you were in your new solo track. You then can fine-tune how little or long it stays audible before being forced back into submission.
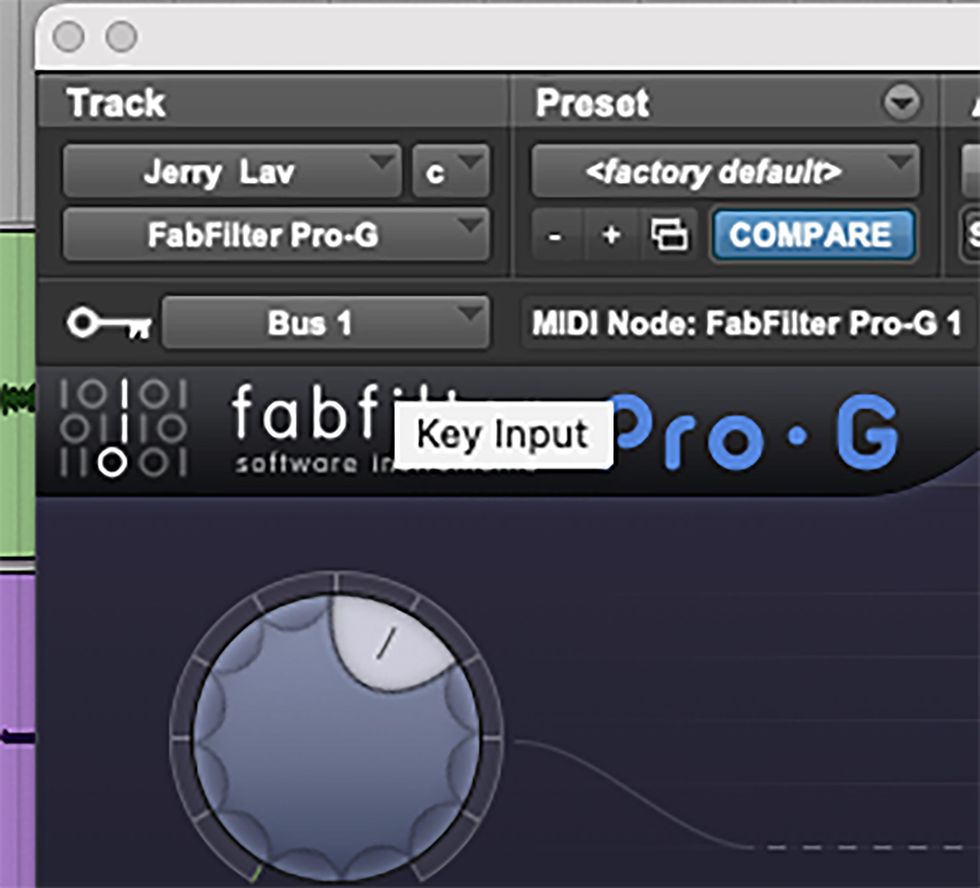
Fig. 2
In Pro Tools, open up the gate plug-in you placed on your guitar solo track [Fig. 1] and set sidechain from internal (In) to external (Ext). Next, in the “key input” menu of the plug-in interface, which is just above the FabFilter logo [Fig. 2], choose Bus 1 instead of the default “no key input.” The gate is now looking for an external source to trigger it open.
In Pro Tools, open up the gate plug-in you placed on your guitar solo track [Fig. 1] and set sidechain from internal (In) to external (Ext). Next, in the “key input” menu of the plug-in interface, which is just above the FabFilter logo [Fig. 2], choose Bus 1 instead of the default “no key input.” The gate is now looking for an external source to trigger it open.
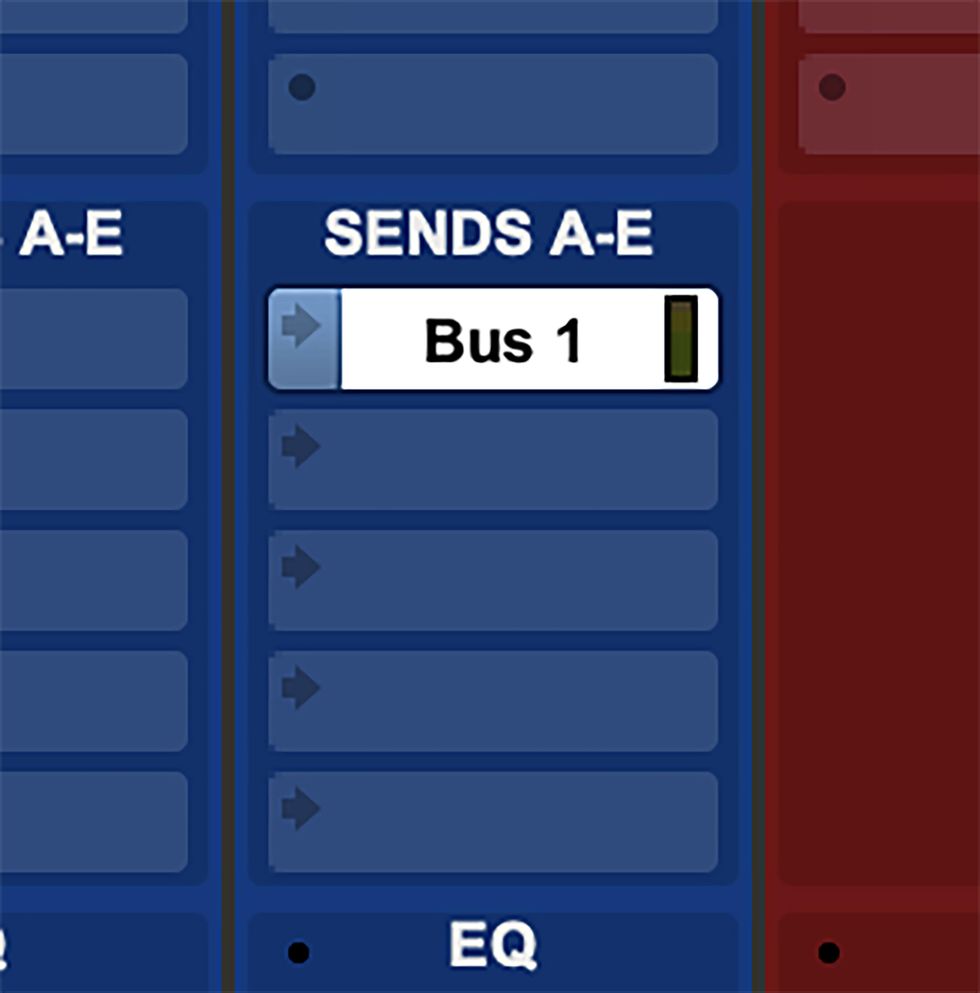
Fig. 3
Now, let’s bus-route the snare drum track to the gate on the guitar track. In the “sends” slot of the snare drum track, select Bus 1. The Bus view window for Bus 1 will pop up [Fig. 3]. Set its level to 0.0 dB (so it will send audio signal to the gate) and select “PRE” (pre-fader) [Fig. 4]. You’ve now routed the audio (using Bus 1) from the drum track to the gate’s sidechain input on the guitar track.
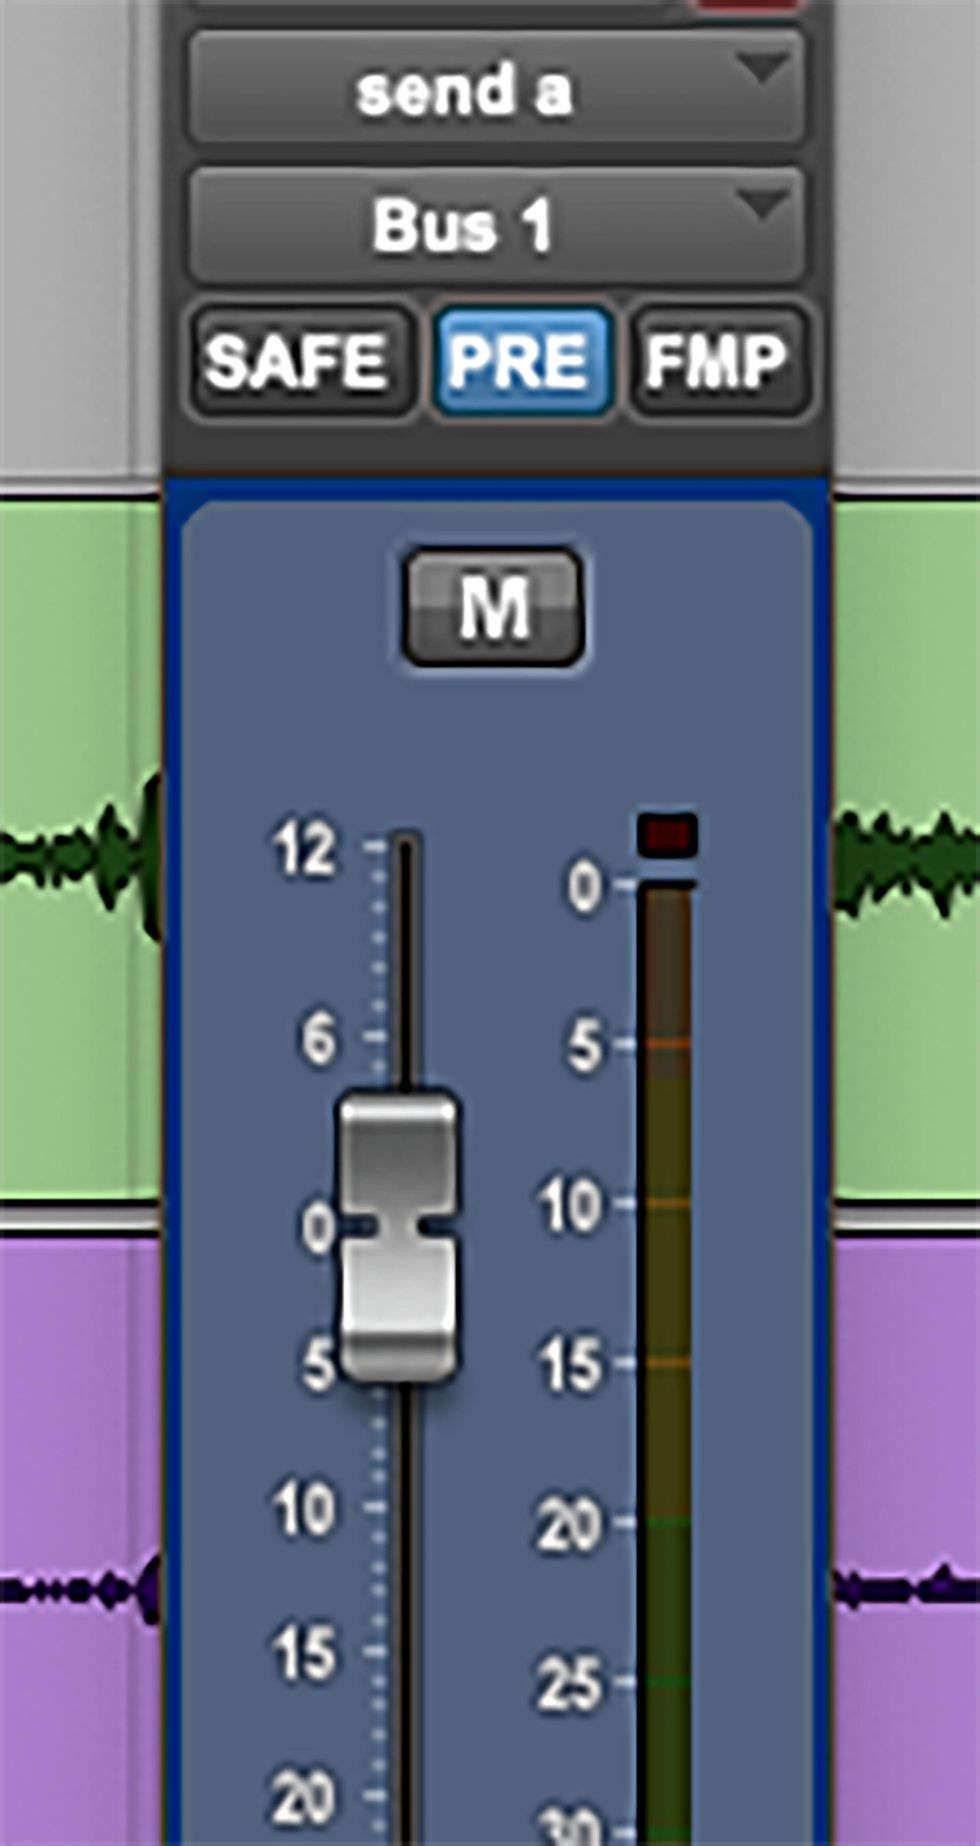
Fig. 4
If you mute the snare drum track, you’ll be able to hear how it is affecting the guitar track. Now you can play with the threshold, attack, ratio, and release. Start with a quick attack (.010-.025 ms), a high threshold, and a medium release time (150-200 ms), then adjust to taste.
I love doing things like this because every time the snare drum hits, you don’t know what you’re going to get. You can take this farther and add some reverb and delay to the guitar track to further play with how long the solo “blip” will last. This is just the tip of the iceberg, so keep experimenting and let me know if you find something really cool by emailing me here. Keep sharing your musical passion with the world and, until next time, namaste.