Last month, we took the first step of our epic Tele-modding journey by looking at how to prepare the guitar's standard 2-conductor single-coils for hot-rodding [“Preparing Your Tele for Future Mods," June 2013]. While you have your pickups out to do this prep work, why not take a moment to make a few feedback-fighting tweaks? (Even if you're not planning to rewire your pickups, these simple mods are worth the effort of taking your Tele apart.)
The Telecaster's bridge pickup is a well-known source of feedback if you play at high volumes. This is typically caused by the metal bridge plate, the way the pickup is mounted to this plate, and the pickup's metal baseplate. By addressing two of these problematic areas, the following mods will dramatically reduce the chance of feedback.
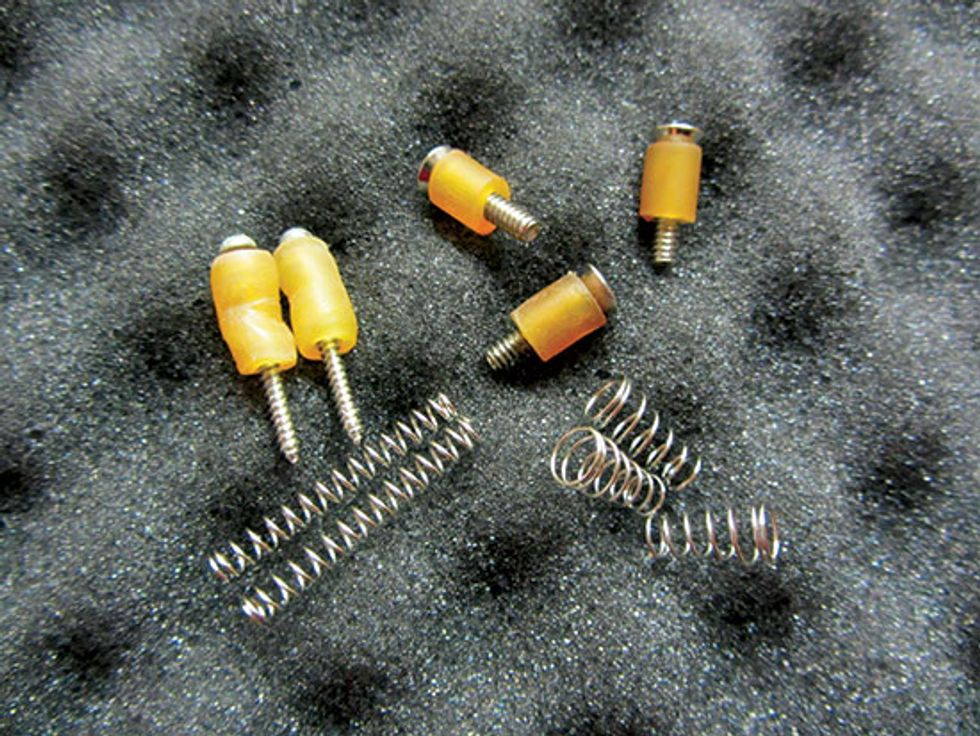
Replace the pickup mounting springs. Pop off the pickguard and see if your guitar has metal springs for pickup height adjustment. If so, get some latex tubing and replace the metal springs with it. (Latex surgical tubing is readily available from pharmacies or medical supply stores.) The metal springs interact with the pickup's magnets and are often a source of unwanted feedback. In the '50s and '60s, Fender used latex tubing around the pickup-height adjustment screws, so this is a “back-to-basics" upgrade.
Fig. 1 shows how to mount the latex tubing on the Tele's three bridge pickup screws (on the right) and neck pickup screws (left). Save the metal springs in case you want to return the guitar to its original condition.
Pad the bridge pickup's baseplate. Take a piece of thin foam like the one shown in Fig. 1, and cut it to size so it will fit the cavity area underneath your bridge pickup. It can be tricky to get a piece of foam with the right thickness. If it's too thin, the foam won't contact the pickup's baseplate and that's useless. However, if it's too thick, the foam will interfere with any pickup height adjustments. Take your time and get this right.
Once you've determined the foam is the correct thickness to apply gentle but consistent pressure against the baseplate—and thus keep it from vibrating at loud volumes and squealing or causing feedback—glue the foam piece to the bottom of the pickup cavity. This foam padding is most important for the bridge pickup baseplate, but it can't harm to repeat the operation for the neck pickup, too.
Bonus! Strat-style neck pickup adjustment. On most Teles, the neck pickup is screwed directly to the wood with the pickup screws covered by the pickguard. Personally, I don't think this is a problem because once you've adjusted the neck pickup height to your satisfaction, you're done—set it and forget it. Furthermore, if you do need to adjust the neck pickup height, it's no big deal to remove the pickguard. You can do this without unstringing the guitar.
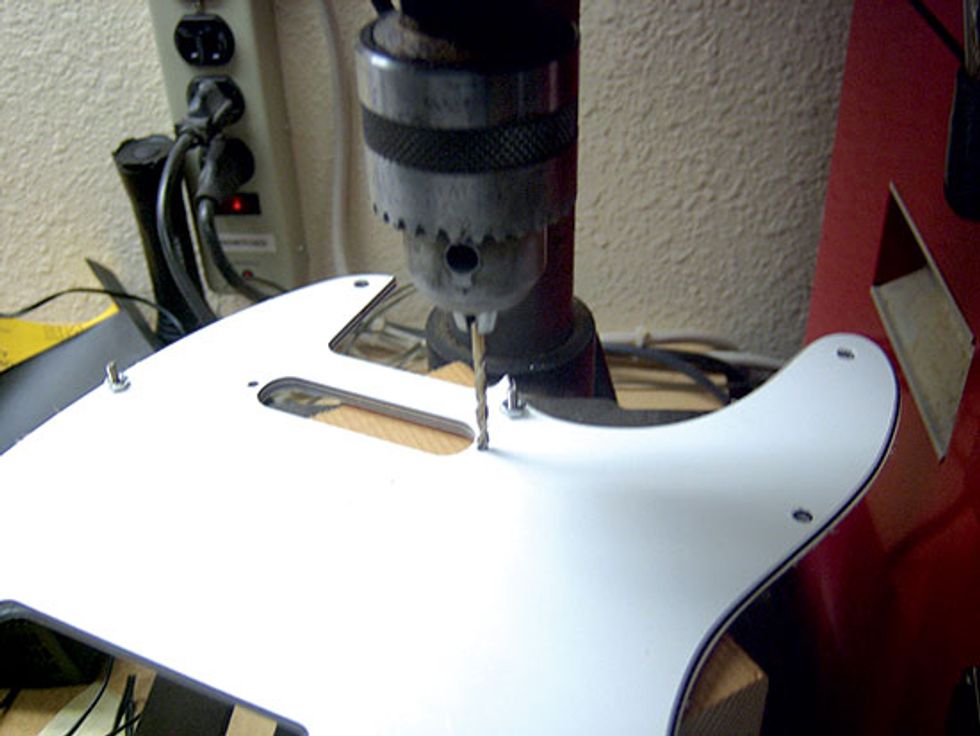
But if you want the ultimate convenience of a Strat-style mounting for the neck pickup, here's how to do it: First, remove your pickguard and on its underside, put a piece of masking tape on each side of the neck pickup hole. Place your pickup in the pickguard and using a Sharpie, mark the two fastening holes on the masking tape. Then measure the diameter of the screws and drill two matching holes into the pickguard (Fig. 2). Finally, install the neck pickup in the pickguard and enjoy!
Nuke that static. Our last project for this column is to prevent static noises that often show up with plastic pickguards under certain weather and humidity conditions. I'm sure you all know this culprit: You touch the pickguard and hear noises coming from your amp. Annoying? Yes, but then again, maybe you like to scratch the pickguard with your fingernails and use the sounds as percussion.
By the way, if you decide to mod your pickguard for Strat-style neck pickup adjustment, it makes sense to do this anti-static mod first.
Here's the process: Take some mid-grade sand paper (150 grit or something close to it) and carefully sand the underside of the entire pickguard. Next, grab some dryer sheets (chances are good you'll find some in your laundry room) and rub both sides of the pickguard with them for several minutes. As a side effect, your pickguard will smell like early spring for days!
In most cases this should do it, but if you still have problems with static noise, repeat this treatment or make a 1:1 template of your pickguard out of thin paper and install it between the guitar and the pickguard.
All right—that does it for today. Next time, we'll start to explore factory Telecaster wirings to discover how they work and how to mod them. Until then, keep on modding!
Dirk Wacker lives in
Germany and is fascinated
by anything related to old
Fender guitars and amps.
He plays country, rockabilly,
and surf music in two
bands, works regularly as a
session musician for a local studio, and writes
for several guitar mags. He's also a hardcore
guitar and amp DIY-er who runs an extensive
website—singlecoil.com—on the subject.




![Rig Rundown: Russian Circles’ Mike Sullivan [2025]](https://www.premierguitar.com/media-library/youtube.jpg?id=62303631&width=1245&height=700&quality=70&coordinates=0%2C0%2C0%2C0)
