The easiest way to fill a dance floor.
Beginner
Beginner
- Learn the basic rhythmic theory used in playing funk guitar.
- Turn your guitar into a percussion instrument and master the muted scratching technique.
- Become comfortable with all 16th-note combinations.
The 1960s saw the rise of many legendary guitarists bringing us revolutionary new styles and techniques that we still use and build upon to this day. Arguably, one of the less heralded is Jimmy Nolen whose recordings with James Brown gave birth to the funky 16th-note, scratchy staccato-style playing that has become such an iconic building block of popular music to this day. To cover all the great players who have added their own unique flavor, from Freddie Stone to Nile Rodgers up to Cory Wong, would fill a whole book. But to think of funk guitar playing as purely a gimmick would be a huge mistake as these techniques can be seen across so many styles of music. Ultimately, if you want to be hired as a guitar player, chances are you will need to funk it up at some point. Here are the building blocks to start grooving with the best of them.
What is Funk Guitar?
Ask that question and you’ll probably get lots of different answers, but all will have some key themes in common: syncopation, staccato, percussive attack, rhythmic variations, 16th-notes, pocket, timing, and groove, among others. But what does all that mean?! As a newbie it can all seem a bit daunting but if we take it step by step we can start to understand.
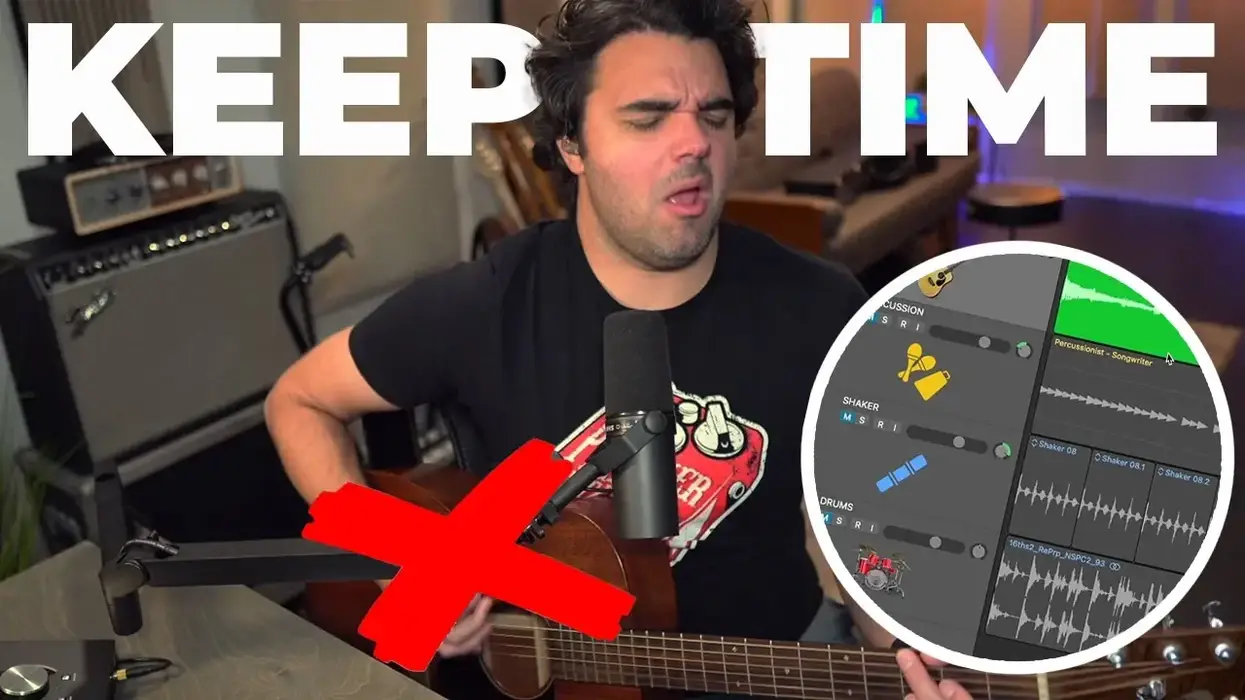
Let’s start with the fundamentals and build up from there. This approach is especially important when playing funk, because if you don’t nail these basics then the whole thing will fall apart as you approach more complex parts. Discipline is key. (You will need a metronome or basic drum machine app to practice with. That’s non-negotiable.)
The Theory of Rhythm
Our first step is to start with the different ways you can divide up a measure of music into beats and subdivisions. For now, we are only looking at 4/4 time signatures and ignoring triplets. Ex. 1 shows how we can divide up a measure of four beats into different note durations. I’m using the top half of an A minor chord in this example, and you can see how with each measure the rhythms become twice as fast.
Playing funk requires precision timing so it is important to know where you are in a measure as you go along. Counting through a measure might sound simple but it is critical to all rhythm playing, not just funk. You can usually spot the players who haven’t practiced this (the drummer will be shouting at them). Ex. 2 shows how we would usually count notes while playing. Quarter-notes are as easy as 1, 2, 3, 4. For eighth-notes we add an “and” (+) between each beat. And for the all-important 16th-notes we add an “e” and “a.”
Over time, with lots of practice, counting becomes second nature and you can feel it when you play. You don’t even need a guitar in your hands. Next time you are listening to music simply count along.
If you feel this is starting to sound more like a beginner’s drum lesson, then you’d be right. On taking up the challenge of learning funk guitar, you have unwittingly signed up to be a member of the percussion family. More on that later, but let’s quickly look at Ex. 3 which shows how to strum or pick with our right hand. If you haven’t seen the symbols above the tab before, they represent downstrokes, which look like a bracket, and upstrokes, which look like a V. Start getting used to that down/up strumming while counting along.
Welcome to Drum School!
Welcome to day one as a percussionist and congratulations on agreeing to take on some percussive tasks in addition to playing the guitar. We may joke, but this is in many ways the essence of funk guitar playing and what makes it different and so cool. It’s what Jimmy Nolen and his “chicken scratch” style brought to the studio all those years ago when recording “Papa’s Got a Brand New Bag.” In addition to playing the harmonic content we are going to use the guitar as a percussive instrument.
The most common way we create some a percussive sound is by muting the strings with our fretting hand, while strumming to give a scratch like sound as demonstrated in Ex. 4.
To get this sound you release pressure on the fretboard and have your fingers resting lightly on the strings. You want the pressure to be light enough that you can’t hear a fretted note ringing out, but hard enough so the open string isn’t sounding. It takes a bit of practice and of course you should be doing this along with a metronome or other fixed beat. When playing this at speed, an open string on one 16th-note is not going to ruin the whole thing. The key is that you are in time and producing your own percussive sound.
We have learned to count and play (in time) a measure of 16th-note chords and a measure of scratches. Now we are going to combine the two and start creating syncopated rhythms. If you’re not sure what syncopation means, then a good definition would be “music or a rhythm characterized by displaced beats or accents so that the strong beats are weak and vice versa.” By mixing up chordal stabs and muted scratches we can move the accents around within a beat and bar to create some funky rhythms. Moving from one to another is not easy at first, so start slowly and build it up with plenty of practice.
In Ex. 5 we are playing the chord on the first sixteenth-note of each beat followed by three scratches. Your right hand should be in a constant down/up strumming pattern. The only thing changing is the pressure you’re applying with your left hand and that is where the practice is needed. It can be hard to make sure the pressure is applied so that the chord sounds in the right place. You should be aiming to make the chord stabs staccato as possible.
For Ex. 6 we’re going to move the chord to the “and” of each beat. That instantly sounds a bit different. In Ex. 5 we were essentially just playing on each beat with some scratches in between, but now we’re moving the accent off the beat. It may feel strange at first, but keep at it.
Now we’re going to go really off the beat in Ex. 7. We are hitting the chord on the “e” of each beat for the first two measures, then the “a” for the second two measures. Take it slowly and keep counting.
In the previous examples we played the same rhythm for the whole measure. How about we try a different one on each beat? There are many options for this. Ex. 8 shows a couple, but have a go at working out other options and practicing those too.
Now let’s start adding two chord stabs per beat. Ex. 9 gives us a couple of examples and you can really hear the funk building as we start moving those chord accents around. Over time we want all these variations ingrained in our head ready to implement whenever needed. The more you play and learn new riffs and licks, you’ll start to recognize these rhythmic patterns.
The final combinations are where we play three-chord stabs and just one scratch per beat. Ex. 10 shows us all the options.
Once you’re comfortable with all these variations try mixing them up and seeing which sound the best to your ear. There is no right or wrong, and most players tend to lean toward a few favorite combinations to achieve their own sound. Ex. 11 is an example of how things can sound when you mix and match, and how, when combined with some drums and instrumentation, things can start getting really funky, all just on one chord!
All the examples above will allow you to learn all the various 16th-note chord/scratch combinations. This will take some time. We have covered a lot of ground here so don’t expect to master all of this in a week. Try building these concepts and exercises into your existing practice routine and over time your skills will develop. But, if you don’t nail what we’ve gone through in this lesson, it just won’t sound right. So, grab that metronome and get the funk started.
- Rhythm Rules: Call-and-Response Funk Guitar ›
- Funk Guitar in One Chord Shape or Less ›
- 5 Funk Guitarists You Should Know ›
- Scary Pockets' Ryan Lerman Shares Rig Secrets ›
The range of clean, dirty, and complex tones available from this high-quality, carefully crafted Dumble modeler make it a formidable studio and performance device.
Fantastic variation in many delicious sounds makes it a bargain. High-quality. Easy to use and customize. Killer studio path to lively, responsive guitar sounds.
Price may be hard for some to swallow if they don’t leverage the whole of its potential.
$399
UAFX Enigmatic ’82 Overdrive Special
uaudio.com
I’ve never played a realDumble. I’d venture most of us haven’t. But given my experiences with James Santiago’s UAFX modeling pedals, most recently theUAFX Lion, I plugged in the new Dumble-inspired UAFX Enigmatic confident I’d taste at least the essence of that very rare elixir. You could argue there is no definitive Dumble sound. Each was customized to some extent for the customer, and they are renowned nearly as much for dynamic responsiveness and flexibility as their singing, complex, clean-to-dirty palettes.
The Enigmatic nails the flexibility, for sure. To my ears, its tone foundation lives somewhere on a sliver of Venn diagram where a black-panel Fender and a 50-watt Hiwatt intersect. It’s alive, dimensional, snappy, sparkly, massive, and, at the right EQ settings, hot and excitable. But the Enigmatic’s powerful EQ and gain controls, multiple virtual cab and mic pairings, rock, jazz, and custom voices, plus additional deep, bright, and presence controls enable you to travel many leagues from that fundamental tone. The customization work you can do in the app enables significant changes in the Enigmatic’s tone profile and responsiveness, too. All these observations are made tracking the Enigmatic straight to a DAW—making the breadth of its personality even more impressive. But the Enigmatic sounds every bit as lively at the front end of an amp, and black-panel Fenders are a primo pairing for its saturation and sparkly attributes. The Enigmatic is nearly $400, which is an investment. But considering the ground I covered in just a few days with it, and the quality and variety of sounds I could conjure with the unit just sitting on my desk, the performance-to-price ratio struck me as very favorable indeed.
This simple passive mod will boost your guitar’s sweet-spot tones.
Hello and welcome back to Mod Garage. In this column, we’ll be taking a closer look at the “mid boost and scoop mod” for electric guitars from longtime California-based tech Dan Torres, whose Torres Engineering seems to be closed, at least on the internet. This mod is in the same family with the Gibson Varitone, Bill Lawrence’s Q-Filter, the Gresco Tone Qube (said to be used by SRV), John “Dawk” Stillwells’ MTC (used by Ritchie Blackmore), the Yamaha Focus Switch, and the Epiphone Tone Expressor, as well as many others. So, while it’s just one of the many variations of tone-shaping mods, I chose the Torres because this one sounds best to me, which simply has to do with the part values he chose.
Don’t let the name fool you, this is a purely passive device—nothing is going to be boosted. In general, you can’t increase anything with passive electronics that isn’t already there. Period. But you can reshape the tone by deemphasizing certain frequencies and making others more prominent (so … “boost” in guitar marketing language). Removing highs makes lows more apparent, and vice versa. In addition, the use of inductors (which create the magnetic field in a guitar circuit) and capacitors will create resonant peaks and valleys (bandpasses and notches), further coloring the overall tone. This type of bandpass filter only allows certain frequencies to pass through, while others are blocked, and it all works at unity gain.
“You can’t increase anything with passive electronics that isn’t already there … but you can reshape the tone by deemphasizing certain frequencies and making others more prominent.”
All the systems I mentioned above are doing more or less the same thing, using different approaches and slightly different component values. They are all meant to be updated tone controls. Our common tone circuit is usually a variable low-pass filter (aka treble-cut filter), which only allows the low frequencies to pass through, while the high frequencies get sent to ground via the tone cap. Most of these systems are LCR networks, which means that there is not only a capacitor (C), like on our standard tone controls, but also an inductor (L) and a resistor (R).
In general, all these systems are meant to control the midrange in order to scoop the mids, creating a mid-cut. This can be a cool sounding option, e.g. on a Strat for that mid-scooped neck and middle tone.
Dan Torres offered his “midrange kit” via an internet shop that is no longer online, same with his business website. The Torres design is a typical LCR network and looks like the illustration at the top of this column.
Dan’s design uses a 500k linear pot, a 1.5H inductor (L) with a 0.039 µF (39nF) cap (C), and a 220k resistor (R) in parallel. Let’s break down the parts piece by piece:
Any 500k linear pot will do the trick, in one of the rare scenarios where a linear pot works better in a passive guitar system than an audio pot.
(C) 0.039µF cap: This is kind of an odd value. Keeping production tolerances of up to 20 percent in mind, any value that is close will do, so you can use any small cap you want for this. I would prefer a small metallized film cap, and any voltage rating will do. If you want to stay as close as possible to the original design, use any 0.039 µF low-tolerance film cap.
(L) 1.5H inductor: The original design uses a Xicon 42TL021 inductor, which is easy to find and fairly priced. This one is also used in the Bill Lawrence Q-Filter design, the Gibson standard Varitone, and many other systems like this. It’s very small, so it will fit in virtually every electronic compartment of a guitar. It has a frequency range of 300 Hz up to 3.4 kHz, with a primary impedance of 4k ohms (that’s the one we want to use) and a secondary impedance of 600 ohms. Snip off the three secondary leads and the center tap of the primary side and use the two remaining outer primary leads; the primary side is marked with a “P.” On the pic, you can see the two leads you need marked in red, all other leads can be snipped off. You can connect the two remaining leads to the pot either way; it doesn’t matter which of them is going to ground when using it this way.
Drawing courtesy of singlecoil.com
(R) 220k: use a small axial metal film resistor (0.25 W), which is easy to find and is the quasi-standard.
Other designs use slightly different part values—the Bill Lawrence Q-filter has a 1.8H L, 0.02 µF C and 8k R, while the old RA Gresco Tone Qube from the ’80s has a 1.5H L, 0.0033 µF C, and a 180k R, so this is a wide field for experimentation to tweak it for your personal tone.
This mid-cut system can be put into any electric guitar not only as a master tone, but also together with a regular tone control or something like the Fender Greasebucket, or it can be assigned only to a certain pickup. It can be a great way to enhance your sonic palette, so give it a try.
That’s it! Next month, we’ll take a deeper look into how to fight feedback on a Telecaster. It’s a common issue, so stay tuned!
Until then ... keep on modding!
The two-in-one “sonic refractor” takes tremolo and wavefolding to radical new depths.
Pros: Huge range of usable sounds. Delicious distortion tones. Broadens your conception of what guitar can be.
Build quirks will turn some users off.
$279
Cosmodio Gravity Well
cosmod.io
Know what a wavefolder does to your guitar signal? If you don’t, that’s okay. I didn’t either until I started messing around with the all-analog Cosmodio Instruments Gravity Well. It’s a dual-effect pedal with a tremolo and wavefolder, the latter more widely used in synthesis that , at a certain threshold, shifts or inverts the direction the wave is traveling—in essence, folding it upon itself. Used together here, they make up what Cosmodio calls a sonic refractor.
Two Plus One
Gravity Well’s design and control set make it a charm to use. Two footswitches engage tremolo and wavefolder independently, and one of three toggle switches swaps the order of the effects. The two 3-way switches toggle different tone and voice options, from darker and thicker to brighter and more aggressive. (Mixing and matching with these two toggles yields great results.)
The wavefolder, which has an all-analog signal path bit a digitally controlled LFO, is controlled by knobs for both gain and volume, which provide enormous dynamic range. The LFO tremolo gets three knobs: speed, depth, and waveform. The first two are self-explanatory, but the latter offers switching between eight different tremolo waveforms. You’ll find standard sawtooth, triangle, square, and sine waves, but Cosmodio also included some wacko shapes: asymmetric swoop, ramp, sample and hold, and random. These weirder forms force truly weird relationships with the pedal, forcing your playing into increasingly unpredictable and bizarre territories.
This is all housed in a trippy, beautifully decorated Hammond 1590BB-sized enclosure, with in/out, expression pedal, and power jacks. I had concerns about the durability of the expression jack because it’s not sealed to its opening with an outer nut and washer, making it feel more susceptible to damage if a cable gets stepped on or jostled near the connection, as well as from moisture. After a look at the interior, though, the build seems sturdy as any I’ve seen.
Splatterhouse Audio
Cosmodio’s claim that the refractor is a “first-of-its-kind” modulation effect is pretty grand, but they have a point in that the wavefolder is rare-ish in the guitar domain and pairing it with tremolo creates some pretty foreign sounds. Barton McGuire, the Massachusetts-based builder behind Cosmodio, released a few videos that demonstrate, visually, how a wavefolder impacts your guitar’s signal—I highly suggest checking them out to understand some of the principles behind the effect (and to see an ’80s Muppet Babies-branded keyboard in action.)
By folding a waveform back on itself, rather than clipping it as a conventional distortion would, the wavefolder section produces colliding, reflecting overtones and harmonics. The resulting distortion is unique: It can sound lo-fi and broken in the low- to mid-gain range, or synthy and extraterrestrial when the gain is dimed. Add in the tremolo, and you’ve got a lot of sonic variables to play with.
Used independently, the tremolo effect is great, but the wavefolder is where the real fun is. With the gain at 12 o’clock, it mimics a vintage 1x10 tube amp cranked to the breaking point by a splatty germanium OD. A soft touch cleans up the signal really nicely, while maintaining the weirdness the wavefolder imparts to its signal. With forceful pick strokes at high gain, it functions like a unique fuzz-distortion hybrid with bizarre alien artifacts punching through the synthy goop.
One forum commenter suggested that the Gravity Well effect is often in charge as much the guitar itself, and that’s spot on at the pedal's extremes. Whatever you expect from your usual playing techniques tends to go out the window —generating instead crumbling, sputtering bursts of blubbering sound. Learning to respond to the pedal in these environments can redefine the guitar as an instrument, and that’s a big part of Gravity Well’s magic.
The Verdict
Gravity Well is the most fun I’ve had with a modulation pedal in a while. It strikes a brilliant balance between adventurous and useful, with a broad range of LFO modulations and a totally excellent oddball distortion. The combination of the two effects yields some of the coolest sounds I’ve heard from an electric guitar, and at $279, it’s a very reasonably priced journey to deeply inspiring corners you probably never expected your 6-string (or bass, or drums, or Muppet Babies Casio EP-10) to lead you to.
Kemper and Zilla announce the immediate availability of Zilla 2x12“ guitar cabs loaded with the acclaimed Kemper Kone speaker.
Zilla offers a variety of customization to the customers. On the dedicated Website, customers can choose material, color/tolex, size, and much more.
The sensation and joy of playing a guitar cabinet
Sometimes, when there’s no PA, there’s just a drumkit and a bass amp. When the creative juices flow and the riffs have to bounce back off the wall - that’s the moment when you long for a powerful guitar cabinet.
A guitar cabinet that provides „that“ well-known feel and gives you that kick-in-the-back experience. Because guitar cabinets can move some serious air. But these days cabinets also have to be comprehensive and modern in terms of being capable of delivering the dynamic and tonal nuances of the KEMPER PROFILER. So here it is: The ZILLA 2 x 12“ upright slant KONE cabinet.
These cabinets are designed in cooperation with the KEMPER sound designers and the great people from Zilla. Beauty is created out of decades of experience in building the finest guitar cabinets for the biggest guitar masters in the UK and the world over, combined with the digital guitar tone wizardry from the KEMPER labs. Loaded with the exquisit Kemper Kone speakers.
Now Kemper and Zilla bring this beautiful and powerful dream team for playing, rehearsing, and performing to the guitar players!
ABOUT THE KEMPER KONE SPEAKERS
The Kemper Kone is a 12“ full range speaker which is exclusively designed by Celestion for KEMPER. By simply activating the PROFILER’s well-known Monitor CabOff function the KEMPER Kone is switched from full-range mode to the Speaker Imprint Mode, which then exactly mimics one of 19 classic guitar speakers.
Since the intelligence of the speaker lies in the DSP of the PROFILER, you will be able to switch individual speaker imprints along with your favorite rigs, without needing to do extensive editing.
The Zilla KEMPER KONE loaded 2x12“ cabinets can be custom designed and ordered for an EU price of £675,- UK price of £775,- and US price of £800,- - all including shipping (excluding taxes outside of the UK).
For more information, please visit kemper-amps.com or zillacabs.com.