
Traditional dovetail neck joint
There’s more than one way to join an acoustic guitar’s neck and body. Chris Martin explains.
While, at Martin, we primarily use dovetail neck joints on our instruments, there has been an evolution in neck-joint designs, including simple dovetail, linear dovetail, mortise and tenon, and a few other interesting variations over the years. Let’s take a look at these different neck joints and their usage.
Simple dovetail. The simple dovetail neck joint is a timeless design that consists of a dovetail-shaped projection on the neck fitting into a corresponding recess in the guitar body. This joint provides a secure connection, facilitating good tonal transfer between the neck and body.
Linear dovetail. Similar to the simple dovetail joint, the linear dovetail neck joint offers a different approach. Instead of an angled dovetail, this joint features a linear-shaped connection, providing a distinct aesthetic appeal while maintaining stability and tonal integrity.
Ice cream cone heel. Early Martin guitars featured a unique variation known as the ice cream cone heel neck joint. These necks often had a 3-piece construction, with the heel separate from the barrel. The design utilized a shorter tenon, and the neck’s heel resembled an inverted ice cream cone. C.F. Martin, Sr. learned to build guitars while apprenticing under John Stauffer, who used ice cream cone heels. C.F. was originally trained as a cabinet maker, where he learned dovetail joints. For this neck-joint evolution, he combined these skills.
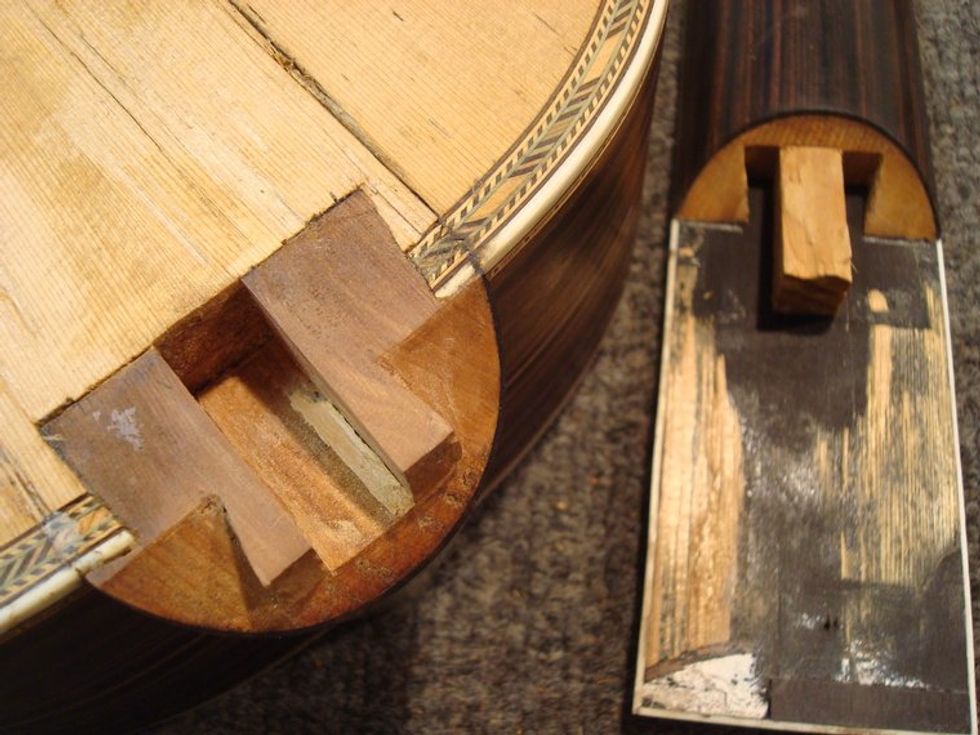
Ice cream cone neck joint
Spanish style. Early Spanish-style neck joints often featured a faux foot on the inside, but this did not affect the joint itself. The tenon in these necks was similar to modern designs, with a longer dovetail compared to ice cream cone heel necks. Initially, Spanish necks were multi-piece, with the headstock being a separate piece from the barrel and heel. Martin transitioned to 1-piece necks around 1909, but this change had no impact on the neck joint.
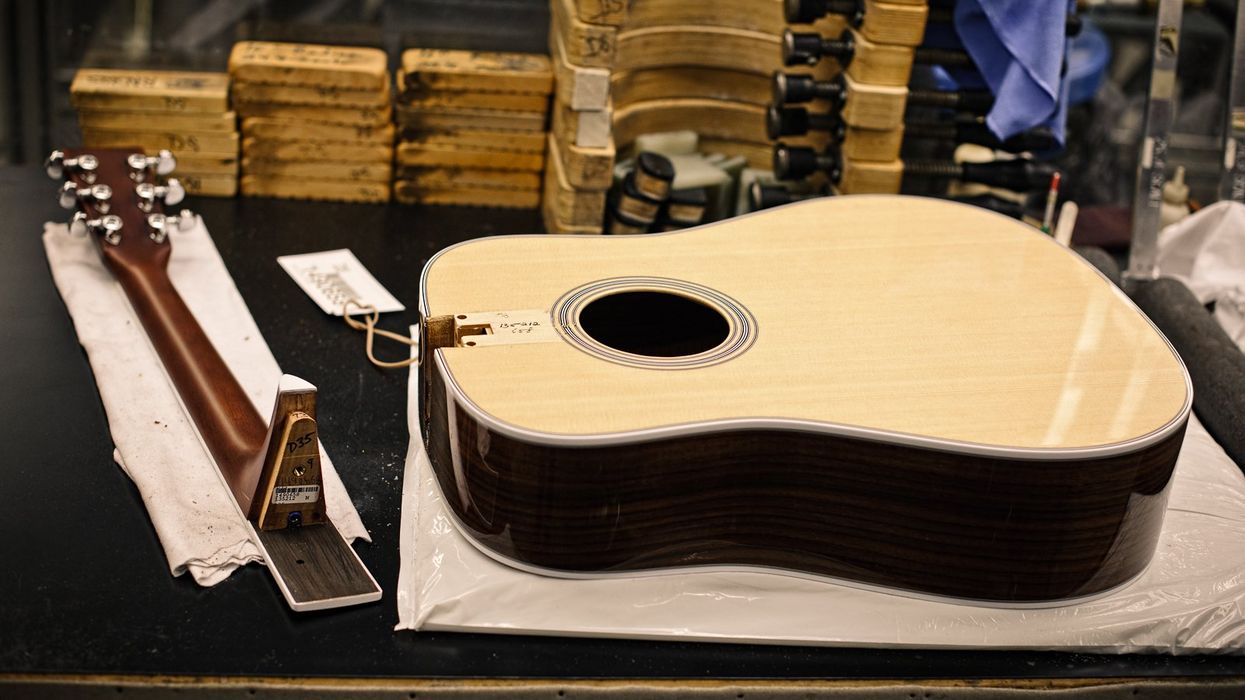
Traditional compound dovetail. The traditional compound dovetail neck joint is the classic neck joint most associated with acoustics. This complex joint has an angle cut into the V-shaped tenon, which tightens the neck to the body. It maximizes energy transfer from the neck to the body. Players argue the compound dovetail neck joints add a wider range of tonal presence to the instrument versus non-dovetail joints. While this joint is used by fewer and fewer acoustic makers due to its complexity, skilled labor requirements, and challenging repair process, Martin continues to utilize it in many of its U.S.-made instruments for the distinctive Martin tone.

Traditional dovetail joint
Mortise and tenon. Introduced in 1993, the mortise and tenon neck joint coincided with Martin’s adoption of CNC necks. These necks featured a straight tenon that slipped together and was held in place by a bolt while the glue dried. This joint provides ease of assembly, production accuracy, and a strong connection between the neck and body.
In 2012, the simple dovetail joint replaced the mortise and tenon at Martin USA. It utilizes a non-compound dovetail joint for attaching the neck to the body, offering ease of assembly while still retaining many tonal benefits of the dovetail connection. This joint provides a significant tonal improvement over the M&T and is primarily used on the 15, 16, and 17 series models.
Neck to Body Joints
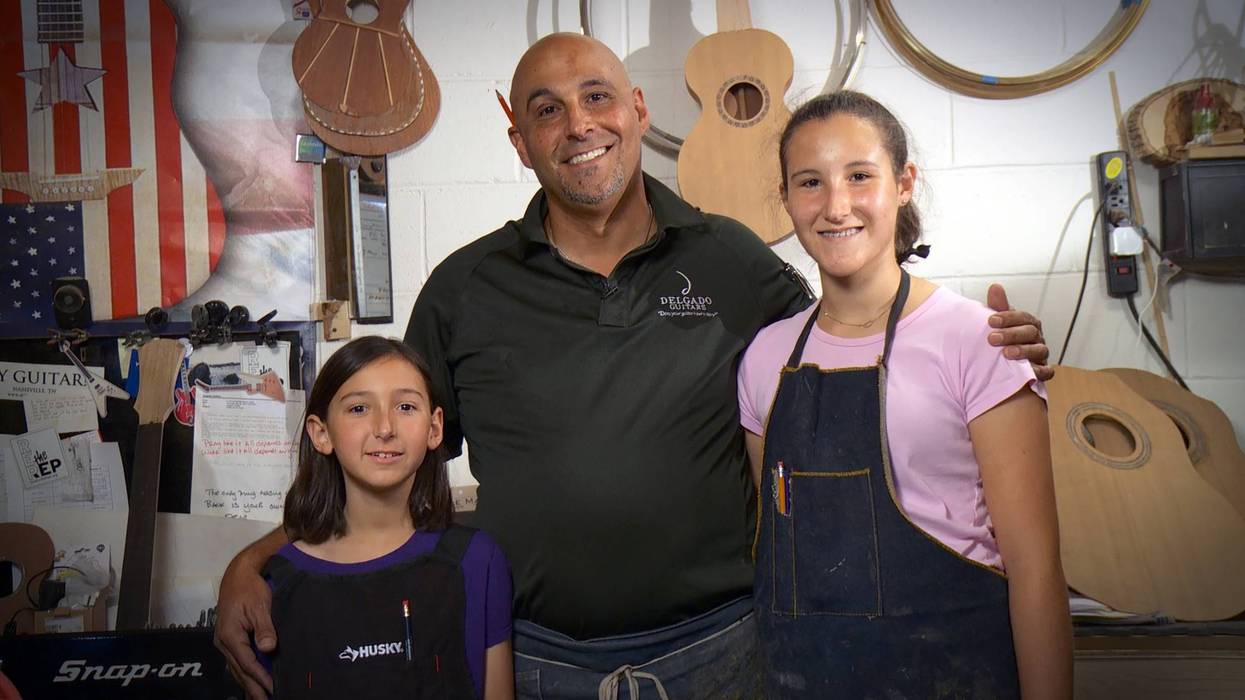
On this episode, Martin Brand Ambassador Diane Ponzio teaches us about that most important of unions, neck to body joints.
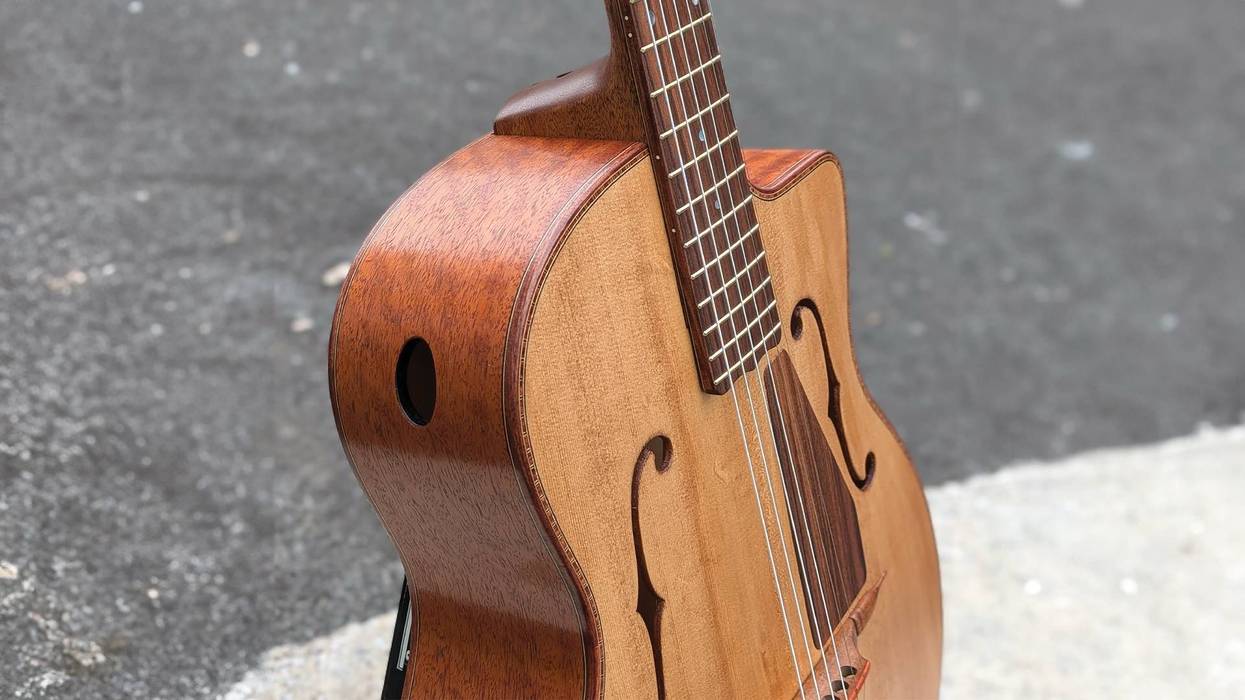
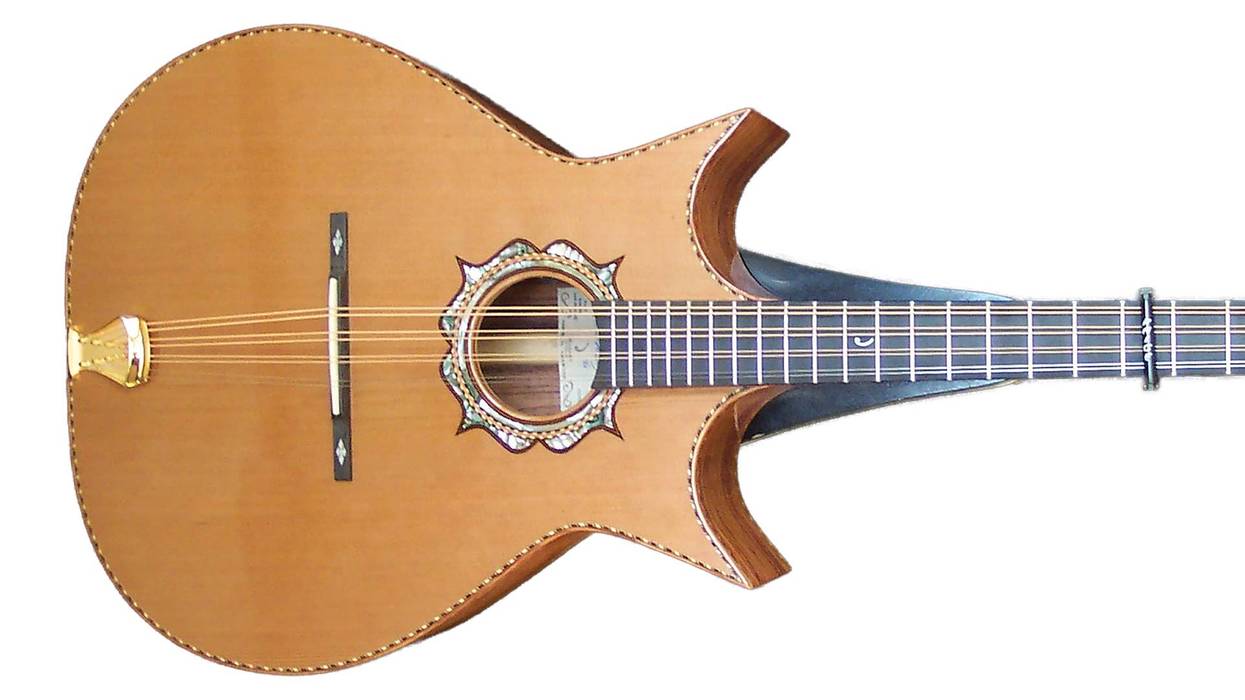
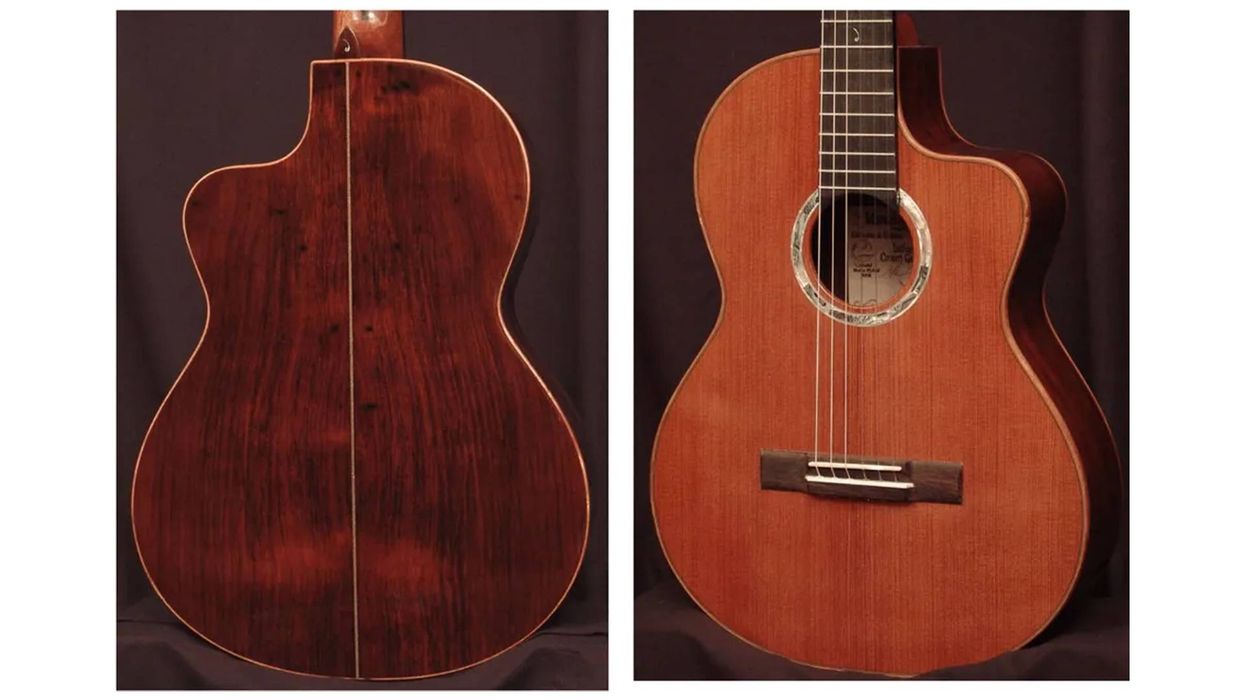
A traditional dovetail joint runs perpendicular to the top, while the linear dovetail joint is parallel to the top. In the linear dovetail joint, a floating dovetail tenon is attached by two bolts through the front block. The neck slides onto the dovetail tenon, and bolts secure the tenon tightly to the body without touching the neck. This system eliminates the need for a neck heel, allowing for a beveled front block providing enhanced access to the fretboard via the cutaway.
Advancements in technology and manufacturing techniques continue to shape the evolution of neck joints. While traditional handcrafted techniques remain cherished, modern innovations offer improved precision, efficiency, and consistency. However, the artistry and skill of the luthier will always be crucial in achieving a perfect fit between a guitar’s neck and body, ensuring exceptional playability and tonal quality for generations to come.
- Bohlinger Carves a Martin Neck ›
- Oldest Acoustic Guitar Alive? ›
- CAT Scanning a Vintage Martin D-18 ›
- An Acoustic Guitar Care and Repair Recap from Martin’s Top Tech - Premier Guitar ›
It’s Day 26 of Stompboxtober! Today’s pedal from MXR could be yours—enter now and return tomorrow for more!
MXR M309 Joshua Ambient Echo Pedal
The MXR Joshua Ambient Echo is your ticket to iconic sonic sanctuaries, featuring a foundation of carefully concocted tones and textures, highly customizable delay, and other features to help you craft soundscapes worthy of tonal trips out of the ’60s and ’70s and ethereal ambience from the ’80s.
This pedal requires 9 volts (300mA) and can be powered by the Dunlop ECB003 9-volt adapter or the MXR Iso-Brick Pro, Iso-Brick, and Mini Iso-Brick power supplies. This pedal cannot be powered by a battery.
Vintage-style reverb, tremolo, and vibrato sounds abound in a 3-in-1 stomp that might be the only box you need.
The Keeley ZOMA combines two of iconic amp effects—tremolo and reverb—into one pedal.
Key Features of the ZOMA
● Intuitive Control Layout: Three large knobs give you full control over Reverb Level, Tremolo Rate,and Depth
● Easy Access to Alternate Controls: Adjust Reverb Decay, Reverb Tone, and Tremolo Volume withsimple alt-controls.
● Instant Effect Order Switching: Customize your signal path. Position tremolos after reverb for avintage, black-panel tone or place harmonic tremolo before reverb for a dirty, swampy sound.
● True Bypass or Buffered Trails: Choose the setting that best suits your rig.
Three Reverb and Tremolo Modes:
● SS – Spring Reverb & Sine Tremolo: Classic spring reverb paired with a sine wave tremolo for that timelessblack-panel amp tone.
● PH – Plate Reverb & Harmonic Tremolo: Smooth, bright plate reverb combined with swampy harmonictremolo.
● PV – Plate Reverb & Pitch Vibrato: Achieve a vocal-like vibrato with ethereal plate reverb.
Reverb: Sounds & Controls
● Spring Reverb: Authentic tube amp spring reverb that captures every detail of vintage sound.
● Plate Reverb: Bright and smooth, recreating the lush tones of vibrating metal plates.
● Reverb Decay: Adjust the decay time using the REVERB/ALT SWITCH while turning the Level knob.
● Reverb Tone: Modify the tone of your reverb using the REVERB/ALT SWITCH while turning the Rate knob.
Tremolo: Sounds & Controls
● Sine Wave/Volume Tremolo: Adjusts the volume of the signal up and down with smooth sine wavemodulation.
● Harmonic Tremolo: Replicates classic tube-amp harmonic tremolo, creating a phaser-like effect withphase-split filtering.
● Pitch Vibrato: Delivers pitch bending effects that let you control how far and how fast notes shift.
● Alt-Control Tremolo Boost Volume: Adjust the boost volume by holding the REVERB/ALT footswitch whileturning the Depth knob.
The ZOMA is built with artfully designed circuitry and housed in a proprietary angled aluminum enclosure, ensuring both simplicity and durability. Like all Keeley pedals, it’s proudly designed and manufactured in the USA.
ZOMA Stereo Reverb and Tremolo

The first sound effects built into amplifiers were tremolo and reverb. Keeley’s legendary reverbs are paired with their sultry, vocal-like tremolos to give you an unreal sonic experience.
A Telefunken ELA M 251E large-diaphragm condenser mic, seen in its natural habitat.
By now, we’re all familiar with the many options out there for amp modeling. Mic modelers are another reliable asset to digital recording tech, and can rapidly grow your inventory with just a few clicks.
As guitarists, we’re very aware of amp-modeling and profiling technologies, such as the Line 6 Helix, Fractal Axe-Fx, Neural DSP Quad Cortex, and Kemper Profiler. While our bases are covered for these (with modelers available for every “holy grail” amp under the sun), we are still missing another vital area of the recording process—microphones—for the acoustic instruments and vocals we might want to capture.
What if we could record them using holy-grail-modeled microphones? This month, let’s evaluate microphone modeling to help you make better-sounding recordings. Tighten up, the Dojo is now open.
The Sincerest Form of Flattery
Microphone modeling is an intriguing advancement in recording technology, offering great flexibility and possibilities for musicians, producers, and engineers. Makers like Slate Digital, Antelope, and Antares make many offerings, from hardware to software.
Universal Audio’s Sphere DLX ($1299 Street), LX ($799), and their six new Standard Mic series have impeccably modeled classic mics, and when coupled with their classic mic pre and compressor plugins, you can enjoy the same highly coveted mic chains appreciated the world over.
How It Works
The technology behind microphone-modeling systems relies heavily on convolution and impulse response techniques. These techniques involve capturing the unique sonic fingerprint of a microphone by recording its response to a wide range of frequencies and sound pressure levels. The immediate benefit is that this means you can grow your mic locker exponentially and gain access to a wide range of legendary microphone tones and textures all from a single mic! Most modeling microphones are usually either small- or large-diaphragm, multi-pattern, condenser microphones that are capable of capturing a wide frequency range and dynamic response. By adding other modeling mics, you can record in stereo or surround, and/or record multiple instruments at a fraction of the cost of owning multiples of the modeled mics themselves.
A Wealth of Options
One significant advantage of mic-modeling systems is their ability to offer a vast array of microphone options within a single session instead of having the time-consuming duty of swapping them out to achieve different sounds. With a modeling system, you can switch between different mic models instantly and audition various mics to find the perfect tone for the recording.
“The same vintage microphone can sound different on different days depending on temperature, humidity, and the voltage from the wall.”
Another lovely bonus is that microphone-modeling systems also offer the ability to swap microphone characteristics after the recording has been made! Want to swap your AKG C12 for a Neumann U 47 long after the recording session is over? No problem! This is especially useful when the initial microphone choice may not have been ideal or when the production requires a different tonal character than originally intended.
Weighing the Pros and Cons
Some audio purists argue digital emulation can’t truly replicate the sound of a physical microphone, especially when it comes to vintage models that have unique characteristics developed over decades of use. The subtleties of these microphones and their aging components shape the way they interact with different preamps and compressors.
After making over a hundred records at Blackbird over the last eight years, I’ve grown quite familiar with a good portion of our 1,800-plus vintage mics, like Telefunken 251s, AKG C12s, Neumann U 47s and KM 84s, Shure SM7s and SM57s, RCA 44s and 77s, and Royer R-121s. These are the very same mic models that most modeling mics are trying to capture. But experience has taught me that not all microphones sound identical even if they are the same make and model (and year). Also, the same vintage microphone can sound different on different days depending on temperature, humidity, and the voltage from the wall (that’s why Blackbird has its own regulated power and all the studios strive for consistent temperature and humidity year-round).
For home studios and smaller production environments, microphone-modeling systems can be a game changer. You’ll get a wide range of high-end microphone sounds without the need for a large microphone collection, and the ability to change microphone models after the fact gives budding producers and engineers greater confidence and flexibility in their work.
In reality, most users find that the convenience, cost savings, and versatility offered by modeling systems far outweigh any potential shortcomings. Finally, keep in mind that even though the mic “profile” you choose (U 47, U 67, SM7, etc.) will be consistent day in and day out, the modeling mic itself is also still a mic and will require you to be mindful of these same issues I mentioned above in order for your mic “profile” to be as accurate as possible.
Until next time, namaste.


