
A closeup of a trusty ol’ tap-tempo switch.
Our columnist makes an argument against the usefulness of tap tempo footswitches. Should we really be bothering with them?
The ability to tap in a tempo on pedals is a fairly new concept, especially compared to the amount of time that stompboxes have existed in our world. I would venture to guess that this is due in part to the availability of, and need for, digital ICs. Then, being able to code them and apply them to effects circuits appropriately.
Piece of cake! … If you’re good at baking cake. This process isn’t exactly easy to implement, but these days, I feel like some players are almost expecting this modern commodity—to the point where a great delay pedal might be overlooked due to not having tap tempo.
Setting aside the history and design applications, I’ve been pondering if tap tempo even makes sense or is achievable in a band context. For this thought experiment, I’d like to run through a few scenarios, while also shedding light on a few software/hardware aspects for you to consider. To put it plainly, “Why would you need tap tempo on a pedal?” The most compelling argument I’ve thought of is the “band” aspect: being part of a band where the rhythm section has laid down the tempo and you’d like to add delay to the song. Now, if you set the knobs on your delay pedal and started playing to that tempo, your bandmates could join along with your delay line acting as the group’s metronome. However, in this scenario, you didn’t start the tempo. That’s no problem! You’ve got a footswitch on your delay that allows you to tap your foot to the beat of the drummer and you’ll be all set! But will you?
Let’s assume, for argument’s sake, that the drummer is playing to a click track at 120 bpm. Your foot starts tapping along and you press that magical tap footswitch on your favorite delay three to six times. Boom! Now you’ve set the delay line to 120 bpm. But what are the chances that you tapped 120 exactly? Is it likely that you tapped in 122 bpm? Or 121.3 bpm? Absolutely. This discrepancy may not be very noticeable for a couple bars, but every subsequent bar you play will start to become more noticeable. So what do you do? You can keep tapping in the tempo to the best of your ability every few bars. Seems cumbersome given that you still have to play the guitar parts and focus on other things that are inherently involved in a band setting.
Pulling the curtain back for a second here, let’s call the part of the pedal that handles the tap tempo “the brain.” The brain of the delay sees you pressing the tap footswitch multiple times and processes this in a couple ways (that I’m aware of). One, it measures the distance between all the consecutive taps and spits out an average. Two, it takes the last two distances in the string of taps and makes that the bpm. That’s not even going into whether the brain is floating point (121.3 bpm) or fixed point (121.32 bpm).
“You’ve got a footswitch on your delay that allows you to tap your foot to the beat of the drummer and you’ll be all set! But will you?”
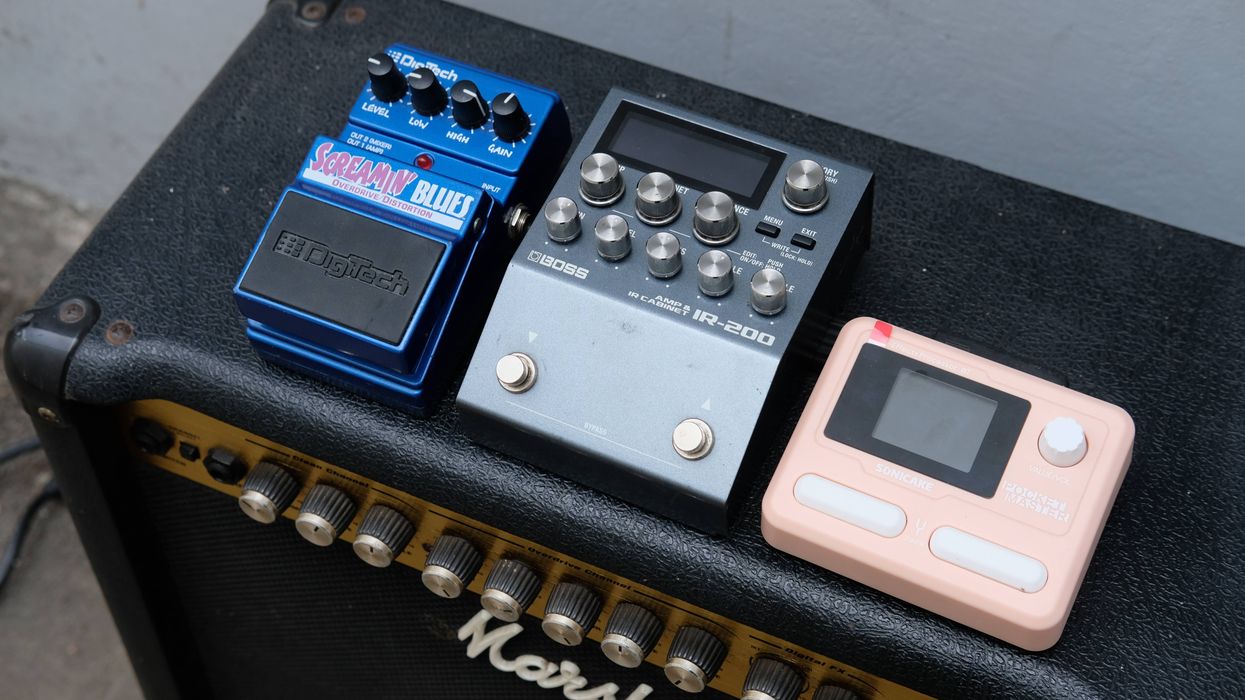
Your drummer is still waiting for you to get the tempo dialed in. So what can you try next? Well, if your delay pedal has an insert jack for tap tempo, we can try to connect something like the Disaster Area SMARTClock. The tap footswitch on it won’t help here. It’ll be the same as the bpm discrepancy we discussed previously. However, there’s an encoder knob that allows you to scroll through the output tempo in bpm or millisecond increments. Yes! Not all is lost! You just have to make sure to sync it up exactly on the downbeat of the tempo—crap!
Another more intricate and exact option would be to have the drummer’s click track send a MIDI signal to your SMARTClock that then connects to your delay. At this point, I’d change my question to, “Is this level of tap tempo necessary?” Perhaps if you’re the Edge and/or the song is predicated on the delay.
If you’re adding a lead part to a song and the delay isn’t exactly “on” with the bpm, I would argue that it can stand out better, be more easily heard, and be more interesting. I would also argue that an amplitude-style tremolo makes more sense to require exact bpm. I’m thinking about the Smiths’ “How Soon is Now?”
Tap-tempo options on modulation have been fun and we’re seeing more of it nowadays, but we’ve been playing and listening to the Phase 90 for decades without needing tap. Ultimately, if having certain options inspires you and brings you joy, go for it! Enjoy! But I’d ask you, “Did you actually tap in the correct bpm?” and “Did it matter?”You could be one of THREE winners in this PG Perks Exclusive giveaway
Dr Strings Dragon Skin+ Coated Accurate Core Technology 6-String Phosphor Bronze Acoustic Guitar Strings 12 54
DR Strings Dragon Skin+ Coated Accurate Core Technology 6-string phosphor bronze acoustic guitar strings provide an unparalleled playing experience for acoustic guitarists. Packed with patented technology, these strings upgrade both the core and wrap wires to sound full, balanced and loud. Accurate Core Technology creates grooves on the core to cradle the wrap wire, allowing the strings to ring out fully. A micro-thin coating provides long life while feeling like an uncoated string. Designed to feel and sound better, Dragon Skin+ strings are unlike anything you've played before. The difference is real. Accurate Core Technology grooves cradle wrap wire . Micro-thin coating provides long life, uncoated feel . Huge, balanced tone from upgraded core and wrap . Patented technology for outstanding musical endurance.Guild M-20 Concert Acoustic Guitar - Natural Finish
Guild’s iconic M-20 was the first guitar off the production line in 1967, when the company had grown so much that they relocated to a new factory in Westerly, RI. Nearly 50 years later, history has repeated itself in a brand new, state-of-the-art facility in California. The M-20 is a concert size acoustic guitar built with solid mahogany top, back, and sides, informally nicknamed “the Nick Drake guitar” for its inclusion on the album art for Drake’s album, Bryter Layter. It features a rosewood bridge and fingerboard, bone nut and saddle, and an extremely light satin finish that allows this guitar to truly sing. The M-20’s modest appointments include a vintage style rosette and Guild’s peak logo inlaid in Pearloid on the headstock. Each M-20 comes with a hand-signed, numbered certificate of authenticity, and ships with a hardshell case. Available in Natural, Vintage Sunburst, Natural with LR Baggs pickup (M-20E Nat), and Sunburst with LR Baggs pickup (M-20E VSB).
An easy guide to re-anchoring a loose tuning machine, restoring a “lost” input jack, refinishing dinged frets, and staunching a dinged surface. Result: no repair fees!
Pardon my French, but I’m about to misethe hell out of some en scenein this article about do-it-yourself guitar repair. Buckle-vous up.
The Guitarist is in the middle of double-tracking a solo. It’s not quite right. Creative juices are flowing, but at any moment, the gate could slam shut. Their social media feed is stagnant, and the algorithm thirsts for content. The studio is 80 bucks an hour. That new boutique fuzz pedal would sound great on this track, surely? It would, of course, as these things are the cure for all problems, but it rests just out of reach.
Desperate for a solution, the Guitarist rests their perfect new guitar against the warm tube amp–only for a moment … but a horrible amplified bwaang from wood, string, and concrete’s violent meeting breaks the temporary silence as gravity muscles potential into the kinetic. The Guitarist breathes a defeated “aw, man,” like a loosened balloon farting hopelessly across an empty room. The gate closes, juices no longer loose, locked, impenetrable by any transistor-based effect. And it’s time to assess the damage.”
I bet you saw yourself in the opening scene of Twenty-Four-and-Three-Quarter-Inches of Woe, which may be the title of the screenplay I just started to write, most likely due to the fact that you’ve made a similarly boneheaded mistake with your instrument.
Unfortunately, my storytelling skills didn’t save a nice new Epiphone Casino from sliding off my amp, meeting the floor, and earning some damage on the way down. Yeah, that’s a true story, and I’m sure something similar has happened to you as well. It can happen to anyone who plays guitar for long enough, but there’s no need for despair yet.
If you’ve been victimized by gravity like I have, as long as the damage isn’t major, you can fix a lot of things yourself. I’ll use my felled Casino as an example. It suffered a loosened tuner, an input jack that fell inside the guitar, a damaged fret, and a few dents in the finish. While I work, I’ll provide some suggestions for supplies and tools to keep in your home repair kit, just in case you ever need them.
Tools for the Tasks
We ordered all of the tools we used in these repairs, excluding the painter’s tape and the toothpicks, which we picked up during lunch at Jack’s Bar-B-Que, from StewMac.
The essentials:
• ESP Multi Spanner
• Archtop Guitar Helping Hand
• Guitar Tech Screwdriver Set
• 3 Corner Fret Dressing Files
• Ultra Thin Master Glue
• GluBoost Fill n’ Finish
• Rectangular Sanding Kit
Can’t Tune It like That
First, let’s take care of the loose tuner, since it’s currently in no shape to reliably hold string tension. The tumble knocked it sideways, which loosened the screws holding in the key, which caused the wood around the screws to strip. It’s alarming to see, but this is a very simple fix.
Add to Repair Kit: Round toothpicks, water-thin CA glue, glue applicator tips, safety goggles
[Note: For the unfamiliar, CA is short for cyanoacrylate. It’s commonly referred to as “Super Glue,” but since that is a brand name, not the generic, I’ll refer to it here as “CA glue.”]
First, remove the tuner by backing the screws out, then pull the tuner from the headstock. My Casino’s tuning keys use a press-in bushing to hold the post straight in the headstock, so no further disassembly is required. However, if you experience this issue with a guitar with more modern-styled tuning keys, you’ll need to use an appropriately sized wrench or socket to remove the screw-in bushing before removing the key.
Next, break a toothpick in half, insert the thicker end into the hole where your mounting screw used to be. Break it off flush with the surface, and repeat the process with the other hole.
Safety goggles on: It’s CA glue time. Trust me, you do not want to squirt this stuff into your eye. Fit an applicator tip to the glue bottle and practice your squeeze on a scrap piece of paper or wood, far away from anything you don’t want glued to your guitar or yourself. This stuff is magic—it will bond things you never intended if you aren’t careful.
All you need is a very small drop, so practice until you can confidently flow out just a small controlled amount. Once you’ve mastered that, drop a small amount of water-thin CA glue into each filled hole. It will soak through the toothpick into the surrounding wood just enough for this quick fix. Let it cure for at least 15 minutes, but longer is even better.
Pop the tuner back in and drive the screws straight into the toothpick-filled holes. The screw will compress the toothpick into the existing wood and create new threads strong enough to hold your tuner in place.
Congratulations! You fixed it well enough to at least make it through a session. I’ve done this on several guitars that lasted years with no issues, so you should be confident in your work.
Hit the Road, Jack
Look, there’s no way to sugarcoat this. Fishing an output jack out of a hollowbody guitar is a pain. You can do this. All you need is patience and a few handy gadgets.
Add to Repair Kit: flashlight, multi-spanner, small drywall anchor, “helping hand,” small screwdriver
Your first task is to locate the jack inside the guitar. Odds are it didn’t fall far away from where it needs to be, since it’s probably wired to one of your control potentiometers. Use your flashlight to shine some light inside the f-hole to help find it.
I found mine wedged against the treble side of the rim, a little farther away than I can reach with my fingers. This is not zesty. I am unhappy but equipped and determined.
The tool I described as a “helping hand” becomes useful here. It’s essentially just a bent hook at the end of a handle made out of pliable heavy wire. Several guitar parts suppliers sell something similar. I got mine from StewMac for a reasonable price, but if you want to be thrifty about it, there’s no reason why you can’t cut and bend a wire coat hanger.
Take a few deep breaths, and working through the f-hole, use the hook end of your helping hand to gently pull the output jack back toward where it was mounted. Bend the helping hand however needed to reach the jack as easily as possible.
I managed to pull the jack back enough to put a small screwdriver through the jack’s mounting hole and then through the jack itself. That screwdriver will act as a guide while I lift the jack back into place with the helping hand.
You should expect this will take several attempts. Try not to get frustrated. With enough patience, you’ll be able to get the jack back where it belongs. Once you have the jack in place, carefully thread the washer and nut back onto the jack. It shouldn’t take much effort to thread it back on. Just be careful not to cross-thread the nut.
Now that the nut is threaded on enough so it won’t fall back in, the challenge is to tighten it without twisting the jack itself to avoid breaking any wires. I’ve seen and used a few different methods to accomplish this, but I came across one recently that I really like.
This is where you’ll use your drywall anchor. Get one small enough to fit inside the jack without using too much force, then tighten the screw in the anchor so that it spreads to fit tightly inside the jack. This will hold it steady enough to tighten the nut with a multi-spanner tool or an appropriately-sized wrench.
I like a multi-spanner for this job, because it’s always the right size and is slim enough to not be clumsy for operations like this. Like the helping hand, lots of suppliers sell something similar using different names. Mine is made by ESP and also arrived in my StewMac tool box. I use it all the time for all sorts of tasks.
Once the nut is tightened, unscrew the drywall anchor, remove it, and test the jack for sound by plugging your guitar into an amp. A positive result should be obvious at this point, but if you don’t hear any signal, or an excessive consistent buzz, get in touch with your local repair tech.
Got a Dent In My Fret, Man
Honestly, face-first is probably the best way a guitar like my Casino could have hit the ground. The damage could’ve been far worse. Check any forum for endless complaints about Gibson/Epiphone headstock breaks. But I do need to address some damage to a fret caused during the fall.
The issue here is that plain steel electric guitar strings—like your G, B, and E strings—are considerably harder than most frets (my stainless steel fret contingency, put your hands down and let me finish), so it’s possible for a string to leave a small sharp dent in a fret if you hit it with enough force. This specific issue might go unnoticed until it’s time to bend a note at that fret, then you’ll feel and hear the string catch it. No good.
Before we get started: Having allof your frets carefully levelled, recrowned, and polished is alwaysa better solution than partially levelling just a few frets. But considering the entire premise we’ve constructed, which is a situation where we just want the guitar back in action relatively quickly, a partial fret level on the upper frets is perfectly fine as long as it’s done carefully.
Add to Repair Kit: Crowning file (three-corner or rounded), assortment of sandpaper (400 grit to 800 should be fine), 0000 extra-fine steel wool (optional), fretboard conditioner, permanent marker.
First thing we need to do is identify which frets need the work. Let’s say you have a nick in your 17th fret on the treble side under the B string. The goal is to bring the height of that damaged fret and all the frets past it down until the nick disappears. After that, remove the strings before you begin working.
To accomplish this, mark the damaged frets and all frets past it with a permanent marker. A trusty black Sharpie works great for this, but any darker color works fine. For this repair, we only need to work on the treble side of the frets, so that’s all you need to focus on. Also, use some blue painter’s marking tape to protect the area of the guitar near where you will be working. Small slips of a file or sandpaper can cause some nasty injuries to the guitar’s surface.
Next, level the damaged fret and all frets past it (moving toward the bridge) with something stiff enough to not flex under pressure. I keep an old credit card—a nice sturdy one—with a bit of 400-grit sandpaper glued to one side along the shorter edge, 800 grit on the other side. Start with the 400 and work your way down, being careful not to use too much pressure. Let the sandpaper do the work.
You’ll notice the ink is removed as you sand. The way to make sure you’re keeping everything level is to stop frequently and observe the new clean areas on top of each fret. Each one should be about the same width.
This will take a while. A 400-grit sandpaper does not remove material quickly, 800 grit even less so. I’m suggesting this technique because working slowly makes it more difficult to get yourself in trouble. Several suppliers sell mini files for spot leveling, but I don’t recommend starting there because they remove fret material pretty aggressively.
Eventually you’ll notice the little divot in your 17th fret is almost gone. Now’s time to switch to 800 grit to finish the job. You guessed correctly: This will take even longer, but it’ll leave a nice finish without removing any more material than necessary.
Great! Now you have five flat-topped frets. That won’t sound very good, so now you need to re-crown them, giving them a rounded profile to match the other frets. I like to use a 3-corner file to slowly round over each side of the fret, working from the fretboard up, but if you feel like dropping some serious flow on a specialized crowning file, this job can be a lot easier. Be sure to get the marker back out, ink up each fret, and stop filing when just a tiny sliver of ink is left on top of each fret.
Use a piece of 800 grit paper to remove any file marks and smooth out each fret. If you have finer grits, you could work your way up to 1200 or so, but don’t go too hard or you could undo your work. You just want the frets clean and smooth. At this point, I like the way frets feel after a quick buff with 0000 steel wool, but the mess left behind does rightfully deter a lot of repair techs. If you opt in for this, be sure to tape off your pickups and consider finding a second location for this step.
Work in some fretboard conditioner if you like (skip it if you have a maple or synthetic board; no need for that here), put some new strings on, and check your work. Play every note on these frets, to make sure they ring out without any buzzes. It may not look perfect, but as long as the guitar sounds good, you’re okay until it’s time for a full level/crown/polish job.
Not Finished Until It’s, Uh, Finished
Now for the last souvenir from my Casino’s short journey to the floor. I noticed a few spots along the rim of the guitar where the finish was damaged. Specifically, it looks like the guitar hit something with an edge on the way down hard enough to put a couple of jagged dents in it, right along the binding.
Funny, that’s actually what binding is intended for–protecting edges and corners from damage. Anyway, we need to discuss a few things about guitar finishes.
For the purpose of this article, I’m only going to discuss repairs to the clear coat, since that’s where my damage is. Most guitars now are finished using polyurethane or lacquer for the top clear-coat layer.
Speaking verygenerally, lacquer finishes are softer and less durable, which makes hiding repairs a lot easier if you have the skills and patience. Polyurethane finishes are hard and tough in every way: hard to damage and tough to hide repairs regardless of skills or patience.
I happen to know that my formerly mint-condition Casino has a polyurethane finish, which means I’m going to lower my expectations with this repair. Instead of trying to make it look like it never happened, which will take a lot of work, I’ll just try to keep it from getting worse over time, which will take considerably less work.
It also means I won’t be discussing how to repair lacquer finishes, which is a bit more in-depth, requires a lot more patience and practice, and is therefore not really recommended for the average DIY’er—at least not in the scope of this piece. So if your guitar has a lacquer finish, I don’t think this part applies. Let someone else take care of it, or maybe skip this part and learn to love your guitar as is. The latter is still an admirable move.
Add to Repair Kit: Nothing! You already have what you need from the previous repairs. Feel good about that.
Since the damage is a pronounced dent with sharp edges in the clear coat, all I really need to do is seal it with an appropriate material. And the material appropriate for repairing polyurethane finishes is—you guessed it—CA glue, because it dries hard, clear, and quickly, much like polyurethane.
Step one: Use painter’s masking tape around the area of the damage, just in case the glue runs when applied. Step two: Put glue on the dented finish. CA glue will fill in all the small cracks within the damage and seal the existing finish. Be careful; use the smallest-drop-possible technique you perfected when fixing the tuning peg, and give it plenty of time to dry.
That’s it. That’s all I need to keep the finish from continuing to chip the more I play it. Yes, I saved the easiest one for last, as a little treat.
Obviously, this isn’t a particularly beautiful repair, so I could go above and beyond by using thicker CA glue—for example, GluBoost Fill n’ Finish—to fill it in completely, sand it level, and polish the area back to the original mirror gloss. Dan Erlewine has a few excellent YouTube videos outlining this exact method that are easy to find, and I encourage you to try if you’re so inclined. But for my purposes, this will do.
Accidents will happen if you’re actually playing your guitar, but they’re no cause for panic when they do. Even though the guitar isn’t perfect anymore, it’s perfectly playable, and I can get by with it for now. I broke it, so I fixed it, which is something I hope you feel empowered to do should you break yours.
Next time, I’ll use a good guitar stand.
Elliott Sharp is a dapper dude. Not a dandy, mind you, but an elegant gentleman.
The outside-the-box 6-string swami pays homage to the even-further-outside-the-box musician who’s played a formative role in the downtown Manhattan scene and continues to quietly—and almost compulsively—shape the worlds of experimental and roots music.
Often the most potent and iconoclastic artists generate extraordinary work for decades, yet seem to be relegated to the shadows, to a kind of perma-underground status. Certainly an artist like my friend Elliott Sharp fits this category. Yes, his work can be resolutely avant-garde. But perhaps the most challenging thing about trying to track this man is the utterly remarkable breadth of his work.
I am writing this piece for a guitar magazine, so, necessarily, I must serve up info that is guitar-centric. And I can do that, at least a little bit. But Elliott is also a noted composer, runs his own little record label, plays woodwinds proficiently, is a guitar builder/tinkerer, author, gracious supporter of other musicians’ efforts, family man, and killer blues player—a blues scholar, in fact. So where do we, the public, conditioned to needing categories, pigeonholes, and easy assessment signals, put Elliott Sharp—an artist with a powerful work ethic and a long, illustrious career of making mind-bending sounds and conceptual works? How about putting him in the pantheon of the maverick and the multifaceted? Surely this pantheon exists somewhere! In mind, in heart. To those for whom such things resonate and inspire, I bring you Elliott Sharp.
One can obviously go to the information superhighway to find info on Elliott, and to hear his music, so I won’t go into too many details about where he was born (Cleveland) and when (March 1, 1951; as of this writing, Elliott is 74), or what he is best known for (being a crucial figure in the downtown New York City scene from 1979 to the present). He is Berlin Prize winner and a Guggenheim Fellow (among other honors). And I have never asked him what strings and picks he uses, so maybe I have already blown it here. But I realize now, having taken on this assignment, that inherent in writing about and trying to explain Elliott Sharp is an implicit TMI factor. There is so much going on here, so much diverse information that could be imparted, that I would not be the least bit surprised if some readers eventually glaze over a bit and start thinking of their own life’s efforts and goals as rather paltry. I get that! Although you shouldn’t.
E# @NaturalHabitat
Here, now, is my portrait of Elliott, accompanied by what I imagine is a day in the life of Elliott when he’s at home in New York City.
Elliott Sharp is a dapper dude. Not a dandy, mind you, but an elegant gentleman. He, like so many in New York and in the world of music/art/guitar, favors dark-hued clothing (yeah, a preponderance of black) and is most often seen wearing a classic slouch hat of obvious quality. He relocated from Buffalo via Western Massachusetts to lower Manhattan in 1979 to a zone that was, back then, quite treacherously decrepit, in an apartment that offered only an hour or so of heat in the winter, etc., etc. It was cheap, and things were always happening, and, in fact, it was the 1950s domicile of William Burroughs, Allen Ginsberg, and Jack Kerouac.The area became the nexus of an ever-expanding circle of iconoclastic, experimental artists of many stripes.
Sharp plays what passes for a fairly staid instrument in his collection: a bass and guitar doubleneck, in 1992.
Elliott is still in that building in the East Village, though it is now only his workplace and not his living space. I am trying to remember exactly when I met Elliott, but it was probably about 25 years ago, and he still had only the one small, original apartment and a shared music space in the Garment District. I, like countless others before and after me, stayed in that East Village apartment whenever I needed a place to crash and Elliott was elsewhere, and eventually he was able to secure the next door apartment and expand his space. This is where Elliott Sharp works every day that he is not touring, pretty much 9 to 6. The place is a bit funky and dusty, and it is filled with instruments, amps (some classics, like a mid-’60s Princeton Reverb and a tweed Champ), and other tools accumulated over many decades—in spite of the many times that certain ones had to be sold to keep bread on the table.
When he’s not composing, scoring films, recording other artists, or gigging with the bands he has been in or led for the last several decades (Mofungo, Carbon/Orchestra Carbon, SysOrk, Terraplane, The Bootstrappers, Aggragat), Elliott tinkers with guitars, pedals, mandolins. Elliott is, to me, the king of guitar transformation, and his tinkering is stunningly Frankensteinian as he guts, rebuilds, and alters all kinds of stringed instruments, both electric and acoustic. He recently told me that in the ’60s he built fuzz boxes out of tobacco tins to make money. How cool would it be to have one of those now?? If one does a search on Elliott Sharp, many photos will reveal what I'm talking about: the handcrafted doubleneck he was most often seen playing in the ’80s (there was maybe more than one), 8-string guitars, modified Strat-type guitars with completely different pickups.. He also has a fancy guitar or two, such as his Koll fanned-fret 8-string, upon which he has played many a solo recital. During Covid time,, things were a little slow in the cash-flow department and, as a family man with twins, a little extra income was needed. So Elliott started building really cool-looking guitars out of cheap
ones and parts from wherever and refinishing them in hip and attractive ways and called them Mutantu. He sold them to friends and friends of friends. Yours truly basically only changes strings on his guitars, appealing helplessly to experts to do any kind of work on his guitars and amps, afraid of costly errors. The maverick and multifaceted among us, like Elliott, possess no such fear.
Even a leader in experimental 6-string gets a little guitar face now and then—especially when he’s playing blues.
Photo by Scott Friedlander
So, back to that promised day in the life of Elliott Sharp (as imagined, with some degree of knowledge, by me): It’s early morning, and there is family to contend with. No bohemian lollygagging! So it’s feed the kids breakfast, do what parents must do. Then it’s off to the office (his studio), so Elliott dons a fine gray shirt (is that silk?), dark trousers, coat, and hat, and walks north from the family apartment on nearly the lowest point of eastern Manhattan to the East Village. The traffic and endless refurbishing of the Williamsburg Bridge roars familiarly overhead, the East River flows, and eventually a river of another kind, Houston Street, is crossed. Up the stairs to the fifth floor and the studio door is unlocked. Espresso is made. (There will be more of this.) The computer is turned on. And then ... who knows? Anything could be on the docket, but some sort of work will ensue for a good eight hours. Maybe a new graphic score for a German symphony is in the works (some of these have become visual artworks, too), or maybe it's time to try another mix of that Terraplane track, the one with Elliott’s friend, hero, and inspiration Hubert Sumlin—the one Elliott recorded not long before the famed Howlin’ Wolf guitarist joined his ancestors in the Great Beyond. Or maybe he’s recording a variation on his trio ERR Guitar (where he was originally joined by Marc Ribot and Mary Halvorson), called ERE Guitar Today, with Sally Gates and Tashi Dorji. Could happen—and it did. You can see Elliott’s studio in the ERE Guitar CD booklet.
Or maybe it’s guitar tinkering/building time. Where’s that delightfully chunky neck from China that would be awesome on that fake Tele body that was just refitted with no-name humbuckers (“sounded good once I removed the pickup covers,” Elliott observes) and a resophonic guitar tailpiece? By 5 or 6 it’s time to go home, maybe cook dinner tonight. And then ... my little imagined epic ends with a tasteful cinematic cliché: the dissolve.
The E# Way
Elliott Sharp has techniques that, in some cases, are all his own. No stranger to open tunings, prepared guitar, and other extended techniques, he often utilizes rhythmic, two-hand tapping to create spiraling, hypnotic patterns. His composing over these many years has employed and embraced genetics, Fibonacci numbers, algorithms, and fractal geometry. Though a mathematics and physics know-nothing myself, I see and hear a relationship between these elements as he has applied them to his uncompromisingly avant-garde compositions and these tapping patterns often heard in his solo work. Once he kicks in signal processing, stand back! What one hears sounds like four people (or other species and life forms), and the sensation is exhilarating. Sure, there could also be evidence of (here it comes) skronk (I can't believe I used that word), but Elliott certainly does not reside permanently in that world. Enjoying all kinds of sounds, from the lonesome moan of a resonator guitar to the aleatoric sputterings and squeals of a tormented electric guitar, is something he and I share, after all. Take, for example, two of his latest recordings on his zOaR imprint, Mandorleand Mandocello, which document his solo work on the two instruments, respectively. Both recordings investigate the instruments’ acoustic characteristics before, about half-way through, switching suddenly to electric, ultra-processed sounds. It’s a bracing experience that explains a few things about this man and the breadth of his aesthetic sweep. The sounds bring up images of recombinant DNA (information on which he has also imbued into his work), roiling lava, and the ever-expanding universe. Recommended!
Sharp applies his wicked two-handed-tapping technique to his 8-string, fanned-fret guitar built by Saul Koll.
Photo by Scott Friedlander
So, this might fit into the aforementioned TMI category, but Elliott Sharp puts out a staggering amount of recordings. Every time I see him (which is not often enough), he has a little pile of compact discs for me, often on zOaR. I saw somewhere recently that he has released 165 recordings, but I think there are probably more than that. It’s hard for even the data lords to keep up! But it’s not always Elliott Sharp pieces or improvisation/collaborations on these albums. Other artists whom Elliott knows and respects can be represented, such as Spanish electric guitarist/conceptualizer A. L. Guillén, late bassist/producer Peter Freeman, Italian voice and guitar duo XIPE, or Hardenger fiddle player Agnese Amico—all articulate and singular musicians whom Elliott assists by releasing their music. I am grateful for this. It’s obviously more “work” for Elliott, and he accomplishes it, along with everything else he takes on or imagines doing, with elegant aplomb. Though obviously a nose-to-the-grindstone worker, Elliott is generally low-key and relaxed, even after those espressos.
The last thing I want to write about is Elliott's interpretations of the music of Thelonious Monk. Are you surprised, even after everything else you have just read, that something like that exists? In 2003, Elliott released a solo acoustic guitar recording called Sharp? Monk? Sharp! Monk!, and stunned the world (well, those few who pay attention to such things). However, my first exposure to Elliott's Monk interpretations was the more recent Monkulations, expertly recorded live in Vienna in 2007. (You can hear it on Bandcamp). These recordings are, justifiably I suppose, controversial in certain corners, because they do not adhere to Monk's exact written particulars note-for-note. Yet the mood, gestures, rhythmic wonders, and even the harmonic depth of Thelonious Monk often emerges, and frequently in astonishing ways. I understand why some would take issue with this approach because it departs significantly from the jazz tradition, but I find it remarkably fresh, bold, and so delightfully E#. They reveal an aspect of Elliott’s thinking and playing that is surprising in some ways, but also so him. It is clear to me that Elliott has seriously examined and internalized Monk’s repertoire.
Spring(s) in the garden: Sharp can use just about any tool in his improvisations.
Photo by Norman Westberg
Elliott is an artist who plays more than one instrument, plays them all in unique, startling, and often innovative ways, composes rigorous conceptual works from chamber music to operas, makes electronic music with no guitar, plays mean blues guitar like a swamp rat, authors books (I highly recommend his mostly memoir IrRational Music, and a second book is emerging this fall), builds and modifies guitars and other devices, is stunningly prolific, and is an elegant gentleman. The planet is a better place with him and his work in it. The maverick and multifaceted often have a rough road to tread, as we all know. So check out Elliott Sharp's vast world if any of this seems interesting to you. Thanks, Elliott!
YouTube
Watch Elliott Sharp and Marc Ribot deliver a masterclass in free improvisation at Manhattan’s Cornelia Street Café in 2010—Sharp’s two-handed tapping and slide playing included.
Elliott Sharp’s Favorite Gear
This doubleneck guitar accompanied Sharp on many of his ’80s performances and is one of his earlier experimental instruments, as is this 8-string.
Road
Guitars
• Strandberg 8-string Boden
• 1996 Henderson-Greco 8-string
Amp
• Fender Deluxe Reverb or black-panel Twin Reverb (depending on size of venue)
• Trace-Elliot bass amp w 4x10 cabinet
(live rig uses both amps, run in stereo)
Effects
• Eventide H90 w/ Sonicake expression pedal
• Sonicake Fuzz
• Hotone Komp
• Hotone Blues
• TC Electronic Flashback 2
• VSN Twin Looper
Accessories
• Slides, EBows, springs, metal rods and strips, small wooden and ceramic square plates
Home
Guitars
• 1946 Martin OO-18 acoustic guitar
• 2006 Squier 51 (Sharp explains: “On New Year's Day 2007, I took the twins down to the East River in their stroller. They were 15 months old and knew a few words. As we rolled along, they started shouting “guitar, guitar,” and, sure enough, sticking out of a garbage can was a black Squier 51 that someone had attempted to ritually sacrifice. Brought it home and cleaned it, and it’s become a favorite couch guitar.”)
Obviously, any sound that emerges from the Triple-Course Bass Pantar is likelly to be interesting.
Studio
Guitars and stringed instruments
• Fender 1994 ’50s Telecaster built from a Fender-offered kit
• Mutantum lime green metalflake Strat w/Seymour Duncan Little ’59 pickups
• Mutantum solidbody “manouche” Strat w/classical neck
• Saul Koll custom 8-string
• Rick Turner Renaissance Baritone
• 1966 Epiphone Howard Roberts
• 1965 Harmony Bobkat
• 1984/’96 Heer-Henderson Doubleneck
• 1956 Gibson CF-100 acoustic guitar
• 1968 Hagstrom H8 8-string bass
• Mutantum Norma fretless electric
• Godin Multiac Steel Duet
• 2001 Dell’Arte Grande Bouche
• 1958 Fender Stringmaster 8-string console steel guitar
• 1936 Rickenbacker B6 lap steel
• 1950s Framus Nevada Mandolinetto
• Mutantum Electric Mandocello
• Arches H-Line
• Triple-Course Bass Pantar
Amps
• 1966 Fender black-panel Princeton Reverb
• 1980 Fender 75 (Per Sharp: “Cut down to a head and modded by Matt Wells into a Dumble-ish monster! For recording, it plugs into a 1x10 cab with a Jensen speaker or a Hartke Transporter 2x10 cab
• 1970 Fender Bronco
• 1960 Fender tweed Champ modded by Matt Wells
Effects and Electronics
• Vintage EHX 16-Second Delay w/foot controller
• Eventide H3000
• Eventide PitchFactor
• Lexicon PCM42
• ZVEX Fuzz Factory
• Summit DCL-200 Compressor Limiter
• SSL SiX desktop
• Prescription Electronics Experience
• Zoom Ultra Fuzz
• Korg MS-20 analog synthesizer
• Korg Volca Modular synthesizer
• Make Noise 0-Coast synthesizer
• Moog Moogerfooger Ring Modulator
• Moog Moogerfooger Low-Pass Filter
• Softscience Optical Compressor (for DI recording, custom made by Kevin Hilbiber)
Strings
• Ernie Ball Regular Slinky (.010–.046) or Power Slinky (.011–.048), for conventional guitar.
Growing up in Australia, guitarist Jedd Hughes tells us he dreamed of playing in Vince Gill’s band as far back as elementary school. Now, he lives in Nashville and stands next to the man himself on stage night after night. We’ve invited Jedd to join us on this episode of 100 Guitarists to talk about just what makes Vince’s playing so special.
Jedd tells us how his dream came true and how he first started playing with Vince. We dig deep into how everybody’s favorite country guitarist raises the bar every time he picks up the guitar, how he gets his amazing clean tone, and we take time to appreciate all aspects of his solos—including how he builds them and how he plays such clean bends. As for why his concerts are so long? “He loves to play.”
In our current listening segment, we’re covering the Black Crowes and Jimmy Page’s Live at the Greek box set and a live recording from Burlington, Vermont’s Breathwork.