When I was first learning rockabilly, I remember being baffled by the picking of the rhythm guitar. Little did I know it was my first exposure to Travis picking. For those of you who are unsure of what I'm talking about, Travis picking is a style of playing chords with your thumb acting as the bass player and alternating bass notes while your fingers fill in the gaps. This is a style that was pioneered by Merle Travis and perfected by Chet Atkins. However, rockabilly took this style and dragged it behind a truck down a dirt road. Let's face it, rockabilly was the punk music of its day. So, once you have perfected the technique, you must take on a an aggressive "go for it" kind of attitude. Otherwise, you will sound like Chet, which is great but not our goal here.
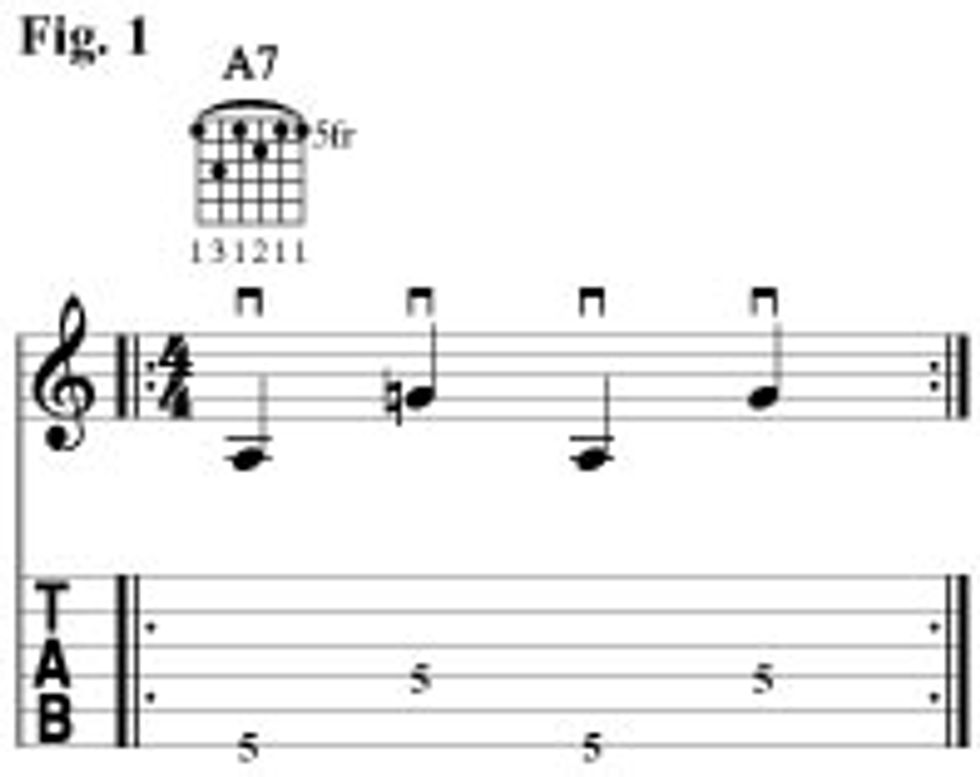
In this lesson, I'm going to teach you finger independence and a couple riffs just for fun. You want to work on these exercises until they become second nature. I recommend getting a stopwatch or egg timer and repeating each example for five minutes before moving to the next one. First, let's repeat the bass line and get comfortable with the distance between the notes. It doesn't matter if you use a flatpick or a thumbpick for this lesson. We'll be palm muting the lowest note while letting the other notes ring out. For this entire lesson we'll only use the A7 barre chord.
In Figure 1, focus on getting your thumb to move between the 6th and 4th string without thinking about it. In the next examples, we will add some layers to this basic pattern.
Download Example Audio...
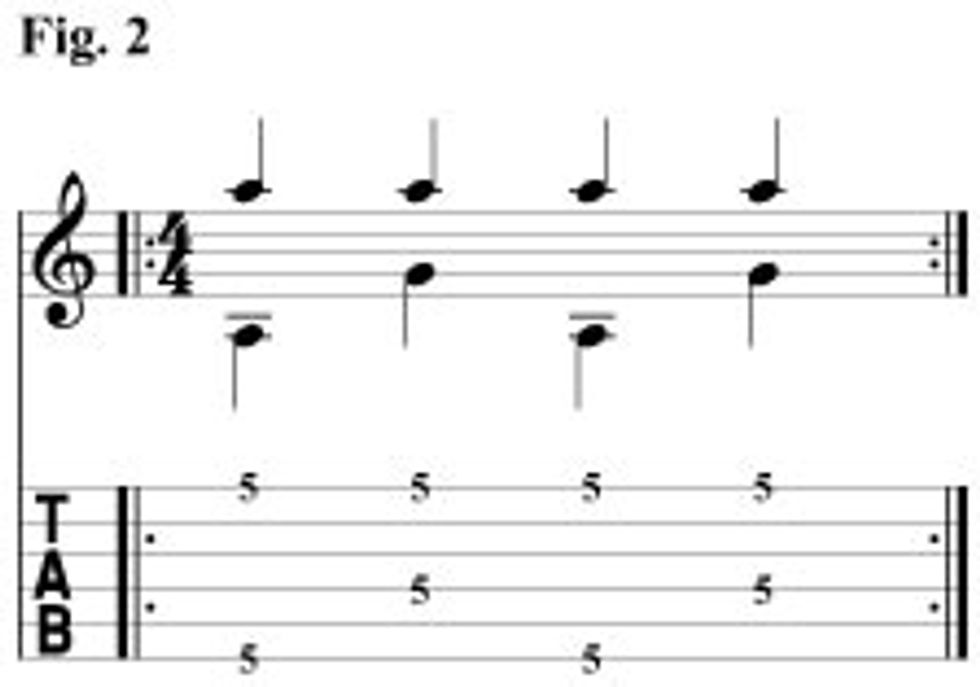
For Figure 2, Let's get comfortable fingerpicking the first string on the beat with the alternating bass note. When this is starting to feel good, try fingerpicking the second string, then the third. Use whatever finger that seems to naturally hover over that string. Let the notes ring out. Download Example Audio...
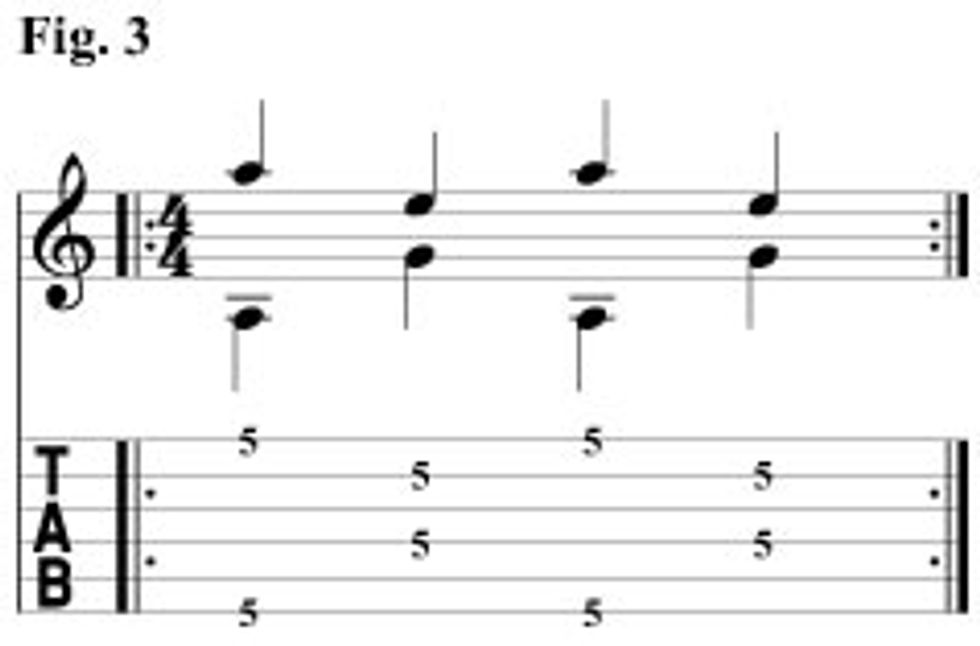
In Figure 3, let's alternate the fingerpicked notes against the bass line. Try every combination of strings. Download Example Audio...
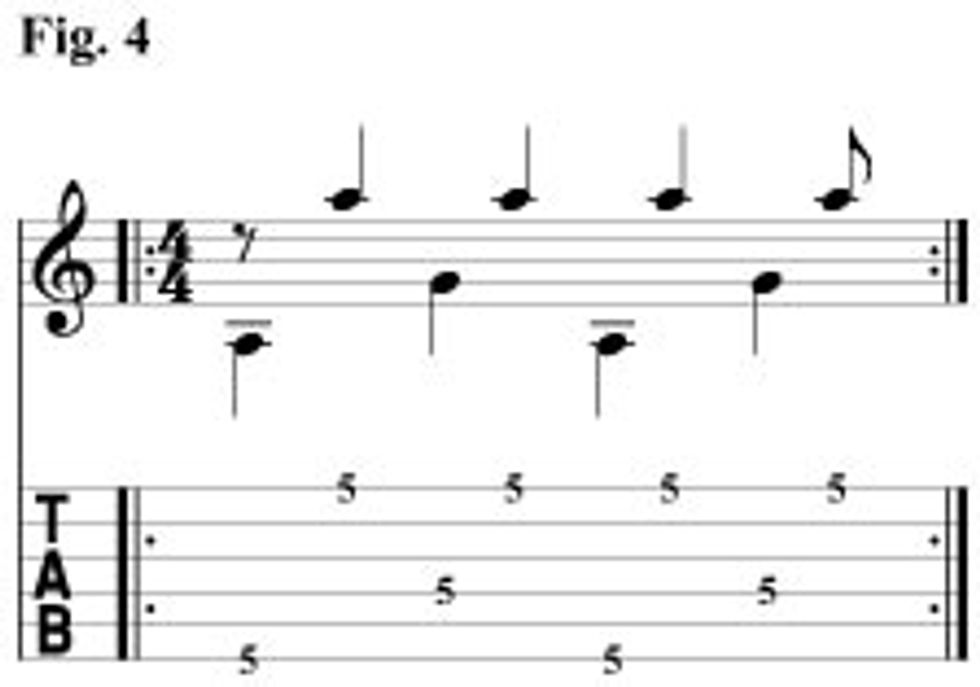
For Figure 4 the bass notes are on the downbeat and the fingerpicked notes are on the upbeat. We are fingerpicking between the bass notes. Try this with every string. Download Example Audio...
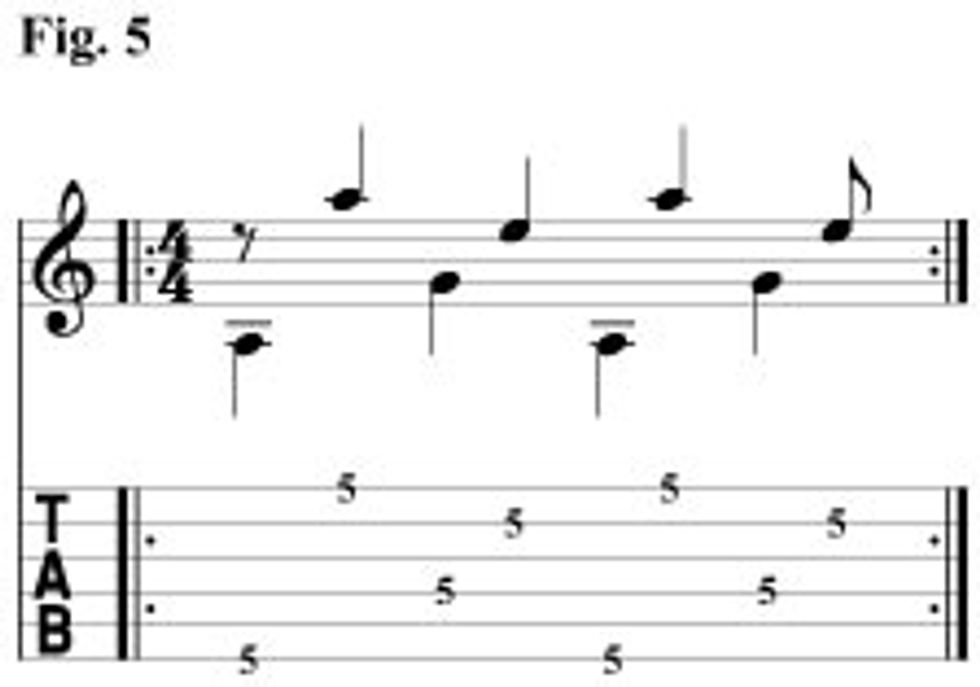
In Figure 5 we alternate the fingerpicked notes. Again, try every combination of strings. Download Example Audio...
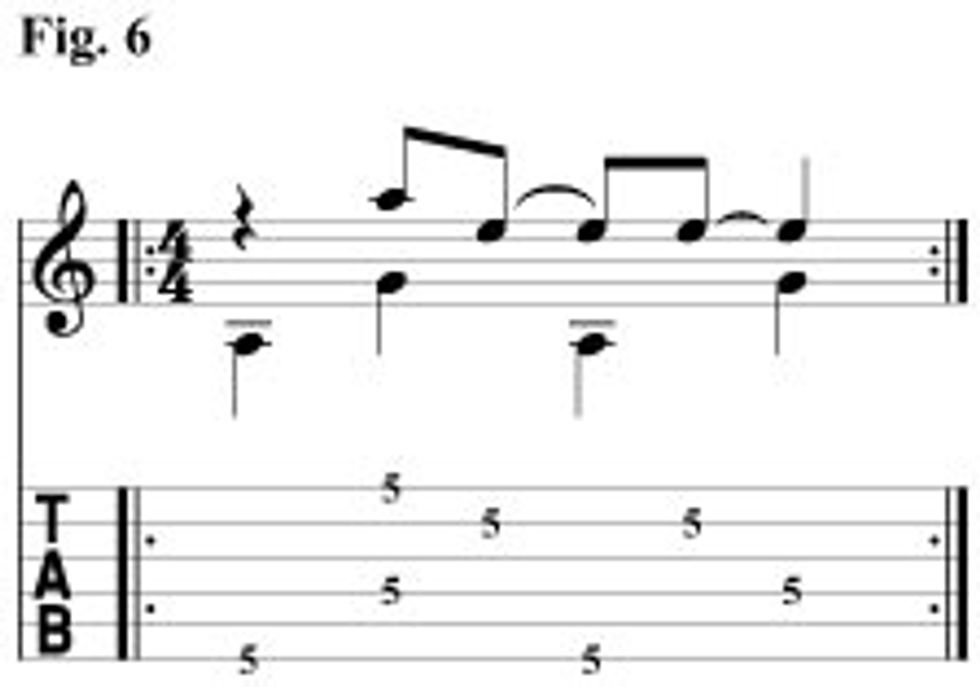
Great! Figure 6 is the big payoff. Here's a classic way to play off of a barre chord for rockabilly. Go slow and watch out for what notes are on the downbeat with the bass line and which ones are on the upbeat all by themselves. Download Example Audio...
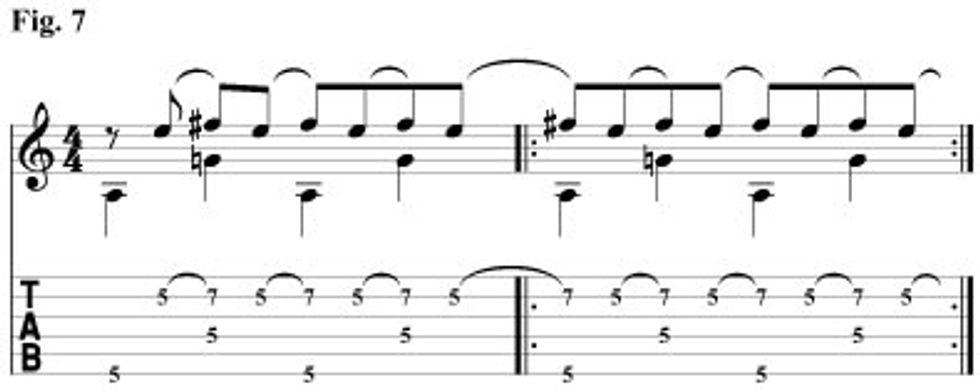
The trick in Figure 7 is getting the hammer-on to hit at the exact same time as the bass note while keeping time steady. I've slowed the tempo way down so you can hear how they line up. Download Example Audio...
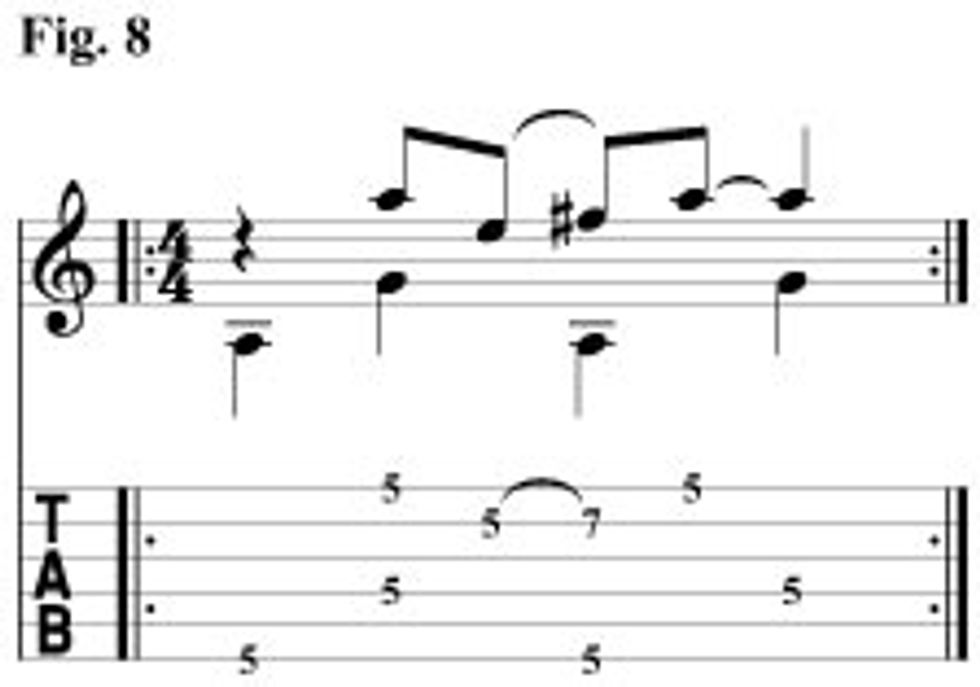
Finally, Figure 8 incorporates everything we've learned so far. Download Example Audio...
Once you have this down using the A7 barre chord, try this approach with other movable chord shapes. Remember, go slow and aim for total precision before speeding up. Put yourself through every possible combination and compose your own patterns. This will make you better at improvising, not to mention your recognition of patterns will help with transcribing. Brrrang!!!