Our much-loved former columnist Jeff Bober returns to explain how to check and reset the bias of your amp’s output tubes—and delivers some potentially shocking warnings about a few common but dangerous techniques.
Hello again, Premier Guitar readers! It’s your old bud Jeff here, author of the once popular Ask Amp Man column. Editorial Director Ted Drozdowski asked me if I would be interested in writing about bias, and, of course, I said, “Sure, I know a thing or two about that!” So here I am, temporarily returning to these pages. Now, let’s get started.
What exactly is bias? Bias is prejudice in favor of or against … oh wait, wrong kind of bias. I think he wanted me to write about bias in a tube amplifier, which is far less polarizing.
Bias, as defined in the RCA Radiotron Designers Handbook, is “voltage applied to the grid [of a tube] to obtain a desired operating point.” Well, that is the most basic explanation, but for the most part it is good enough and pertains to the majority of tube output stages in our favorite tube guitar amps.
Setting the bias adjustment controls to these listed voltages in no way guarantees that your amp is properly biased.
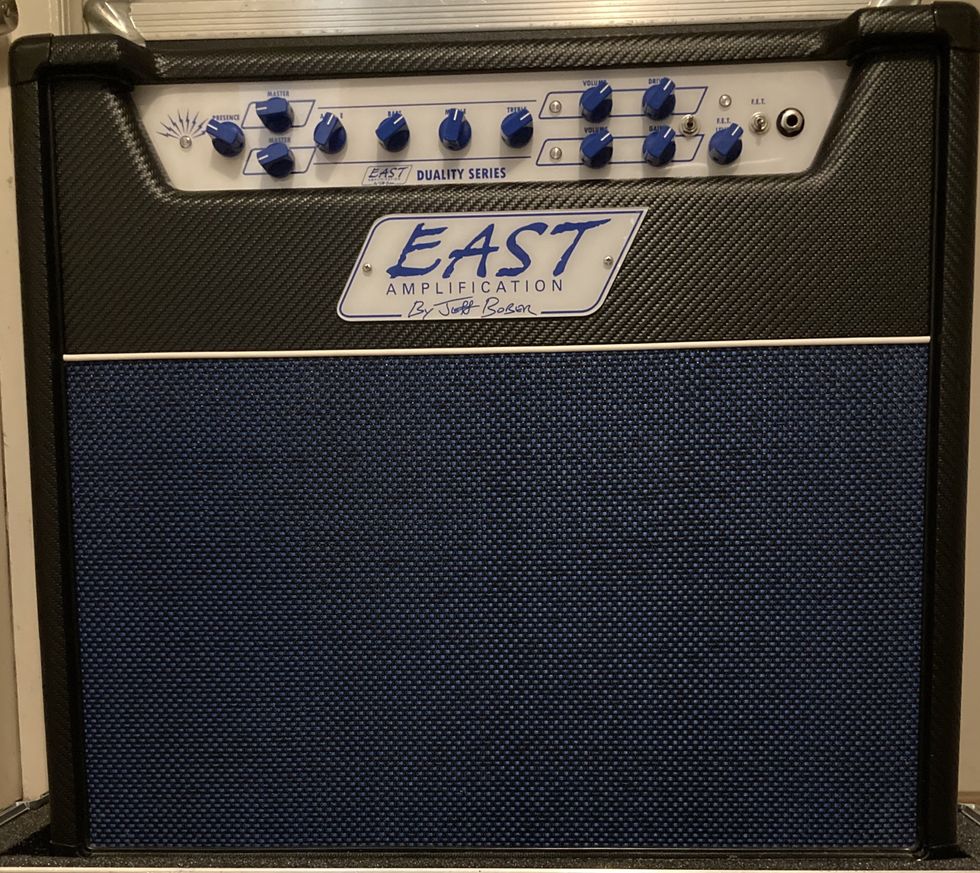
Besides “applying” a voltage to a vacuum tube, however, biasing can occur in another way as well. There are quite a few amplifiers, such as a Vox AC15 and AC30, any of my Budda and EAST designs, and even most of the early, low-wattage amplifiers of the tweed era that use what’s known as a “cathode bias” design. This is where the current flowing through the tube (which attains the aforementioned “desired operating point”) is not set by the voltage “applied” to the grid of the tube, but is instead set by the resistor in the cathode leg of the tube. It’s a bit more complicated than that, but the result is an amplifier whose output stage is “self-biasing.”
Most amplification devices, including transistors and even preamp tubes, need to be “biased” in order to perform properly, but this type of biasing is fixed in the design parameters of the circuit. In the case of the preamp tubes in your guitar amp, bias is based on the value of the cathode resistor, among other things. But that’s enough design theory for today. Let’s get back to the core task of biasing the output tubes in most guitar amplifiers.
First, the bias voltages you see listed on many schematics, such as 52V on a black-panel Fender Twin Reverb or 51V on a Marshall 100W Super Lead schematic, are merely approximations of the voltages that should be expected in that area of the circuit. Setting the bias adjustment controls to these listed voltages in no way guarantees that your amp is properly biased. Tube bias is also dependent on the high voltage (or B+) applied to the plate of the output tube, which can vary within tolerances of the transformers as well as in the AC line voltage fed to the amp. (This is why amps can sometimes sound better in one room or club than others.)
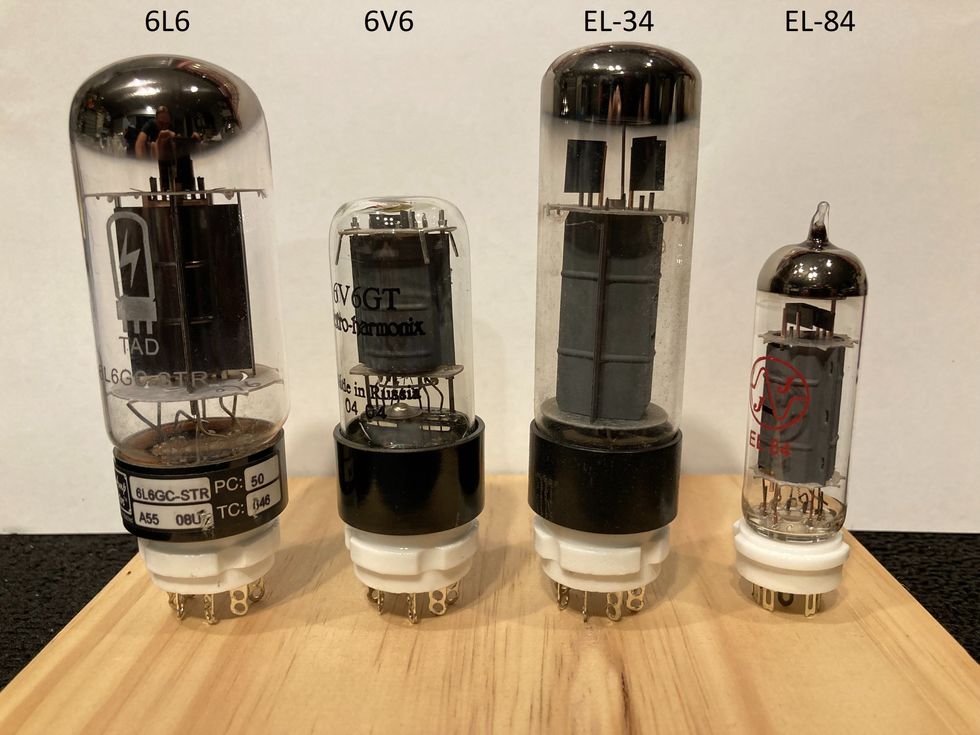
But even more important to understand is that tubes produced in different factories across the globe will bias up differently! What I mean by this is, if you properly bias a set of output tubes—let’s say 6L6s made in Russia—and then you swap them out with a set made in China, in the same amplifier without changing the setting of the bias control, the end result will almost always be a different bias reading. This is why it’s always best to have checked and reset the bias whenever output tubes are replaced. Now, how do we do that?
The Preferred Method
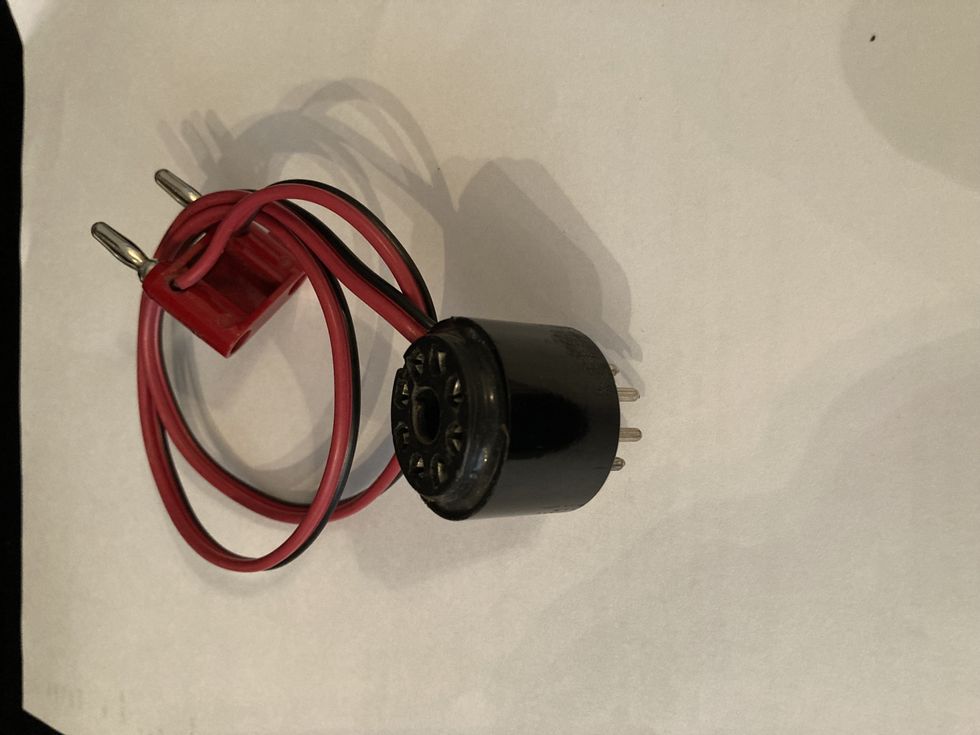
Fig. 1
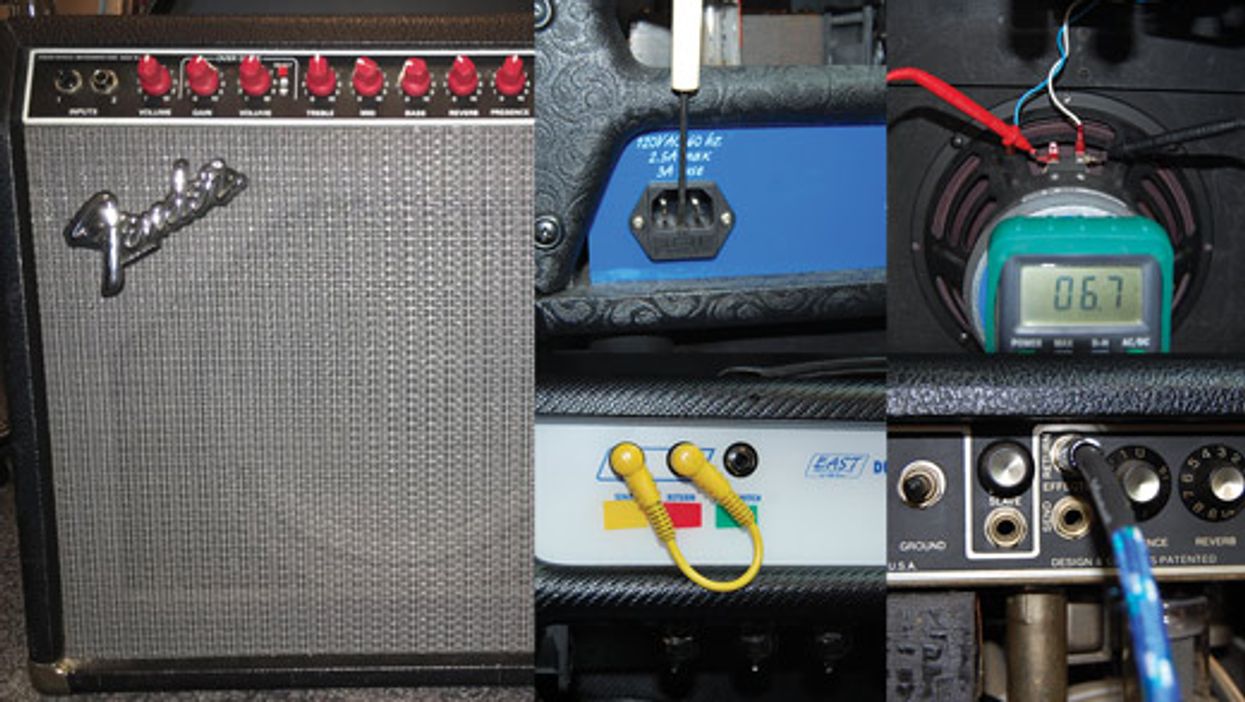
There are several different ways to measure output-tube bias current at idle. The safest method is to use what is commonly called a bias probe (Fig. 1). This is a device that is inserted between an output tube and its socket. (I typically make my own bias probes, but if you simply search “bias probe” online, you’ll find plenty to choose from. If you already own a multimeter, you can simply purchase the probes, but there are also options to purchase a full system with either a digital or analog meter, should you need it.) This device breaks the connection between the cathode (which is the metallic electrode from which electrons are emitted into the tube) of the tube and its ground connection, and inserts a small value resistor in between. It then allows the voltage across the resistor to be read. The resistor is typically 1 ohm and the resulting voltage drop across it is in millivolts (mV), so no chance of shock here. This provides a true and accurate measurement of the actual current flowing through one tube. Then, you set your bias and you’re done!
But even more important to understand is that tubes produced in different factories across the globe will bias up differently!
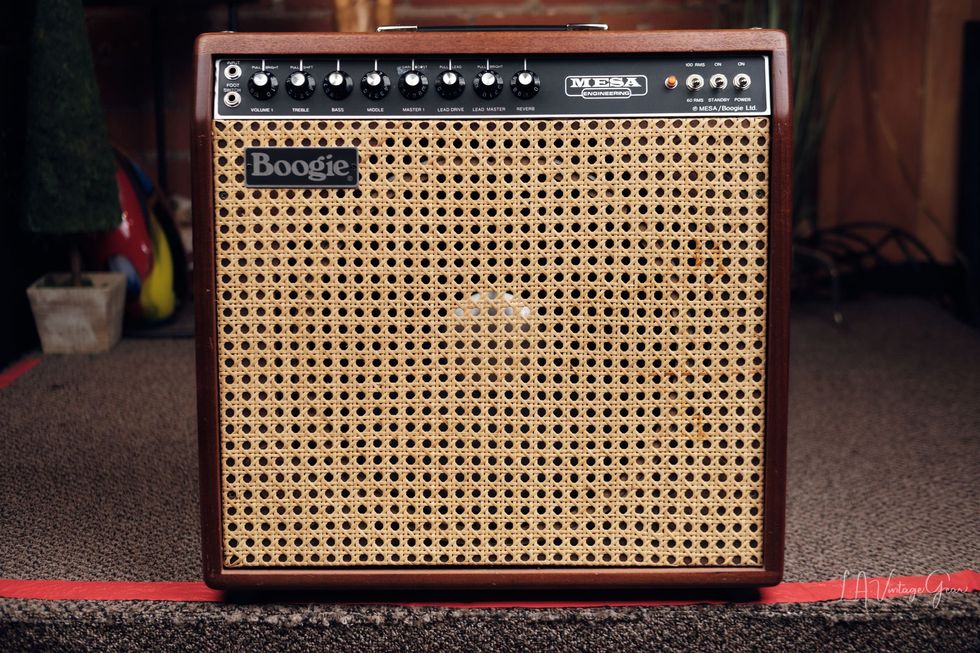
Ah, but wait! How do you set your bias? Let’s learn a bit more. Most tube amplifiers, if they are not cathode-biased designs, have some way to adjust the output-tube bias. One longstanding exception to this are most Mesa/Boogie amps. The bias voltage in these amps is not adjustable, which is why Mesa suggests only purchasing their tubes for their amps, because they are designed to fall within the acceptable bias range for their amps. This adds a certain degree of confidence for owner servicing, although, of course, it limits your options.
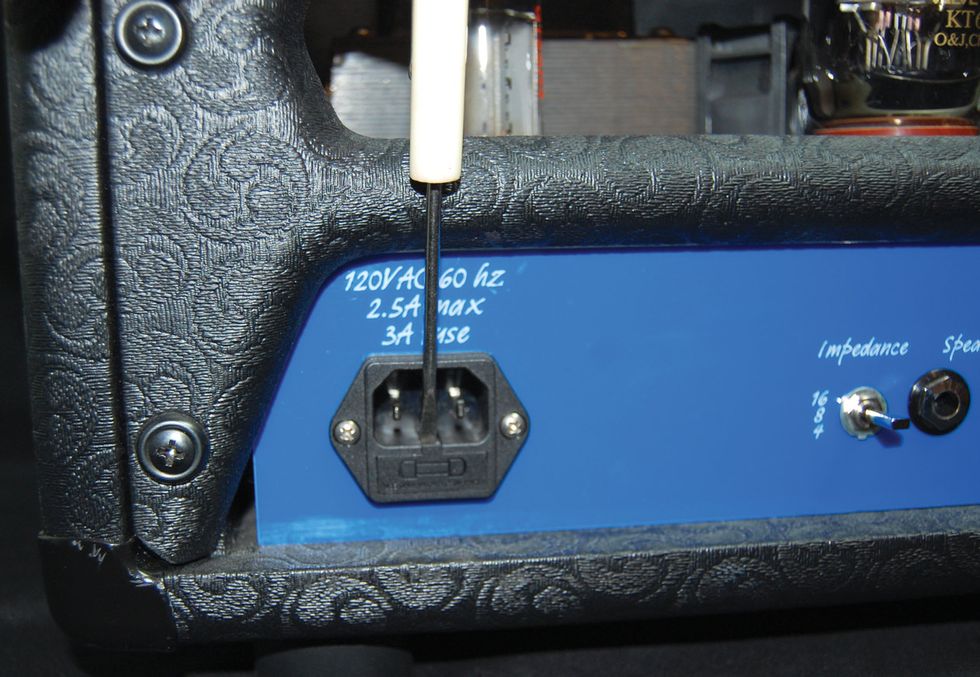
Let’s take a look, however, at a typical Fender or Marshall bias control. Most older Fenders have a pot with a slot for a screwdriver mounted to the chassis in the area of the power or mains transformer, while most older Marshalls have their bias pot mounted on the circuit board. (You might want to go online to look at schematics for your amp to help you find it.) Either way, this is where you’ll make your adjustment.
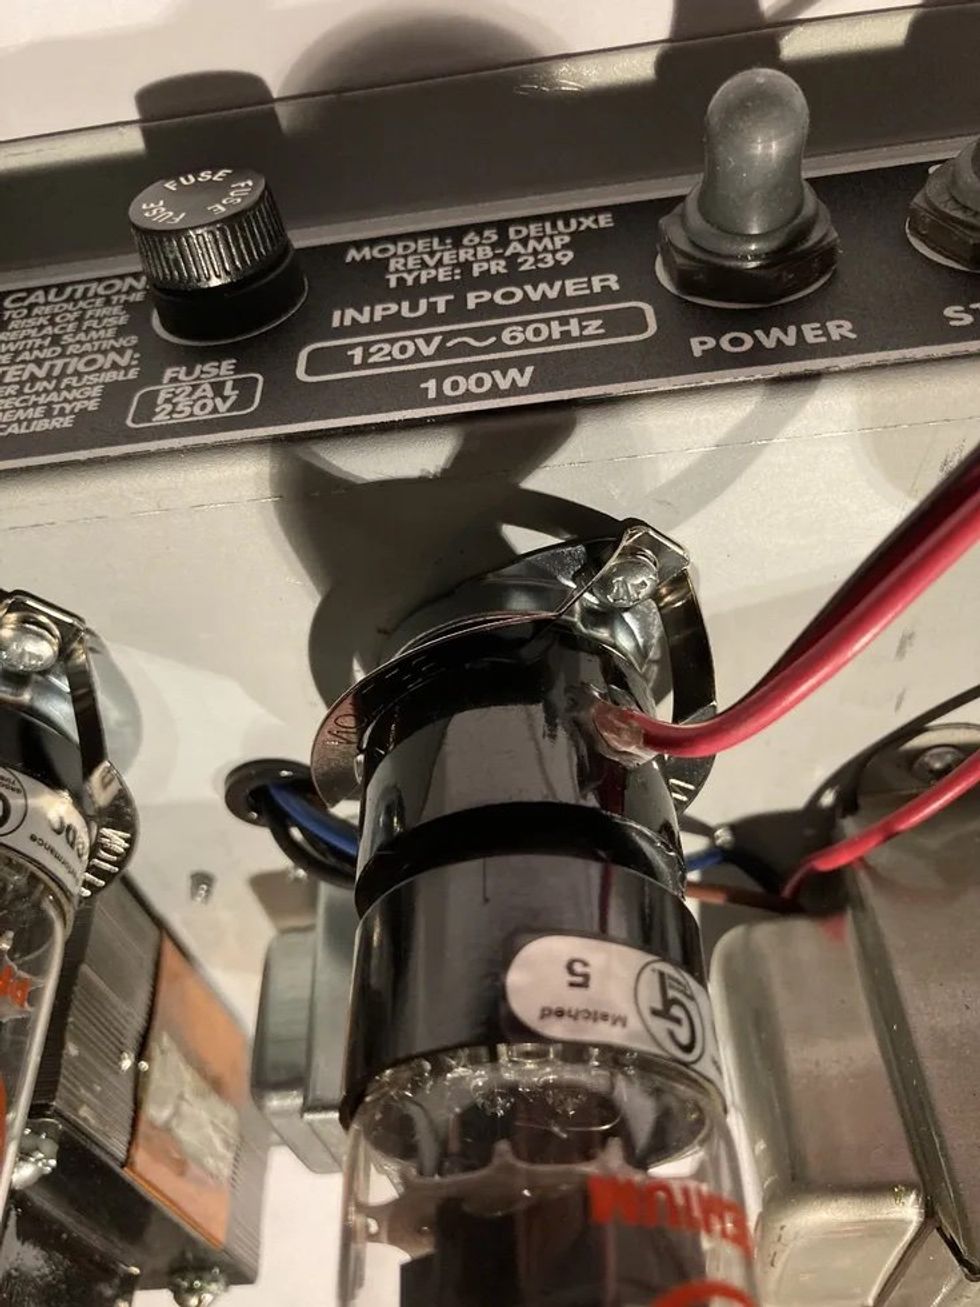
To get started, you’ll most likely need to pull the chassis and place it in a stable work environment. Insert the bias probe device between one of the tubes and the socket (Fig. 2). Make sure all the volume controls are set to zero, turn the amp on, and let the tubes warm up. It’s also good to try to have a load on the speaker jack—whether a speaker or an appropriate resistor or load box. This is not 100 percent necessary for just setting the bias to a particular number, but sound checking is one of the ways I like to make the final adjustments, so being able to connect the speaker to the chassis while it’s on the bench is certainly a necessity for me.
Now, where to set the numbers? There are certainly more than a few opinions floating around on the interwebs about what optimal bias settings are. Some engineering types will tout 50 percent maximum plate dissipation or 70 percent maximum dissipation, and while it may look good or make sense on paper, I’ve heard the result of guitar amplifiers designed by the book to optimal specifications … and to me they sound, well, less than optimal. It may work in the hi-fi world, where perfect sound reproduction is the goal, but guitar amplifiers are in the sound production business, so it’s a bit different. (In the most basic terms, maximum plate dissipation is the amount of power the plate of the tube is designed to deliver.)
Different types of output tubes have their own acceptable range of bias current. There are so many variables at play that there is no “correct” number. The plate voltage in the amplifier, the output transformer’s primary impedance, and the country of origin of a tube all factor into how it interacts with the voltage and output transformer to define what the optimal bias current will be. Below are the average ranges for some typical octal output tubes:
• 6L6: 25–35 mA
• EL34: 30–40 mA
• 6V6: 18–25 mA
• 6550: 35–45 mA
• KT66: 30–40 mA
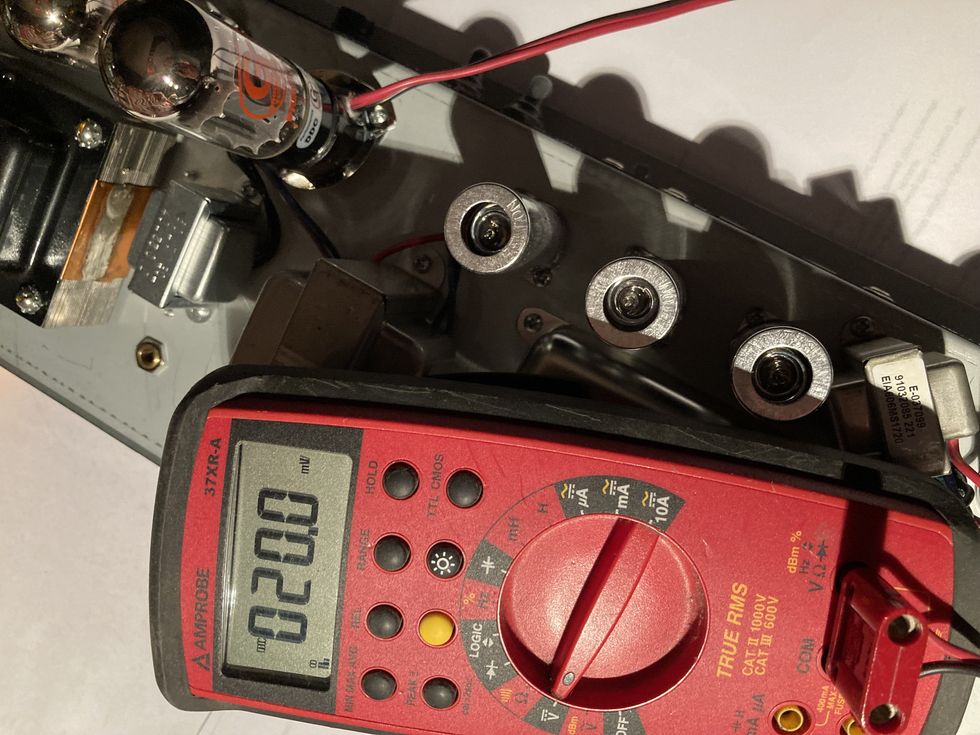
Fig. 3
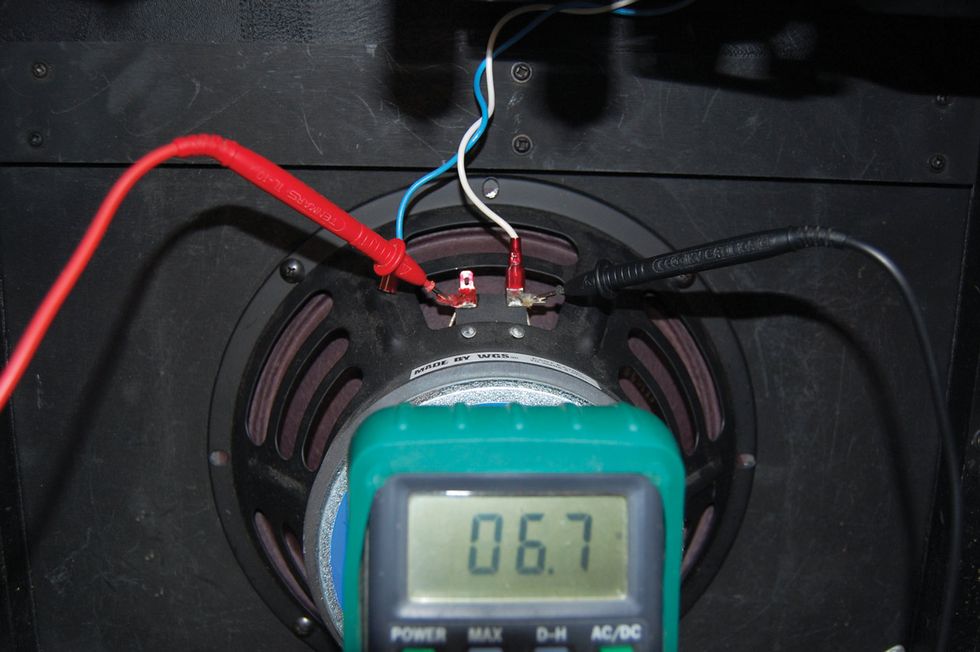
These should be the ranges in which these tubes will perform and sound the best, and they can be accurately measured with a digital multimeter. The best way for you to decide what setting is best for you is a combination of the reading on the meter and your ears! Using the bias control, set the bias to somewhere in the ranges given above (Fig. 3) and play the amp. Note: Some amps will act funny and develop horrible noises (parasitic oscillations) when a bias probe is in place while the amp is being played. If this is the case, you’ll need to remove the bias probe each time you play the amp.)
Move the setting a couple mA in one direction or the other and play again. Don’t expect extreme changes; that’s not what we’re looking for. Listen for subtle differences. Is one setting a little more or less harsh? Is the bottom end too soft or flubby? Is the amp as clean as you want it? Sometimes these little subtleties are what make one amp sound and feel better than another!
Most older Fenders have a pot with a slot for a screwdriver mounted to the chassis in the area of the power or mains transformer, while most older Marshalls have their bias pot mounted on the circuit board.
Also, you should be doing this at the volume you would typically use onstage or in the studio. You may not notice much change if your volume is at 1, but you want to optimize the amp for the way you will be using it.
Eyes Wide Open
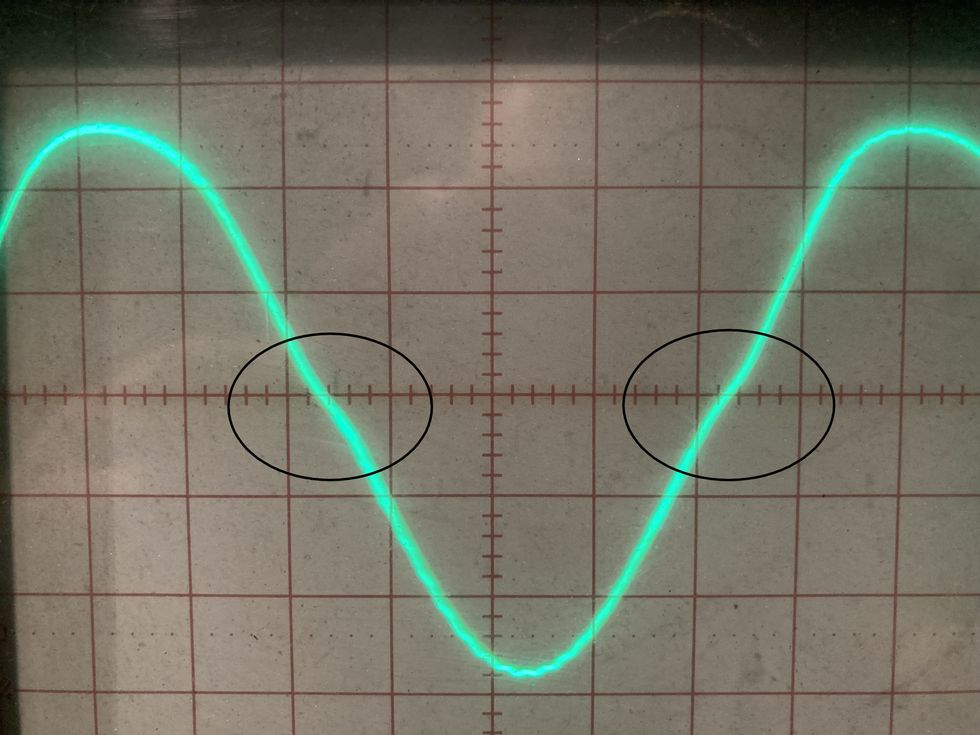
Fig. 4
Knowing the ballpark bias numbers is good, and adding your ears is even better, but I also like to see what I’m hearing, so I always incorporate an oscilloscope when I’m setting the bias on an amp. I mentioned crossover distortion above, and when it comes to setting up amps for today’s pedal-hungry players, I find that setting the bias to where there is just a hint of crossover distortion at full output is what works best. Fig. 4 is what that looks like on the oscilloscope. This keeps the amp very clean and makes most pedal users happy.
By the way, here’s a mini primer in crossover distortion. In a push-pull output stage, which is found in most amplifiers with two or more output tubes, each tube (or pair of tubes) is responsible for amplifying at least half of the audio signal. If the tubes are not biased properly, one tube (or pair) will stop amplifying before the other tube (or pair) start amplifying. This will create crossover distortion. Proper biasing will allow the two halves to interact correctly. It’s like a nice firm handshake between both halves.
Beware These Old-School Methods
Let’s look at a couple popular methods that I do not recommend, but are worth discussing because they are, nonetheless, common. The first is: With the amp off and output tubes removed, use a multimeter to measure the resistance of each half of the primary side of the output transformer. This would typically be from the center tap to each side of the primary winding.
In the most basic terms, a transformer is a bunch of wire wound around a steel core. On the primary side of an output transformer, the center tap is the electrical “middle” of this long length of wire. This is typically where the high voltage is applied. The ends of this length of wire are connected to the plates of the tube, thereby applying the high voltage to the tubes. As an example, typically in most Fender amps, the center tap is red, and the ends of the primary windings are blue and brown.
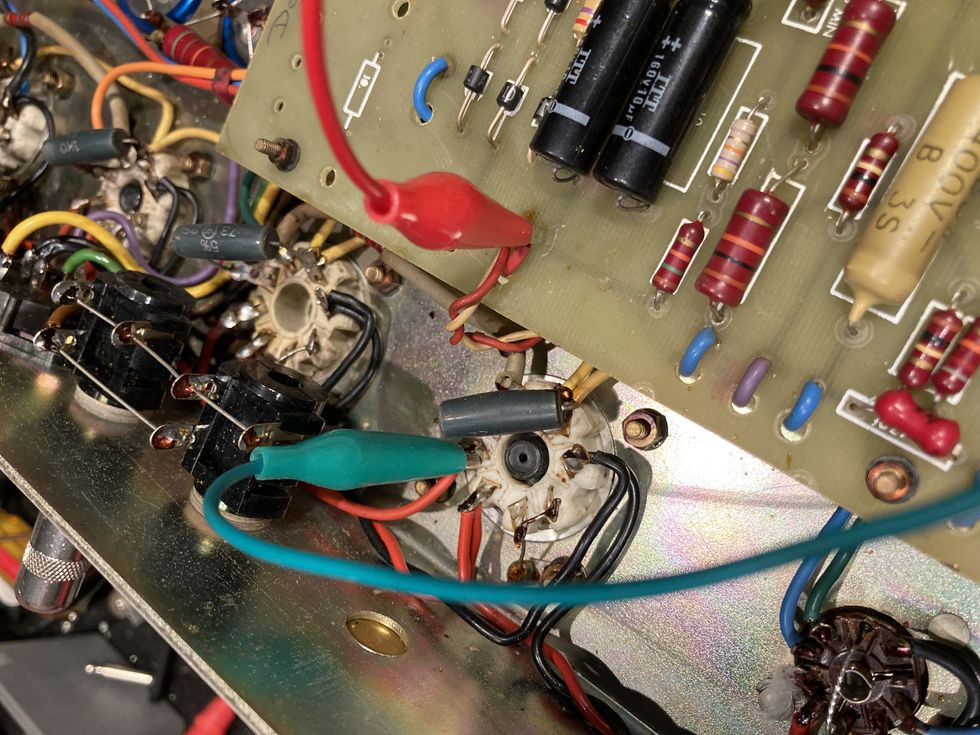
Fig. 5
Next, install the output tubes, turn the amp on, and measure the voltage drop across each half of the output transformer with the amp at idle in operational mode (Fig. 5). Voltage divided by resistance will give you the DC current through the tubes. For example, 1.17V / 15.8R = 0.074, or 74 mA. The numbers I used here were actual measurements in one side (one half) of a 100W amp using four output tubes (two per side). So, divide the 74 mA by two, and you get an average of 37 mA per tube.
Next, you can try the shunt method. This requires a multimeter that can read DC current in milliamps (mA). Connect one meter lead to the center tap of the output transformer and the other lead to the output transformer’s primary side. Typically, in most amps using octal tubes (6L6, 6V6, EL34, 6550, KT88, etc.), this will be pin 3 on any output tube socket. Turn the amp on and, in operating mode at idle (i.e., volume off), measure the current across that half of the output transformer. For example, if your measurement is 72 mA and it’s an amp that utilizes four output tubes, the current measured is for two of those tubes, so once again divide by two to arrive at 36 mA per tube.
I’ve heard the result of guitar amplifiers designed by the book to optimal specifications … and to me they sound, well, less than optimal.
Both of those methods are very old school and still in practice, but I wouldn’t use either for two reasons: 1) I don’t believe they’re very accurate, and 2) they’re dangerous! You’re probing around inside the high voltage area of the amp, and one slip will either take out a fuse, take out a tube, take out your meter, or, worse case, let you know exactly what 450V DC feels like! So, although these methods are used, let’s just say no here.
Some Personal Insights
I’d also like to add a little personal experience to this procedure, based on decades in the biz. Back in the day, when I began servicing and modifying gear, guitarists were regularly playing 50- and 100-watt amps. (Everybody looked at me like I had three heads when I came out with the 18-watt Budda Twinmaster, but that’s a whole other story.) There were some overdrive and distortion pedals around (now all vintage), but certainly not the pedal proliferation we have now, so players were pretty much guitar, cable, amp … go! In these situations, I would most times run the tubes with a pretty hot bias so the amp would be fatter and overdrive a bit earlier and easier, as a decent percentage of the overdrive was developed by pushing the output tubes. As time went on, output attenuators became more popular, so amps could be pushed hard, but at more manageable volume levels. That was still a good scenario for a hotter bias of the output tubes in high-power amps. Eventually, players started playing lower-power amps, so they could open them up and get great output-tube distortion at lesser volumes. The problem is that hotter-biased low-power amps tend to get mushy and have less definition when pushed hard, so a more moderate bias setting is preferred here—just enough so there is no crossover distortion. Move up to today’s scenario and you’ll find that almost all overdrive and/or distortion is typically coming from a pedal. In that case, an amp is nothing more than an amplification device for pedals.
So, that’s what I’ve learned about tube-biasing from my decades of experience. But the bottom line is, there is no absolute right or wrong settings when it comes to biasing an amp. Keep your ears open and go with what sounds best to you.
- Ask Amp Man: A Fond Farewell ›
- Ask Amp Man: A Vintage Showman, Not Ready for Prime Time ›
- Ask Amp Man: Add Some Marshall Grit to a Fender Bassman ›
Stompboxtober is rolling on! Enter below for your chance to WIN today's featured pedal from Peterson Tuners! Come back each day during the month of October for more chances to win!
Peterson StroboStomp Mini Pedal Tuner
The StroboStomp Mini delivers the unmatched 0.1 cent tuning accuracy of all authentic Peterson Strobe Tuners in a mini pedal tuner format. We designed StroboStomp Mini around the most requested features from our customers: a mini form factor, and top mounted jacks. |
Intermediate
Intermediate
• Learn classic turnarounds.
• Add depth and interest to common progressions.
• Stretch out harmonically with hip substitutions.
Get back to center in musical and ear-catching ways.
A turnaround chord progression has one mission: It allows the music to continue seamlessly back to the beginning of the form while reinforcing the key center in a musically interesting way. Consider the last four measures of a 12-bar blues in F, where the bare-bones harmony would be C7-Bb7-F7-F7 (one chord per measure). With no turn around in the last two measures, you would go back to the top of the form, landing on another F7. That’s a lot of F7, both at the end of the form, and then again in the first four bars of the blues. Without a turnaround, you run the risk of obscuring the form of the song. It would be like writing a novel without using paragraphs or punctuation.
The most common turnaround is the I-VI-ii-V chord progression, which can be applied to the end of the blues and is frequently used when playing jazz standards. Our first four turnarounds are based on this chord progression. Furthermore, by using substitutions and chord quality changes, you get more mileage out of the I-VI-ii-V without changing the basic functionality of the turnaround itself. The second group of four turnarounds features unique progressions that have been borrowed from songs or were created from a theoretical idea.
In each example, I added extensions and alterations to each chord and stayed away from the pure R-3-5-7 voicings. This will give each chord sequence more color and interesting voice leading. Each turnaround has a companion solo line that reflects the sound of the changes. Shell voicings (root, 3rd, 7th) are played underneath so that the line carries the sound of the written chord changes, making it easier to hear the sound of the extensions and alterations. All examples are in the key of C. Let’s hit it.
The first turnaround is the tried and true I-VI-ii-V progression, played as Cmaj7-A7-Dm7-G7. Ex. 1 begins with C6/9, to A7(#5), to Dm9, to G7(#5), and resolves to Cmaj7(#11). By using these extensions and alterations, I get a smoother, mostly chromatic melodic line at the top of the chord progression.
Ex. 2 shows one possible line that you can create. As for scale choices, I used C major pentatonic over C6/9, A whole tone for A7(#5), D Dorian for Dm9, G whole tone for G7(#5), and C Lydian for Cmaj7(#11) to get a more modern sound.
The next turnaround is the iii-VI-ii-V progression, played as Em7-A7-Dm7-G7 where the Em7 is substituted for Cmaj7. The more elaborate version in Ex. 3 shows Em9 to A7(#9)/C#, to Dm6/9, to G9/B, resolving to Cmaj7(add6). A common way to substitute chords is to use the diatonic chord that is a 3rd above the written chord. So, to sub out the I chord (Cmaj7) you would use the iii chord (Em7). By spelling Cmaj7 = C-E-G-B and Em7 = E-G-B-D, you can see that these two chords have three notes in common, and will sound similar over the fundamental bass note, C. The dominant 7ths are in first inversion, but serve the same function while having a more interesting bass line.
The line in Ex. 4 uses E Dorian over Em9, A half-whole diminished over A7(#9)/C#, D Dorian over Dm6/9, G Mixolydian over G9/B, and C major pentatonic over Cmaj7(add6). The chord qualities we deal with most are major 7, dominant 7, and minor 7. A quality change is just that… changing the quality of the written chord to another one. You could take a major 7 and change it to a dominant 7, or even a minor 7. Hence the III-VI-II-V turnaround, where the III and the VI have both been changed to a dominant 7, and the basic changes would be E7-A7-D7-G7.
See Ex. 5, where E7(b9) moves to A7(#11), to D7(#9) to G7(#5) to Cmaj9. My scale choices for the line in Ex. 6 are E half-whole diminished over E7(#9), A Lydian Dominant for A7(#11), D half-whole diminished for D7(#9), G whole tone for G7(#5), and C Ionian for Cmaj9.
Ex. 7 is last example in the I-VI-ii-V category. Here, the VI and V are replaced with their tritone substitutes. Specifically, A7 is replaced with Eb7, and G7 is replaced with Db7, and the basic progression becomes Cmaj7-Eb7-Dm7-Db7. Instead of altering the tritone subs, I used a suspended 4th sound that helped to achieve a diatonic, step-wise melody in the top voice of the chord progression.
The usual scales can be found an Ex. 8, where are use a C major pentatonic over C6/9, Eb Mixolydian over Eb7sus4, D Dorian over Dm11, Db Mixolydian over Db7sus4, and once again, C Lydian over Cmaj7(#11). You might notice that the shapes created by the two Mixolydian modes look eerily similar to minor pentatonic shapes. That is by design, since a Bb minor pentatonic contains the notes of an Eb7sus4 chord. Similarly, you would use an Ab minor pentatonic for Db7sus4.
The next four turnarounds are not based on the I-VI-ii-V chord progression, but have been adapted from other songs or theoretical ideas. Ex. 9 is called the “Backdoor” turnaround, and uses a iv-bVII-I chord progression, played as Fm7-Bb7-Cmaj7. In order to keep the two-bar phrase intact, a full measure of C precedes the actual turnaround. I was able to compose a descending whole-step melodic line in the top voice by using Cmaj13 and Cadd9/E in the first bar, Fm6 and Ab/Bb in the second bar, and then resolving to G/C. The slash chords have a more open sound, and are being used as substitutes for the original changes. They have the same function, and they share notes with their full 7th chord counterparts.
Creating the line in Ex. 10 is no more complicated than the other examples since the function of the chords determines which mode or scale to use. The first measure employs the C Ionian mode over the two Cmaj chord sounds. F Dorian is used over Fm6 in bar two. Since Ab/Bb is a substitute for Bb7, I used Bb Mixolydian. In the last measure, C Ionian is used over the top of G/C.
The progression in Ex. 11 is the called the “Lady Bird” turnaround because it is lifted verbatim from the Tadd Dameron song of the same name. It is a I-bIII-bVI-bII chord progression usually played as Cmaj7-Eb7-Abmaj7-Db7. Depending on the recording or the book that you check out, there are slight variations in the last chord but Db7 seems to be the most used. Dressing up this progression, I started with a different G/C voicing, to Eb9(#11), to Eb/Ab (subbing for Abmaj7), to Db9(#11), resolving to C(add#11). In this example, the slash chords are functioning as major seventh chords.
As a result, my scale choices for the line in Ex. 12 are C Ionian over G/C, Eb Lydian Dominant over Eb9(#11), Ab Ionian over Eb/Ab, Db Lydian Dominant over Db9(#11), and C Lydian over C(add#11).
The progression in Ex. 13 is called an “equal interval” turnaround, where the interval between the chords is the same in each measure. Here, the interval is a descending major 3rd that creates a I-bVI-IV-bII sequence, played as Cmaj7-Abmaj7-Fmaj7-Dbmaj7, and will resolve a half-step down to Cmaj7 at the top of the form. Since the interval structure and chord type is the same in both measures, it’s easy to plane sets of voicings up or down the neck. I chose to plane up the neck by using G/C to Abmaj13, then C/F to Dbmaj13, resolving on Cmaj7/E.
The line in Ex. 14 was composed by using the notes of the triad for the slash chord and the Lydian mode for the maj13 chords. For G/C, the notes of the G triad (G-B-D) were used to get an angular line that moves to Ab Lydian over Abmaj13. In the next measure, C/F is represented by the notes of the C triad (C-E-G) along with the root note, F. Db Lydian was used over Dbmaj13, finally resolving to C Ionian over Cmaj7/E. Since this chord progression is not considered “functional” and all the chord sounds are essentially the same, you could use Lydian over each chord as a way to tie the sound of the line together. So, use C Lydian, Ab Lydian, F Lydian, Db Lydian, resolving back to C Lydian.
The last example is the “Radiohead” turnaround since it is based off the chord progression from their song “Creep.” This would be a I-III-IV-iv progression, and played Cmaj7-E7-Fmaj7-Fm7. Dressing this one up, I use a couple of voicings that had an hourglass shape, where close intervals were in the middle of the stack.
In Ex. 15 C6/9 moves to E7(#5), then to Fmaj13, to Fm6 and resolving to G/C. Another potential name for the Fmaj13 would be Fmaj7(add6) since the note D is within the first octave. This chord would function the same way, regardless of which name you used.
Soloing over this progression in Ex. 16, I used the C major pentatonic over C6/9, E whole tone over E7(#5), F Lydian over Fmaj13, and F Dorian over Fm6. Again, for G/C, the notes of the G triad were used with the note E, the 3rd of a Cmaj7 chord.
The main thing to remember about the I-VI-ii-V turnaround is that it is very adaptable. If you learn how to use extensions and alterations, chord substitutions, and quality changes, you can create some fairly unique chord progressions. It may seem like there are many different turnarounds, but they’re really just an adaptation of the basic I-VI-ii-V progression.
Regarding other types of turnarounds, see if you can steal a short chord progression from a pop tune and make it work. Or, experiment with other types of intervals that would move the chord changes further apart, or even closer together. Could you create a turnaround that uses all minor seventh chords? There are plenty of crazy ideas out there to work with, and if it sounds good to you, use it!
Fuchs Audio introduces the ODH Hybrid amp, featuring a True High Voltage all-tube preamp and Ice Power module for high-powered tones in a compact size. With D-Style overdrive, Spin reverb, and versatile controls, the ODH offers exceptional tone shaping and flexibility at an affordable price point.
Fuchs Audio has introduced their latest amp the ODH © Hybrid. Assembled in USA.
Featuring an ODS-style all-tube preamp, operating at True High Voltage into a fan-cooled Ice power module, the ODH brings high-powered clean and overdrive tones to an extremely compact size and a truly affordable price point.
Like the Fuchs ODS amps, the ODH clean preamp features 3-position brite switch, amid-boost switch, an EQ switch, high, mid and low controls. The clean preamp drives theoverdrive section in D-Style fashion. The OD channel has an input gain and outputmaster with an overdrive tone control. This ensures perfect tuning of both the clean andoverdrive channels. A unique tube limiter circuit controls the Ice Power module input.Any signal clipping is (intentionally) non-linear so it responds just like a real tube amp.
The ODH includes a two-way footswitch for channels and gain boost. A 30-second mute timer ensures the tubes are warmed up before the power amp goes live. The ODH features our lush and warm Spin reverb. A subsonic filter eliminates out-of-band low frequencies which would normally waste amplifier power, which assures tons of clean headroom. The amp also features Accent and Depth controls, allowing contouring of the high and low response of the power amp section, to match speakers, cabinets andenvironments. The ODH features a front panel fully buffered series effects loop and aline out jack, allowing for home recording or feeding a slave amp. A three-position muteswitch mutes the amp, the line out or mute neither.
Built on the same solid steel chassis platform as the Fuchs FB series bass amps, the amps feature a steel chassis and aluminum front and rear panels, Alpha potentiometers, ceramic tube sockets, high-grade circuit boards and Neutrik jacks. The ICE power amp is 150 watts into 8 ohms and 300 watts into 4 ohms, and nearly 500 watts into 2.65 ohms (4 and8 ohms in parallel) and operates on universal AC voltage, so it’s fully globallycompatible. The chassis is fan-cooled to ensure hours of cool operation under any circumstances. The all-tube preamp uses dual-selected 12AX7 tubes and a 6AL5 limiter tube.
MAP: $ 1,299
For more information, please visit fuchsaudiotechnology.com.
Jackson Guitars announces its first female signature artist model, the Pro Series Signature Diamond Rowe guitar.
“I‘m so excited about this new venture with the Jackson family. This is a historic collaboration - as I am the first female in the history of Jackson with a signature guitar and the first female African American signature Jackson artist. I feel so honored to have now joined such an elite group of players that are a part of this club. Many who have inspired me along this journey to get here. It’s truly humbling.” says Diamond.
Diamond Rowe is the co-founder and lead guitarist for the metal/hard rock band Tetrarch. Since co-founding the band in high school, Tetrarch has become one of the most talked about up-and-coming bands in the world - with several press outlets such as Metal Hammer, Kerrang, Revolver, Guitar World and many others boldly naming Diamond Rowe the world’s next guitar hero. Tetrarch has connected with many fans while performing on some of the world's biggest stages garnering spots alongside several of the heavy music world’s biggest names such as Guns N’ Roses, Slipknot, Lamb of God, Disturbed, Avenged Sevenfold, Sevendust, Rob Zombie, Trivium, and many many others. The Jackson Pro Series Signature Diamond Rowe DR12MG EVTN6 is based on Jackson’s single-cut Monarkh platform and is a premium guitar designed for progressive metal players seeking precision and accuracy.
Crafted in partnership with Diamond, this model boasts a 25.5 “ scale, Monarkh-styled nyatoh body draped with a gorgeous poplar burl top, three-piece nyatoh set-neck with graphite reinforcement, and 12˝ radius bound ebony fingerboard with 24 jumbo frets. The black chrome-covered active EMG® 81/85 humbucking bridge and neck pickups, three-way toggle switch, single volume control, and tone control provide a range of tonal options. The Evertune® bridge ensures excellent tuning stability, while the Dark Rose finish with a new custom 3+3 color-matched Jackson headstock and black hardware looks simply stunning.
To showcase the Pro Plus Signature Diamond Rowe DR12MG EVTN6, Diamond shares her journey as a guitarist, delving into the inspiration behind her unique design specifications and the influential artists who shaped her sound within a captivating demo video. This video prominently features powerful performances of Tetrarch’s latest release, “Live Not Fantasize,” and “I’m Not Right” showcasing the DR12MG EVTN6’s unparalleled tonal versatility and performance capabilities.
MSRP $1699.99
For more information, please visit jacksonguitars.com.