
Dear Jeff,
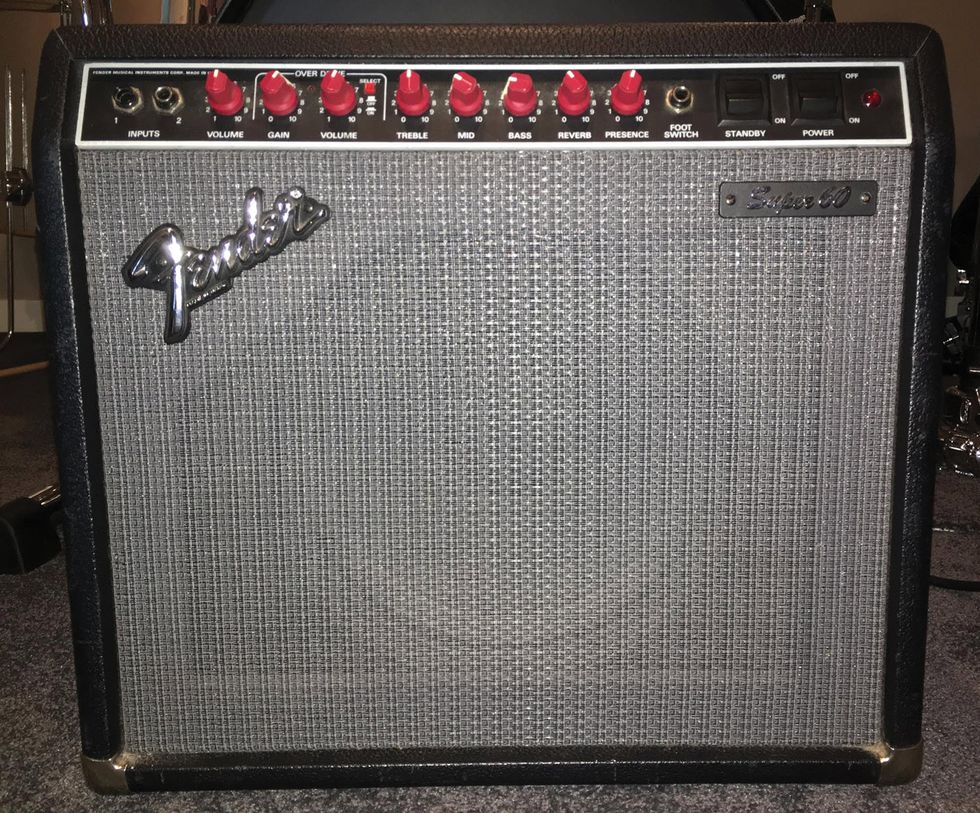
I’m an older rocker who wants to learn electric guitar. I picked up a Fender Super 60 at an auction, but it doesn’t work. (Figures!) I’ve tried a guitar and a mic—and nothing. I live near Minneapolis and need to start asking around about who can help me. I looked up the schematic, but I’ll have to noodle on it for a while because I’m not fluent in electronics. The tubes light up and the fuse is good. It doesn’t even pop when plugging in devices. Is it worthwhile to start replacing some tubes? Is there anything quick or easy to check?
Thanks for your time. Rock ‘n’ roll!
Twisted Dave
Hi, Twisted Dave and Ask Amp Man readers. I quite often get questions like this, where people are basically saying: “I have an amp and it’s not working properly. Is there anything I can do?” Well, being a guy who has repaired amps for 30-plus years and having respect for others that do so, my first response should be “Take it to your local repair guy!” But ya know, sometimes there isn’t a local repair guy, or you may be on the road, or it may be 15 minutes before hit time and you didn’t bring a spare amp! (Shame, shame.) Whatever the reason, I’m going to try to help you help yourself.
As I write this column, we’re into the beginning of the new year and it’s cold out. Okay, for some it’s really cold out. But it won’t be long before the spring thaw, and that hopefully means more gigs, more outdoor shows, and maybe even more touring. While this is fantastic, most of the time you’re going to be your own tech and crew, which, when your amp goes down, might not be so fantastic. That being the case, I’m going to do my best to give you a step-by-step troubleshooting procedure so you can hopefully find and repair some common failures. You might want to keep this issue in your gig bag, tool box, or even in the back of the amp. Some of these fixes may sound simple or seem intuitive, but following these steps couldget you out of a bind. Also, you may notice some of these procedures assume that you have a particular item, and that’s because … you should! Read through this thoroughly and be sure that you have a “spares” kit with everything you’ll need to fix these problems. (Hint: Those items are in bold type.) Good luck.
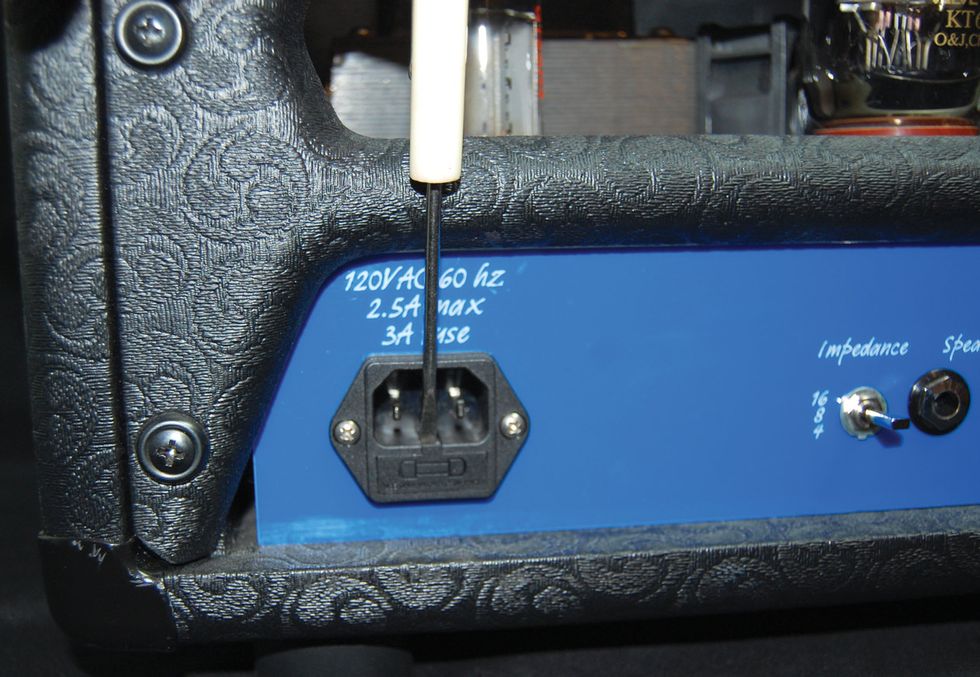
Photo 1
• Step 1: Does the power light go on? Be sure your amp is in “standby” mode, if so equipped. If the answer is yes, proceed to Step 2. If not, first check the fuse. Almost every amp has at least one external fuse holder. If you don’t see one, it may be contained in the AC inlet (Photo 1) where the power cable plugs in. Look for a little rectangle as part of the assembly. If it’s there, you’ll need a small flat-blade screwdriver or something similar to pry it out. Sometimes a fuse can look good and still be bad. If you have a small multimeter, check the continuity. If you don’t have a meter, install a replacement fuse. If the amp still doesn’t come on and it has a detachable power cable, install a replacement power cable. Believe it or not, they can go bad, too!
• Step 2: Did the amp blow a fuse or does it continue to blow fuses? If not, proceed to Step 3. If the answer is yes and the amp is equipped with a tube rectifier, install a replacement rectifier tube. If it doesn’t have a rectifier tube, or continues to blow a fuse after a new one has been tried, install a replacement set of output tubes.
WARNING:
All tube amplifiers contain lethal voltages. The most dangerous voltages are stored in electrolytic capacitors, even after the amp has been unplugged from the wall. Before you touch anything inside the amp chassis, it’s imperative that these capacitors are discharged. If you are unsure of this procedure, consult your local amp tech.• Step 3: Does the amp make any noise at all? Does it make a little pop when you turn the power on (or flick on standby, if so equipped). Or is there possibly some hiss through the speaker(s)? If the answer is yes, proceed to Step 4. If not, and the amp has a second, external HT fuse, check that fuse with the multimeter or install a replacement HT fuse. If it doesn’t have an HT fuse, but it does have a tube rectifier, install a replacement rectifier tube. If the amp still makes no sound, you’ll need to check the speaker in the following ways.
A) If the amp is a combo and the speaker plugs into the chassis, unplug the speaker and check across the jack with your multimeter. You should get some sort of resistance measurement between maybe 3 and 15 ohms, depending on the impedance of the speaker. If you get no reading, try to check directly across the speaker terminals. If you now have a reading, install a replacement speaker cable. These cables, especially the types used in combos, which utilize a molded plastic plug, can definitely go bad.
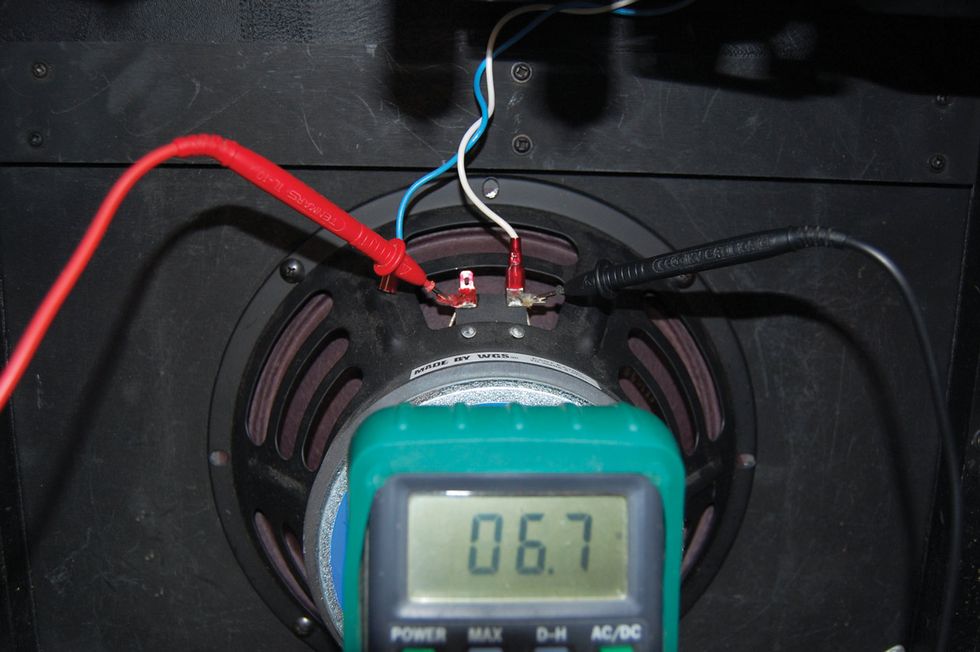
Photo 2
B) If the amp is the combo type where the speaker leads are hardwired to the chassis, but you can remove connectors from the speaker, remove at least one connector and measure directly across the speaker (Photo 2). If you get a decent reading, the speaker should be okay.
C) If you don’t have a multimeter, but the amp has an external speaker jack, plug any other speaker cabinet into the amp—even if it’s a bass cabinet. All you want to find out is if the amp has some sort of output. If the amp does have some output, your speaker or speaker lead is more than likely the failure.
• Step 4: Does the amp have an effects loop? If “yes,” there are a couple ways to use it for troubleshooting, so follow the steps below in order. If “no,” skip to Step 5.
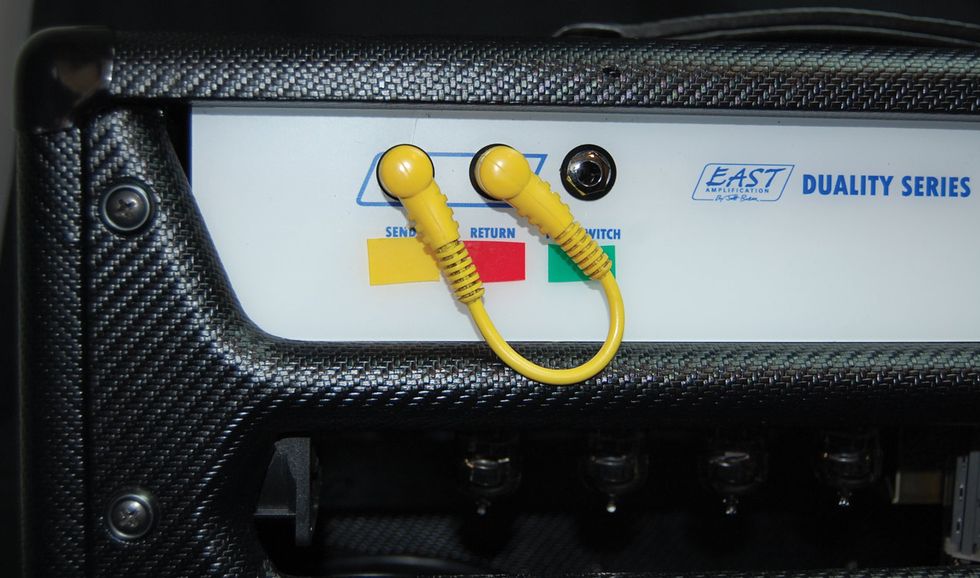
Photo 3
A) Grab a short 1/4” jumper cable. The type used between effects pedals is great, but any guitar cable is fine. Plug one end into the send and the other end into the return jack (Photo 3). If you now have sound, the switching contacts in the effects loop are compromised and need to be thoroughly cleaned, or the jacks replaced. If there’s no sound, continue to the next step.

Photo 4
B) Plug your guitar into the effects loop return jack to see if the amp has any output (Photo 4). At this point you’re past all the front-end gain and tone functions, so don’t expect them to work. You may, however, need to turn the master volume all the way up, if the amp is so equipped. If you have output, the volume will be substantially reduced and only controllable with the volume of your guitar, but that’s okay. If you don’t have output, proceed to Step C. If you do, proceed to Step D.
C) If you had no output, more than likely there are only one or two preamp tubes that could be the cause. Starting with the preamp tube closest to the output tubes (or farthest away from the input jack), install a replacement (12AX7) preamp tube. This will typically be the phase inverter tube, and while some amps utilize a 12AT7 in this position, using a 12AX7 for troubleshooting purposes is fine. If there is still no output, replace the original tube and move on to the next tube down the line. There is probably no need to go more than two tubes back from the output, as anything else would be pre-effects loop.
D) If you did have output when plugging into the effects loop return jack, this generally means that the problem is in the front end somewhere. Starting from the tube closest to the input jack, install a replacement tube and see if the amp has output. If not, replace the original and move on down the line to the next preamp tube.
• Step 5—Take your amp to a reputable, experienced tube amp repair technician, since that’s about all you can troubleshoot and repair yourself.
Hopefully this will, at some point, get you out of a bit of hot water ... or, at the very least, amaze your friends!