
Hello and welcome back to Mod Garage. This month we'll continue with our aging series that began in May 2020 ["DIY Relic'ing: Break the Shine"]. Let's take a closer look at the electronics of our Harley Benton DC-Junior guitar, which is a copy of a Gibson Les Paul Junior double-cut, and consider some part swaps before we keep relic'ing. If you need a refresher, we covered aging of the pickup in the last part of this series ["Mod Garage: DIY Relic'ing—Aging a P-90 Pickup"].
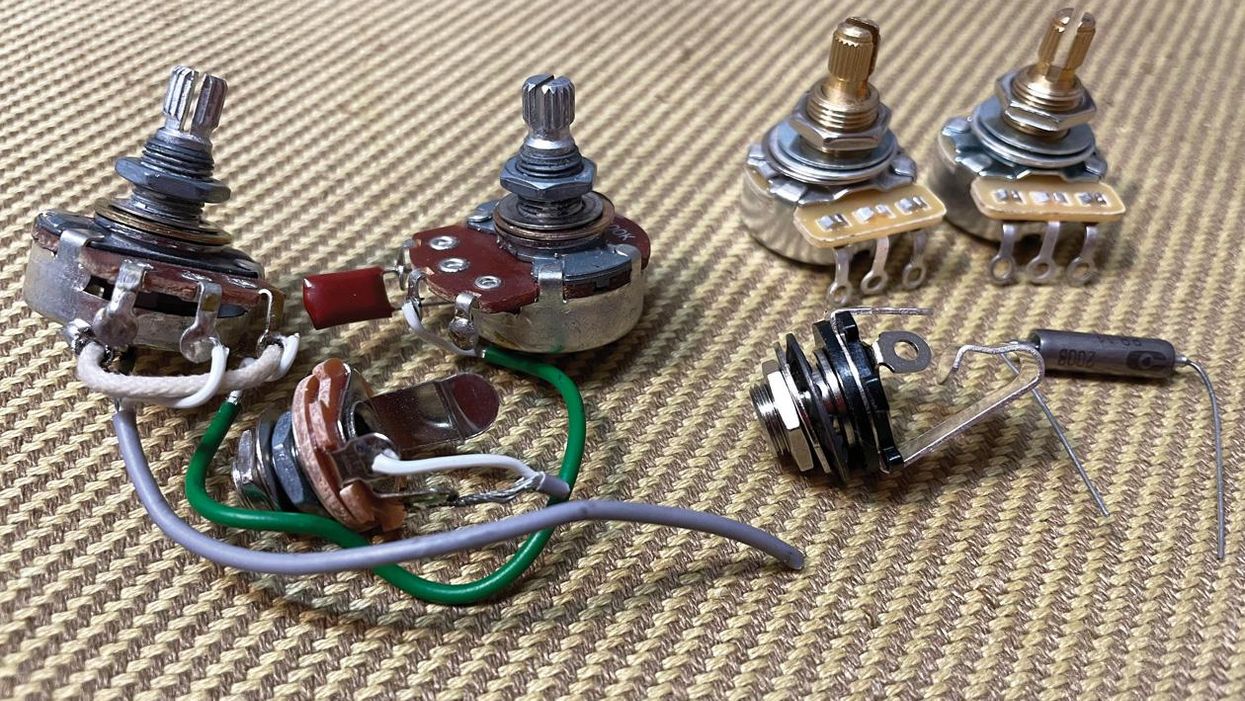
When doing aging work to the body and the neck of this guitar (which we'll cover in a later part of this series), it's important to remove everything from the guitar that's removable, so I took out all of the electronics. Taking a closer look at the removed guts, I found two metric standard (24 mm) sized pots from the Alpha company: a 500k linear pot for the volume and a 500k audio pot for tone with a 0.022 uF polyester film cap attached to it, all connected with plastic-coated shielded wire. I also found a small-sized budget output jack, connected with plastic-coated shielded wire.
The circuit of the guitar was wired in the typical "modern" style, and you can take a look at it on the website for Roswell, which is the company that makes the P-90 pickup on this guitar.
While the overall quality of the electronics isn't bad, there's still some headroom that could be added to enhance everything and put it a little closer to the vintage Les Paul Junior tone we're going for. To spruce up usability, here is my list of electronics and optional mods for tweaking this guitar. You can see a photo of the "guts" in Image 1.
I've known players who've gotten serious cuts on their hands from these. To avoid this, I prefer blunt-tip pointers with rounded tips and minimized risk.
1. Pots
Using two 500k pots follows the original formula of the Les Paul Junior, but using a linear volume pot in a passive guitar circuit doesn't make any sense. It should have two audio pots for much better usability, preferably with a 60:40 or at least 70:30 taper. In the last part of this series on aging the pickup, we discussed the stock pickup's treble response.
If you decide to keep the stock pickup like me, it's a good idea to use a mixed configuration with a 250k audio volume and 500k audio tone pot to get the best of both worlds. The 250k pot will smooth the high-end a little bit, and, as a positive side effect, the sweep control is much better compared to a 500k pot with the same taper—the nature of the passive beast. I decided to use two U.S. inch-measurement military-grade audio pots with a 60:40 taper: 250k for volume and 500k for tone.
To make these pots fit, you'll have to slightly enlarge the metric holes in the guitar. You can easily do this with a reamer or a simple half-round file. Because it's only a smidge, you should stay away from any other method! To minimize the risk of damaging the wood, don't use a drill press with a super sharp milling drill bit, etc.
2. Tone Caps
While 0.022 uF is the quasi-standard for single-coil pickups and the correct value if you want to stay as close as possible to a Les Paul Junior (0.02 uF), I decided to change the tone cap and convert the tone control into a warmth control—something we've covered in Mod Garage before. I decided to use a NOS military-grade 3300 pF paper-in-oil cap on this guitar, which will add some oomph to the tone. With the extremely low capacitance of the cap, it'll be possible to fine-tune the high-end and treble response of the pickup very precisely. If you want super dark jazzy tones, you should stay with the 0.022 uF value. This is a wide field to experiment with if you're inclined. Gibson also used paper-in-oil tone caps in their early Juniors—the famous Sprague "Black Beauty" caps.
3. Wire
While plastic-coated wire works, I decided to use the vintage stuff from the '50s, just like in the original guitars: cloth-covered wire.
The original vintage wire was AWG22 7-strand, tinned copper, consisting of seven individually tinned and twisted copper strands, with a woven Celanese overwrap, followed by a waxed cotton overbraid. Such wires are available as reissues from several companies. I also decided to skip the plastic-coated wire from the volume pot to the output jack, like in the original wiring, using shielded braided wire. The length of this wire is very short, so there's not much chance for hum and noise to creep in. If you want to stay as close as possible to the original, use cloth wire and shielded braided wire for connecting the output jack.
4. Output Jack and Wiring
The quality of the stock mini output jack is very decent, but upgrading it to a full-sized version is a good idea in terms of reliability and longevity.
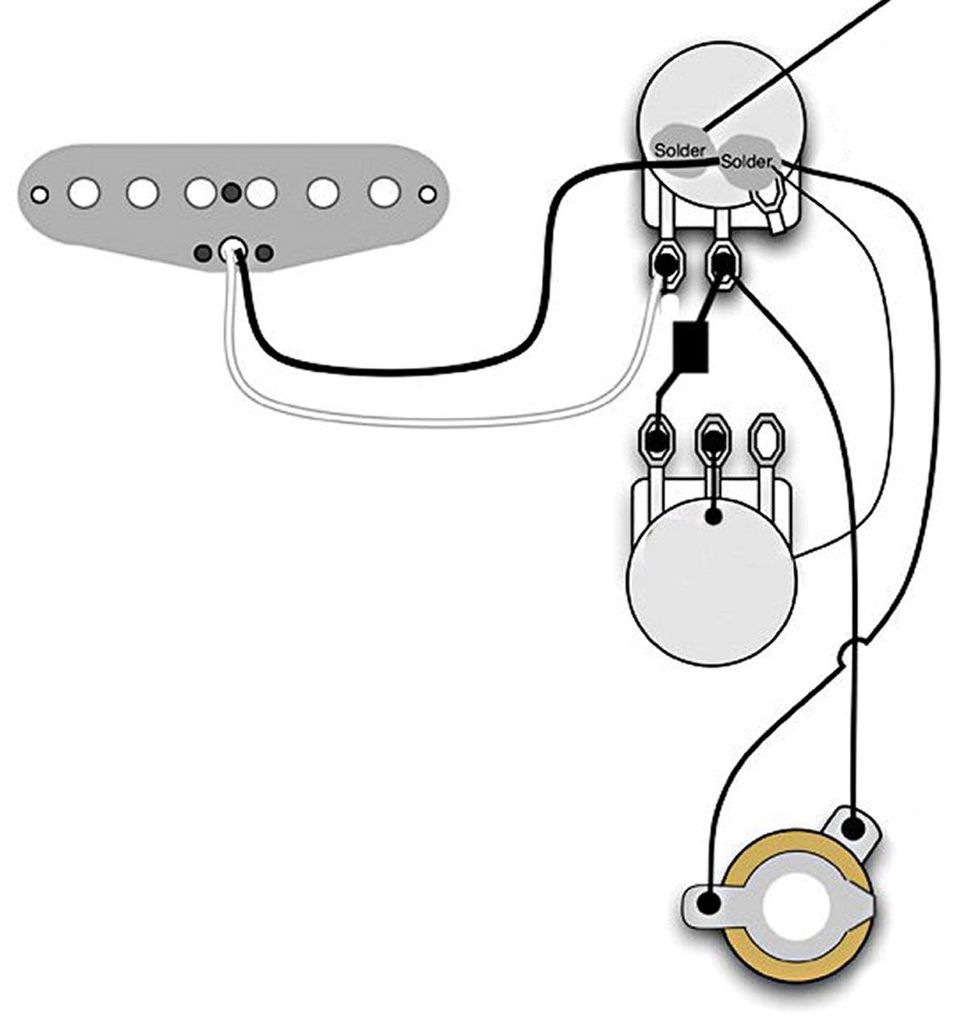
The early Juniors were set up with '50s wiring, which is part of their special tone, and different from the modern-wiring style our Harley Benton came with. Because I will have to rewire everything already when I put this guitar back together, I decided to convert it to the traditional '50s wiring as shown in Fig. 1. This is also why I decided not to use an additional treble-bleed network on the volume pot. Usually, the treble response is perfect the way it is with traditional '50s wiring when rolling back the volume.
5. Knobs
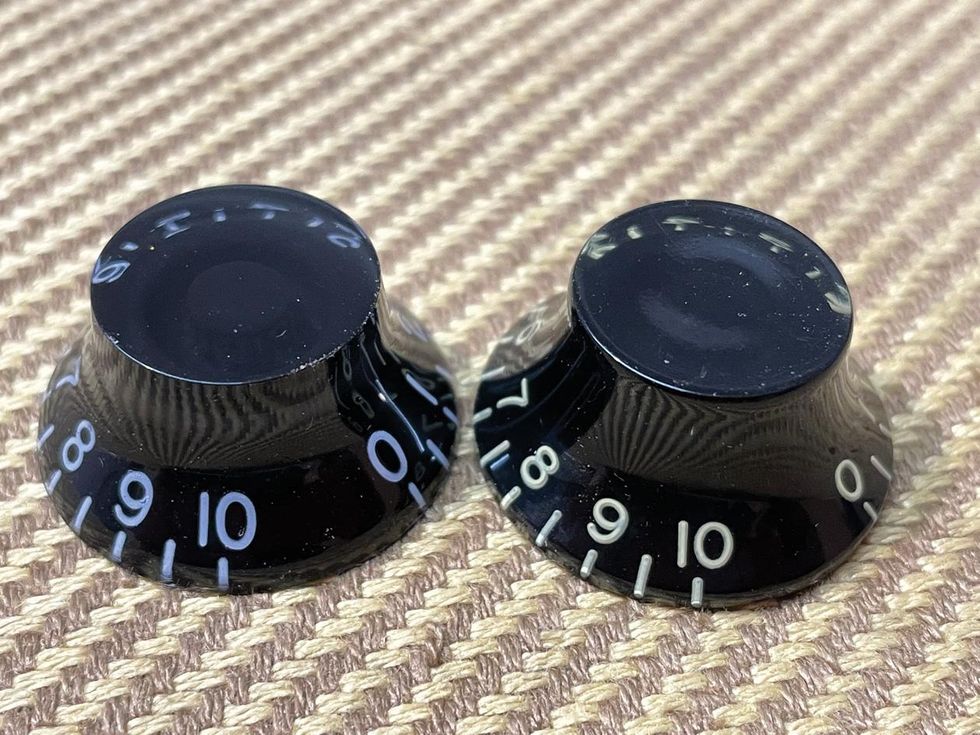
Image 2
Using U.S. inch pots, the stock metric knobs will not fit anymore, so you'll need new knobs for the guitar. Taking a closer look at the stock knobs shows that Harley Benton uses the right and historically correct knobs (black "top hats" with bright numbers), but the size of the numbers is not correct (too big), and the printed numbers are pure white. The numbers on vintage guitar knobs usually turn a yellowish color over the years—something that's difficult (but not impossible) to mimic when you have knobs with pure white printing. So, I decided to get a new pair of knobs that fits U.S. inch pots and has the yellowish discolored embossed numbers in the correct size. You can clearly see the difference between the two knobs in Image 2. The stock knobs are made with modern plastics while the new knobs use vintage material from the '50s: fully tinted cellulose acetate butyrate (CAB for short). Besides the different look, the feel is also different to the touch.
6. Pointers
The guitar comes stock without any pointers, but, for a more vintage look, I decided to add them. Take care to get pointers with the right hole for your pots (metric or U.S. inch). Enlarging holes that are too small is not a fun project. Vintage correct are nickel pointers with 90-degree pointed arrowhead tips. Personally, I don't like the very sharp tips of these pointers because the risk of injury is high. I've known players who've gotten serious cuts on their hands from these. To avoid this, I prefer blunt-tip pointers with rounded tips and minimized risk to hurt you.
7. Jack Plate
Gibson used nitrate 3-ply (black/cream/black) jack plates on their early Juniors, while our Harley Benton guitar comes with a single-ply, solid-black jack plate. Initially, I wanted to swap the jack plate for a vintage-correct one, but while doing so I realized the Gibson jack plate won't fit the Harley Benton, which uses a smaller jack plate. Sure, it would be possible to make a custom jack plate out of the correct 3-ply material using the stock plate as a pattern, but I decided to simply leave the stock jack plate on the guitar, sacrificing some of the vintage look. Because I decided to upgrade the output jack to a full-sized version, I had to slightly enlarge the hole in the plate with a reamer. The four stock screws are chrome, so I decided to swap them for nickel versions, which will provide a more authentic look when aging them later.
8. Back Plate
Gibson used a black nitrate single-ply back plate in the '50s. Harley Benton did the same, but with modern plastic material. This is okay for me and will look very close to the original after aging it a bit. The two stock screws are chrome, so I decided to swap them for nickel versions for a more authentic look when aging them.
That's it for now. In the next part of this series, we'll cover the aging process for the hardware parts listed above and take a closer look at the pickguard.
Until then ... keep on modding!