
Hello and welcome back to Mod Garage. This month we’ll continue with our relic’ing project, taking a closer look at the front side of the neck and treating the fretboard and the headstock. We’ll work on the front side of the headstock in the next part, but first we must prepare it.
When we talk about a vintage Gibson fretboard from the ’50s, we’re talking about the mystic Brazilian rosewood (Dalbergia nigra) and its certain look and feel. Our Harley Benton doesn’t have a Brazilian rosewood fretboard. If it did, the fretboard material would cost more than the entire guitar because it’s so rare and limited today. Brazilian rosewood trade is restricted by CITES and almost no guitar companies use it anymore, except for some special custom shops. Other rosewoods or alternative woods are common substitutes.
Our Harley Benton fretboard is amaranth (better known as purpleheart), but sadly it was stained or painted black, giving the guitar a different look that’s closer to ebony rather than rosewood. So, there’s no way to get it brown or make it look like rosewood other than getting a new fretboard installed, which isn’t reasonable. Maybe it’s possible to get the black color out of the wood by using chemicals, but we don’t know what we’d find underneath, either. There could be another surprise waiting for us and all the work would be useless. On a budget guitar like this, we’ll have to live with this fretboard, loving it for what it is rather than hating it for what it’s not. The fretwork is surprisingly good and close to excellent, which is far from the industry standard in this price range.
The fretboard edges of well-played vintage guitars feel comfortable and round because the edges receive pressure from a player’s hand over decades.
But to show you the process of aging a fretboard, I chose a guitar with a rosewood fretboard, so you’ll know how to do this on a guitar with this type of fretboard if you want to. It’s not complicated so here we go.
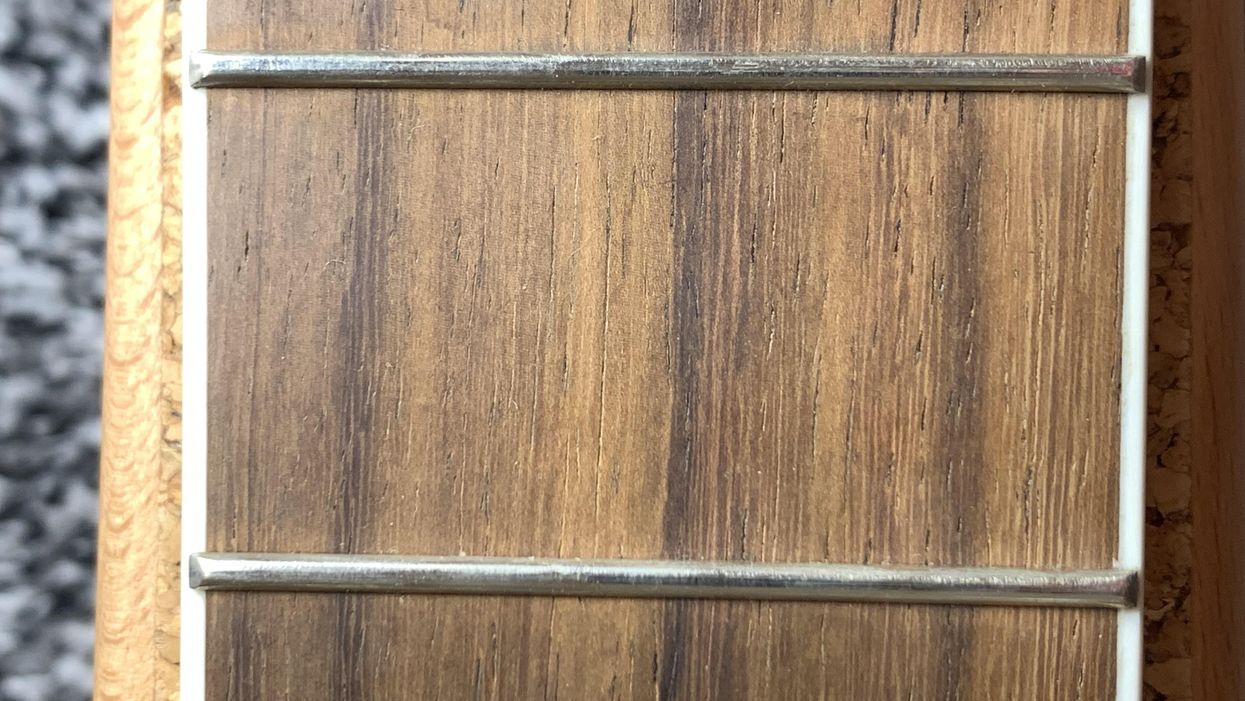
Look at the slightly pale and lifeless color of the rosewood in Photo 1. It has a nice grain but is rather dull. Brazilian rosewood has a rich chocolate brown color, which clearly shows the grain of the wood.
Let’s make it less boring:
Use some fine steel wool or sanding pads to sand the rosewood. Use a soft brush afterwards to get the dust off.
Use some naphtha or alcohol and a cotton cloth to degrease the wood and get all the fine dust and dirt out of it.
Use masking tape to protect the fretboard edges and the binding, if your neck has one. You don’t need to cover the frets. They’re easy to clean after the process. Use a Q-tip and some Vaseline to protect the fretboard dots from the dye.
You need a chocolate brown wood dye and a small soft brush to apply it.
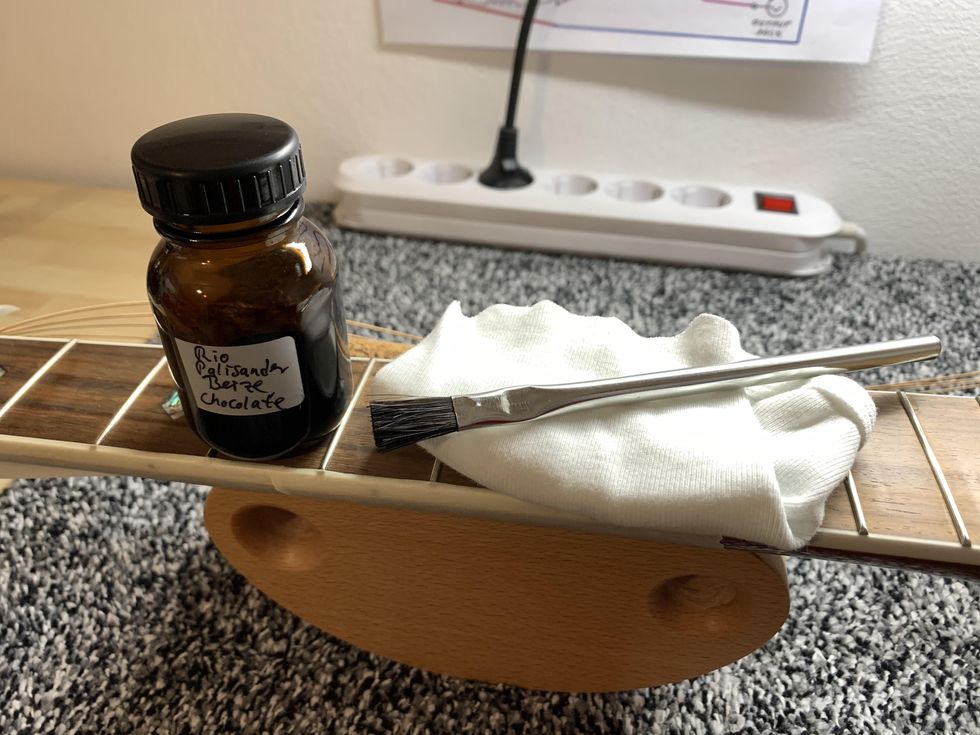
Photo 2
Some luthier supply stores offer special Brazilian rosewood dye in different shades of brown (Photo 2). I decided on a classic chocolate brown color on a solvent base for best results. Apply the dye thin and carefully and let it dry for some minutes.
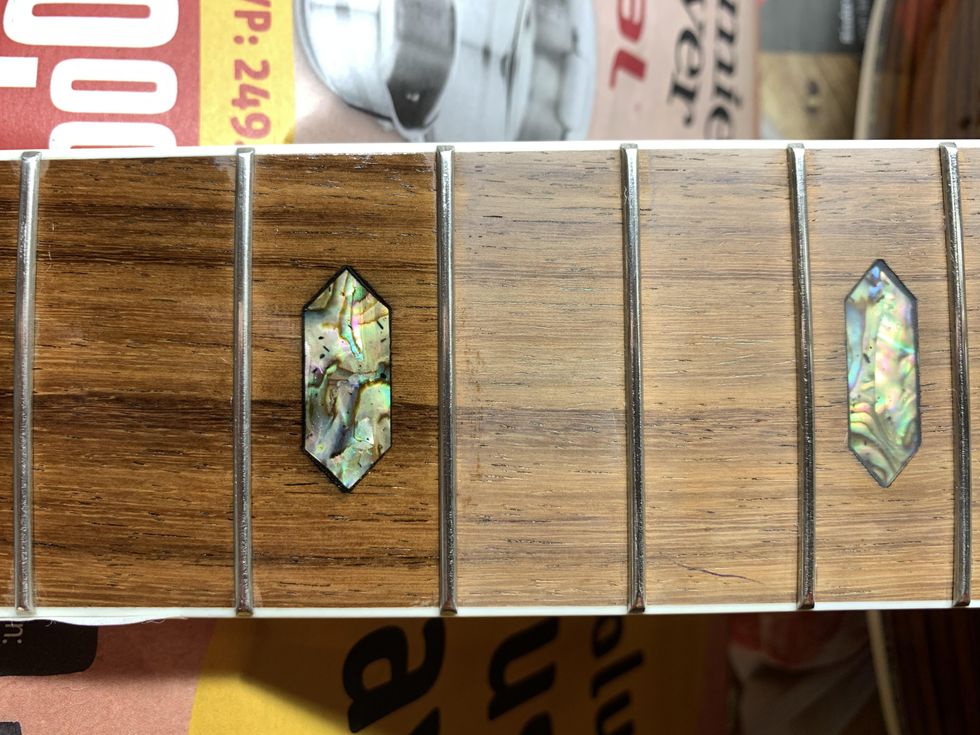
Photo 3
Now look at the difference in Photo 3. It’s easy to see! If you want your fretboard darker, repeat the process until you like it. Cover your workspace with old newspapers and have an old cotton rag nearby just in case. This dye will stain everything permanently and you don’t want it on your clothes or your kitchen table. Let the fretboard dry for a day and take off the masking tape.
Use some very fine steel wool to polish the fretboard and the frets, to get any dye off the fret material easily. Use a soft brush to clean the fretboard afterwards.
Use some naphtha and a Q-tip to carefully clean the fretboard dots from any Vaseline leftovers.
Then use the amber color from the last part of this series [“DIY Relic’ing: Hardware Continued”] together with a fresh Q-tip and apply the amber color to the dots until you like the shade.
Now that we’ve made this rosewood fretboard look much closer to Brazilian rosewood, it’s time to mimic the touch and feel of it. Brazilian rosewood has a certain smell and feel that can be described as greasy compared to most other rosewoods. This is because of the oil content of this wood. We can’t naturally “oil up” other woods, but we can get close to this certain feel by waxing the fretboard rather than oiling it. This is also an easy process so let’s go for it.
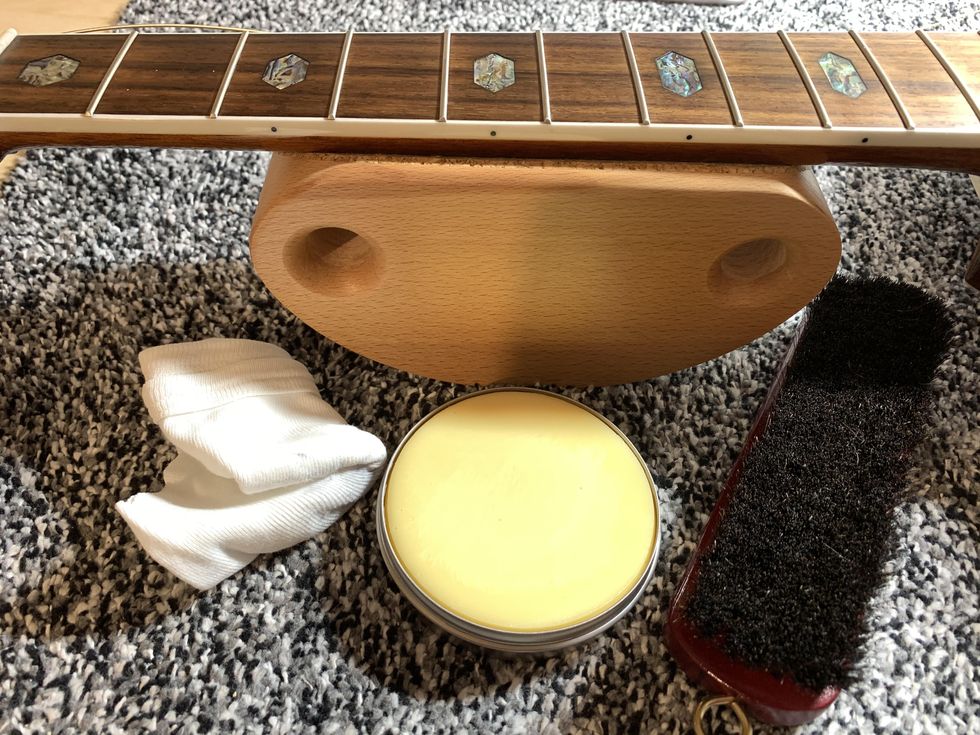
Photo 4
Get a clear, hard wax for fretboards and a soft polishing brush (Photo 4). Apply a thin layer of wax to the fretboard using a cotton cloth to massage it into the wood.
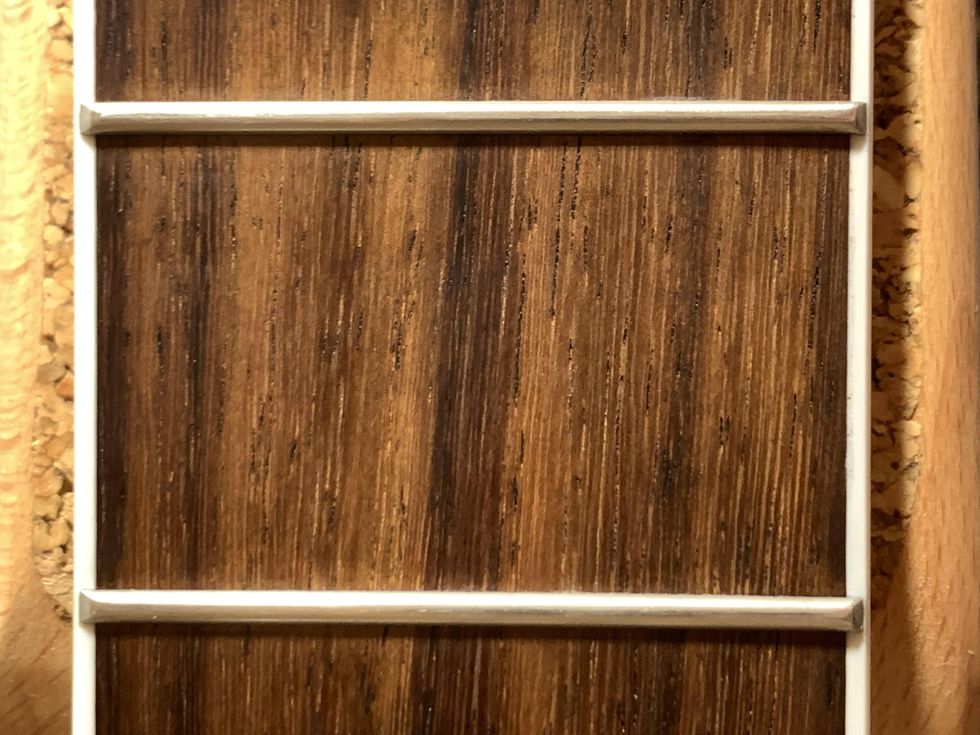
Photo 5
Let it dry for some time, then wipe off any remaining excess wax and use the soft polishing brush to get this greasy look and shine on your fretboard, as seen in Photo 5.
So far, so good. We’ve taken care of the color and the feel of the fretboard but there is another haptic thing to consider when talking about vintage necks: the broken-in feeling of the fretboard edges. The fretboard edges of well-played vintage guitars feel comfortable and round because the edges receive pressure from a player’s hand over decades. This is not what is called “rolled fretboard edge,” which is a common custom shop option, but it goes in the same direction only to a much lesser degree.
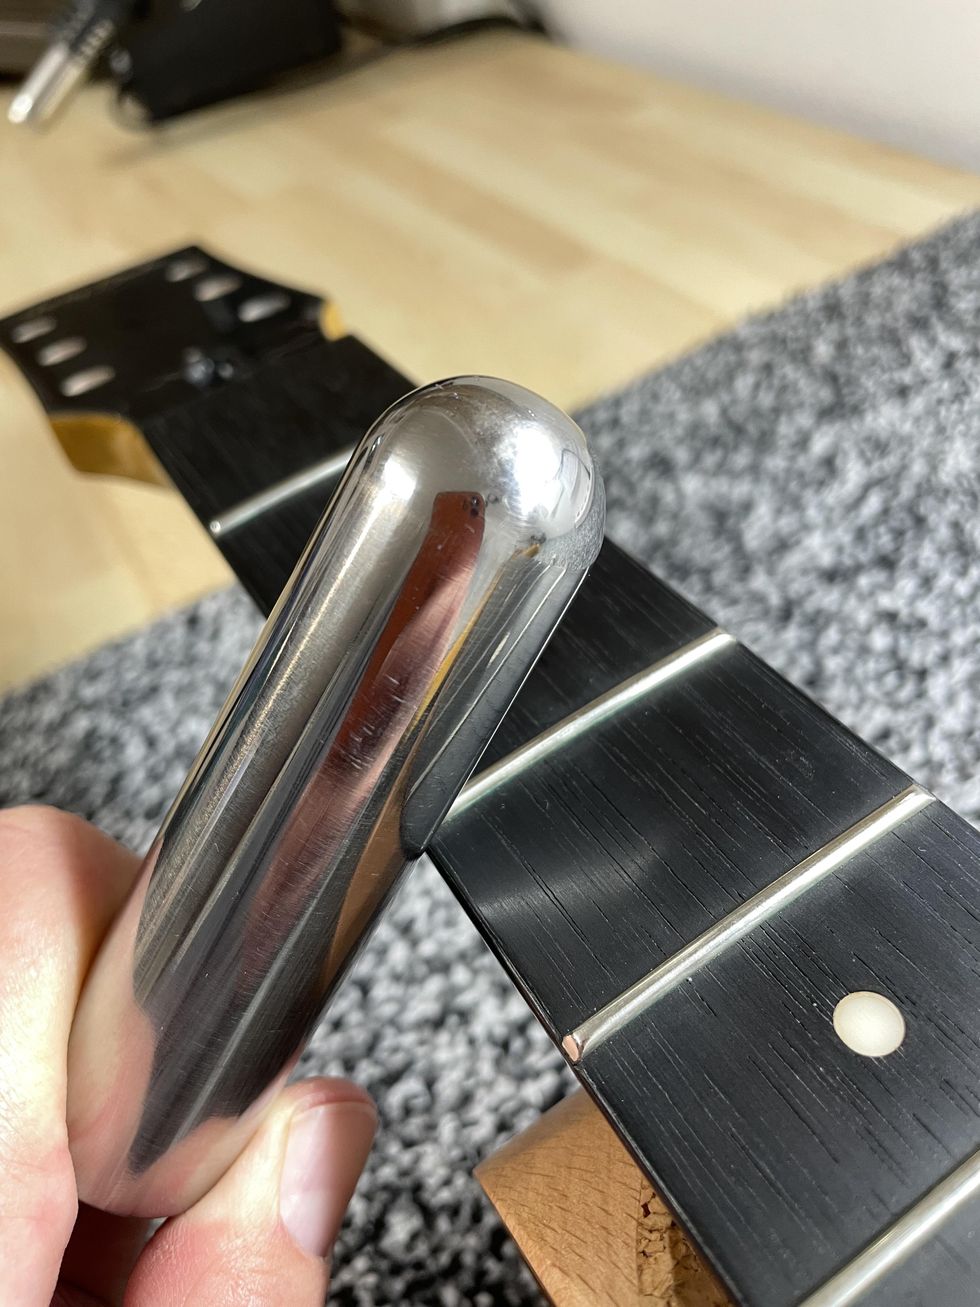
Photo 6
To bring this typical broken-in feeling to your neck, you don’t need much: just a round metal bar and some time. You can do this to any guitar neck. I prefer to use a massive metal slide for pedal-steel players, but you can also use a bigger screwdriver or something similar. If possible, clamp down your guitar and use the steel bar in a 45-degree angle to move it along the edge of the fretboard, applying pressure (Photo 6). What we’re doing with this is not making a rolled edge but compressing fibres, which is exactly the natural process over time. Repeat moving the bar while applying pressure for some time and check the result until you like it. This is not done within a minute, so take your time. With the metal slide, I usually need 10-15 minutes for each edge until I like it, but this depends a lot on how hard your fretboard material is.
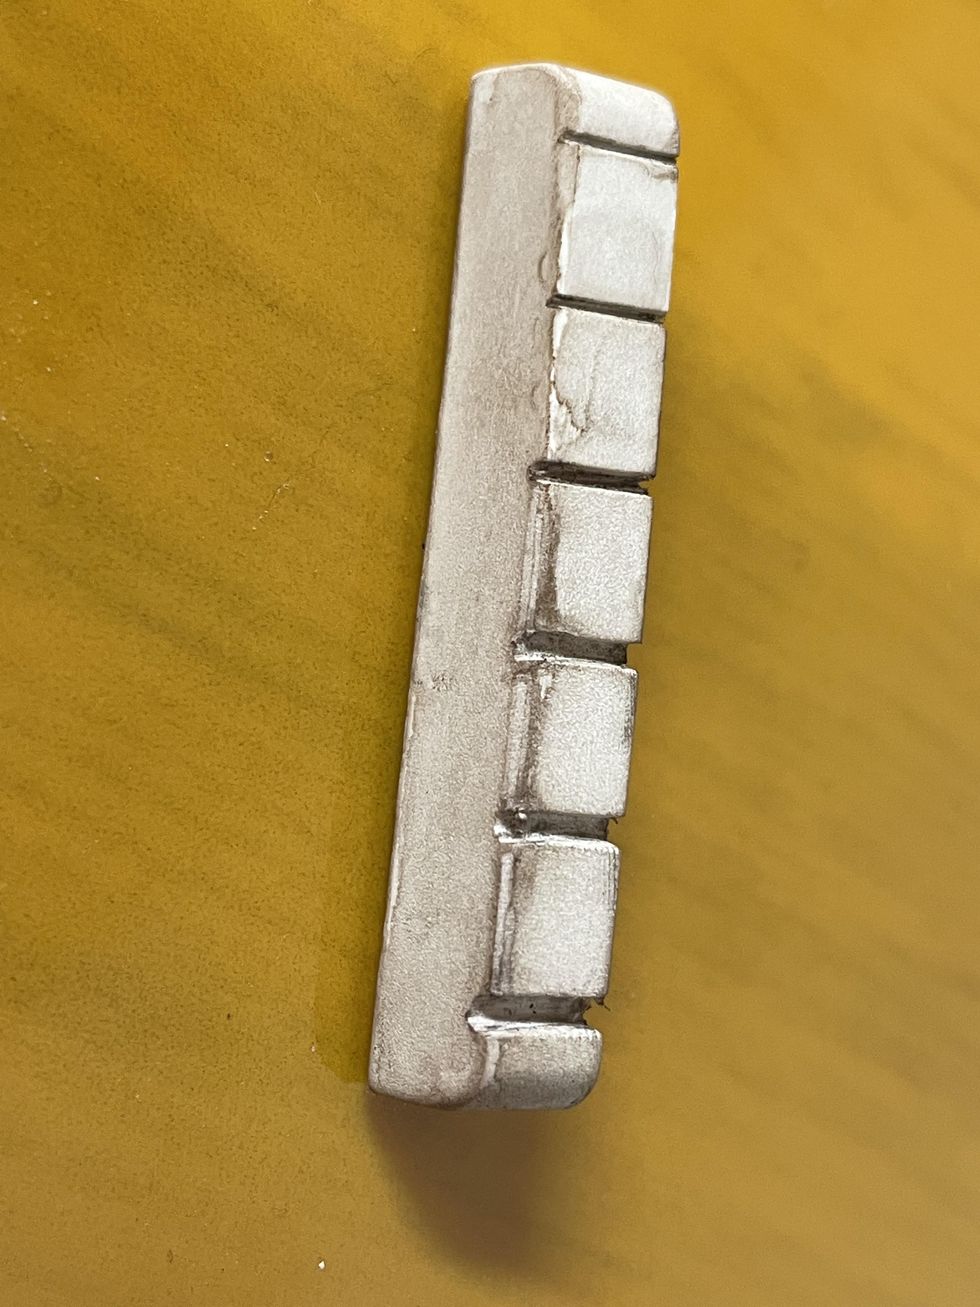
Photo 7
If you’re done with that part, excellent! You just finished your fretboard. Moving up the neck, the nut is our next task. The nut of our Harley Benton is pure white plastic, which not the best choice. If you want to keep it, you can sand it with some steel wool and apply some of the amber color with a Q-tip, followed with some of our mixture of dirt, dust, and ashes we used for the plastic buttons of the tuners [DIY Relic’ing Tuners, Part 2”]. Use your fingers to wipe on some of this mixture and you’re done. If you want to upgrade the nut, nylon is the historically correct material, and such nut blanks are available from numerous luthier supply stores. I decided to use an unbleached bone nut blank and make a new nut. Afterwards, I used some of the amber color and dust to make it look old (Photo 7).
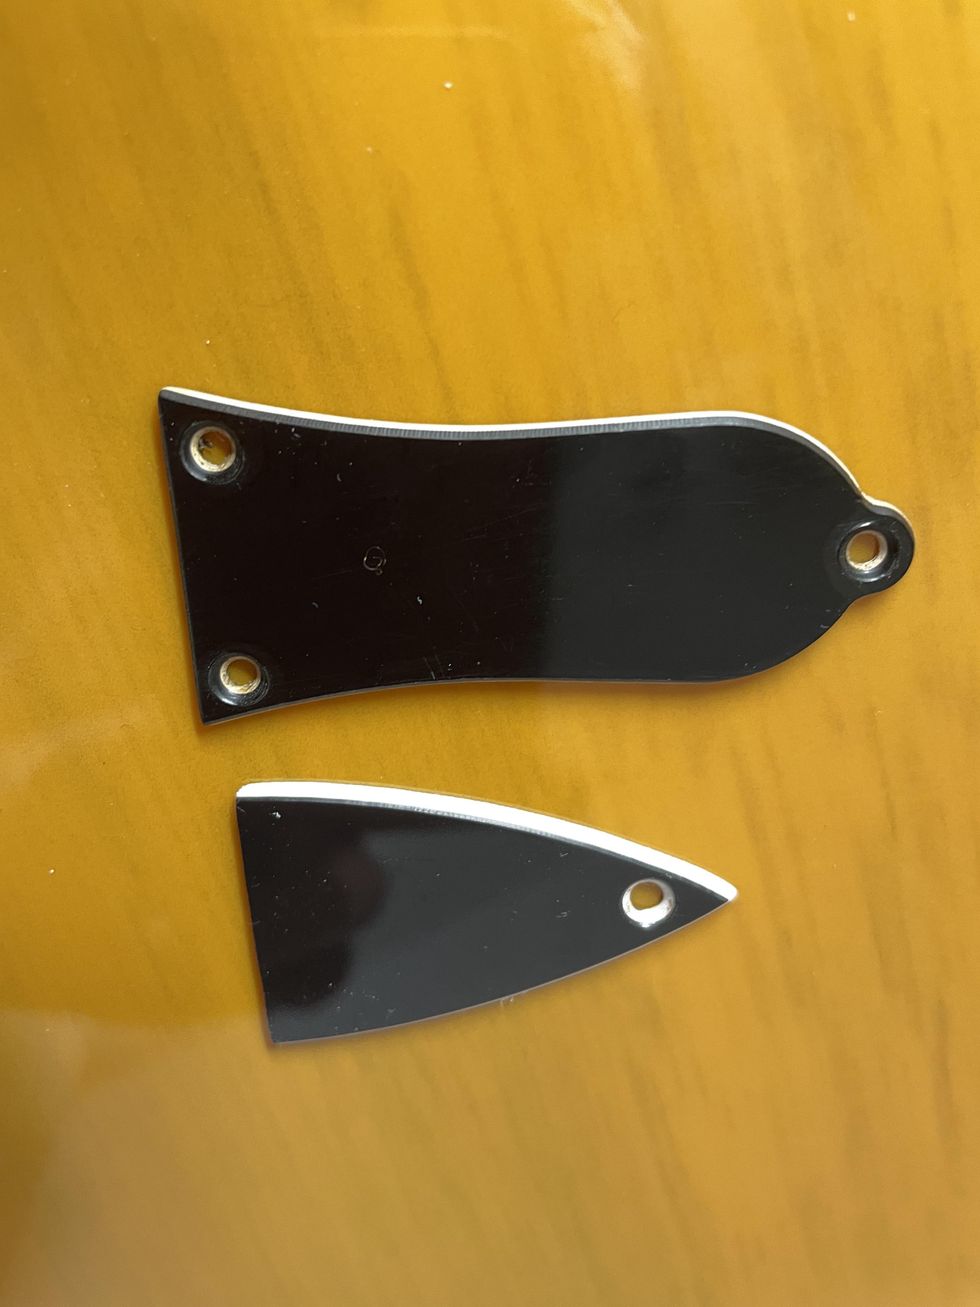
Photo 8
Further up the neck is the cover for the truss rod adjustment screw with its mounting screw. Harley Benton decided to use a modern shape for it, which doesn’t look very good to me. The typical Gibson-style covers with their bell-like shape look much different, so I decided to swap the cover for such a model, modifying it for a flat bottom so it covers the whole opening for the truss rod (Photo 8). To make it look old, you can use the exact steps we used on the jack plate: break the shine with some steel wool, add some light scratches, wipe on some amber color on the white part of the cover, and then rub in some dust and dirt. You already know how to age screws, having done it many times before in the earlier parts of this ongoing project. If you need a refresher on our aging process for screws, refer back to “DIY Relic’ing: Break the Shine” for guidance.
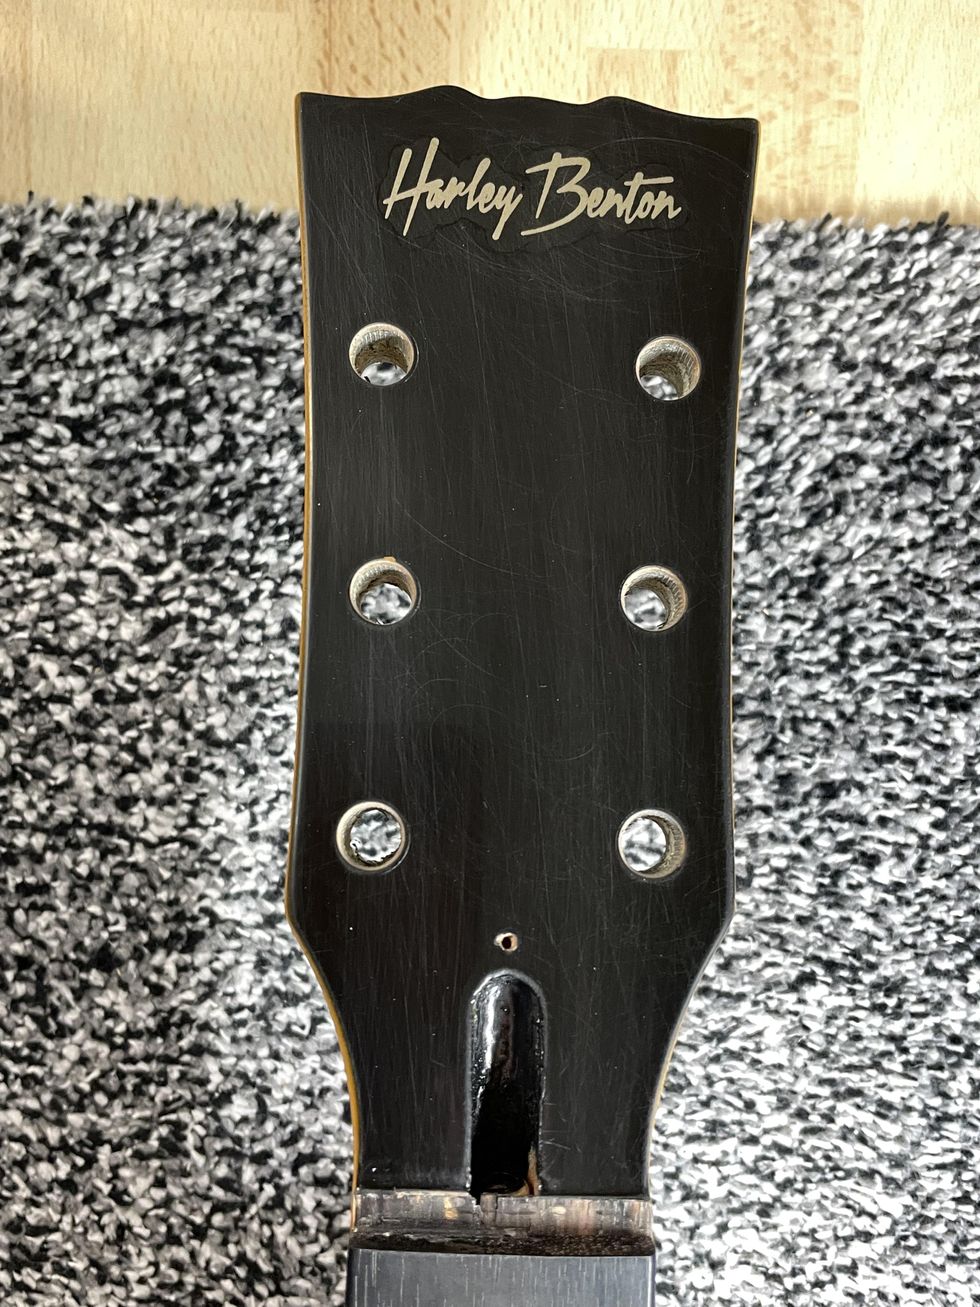
Photo 9
The last thing we’ll do today is begin to work on the headstock of the guitar, which is often a delicate task. A lot of modders try to reshape the headstock so it will look like it’s from a vintage guitar, and, even worse, replace the headstock logo with a fake logo from another company. I would never do that. This project is about aging a guitar and not about making it an exact copy of a vintage original. Personally, I really like the headstock shape of the Harley Benton. It looks at least a little bit Gibson-like, and I also think the Harley Benton logo looks cool the way it is (Photo 9). So, aging it is very easy: Break the shine with some steel wool and wipe off the dust. Use a Q-tip and apply some layers of the amber color to the logo until you like the shade. Adding dings, dongs, and scratches will come later. In the next part of this project, we’ll take care of the backside of the neck and the body by cracking the lacquer to mimic some old nitro lacquer.
That’s it for now. We’re almost finished with this relic’ing project, but before we wrap it up, we’ll return to guitar mods in the next issue. We’ll take a deeper look at putting vintage parts into new electric guitars, so stay tuned.
Until then ... keep on modding!