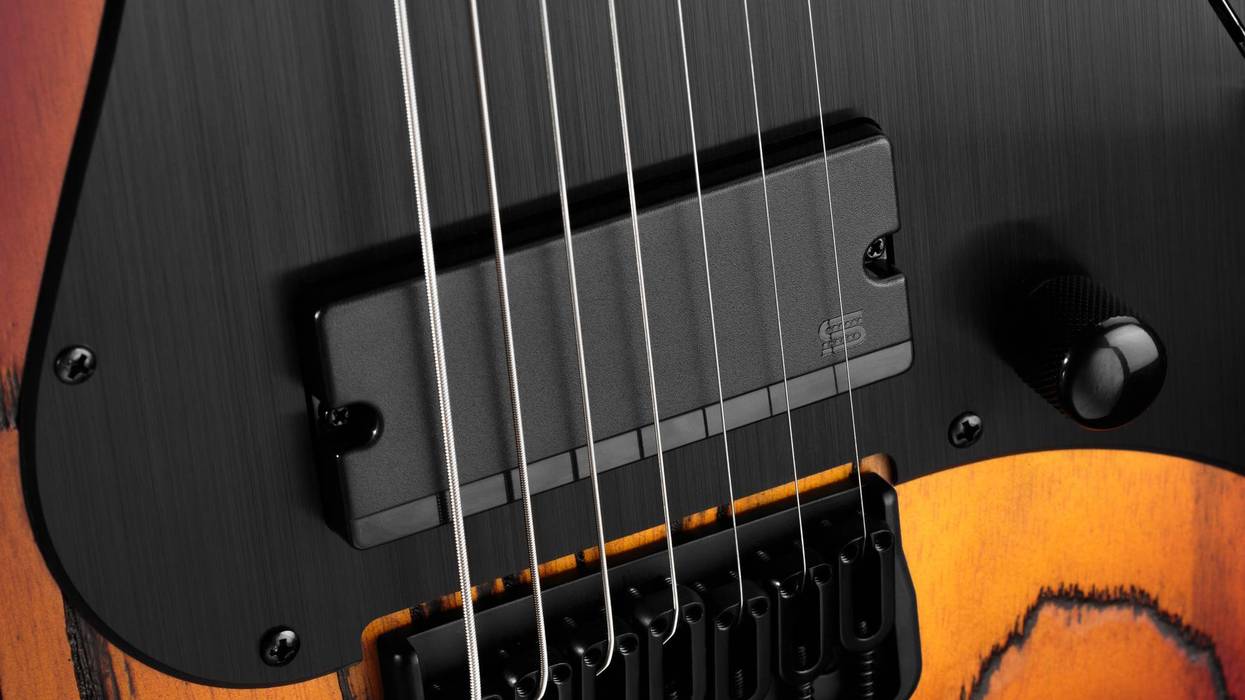
Photo 1
We're getting close to the end of our journey. We've aged most of the metal parts on our project guitar, so now let's take care of the output jack, knobs, back plate, and pickguard.
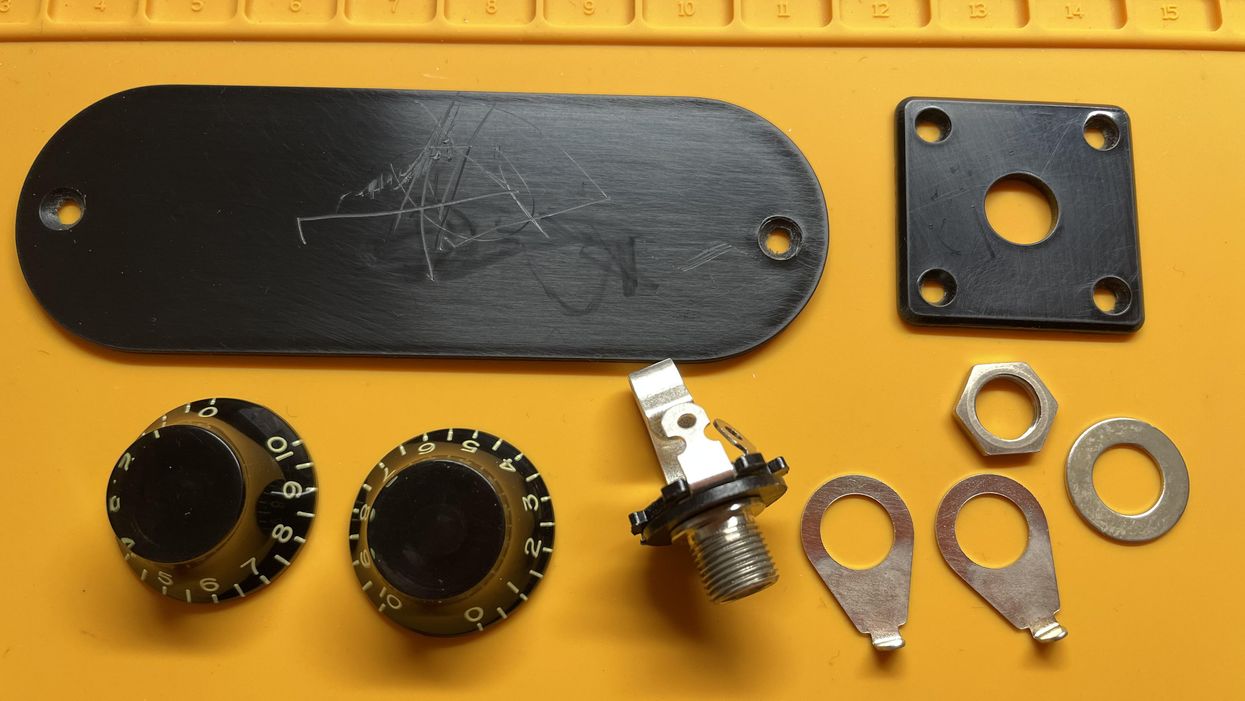
Hello and welcome back to Mod Garage. This month, we'll continue with the aging process of our Harley Benton DC-Junior project guitar (which is a copy of a 1958 Les Paul Junior Double Cut), taking a closer look at the pickguard while aging the rest of the hardware discussed in the last part of this series ["DIY Relic'ing: Harley Benton DC-Junior Electronics"]. If you need a refresher on our aging process for hardware, refer back to "DIY Relic'ing: Break the Shine" for guidance. You can see the parts we'll be discussing today in their "finished" form, aka relic'd, in Photo 1.
1. Output Jack
I'm not a big fan of aging the complete output jack or applying any corrosion to it because it's the transfer point of the signal to the guitar cable. We want this as clean as possible and without any avoidable contact resistance to keep the signal as strong and as fresh as possible. So, aging the parts you can see from the outside is the way to go, meaning the collar, the washer, and the hex nut.
You often see shiny new output jacks on vintage guitars, but why is this? Output jacks don't last forever, and chances are good that a vintage guitar has a replaced output jack that looks new because it is new. If the original output jack is still in a vintage guitar, it's usually dull, often showing some slight rust on the edges of the hex nut. To mimic this appearance, first take off the shine with some steel wool or fine sandpaper as we did before with many other parts. Then use an iron (III) oxide (ferric oxide) liquid to create some patina until you like the result. If you want to mimic some rust on the edges of the hex nut, sand off the nickel until you see the metal underneath—the ferric oxide will do the rest. Just let it sit for soak for a few minutes on these spots.
2. Knobs and Pointers
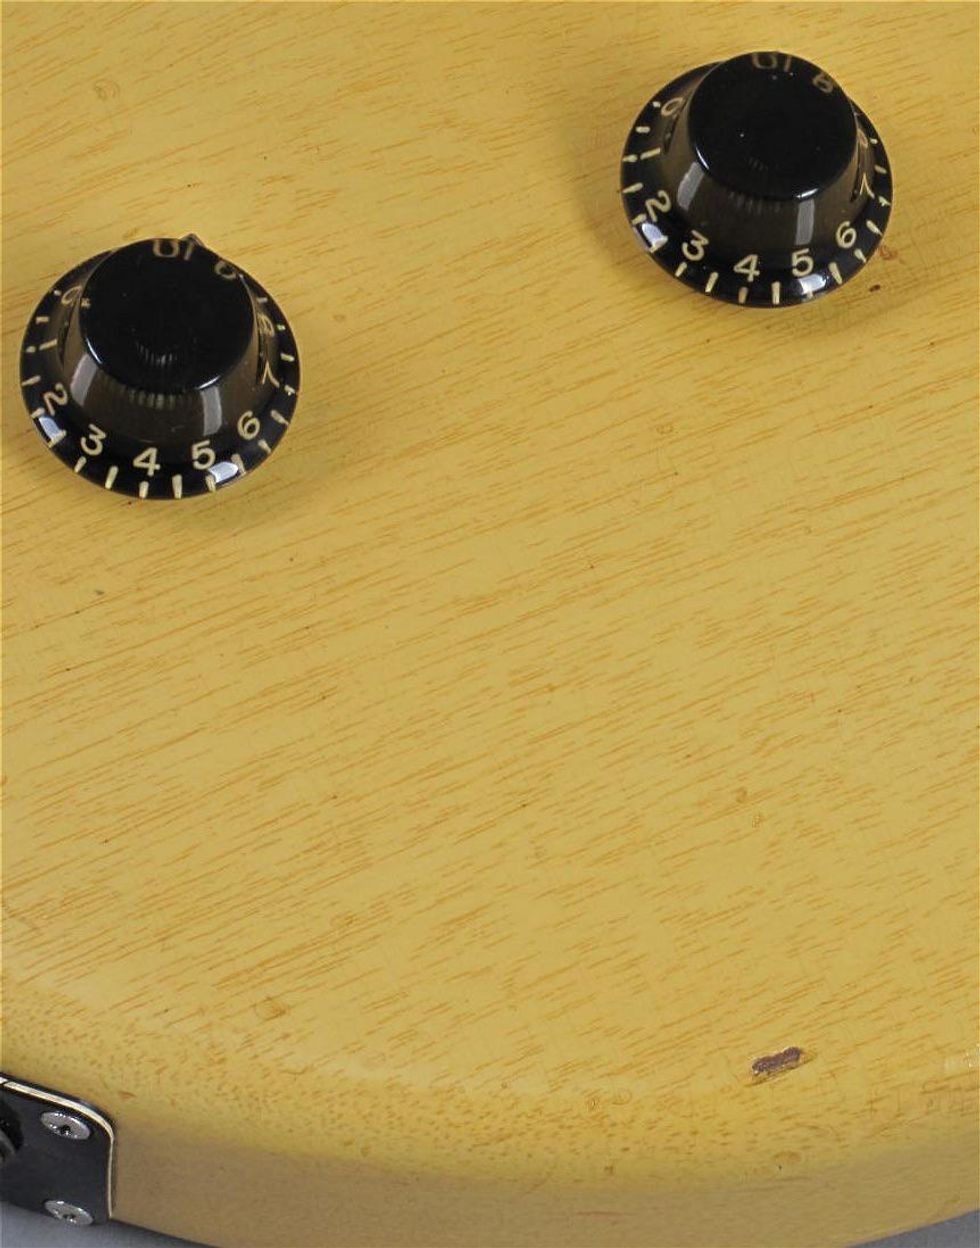
Photo 2
The top-hat knobs on vintage guitars also usually look shiny and new, but for a different reason. Because the knobs are touched and used very often, they get a kind of self-polishing from our fingers through the years, keeping them shiny with a greasy touch. Have a look at the original knobs of a '58 Les Paul Junior, shown in Photo 2, to see what I mean.
To mimic this, you can use a solvent and rub the knobs carefully with a paper towel, the surface will get slightly dull. Afterwards use a polish for plastics (or simply some of your toothpaste) and polish up the knobs a little bit until you like the result. The goal is to find the right mixture between old and new regarding the look. If you like a more beaten-up look, you can add some light scratches and file down some of the edges.
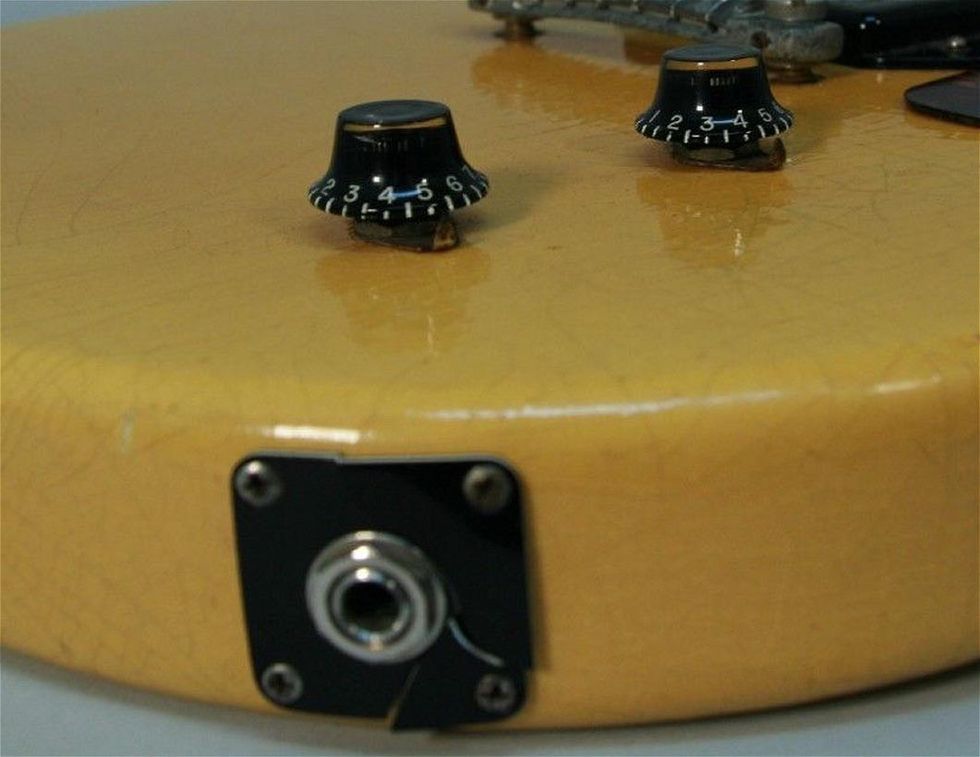
Photo 3
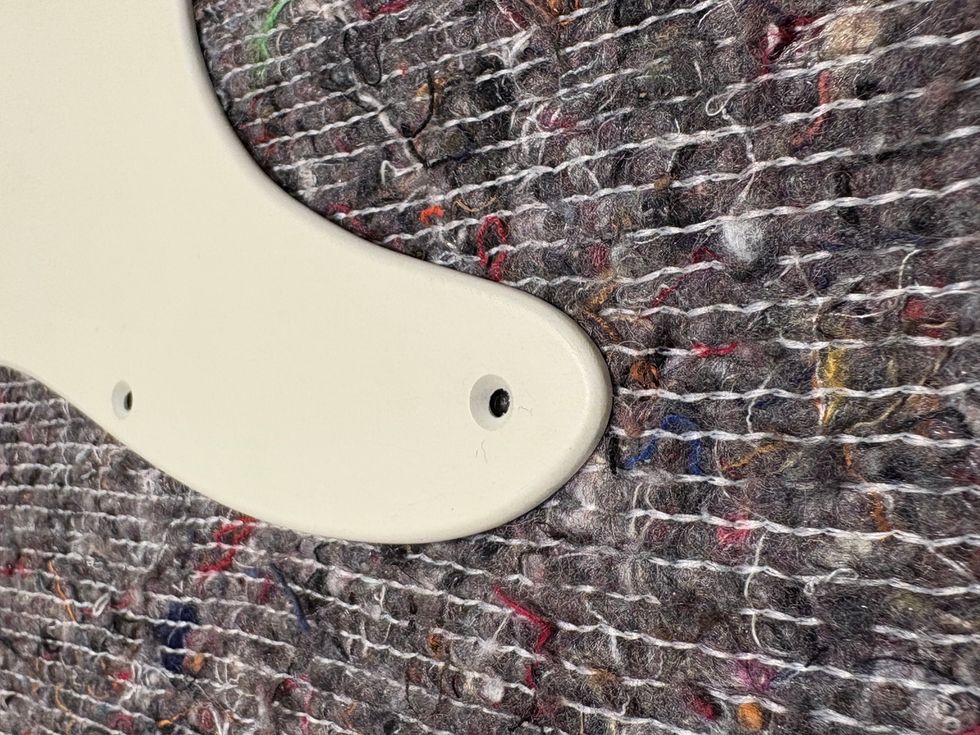
As you can see in Photo 3 of an original Junior from 1958, the pointers usually look dark and rusty. You can use the same process as aging the output jack to give them an old look.
3. Jack Plate and Screws
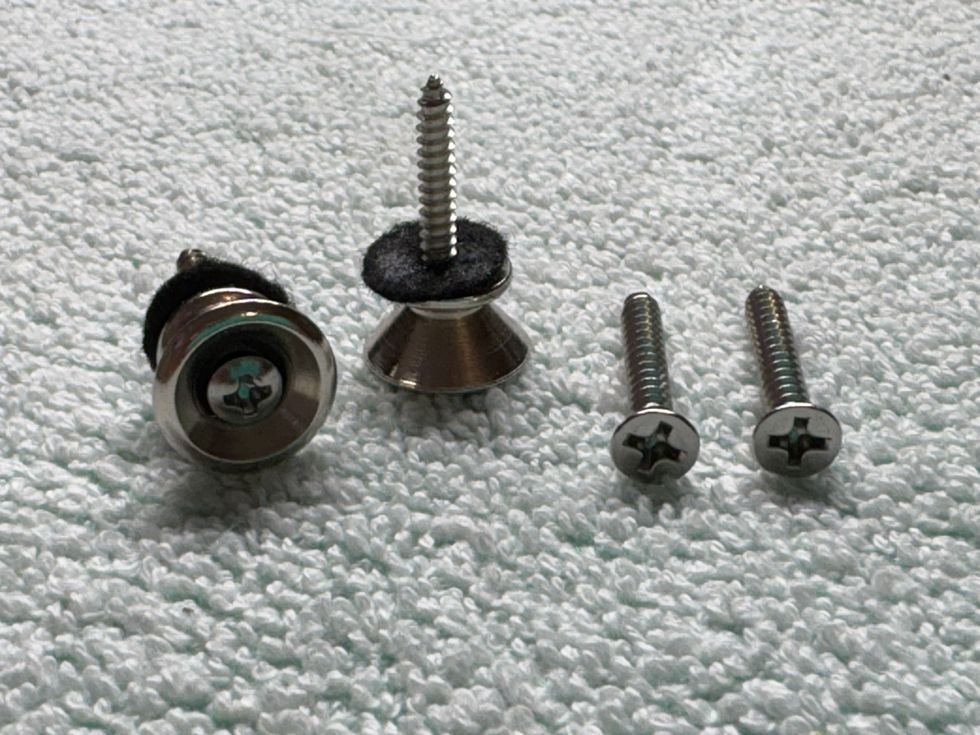
If you've been following along, you already know how to age screw heads. Nickel works out much better and looks much more authentic compared to chrome, so it's always a good idea to substitute chromed screws like on our Harley Benton with nickel before you proceed.
The jack plate usually shows some dings and scratches from botched attempts to plug in the guitar cable. You can simulate that by scrubbing off the shine with the steel wool, creating some random scratches with sandpaper, and hitting the plastic with the tip of the plug of your guitar cable while the jack plate is lying on a flat and even surface. If you want the jack plate cracked like on the photo of our vintage guitar, as seen in Photo 3, you can sketch out the cracking lines with a fine X-Acto knife on the back of the jack plate. Afterwards, screw it to a flat piece of wood and bolt on the screws very tight until the line cracks. If it doesn't crack, repeat the process and cut deeper with your knife, then install the output jack by fastening the hex nut very tightly.
If you decided to swap the modern 1-ply solid black jack plate for a more authentic 3-ply plate (black/white/black), some more work is required. On vintage guitars, the white sometimes turns to a kind of "nicotine white" or ivory color. To mimic this color, first take off the shine with some steel wool. Now you need something we haven't discussed before: concentrated liquid stain you can mix with alcohol. This is something we'll need again in the future, but as a basis some alcohol like isopropyl or naphtha works great. You also need a stain mixing cup (a small glass) and a spatula or anything else to stir the mixture. To mimic an aged white color, I like to use a stain in amber or vintage amber. Put some alcohol in your glass and add a drop of the stain, stir it, and see what it looks like. If it's too bright, add another drop of the stain and stir again. If it's too dark, add some more alcohol until you like the color.
You can get such stains in almost every luthier supply store. I like to use ColorTone Concentrated Liquid Stain from StewMac. After you finish your mix, take a Q-tip and wipe some of the liquid onto the white layer of your jack plate. Let it dry for a few minutes and watch the result. If it's still too bright, repeat the process. If it's too heavy, use some alcohol to wipe some of it off. You can also use this mix on black plastic parts if you want to mimic some stain spots, with excellent results. Lastly, we use the same mixture of dirt, dust, and ashes that we used for the plastic buttons of the tuners ["DIY Relic'ing Tuners, Part 2"]. I use a mixture of the contents from my vacuum cleaner bag, spiced up with some ashes from my open fireplace. Use your fingers to wipe some dirt onto the white part of the jack plate. Now, how does it look?
I use a mixture of the contents from my vacuum cleaner bag, spiced up with some ashes from my open fireplace.
4. Back Plate and Screws
The back plate of the original '58 Les Paul is a piece of solid black plastic that is held by two screws, and our Harley Benton stays true to this original formula. For the two screws, repeat the process from the jack plate screws. The back plate on vintage guitars usually shows some light scratches, along with some deeper scratches and little chips caused by belt buckles. To mimic this wear, first break the shine with some steel wool, add some random scratches with sandpaper, and use a small chisel or maybe one of your belt buckles to add some deeper scratches and little chips.
By the way, the bottom of the back plate on our Harley Benton is "shielded" with a thick piece of self-adhesive aluminum foil, but it's not connected to ground in any way, so it's pretty useless. If you want to add some shielding, connect it to ground so it can work as it should. There is no shielding inside the cavity of the Harley Benton, same as on the vintage Les Paul. The black color inside the Harley Benton is only black paint but no shielding paint. If you want some shielding in the cavity, go for it, using copper foil or conductive shielding paint.
Congratulations! After you've worked on all these parts, they will look similar to what I did while writing this column for you, as seen in Photo 1.
5. Pickguard
In the last step for today, let's have a look at the pickguard, including the screws. Our Harley Benton comes with a 3-ply (black/white/black) pickguard, so the aging process will be easy: You can simply follow the process from the jack plate. Pickguards usually show scratches from contact with a plectrum, so I recommend using a guitar pick to put some typical scratches on it. Take care of the direction of the pick during this process so it will look authentic afterwards.
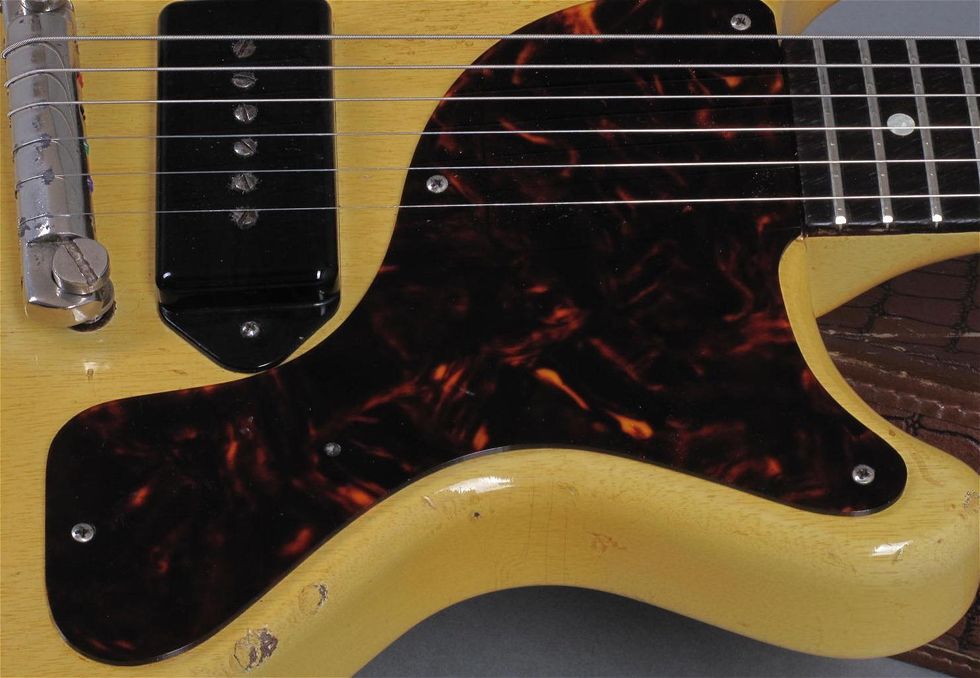
Photo 4
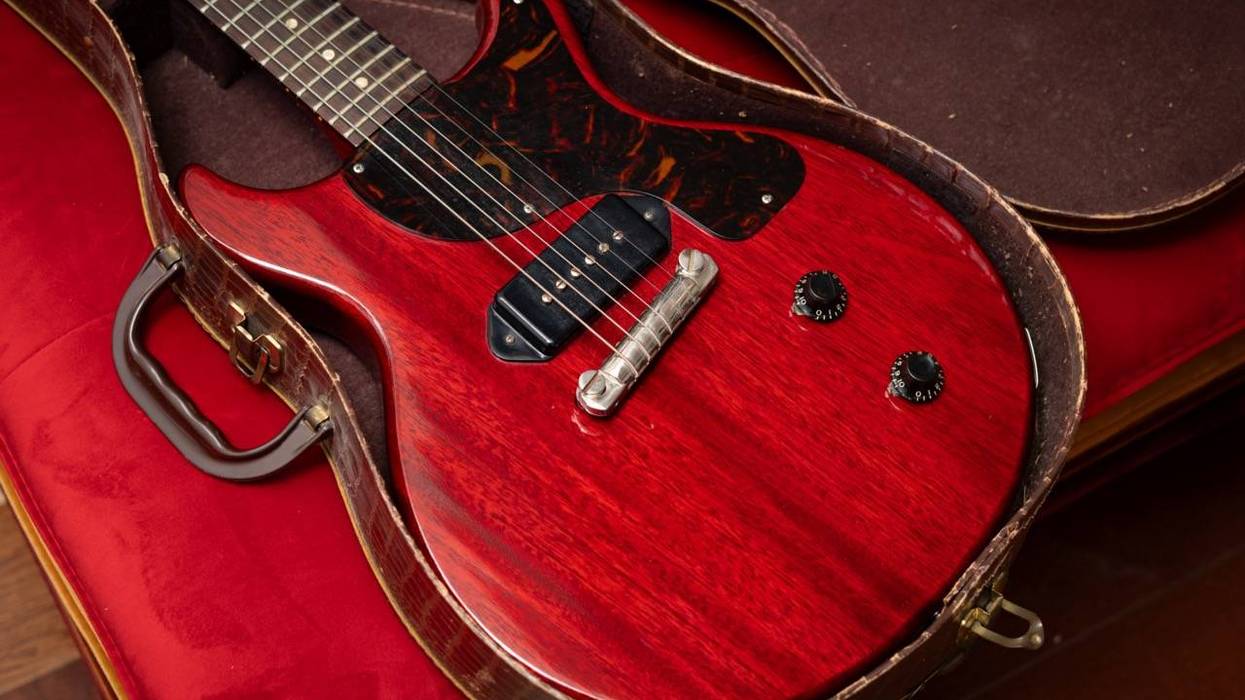
If you're fine with the stock pickguard, you're done for now. The original Les Paul Juniors never had such a pickguard—if they came with a black one, it was always single-ply solid black. Such pickguards are available, and you can swap it if this bothers you. The typical and classic look with a TV yellow Junior guitar was a celluloid tortoise-style pickguard, as seen in Photo 4, which is an original '58 Les Paul Junior.
The old celluloid material was semi-transparent, and the early pickguards had wonderful, rounded edges. The fake tortoiseshell material available today is not transparent in any way, and far from replicating the beauty of the original material. There is a fantastic substitute material called Tortoloid, but it's only available in very thin sheets for acoustic guitars. The only way to come closer to the original would be to use a clear Lucite pickguard and to cover it with a sheet of self-adhesive Tortoloid, or to try to find some of the original celluloid material in the right thickness.
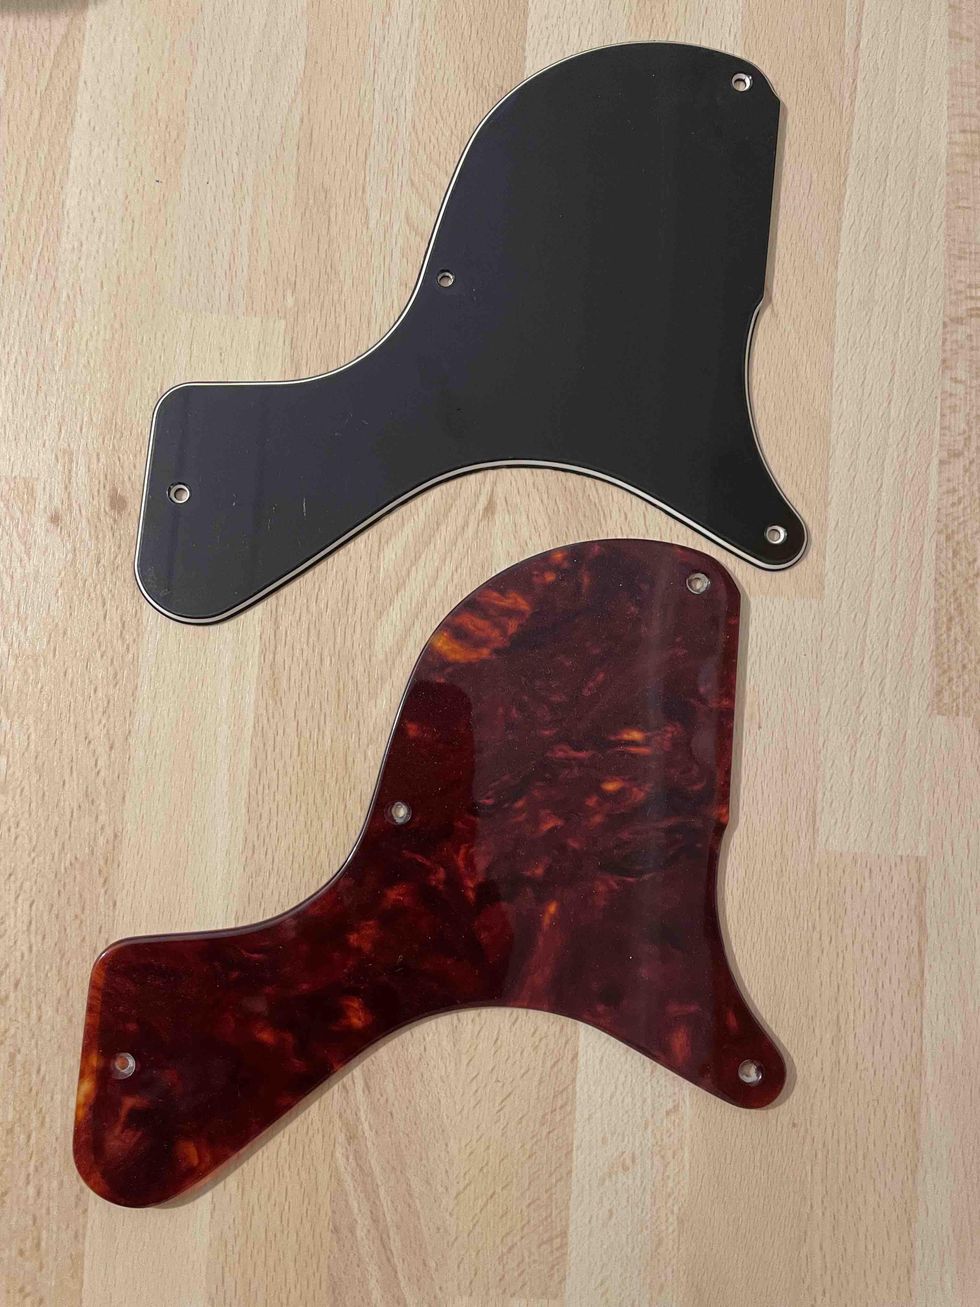
Photo 5
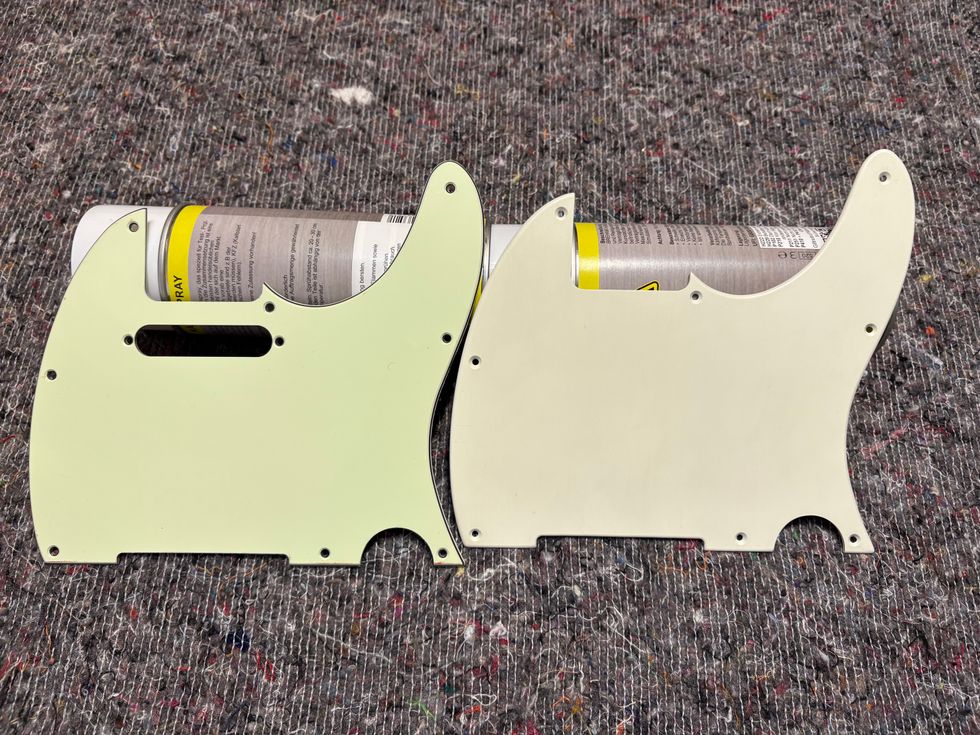
To give this guitar the classic look, and because I love these pickguards very much, I decided to make one for our Harley Benton, using an NOS blank celluloid piece from the '50s, which I got from the Roger Rossmeisl workshop in Berlin. I still have some of these blanks for such projects and working with real celluloid is a pleasure and pain at the same time. Look at this material compared to the stock pickguard in Photo 5.
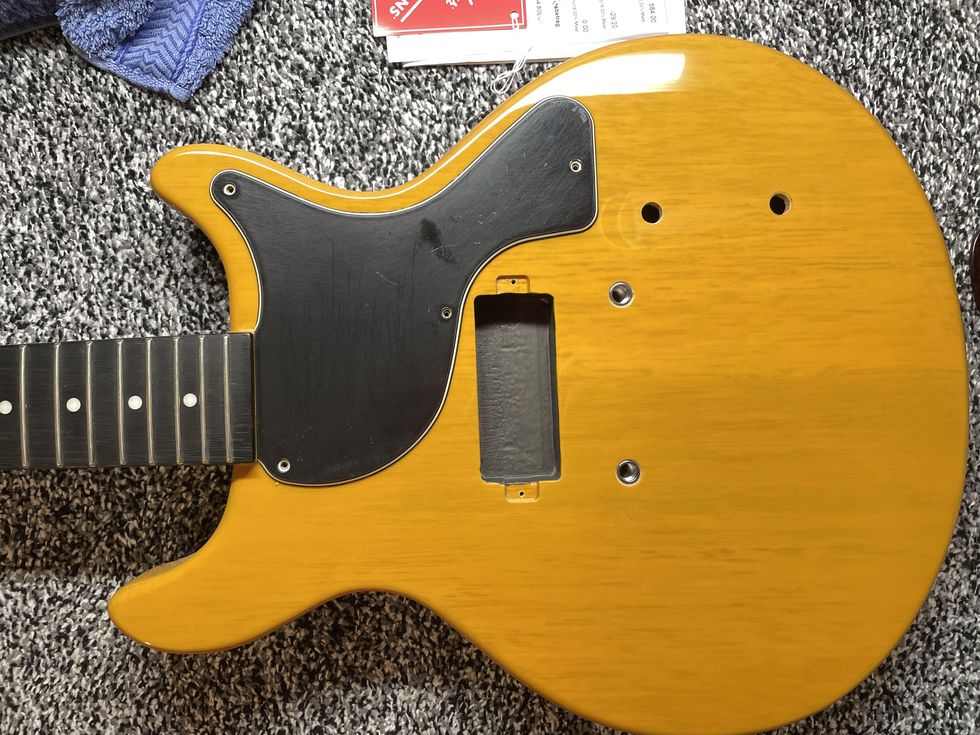
Photo 6
I think it's a big difference. To get a feel for which you prefer, you can see the different pickguards on the project guitar in Photo 6 and Photo 7.
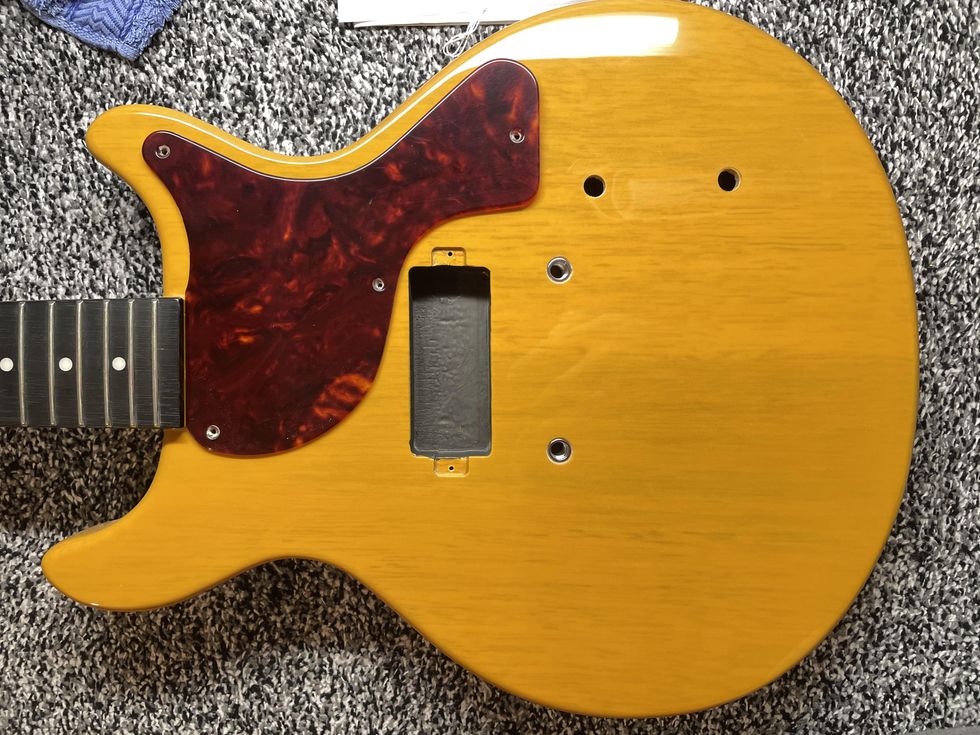
Photo 7
That's it for now. In the next part of this series, we'll work on aging the fretboard and the headstock. But before this, we'll return to guitar mods in the next issue.
Until then ... keep on modding!
- The DIY Relic Job—Fantasy or Reality? - Premier Guitar ›
- DIY: Relic'ing Metal Hardware - Premier Guitar ›
- DIY Relic'ing: Break the Shine - Premier Guitar ›
The series features three distinct models—The Bell,The Dread, and The Parlor—each built to deliver rich, resonant acoustic sound with effortless amplification.
Constructed with solid Sitka spruce tops and solid mahogany back & sides, the Festival Series offers warm, balanced tone with incredible sustain. A Fishman pickup system, paired with hidden volume and tone control knobs inside the sound hole, ensures seamless stage and studio performance.
Grover 16:1 ratio tuners provide superior tuning stability, while D’Addario strings enhance clarity and playability. Each guitar comes with a heavy-padded gig bag, making it a perfect choice for gigging musicians and traveling artists.
Key Features of the Festival Series Guitars:
- Solid Sitka Spruce Top – Provides bright, articulate tone with impressive projection
- Solid Mahogany Back & Sides – Adds warmth and depth for a well-balanced sound
- Fishman Pickup System – Delivers natural, high-fidelity amplified tone
- Hidden Volume & Tone Control Knobs – Discreetly placed inside the sound hole for clean aesthetics
- Grover Tuners (16:1 Ratio) – Ensures precise tuning stability
- D’Addario Strings – Premium strings for enhanced sustain and playability
- Heavy-Padded Gig Bag Included – Provides protection and convenience for musicians on the go
Mooer Prime Minimax M2 Intelligent Pedal boasts 194 effects models, 80 preset slots, MNRS and third-party sample file compatibility, an 80-minute looping module, internal drum machine, high-precision tuner, Bluetooth support, and a rechargeable lithium battery.
Over the last few years, Mooer has released several Prime multi-effects devices, including the Prime P1, P2, S1, and most recently in 2024, the Prime Minimax M1. Excitingly, the company is kicking off 2025 with a brand new addition to the Prime family–the Prime Minimax M2 Intelligent Pedal.
Within this small multi-effects device, a whole lot of functionality is packed in, including an impressive 194 effects models, including overdrive, preamp simulators, cabinet models, delays, reverbs, modulation effects, etc., and more. In typical Mooer style, though, the company took things a step further by offering limitless flexibility through the support of its in-house MNRS sample files, as well as third-party IR sample files. Essentially, this means that users can download additional tonal emulations and effects from the Mooer Cloud and third-party sources to the device, which they can then save across 80 preset slots.
As with some past models in the Prime series, the M2 sports a convenient touchscreen design, facilitating easy browsing through the devices banks of presets. However, guitarists are not limited to interfacing with the pedal in this way, as it also features two footswitches, both of which can be used to switch between presets in each bank. There is even a MIDI jack built into the device, enabling users to connect their MIDI controllers to extend the control functions, and the MOOER F4 wireless footswitch support is also supported. Essentially, these augmentation options facilitate additional footswitches to ensure switching preset tones is always as quick and seamless as possible within any workflow.
While the Prime M2 Intelligent Pedal is primarily designed for effects and tonal simulations, it also comes packed with an array of other useful features. For example, it contains a looping module with a hefty 80-minute capacity, in addition to 10 recording save slots to ensure that any looping creations can be kept for future use in performances. Similar to past looper modules in Mooer's products, users are also free to overdub their recordings and even undo or redo their overdubs, offering a lot of real-time flexibility for creating loop-based musical structures.
As if the addition of a looper wasn’t enough, this feature is also synchronizable with an internal drum machine and metronome, a combination that includes 56 drum grooves and 4 metronome varieties. Ultimately, it’s a reminder that Mooer clearly recognizes and wishes to solve the struggles that musicians have when attempting to produce precise loops while staying in time. Upon commencing recording, the drum machine can produce four initial beats to serve as a count-in cue, and of course, this can be combined with the device's tap-tempo control for dynamic use. Best of all, this feature can also be applied to modulation and delay effects, ensuring that they work perfectly in time with any performance.
Extra features are included to complete this all-in-one pedal, including a high-precision tunerwith fully customizable frequency ranges. Guitarists can even leverage the M2’s built-inBluetooth input support, allowing them to practice, jam, and even produce looped musicalstructures over their favorite backing tracks, band prototypes, and musical pieces.
Perhaps unsurprisingly for existing Mooer product users, the Prime M2 also boasts an impressive variety of audio routing systems. As was previously mentioned, that includes Bluetooth input, as well as industry standards such as dual-channel stereo output, perfect for stereo delay and modulation effects. It also supports headphone output for those who wish to practice in silence, and even OTG recording, which means that guitarists can record their creations directly to their smartphone whilst on the go.
Speaking of on-the-go, Mooer is continuing its recent portable-play focus with the Prime M2Intelligent Pedal, as it is fitted with a built-in rechargeable lithium battery with a battery life of up to 6 hours. Ultimately, this means that even a lack of local power sources won’t get in the way of rehearsals and live performances. Combined with the pedal’s lightweight and small build, it truly is an ideal addition to the pedalboard of any traveling musician.
Overall, the Prime M2 Intelligent Pedal is set to be an impressive new addition to the Prime series. It features augmented functionality when compared to past models, yet still in a minimalist and easy-to-use package, keeping the size small and light yet still packing in footswitches, a touch screen, and other flexible control systems.
Features:
- 194 built-in effect models and tonal emulations
- 80 preset slots for storing downloaded MNRS and third-party sample files
- Compatibility with the MOOER Cloud tone-sharing platform
- Built-in 80-minute looping module
- Record, overdub, pause, delete, and playback functions for looping
- Internal drum machine module, stocked with 56 drum grooves
- 4 unique metronomes
- Synchronization between drum machine and looper
- Convenient count-in cue function support from the metronome
- High-precision and customizable tuner module
- 2 multi-function footswitches
- 1.28-inch touchscreen interface
- LED digital display
- LED charge indicator
- Portable USB/OTG recording
- Direct compatibility with the MOOER prime mobile APP and MOOER Studio desktop software for preset management
- Bluetooth 5.0 audio playback
- 3000mAh integrated lithium battery with up to 6 hours of use time
- DC 5V/2A power supply and charging
- 3 hours charging time
- Low weight of 228g
- Compact, at 74mm (L), 125mm (W), and 49mm (H)
- Sample rate of 44.1kHz
- Bit depth of 24bit
- Compatible with MOOER F4 wireless footswitch
- 3.5mm MIDI port
- Mono TS ¼” input
- Stereo TS ¼” output
- 3.5mm headphone output
- Power switch button
The Prime Minimax M2 Intelligent Pedal will be available from the official distributors or retailersworldwide.
For more information, please visit mooeraudio.com.
The collection includes Cobalt strings with a Paradigm Core, Tim Henson Signature Classical Strings, and the Tim Henson Signature FretWrap by Gruv Gear.
Engineered for maximum output, clarity, and durability, these strings feature:
- Cobalt with a Paradigm Core (not RPS) for added durability
- Nano-treated for maximum lifespan and corrosion resistance
- Gauges 9.5, 12, 16, 26, 36, 46 (Turbo Slinky set)
- Available individually or as part of the Tim Henson Signature Bundle
Tim Henson Signature Classical Strings
Crafted for dynamic, percussive tonality, these strings pair fluorocarbon trebles with silver-plated copper basses to deliver exceptional response and clarity.
- Gauges: 24, 27, 33, 30, 36, 42
- Available individually or as part of the Tim Henson Signature Bundle
Tim Henson Signature FretWrap by Gruv Gear
An essential string-dampening tool, the Tim Henson Signature FretWrap is designed for cleaner playing by eliminating unwanted overtones and sympathetic vibrations.
- Features Tim Henson’s custom ‘Cherub Logo’ design
- Size Small, fits 4-string basses, 6-string electric/acoustic guitars, and ukuleles
- Ideal for live performance and studio recording
- Ernie Ball collaboration with Gruv Gear
- Available individually or as part of the Tim Henson Signature Bundle
The Ernie Ball Tim Henson Accessory Bundle Kit
For players who want the complete Tim Henson experience, the Ernie Ball Tim HensonSignature Bundle Kit includes:
- Tim Henson Signature Electric Strings (9.5-46)
- Tim Henson Signature Classical Strings (Medium Tension)
- Tim Henson Signature FretWrap by Gruv Gear (Small)
- Tim Henson Signature Cable (Exclusive 10ft white dual-conductor cable, only available in the bundle)
The Tim Henson Signature String & Accessory Collection is available starting today, March 19, 2025, at authorized Ernie Ball dealers worldwide.
For more information, please visit ernieball.com.
Ernie Ball: Tim Henson Signature Electric Guitar Strings - YouTube
Enjoy the videos and music you love, upload original content, and share it all with friends, family, and the world on YouTube.Teamwork makes the dream work for the Charleston, South Carolina, twosome, who trade off multi-instrumental duties throughout their sets.
Michael Trent and Cary Ann Hearst have been making music as Shovels & Rope since 2008. The husband-and-wife duo from South Carolina specialize in rootsy, bluesy rock, Americana, and alt-country, but they don’t confine themselves to traditional two-piece arrangements. They switch off on vocal, guitar, percussion, and synth duty throughout their shows, orchestrating a full-band ruckus with all available limbs.
Their seventh full-length, Something Is Working Up Above My Head, released in September last year, and while touring in support of it, they stopped at Nashville’s Brooklyn Bowl in late February. PG’s John Bohlinger caught up with Trent before the gig to see what tools he and Hearst use to maintain their musical juggling act.
Brought to you by D’Addario.Black Bird
Trent’s not a guitar snob: Generally speaking, he plays whatever he can get his hands on. While playing Eddie Vedder’s Ohana Fest, someone loaned him this Gretsch Black Falcon, and he fell in love with it. He likes its size compared to the broader White Falcon. It’s also the band’s only electric, so if it goes down, it’s back to acoustic. Hearst takes turns on it, too.
Trent loads the heaviest strings he can onto it, which is a set of .013s. It lives in standard tuning.
Ol' Faithful
As Trent explains, he and Hearst have done some DIY decorating on this beautiful Gibson J-45—it’s adorned with sweat droplets, stains, and fingernail dust. It runs direct to the venue’s front-of-house system with an LR Baggs pickup. This one is strung with Martin heavy or medium gauge strings; lighter ones are too prone to snapping under Trent’s heavy picking hand (which holds a Dunlop Max-Grip .88 mm pick). And it rolls around in an Enki tour case.
On Call
These second-stringers—a Loar archtop and an LR Baggs-equipped Recording King—are on hand in case of broken strings or other malfunctions.
Need for Tweed
Trent doesn’t trust amps with too many knobs, so this tweed Fender Blues Junior does the trick. It can get fairly loud, so there’s a Universal Audio OX Amp Top Box on hand to tame it for some stages.
Shovels & Rope's Pedalboard
Because Trent and Hearst trade off bass, guitar, keys, and percussion duties, all four of their limbs are active through the set. Whoever is on guitars works this board, with an MXR Blue Box, Electro-Harmonix Nano Big Muff, EarthQuaker Devices Hummingbird, and Boss OC-5, plus a pair of Walrus Canvas Tuners for the electric and acoustic. Utility boxes on the board include a Walrus Canvas Passive Re-Amp, Radial J48, Livewire ABY1, and a Mesa Stowaway input buffer.
A Roland PK-5 MIDI controller, operated by foot, sits on the lower edge of the board. It controls the board for “Thing 2,” one of two MicroKORG synths onstage.
Thing 1 and Thing 2
There’s no one backstage helping Hearst and Trent cook up all their racket; they handle every sound themselves, manually. During the first few sets of a tour, you’re liable to see some headaches, like forgetting to switch synth patches during a song, but eventually they hit a rhythm.
Affectionately given Seuss-ian nicknames, this pair of microKORGs handles bass notes through the set, among other things, via the foot-controlled PK5. “Thing 1” is set up at the drum station, and runs through a board with an EHX Nano Big Muff, EHX Bass9, EHX Nano Holy Grail, and a Radial Pro DI. A Walrus Aetos keeps them all powered up.
The board for “Thing 2,” beside the guitar amps, includes an EHX Mel9 and Bass9 powered by a Truetone 1 SPOT Pro, plus a Radial ProD2.