Never kit-built a stompbox? It’s easy—if you let pro pedal maker Alex Guaraldi of CopperSound be your guide. Here, he takes you on a step-by-step tour as he assembles a Build Your Own Clone Classic Delay.
For this DIY adventure, we’re going to be walking through the steps of building the Classic Delay pedal from Build Your Own Clone (BYOC), a company that has been a big player in the pedal-kit game for quite a while. This is a little more complicated than building a fuzz or overdrive, so I’m going to explain the process with great detail. Let’s get started.
Tools You’ll Need for This Project
- Soldering Iron
- Solder
- #2 Phillips screwdriver
- Wire strippers
- 8 mm (5/16") nut driver/wrench
- 10 mm (25/64") nut driver/wrench
- 1/2" nut driver/wrench
- 14 mm (9/16") wrench
- Flush cutters
- Small needle-nosed pliers
- Third hands
These tools are available via a variety of suppliers, including StewMac, Allparts, and Amazon.
Step 1: Review the Instructions
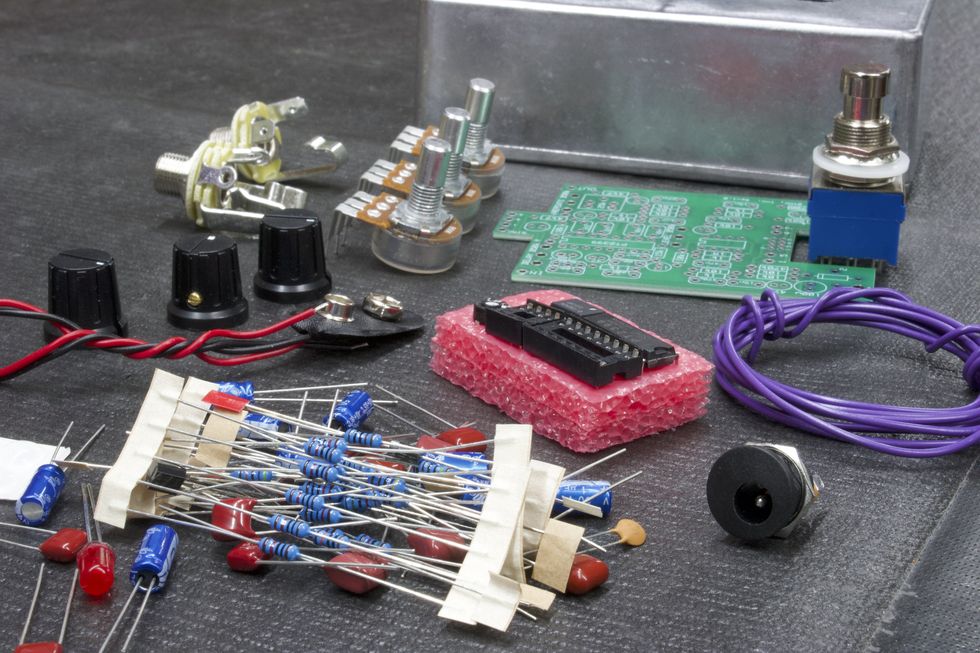
The kit as it arrives (Photo 2).
Each BYOC kit comes with a detailed set of instructions in the form of a PDF that can easily be printed out. The Classic Delay’s instructions can be found at https://www.byocelectronics.com/classicdelayinstructions.pdf. They are 32 pages long, and I suggest following their steps as you read this article. Here, I will refer to specific page numbers that correspond with the steps. I’ve also taken photos to coincide with the steps. Within the instructions, we find a table of contents, pictures of the fully assembled pedal, a list of parts included, and step-by-step instructions from internal population and soldering to external assembly. With any kit, always read the instructions carefully before you start building.
Step 2: PCB set-up
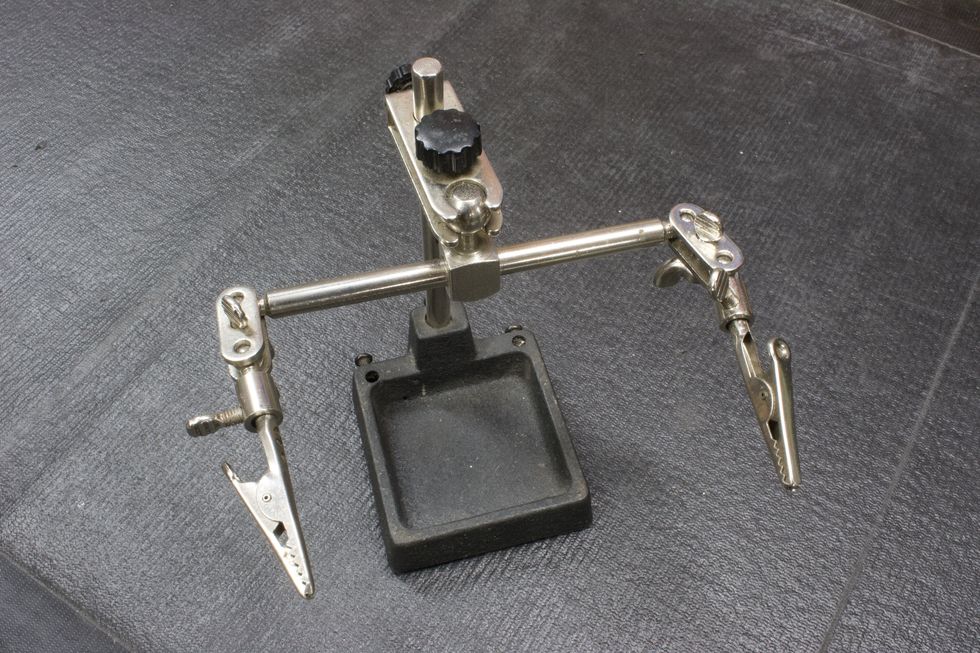
Photo 3
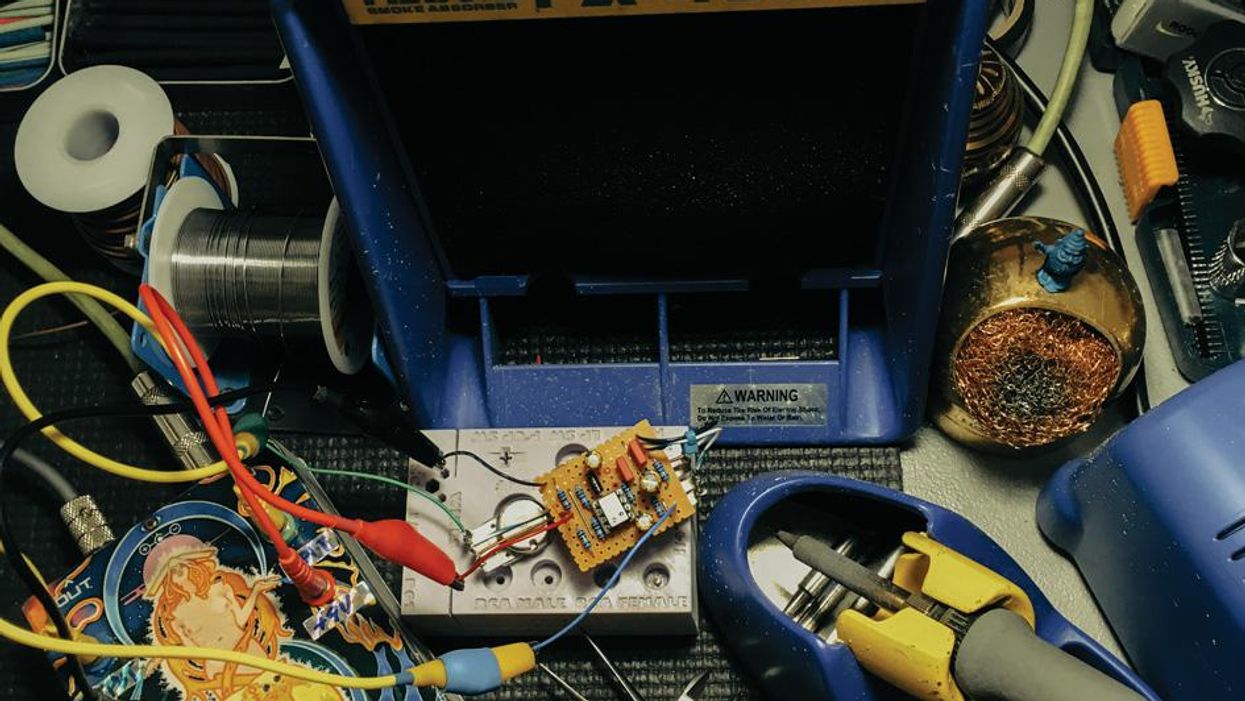
A lot of pedal builders use PCB jigs that are specifically designed to hold several printed circuit boards so that they can be easily populated and soldered. These jigs are great tools. However, they’re not something a casual DIY enthusiast will often have. Essentially, all we really need to do is elevate the PCB off of the working surface so that the leads of the components can pass through the bottom side of the PCB. This is most helpful with components that can be soldered from the top side of the PCB. “Third hands” or “helping hands” (Photo 3) are a good tool for this job. So, what can we do to elevate the PCB if we don’t have access to third hands? Simply turn the enclosure upside down and place the PCB perpendicular (Photo 4). This will elevate the PCB enough to allow the component leads to easily pass through.
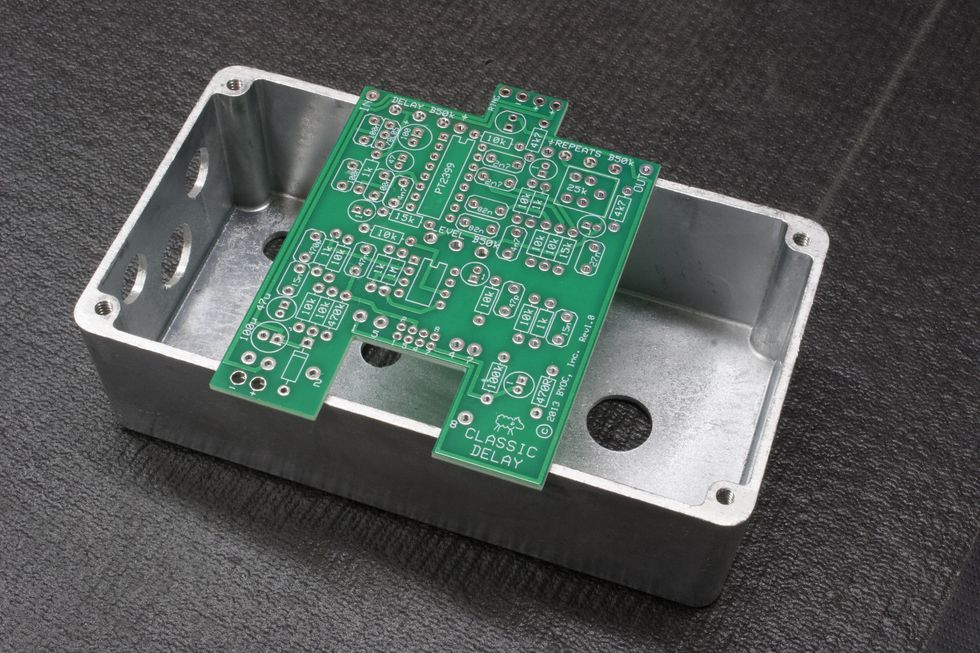
Photo 4
Step 3: Populating Resistors and Diodes (instructions page 9)
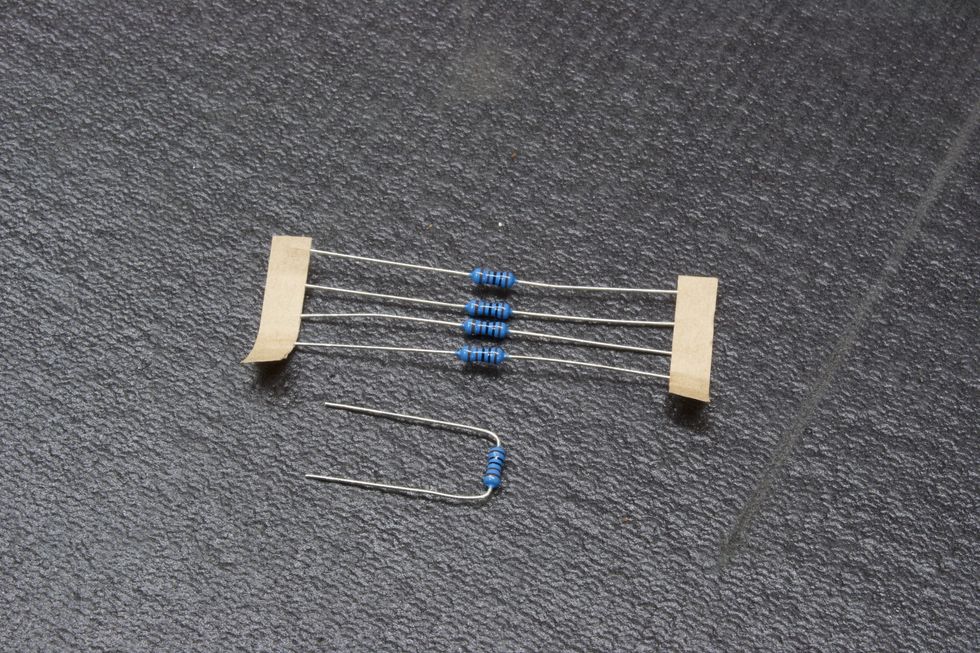
Photo 5
When populating PC boards, we typically like to work lowest to tallest in regards to the seating. Seating is how far above the PC board the component rests. Resistors and diodes sit pretty low to the PC board, so populating them first makes sense.
Resistors: Remove the resistor from the paper ribbon, bend the leads (Photo 5), and place them through the corresponding pads (Photo 6) as directed. (A pad, by the way, is the term for the designated surface area of a component’s electric contact point.) A good practice is to populate all resistors of the same value before moving on to the next value. Populate all 1k resistors, then all 10k resistors, and so on.Photo 6
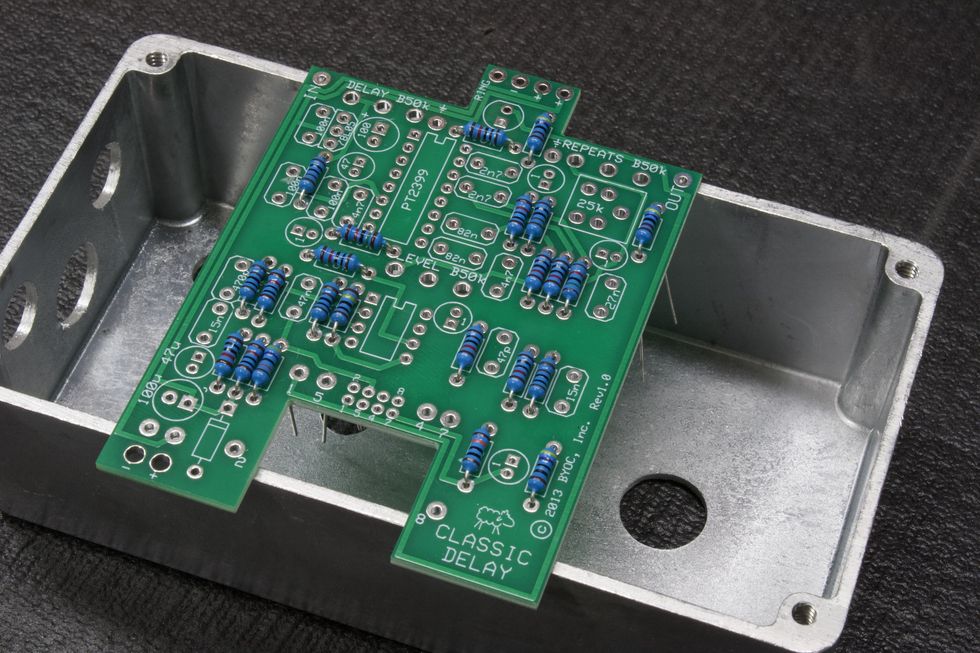
Reading resistor color bands can be confusing, so don’t forget the reference guide on page 7 of the instructions. Here, you will find a detailed breakdown of each value and its corresponding 5-band reading (i.e. 1k = brown/black/black/brown/brown). Once all the resistors are placed, we can go on to the diode.
Diode: Next, we need to place the diode. Just like resistors, remove the diode from the paper ribbon, bend the leads, and place them through the corresponding pads. Diodes are polarized and need to be oriented a certain way (Photo 7). Be sure to match the diode to the outline on the PCB, as shown on page 10 of the instructions.
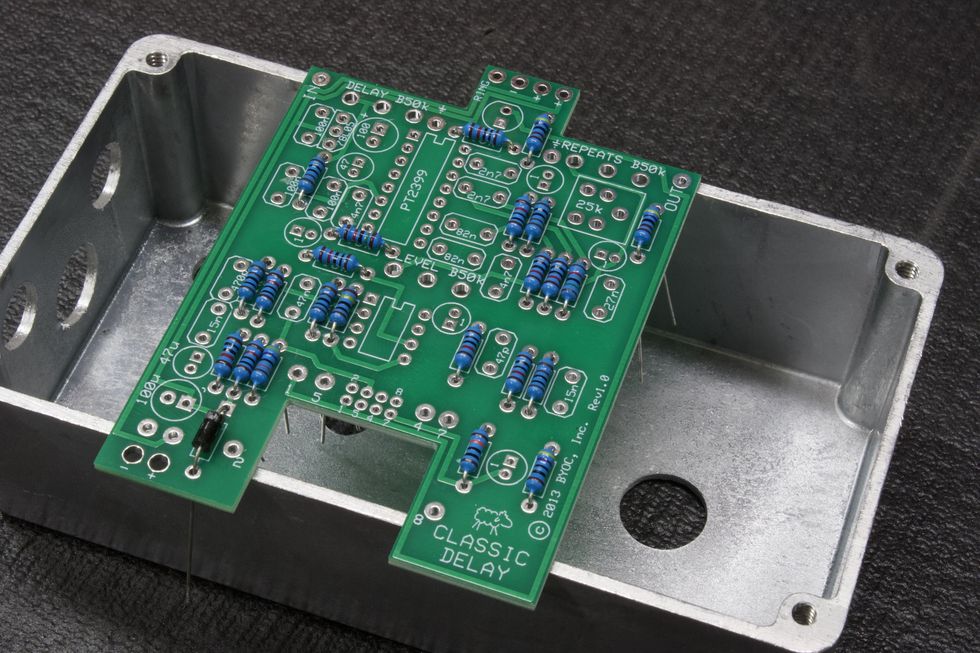
Photo 7
Step 4: Solder Resistors and Diode
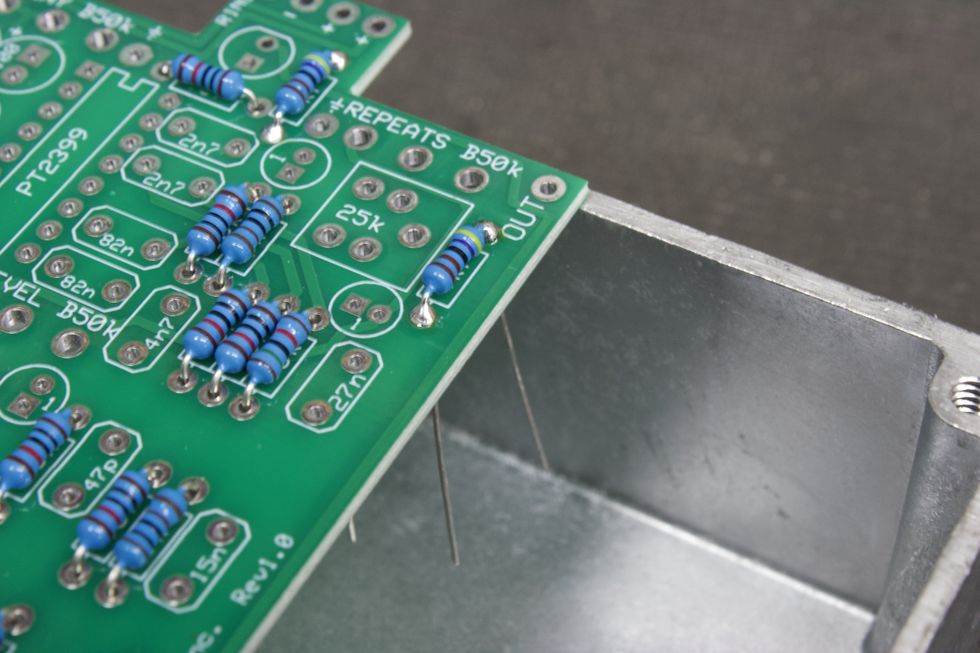
Photo 8
Fire up the soldering iron! Once the iron is up to temperature (650 to 750 degrees Fahrenheit, depending on how fast you work), it’s time to get to work. Resistors and diodes can easily be soldered from the top side. So no need to flip the PCB over. Place the solder tip to the pad and feed the end of the tip a bit of solder. What we’re looking for here is solder that covers the entire pad, encapsulates the lead, and has a nice shine to it. Think of it like a shiny Hershey's Kiss shape (Photo 8). Repeat this step for every part. If you’re new to soldering, you should consult our concise guide to soldering, online or in PG’s October 2015 issue.
Soldering tip: Shut the iron off between population steps. Use a small, tabletop fan to blow the solder fumes away during soldering steps. Quick tutorial videos on YouTube are also of benefit here, for builders new to soldering.
Step 5: Trim the Leads
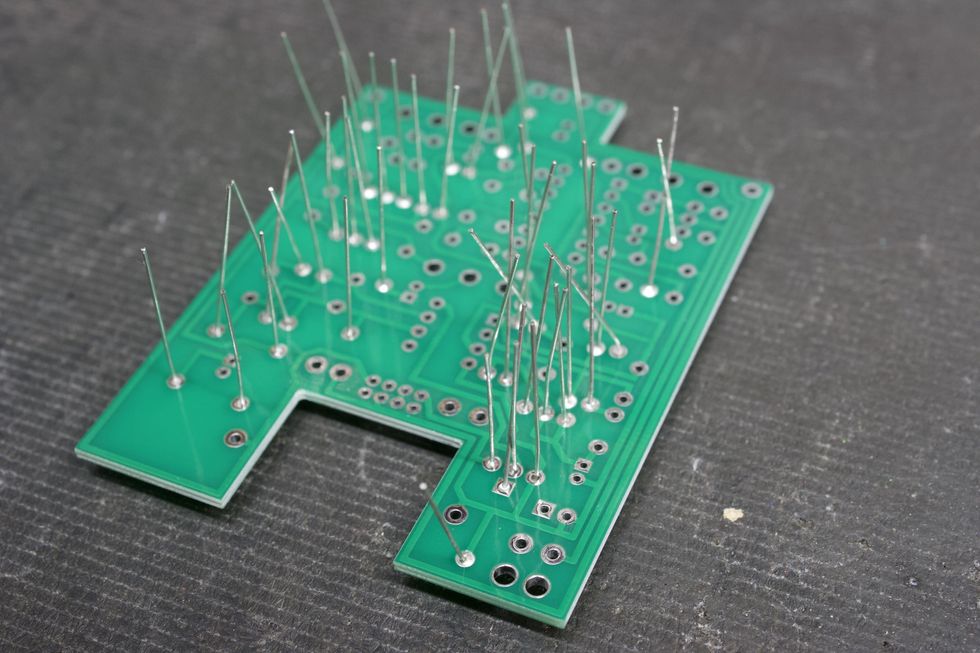
Photo 9
Next, place the PCB upside down to expose the leads (Photo 9). Using flush cutters, trim the excess leads (Photo 10).
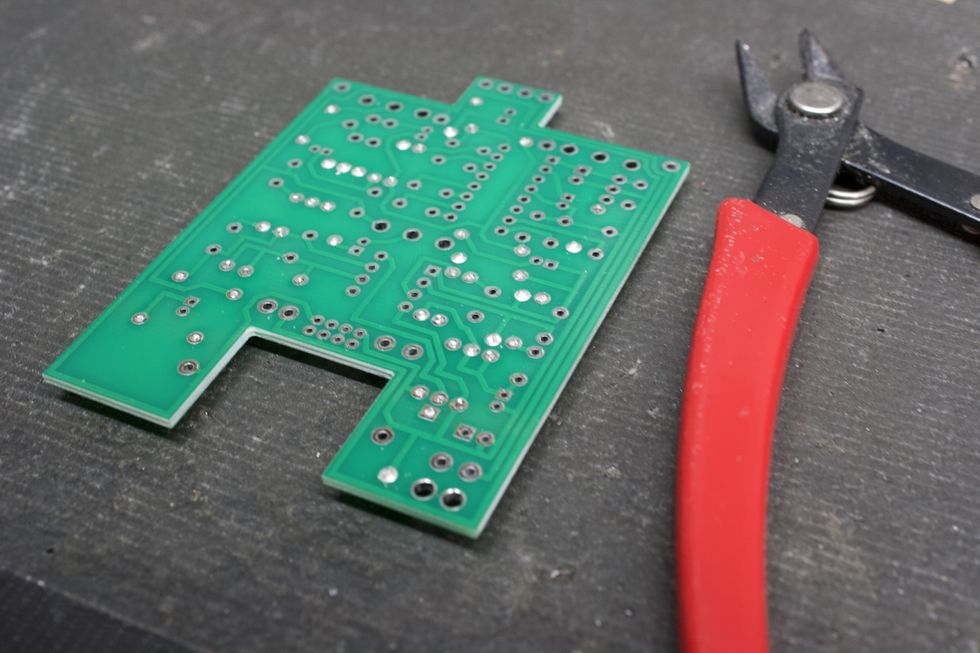
Photo 10
Step 6: Soldering IC Sockets (page 11)
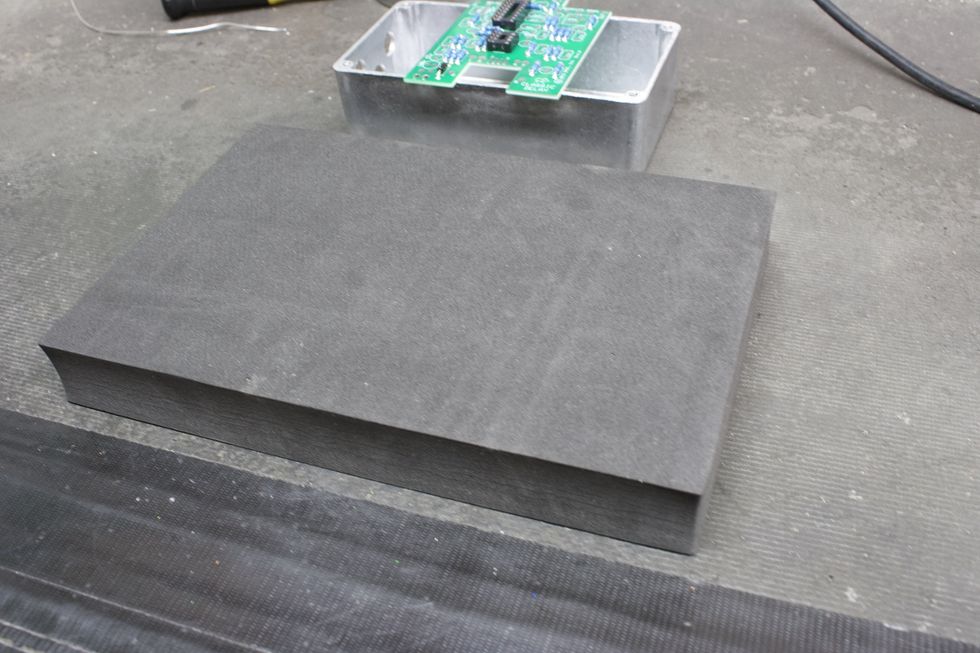
Photo 11
Place the 8-pin and 16-pin IC sockets into the corresponding pads on the top side of the PCB. We need to solder the IC socket pins from the bottom side. This means flipping the PCB over without having the IC sockets fall out. For this, I like to use a small piece of foam (Photo 11).
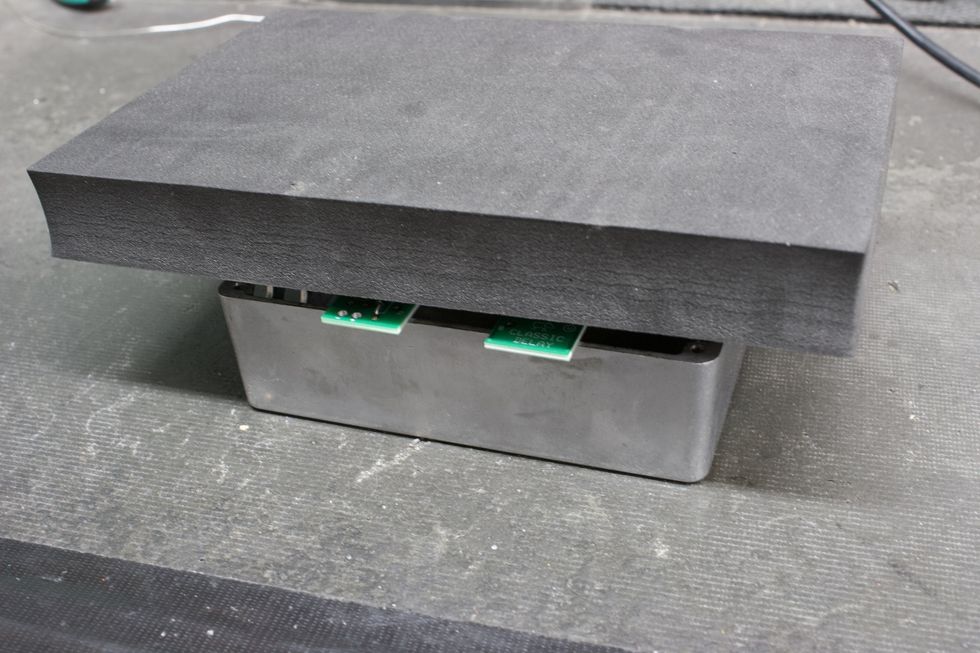
Photo 12
I place the foam on top of the PCB (Photo 12), then flip the foam and PCB simultaneously so the foam is below the PCB and the bottom side of the PCB is facing up (Photo 13).
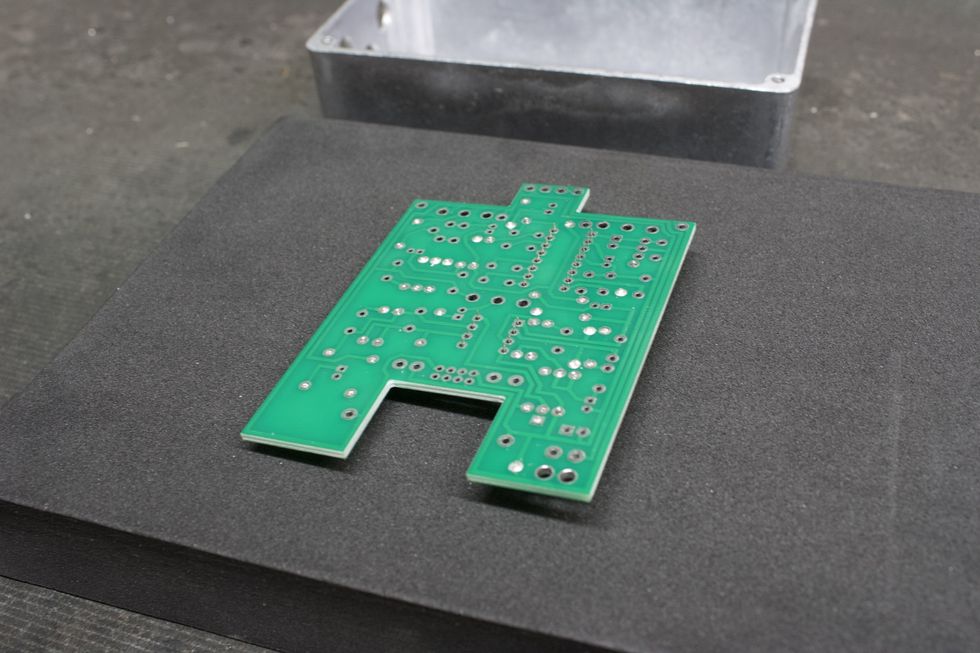
Photo 13
For this soldering step, we’ll want to solder ONLY 1 pad and then flip the board over to ensure that the IC sockets are sitting flush. If the IC sockets are not flush, go back to the bottom side and reflow that solder pad while pressing the PCB downward and keeping it parallel to the work surface. Solder the remaining pads (Photo 14).
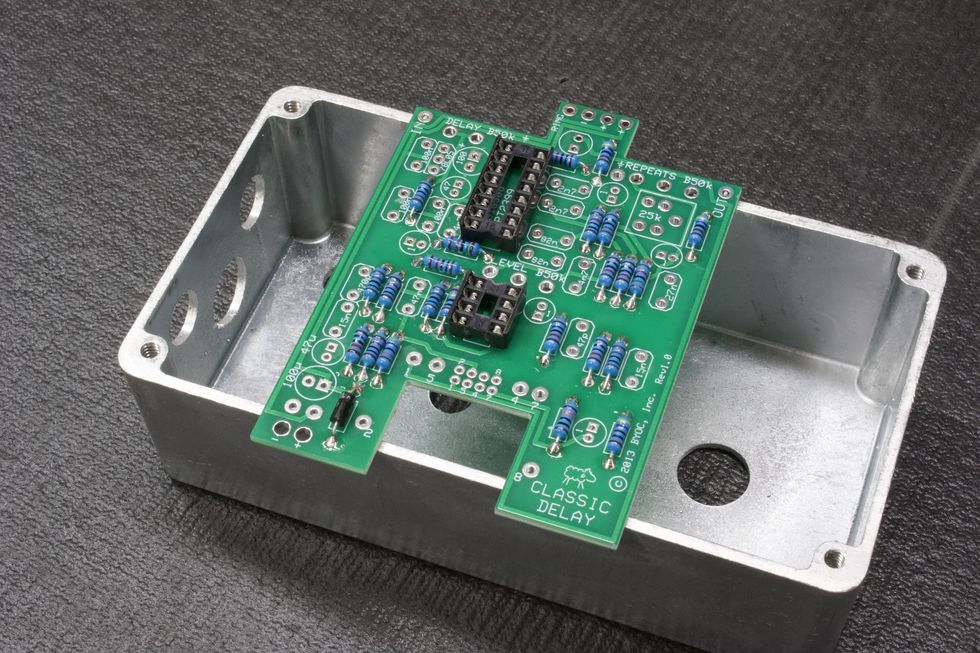
Photo 14
Step 7: Soldering the Voltage Regulator (page 12)
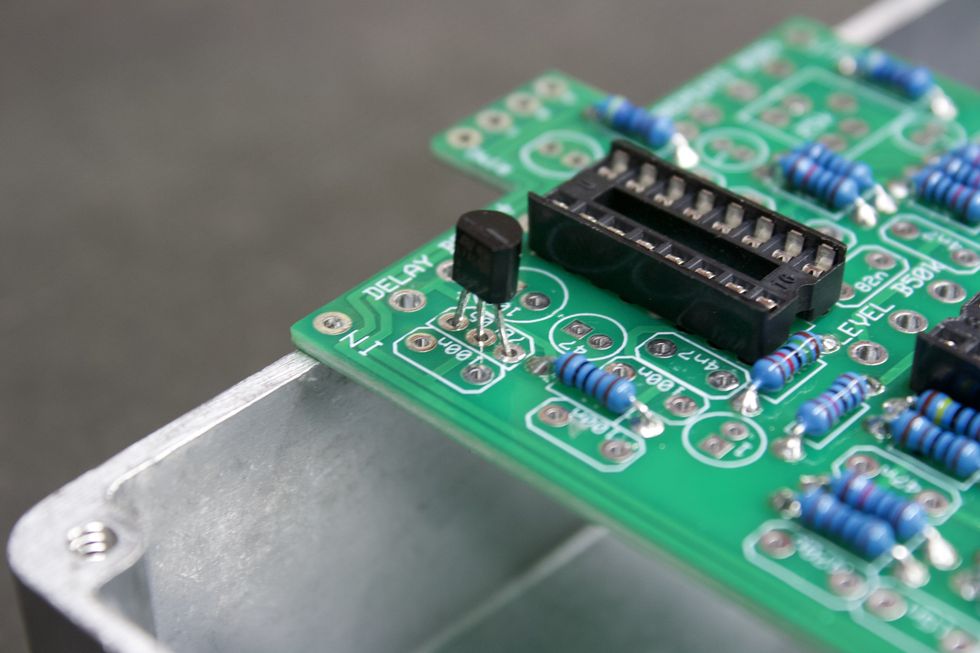
Photo 15
Place the voltage regulator into the three corresponding pads, while keeping mindful of the orientation. The flat side needs to match the outline on the PCB. Now, we’re ready to solder. This can be done from either side. Flush-cut the excess lead and we’re done here (Photo 15).
Step 8: Soldering the Trim Pot (page 13)
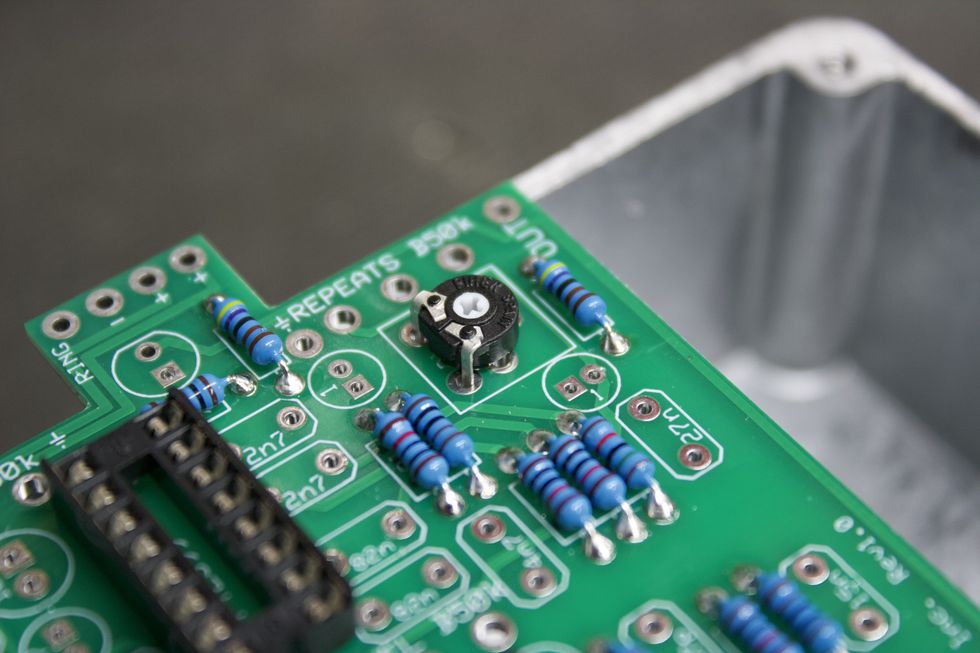
Photo 16
Place the trim pot (Photo 16) into its corresponding pads. For the trim pot provided, I found it easiest to solder the two exposed legs from the top side (Photo 17) and then the remaining leg from the bottom side.
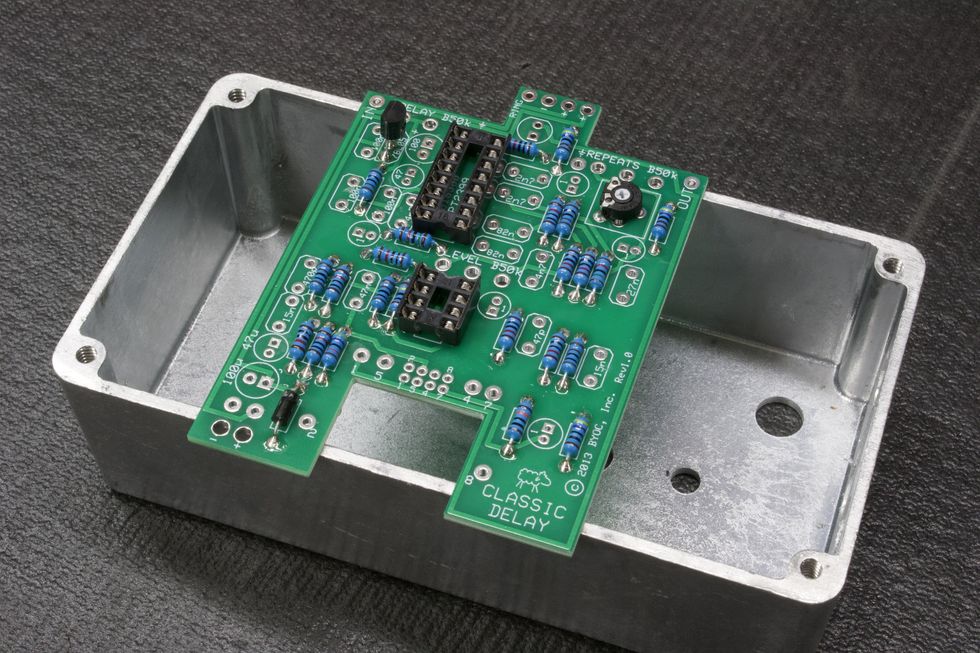
Photo 17
Step 9: Soldering Ceramic and Film Caps (page 14)
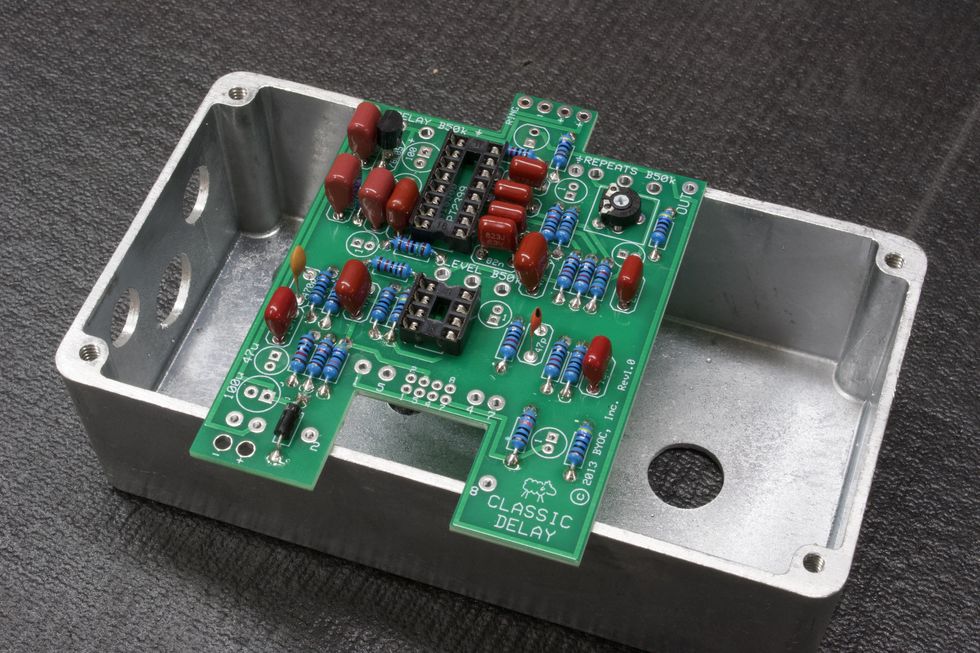
Photo 18
Place all ceramic (pill-shaped) and film (red) caps into their respective locations. Again, use page 7 of the instructions as a reference for identifying the correct capacitors (i.e. 100n film cap, which may say “104” or “.1” or “u1” on the body). We’ll need to solder the pads from the bottom side. So, once again, the piece-of-foam trick can be your friend here. Flush-cut the excess lead and we’re done (Photo 18).
Tip: An alternate method would be to bend the leads away from each other so they stay in place when the PCB is flipped over (Photo 19).
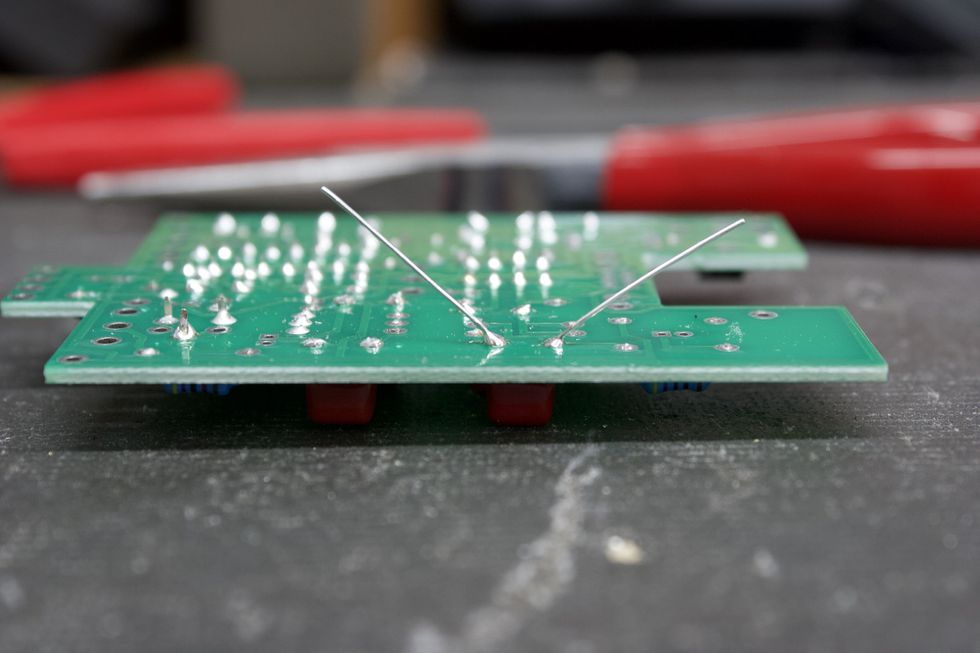
Photo 19
Step 10: Soldering Electrolytic Caps (page 15)
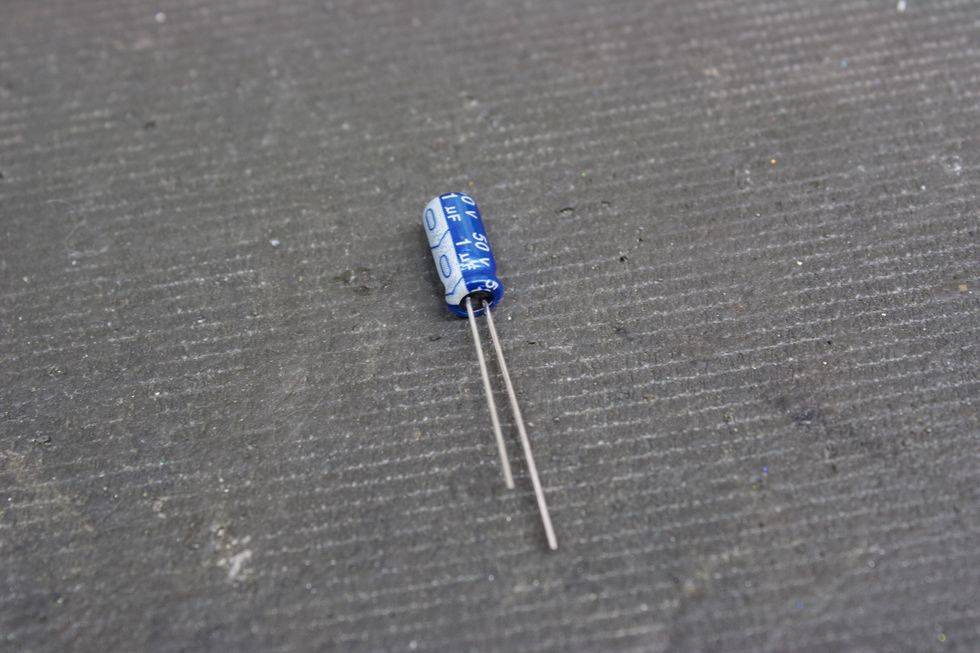
Photo 20
Let’s do the same thing here as we just did in Step 9. One thing to note is that electrolytic capacitors are polarized and need to be populated in the correct orientation. This is denoted on both the PCB and the component itself. On the PCB, the positive pad is denoted by the square pad. On the electrolytic capacitor, the positive lead is the longer leg. Additionally, the negative lead of the cap also corresponds to the white strip on the body (Photo 20).
So, let’s go ahead and populate the caps and solder them with either the foam trick or by bending the leads. Flush-cut the excess lead and we’re done (Photo 21).
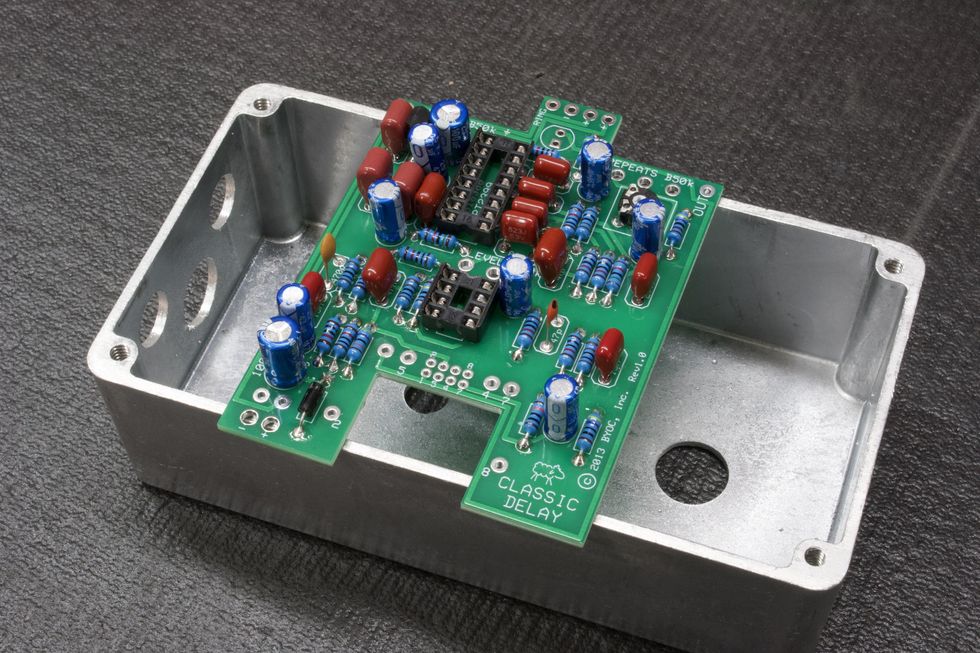
Photo 21
Step 11: Battery Snap and Hook-Up Wire
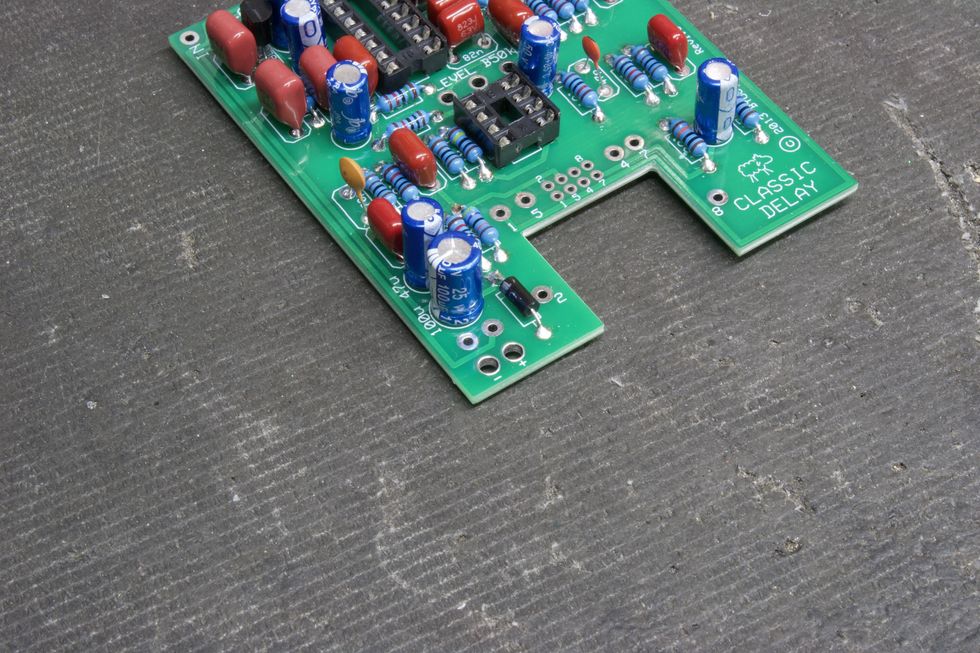
Photo 22
This DIY kit offers a battery option for those that feel so inclined. (See page 17 of the instructions.) For this step, we’ll need to connect the battery snap to the PCB. Before soldering, we’ll want to first feed the two wires through the holes directly below the solder pads. These holes act as strain relief for the battery snap and have + and - signs next to them (Photo 22). Then, simply solder the red wire to the positive (+) pad and the black wire to the negative (-) pad (Photo 23).
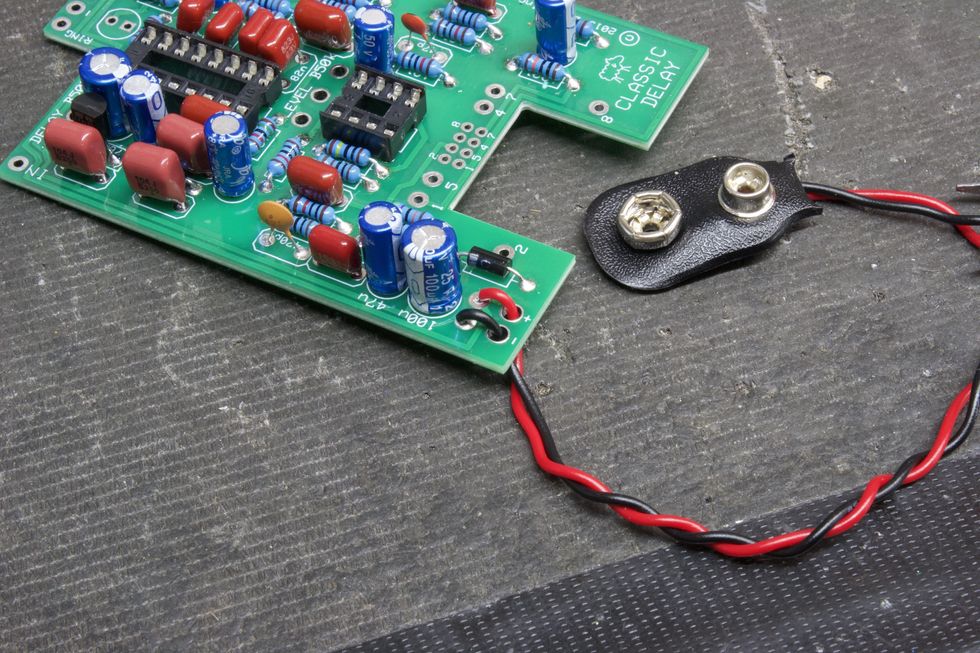
Photo 23
Next, we need to cut and strip the included wire (page 18). We need four 2.5" pieces of wire, and one 1.5" piece (Photo 24).
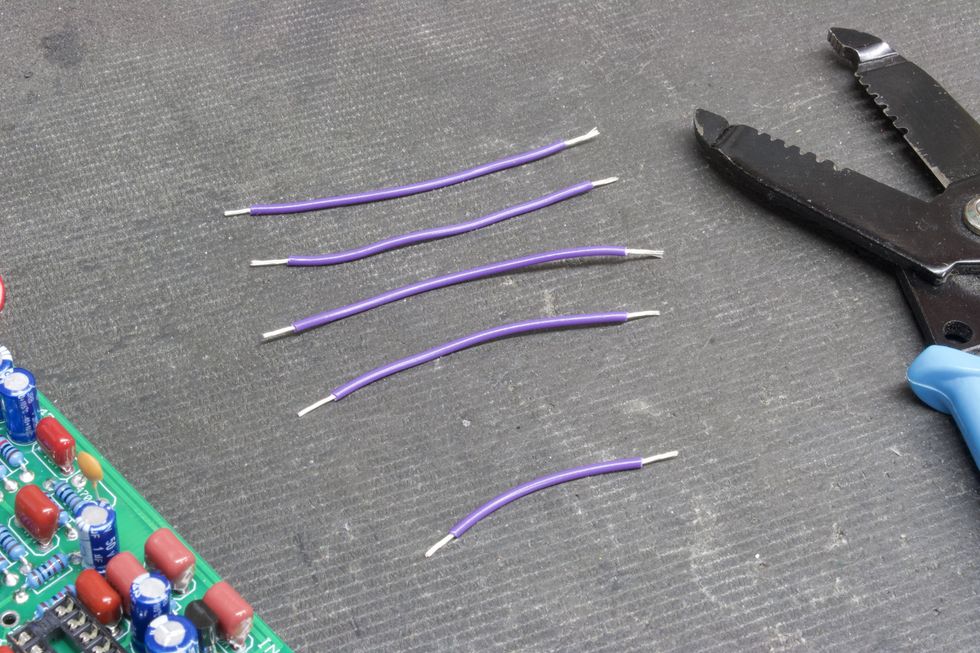
Photo 24
Place the 2.5" wires into the top side of the solder pads for in, out, and the two courtesy grounds—all handily marked. Then, solder from the bottom side. Do the same for the 1.5" wire going to the ring pad (Photo 25).
Tip: If painting the enclosure is desired, this is the last chance you’ll have to do it. After this, there will be components mounted to the chassis.
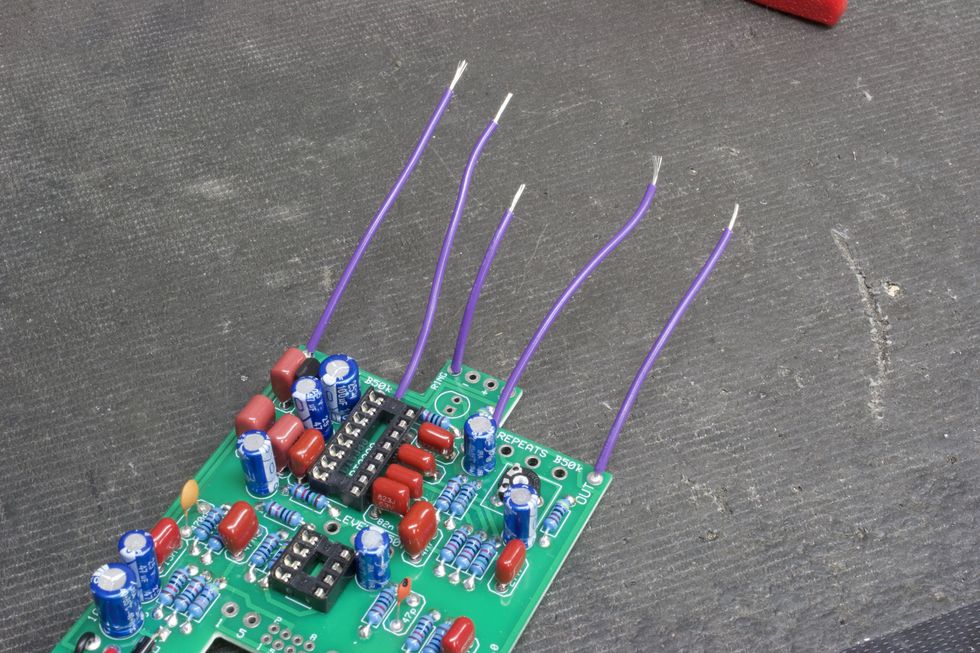
Photo 25
Step 12: Install DC Jack (page 19)
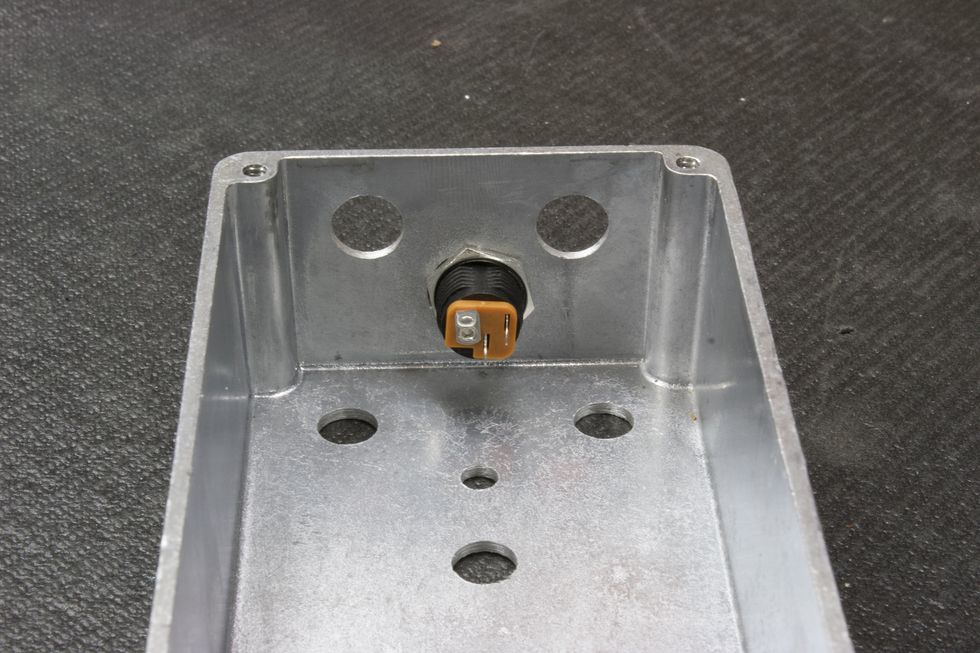
Photo 26
Place the DC jack into the large hole on the back heel of the enclosure and tighten the nut using a 14 mm (9/16") wrench (Photo 26).
Step 13: Potentiometers and Status LED (pages 20 and 21)
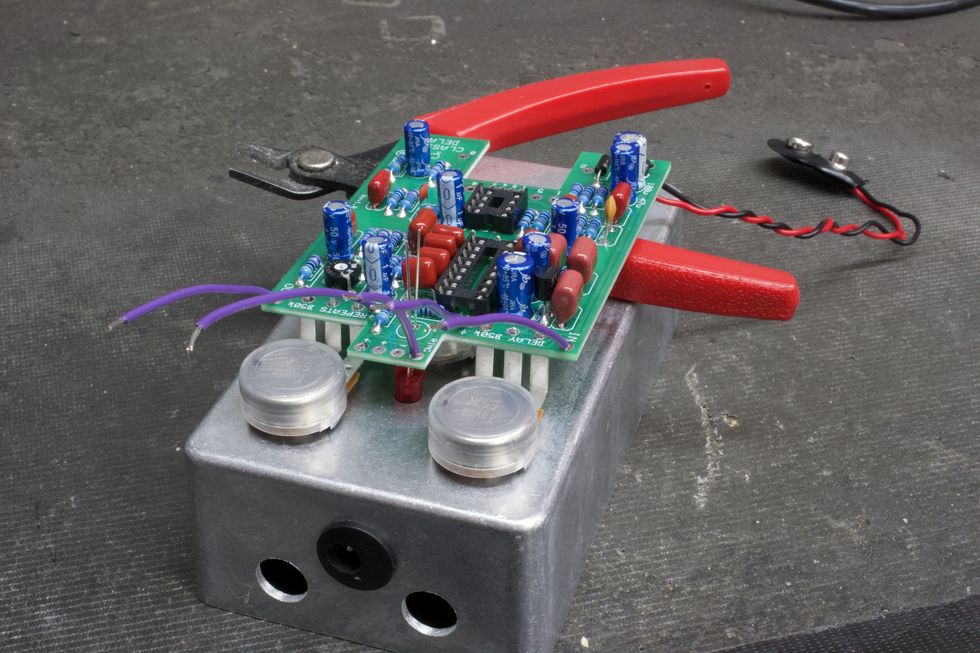
Photo 27
The included instructions for this next part have you mate the PCB to the inside of the enclosure. This will help line up the pots and LED. However, afterwards it will make soldering the remaining wire more difficult. Here’s a trick we can do that gives us the benefits of using the enclosure to help with pot alignment without needing to take the PCB out afterwards to solder the remaining wires. What we’ll want to do is simply use the face of the enclosure to hold the pots and set the LED height. Additionally, we can use the flush cutters to help balance the PCB (Photo 27). Be sure to have the long lead of the LED mate with the square pad, then solder away!
Step 14: Final Hook-Up Wire
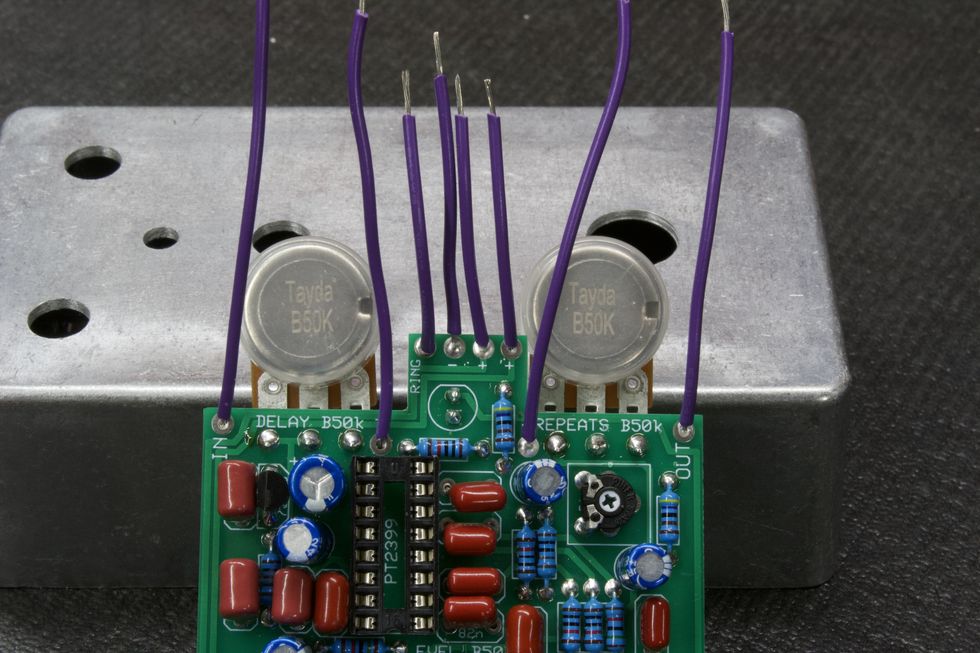
Photo 28
My steps continue to vary slightly from the instructions throughout the rest of the build, so you might want to do a side-by-side comparison. Let’s finish the wire for the DC jack next. Cut and strip three 1.5" pieces. These need to be placed into the three power pads at the top of the PCB marked -, +, + , as in Photo 28.
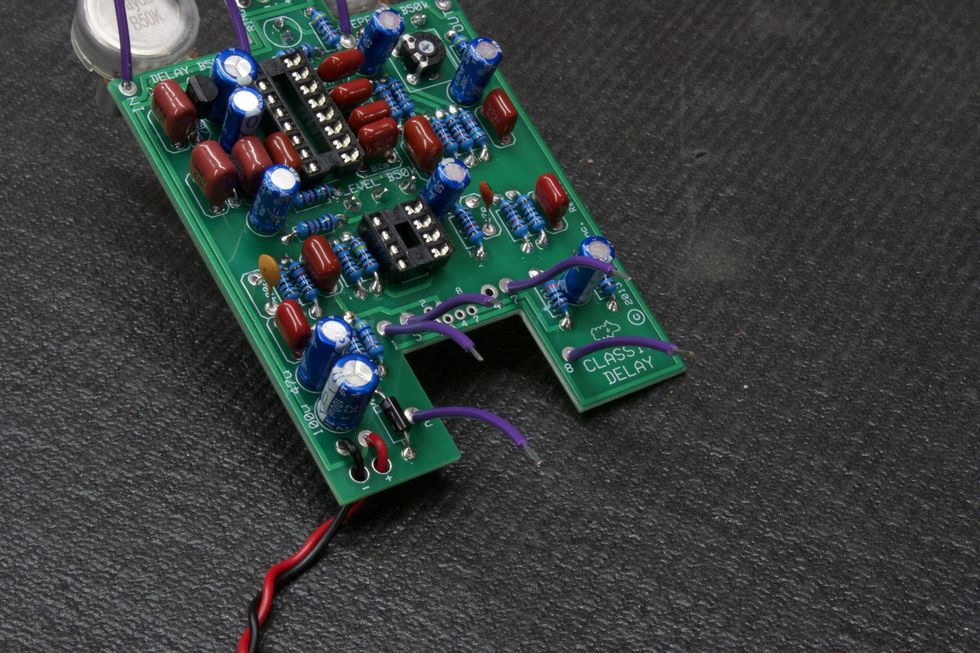
Photo 29
Next, cut and strip five more 1.5" pieces. Place these in the footswitch pads at the bottom of the PCB marked 1, 2, 5, 7, 8 as shown in Photo 29.
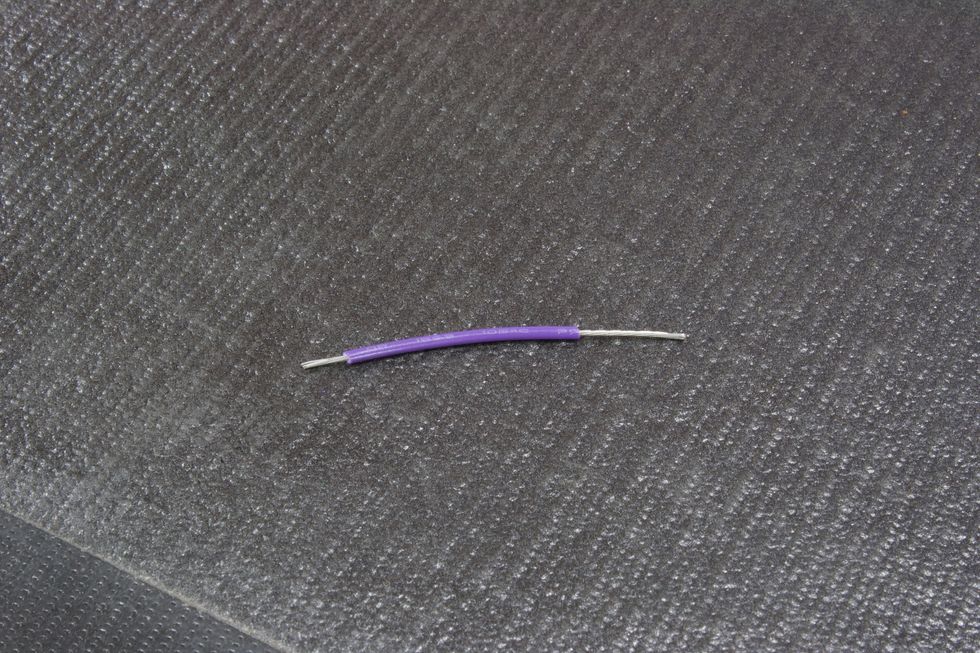
Photo 30
Last wire! Cut one 1.5" piece. Only for this one, strip half an inch off of one side (Photo 30). Place the short-stripped side into the footswitch pad labeled 4.
Step 15: Footswitch prep
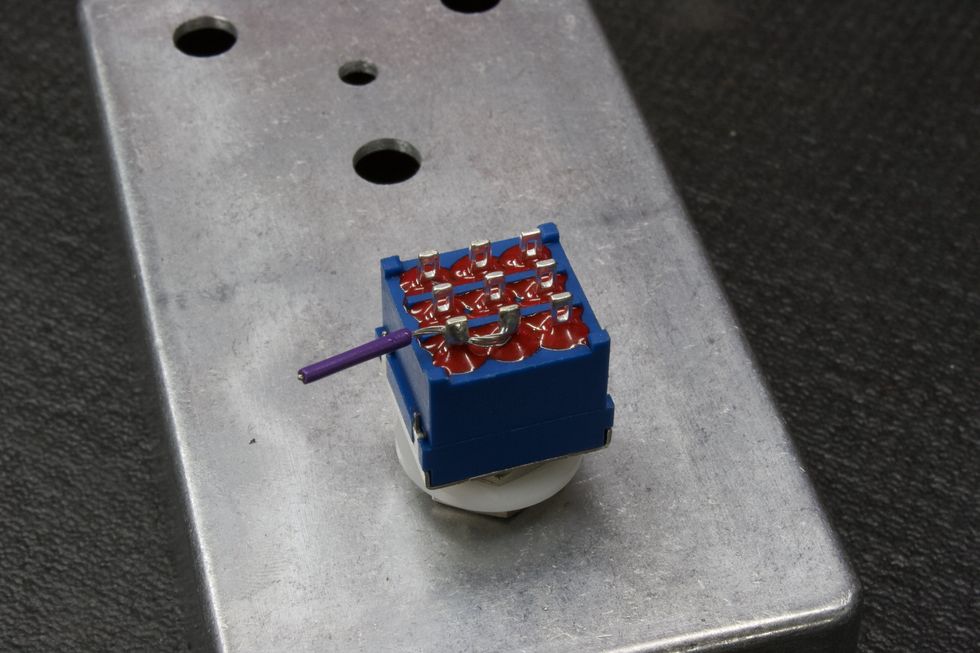
Photo 31
For the footswitch, we need to jump lugs 3 and 6. To do this, we’ll use the remaining wire. Place the footswitch into the correct hole on the face of the enclosure. Then, cut a 1" piece of wire and strip half of it. Feed the exposed wire through lug 3 and into lug 6 and then solder both (Photo 31). Cut the excess wire.
Step 16: Insert the IC
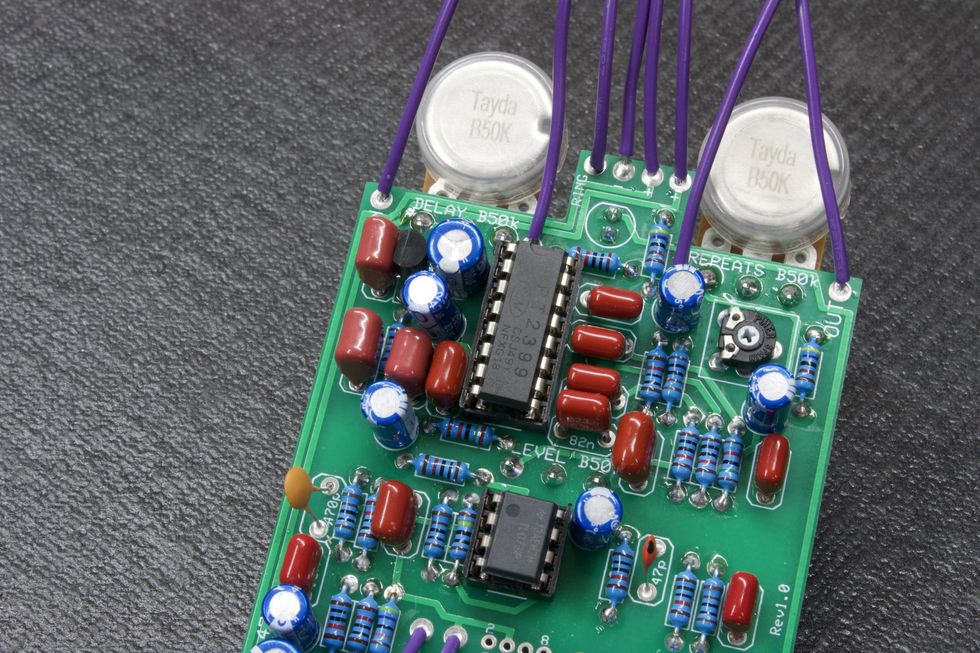
Photo 32
Now, we’re ready to insert the integrated circuits into their respective sockets. These need to be placed in the correct way, and there are two ways to identify them. Pin 1 is the top left leg of the IC—which is the rectangular black object in Photo 32. These legs are marked with a small dot in the top left corner or the upside of the IC is marked with a debossed half circle.
Step 17: Mounting and Final Soldering
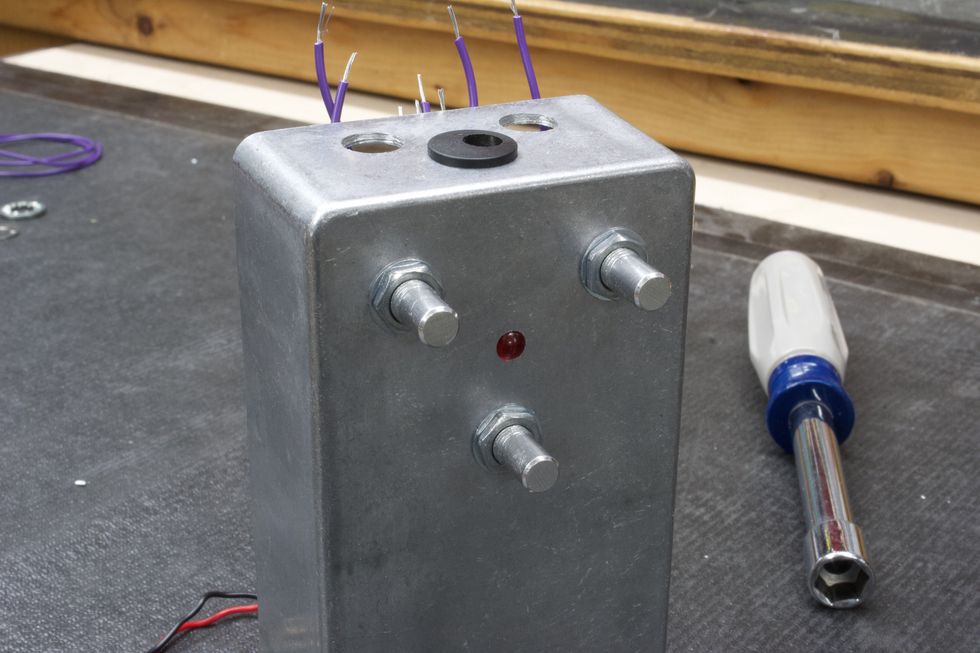
Photo 33
PCB: Now for the real fun! We’re ready to start inserting chassis-mounted components. Let’s start with the populated PCB. Place the PCB with the three pots lining up with the drilled holes, place the pot washers on the shafts, and then tighten the pot nuts using a 10 mm (25/64") nut driver/wrench, for the results in Photo 33.
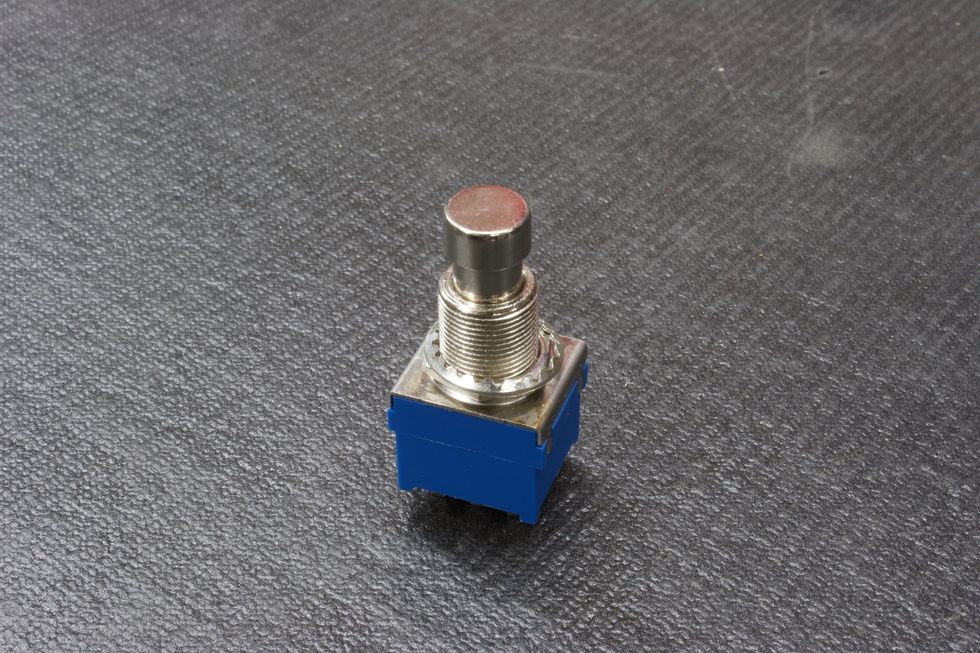
Photo 34
Footswitch: Now that the PCB is securely tightened, let’s go ahead and do the same for the footswitch. Remove all hardware from the footswitch bushing except for one nut and the lock washer (Photo 34).
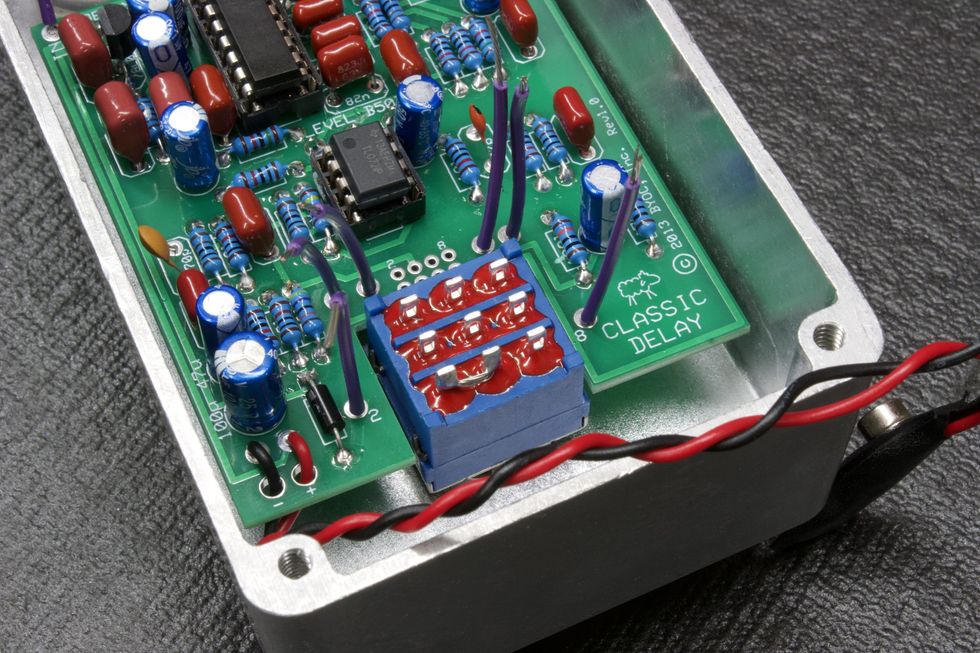
Photo 35
Feed the footswitch through the footswitch hole, making sure that the footswitch has the two poles that we soldered together facing the bottom left (Photo 35).
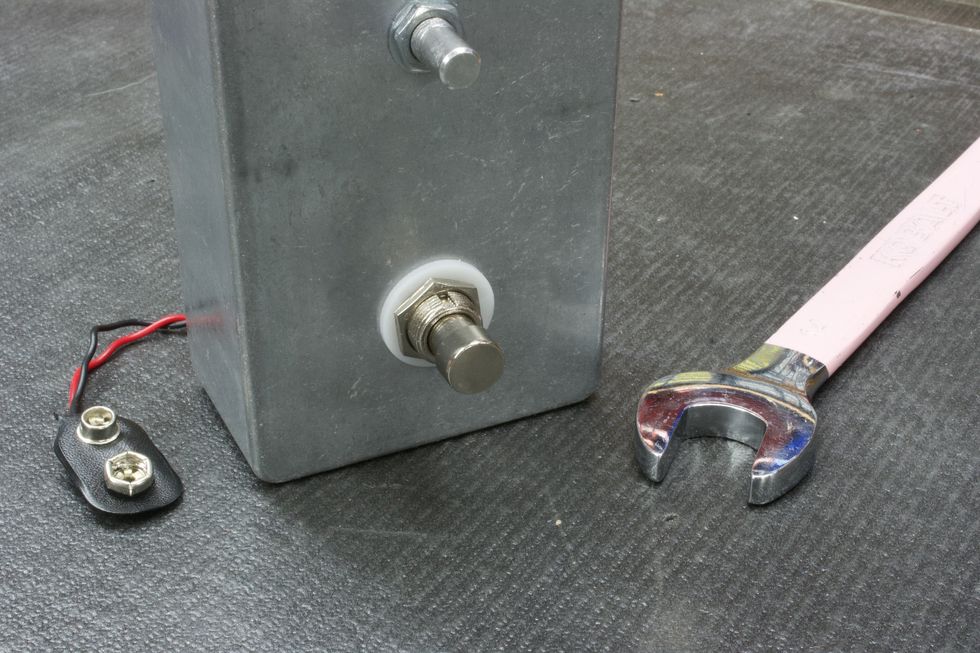
Photo 36
Next, place the plastic washer onto the bushing (optional), and tighten the hex nut with a 14 mm (9/16") wrench (Photo 36).
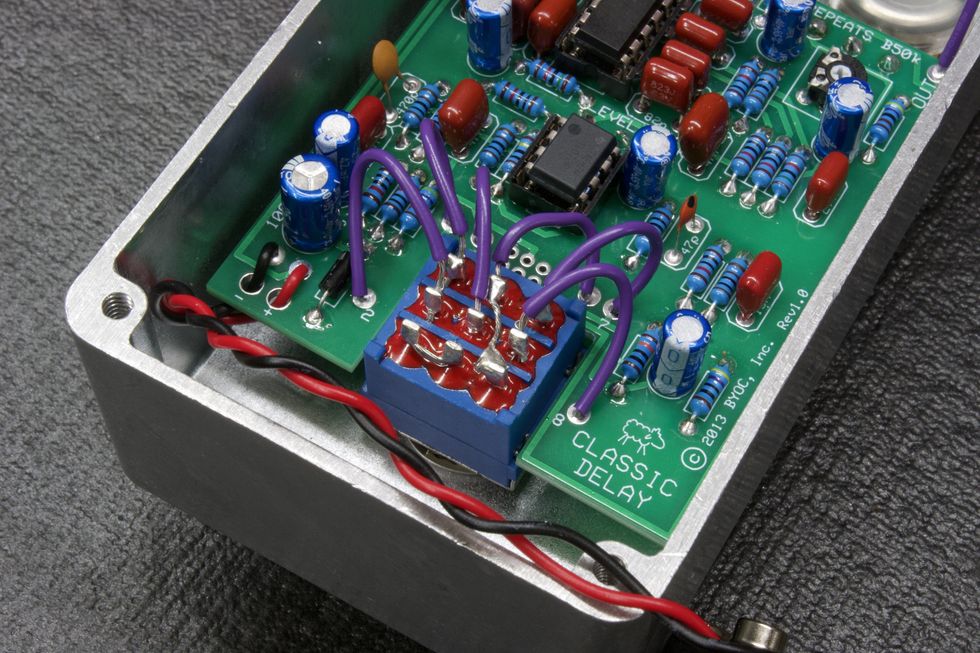
Photo 37
Lets go ahead and solder the footswitch wires to their respective footswitch poles (Photo 37). See the instructions’ page 26 for pole-numbering reference.
Tip: Solder from the top row down—i.e. 1, 4, 7, then 2, 5, 8.
Another tip: Remember that the wire for pole 4 also connects to pole 9.Step 18: DC Jack
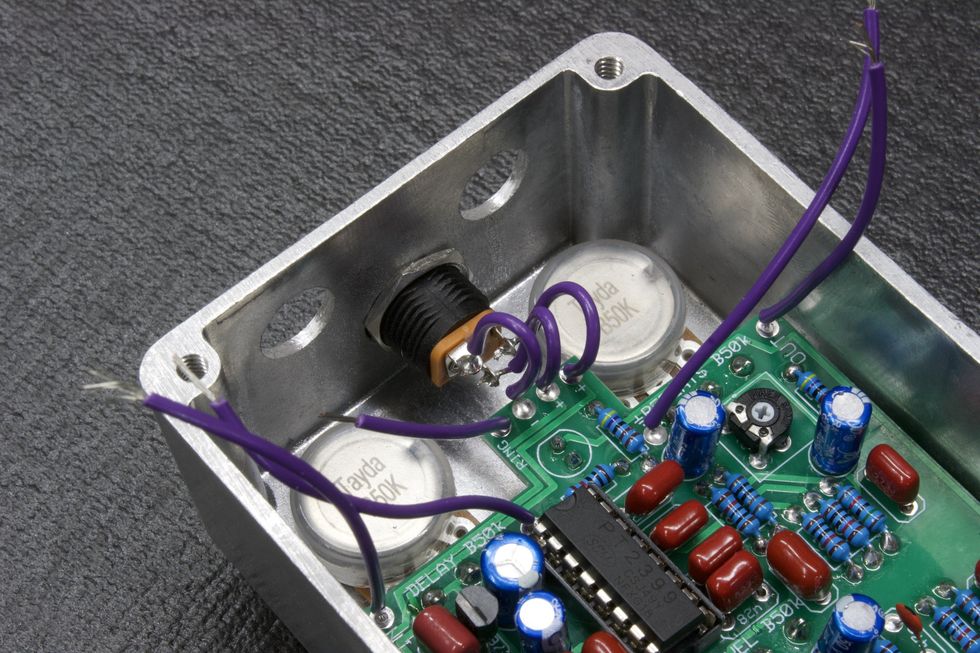
Photo 38
Next, we’ll need to solder the three wires that go to the DC jack, as explained in page 22 of the instructions. Start with the middle wire, since it sits the lowest and will be easier to get at without the other two wires in the way (Photo 38).
Step 19: Audio Jacks
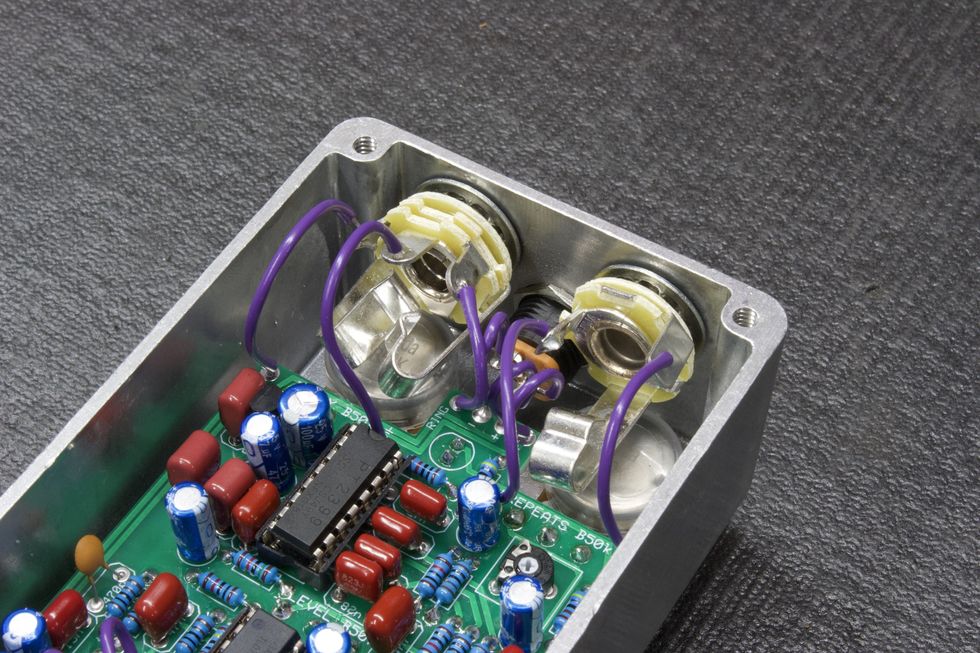
Photo 39
The last chassis-mounted components are the two audio jacks. Let’s do the stereo input jack first. Go to page 24 of the instructions to see how these jacks are oriented. The lock washer goes on the bushing first, then gets placed into the hole to the left of the DC jack. Then, place the washer onto the bushing and tighten the hex nut with a 1/2" nut driver/wrench.
Follow the same steps for the mono output jack. And then, it’s the final soldering step: Solder the wires to the appropriate lugs on the audio jacks (Photo 39), as on instructions page 28. Then, finally, place the knobs on, tighten them down, and we’re done!
- The DIY Relic Job—Fantasy or Reality? ›
- DIY - Premier Guitar ›
- DIY Pedalboard Build ›
- Reader Guitar of the Month: Strat Style ›
- Are You Throwing Away Money Cleaning Your Shop? - Premier Guitar ›
The tiniest TS on Earth has loads of practical upside and sounds that keep pace with esteemed overdrive company.
Solid Tube Screamer tones in a microscopic machine. Light and easy to affix to anything.
Small enough to lose easily! Vulnerable in the presence of heavy steppers?
$99
Olinthus Cicada
olinthus.com
The Olinthus Cicada’s Tube Screamer-on-a-postage-stamp concept is a captivating one. But contemplating the engineering impetus behind it begs questions: How much area does the pedal and mandatory/included TRRS breakout cable actually conserve? Where do you situate it in relation to other pedals so you can actually tap the bypass—which is the pedal enclosure itself! Would my neighbor’s cat eat it? As it turns out, there’s many good reasons for the Cicada to be.
For starters, small size and light weight on this order are a big deal. Flying with gear is stupid expensive. So, for players that don’t relish the antiseptic aspects of modeling, this micro-analog middle path could be a sensible one. Altogether, pedal and cable are about the size of a set of keys. You can stuff it all in a pocket, put clean laundry in your gig bag, and tour for a while, as long as the rain doesn’t soak your shoes.
All this assumes you roll with very small and very few additional effects. But if you can survive on overdrive alone, you can stick a little adhesive to the back—tape, Velcro, bubblegum, etc.—and affix the Cicada to almost anything. It sounds really good, too! A classic TS application—Fender combo and Stratocaster—yields soulful blues smoke. The same Fender amp and an SG means dynamite, raunchy, and rich Mick Taylorisms. It even does the Iommi stomp pretty well at high gain! I’m still not sure if the Cicada is a solution for a less-than-pressing engineering problem. Nevertheless, it opens up real practical possibilities and sounds more than legit in the process.
Featuring a slim Headlock system, water-resistant shell, and spacious front pocket. Available in classic Black and Ash, as well as new colors Moonlight Blue, Amazon Green, and Burnt Orange.
This brand new design reimagines and elevates the original to new heights, featuring a fresh range of colors and a refined slim Headlock system. The enhanced MONO Sleeve is engineered for durability, featuring industrial-grade webbing handles reinforced with steel rivets and bar-tack stitching, a water-resistant 420D shell, and plush interior lining. A spacious front pocket offers easy access to essentials like cables, tuners, and other gear, while the ergonomic shoulder straps ensure comfort during long-distance commutes. Sleek and compact, the MONO M80 Sleeve 2.0 is the perfect choice for guitarists on the go.
To bring the MONO M80 Sleeve 2.0 to life in the launch campaign, MONO collaborated with renowned guitarist Rock Choi from Seoul, South Korea, known for his bold and precise playing style, and Susannah Joffe, an emerging indie-pop musician from Austin, Texas, USA. Together, the artists showcase the M80 Sleeve 2.0 in a dynamic video set in New York City, demonstrating how effortlessly the case integrates into the urban lifestyle while offering superior protection for their instruments.
The updated Sleeve 2.0 is available in classic Black and Ash, and for the first time in MONO’s history, debuts a range of new colors: Moonlight Blue, Amazon Green, and Burnt Orange, giving artists fresh avenues to express themselves through their gear.
The MONO M80 Sleeve 2.0 features include:
- An ergonomically designed case that is sleek and suited for urban travel, along with comfortable shoulder straps and a tactile side handle for easy carrying.
- A water-resistant 420D shell and plush interior lining, built to military specs and extreme resistance to abrasion and the elements.
- A slim Headlock system, made from shock-absorbing EVA rubber, secures the guitar's neck and headstock, while the EVA insole protects the body and strap pin from impact.
- A spacious front pocket for essentials like laptops and cables, and a small interior mesh pocket for critical items.
- Side-release chest buckles provide added security and a construction reinforced with steel rivets for extra durability.
- Rock-solid, industrial webbing handles that are standard in MONO cases. Bar-tack stitching and steel rivets reinforce strength, while high-grade webbing offers a comfortable grip.
- String guard protection to safeguard your guitar’s strings.
Your esteemed hosts of the 100 Guitarists podcast have been listening to Randy Rhoads’s body of work since they learned the word “pentatonic.” His short discography with Ozzy Osbourne has been emblazoned on both of our fingertips, and we’ve each put in our hours working out everything from the “Crazy Train” riff to the fingerpicked intro to “Diary of a Madman.” But in our extended Premier Guitar fam, we have an expert who’s been studying Randy’s licks since longer than either of us have been alive.
On this episode, we’re thrilled to be joined by Chris Shiflett—best known to you as the host of Shred with Shifty or as the Foo Fighters’s foremost expert on Randy Rhoads. Since growing up with these riffs in his ears, Shifty’s been making tokens of tribute to the later guitar slinger, from bespoke t-shirts to stuffed guitars.
Join us for Shiflett’s Randy Rhoads primer, learn why you should crank the outro to “S.A.T.O.” as loud as you can, and what Ozzy song makes this Foo cry.
Use code: PREMIERGUITAR10 for 10% off.
Offer valid until Dec 31, 2024. Visit http://bullheadamplification.com.
For the first time, Dave Grohl, Pat Smear, and Chris Shiflett discuss their shared 6-string history, breakdown some Foos riffs, and give insight on 30 years of rock and roll.
Over the past 30 years, Foo Fighters have become one of the most influential and important bands in rock and roll. Through countless gigs from clubs and theaters to arenas and stadiums, the trio of Dave Grohl, Pat Smear, and Chris Shiflett have developed a vocabulary that at this point comes together naturally. It’s a shared language that is always present but rarely (if ever) discussed. Until now.
Back in February, the trio convened in Studio 607 for a sitdown that is destined to be an instant classic among Shred with Shiftydiehards. Below are a few excerpts from the conversation—edited for clarity—that hit on what first inspired Dave and Pat to pick up a guitar, why there was so much feedback at Germs gigs, and that one time they ran into Joe Bonamassa at Guitar Center. You can watch the full episode on YouTube, where they break down “Hey, Johnny Park!,” “La Dee Da,” “Rope,” and so much more. — Jason Shadrick
Chris Shiflett: Alrighty, fellas, let's jump into it. You're in the hot seat now.
Dave Grohl: Oh God. Here we go.
Shiflett: Let's start off easy. What are you playing today?
Grohl: This is my signature DG-335 Epiphone and it's fucking rad. Love it. Been playing it on tour.
Pat Smear: It's not even out.
Dave: Is it not out yet?
Smear: No. Only rumors.
Shiflett: For the sake of this interview, it might be out by the time this airs, so we could be in a time machine. Pat, how did you go from being a guy who famously borrowed guitars at Germs gigs, didn't own one of your own, to the man we see here today with a barn full of guitars?
Smear: That's why, because I didn't even have my own guitar, so I'm like, well, now I need two.
Shiflett: … hundred … thousand. [laughs]. What are you playing today?
Smear: I am playing prototype number one, made by Mike McGuire from the Gibson Custom Shop. It's a Mini Barney Kessel Triburst prototype from 2011. May 11th, 2011.
Shiflett: Do you also have a baritone back there?
Smear: I do. My Hagstrom baritones are on tour, so that's my SG baritone. It's a funny guitar. I'm told that it was originally going to be a Buckethead model, his new model, and he just disappeared. So, they put it out as a baritone.
Grohl: He flew the coop?
Shiflett: When you first came back to the Foos, why did you land on a baritone so much of the time? Had you played much baritone prior to that?
Smear: I played one a little bit. I played one on The Color and the Shape album. That sounded great, but I never played it live. But then, what am I going to do? There are already two guitar players. When we were doing Wasting Light, I'm like, “What am I going to fit in here? Well, nobody's playing baritone. I'll pull that out.”
Grohl: And that’s the story of the Foo Fighters. [laughs]
Shiflett: What made you guys want to be guitar players in the first place? Because probably a lot of people don't know that the guitar actually came before drums, right?
Grohl: Yeah. My father was a classically trained flautist, and my mother bought him a nylon-string, which I don't think he ever played, but it sat in the corner of the room like a piece of furniture, and by the time I got to it I was maybe like eight or nine years old and it maybe had two or three strings on it. I picked it up and played “Smoke on the Water” or something like that. I understood where to put my hands on the frets, and then I was like, “wow, this is cool.”
Shiflett: Did you ever take lessons?
Grohl: I took a few lessons when I first started playing, and I was disappointed because I wanted to learn how to play chords so I could play along to things. I could hear the songs and sort of figure them out, but I was stuck with just getting my little-kid stuff together. And then the teacher started to try to teach me classical. I remember he taught me this thing. [plays short classical piece].
Smear: It worked! It's still there.
Grohl: I was like, fuck that shit.
“I don't even know what a good guitar sound is, but I do know when I play an old Trini through the Tone Master, I really have control over what I'm doing.” — Dave Grohl
Shiflett: What about you, Pat? What made you want to be a guitar player?
Smear: It was my sister Ingrid, who is a couple of years older. She had a nylon-string acoustic guitar in the house. I had those forced piano lessons when I was a kid, and I would cry through the whole thing. I hated it so much, and then I picked up the guitar and I'm like, “Oh, well, that's my thing.” But it was really [Alice Cooper’s] Love it to Death. That picture on the back cover. I'm like, I want to do this. I want to play that.
Shiflett: It's funny how that still informs your guitar choices. Who would you consider your primary guitar influences?
Grohl: I really liked Ace Frehley. I mean, I had a Beatles chord book, and that's where I was learning to play chords and stuff, but I never saw footage of the Beatles playing when I was eight or nine. I just thought Ace was so fucking cool looking, and I loved the way he stood, and I loved his Les Paul, and I thought that I could be a guitarist and look like him without all the fucking heels and the makeup and shit.
Smear: I don't know that I had one. I had a bunch. I had all the usual ones, but I thought Mick Ronson was the coolest, but as far as the playing, it was the Alice Cooper guys.
It wasn’t until the band started recording Wasting Light, that Pat Smear dived into the baritone guitar. “What am I going to fit in here?” thought Smear. “Well, nobody's playing baritone. I'll pull that out.”
Shiflett: When did you figure out that you needed a certain kind of gear to make it sound like the record?
Dave: It's funny. My mother bought me a Silvertone, like an old one from Sears with an amp in the case and everything, and it was cool. But then I found out about a distortion pedal. I don't know how, but I think I was in a music store and I saw one, and I said to my mom, I was like, “oh my God, mom, can I get it?” It was 30 bucks. It was an MXR. And I was like, “This is going to make it sound so much better.” And she's like, “Oh, good.” And we buy it and bring it home. After I plugged it in, she was like, “I thought you said it was going to make it sound good!”
Shiflett: It's distorting the sound. [Laughs]
Dave: Yeah, it doesn't sound good.
Shiflett: I had a little solid-state practice amp, and I'd go home and I'd try to play whatever I learned in my lesson and it wouldn't grit up at all. And you'd just kind of be confused. Why doesn't this sound like the Ozzy record? It doesn’t sound right!
Smear: I know! I never knew anything about that part of it.
Grohl: Well, you didn't even have any fucking gear. [Laughs]
Smear: I didn't even have gear. I didn't have a guitar. I didn't have an amp.
Shiflett: What was the time that you showed up at a Germs show and had to borrow somebody else's gear?
Smear: Well, that happened all the time, but the worst one was we were playing with X and I broke my guitar in the first song, and so I'm like, “I need Billy Zoom's guitar!” And, dude, I found out he was hiding in some closet with his guitar saying, “Keep him away from my fucking guitar.” I'm all drunk. I think somebody just taped it back together and we were okay.
Grohl: Is this why there was always so much fucking feedback at Germs gigs? You had no pedals, you would just crank the amp?
Smear: Well, if there was a pedal, I would just step on it and leave it there. And my favorite when I hear old tapes is tuning full volume with the pedal on.
Shiflett: Well, let's talk a little bit about your live rigs that you've gotten nowadays and how that's kind of changed over the years.
Smear: Yeah, Dave, talk about your live rig. [Laughs]
Grohl: Okay, just a disclaimer. I don't know a fucking thing. At first I was playing a Marshall, it was like a JCM 900 or something like that. For the first [Foo Fighters] album, that's what I was playing.
Shiflett: Pedals? No pedals?
Grohl: I really think I only had a RAT pedal and a fucking tuner. I don't think I had any delays or phasers or anything yet. I think I just had a RAT. Then eventually the Mesa/Boogies came along and it was like Dual Rectifiers and 4x12s and that kind of stuff. And then eventually I found one of those [Fender] Tone Masters at Norman’s [Rare Guitars]. And he was like, “These are great, man. This is what Aerosmith used on all of their cool shit.” I've stuck with them ever since. And the thing is that, I mean, I don't even know what a good guitar sound is, but I do know when I play an old Trini through that, I really have control over what I'm doing. I don't have any volume pedals or anything like that. I've got four channels of clean to dirty.
Shiflett: You do have a pretty straightforward live set up. Not a ton of pedals, just phaser and delay and a couple of things.
Grohl: And I can roll [the volume knob] a lot. I mean, that's the thing with the Trini is that they're kind of reactive. They're dynamic and you can make them do …
Shiflett: It leaves a lot in your hands.
Grohl: It does. And especially when you're running around the stage and I don't have 20 seconds to get back to a pedalboard, then I could just roll up and down and just do it in the hands.
“But it was really [Alice Cooper’s] Love it to Death. That picture on the back cover. I'm like, I want to do this. I want to play that.” — Pat Smear
Shiflett: It's interesting. When I joined the band I was playing through a Dual Rectifier and I think you were playing through a Dual Rectifier live, but I was surprised to learn that for Nothing Left to Lose you had used the Trini and old vintage AC-30s and Memory Man, and Hiwatts, so your studio thing and your live thing were very different.
Grohl: I remember having that conversation with my guitar tech at the time, and the justification was basically, if one of those things goes down while we're on the road, we're kind of screwed. And so the Rectifiers were really consistent and you didn't have a lot of problems with them, and if you needed to find another one, they were easy to find.
Smear: And they'd send them like that. [snaps fingers]
Grohl: Yeah, they'd be really quick. And we were just doing that because we were blazing through gigs so much.
Shiflett: I don't remember which tour cycle it was, but there was just a point where when you got that Tone Master and I came in with a Friedman and a something else or an AC, I forget what it was, all of a sudden it went from that to this completely other tone thing live.
Smear: We all had the Mesas.
Grohl: I think we had gotten to the point where we all had sort of three different sounds and three different duties in the band, and so we all started to focus more on that.
Both Grohl and Shiflett are armed with their respective signature guitars. Grohl’s recently released Epiphone DG-335 has been long requested by fans, while Shiflett’s Tele Deluxe will soon get a refresh.
Shiflett: I never had any effect pedals until I joined the band. Can you believe that?
Grohl: Wow.
Shiflett: Never, never played with a delay pedal or a flanger or any of that stuff in my life. And when we first started doing those rehearsals and there were songs like “Aurora” and “Generator” and stuff that had some color, that was when I had to first learn how to do that.
Grohl: I think that a lot of what we do comes from the studio. When we go in to record songs, the basic idea is usually pretty simple and we'll pull that together and then we start to color it with different things, different sections of the song, different effects, different tones, and things like that. And also the arrangement or composition of the three of us doing what we do since we don't want to just do the same thing all the time. I think it took 15 or 20 years for us to figure out the recipe or combination of what we do.
Shiflett: I wanted to talk to you about, “Hey, Johnny Park!” I remember when I bought that record, putting that song on and the big drums came in and then the guitars kicked in, it's like a guitar solo and there wasn't a lot of that in your music, and there really wasn't a lot of that even in alternative rock at that time. I was listening to the recorded version last night and it sounds like maybe it's like a Big Muff or something in that part? Do you remember what guitars you were playing? What amps, pedals, all that sort of stuff?
Grohl: I'm sure on that I was playing through a combination of amps. I think one was old Marshall. I think another might've been a Hiwatt. I don't remember what we had in there.
Smear: The only amp I remember was when you used that smokey cigarette amp. I don't even remember what song it was. But you used that on something.
Shiflett: What was your main go-to guitar back then?
Grohl: I was using the Trini a lot.
Shiflett: Oh, you had it even back then?
Grohl: Yeah, I got the Trini before Foo Fighters. I got it at this place called Southworth Guitars in Bethesda, Maryland, and there was a row of 335s and they're all red. They all kind of looked the same. And then there was this one with this different headstock and it had these diamond f-holes. I knew nothing about it. I didn't know anything about Trini Lopez. And it turned out great. It's the same one that I've used on fucking everything.
Shiflett: How many Trinis do you have? Vintage old ones?
Grohl: Maybe like five or six of them.
Shiflett: I didn't know if you were the Joe Bonamassa of Trinis.
Grohl: No, I’m not the Joe Bonamassa of anything.
Shiflett: I bet Joe Bonamassa is probably the Joe Bonamassa of Trinis. [Laughs.] That reminds me. My favorite guitar shopping moment with Pat was when we were making the last album and we were sitting there and we ran over to the rock and roll Guitar Center, and we went into the vintage room and we're looking at guitars.
Smear: Was Bonamassa there taking apart a Strat?
Shiflett: Yes, but the part that always sticks in my head is there was a 1997 Les Paul and they called it “vintage.” I was like, what? Really? God, how fucking vintage are we? [Laughs.]
Grohl: I just think we’re “used.”