
If you've been in a music store anytime since 1978, you've no doubt seen the ubiquitous orange Boss DS-1 Distortion pedal. Universally recognized as a good, inexpensive distortion pedal, you've probably even owned one or two in the past. Although it houses a simple circuit design, it produces a very good sound, particularly for a mass-produced pedal. Let's look a little more closely at the circuit and check out some changes that are available to make this great pedal even better.
The circuit is a buffered bypass circuit with electronic switching, as are all Boss pedals. The circuit comes in through R1, a 1K resistor, and then travels through C1, a .047 microfarad, or µf, capacitor into the first buffer. This buffer goes out through C2 and then into a JFET (junction gate field-effect transistor), which is part of the switching. If the pedal is off, the signal goes out to the switching circuit and through the output through Q7, which is the other JFET. These JFETs act as a switch, allowing the signal to either go through the distortion circuit or out through the buffers, producing a clean signal.
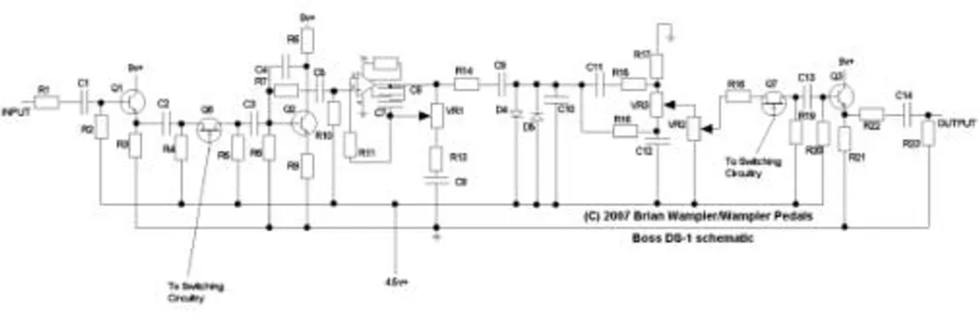
Click to download a full-size PDF of the schematic.
When the pedal is on, signal travels to Q6, through C3 and into a transistor gain stage. R7 controls the gain of this circuit by changing the voltage bias, consisting of a 470k resistor which you can increase or decrease in value to adjust gain before the next stage. Increasing the value increases gain, while decreasing it will give you a little less gain overall but will tighten up the DS-1's low-end response, ridding it of the flubbiness many people dislike. We can also decrease C3 to get this same effect by not allowing as much bass to come through. I like to change its value to either .022µf or .033µf if I'm looking for a less flubby tone. To clarify, to me "flubby" means a deeply compressed tonality. C4, which has a value of 250 picofarads (pF) also filters out some highs. Changing this won't do too much, although you may be able to coax a little more brightness by changing it to a 100 pF capacitor.
The signal then goes out through C5 into the opamp. This opamp is used in a unique way to clip the signal. R11 controls the gain in combination with the distortion knob, R13 and C8. The gain control is set up this way to enable the clipping of higher frequencies as you turn the distortion up. When it's turned down, it allows lower frequencies in – giving it a muddy sound since the signal is clipped beforehand through the transistor gain circuits, then clipped again when the distortion control is turned down. The first stage clipping is still occurring and as a result, the pedal doesn't sound as clear and articulate as many would like. R13 and C8 are part of this "non-inverting" opamp circuit which provides negative feedback to ground. This is important for several reasons. The resistor value of R13 and the capacitor value of C8 basically provide a frequency range where the signal is made to clip. In this case all frequencies above 33hz is being clipped. To contrast, a Tubescreamer only lets frequencies above 728 hz clip. This means that none of the lower bass frequencies are being boosted and/or clipped in the Tubescreamer.
The signal goes out through R14, which is a 2.2k resistor, through C9, which is a .47µf capacitor running across two diodes – D4 and D5 – and then to ground. All the usual diode tricks can be done here to allow more asymmetric clipping or different clipping flavors. Here C10 is also in parallel with D4 and D5 and is used to filter out highs in conjunction with R14. R14 and C10 form a low pass filter, cutting out high frequencies.
Go to indyguitarist.com/filter.htm and scroll to the bottom. Plug these values into the corresponding fields to determine which frequencies are being filtered. With the current values you will find it's filtering everything above 7k, which helps to smooth things out a little bit. If it's too bright, replace R14 with a resistor valued at 3.3k, allowing more highs to be filtered out, or try a 4.7k resistor to filter out everything above 3.3kHz.
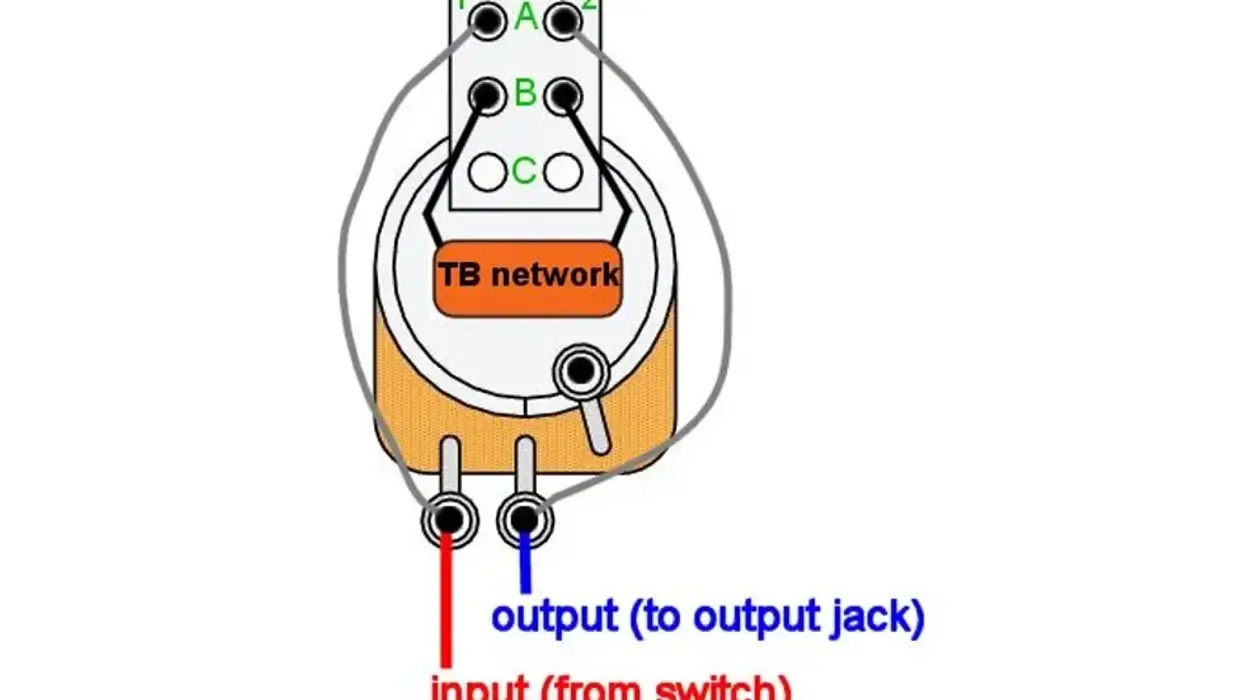
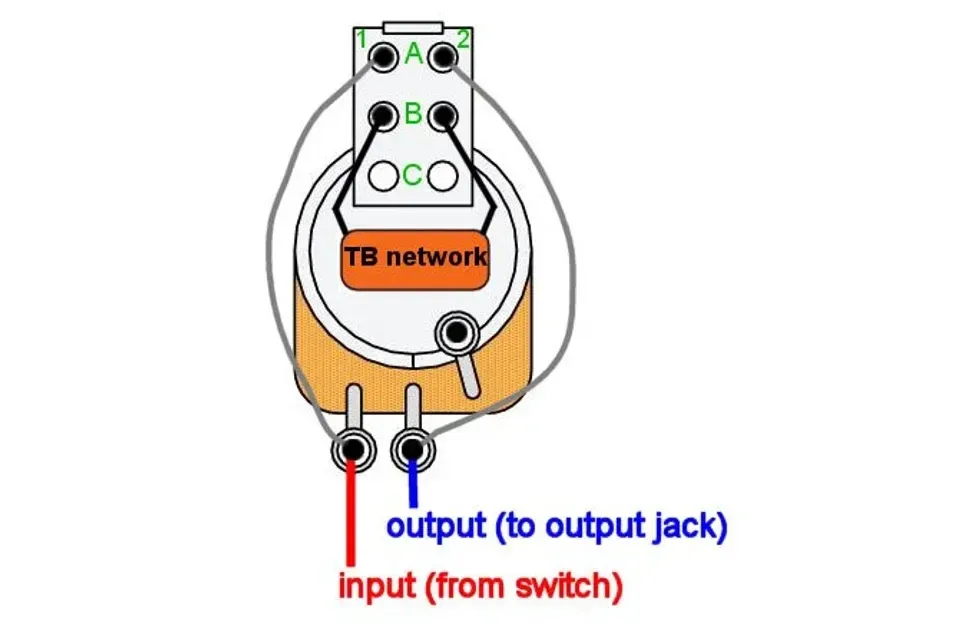
After traveling through the diodes and the capacitor, the signal goes through a Big Muff - inspired tone control. There are many things we can do to manipulate the tone here, and a great resource is the Duncan Tone Stack calculator, available at duncanamps.com/tsc/. Experiment with different values to find the tone you're looking for. In the stock version of the pedal, the tone is a bit "scooped," meaning that there is little mid frequencies allowed through making the tone a little "thin" sounding. We can change that quite easily however. Check out the suggested changes in the charts below to get a warmer tone, a scooped mid tone or simply less highs.
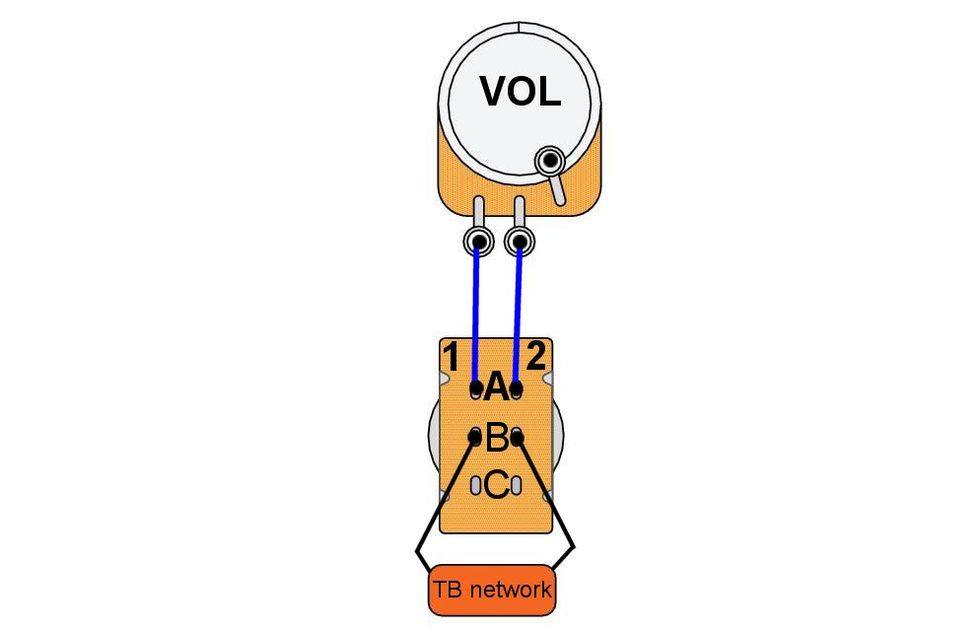
After the tone control the signal travels through the level control and then out through R18, which is a 10k resistor, and then on to Q7, which is the other side of the JFET switching circuit. In its on state, it goes past Q7, through C13 – which is a .047µf capacitor – through yet another output buffer and then a resistor, a capacitor and finally through the output.
Let's look at some modifications that will have your DS-1 doing your bidding in no time.
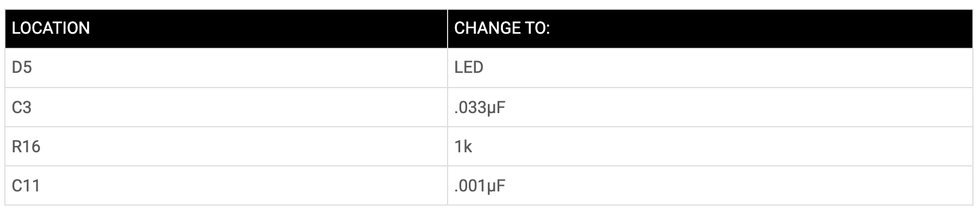
Classic JCM-type Marshall Tones:
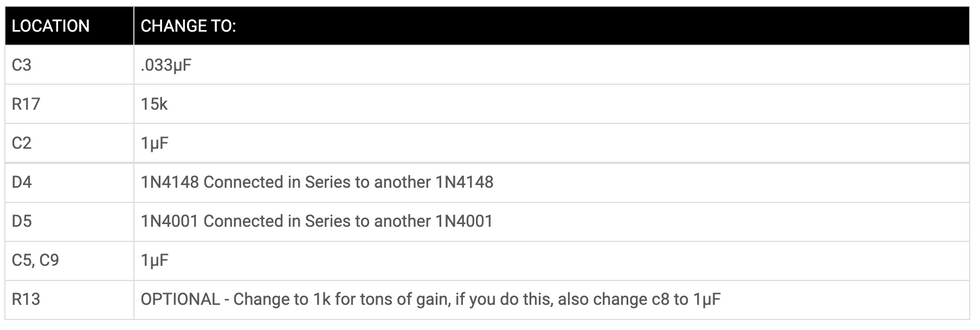
Modern Distortion Tones:
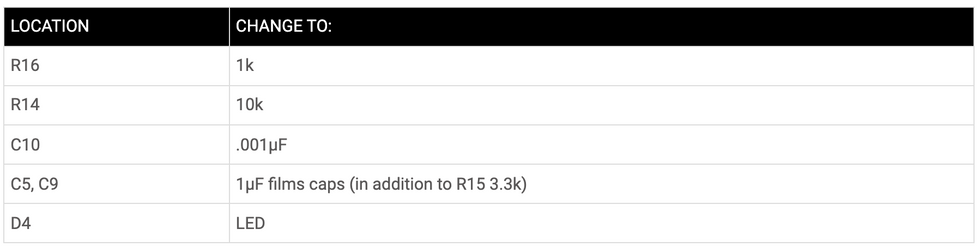
Vintage Distortion Tones:
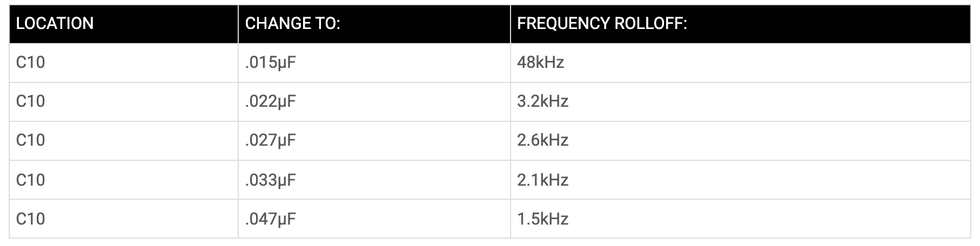
If you like the general sound of the DS-1 but are looking for less highs and more of a tonal range change C10 to a capacitor with a larger value. Stock is .01"F for a frequency roll-off of 7.2kHz.
Less Shrill Highs:
All in all, the Boss DS-1 Distortion is an inexpensive pedal that can rival many of the best boutique pedals simply by changing the circuitry a little. While this may seem difficult, technical and out of reach, it really is very simple if you know what to change and where to change it. I hope that I've given you the knowledge and courage necessary to change your pedal from a mouse into a monster. Happy soldering!
[Updated 11/8/21]