After playing and collecting pedals for a while, many players decide that off-the-shelf pedalboards don't quite offer all of the options they'd prefer for organizing and getting the most out of their stompboxes. Some of us want little more than a platform with space for our effects and a power supply, while others are at the opposite end of the spectrum and can't live without various jacks and specialized connections being built right into the pedalboard.
For this DIY piece, I wanted to solve the problem I'm facing: I have a growing pedal collection, but after using some of the pre-assembled products on the market for a while I decided they weren't quite cutting it. I wanted something closer to a custom pedalboard—minus the elevated price tag. After scoping out the range of custom options offered by various companies, I decided to make something with all the features I wanted. It's a bit more involved than duct-taping everything to an IKEA shelf, but it's definitely not as involved as some of the space-age control centers on the market. I was careful to keep costs as low as possible, though. in fact, I was able to keep the price around $100.
Tools & Supplies
- Appropriate lengths of 1/2" oak and 3/4" cabinet-grade birch
- Table Saw (with taper angle attachment and 80-tooth blade)
- Mitre Saw
- Router (with 1/2" straight bit)
- Medium-sized Phillips screwdriver (or similar-sized bit for a power drill)
- (6) 1/2" self-tapping wood screws (1/8" diameter with fine threads)
- (24) 1" self-tapping wood screws (1/8" diameter with fi ne threads)
- (10) 1 1/4" self-tapping wood screws (1/8" diameter with fi ne threads)
- Kreg Jig
- Marinco 5278BL power inlet
- (2) solderless Neutrik conenctors
- 7/8" hole saw
- 1 3/4" hole saw
- Power drill
- 1/8" drill bit
- Wire strippers
- Electrical tape
- IEC power cord
- 2" industrial-strength Velcro
- 220-grit sandpaper
A couple of notes about things we're not covering here: I won't go into the theory of wiring up your board (effect order, switching options, etc.)—that's a whole other topic. Here we're covering the basics of getting a signal and power to and from your board. Also, though most players need a pedalboard case because they drag their boards all over the place, we'll refer you to the fine folks at blackbirdpedalboards.com, stompin-ground. com, nycpedalboards.com and other outlets with a multitude of sizes, options, and materials for you to choose from once you've decided on the final size and shape of your board.
All right—let's get to it!
Step 1
Lay out your pedals on the floor in ideal performing position and use a tape measure to determine what size of board will fit them. I decided on 24" x 16". I wanted my board to have an angled surface so I can comfortably reach two rows of pedals, so we'll also make the surface angle from 4" high in back down to 1 1/2" high along the front edge. This will also let me mount a power supply underneath.
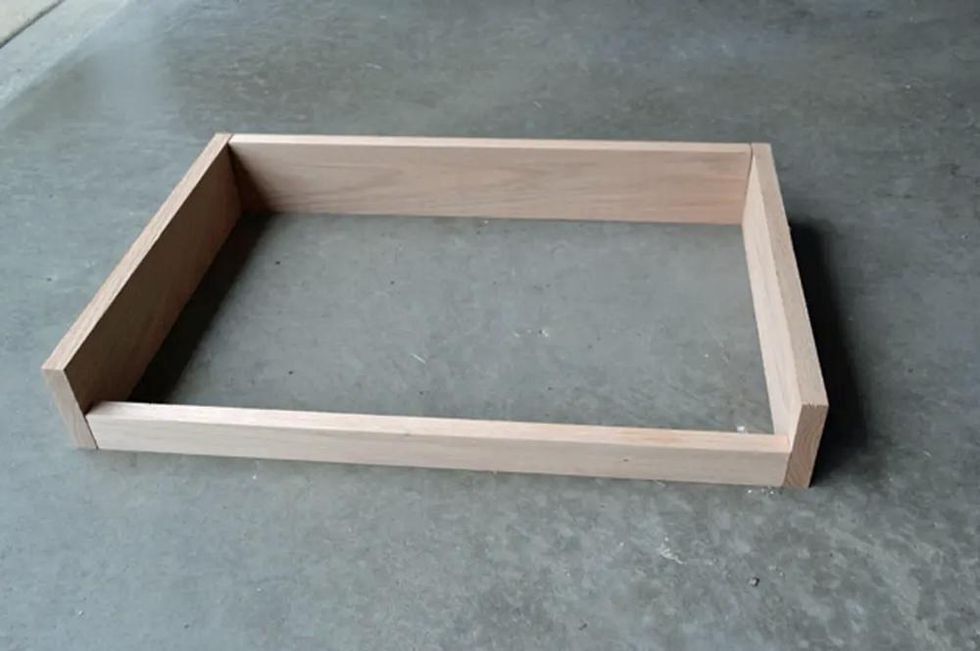
Step 2
Next, we need a basic frame. I used a miter saw to cut the four sides to the appropriate lengths. I chose 1/2" oak for the sides, and 3/4" cabinet-grade birch for the top.
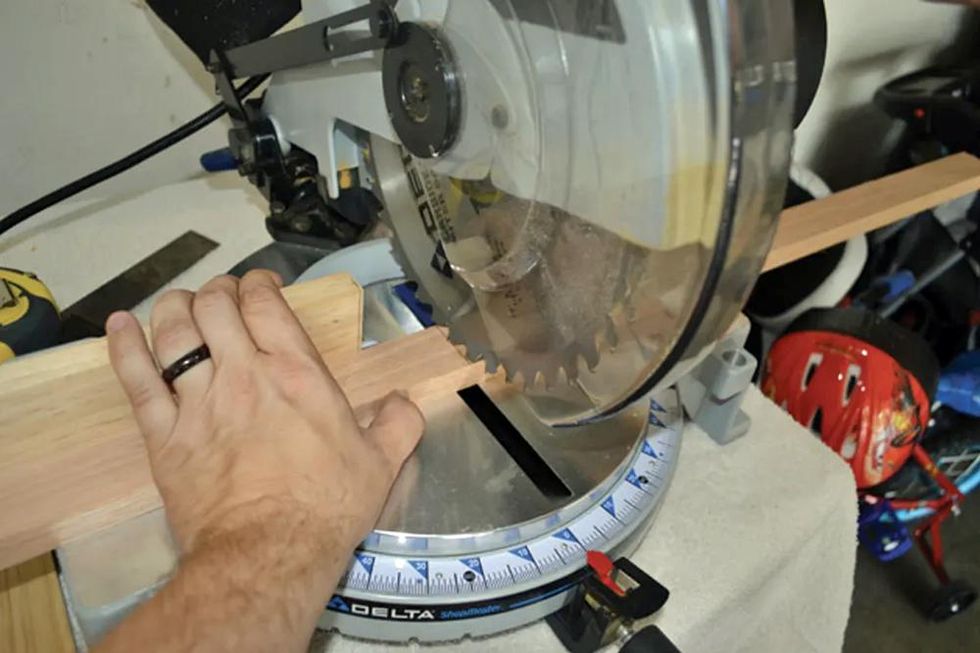
Step 3
I determined that a 7-degree cut on each of the pedalboard's side pieces would provide the optimum surface incline.
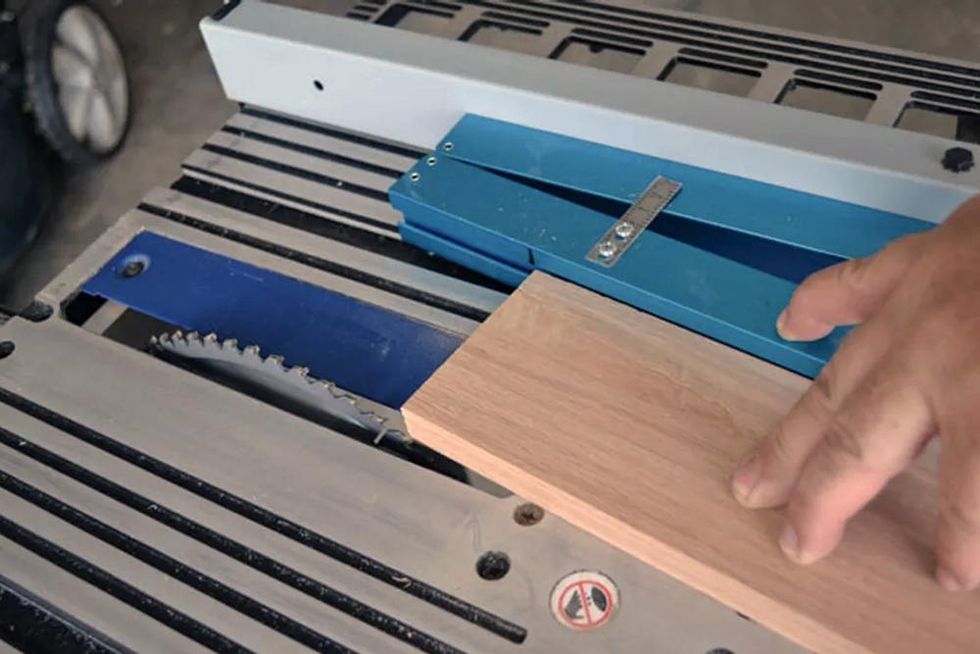
To cut the sides flat and even so they'd make complete contact with the underside of the top, I used a table saw and the blue taper-angle attachment in the top portion of this photo. A blade with a higher number of teeth reduces the chance of rough or damaged edges, so I used an 80-tooth blade.
Step 4
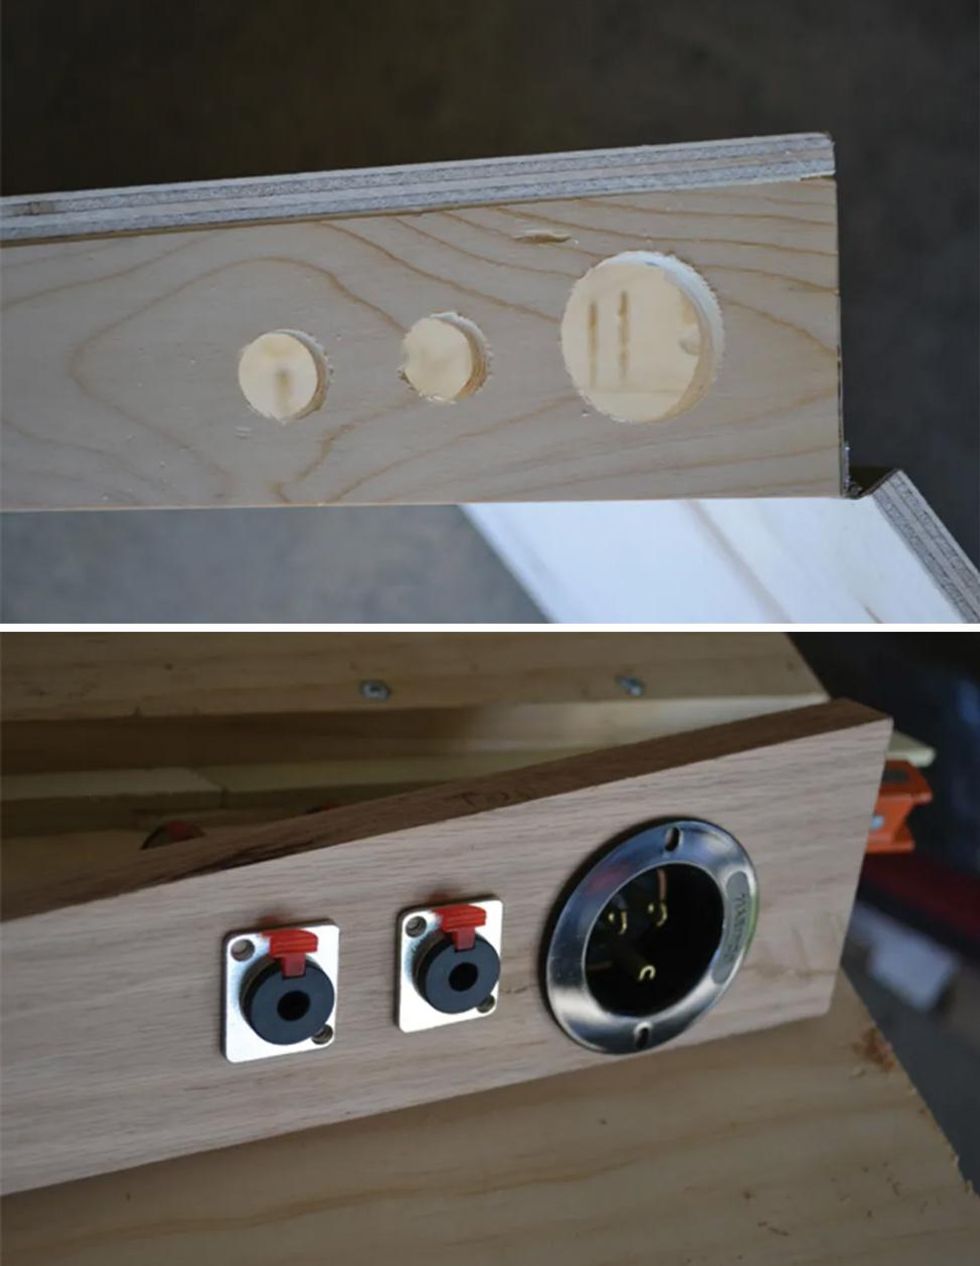
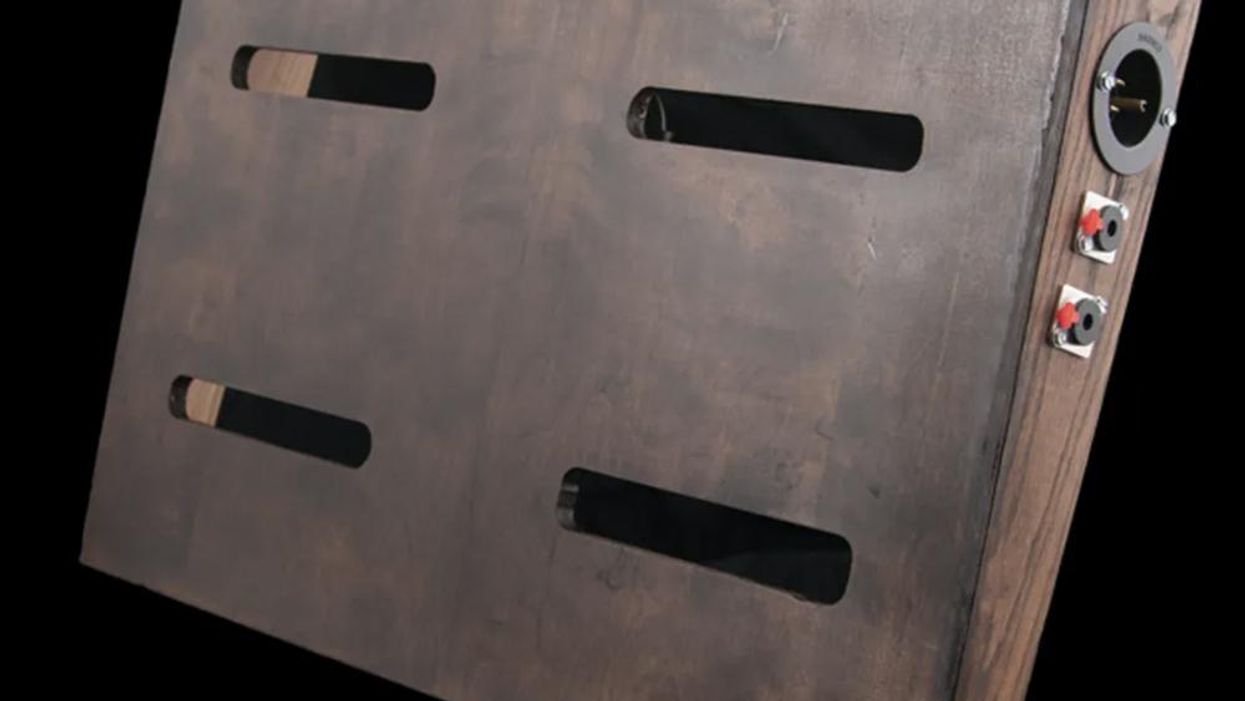
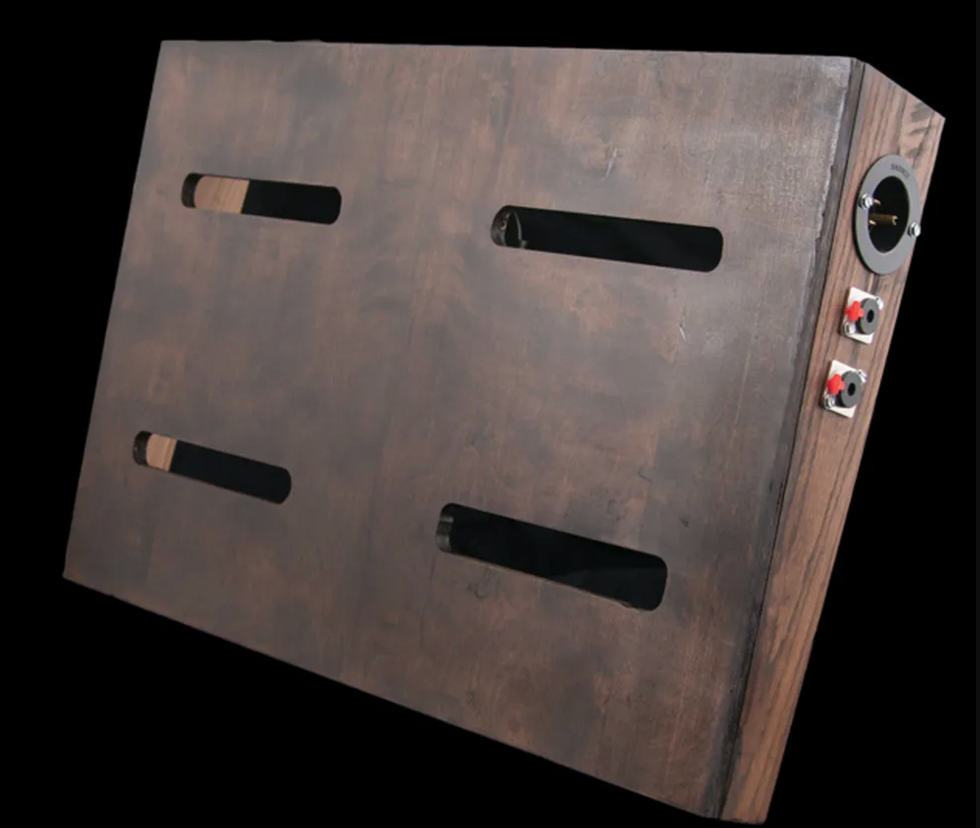
I cut the holes for the power inlet and neutrik connectors in the board's right side piece. I used a 7/8" hole saw for the smaller holes, and a 1 3/8" hole saw for the larger one. If you prefer adding more jacks for, say, an effects loop or a parallel acoustic setup, add the appropriate number of connectors using the same tools.
Step 5
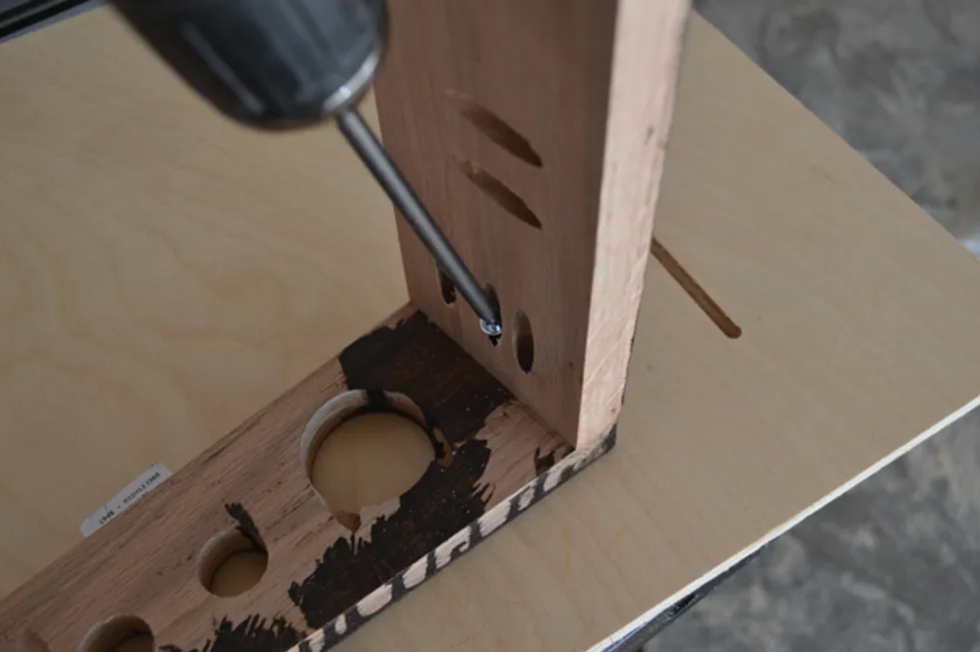
To assemble the frame, we need holes for the screws. I used a kreg jig to pre-drill all the holes with a 3/8" drill bit. for a secure fit, I used two 1 1/4" screws for the front two edges, and three for each of the back corners. be sure to use fine-threaded screws, which prevent splintering and hold things together much tighter. While you're tightening the screws, make sure everything is square and level so it won't rock back and forth during use—the last thing you need to worry about while performing is whether you're stomping too hard.
Step 6
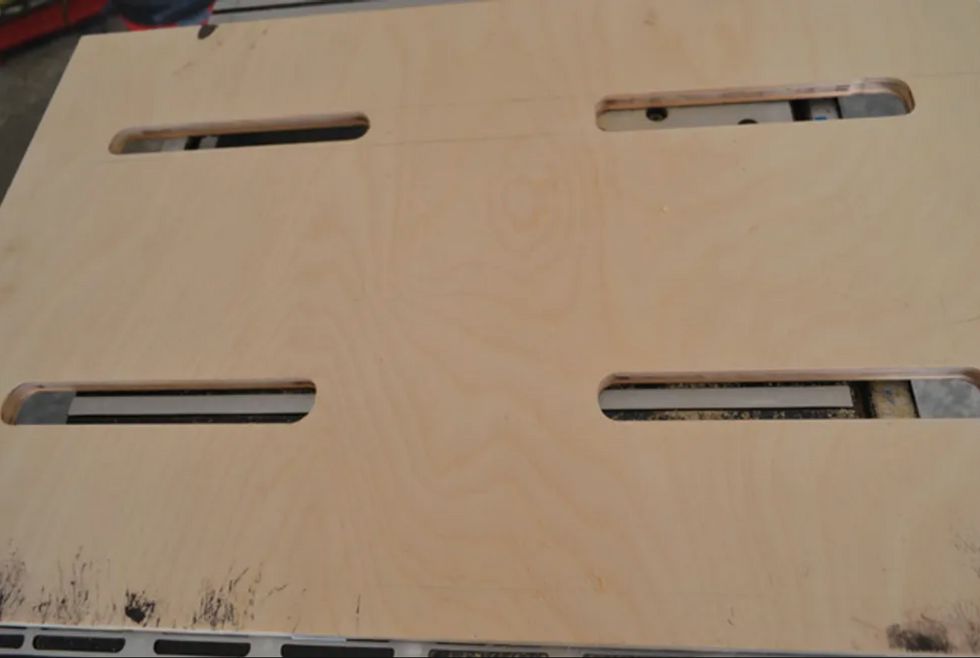
In order for the signal and power cables to pass efficiently throughout the board, I opted for a slotted pattern on the top piece. I used a 1/2" straight bit in my router to cut each channel. Each slot was 7" long, and I left 6" of wood between each pair. Be careful about placing the slots too close together—it can weaken the top of the pedalboard.
Step 7
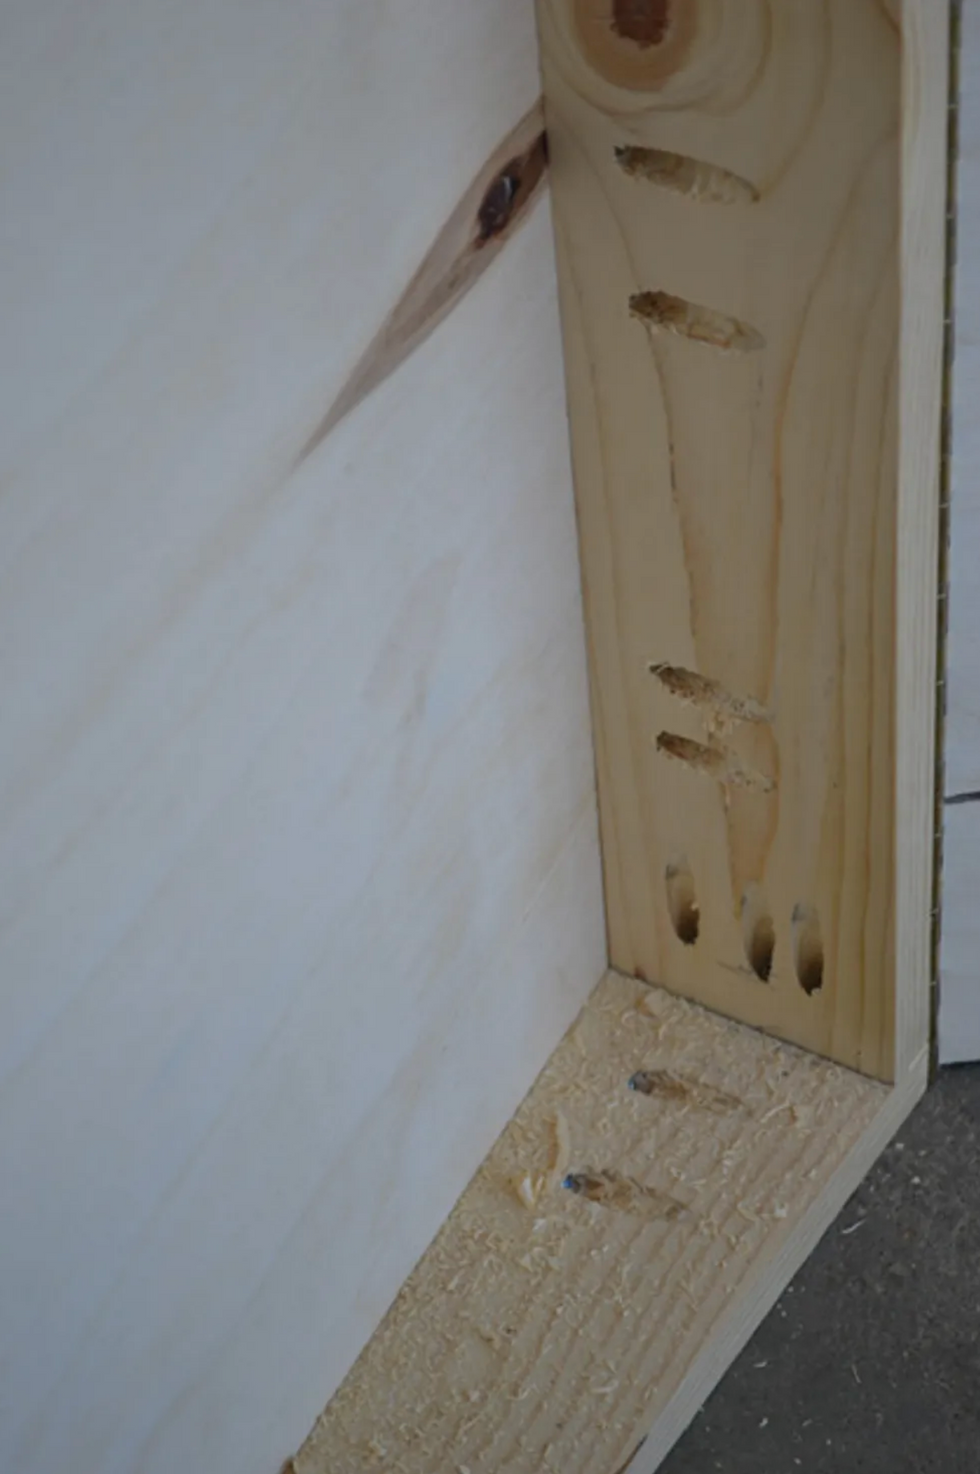
To attach the top piece, I used the Kreg jig and a 3/8" drill bit to pre-drill three pairs of holes along each surface. I spaced them 7" apart along the front and back, and 3" apart along the sides. The top of my board is 1/2" thick, so I used 1" wood screws that wouldn't puncture the top surface. Using screws rather than glue makes it so I can easily remove the top if I ever want to replace or repair anything.
Step 8
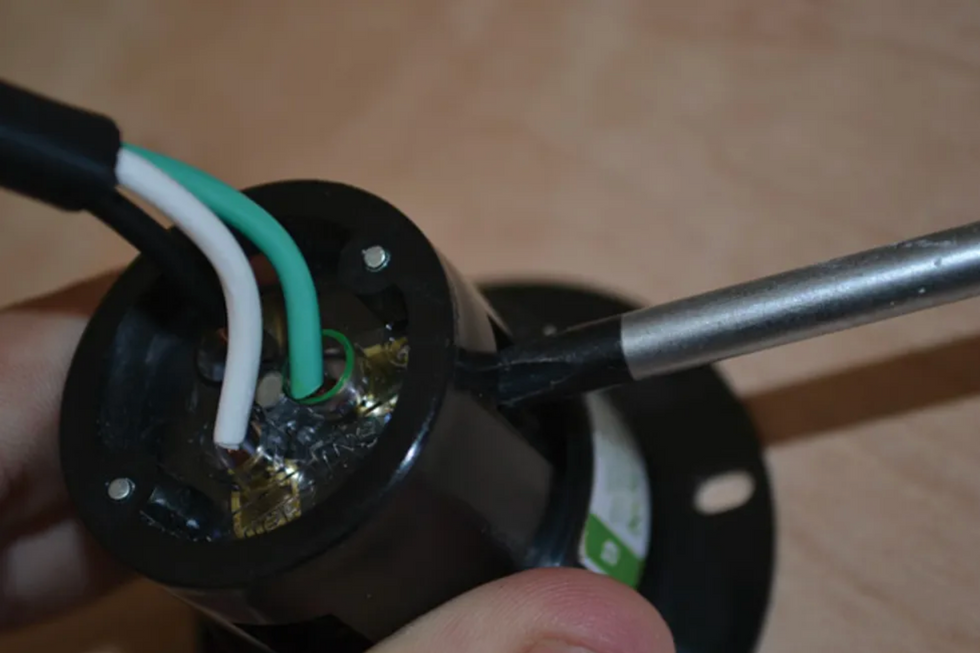
Now it's time to wire up the hardware connectors. I didn't want to risk a bad connection with the power jack, so I used a Marinco 5278BL flanged inlet, which lets you connect wires with screws rather than solder. (You can find this part, as well as the solderless connectors, at pedalboardshop.com.)
To begin, snip the male end from a regular IEC power cord. Inside you'll see three wires with black, green, and white insulation. Strip about 1/2" of the insulation from each wire, then match the wires with the corresponding inlet connectors. Finally, tighten each screw and wrap any exposed wire with electrical tape.
Step 9
Before attaching the hardware, apply whatever finish you prefer. I used a dark polyurethane stain. Don't be afraid to do a few coats to achieve the desired hue, just make sure you wipe the board thoroughly between each one. After the stain has dried, be sure to sand the top surface of your board so that whatever you use to attach the pedals—be it Velcro or a specialized product like Godlyke's Power-grip—has a nice surface to bond to.
Step 10
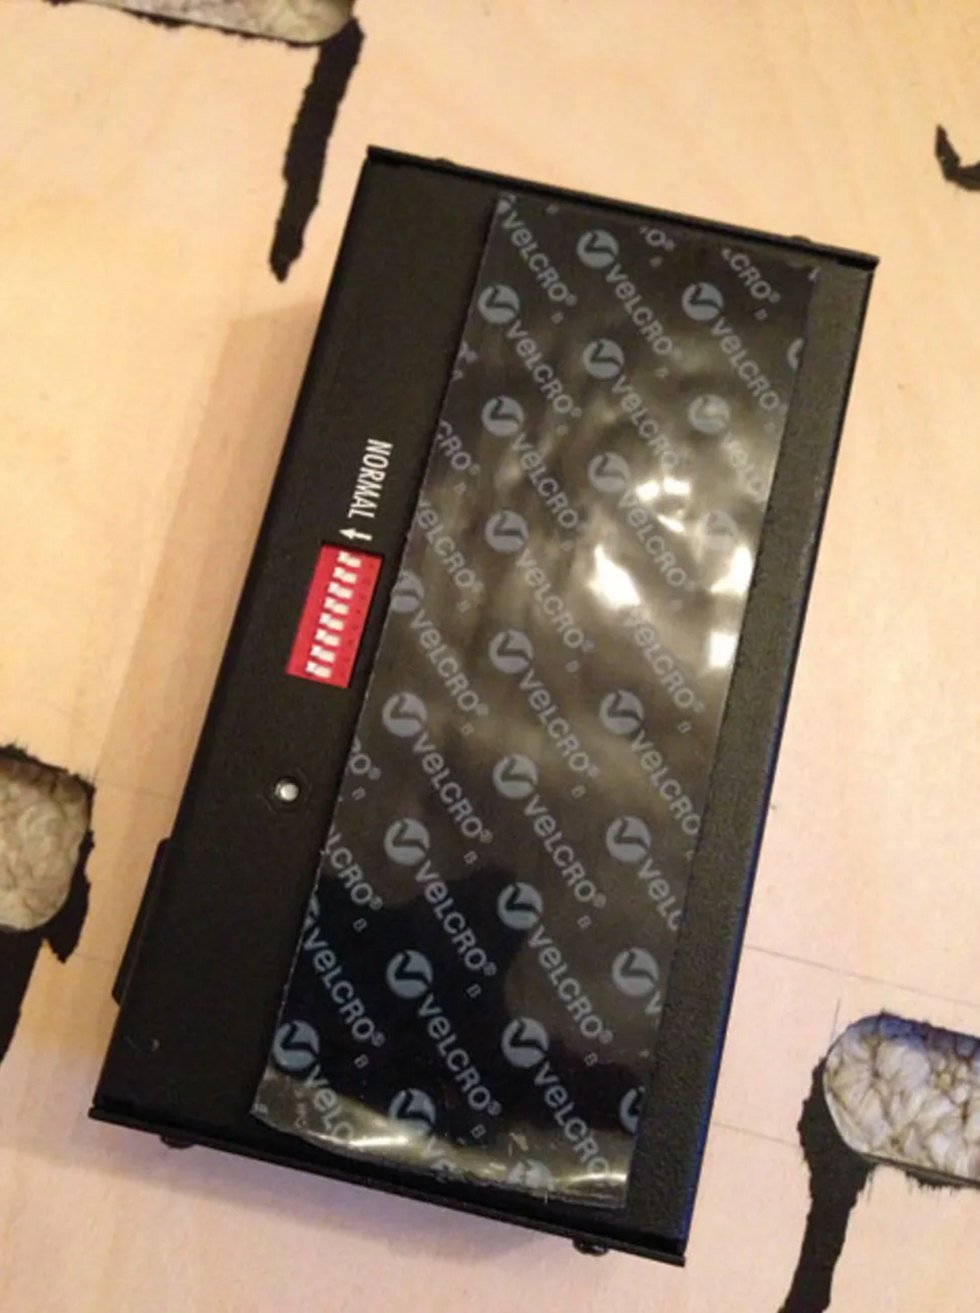
To facilitate a power supply upgrade or replacement in the future, I used a 2" strip of industrial-strength Velcro to attach the power supply to the underside of the top piece.
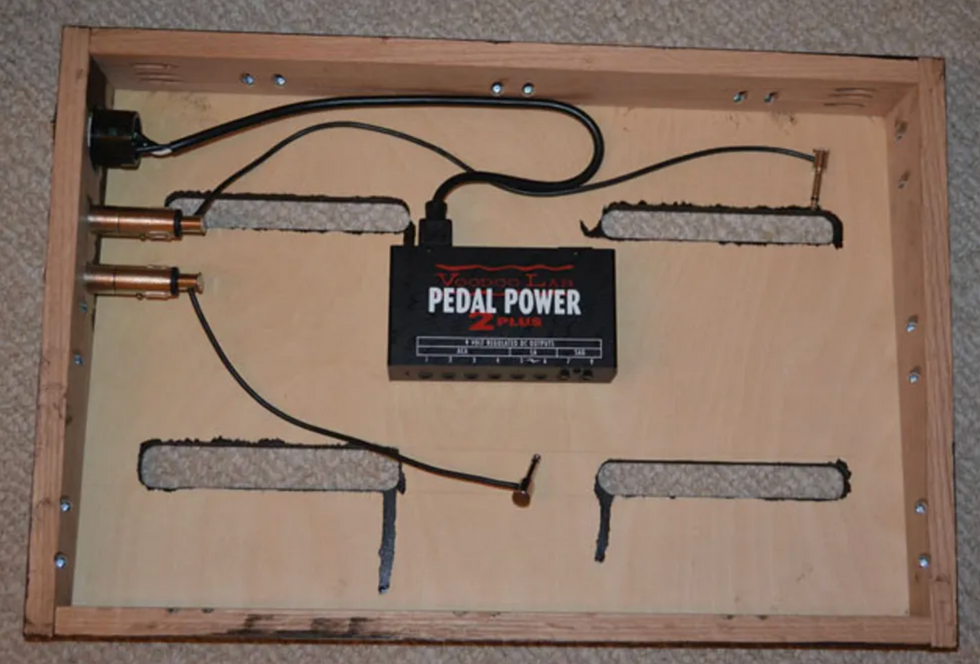
Mount the power supply and install the wired inlet and solderless connectors with 1/2" wood screws.
Use fine-grit (at least 220) sandpaper to sand the surface nice and smooth so the Velcro adheres sufficiently.
That's it! Once you've attached your pedals and wired up your power and signal cables, you're ready to plug in and go—enjoy!
Special thanks to Mason Marangella from Vertex Effects, David Quinones from Blackbird Pedalboards, Luke Summers from Agape Custom Shop, and Michael Helweg from Helweg Pedalboards.
[Updated 7/27/21]


![Rig Rundown: Russian Circles’ Mike Sullivan [2025]](https://www.premierguitar.com/media-library/youtube.jpg?id=62303631&width=1245&height=700&quality=70&coordinates=0%2C0%2C0%2C0)