The other day I was replacing a pickup in my “Zombie-Caster” and noticed that several of the pickguard screws were spinning in their holes. Like many players, I change out pickups and pots from time to time. While this has many sonic benefits, it causes wear and tear on the guitar body. If screws are frequently removed and re-inserted, their threads can bore out the wood, enlarging the screw holes. Eventually the screws can become so loose they no longer secure the pickguard to the body.
Fortunately it’s easy to repair stripped screw holes. Although I’ll use a Strat and its top-mounted pickguard to illustrate the process, the essential technique works with any solidbody guitar. And with a little creativity, you can also adapt this doweling method to other types of screw-mounted hardware, such as pickup mounting rings, strap buttons, and truss rod covers.
Let’s take a look.
Note: This repair is intended for a “player” instrument—not a collectable, vintage guitar. The latter must be kept in original condition to maintain its value. Always consult a qualified luthier if you have a vintage axe that requires work.
Getting started. To fix stripped screw holes, you’ll need an electric drill with 3/16" and 5/64" bits, a medium tip Phillips head screwdriver, a flush cut saw, a small hammer, wood glue, and a 3/16" dowel rod made of poplar, basswood, or maple (Photo 1).
Once you’ve gathered your tools and materials, take the strings off your guitar and remove all the pickguard screws. On a Strat- or Tele-style guitar, you don’t need to unsolder anything—just gently turn the pickguard upside down and lay it on the body with the wires connected.
As you remove the screws, make note of which holes are stripped. If a pickguard screw feels snug as you turn it, then leave that hole alone.
The doweling concept. I often see a patched screw hole with a toothpick and some glue shoved into it. This temporary fix may get you through a few gigs, but it usually wears out quickly. The best way to permanently repair a stripped hole is to re-drill it and then fill it with a glued-in wooden dowel.
To ensure the repair will last, the key is to use a dowel that’s a bit larger than the original hole. It’s a simple, two-step operation: First drill the screw hole to a larger diameter, and then plug it with a solid piece of wood. Using a 3/16" wooden dowel creates a solid “sleeve” for the screw to thread into, and this will last just as long as the original body wood.
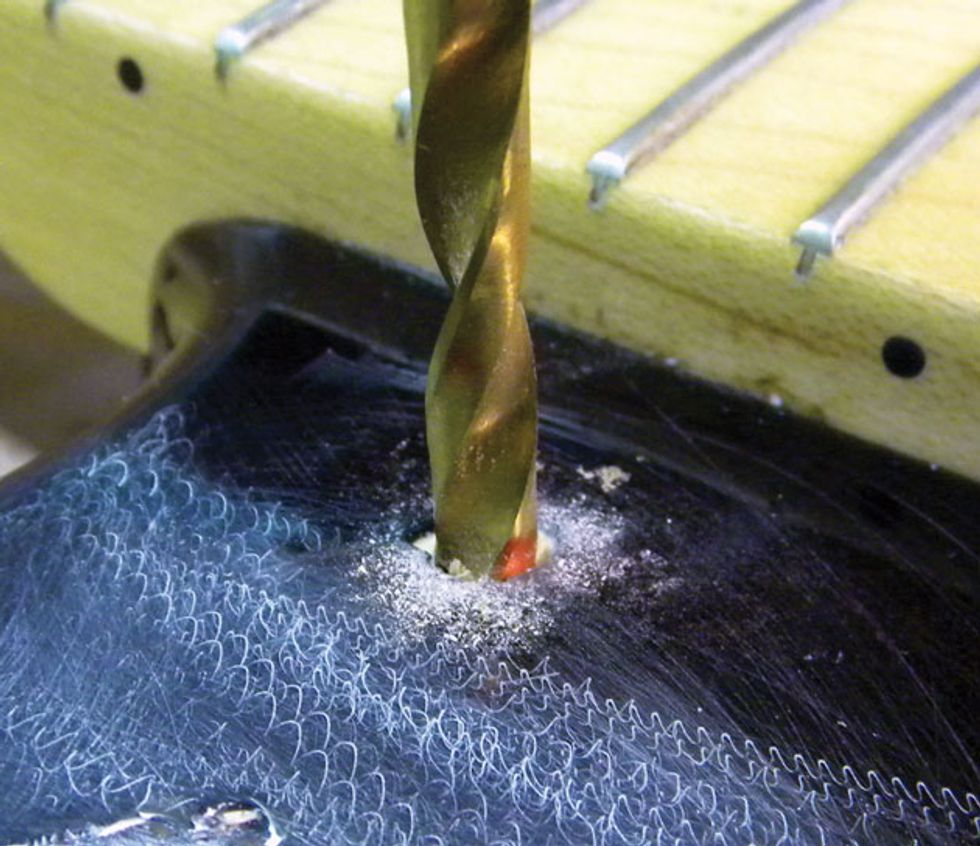
Photo 2
Drill, baby, drill. The next step is to drill out each stripped hole using a 3/16" drill bit. Measure the pickguard screw, and then make a mark on your bit that’s about 1/32" deeper than the length of the screw. I use a red Sharpie to indicate this depth (Photo 2), but alternatively you can use a slender strip of masking tape or a grease pencil. The idea here is to avoid drilling too deep a hole.
Tip: To drill a straight hole, watch your drill bit—it should stay perpendicular to the body.
Plugging the hole. Now it’s time to prep the dowel. From your dowel stock, carefully cut off a piece that will protrude about 1/4" from the hole you just drilled. You can measure the depth using a guitar string or skinny drill bit and then transfer that length to the dowel stock.
Before you insert the new dowel piece, fill the hole with wood glue. Keep a damp paper towel nearby to wipe up any drips or overflow. For this job, I like to use Titebond II because you can mix it 50/50 with water and it will still create a very strong bond. Here’s the advantage of diluting Titebond II: The thinner solution makes it easier to saturate the hole and dowel, and it absorbs deeper into the wood than if you were to use the thick formula straight from the bottle.
Tip: I mix a small bottle of Titebond II and water to keep around the shop for this type of project.
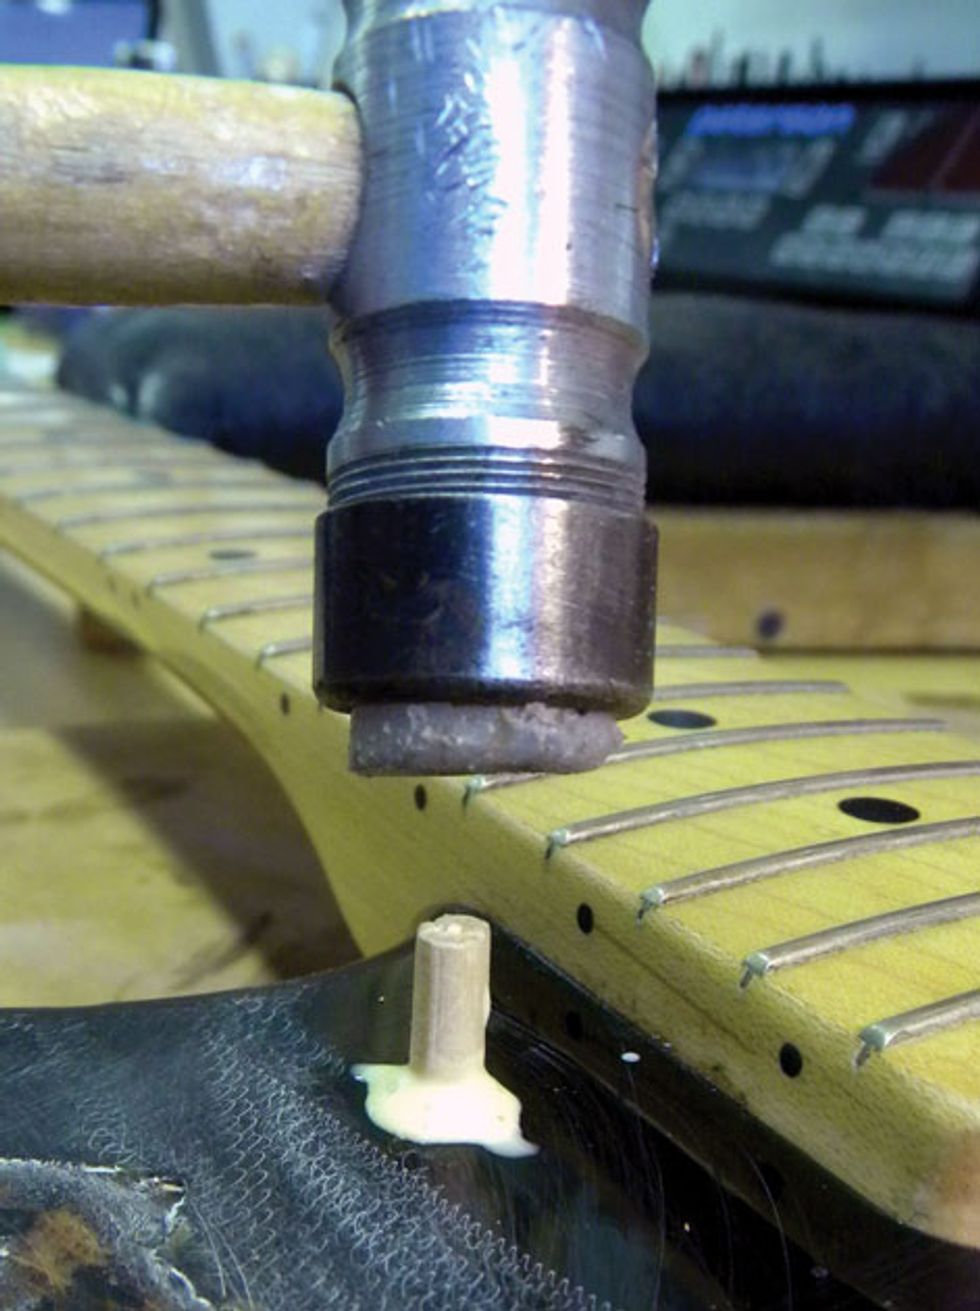
Photo 3
With a small hammer (preferably one with a nylon tip, like those used to install frets) lightly tap the dowel into the hole (Photo 3). Go easy—you don’t want to splinter the dowel or have the hammer slip off and ding your guitar.
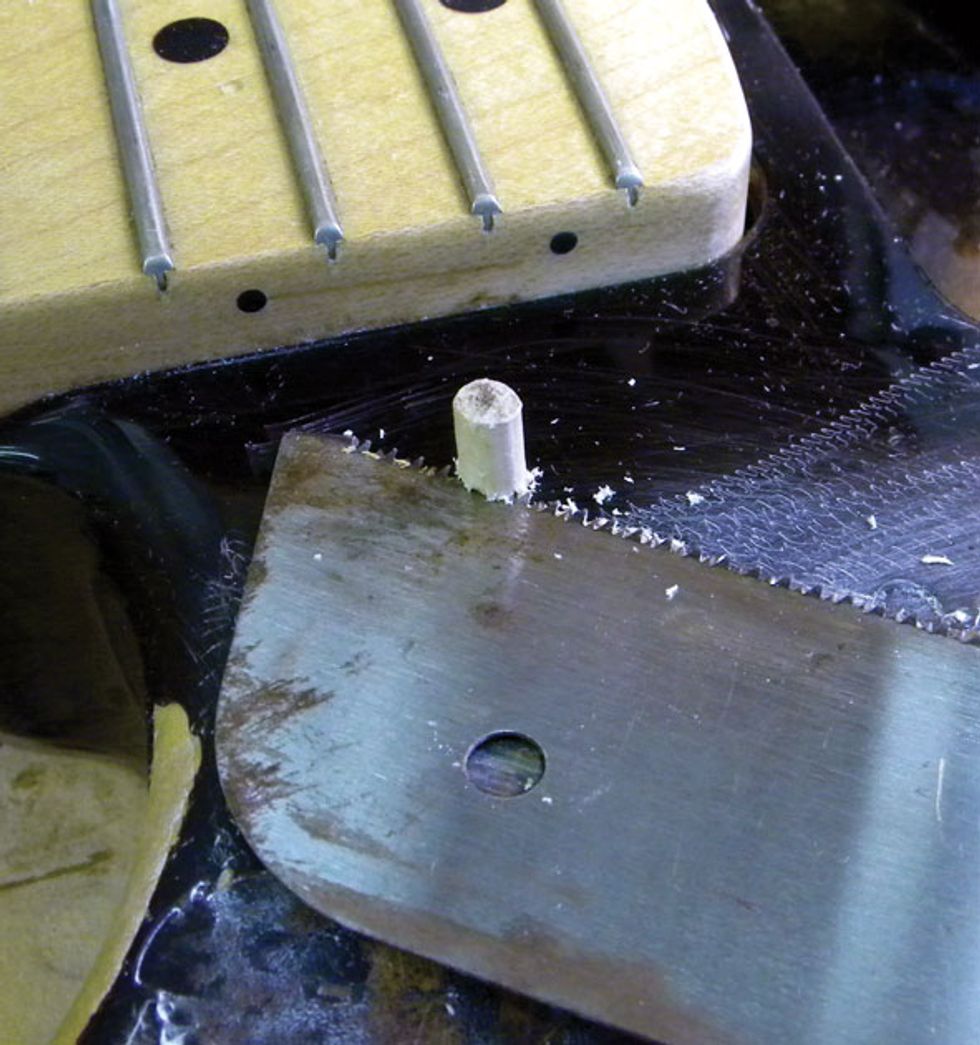
Photo 4
Let the glue dry overnight. If you get impatient and start drilling your new hole before the glue is fully dry, you’ll have a mess and need to start all over again. (Hmm, does that sound like the voice of experience?)
Trimming the dowel piece. After you’ve let the glue dry overnight, it’s time to trim off the section of the dowel that’s sticking up from the hole. There are two tools that will work for this task—flush-cut dykes or a small flush-cut pull saw. I prefer the latter because although the dykes will work, you run the risk of crushing the dowel. A flush-cut saw is very flexible, which allows you to cut the dowel level with the body. To avoid scarring the exposed finish, keep the blade pointed toward the area that will be covered by the pickguard (Photo 4).
Drilling the new hole. Once the dowel is trimmed flush, put the pickguard in place and line it up with the screw holes. Install the screws into any holes that were not doweled.
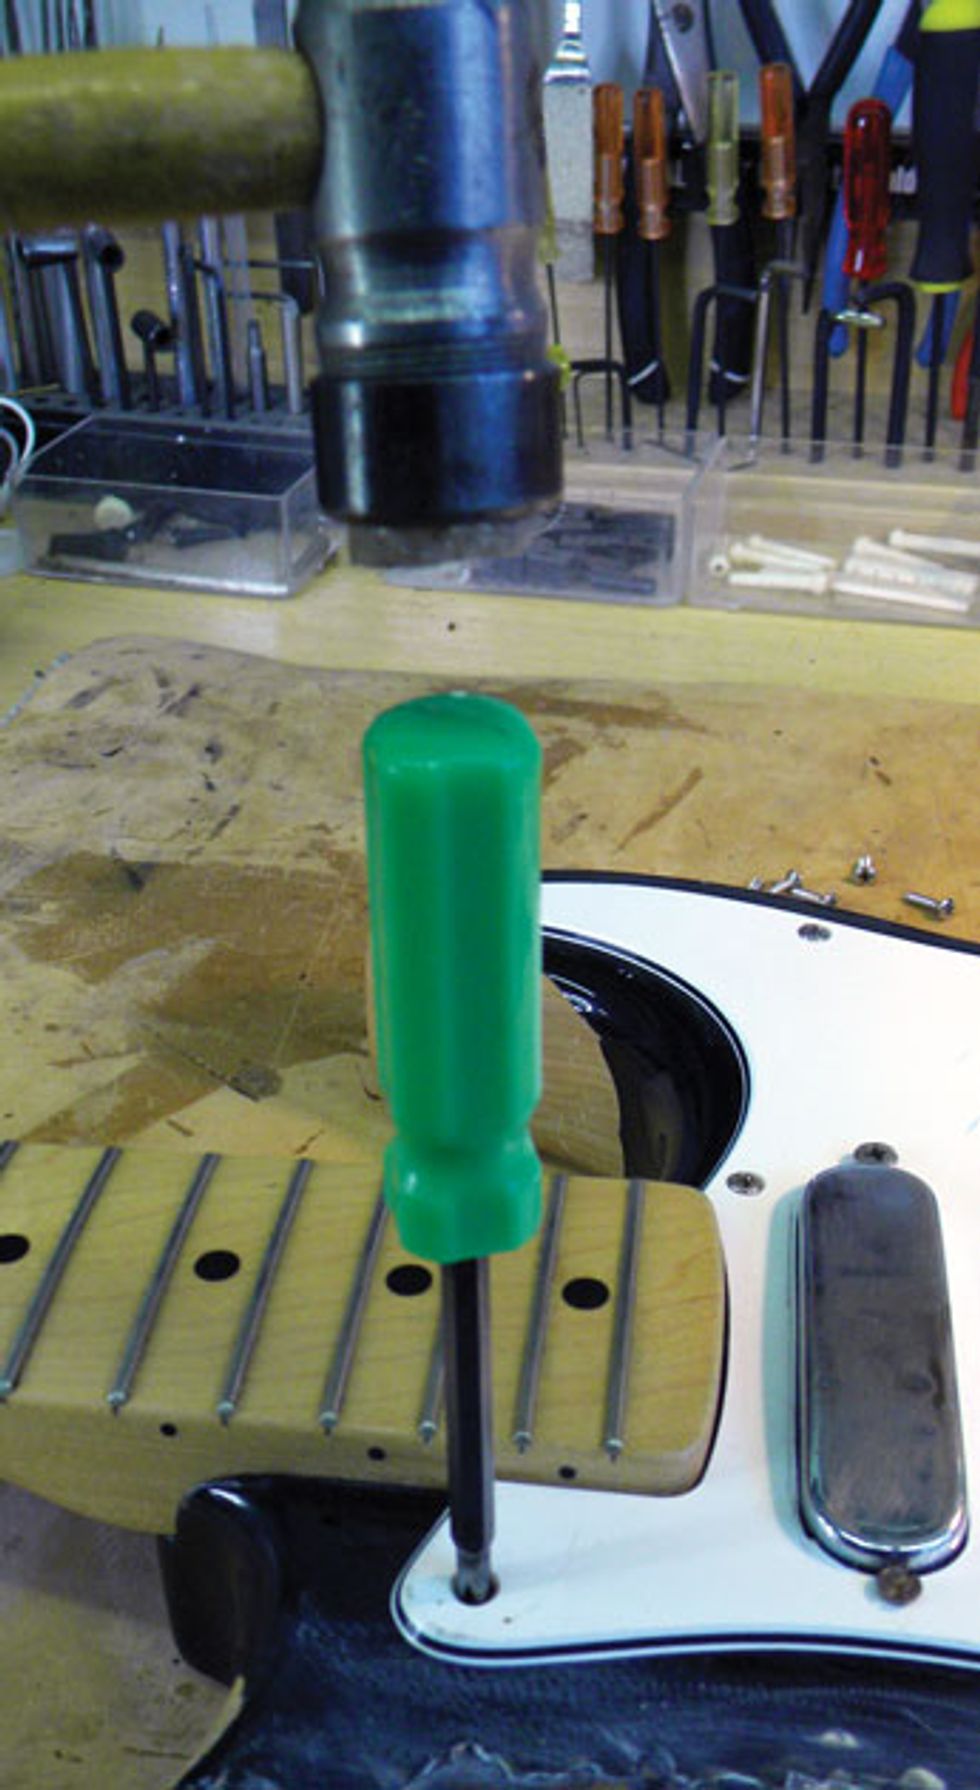
Photo 5
Next, using the pickguard as a guide, make a pilot hole for your 5/64" drill bit by lightly tapping the dowel with a medium Phillips screwdriver (Photo 5). Its tip leaves an imprint in the dowel—perfect for centering your drill bit and keeping everything aligned correctly (Photo 6).
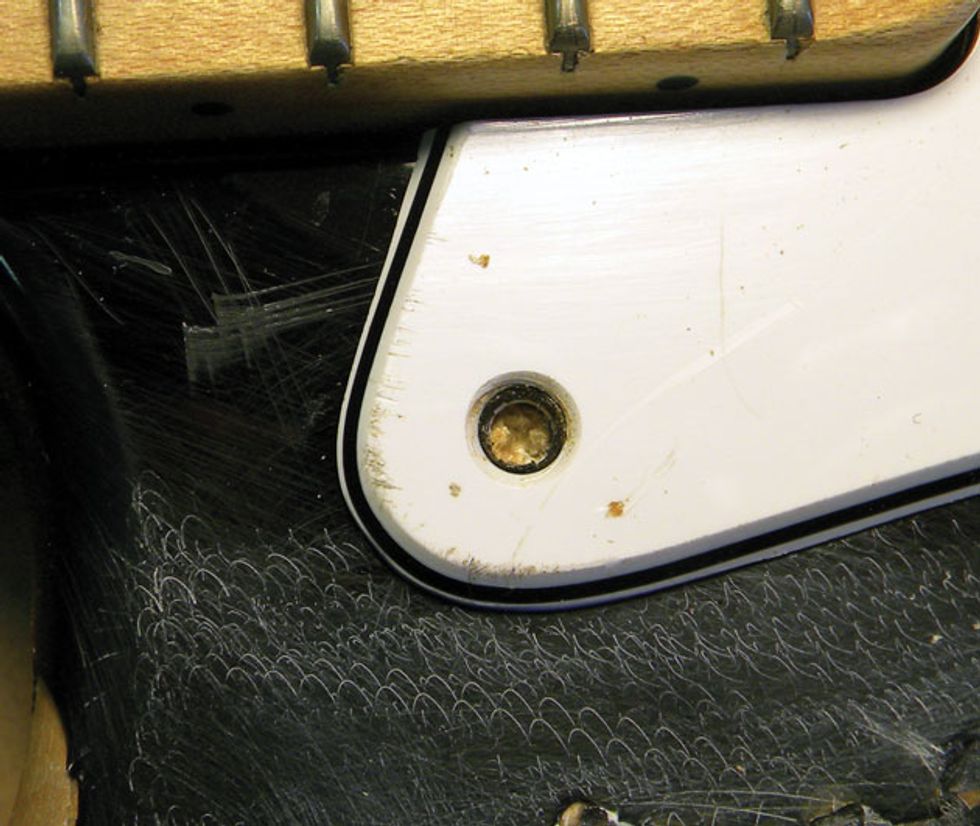
Photo 6
Okay, you know what comes next: Re-drill the new hole using a 5/64" drill bit. But before you hit the on switch, measure the screw and mark the bit, so you know how deep to drill (Photo 7). Typically this will be about 3/8".
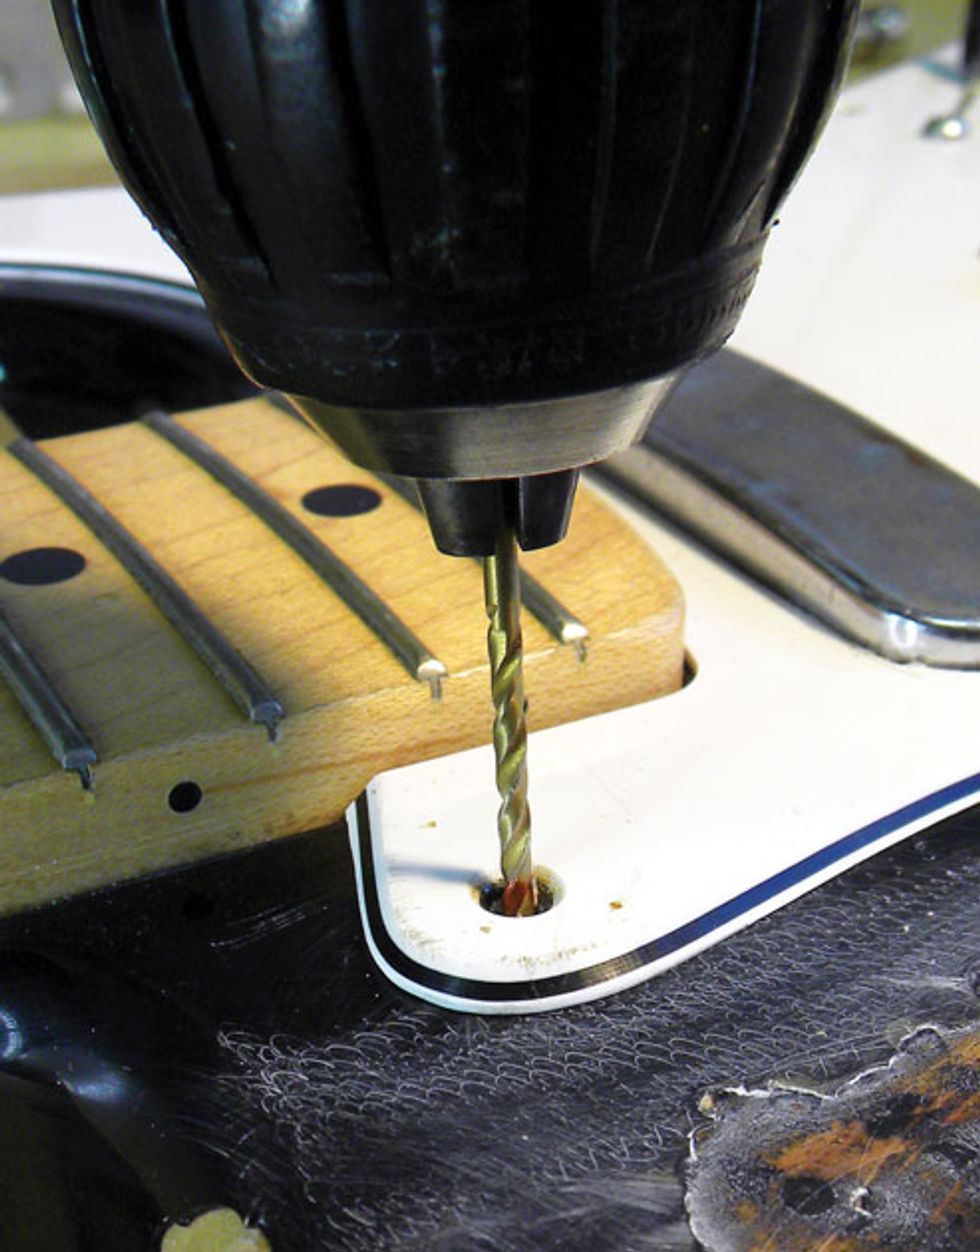
Photo 7
After drilling out each new screw hole, install the remaining screws. If the tops of any screws are worn, replace them with new ones. On a worn screw, the metal can corrode and weaken over time, especially when the screw begins to rust. The last thing you need is to strip out the head, or worse yet, break it off orphaning the shaft inside the body. Pickguard screws are inexpensive, and you’ll save time, money, and aggravation by replacing them before they fail.
Slowly tighten the pickguard screws. Don’t go all Tarzan on them, just make them snug. (Ever wonder how screw holes get stripped to begin with?) Once you’ve secured the pickguard, it’s time to clean up—you’re done with this project.