
Here’s a description of the tools you need to handle routine maintenance tasks.
If you’re the kind of guitarist who likes to work on instruments—doing your own basic setup and maintenance, for example—you need to have the right tools at your fingertips to get the job done correctly. With simple tools, good instruction, and a modicum of patience, you’ll save yourself money and have the satisfaction of keeping your guitar or bass in top playing condition.
And here’s another important payoff: By performing routine maintenance and basic setups on your instruments, you can better understand how they actually produce sound, and ultimately this will improve your playing.
A well-equipped guitar shop has lots of tools (Fig. 1)—with good reason. The professional luthier or repair person has the training and experience to handle the kind of projects that require an expert, such as fixing broken headstocks, doing fretwork, installing tremolo systems, and dozens of other demanding tasks. Fortunately, maintaining your guitars doesn’t require a complete workshop. Let’s take a look at the essential tools you’ll need for the kind of projects that fall within a musician’s purview.
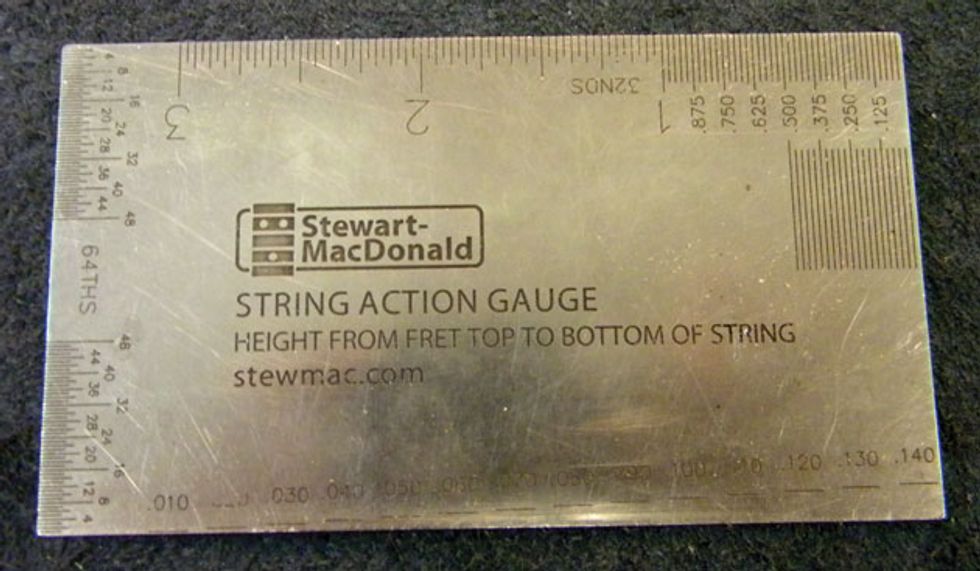
Fig. 2. The String Action Gauge from Stewart-MacDonald (stewmac.com) is designed to precisely and quickly measure action and neck relief.
Measuring tools. An invaluable part of any kit is the String Action Gauge (Fig. 2) from Stewart-MacDonald (stewmac.com). I use this tool daily—it’s perfect for measuring action at both the 12th fret and nut, and also determining neck relief. You control the latter by adjusting the truss rod, and this handy gauge lets you accurately measure relief before and after making any adjustments.
Another useful tool is a 6" machinist’s metal rule. You can use this when adjusting pickup height or anytime you need precise measurements for replacement hardware, knobs, tuners, and so on.
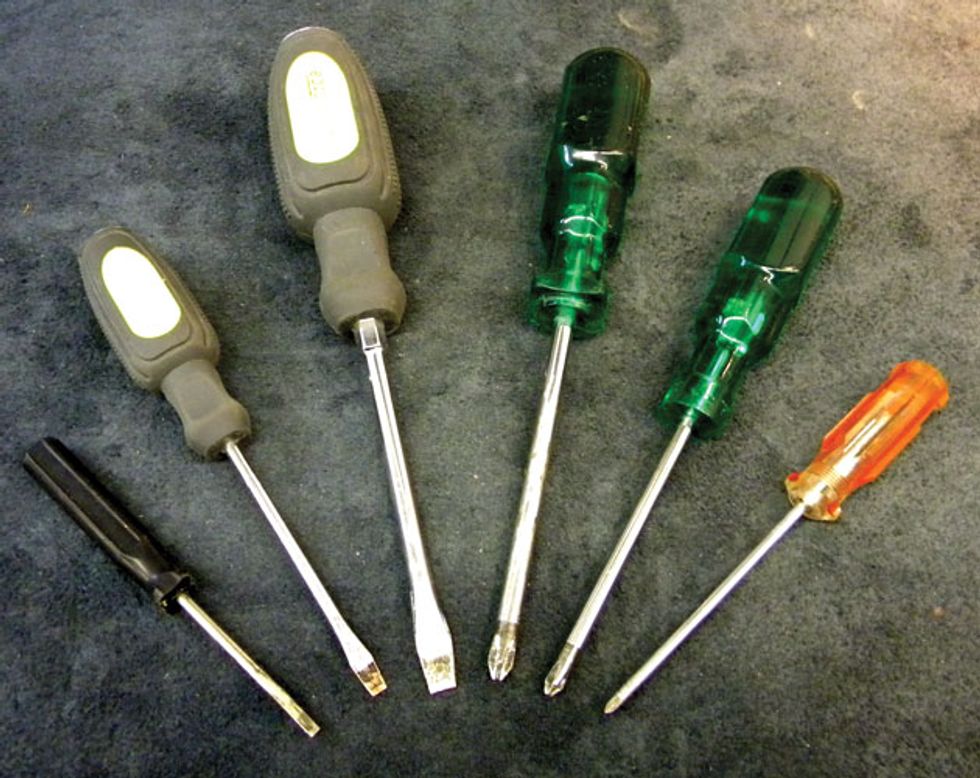
Fig. 3. Three flathead and three Phillips screwdrivers in large, medium, and small sizes will cover most jobs.
Screwdrivers, nut drivers, and hex keys. I recommend having six different screwdrivers on hand: three flathead and three Phillips in large, medium, and small sizes (Fig. 3). Parts you can adjust with these include pickguard screws, jack plates, neck bolts, tuning key screws, bridge plates, certain truss rods, and some bridge saddles. Having several sizes lets you handle most types of screws used on guitars.
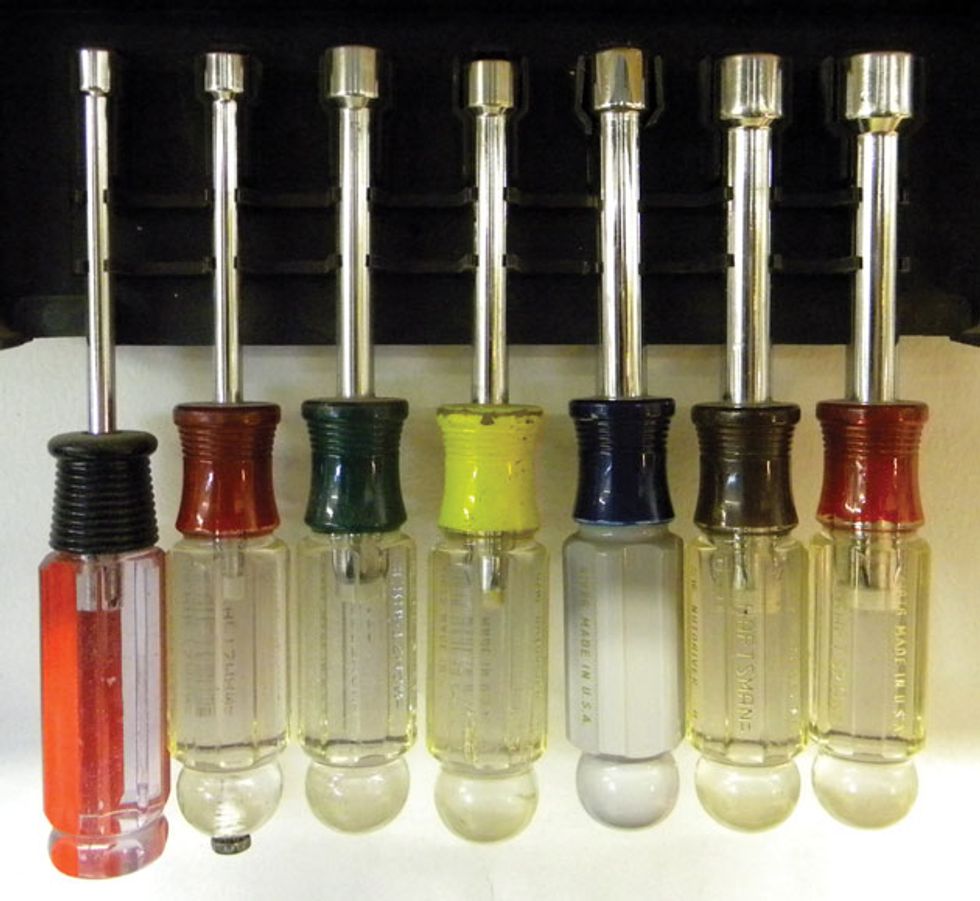
Fig. 4. Nut drivers are essential for tightening output jacks, tone and volume pots, switches, tuner collars, and some truss rods.
Nut drivers (Fig. 4) are great for tightening output jacks, tone and volume pots, switches, tuning key collars, and some truss rods. I’d suggest you keep seven different sizes in your kit: 3/16" and 11/32" for mini switches, 5/16" for Gibson truss rods, 1/4" for Taylor, Guild, and many other truss rods, 1/2" for most potentiometers and jacks, 7/16" for import jacks and potentiometers, and 10 mm for tuning key collars.
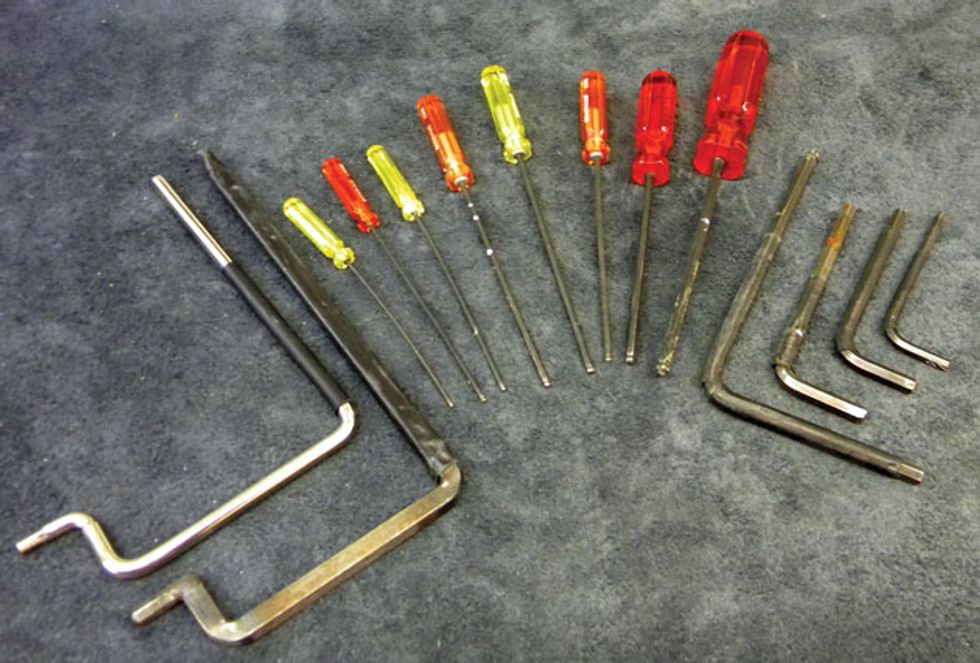
Fig. 5. Many guitar adjustments are done with hex keys. The two odd-looking tools on the left are designed to reach truss rods accessed through a flattop’s soundhole.
Having a set of hex keys is essential for adjusting your guitar at home and on the fly. I use about 13 different sizes on a regular basis (Fig. 5). You may not need all 13, but it’s a good idea to collect all the hex keys that fit your guitars. Here are the go-to hex keys in my toolkit: .050", 1/16", 3/32", 1/8", 9/64", 5/32", 3/16", 1.5 mm, 2 mm, 2.5 mm, 3 mm, 4 mm, 5 mm. Having both metric and imperial (U.S.) sizes means you’ll be able to adjust most bridge saddles, truss rods, locking nuts, tremolos, and much more.
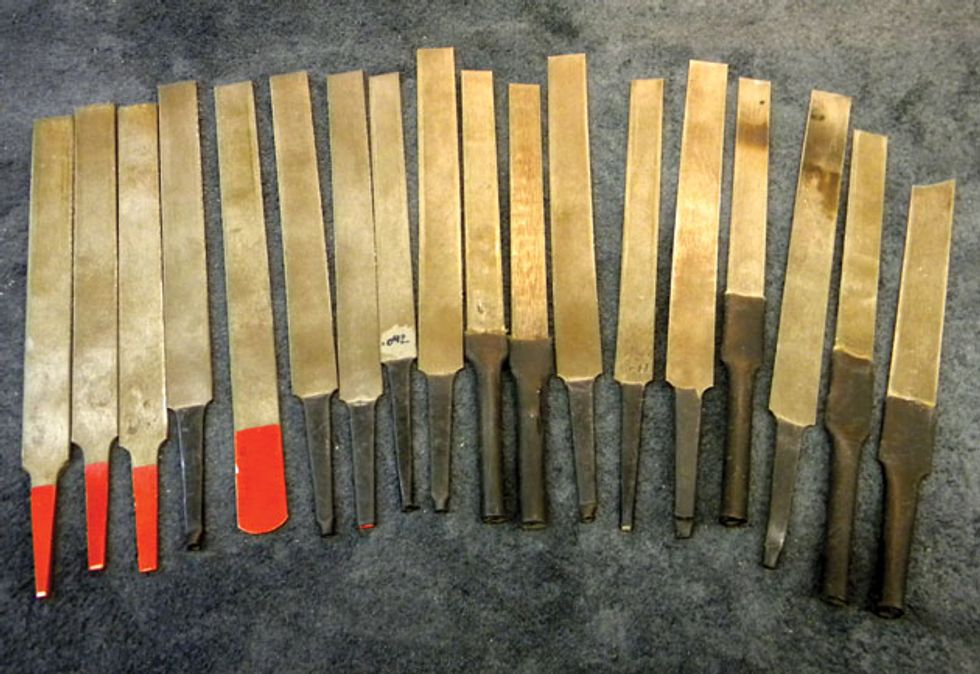
Fig. 6. Unlike regular files, nut files produce round-bottom slots that correspond to different gauges of strings.
Nut files. Unlike regular files, these specialized files are designed to produce round-bottom slots that correspond to strings of different gauges (Fig. 6). Nut files come in handy when you have a string that’s constantly hanging up at the nut and causing tuning problems. Many luthier suppliers sell single nut files or sets of them. Although most sets don’t match the exact string gauges you might use, that’s not a problem. I typically select a file that’s slightly smaller than the string and then simply roll the file as I work the slot to expand it to the right width. I recommend you have at least six files—one for each basic string width.
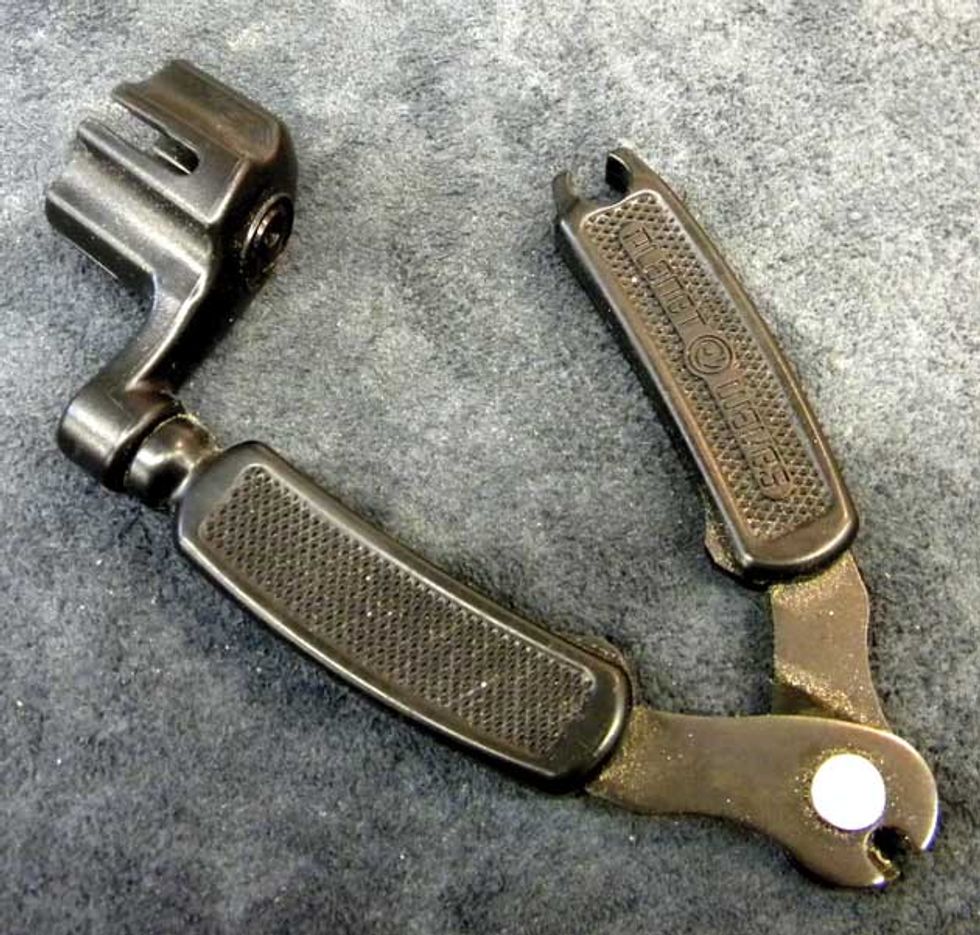
Fig. 7. This Planet Waves ProWinder includes a string-cutter and bridge-pin puller.
String winder and wire cutter. Few things make changing strings easier than a string winder. In fact, it’s good to have two: One in your toolkit and one in your gig bag to ease that panicked feeling when you break a string at soundcheck. There are several great string winders on the market. If you prefer a manual string winder, check out the Planet Waves ProWinder (Fig. 7). It fits the tuners on most acoustic and electric guitars, as well as mandolins. It also has a built-in string cutter and if you have a flattop, you’ll appreciate the bridge-pin puller. There are winders for bass, too.
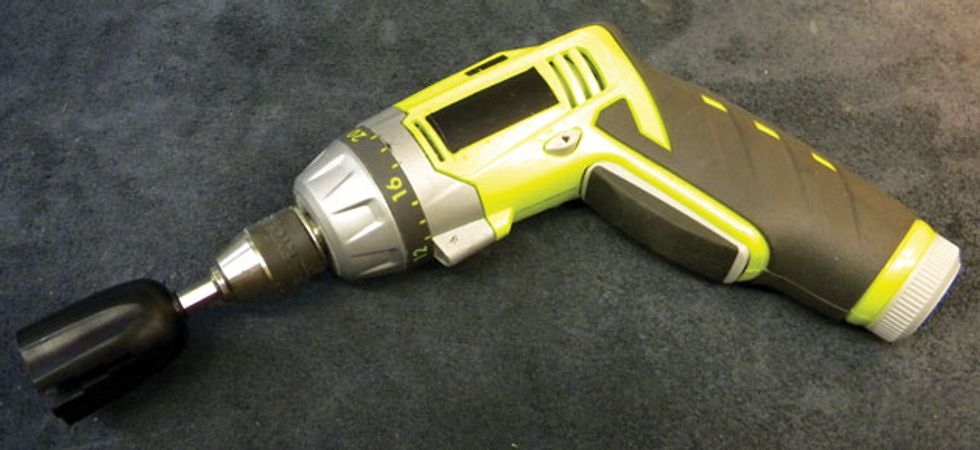
Fig. 8. Got a hand drill? You can get a string-winding attachment for it.
If you’re like me and prefer an attachment for your hand drill, Planet Waves also makes a Drill Bit Peg Winder (Fig. 8). It’s sized to fit both guitar and bass tuners. It really speeds up the stringing process. Just chuck it into your drill and start winding. The hardest part of using a drill bit winder is remembering which direction the drill is about to turn. You’ll get the hang of it after you use it a few times.
For trimming strings, it’s always good to have a solid pair of wire cutters in your kit, especially if you use a drill bit winder, which won’t have a built-in clipper. And a wire cutter is essential when you rewire a guitar or work on its electronics.
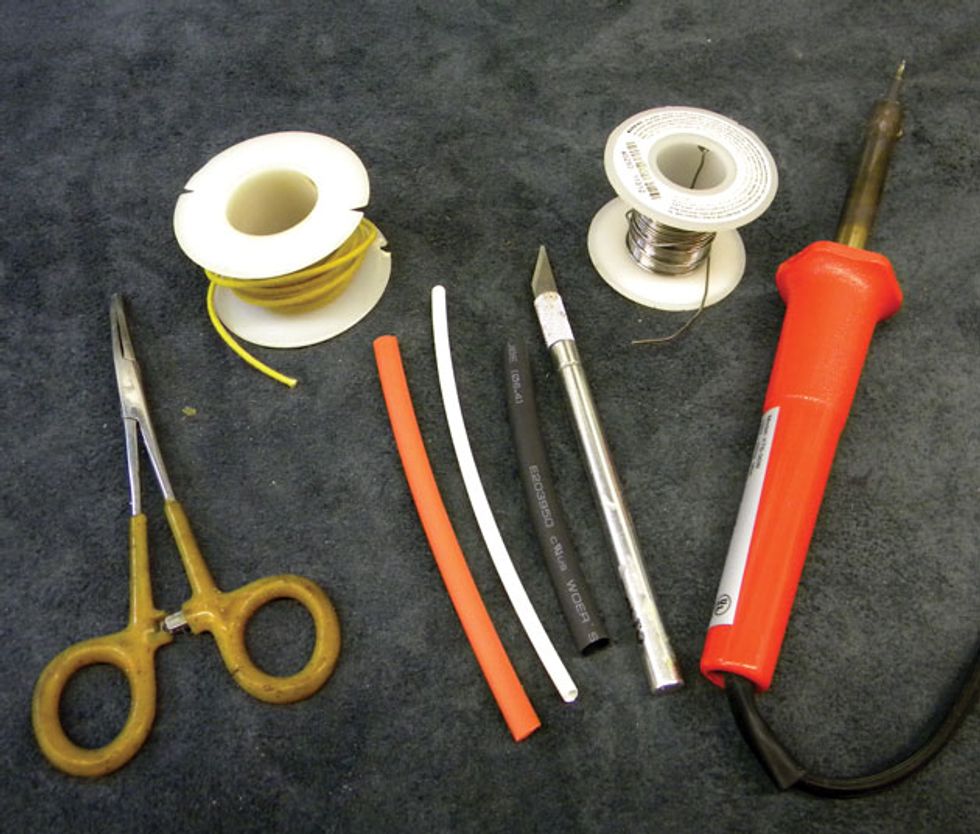
Fig. 9. Guitarists who want to tinker with potentiometers, pickups, and circuitry need a basic soldering kit.
Soldering supplies. A soldering kit (Fig. 9) is another must-have for any guitarist who wants to tinker with potentiometers, pickups, and circuitry. Plus you never know when you’ll have to re-attach a wire to your jack or one of the switches or pots.
Here’s what I keep in my soldering kit: 60/40 rosin core solder (not acid core), 30-watt soldering iron (don’t use a soldering gun because it can degauss pickup magnets), cloth-covered stranded wire (not solid core wire), hemostats for holding wires and parts while you solder them together, and heat-shrink tubing to make the wiring job look professional and provide insulation. Most soldering irons include a small stand for your iron. If you don’t yet have a stand, get one for safety.
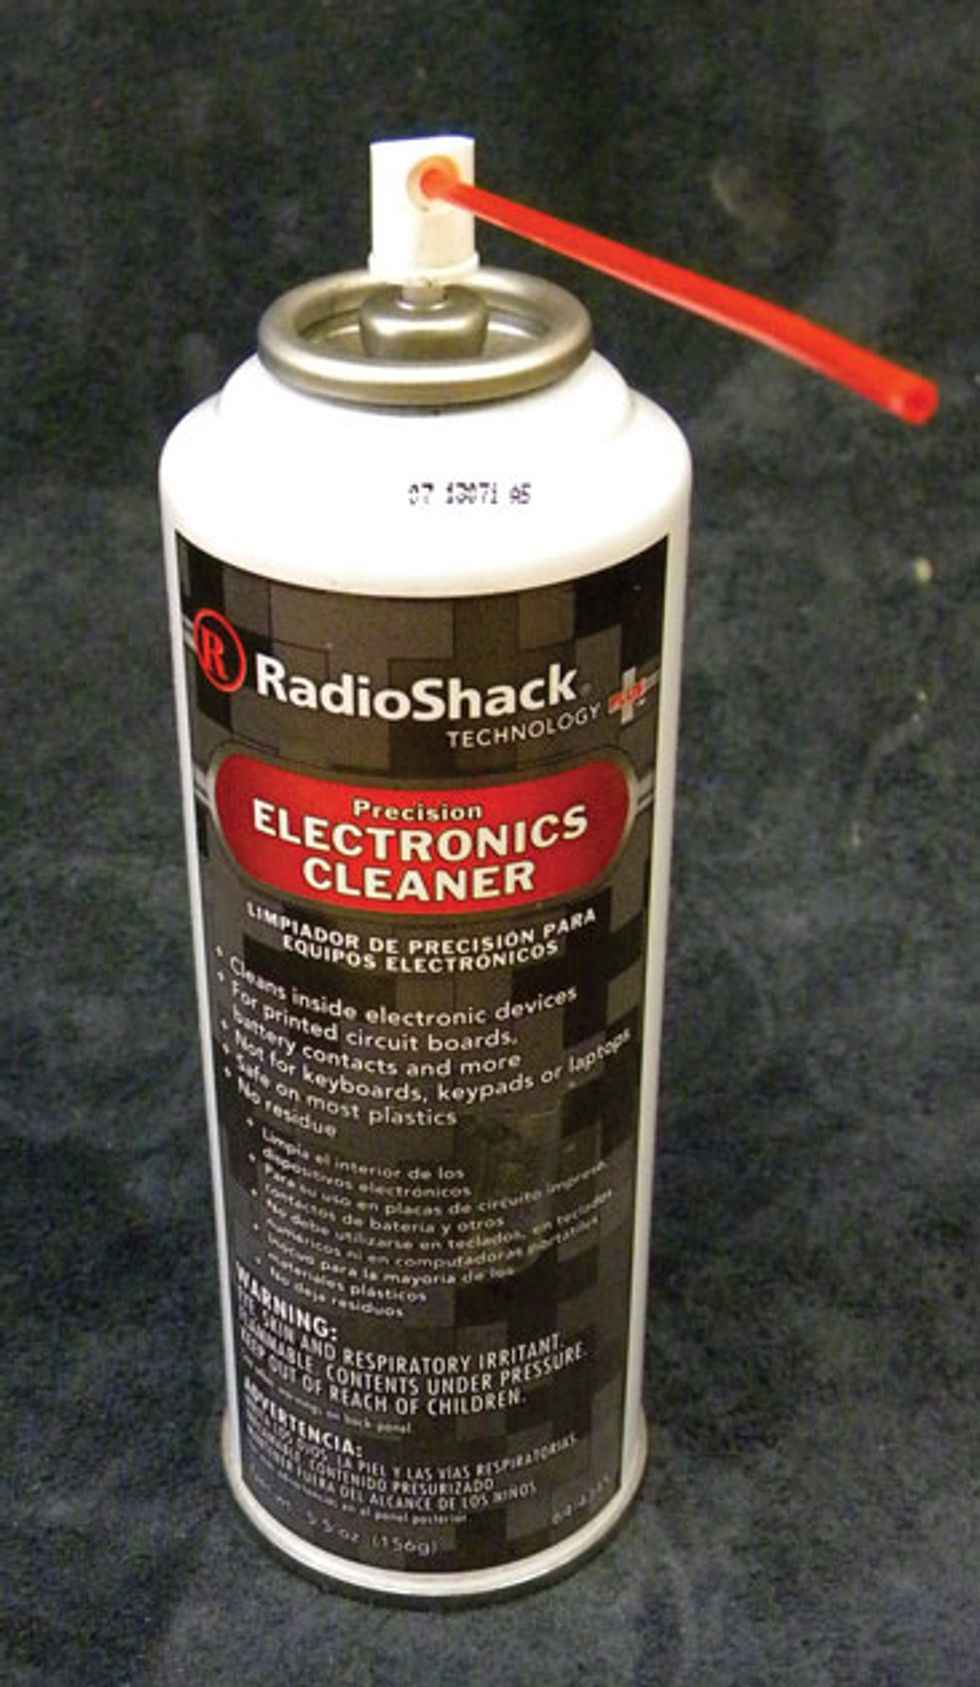
Fig. 10. Keep a can of electronics cleaner handy for fixing scratchy pots.
And while we’re discussing electronics, keep a spray can of electronics cleaner handy for fixing scratchy pots (Fig. 10).
Glue. If you’re entertaining the idea of gluing a guitar’s parts, you may have crossed the line that separates “setup or mod projects a guitarist can handle” from “this is a job for a professional.” Don’t get in over your head. When in doubt, take the instrument to your favorite tech.
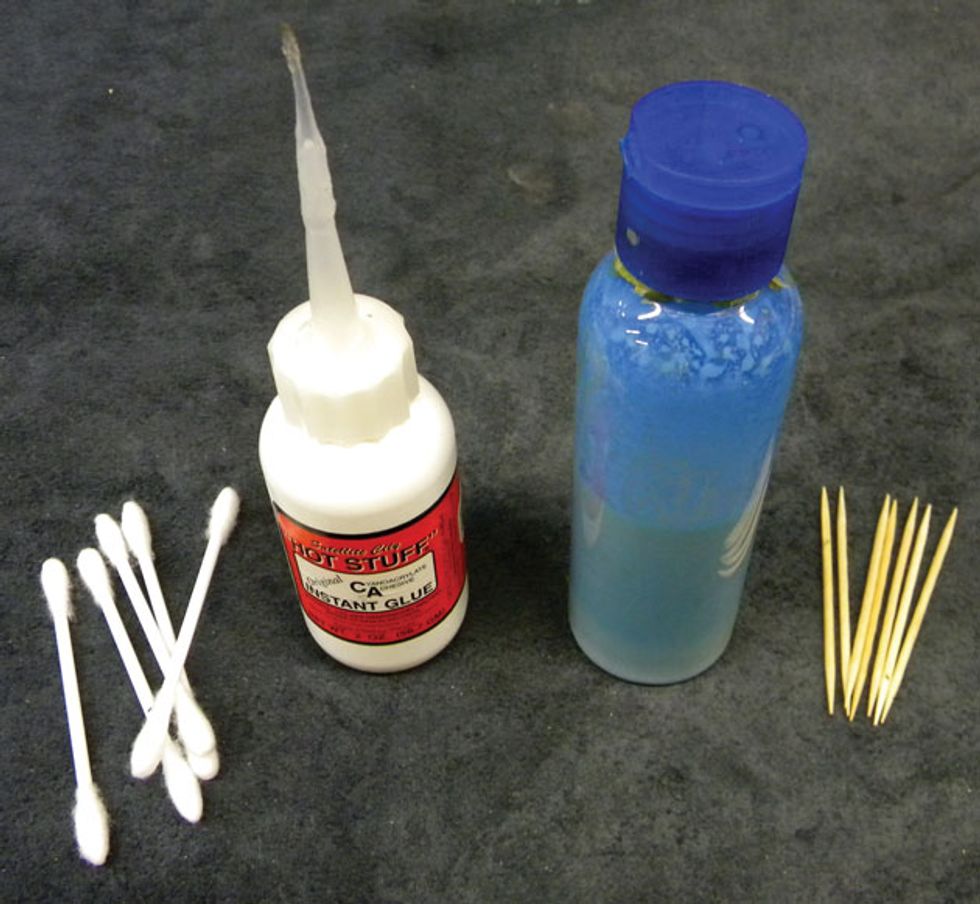
Fig. 11. Along with a few toothpicks and some Q-Tips, fast-acting cyanoacrylate adhesives like Super Glue can be useful for emergency repairs.
That said, two small bottles of glue can go a long way when your guitar needs an emergency repair. Your toolkit should have a bottle of Titebond wood glue and a small bottle of cyanoacrylate, such as Super Glue. In addition, stock up on a few toothpicks and Q-Tips (Fig. 11).
Combined with a toothpick or two, wood glue can temporarily secure a loose strap button—at least until you can get the instrument to a repair shop. This combination also works well for fixing stripped holes for pickguard and pickup ring screws.
Super Glue is perfect for gluing a loose string nut or temporarily filling a nut slot to get you through a gig. The Q-Tips are essential for immediately cleaning up any excess glue. In fact, whenever you’re holding instant glue in one hand, you should always have a Q-Tip in the other! If you spill or squeeze out too much glue, a Q-tip works great for a quick cleanup.
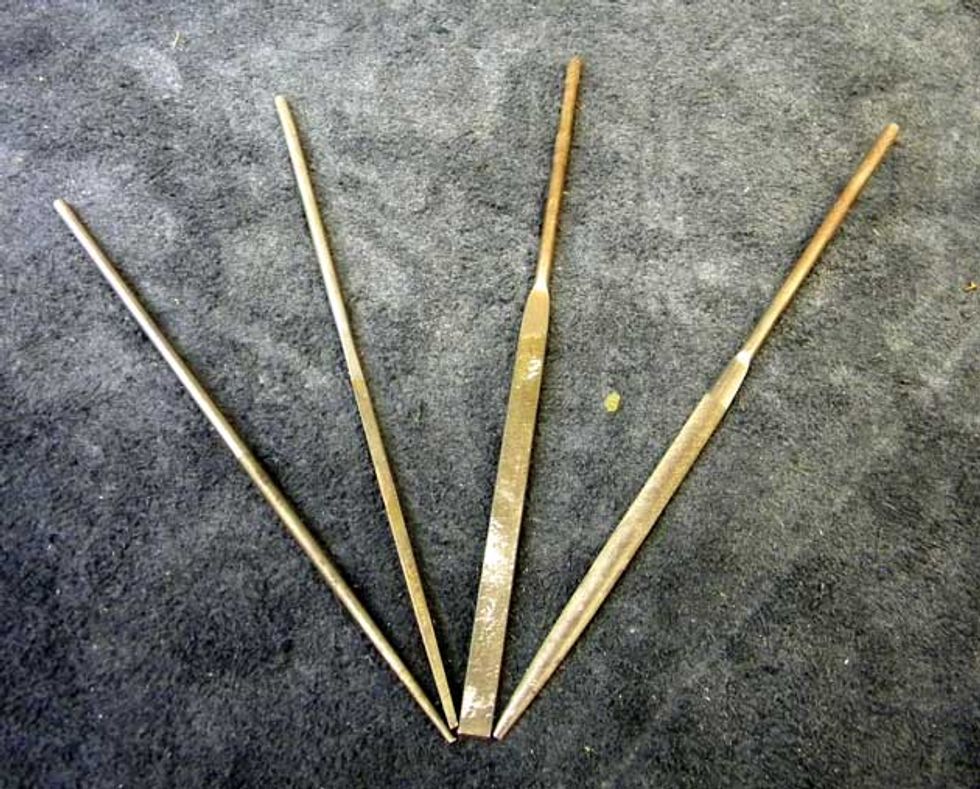
Fig. 12. A set of miniature bastard files can remove a burr from a bridge saddle, smooth out a sharp fret end, and perform many other useful tasks.
Files. A set of miniature bastard files can solve a lot of little problems, including removing a burr from a bridge saddle, smoothing out a sharp fret end, carving string slots into the nut on a bass, widening the string slots in an acoustic bridge, and much more. They are available in many shapes and sizes. I have four main shapes in my kit: round, flat, half-round, and square (Fig. 12).
If you have several instruments, it’s good to invest in a carefully organized and well-stocked toolkit. You may find you enjoy the process of maintaining your axes almost as much as playing them.- Guitar Shop 101: Touch-up a String Nut with Super Glue - Premier Guitar ›
- Can You Build a Pedal with No Experience? | PG DIY - Premier Guitar ›
- Spend More Time Playing Your Dang Guitars and Less Time Fixing ’Em - Premier Guitar ›
- The Inexpensive, Everyday Tools That Live on My Workbench - Premier Guitar ›
This wonky Zim-Gar was one of many guitars sold by importer Gar-Zim Musical Instruments, operated by Larry Zimmerman and his wife.
The 1960s were strange days indeed for import guitars, like this cleaver-friendly Zim-Gar electric.
Recently I started sharing my work office with a true gem of a guy … one of the nicest fellas I’ve ever come across. If you’ve been following my column here, you might remember my other work mate Dylan, who is always telling me about new, fad-type things (like hot Honey guitars) and trying to convince me to use AI more. (What can I say, he’s a millennial.) But Steve, on the other hand, is about 10 years my senior and is a native New Yorker—Brooklyn actually, from the Canarsie neighborhood. Steve is a retired teacher and spent many years teaching in the Brownsville area of Brooklyn, and man, he has some amazing stories.
Mostly we talk about music and sports (he’s exiled here among us Philadelphia sports fans) and he’s just endlessly interesting to me. He has a huge appetite and can eat a whole pizza. When he talks, he sounds like one of the Ramones and he still has an apartment in Rockaway Beach. We both love Seinfeld and, like George Costanza, Steve knows where all the great bathrooms are across New York City. Since he’s been added to my circle (and is such a mensch), I decided I should work him into a column.
So here’s the connection: Back in the day there were many American importers, dealers, and wholesalers. A lot of them were based in New York, Chicago, and Los Angeles, but I only know of one guitar importer located in Brooklyn: Gar-Zim Musical Instruments. The company was run by Larry Zimmerman and his wife, and the couple had some success importing and selling Japanese guitars and drums. I used to see early Teisco imports with the Zim-Gar badge, which was the brand name of Gar-Zim. I’ve also seen Kawai guitars with the Zim-Gar label, but the Zimmerman’s seemed to sell cheaper and cheaper gear as the ’60s wore on, including the piece you see here.
“This build reminds me of the cutting boards I used to make in wood shop back in my high school days.”
The model name and factory origin of this guitar is a mystery to me, but this build reminds me of the cutting boards I used to make in wood shop back in my high school days. The guitar is just flat across the top and back, with absolutely no contouring or shaping. Its offset body is plywood with a thin veneer on the top and back. From a distance this guitar actually looks kind of nice, but up close you can see a rather crude and clunky instrument that offers little flexibility and playability. The non-adjustable bridge is off center, as is the tremolo. It was really hard to get this guitar playing well, but in the end it was worth it, because the pickups were the saving grace. Another example of gold-foils, these units sound strong and raw. The electronics consist of an on/off switch for each pickup and a volume and tone knob. The tuners are okay, and the headstock design is reminiscent of the Kay “dragon snout” shape of the mid to late ’60s, which is where I would place the birthdate of this one, probably circa 1966. Everything is just so goofy about this build—even the upper strap button is located on the back of the neck. It reminds me of that era when simple wood factories that were making furniture were tasked with building electric guitars, and they simply didn’t know what they were doing. So, you get oddities like this one.
Gar-Zim continued to sell guitars and other musical instruments through the 1970s and possibly into the ’80s. I once even saw a guitar with the label Lim-Gar, which is totally puzzling. I think there should’ve been a Stee-Gar designation for my new buddy Steve-o! Yes, good readers, with guitars and me, there are always just a few degrees of separation.
Dive into the ART Tube MP/C with PG contributor Tom Butwin. Experience how this classic tube-driven preamp and compressor can add warmth and clarity to your sound. From studio recordings to re-amping and live stage applications, this time-tested design packs a ton of features for an affordable price.
Art Tube Mp Project Series Tube Microphone/Instrument Preamp
Designed in Rochester NY and originally released in 1995, the Tube MP is celebrating its 30th anniversary in 2025.
The Tube MP/C is the most fully-featured member of the Tube MP family, designed for recording guitarists and bassists. It is a tube mic preamp and instrument DI with advanced features including an optical compressor/limiter and switchable line/instrument output levels for use as a re-amping device.
See and hear Taylor’s Legacy Collection guitars played by his successor, Andy Powers.
Last year, Taylor Guitars capped its 50th Anniversary by introducing a new guitar collection celebrating the contributions of co-founders Bob Taylor and Kurt Listug to the guitar world. The Legacy Collection revives five of Bob Taylor’s classic acoustic models, curated by the legendary luthier and innovator himself. “To imagine that we’re doing guitars that harken to our past, our present and our future all at the same time,” Bob says, “I really like that.”
In developing the collection, Bob preserved the essence of his originals while integrating performance and playability upgrades introduced during his tenure as designer-in-chief. “It’s an up-to-date version of what those guitars would be,” Bob explains, “but with the same sound.”
Visually, these guitars feel classic—clean, understated and unmistakably Taylor. While Bob’s original aesthetic preferences are showcased in his Legacy models, the nod to the past runs deeper than trade dress.
From his earliest builds, Bob favored slim-profile necks because he found them easier to play. That preference set a design precedent that established Taylor’s reputation for smooth-playing, comfortable necks. Legacy models feature slim mahogany necks built with Taylor's patented New Technology (NT) design. “My first neck was a bolted-on neck but not an NT neck,” Bob says. “These are NT necks because it’s a better neck.” Introduced in 1999, the NT neck allowed for unprecedented micro-adjustability while offering a consistent, hand-friendly Taylor playing experience.
What makes this collection unique within the Taylor line is Bob’s use of his X-bracing architecture, favoring his time-tested internal voicing framework over more recent Taylor bracing innovations to evoke a distinctive tone profile. Since Andy Powers—Taylor’s current Chief Guitar Designer, President and CEO—debuted his patented V-Class bracing in 2018, V-Class has become a staple in Taylor’s premium-performance guitars. Still, Bob’s X-bracing pattern produces a richly textured sound with pleasing volume, balance and clarity that long defined the Taylor voice. All Legacy models feature LR Baggs VTC Element electronics, which Bob says “harkens back to those days.”
The team at Taylor thought the best way to demonstrate the sound of the Legacy guitars was to ask Andy Powers, Bob’s successor, to play them. A world-class luthier and musician, Andy has spent the past 14 years leading Taylor’s guitar innovation. In addition to V-Class bracing, his contributions include the Grand Pacific body style, the ultra-refined Builder’s Edition Collection, and most recently, the stunning Gold Label Collection.
Below you’ll find a series of videos that feature Powers playing each Legacy model along with information about the guitars.
Legacy 800 Series Models
First launched in 1975, the 800 Series was Taylor’s first official guitar series. Today, it remains home to some of the brand’s most acclaimed instruments, including the flagship 814ce, Builder’s Edition 814ce and new Gold Label 814e.
The Legacy 800 Series features the 810e Dreadnought and two Jumbos: the 6-string 815e and 12-string 855e. Each model serves up a refined version of the Dreadnought and Jumbo body shapes Bob inherited from Sam Radding—the original owner of the American Dream music shop where Bob and Kurt first met. “I was making my guitars in the molds that Sam had made at American Dream,” Bob recalls. “There was a Jumbo and a Dreadnought. That’s all we had.”
All three Legacy 800 Series guitars feature one of Bob’s favorite tonewood combos. Solid Indian rosewood back and sides are paired with a Sitka spruce top, yielding warm lows, clear trebles and a scooped midrange.
Aesthetic appointments include a three-ring abalone rosette, mother-of-pearl Large Diamond inlays, white binding around the body and fretboard, and Bob’s “straight-ear” peghead design. Both Jumbo models also showcase a mustache-style ebony bridge—a nod to Bob’s early Jumbo builds.
Legacy 810e
The 810 Dreadnought holds a special place in Bob Taylor’s heart. “My first 810, the one I made for myself, was a thrilling guitar for me to make,” he says. “It’s the one and only guitar I played. It didn’t matter how many guitars we made at Taylor, that’s the one I took out and played.” The Legacy 810e brings back that bold, room-filling Dreadnought voice along with the easy playability expected from a Taylor.
Taylor Guitars | Legacy 810e | Playthrough Demo
Legacy 855e
Taylor’s first 12-strings found an audience in 1970s Los Angeles. “I was making guitars that would find their way to McCabe’s in Santa Monica and Westwood Music,” Bob says, “and these guitars were easy to play. Twelve-strings were a popular sound in that music. It was a modern country/folk/rock music genre that was accepting our guitars because they were easy to play. They also liked the sound of them because our guitars were easier to record.” The Legacy 855e, with its resonant Jumbo body, slim neck and gorgeous octave sparkle, carries that tradition forward.
Taylor Guitars | Legacy 855e | Playthrough Demo
Legacy 815e
The Legacy 815e revives Taylor’s original Jumbo 6-string, delivering a big, lush sound with beautifully blooming overtones.
Legacy Grand Auditoriums
In the early 1990s, Bob Taylor heard a consistent refrain from dealers: “Not everybody wants a dreadnought guitar anymore.” Players were asking for something with comparable volume but different proportions—something more comfortable, yet still powerful. This feedback inspired Bob to design a new body style with more elegant curves, more accommodating proportions and a balanced tonal response. The result was the Grand Auditorium, which Taylor introduced in 1994 to celebrate its 20th anniversary.
Thanks to its musical versatility and easy playability, Bob’s Grand Auditorium attracted a wide variety of players. “We came into our own with our Grand Auditorium,” he says. “People were describing it as ‘all around.’ It’s a good strummer and good for fingerstyle, but it’s not totally geared toward strumming or totally geared toward fingerstyle.” Also referred to as the “Swiss-Army Knife” of guitars or the “Goldilocks” guitar, the GA quickly became a favorite among guitarists across playing styles, musical genres and different playing applications including recording and live performance. “That guitar made studio work successful,” Bob says. It gained a wider fanbase with the debut of the “ce” version, which introduced a Venetian cutaway and onboard electronics. “That became one of our hallmarks,” says Bob. “If you want to plug in your guitar, buy a Taylor.”
Today, the Grand Auditorium is Taylor’s best-selling body shape.
The Legacy Collection features two cedar-top Grand Auditoriums inspired by past favorites: the mahogany/cedar 514ce and rosewood/cedar 714ce. Both models incorporate Bob’s original X-bracing pattern for a tonal character reminiscent of their 1990s and 2000s counterparts. Shared aesthetic details include a green abalone three-ring rosette, ebony bridge pins with green abalone dots, a faux-tortoiseshell pickguard and Taylor gold tuning machines.
Taylor Guitars | Legacy 815e | Playthrough Demo
Legacy 514ce
The Legacy 514ce features solid mahogany back and sides paired with a Western Red cedar top, yielding a punchy midrange and dry, woody sonic personality that pairs beautifully with cedar’s soft-touch sensitivity and warmth. It’s a standout choice for fingerstyle players and light strummers who crave nuance and depth. Distinct visual details include faux-tortoise body and fretboard binding, black-and-white top trim, and mother-of-pearl small diamond fretboard inlays.
Taylor Guitars | Legacy 514ce | Playthrough Demo
Legacy 714ce
The Legacy 714ce also features a cedar top, this time matched with solid Indian rosewood back and sides. The result is a richly textured sound with deep lows, clear trebles and a warm, mellow response. Inspiring as it is, this specific wood pairing isn’t currently offered in any other standard Taylor model. Additional aesthetic details include green abalone dot fretboard inlays, black body and fretboard binding, and black-and-white “pinstripe” body purfling.
While the Legacy Collection spotlights Taylor’s past, newer models from the Gold Label, Builder’s Edition and Somos Collections show the company’s legacy is always evolving. Explore the Legacy Collection at taylorguitars.com or visit your local authorized Taylor dealer.
Taylor Guitars | Legacy 714ce | Playthrough Demo
The Oceans Abyss expands on Electro-Harmonix’s highly acclaimed reverb technology to deliver a truly immersive effects workstation. The pedal is centered around dual reverb engines that are independently programmable with full-stereo algorithms including Hall, Spring, Shimmer and more. Place these reverbs into a customizable signal path with additional FX blocks like Delay, Chorus, Tremolo, or Bit Crusher for a completely unique soundscape building experience.
Electro-Harmonix has paved the way for powerful, accessible reverbs since the release of the original Holy Grail and now we’ve pushed the envelope deeper with the fully-equipped Oceans Abyss. Featuring a customizable signal path with up to 8 effects blocks, the Oceans Abyss can be configured as individual reverb, modulation, EQ, delay, bit crusher, saturation or volume effects, or as countless combinations for incredibly creative effect shaping. From a simple Spring reverb to a lush stereo field featuring stereo hall and shimmer reverbs, chorus, delay, overdrive, and tremolo, you can go from surf to shoegaze instantly, without breaking a sweat.
Deep parameter editing is accessible via the high-visibility OLED display with multiple graphical views and easy-to-read designs. Expression/CV control over nearly every parameter gives artful control of your effects and dynamics. Fully-stereo I/O plus an FX Loop allows for use with any instrument, recording set up, or live rig. 128 programmable presets via onboard footswitching or MIDI ensure perfect recall in all performance situations. MIDI IN/OUT ports with MIDI IN support of PC, CC, and Tempo Clock expand the already immense talents of the Oceans Abyss. Connect with UBS-C to Windows or Mac for effects editing, preset management, and more with the free EHXport™ app (coming soon).
- Two Stereo Reverbs available at once, each fully pannable in the stereo field
- 10 reverb types to choose from: Room, Hall, Spring, Plate, Reverse, Dynamic, Auto-Infinite, Shimmer, Polyphonic, Resonant
- Additional FX blocks: Delay (Digital, Analog and Tape emulations), Tremolo, Chorus, Flanger, Phaser, Graphic EQ, Saturation, Bit Crusher, External FX Loop, Volume
- Create custom signal path routing with up to 8 effects blocks. Two blocks may be re-verb, the rest may be any of the additional FX blocks.
- Infinite reverb sustain with the press of a footswitch
- Stereo Audio I/O
- Stereo FX Loop routing on TRS Jacks
- Dual action footswitches allow for momentary or latching use
- Easily enable or disable tails
- 128 fully customizable presets
- All controls can be saved to presets
- Dive deep into global and preset settings to set up Oceans Abyss for your specific needs
- Illuminated slide pots and buttons
- High-visibility OLED graphical display
- Multiple graphical views: Signal Path, Performance, Settings, Physical, Explorer
- Easy-to-navigate menu system
- Ergonomic NavCoder knob allows rotary and directional navigation through menus
- EXPRESSION / CV input to control nearly any parameter in any FX block
- Footswitch input allows for adding up to three external footswitches, each assigna-ble to a number of functions
- MIDI In and Out. MIDI IN supports PC, CC (over nearly every available parameter), and Tempo Clock
- USB-C port to connect to Windows or Mac and interface with EHXport™ app (coming soon)
- 96kHz / 24-bit sample rate conversion
- Supplied with 9.6VDC / 500mA power supply