How True are True Bypass Claims?
The great "true bypass" debate has to be one of the most popular topics out there on the numerous internet forums about stompboxes, and almost all stompbox manufacturers use this term in their advertisements – sometimes using very creative terminology. But do we really need to worry about our effects when they're not engaged? Is the true bypass craze just a hype tactic, designed to allow boutique pedal manufacturers to charge tidy sums of money for their products, and for guys to be able to make a living modding effects? As usual, you have to decide this for yourself, but I think it's time to have a closer look at what true bypass really means, what it does (and doesn't) do, and of course, how to determine if a pedal is really true bypass or not.
>
1. What is true bypass?
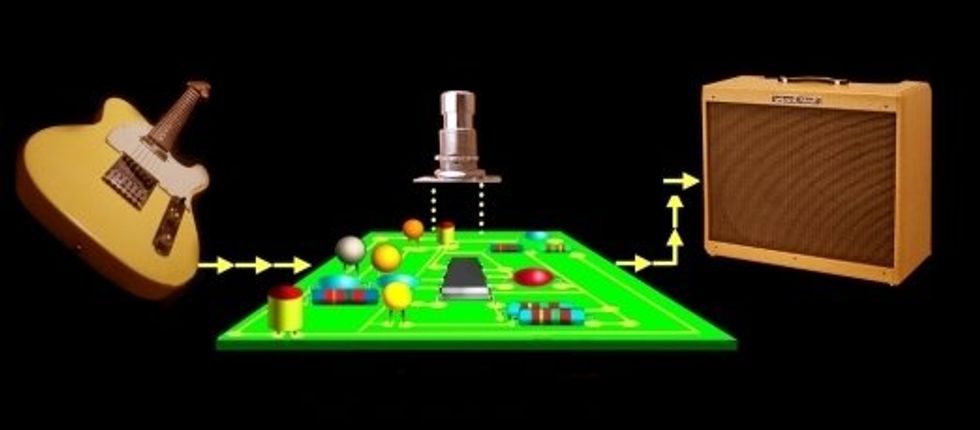
Simply put, it means that the signal passes straight through the box – directly from the input to the output jack, touching only the switch/relay – when the effect is bypassed. This kind of bypass arrangement is only possible with some sort of mechanical switching – either with a good old stompswitch or with an audio relay. The switching is done simultaneously at the input and the output, to route the signal around the electronics in the effect, and when bypassed, the box is completely disconnected from the input signal.
This is important, because as we will see later, this is a simple way of knowing if the claim that a certain pedal is true bypass is true or not. True bypass switching can be wired inside a pedal, or inside a separate true bypass box that the pedal connects to. In that instance, the pedal is kept constantly active, and the signal gets routed through or around it from the box. So always keep in mind: true bypass means that the circuit is physically disconnected from the input jack/bypass line. If a pedal doesn't do this, it is not true bypass. Period!
2. How do I know if a pedal is true bypass or not?
You often hear people wonder if their such-and-such pedal is true bypass or not. Sometimes I wonder if this is the same “I need to know" urge that makes us want to know if the fridge light actually goes out when we close the door. My personal point of view is that you only need to worry about it if you notice a degradation in your tone. Basically, if it works, don't fix it. However, if you just have to know if your pedal is true bypass, read on. Here are some of the fallacies you can often find on the Internet:
If you take the battery out and it still works in bypass mode, it's true bypass.
Ouch. All the battery-out test will tell you is if your pedal has a mechanical switch that carries signal or not, and if there are any active electronics in the main signal path. When the effect is powerless, the bypass line will of course still function as intended, but the effect input is still attached to it. No true bypass there. If your pedal has a buffer stage in front of the switch, or if it has electronic bypass switching (such as in Boss/Ibanez-type pedals), it will of course not pass any signal when powerless. But, again, you cannot use this test to verify that a pedal is true bypass – only that it isn't.
You need a 3PDT switch if you want true bypass and a status LED.
Sometimes you can read this mistake the other way round: if your pedal has an LED and doesn't have a 9-pole switch, it ain't true bypass. That's simply wrong, so forget it! Granted, for me, the easiest way to add an LED to a switching system would be to add a third row on the switch and run it from there. But the truth is that you don't need to redesign the whole circuit to accommodate an LED to indicate on/off status. Even an “aftermarket" true bypass mod with LED can be done with a DPDT. It's called the Millennium Bypass and was invented by R.G. Keen from Visual Sound [R.G. Keen does write our monthly “Tech Views" column – ed]. If the amount of components and effort needed to make it work is worth it is another debate. Personally, I''d recommend you go for a 3PDT switch if you absolutely need to add an LED, especially when you are just entering the world of DIY true bypass modifications.
In bypass mode, the circuit is electrically invisible, so therefore it is, in effect, true bypass.
In theory this one is actually correct. If the circuit's input impedance is sufficiently high, it shouldn't even register to the signal. As we know, current will always choose the path with the least resistance, and if we can make the path leading to the amp that much more inviting than the path leading to the effect, it would qualify as a true bypass (since none of the electrons will choose to veer off into the effects circuit). But in real life, this doesn't seem to work. There is no scientific proof of this – only lots and lots of observations where effects that are supposed to be “invisible" in bypass mode still affect the tone.
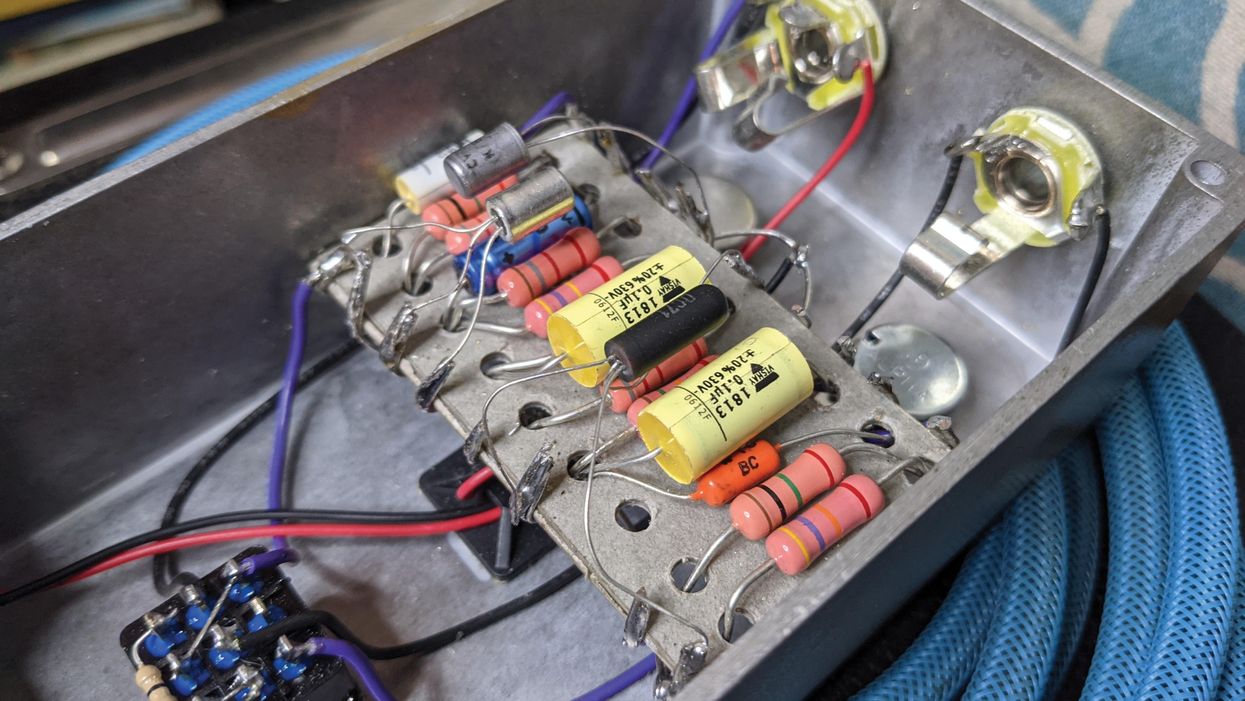
If you really want to know if your effect is true bypass or not, you have to open the pedal and trace the circuit. That's the only way to find out where the signal goes and doesn''t go when the pedal is off. You can use an ohmmeter to measure this, but you still have to do some circuit tracing. Locate the input to the circuit (on the circuit board), and the main input point on the input jack (you can use a patch cable in the input jack for this). Measure the resistance between the two points while you press the switch – if you get zero resistance in both switch positions, the pedal is not true bypass. A true bypass pedal will disconnect the circuit input from the main input jack in bypass mode, showing up as infinite resistance on the meter.
Measuring straight through (from input jack tip to output jack tip) will not show true bypass – it will only reveal the same things as you'll learn when pulling the power.
3. Will an all-true bypass rig cure the tone sucking in my signal chain?
Removing your pedals from the chain when they're not in use will not only get rid of tone sucking but it will also remove their buffering (their ability to drive long cables). This means that the amount and quality of cable between the pedals and amp will have a greater impact than before on your tone.
While I was recently A/B testing a true bypass-modded CryBaby, I was struck by the amount of treble I lost whenever I had the wah in the chain – quite contrary to what the mod was all about. After a while it dawned on me that the difference in treble response came from me not only unplugging the wah to go straight into the amp – I was also unplugging some 5 meters (about 16 feet) of cable, giving me lots more treble. True bypassing your pedals might therefore send you into another tone-hunting frenzy, this time looking for the cable with the least capacitance. George L's, Klotz GY107 LaGrange or Sommer Spirit cables work great for this purpose, by the way.
The best compromise would be to have a really good buffer at the start of the chain (or as early in the chain as fuzz pedals will allow you to), with the rest of the pedals being true bypass. That will give your guitar pickups a consistent input impedance to work with, while the low impedance output from the buffer helps drive the long cable to the amp. Some like to have another really good buffer or slight booster at the end of the chain, and that is also an option.
Keep in mind that you don't absolutely have to buy a dedicated buffer unit – while they are generally quite good, they are also generally quite expensive. If you have a Boss/Ibanez-type (electronic bypass) pedal that you like the sound of even when it's turned off, it will do the job just as nicely. Personally I use a DIY buffer right in front of my pedalboard and it works great. Another interesting article about this is from Mr. Pete Cornish himself, if you are interested, you can read it here.
Next month we will keep on talking about true bypass and how to use it. Until then, have a good one and stay tuned!
Dirk Wacker has been addicted to all kinds of guitars since the age of 5 and is fascinated by anything that has something to do with old Fender guitars and amps. He hates short scales and Telecaster neck pickups, but loves twang. In his spare time he plays country, rockabilly, surf and Nashville styles in several bands, works as a studio musician and writes for several guitar mags. He is also a hardcore DIY guy for guitars, amps and stompboxes and also runs an extensive webpage singlecoil.com about these things.
Day 6 of Stompboxtober is here! Today’s prize? A pedal from Revv Amplification! Enter now and check back tomorrow for the next one!
Revv G3 Purple Channel Preamp/Overdrive/Distortion Pedal - Anniversary Edition
The Revv G3 revolutionized high gain pedals in 2018 with its tube-like response & tight, clear high gain tones. Suddenly the same boutique tones used by metal artists & producers worldwide were available to anyone in a compact pedal. Now the G3 returns with a new V2 circuit revision that raises the bar again.
Intermediate
Intermediate
• Learn classic turnarounds.
• Add depth and interest to common progressions.
• Stretch out harmonically with hip substitutions.
Get back to center in musical and ear-catching ways.
A turnaround chord progression has one mission: It allows the music to continue seamlessly back to the beginning of the form while reinforcing the key center in a musically interesting way. Consider the last four measures of a 12-bar blues in F, where the bare-bones harmony would be C7-Bb7-F7-F7 (one chord per measure). With no turn around in the last two measures, you would go back to the top of the form, landing on another F7. That’s a lot of F7, both at the end of the form, and then again in the first four bars of the blues. Without a turnaround, you run the risk of obscuring the form of the song. It would be like writing a novel without using paragraphs or punctuation.
The most common turnaround is the I-VI-ii-V chord progression, which can be applied to the end of the blues and is frequently used when playing jazz standards. Our first four turnarounds are based on this chord progression. Furthermore, by using substitutions and chord quality changes, you get more mileage out of the I-VI-ii-V without changing the basic functionality of the turnaround itself. The second group of four turnarounds features unique progressions that have been borrowed from songs or were created from a theoretical idea.
In each example, I added extensions and alterations to each chord and stayed away from the pure R-3-5-7 voicings. This will give each chord sequence more color and interesting voice leading. Each turnaround has a companion solo line that reflects the sound of the changes. Shell voicings (root, 3rd, 7th) are played underneath so that the line carries the sound of the written chord changes, making it easier to hear the sound of the extensions and alterations. All examples are in the key of C. Let’s hit it.
The first turnaround is the tried and true I-VI-ii-V progression, played as Cmaj7-A7-Dm7-G7. Ex. 1 begins with C6/9, to A7(#5), to Dm9, to G7(#5), and resolves to Cmaj7(#11). By using these extensions and alterations, I get a smoother, mostly chromatic melodic line at the top of the chord progression.
Ex. 2 shows one possible line that you can create. As for scale choices, I used C major pentatonic over C6/9, A whole tone for A7(#5), D Dorian for Dm9, G whole tone for G7(#5), and C Lydian for Cmaj7(#11) to get a more modern sound.
The next turnaround is the iii-VI-ii-V progression, played as Em7-A7-Dm7-G7 where the Em7 is substituted for Cmaj7. The more elaborate version in Ex. 3 shows Em9 to A7(#9)/C#, to Dm6/9, to G9/B, resolving to Cmaj7(add6). A common way to substitute chords is to use the diatonic chord that is a 3rd above the written chord. So, to sub out the I chord (Cmaj7) you would use the iii chord (Em7). By spelling Cmaj7 = C-E-G-B and Em7 = E-G-B-D, you can see that these two chords have three notes in common, and will sound similar over the fundamental bass note, C. The dominant 7ths are in first inversion, but serve the same function while having a more interesting bass line.
The line in Ex. 4 uses E Dorian over Em9, A half-whole diminished over A7(#9)/C#, D Dorian over Dm6/9, G Mixolydian over G9/B, and C major pentatonic over Cmaj7(add6). The chord qualities we deal with most are major 7, dominant 7, and minor 7. A quality change is just that… changing the quality of the written chord to another one. You could take a major 7 and change it to a dominant 7, or even a minor 7. Hence the III-VI-II-V turnaround, where the III and the VI have both been changed to a dominant 7, and the basic changes would be E7-A7-D7-G7.
See Ex. 5, where E7(b9) moves to A7(#11), to D7(#9) to G7(#5) to Cmaj9. My scale choices for the line in Ex. 6 are E half-whole diminished over E7(#9), A Lydian Dominant for A7(#11), D half-whole diminished for D7(#9), G whole tone for G7(#5), and C Ionian for Cmaj9.
Ex. 7 is last example in the I-VI-ii-V category. Here, the VI and V are replaced with their tritone substitutes. Specifically, A7 is replaced with Eb7, and G7 is replaced with Db7, and the basic progression becomes Cmaj7-Eb7-Dm7-Db7. Instead of altering the tritone subs, I used a suspended 4th sound that helped to achieve a diatonic, step-wise melody in the top voice of the chord progression.
The usual scales can be found an Ex. 8, where are use a C major pentatonic over C6/9, Eb Mixolydian over Eb7sus4, D Dorian over Dm11, Db Mixolydian over Db7sus4, and once again, C Lydian over Cmaj7(#11). You might notice that the shapes created by the two Mixolydian modes look eerily similar to minor pentatonic shapes. That is by design, since a Bb minor pentatonic contains the notes of an Eb7sus4 chord. Similarly, you would use an Ab minor pentatonic for Db7sus4.
The next four turnarounds are not based on the I-VI-ii-V chord progression, but have been adapted from other songs or theoretical ideas. Ex. 9 is called the “Backdoor” turnaround, and uses a iv-bVII-I chord progression, played as Fm7-Bb7-Cmaj7. In order to keep the two-bar phrase intact, a full measure of C precedes the actual turnaround. I was able to compose a descending whole-step melodic line in the top voice by using Cmaj13 and Cadd9/E in the first bar, Fm6 and Ab/Bb in the second bar, and then resolving to G/C. The slash chords have a more open sound, and are being used as substitutes for the original changes. They have the same function, and they share notes with their full 7th chord counterparts.
Creating the line in Ex. 10 is no more complicated than the other examples since the function of the chords determines which mode or scale to use. The first measure employs the C Ionian mode over the two Cmaj chord sounds. F Dorian is used over Fm6 in bar two. Since Ab/Bb is a substitute for Bb7, I used Bb Mixolydian. In the last measure, C Ionian is used over the top of G/C.
The progression in Ex. 11 is the called the “Lady Bird” turnaround because it is lifted verbatim from the Tadd Dameron song of the same name. It is a I-bIII-bVI-bII chord progression usually played as Cmaj7-Eb7-Abmaj7-Db7. Depending on the recording or the book that you check out, there are slight variations in the last chord but Db7 seems to be the most used. Dressing up this progression, I started with a different G/C voicing, to Eb9(#11), to Eb/Ab (subbing for Abmaj7), to Db9(#11), resolving to C(add#11). In this example, the slash chords are functioning as major seventh chords.
As a result, my scale choices for the line in Ex. 12 are C Ionian over G/C, Eb Lydian Dominant over Eb9(#11), Ab Ionian over Eb/Ab, Db Lydian Dominant over Db9(#11), and C Lydian over C(add#11).
The progression in Ex. 13 is called an “equal interval” turnaround, where the interval between the chords is the same in each measure. Here, the interval is a descending major 3rd that creates a I-bVI-IV-bII sequence, played as Cmaj7-Abmaj7-Fmaj7-Dbmaj7, and will resolve a half-step down to Cmaj7 at the top of the form. Since the interval structure and chord type is the same in both measures, it’s easy to plane sets of voicings up or down the neck. I chose to plane up the neck by using G/C to Abmaj13, then C/F to Dbmaj13, resolving on Cmaj7/E.
The line in Ex. 14 was composed by using the notes of the triad for the slash chord and the Lydian mode for the maj13 chords. For G/C, the notes of the G triad (G-B-D) were used to get an angular line that moves to Ab Lydian over Abmaj13. In the next measure, C/F is represented by the notes of the C triad (C-E-G) along with the root note, F. Db Lydian was used over Dbmaj13, finally resolving to C Ionian over Cmaj7/E. Since this chord progression is not considered “functional” and all the chord sounds are essentially the same, you could use Lydian over each chord as a way to tie the sound of the line together. So, use C Lydian, Ab Lydian, F Lydian, Db Lydian, resolving back to C Lydian.
The last example is the “Radiohead” turnaround since it is based off the chord progression from their song “Creep.” This would be a I-III-IV-iv progression, and played Cmaj7-E7-Fmaj7-Fm7. Dressing this one up, I use a couple of voicings that had an hourglass shape, where close intervals were in the middle of the stack.
In Ex. 15 C6/9 moves to E7(#5), then to Fmaj13, to Fm6 and resolving to G/C. Another potential name for the Fmaj13 would be Fmaj7(add6) since the note D is within the first octave. This chord would function the same way, regardless of which name you used.
Soloing over this progression in Ex. 16, I used the C major pentatonic over C6/9, E whole tone over E7(#5), F Lydian over Fmaj13, and F Dorian over Fm6. Again, for G/C, the notes of the G triad were used with the note E, the 3rd of a Cmaj7 chord.
The main thing to remember about the I-VI-ii-V turnaround is that it is very adaptable. If you learn how to use extensions and alterations, chord substitutions, and quality changes, you can create some fairly unique chord progressions. It may seem like there are many different turnarounds, but they’re really just an adaptation of the basic I-VI-ii-V progression.
Regarding other types of turnarounds, see if you can steal a short chord progression from a pop tune and make it work. Or, experiment with other types of intervals that would move the chord changes further apart, or even closer together. Could you create a turnaround that uses all minor seventh chords? There are plenty of crazy ideas out there to work with, and if it sounds good to you, use it!
Many listeners and musicians can tell if a bass player is really a guitarist in disguise. Here’s how you can brush up on your bass chops.
Was bass your first instrument, or did you start out on guitar? Some of the world’s best bass players started off as guitar players, sometimes by chance. When Stuart Sutcliffe—originally a guitarist himself—left the Beatles in 1961, bass duties fell to rhythm guitarist Paul McCartney, who fully adopted the role and soon became one of the undeniable bass greats.
Since there are so many more guitarists than bassists—think of it as a supply and demand issue—odds are that if you’re a guitarist, you’ve at least dabbled in bass or have picked up the instrument to fill in or facilitate a home recording.
But there’s a difference between a guitarist who plays bass and one who becomes a bass player. Part of what’s different is how you approach the music, but part of it is attitude.
Many listeners and musicians can tell if a bass player is really a guitarist in disguise. They simply play differently than someone who spends most of their musical time embodying the low end. But if you’re really trying to put down some bass, you don’t want to sound like a bass tourist. Real bassists think differently about the rhythm, the groove, and the harmony happening in each moment.
And who knows … if you, as a guitarist, thoroughly adopt the bassist mindset, you might just find your true calling on the mightiest of instruments. Now, I’m not exactly recruiting, but if you have the interest, the aptitude, and—perhaps most of all—the necessity, here are some ways you can be less like a guitarist who plays bass, and more like a bona fide bass player.
Start by playing fewer notes. Yes, everybody can see that you’ve practiced your scales. But at least until you get locked in rhythmically, use your ears more than your fingers and get a sense of how your bass parts mesh with the other musical elements. You are the glue that holds everything together. Recognize that you’re at the intersection of rhythm and harmony, and you’ll realize foundation beats flash every time.“If Larry Graham, one of the baddest bassists there has ever been, could stick to the same note throughout Sly & the Family Stone’s ‘Everyday People,’ then you too can deliver a repetitive figure when it’s called for.”
Focus on that kick drum. Make sure you’re locked in with the drummer. That doesn’t mean you have to play a note with every kick, but there should be some synchronicity. You and the drummer should be working together to create the rhythmic drive. Laying down a solid bass line is no time for expressive rubato phrasing. Lock it up—and have fun with it.
Don’t sleep on the snare. What does it feel like to leave a perfect hole for the snare drum’s hits on two and four? What if you just leave space for half of them? Try locking the ends of your notes to the snare’s backbeat. This is just one of the ways to create a rhythmic feel together with the drummer, so you produce a pocket that everyone else can groove to.
Relish your newfound harmonic power. Move that major chord root down a third, and now you have a minor 7 chord. Play the fifth under a IV chord and you have a IV/V (“four over five,” which fancy folks sometimes call an 11 chord). The point is to realize that the bottom note defines the harmony. Sting put it like this: “It’s not a C chord until I play a C. You can change harmony very subtly but very effectively as a bass player. That’s one of the great privileges of our role and why I love playing bass. I enjoy the sound of it, I enjoy its harmonic power, and it’s a sort of subtle heroism.”
Embrace the ostinato. If the song calls for playing the same motif over and over, don’t think of it as boring. Think of it as hypnotic, tension-building, relentless, and an exercise in restraint. Countless James Brown songs bear this out, but my current favorite example is the bass line on the Pointer Sisters’ swampy cover of Allen Toussaint “Yes We Can Can,” which was played by Richard Greene of the Hoodoo Rhythm Devils, aka Dexter C. Plates. Think about it: If Larry Graham, one of the baddest bassists there has ever been, could stick to the same note throughout Sly & the Family Stone’s “Everyday People,” then you too can deliver a repetitive figure when it’s called for.
Be supportive. Though you may stretch out from time to time, your main job is to support the song and your fellow musicians. Consider how you can make your bandmates sound better using your phrasing, your dynamics, and note choices. For example, you could gradually raise the energy during guitar solos. Keep that supportive mindset when you’re offstage, too. Some guitarists have an attitude of competitiveness and even scrutiny when checking out other players, but bassists tend to offer mutual support and encouragement. Share those good vibes with enthusiasm.
And finally, give and take criticism with ease. This one’s for all musicians: Humility and a sense of helpfulness can go a long way. Ideally, everyone should be working toward the common goal of what’s good for the song. As the bass player, you might find yourself leading the way.Fuchs Audio introduces the ODH Hybrid amp, featuring a True High Voltage all-tube preamp and Ice Power module for high-powered tones in a compact size. With D-Style overdrive, Spin reverb, and versatile controls, the ODH offers exceptional tone shaping and flexibility at an affordable price point.
Fuchs Audio has introduced their latest amp the ODH © Hybrid. Assembled in USA.
Featuring an ODS-style all-tube preamp, operating at True High Voltage into a fan-cooled Ice power module, the ODH brings high-powered clean and overdrive tones to an extremely compact size and a truly affordable price point.
Like the Fuchs ODS amps, the ODH clean preamp features 3-position brite switch, amid-boost switch, an EQ switch, high, mid and low controls. The clean preamp drives theoverdrive section in D-Style fashion. The OD channel has an input gain and outputmaster with an overdrive tone control. This ensures perfect tuning of both the clean andoverdrive channels. A unique tube limiter circuit controls the Ice Power module input.Any signal clipping is (intentionally) non-linear so it responds just like a real tube amp.
The ODH includes a two-way footswitch for channels and gain boost. A 30-second mute timer ensures the tubes are warmed up before the power amp goes live. The ODH features our lush and warm Spin reverb. A subsonic filter eliminates out-of-band low frequencies which would normally waste amplifier power, which assures tons of clean headroom. The amp also features Accent and Depth controls, allowing contouring of the high and low response of the power amp section, to match speakers, cabinets andenvironments. The ODH features a front panel fully buffered series effects loop and aline out jack, allowing for home recording or feeding a slave amp. A three-position muteswitch mutes the amp, the line out or mute neither.
Built on the same solid steel chassis platform as the Fuchs FB series bass amps, the amps feature a steel chassis and aluminum front and rear panels, Alpha potentiometers, ceramic tube sockets, high-grade circuit boards and Neutrik jacks. The ICE power amp is 150 watts into 8 ohms and 300 watts into 4 ohms, and nearly 500 watts into 2.65 ohms (4 and8 ohms in parallel) and operates on universal AC voltage, so it’s fully globallycompatible. The chassis is fan-cooled to ensure hours of cool operation under any circumstances. The all-tube preamp uses dual-selected 12AX7 tubes and a 6AL5 limiter tube.
MAP: $ 1,299
For more information, please visit fuchsaudiotechnology.com.