I hope you enjoyed the last column about modding your Telecasters. This month, we''ll talk about a cool-sounding soul mate for your axes.
So you want a small and good sounding all-tube practice/recording amp? And you don''t want to spend a lot of bucks for it? And you''ve always wanted to do some DIY work on a tube amp? Well, here is your ticket.
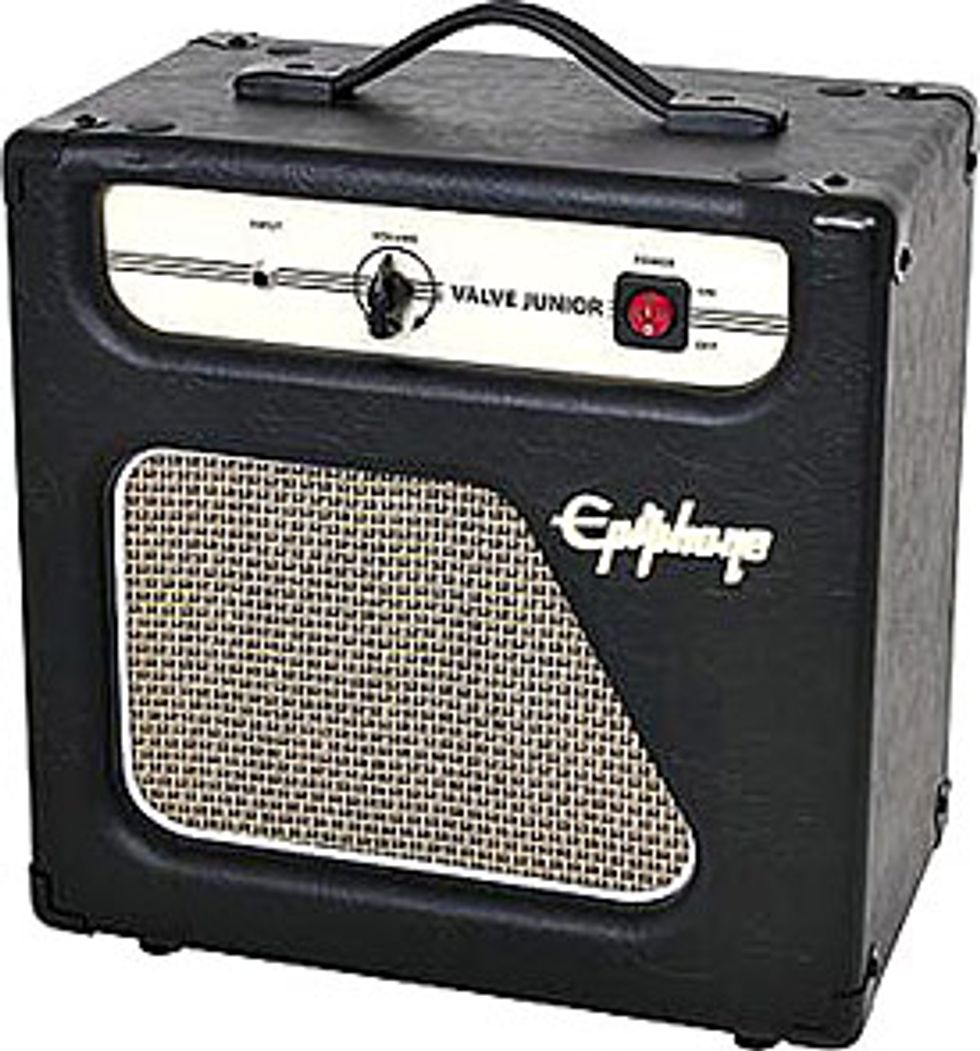
Since small combos had a real renaissance some years ago, your choices have never been bigger than today. I decided to use the Epiphone Valve Junior, because it has a good overall quality and it''s a real cheapo - you can find it new for around $120 and it''s a real class A tube amp. It produces 5 watts and the cab is loaded with a Weber-designed 8" speaker. Because of its price point, the rest of the amp''s options are as minimal as possible - on/off switch, a volume pot, input jack and speaker out. However, because of the simplicity of the circuit, this little amp is ideal for some beginner modding; you can learn a lot when you spend some time with it.
Today we will talk about some mods for the 2nd generation of this amp, which was sold from approximately March 2006 to today as the combo or the "head only" version. All the mods will also work for the 1st generation of this amp, but they require a lot more work because the circuit suffers from some extra noise and various other unpleasant things. If you have such an amp, check out this website and follow the instructions to quiet the beast.
Before we start, a word of warning and the obligatory liability disclaimer:
Do not attempt to perform these mods if you are not familiar with working inside tube amps or other high voltage electronics. There are lethal voltages inside the amp, even when unplugged (if the filter capacitors have not been discharged) and these voltages can cause serious injury or kill you. If you are unsure, take it to an amp tech.
If you decide to perform these mods, you assume all responsibility for anything that happens! Whether the amp explodes, you get zapped, or the amp suddenly increases in value because everyone falls in love with it, it''s all because of you. The glory, the pain, whatever, they''re all yours. If you can''t live with that, don''t mess with the stuff here.
Okay, with that out of the way, you''ll want to first download the circuit drawing of the amp, print it and put it on your workbench, to follow along with what we''re talking about.
The Epiphone Valve Junior sounds pretty good just the way it is, but there are several things you can do to make it sound even better, run more stable and of course tweak the overall tonal character. I decided to "Fenderize" this amp to make it sound close to an old Fender Tweed Champ. There are plenty more ways to mod it - e.g. to make it sound like a Marshall or like an over the top gain monster, etc. In addition, you can also perform some enhancements like adding a stand-by switch, line-out jack, additional 8-ohm speaker out jack, or implement a tone and gain control, etc.
I will divide all the mods into three categories: general mods, necessary mods and the tone tweaking mods, so you can decide on your own how far you want to go.
I''m sure you all know the famous Fender Tweed Champ - it''s one of the classic little amps that can be heard on countless recordings. It featured a punchy and percussive Fender clean tone and a "true, from the bottom of the heart" overdrive, full and warm sounding - in other words, a tone combination to die for. The Epiphone Valve Junior can be modded in this direction and I had the pleasure to play the modded Epi side by side with an old Fender Tweed Champ - the differences in tone are really minimal. So heat up your soldering irons, unplug the amp, discharge the capacitors and take out the PCB.
General Modifications
Tubes This is a quick, easy, inexpensive and effective way to mod your amp. A simple amp like our Epi with only two tubes gives you the rare ability to really hear the differences between different brands and types of tubes with distinct clarity. For a good Fender tone, pull out the two Sovtek tubes and replace them with a NOS 7025 "black plate" and a good EL84 - I prefer the TAD EL84-STR. Naturally, experiment with different tubes to see what you like best.
Speaker I really like the stock speaker and it provides a good, punchy tone for its size - it''s a Weber-designed speaker, what else can I say? But if you want to change it, try a Weber 8F125 or any Jensen 8" speaker. I''ve also heard of people squeezing 10" speakers into the combo, but I haven''t seen it yet. Feel free to experiment with any 8" speaker you like; a friend of mine uses an old Peavey "Marvel" speaker in this amp and it sounds fantastic.
Output Transformer Many of the less-expensive amps available today ship with low-budget output transformers. These are designed to be cheaply made and sound quality can suffer in many cases. Inexplicably, the Valve Junior OT is wound with a 7.5K primary, when the ideal primary for an EL84 in SE mode is 5.2K. I did not change my OT because I like the sound the way it is, but if you want to replace it, try a Hammond 125CSE, which is twice the mass of the stock OT and can be wired for an almost-ideal 5K primary impedance. There are some more OTs that will fit your needs, so feel free to use a different brand.
Necessary Modifications
The mods discussed here should be done to any Epiphone amp to extend tube life and to make it run much more stable and quiet!
Connect a 20 ohm/20-watt power resistor between the IEC mains input socket and one of the primaries of the power transformer. This will bring the plate voltage down to approximately 300VDC and will extend tube life dramatically.
Replace R14 (stock value: 220 ohm) with a 270 ohm/5-watt resistor for true class A performance and extended tube life.
Replace C6 (stock value: 22uF) with a 120uF/450-volt electrolytic capacitor to quiet the amp by providing a better filtering of the power supply.
Replace the four 1N4007 diodes with UF4007 to get rid of this switching noise.
If you have an amp with a non-insulated input jack, replace it with a nylon input jack to break the ground loop and get rid of the 60 Hz hum.
Replace the speaker cable with a good quality speaker cable with a slightly heavier gauge and solder it to a heavy-duty Switchcraft "angled" plug.
Tone Tweaking Mods
This is the section where you can influence your tone and tweak it in any direction you want. Let''s dig deep into the ''50s and make this Chinese Epiphone amplifier sound like it''s famous Californian model.
Replace the stock 1M volume pot with a CTS 500K audio taper pot.
Solder a 47pF silver mica cap across the right and middle lugs of the new volume pot.
Replace C1 and C2 with 0.022uF Sprague 715 Orange Drop caps.
Change R8 and R9 to 1.5k carbon film resistors.
Change R1 to a 1M metal film resistor.
Jumper R2.
Change C5 to a 470uF/25-volt electrolytic cap.
Change R4 to a 100k carbon comp resistor.
The sum of all these mods will give you an incredibly authentic-sounding Fender tone and a one-of-a-kind practice/recording amp. And believe me - nothing beats the feeling of playing a top-notch sounding amp you have modded yourself!
I hope you enjoyed this one. Happy soldering, God bless and greetings from good old Germany - see ya all next month!
Dirk Wacker has been addicted to all kinds of guitars since the age of 5 and is fascinated by anything that has something to do with old Fender guitars and amps. He hates short scales and Telecaster neck pickups, but loves twang. In his spare time he plays country, rockabilly, surf and Nashville styles in several bands, works as a studio musician and writes for several guitar mags. He is also a hardcore DIY guy for guitars, amps and stompboxes and also runs an extensive webpage (singlecoil.com) about these things.
Luthier Dave Helmer shows you how to cure buzzy strings, bad intonation, gnarly frets, high action, and other common troubles with off-the-shelf axes.
Guitars are the best. We love them. It’s fun to fall in love with a guitar at a store, buy it, and proudly bring it home. But we’ve all been there … where after a month that new guitar is just not playing as good as it was before. As guitar players, we know what feels good and what feels bad when it comes to playability. Maybe you have setup preferences that you like on all your guitars, or maybe you want to experiment with changes to your setup?
With a few tools, you can perform a handful of tasks that will make your new axe play better and stay in tune. This article is for folks who already know how to tighten loose parts, raise and lower string saddles or bridges, and adjust their truss rods—though I’ll share a tip on how to check it with even more accuracy.
Is that big bulky stock nut uncomfortable on your hand? Let’s trim it down and reshape it. If the action feels high and the neck looks straight, I’ll show you how to lower the action. And haven’t we all swapped out pickups and wondered, “Do they really sound better, or do I think that just because they’re new?” Before you swap your pickups, I’ll share some pickup-height measurements that might make you change your mind.
But wait! There’s more. With everything feeling and playing great, does moving into the upper register start to sound out of tune? Intonation is very easy to check and adjust. When you go to vibrato or hold a note, do the frets feel “sandy”? Are the fret ends rubbing against your hand while you play? Let’s flush and polish those up.
To be clear, we’re not swapping out anything on your new guitar: We’re simply refining the setup. Be sure to go online to see eight videos I made showing various processes covered in this story.
Begin the Beguine
There is an order of operations for best results. Neck relief is the first item to dial in, followed by getting the nut slots cut to the proper depth. After that, setting your string and pickup heights is in order. The final step is setting intonation.
Fret polishing is its own event and can happen anytime between string changes. Getting the frets feeling comfortable and well-polished will take some time and attention. You’ll also need some specialized tools as well as some that can be found in most households. Check the box for my list.
Tools You’ll Need
All of the specialized tools in this list are available through online suppliers, including StewMac and Amazon.
6" Ruler with measures in 64ths
String action gauge [Photo 1]
Miscellaneous screwdrivers
Allen wrenches
Radius blocks
Understring radius gauges (with the radius on the bottom and the top)
Fret-end dressing file
Micro-Mesh sticks [Photo 2]
Tape (low tack)
Cotton swabs
Paper towels (blue shop towels preferred)
Clean cotton rags
Nut files [Photo 3]
Stikit sandpaper
Tri-Flow lubricant
Capo
Feeler gauges
Simichrome polish
Polishing the Frets
Let’s start with the most Zen of these tasks: fret polishing.
Tape off the fretboard using low-tack tape, exposing only the frets. De-tack each piece of tape on your clothing or maybe a rag—I use my jeans or my sweatshirt. Making it less sticky helps prevent pulling finish off a maple fretboard or the neck. Taping the fretboard also prevents putting any cross-grain scratches into it while you file and polish. You can choose to tape off the entire fretboard or work your way down one fret at a time. Dealer’s choice.
One thing to note about tape, any tape: Even when you de-tack it, you do not want to leave it on overnight. If that happens, rub the tape with your finger, which will break the surface tension. Then carefully pull the tape off from a corner, making sure you’re pulling it off at an angle and not at a straight line with the fretboard edge.
Photo 4
Every fret end has a small burr on the corner from the initial fret job. The fret-end dressing file has a non-marring smooth side for rounding the fret end, and a safe square edge for getting into the corner of the fret end. So, take the fret-end dressing file, use the squared off-side, and file both corners of the fret end [Photo 4].
How to Polish Frets
Here’s how easy it is to polish and smooth frets.
Photo 5
One or two strokes is all you’ll need. Then, using the non-marring side of the file, slightly round off the fret ends. [Photo 5].
Photo 6
With the file positioned vertically, file downward to make the fret end flush with the edge of the fretboard [Photo 6].
Photo 7
For a nice, rounded-off look, polish the frets using the same rounding motion from the previous step, working through all three grits of the Micro-Mesh stick [Photo 7].
Photos 8 (top) & 9 (bottom)
Then, polish both the sides and the top of the frets [Photos 8 and 9]. Using a soft cloth and Simichrome, buff every fret. This will give you a great shine and help prevent oxidation. Now it’s time to remove the tape and condition the fingerboard if it needs it.
Note: Every fret has two fret ends to clean up and polish along with the fret itself. This is a fair amount of handwork. If you’ve never done it, you will get tired and need a break. Take that break. Take multiple breaks. Let the process take however long it requires without rushing. If you’re new, do all the fret polishing over a weekend or a few days. It should be fun, not painful. If it is difficult, call your local luthier and hire them to do it for you.
Adjusting Neck Relief
Neck relief refers to the slight amount of concave bowing intentionally created in the neck of a guitar or bass by adjusting the truss rod. For the safety of the guitar, be sure to slack the strings before doing any adjustments to the truss rod. Neither you nor your guitar needs to be tense during this process.
Photo 10
Before whipping out an Allen wrench for the truss rod, start by sight-checking the neck’s straightness. You can sight the neck with the guitar on its back, but I like to put it on edge and look at it that way. It’s easier to see how much curve there is when the guitar is on its side. I feel like gravity plays tricks on my eyes when I sight the neck with the guitar on its back. When I play the guitar, it’s on its side anyway, so looking at it from this vantage point is best [Photo 10].
Photo 11
Tune the guitar to pitch, put a capo on the first fret, and press fret 15 with your left hand. With your right hand, take a feeler gauge and check the gap at frets 7 through 9 (left-handed players, flip your hands around) [Photo 11].
From the top of the fret to the bottom of the string, the gap is usually anywhere from .003" to .012", depending on the feel you are going for. The feeler gauge should fit just between the top of the fret and the bottom of the string. The string shouldn’t move. This will tell you how much “relief” is in the neck. If you find this challenging, keep going—this will take some practice.
When dialing in the relief, I go back and forth between adjusting the truss rod and the string action. Getting the strings low and playing clean on a budget axe can be a challenge. Usually the fretwork isn’t that great, and in the upper register the frets can be unlevel, causing buzzes and clanks. If you need to raise the string action to get the notes to play clean, some fret leveling may be in order. (For more on fret leveling, go online to our article “About Fret Leveling,” from the December 2007 issue.) For good energy transfer, the neck should be as straight as possible. If the neck is straight and the frets are not level, the strings will buzz with low action.
In general, the flatter the radius on the fretboard, the straighter you can get the neck with the truss rod adjustment. On a fretboard with a 12" radius, you should be able to get .005" relief, and on a vintage 7.25" radius board you may need as much as .014" relief. The only way to get better at checking and setting relief is practice.
Refining the Nut
String buzzes, pinging noises when you tune, strings sticking in the slots, and too much string motion in the nut slots are all indicators of trouble. Before getting out the sandpaper and Micro-Mesh sticks, be sure you know if your guitar’s nut is TUSQ or bone. TUSQ is softer, so you should leave TUSQ nut slots a little higher. This leaves room for the TUSQ to wear without causing buzzing on the first fret. With bone, you can cut the slots lower, because it holds up to string wear.
How to Shape Your Guitar's Nut
Watch as Dave Helmer sands down the back half of a nut and creates a smooth finish.
The back side of the nut is usually very bulky and could often stand to lose some material to be more comfortable on your hand. So, let’s start there. Tape off the neck and headstock around the nut using a few layers of tape to protect the headstock face and fretboard. Then, slack the strings and pull them to either side of the nut.
Photo 12
Sand a bevel into the backside—the side closest to the headstock—of the nut using P320 and P400 grit Stikit sandpaper on a flat sanding stick. The bevel should start at the back of the nut and come forward about one-third to one-half the thickness of the nut [Photo 12]. Use P320 for most of the sanding and switch to P400 for the last 5 to 10 strokes.
Photo 13
Next, take a fresh Micro-Mesh stick and work through the various grits to buff/round over the bevel you’ve sanded into back of the nut [Photo 13], so it looks and feels good.
Photos 14 (left) & 15 (right)
TUSQ nuts are often tall, and the strings sit deep in the slots. Wound strings require 50 percent of the diameter of the string to sit in the nut slot, with the other 50 percent above the top of the nut surface. The plain strings should be flush with the top of the nut. Take a look at the wrong appearance [Photo 14] and the correct look [Photo 15] for properly seated strings.
How to Sand Your Guitar's Nut
Our luthier shows you how to use a radius block and sand down a nut.
Photo 16
Use a radius block that matches the radius of your fretboard. With P320 and P400 grit Stikit sandpapers, use mild pressure to sand down the top of the nut. Sand a bit and check your progress by setting the strings in the slots and putting a little tension on them. Tuning to pitch isn’t necessary. Use the P320 for most of the sanding, and switch to P400 when you are close to the 50/50 height for the wound strings. The radius block sanding will leave a flat, sharp edge on each side of the TUSQ nut [Photo 16]. To round over the sharp edge, use the sanding block and Micro-Mesh stick.
Use the coarse grit of a Micro-Mesh stick to round over and blend the bevel from the back into the top of the nut. Work through the grit gauges until it’s smooth. There is a fine balance between the bevel at the back of the nut and the top radius of the nut. Go back and forth between the two steps to get a nice, finished look and a nut that functions at optimal levels.
… And Refining the Nut Slots
Nut height is the distance from the top of the first fret to the bottom of the string. A good height on the wound strings is about .020", and for the plain strings about .015". Measuring this gap with a feeler gauge can be tricky because of the fretboard radius. Many repair folks do this by eye and feel, based on experience. It takes some practice. A good check: At pitch, fret the third fret and check for a small gap between the string and the top of the first fret.
How to Widen Your Guitar's Nut Slots
A diamond file can make quick work of deepening and widening nut slots.
Photo 17
The bottom of the string should be sitting on the bottom of the front half of the nut slot [Photo 17]. File down each nut slot to its proper depth using the corresponding nut file. There are diamond nut files on the market in multiple sizes to accommodate many string gauges. Make sure to keep your strokes straight. The standard-toothed files have less sizes and usually require rolling them from side to side to get a well-fit string.
Next, using a proper-sized file, round over the bottom back half of the nut slots down, toward the face of the headstock and away from the strings. This will allow the strings to move freely during tuning or bending, while still having support from the front half of the slot.
How to File D and G String Slots on Guitar
The D and G nut slots require special attention on 3x3-style headstock configurations.
Photo 18
On guitars with 3x3 headstock configurations, the D and G strings need the back half of the slots feathered out away from the center, so the string has a direct path to the tuner post. Using a file that is one size bigger than the string and rolling it side to side on the back of the nut slot will give the string a straight path to the tuner post. Photo 18 is my illustration showing which slots need feathering.
Additionally, use pencil lead to lubricate the slots. Just get in there with the point of a pencil and mark the slot with its graphite. You might also put a drop of Tri-Flow on the front of the string tree. Tri-Flow will run down the string, so take a cotton swab or cloth to clean up any excess. Tri-Flow has Teflon in it, so you don’t need much.
Adjusting String Action
First, find your string height by measuring the string action at the 17th fret on a Fender-style guitar and at the 15th fret on a Gibson-style instrument.On electric guitars, action can range from 3/64" to 3/32", depending on the player’s comfort. My preferences are 1/16" on the treble side and 5/64"on the bass side on both Fender- and Gibson-style guitars measured at the appropriate fret.
How to Adjust Guitar Action
Here’s a look at how our author adjusts the action.
Photo 19
Always loosen the string tension before making action adjustments. This will save wear and tear on the small bridge components. Take either a 6" ruler or a string action gauge and set it on the frets. Measure from the top of the fret to the bottom of the string [Photo 19].
If the action is high, you will lower that string’s saddle or that side of the bridge. If it is low, you will raise it. Make sure the individual saddles are sitting square and upright to the face of the bridge. You do not want them sitting at an angle or leaning over. This will cause buzzing.
Photo 20
The bottom of the strings should match the radius of the fretboard when measured with an understring radius gauge [Photo 20]. Start your adjustment with the outside strings, working toward the center. On Fender-style guitars, set the two outside strings to the height you want and have the middle four strings a bit higher than that. Bring the gauge up from underneath and just touch the two outside strings. Then, bring the strings down a little at a time until the radius matches.
On a Gibson-style Tune-o-matic, the saddles are not individually adjustable. So, if the radius doesn’t match, the saddles will need to be filed. To do this, I recommend using toothed nut files and a rolling side-to-side motion. Do a little work and check your progress. Remember to slack your strings when adjusting the saddle or bridge up or down.
Changing Pickup Height
Photo 21
Finally, let’s take a look at pickup-height adjustment. First, to check pickup height, use the two outside strings again. Press the top wound string on the last fret and measure the distance from the top of the pole piece to the bottom of the string [Photo 21]. This distance can range from 3/64" to 1/8". My preferences are 1/16" on the treble side and 5/64" on the bass side.
Adjusting Guitar Pickup Height
Dave Helmer walks you through the process of adjusting the height of your guitar’s pickups.
On most styles of pickups, there are height adjustment screws on either side of the pickup to raise or lower it. The closer the pickup gets to the strings, the more present string frequencies become. If you get too close, the magnetic pull can affect the string’s vibration and you may hear some strange sounds as you go into the upper register.
On Strats, the neck pickup is regularly set too close, and at the 12th fret and above, the low E and A can sound choked, honky, and not clear. Lowering the neck pickup with a screwdriver usually solves this issue.
Setting Intonation
Photo 22
If you can’t get your guitar accurately in tune, you might need to check its intonation. Adjust all saddles as far back as possible so every string will play flat at the 12th fret. You will adjust the saddles forward, gradually making the octave play sharper until it’s in tune with the open string [Photo 22].
Adjust Your Guitar's Intonation
With a tuner and a screwdriver, Dave Helmer shows you how to adjust your guitar’s intonation.
Depending on your vibrato style, experiment with intonating the plain strings slightly flat. Use your ear and do what sounds good. Sometimes, the plain strings can have perfect intonation, but playing with vibrato can make them sound sharp.
To fine-tune intonation, the individual bridge saddles must be adjustable. Once the intonation is set, recheck the string radius using the understring radius gauge and adjust as needed. The radius can change as the saddles come forward during intonation.
Tri-Flow is great for lubricating saddle parts. Put a small drop on the saddle-height adjustment screws and capillary action will suck it in. Adjust the saddle up and down a few times to coat the threads. Clean up any excess with a cotton swab or cloth. Put a drop or two onto a cotton swab and apply the Tri-Flow to the top of each saddle where the string rests. This will help strings move freely during tuning and after any bends or vibrato.
And that’s it! For a relatively small investment in tools and time, you’re now ready to supercharge your new guitar—and maybe your long-treasured axes, too.