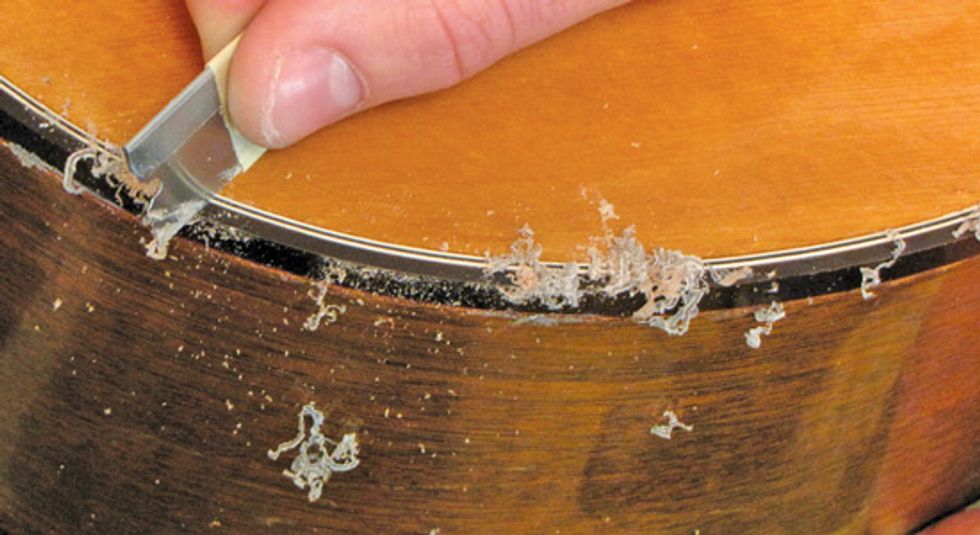
We’ve come a long way in restoring the
decayed binding on this ’74 Gibson J-50
Deluxe. In part 1 (May 2010), I discussed "binding rot," which is when tortoise binding
begins to deteriorate as the plastic binders—
the substances that cause the material’s components to cohere—start to age. We lightly
scored the top and side edge of the decayed
binding using the Sloane purfling cutter, then
simultaneously softened the glue joint and
binding using medium heat from a hair dryer,
and finally removed the decayed binding with
a channel spatula. Part 2 of this restoration (June 2010) was one of my favorites, as I used
the new MacRostie binding trimmer to properly size the replacement tortoise binding
down to .100" in height. The MacRostie, with
its adjustable fence and large-dimensioning
gauge, precisely duplicated the dimensions
of the original binding.
Seating and Gluing the Purfling
We were ready to glue the .060" white/black/
white purfling in place after using a flat luthier’s file to finalize and remove any leftover
slivers of old purfling and tortoise binding.
Weld-On 16 is a fantastic and widely used
glue for adhering wood and plastic laminates,
but due to the specifications of the repair—
the original finish on this Gibson body was
to stay intact with no alterations, other than
some lacquer overspray on the replacement
binding—it would not be the glue of choice
for this factory-finished body. Weld-On sets
very quickly, can have a webbed taffy texture,
and requires acetone as a clean-up solvent. So
I chose Super Glue because it’s easier to control and offered me a much cleaner end result.
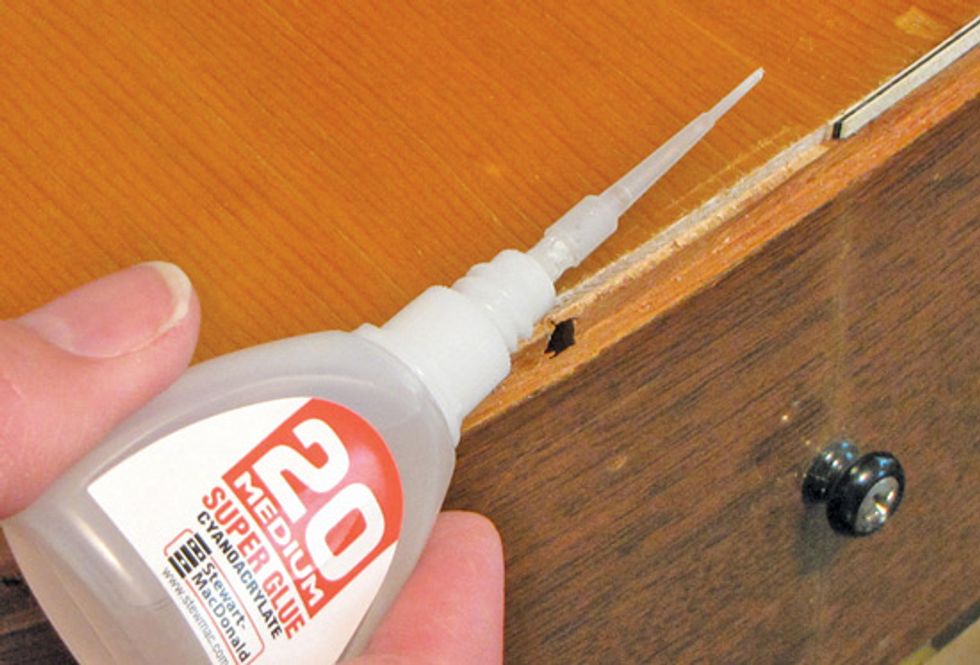
The Whip Tip attached to a bottle of medium Super Glue.
A scarf joint is used to hide the seam where
the two pieces of purfling meet end-to-end at
the tailblock, centered with the top’s center
seam. A scarf joint is the angled mating surface and can be angled across either the top
or the side of the binding strip. I attached
the Whip Tip to a bottle of medium-textured
Super Glue. The Whip Tip, a 1-3/4" precision
nozzle extension for glue bottles, makes my
job so much easier, helping me control the
glue and minimizing cleanup. I started at the
tailblock end of the guitar working my way
up towards the dovetail joint, gluing about
3" to 6" sections at a time, using binding
tape and whispering amounts of Accelerator.
Note: Always pre-check if the finish is too
delicate before using binding tape, as the
adhesion strength of this tape may cause a
major tear-out in the final removal.
Flexing Tortoise
After gluing in the purfling, I went around the
channel to make sure there was no excess
glue buildup anywhere, which helps to guarantee tight seam lines in the final stages. We
were almost ready to shape this single strip
of tortoise binding to the top, but first we
needed to scuff up the bottom and inside
surfaces of the binding with 320-grit sandpaper, which was double-stuck to a flat work-
table. This gives the glue something to bite
into for a secure fit.
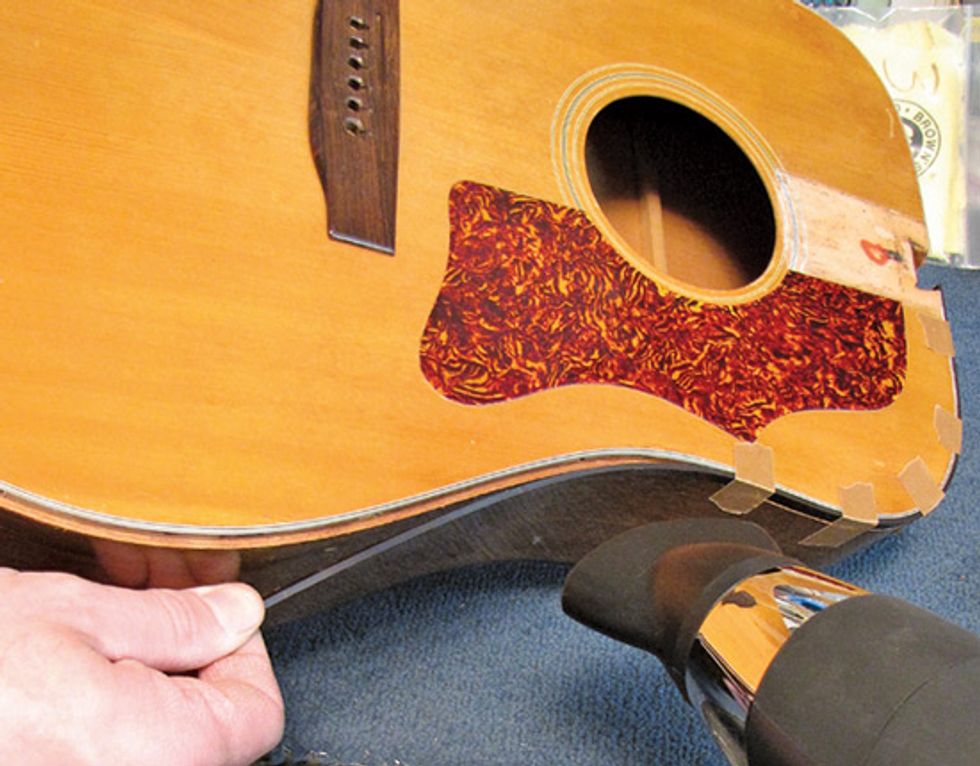
Using a hair dryer to flex the new binding into place.
Using a hair dryer for heat—mounted on our
ShopStand and Guitar Repair Vise set for controlling the heat’s direction—I was able to flex
the binding into place. I placed 1-1/2" strips
of tape—alternating top to side, and side to
top—spaced ½" to ¾" apart to secure the
binding in place and create a new memory for
where the material needed to be positioned.
The next day, I removed the tortoise binding
and then glued it permanently into place,
using the same procedure as in the previous
gluing and taping process. Using the medium
Super Glue allowed extra time for fitting and
getting the plastic to gently melt and bite in
before permanently setting up. After all of
the binding was glued into place, I used Stew
Mac’s thin Super Glue for final touchups.
Performing the final level trimming with a razor blade.
A razor blade with masking tape on one end of
the cutting surface, used as a spacer, works very
well for protecting the top and sides when doing
the final level trimming before light sanding and
airbrushing on a thin nitrocellulose top coat.
I used the following supplies for this restoration (all are available at stew-mac.com):
- Luthier’s file set (0842)
- Binding tape (0677)
- Thin Super Glue (0010)
- Medium Super Glue (0020)
- Whip Tip (1161)
- Accelerator (5984)
- Drop-fill toothpicks (3110)
- ShopStand and Guitar Repair Vise set (5391)
You can buy the hair dryer, razor blades, and
masking tape at your local hardware or convenience store.
I hope this series has given you some valuable
insights on rebinding a vintage instrument.
This is truly a major job and requires many,
many hours if you’re looking to rebind while
keeping a treasured original finish intact. Until
next time, keep those chisels sharp!
John Brown
John Brown, of Brown's Guitar Factory, is the inventor of the
Fretted/Less bass. He owns and operates a full guitar manufacturing and repair/restoration facility, which is staffed by
a team of talented luthiers. He is also the designer of guitar-making/repair tools and accessories that are used today by
instrument builders throughout the world.