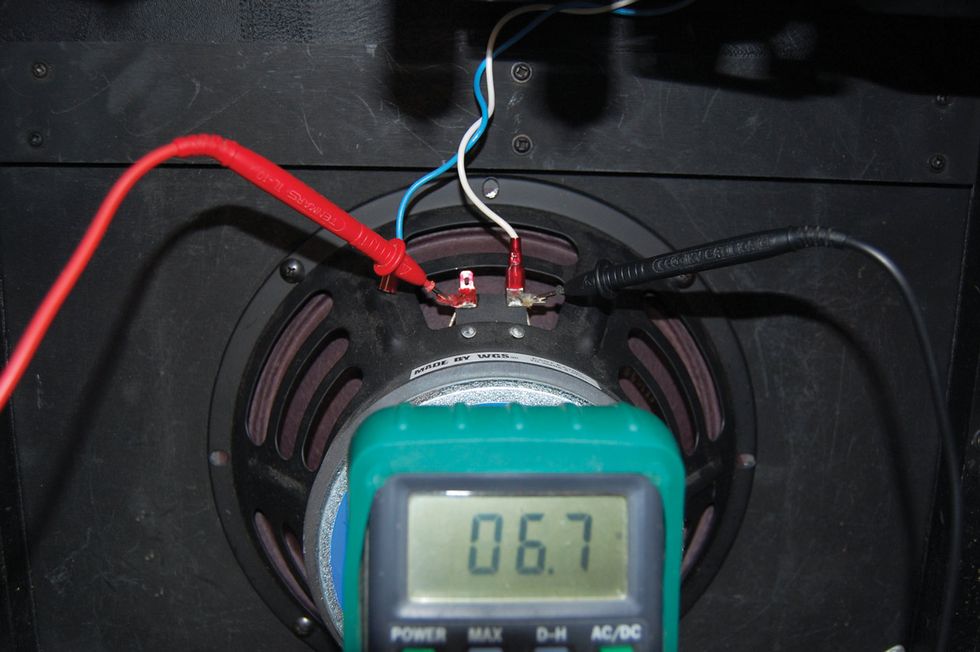
Our much-loved former columnist Jeff Bober returns to explain how to check and reset the bias of your amp’s output tubes—and delivers some potentially shocking warnings about a few common but dangerous techniques.
Hello again, Premier Guitar readers! It’s your old bud Jeff here, author of the once popular Ask Amp Man column. Editorial Director Ted Drozdowski asked me if I would be interested in writing about bias, and, of course, I said, “Sure, I know a thing or two about that!” So here I am, temporarily returning to these pages. Now, let’s get started.
What exactly is bias? Bias is prejudice in favor of or against … oh wait, wrong kind of bias. I think he wanted me to write about bias in a tube amplifier, which is far less polarizing.
Bias, as defined in the RCA Radiotron Designers Handbook, is “voltage applied to the grid [of a tube] to obtain a desired operating point.” Well, that is the most basic explanation, but for the most part it is good enough and pertains to the majority of tube output stages in our favorite tube guitar amps.
Setting the bias adjustment controls to these listed voltages in no way guarantees that your amp is properly biased.
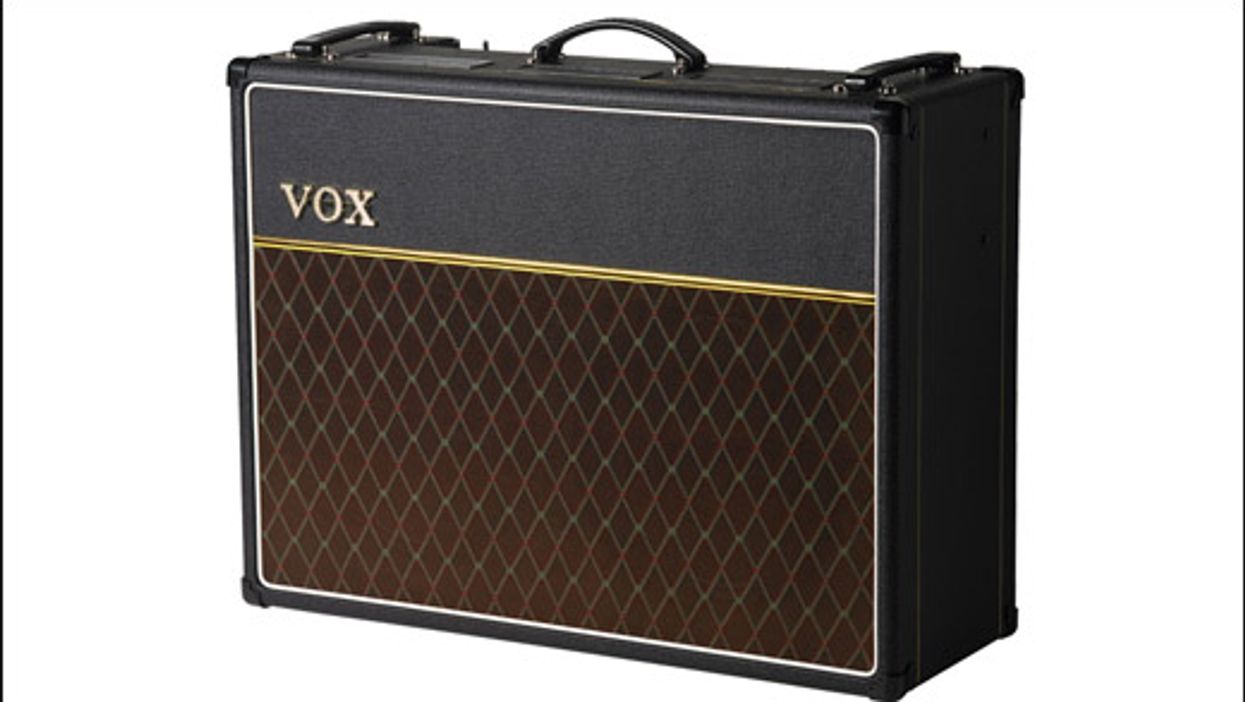
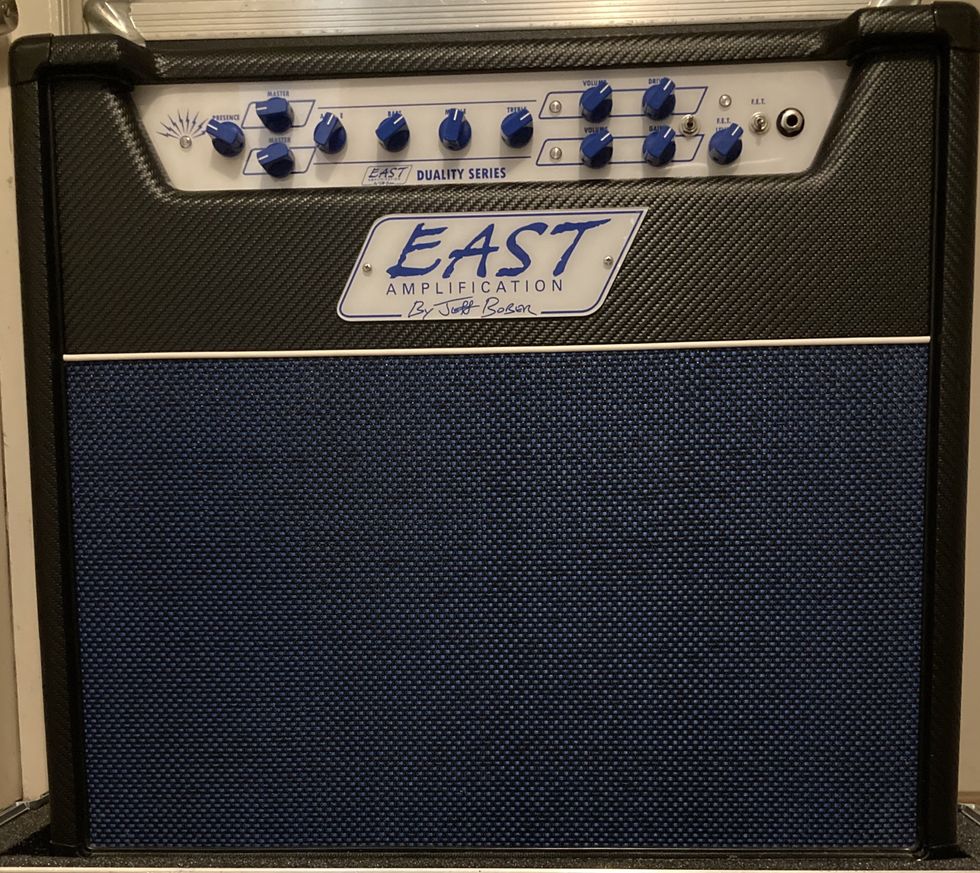
Besides “applying” a voltage to a vacuum tube, however, biasing can occur in another way as well. There are quite a few amplifiers, such as a Vox AC15 and AC30, any of my Budda and EAST designs, and even most of the early, low-wattage amplifiers of the tweed era that use what’s known as a “cathode bias” design. This is where the current flowing through the tube (which attains the aforementioned “desired operating point”) is not set by the voltage “applied” to the grid of the tube, but is instead set by the resistor in the cathode leg of the tube. It’s a bit more complicated than that, but the result is an amplifier whose output stage is “self-biasing.”
Most amplification devices, including transistors and even preamp tubes, need to be “biased” in order to perform properly, but this type of biasing is fixed in the design parameters of the circuit. In the case of the preamp tubes in your guitar amp, bias is based on the value of the cathode resistor, among other things. But that’s enough design theory for today. Let’s get back to the core task of biasing the output tubes in most guitar amplifiers.
First, the bias voltages you see listed on many schematics, such as 52V on a black-panel Fender Twin Reverb or 51V on a Marshall 100W Super Lead schematic, are merely approximations of the voltages that should be expected in that area of the circuit. Setting the bias adjustment controls to these listed voltages in no way guarantees that your amp is properly biased. Tube bias is also dependent on the high voltage (or B+) applied to the plate of the output tube, which can vary within tolerances of the transformers as well as in the AC line voltage fed to the amp. (This is why amps can sometimes sound better in one room or club than others.)
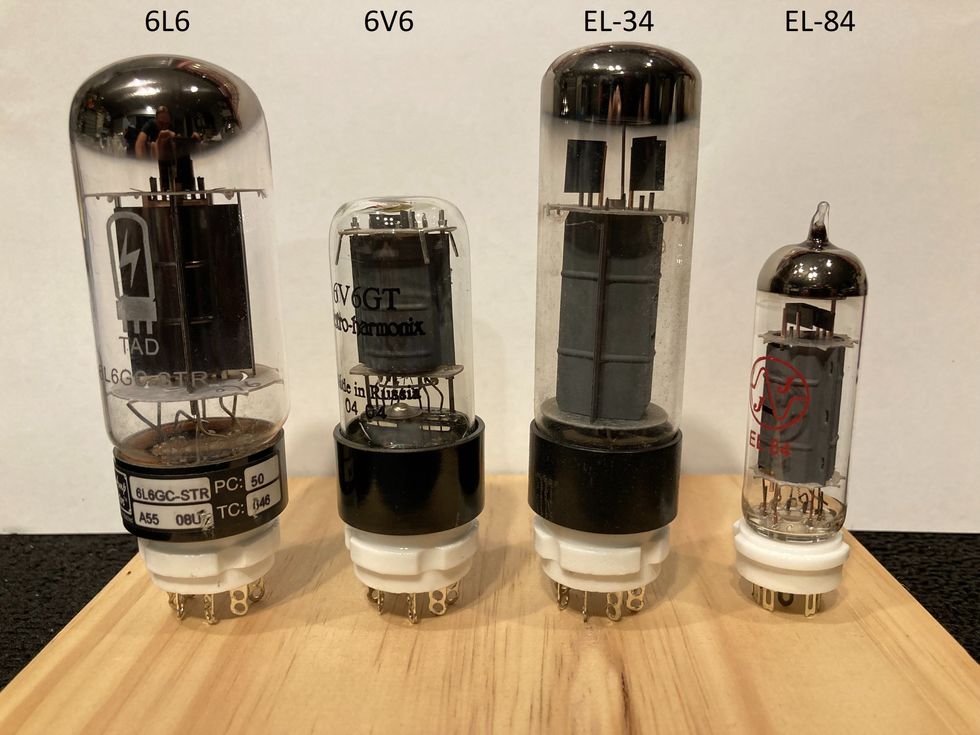
But even more important to understand is that tubes produced in different factories across the globe will bias up differently! What I mean by this is, if you properly bias a set of output tubes—let’s say 6L6s made in Russia—and then you swap them out with a set made in China, in the same amplifier without changing the setting of the bias control, the end result will almost always be a different bias reading. This is why it’s always best to have checked and reset the bias whenever output tubes are replaced. Now, how do we do that?
The Preferred Method
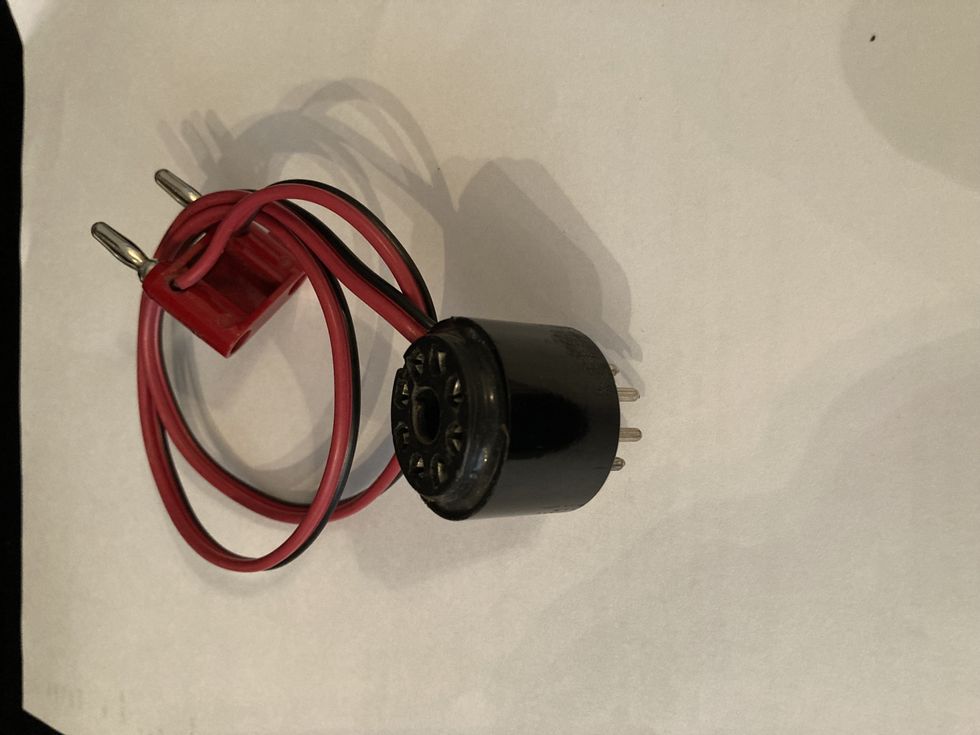
Fig. 1
There are several different ways to measure output-tube bias current at idle. The safest method is to use what is commonly called a bias probe (Fig. 1). This is a device that is inserted between an output tube and its socket. (I typically make my own bias probes, but if you simply search “bias probe” online, you’ll find plenty to choose from. If you already own a multimeter, you can simply purchase the probes, but there are also options to purchase a full system with either a digital or analog meter, should you need it.) This device breaks the connection between the cathode (which is the metallic electrode from which electrons are emitted into the tube) of the tube and its ground connection, and inserts a small value resistor in between. It then allows the voltage across the resistor to be read. The resistor is typically 1 ohm and the resulting voltage drop across it is in millivolts (mV), so no chance of shock here. This provides a true and accurate measurement of the actual current flowing through one tube. Then, you set your bias and you’re done!
But even more important to understand is that tubes produced in different factories across the globe will bias up differently!
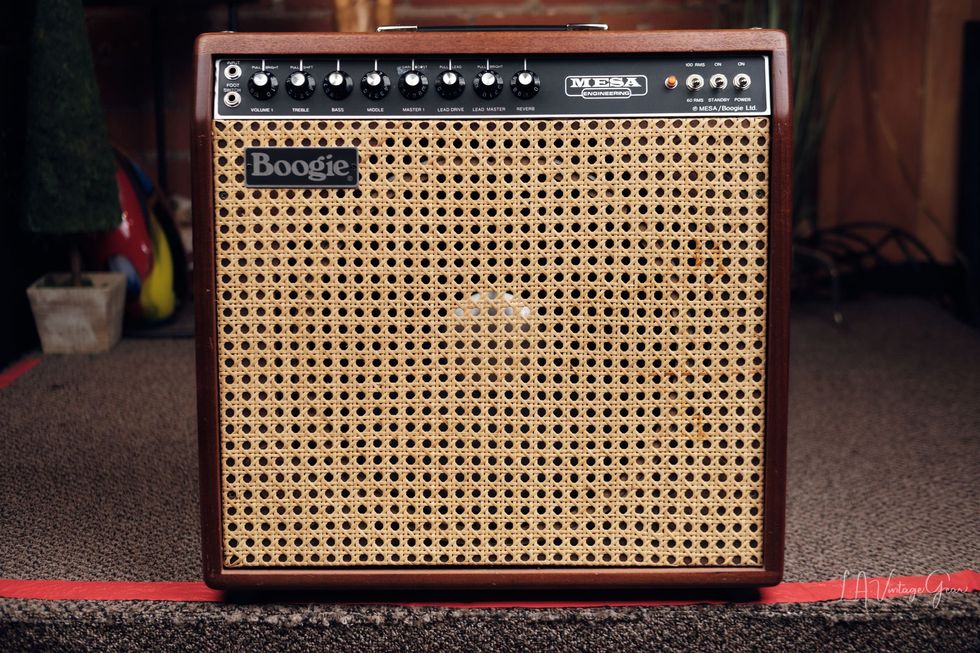
Ah, but wait! How do you set your bias? Let’s learn a bit more. Most tube amplifiers, if they are not cathode-biased designs, have some way to adjust the output-tube bias. One longstanding exception to this are most Mesa/Boogie amps. The bias voltage in these amps is not adjustable, which is why Mesa suggests only purchasing their tubes for their amps, because they are designed to fall within the acceptable bias range for their amps. This adds a certain degree of confidence for owner servicing, although, of course, it limits your options.
Let’s take a look, however, at a typical Fender or Marshall bias control. Most older Fenders have a pot with a slot for a screwdriver mounted to the chassis in the area of the power or mains transformer, while most older Marshalls have their bias pot mounted on the circuit board. (You might want to go online to look at schematics for your amp to help you find it.) Either way, this is where you’ll make your adjustment.
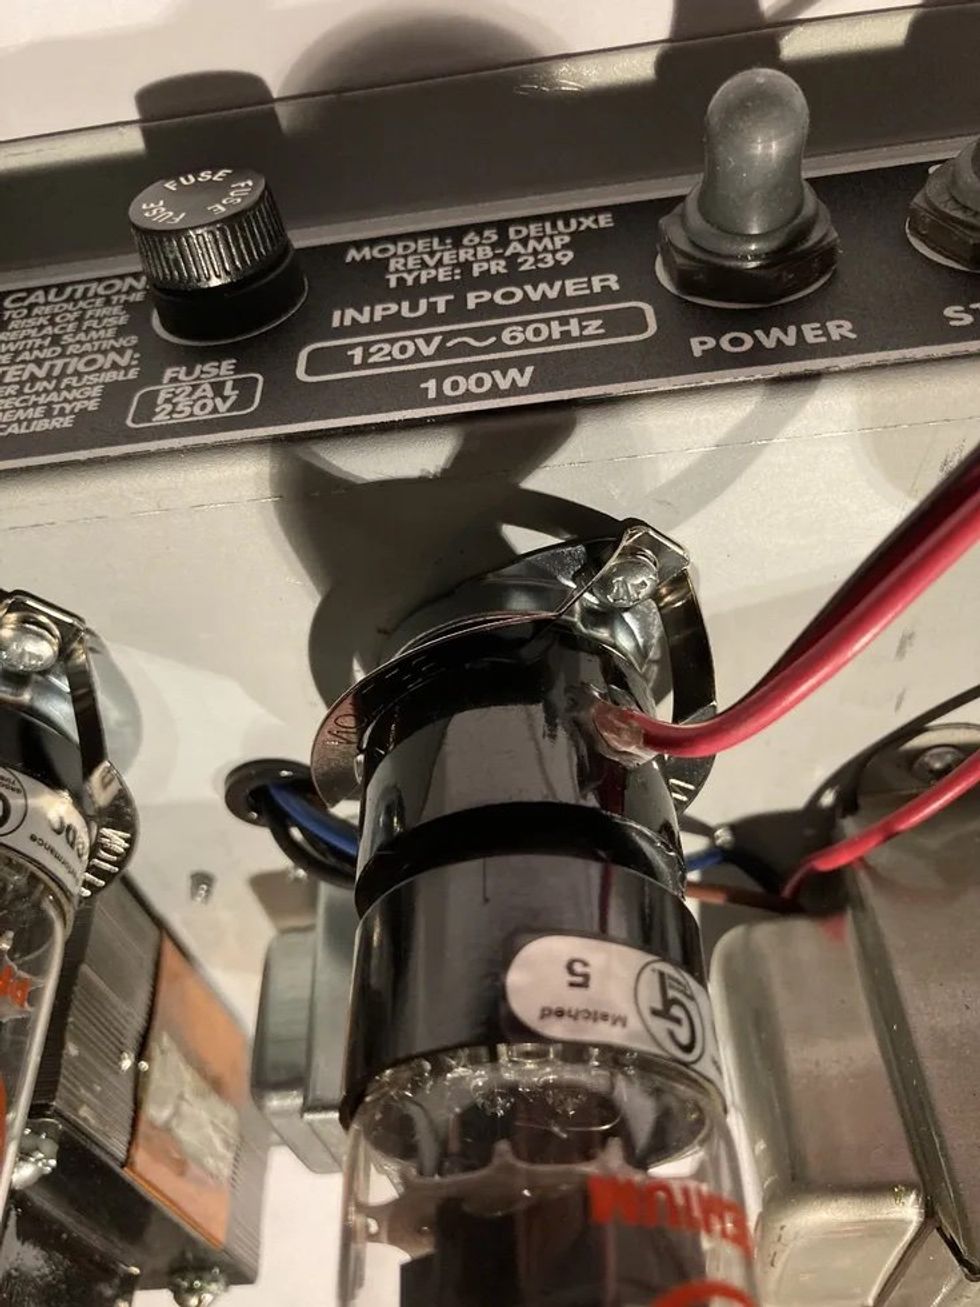
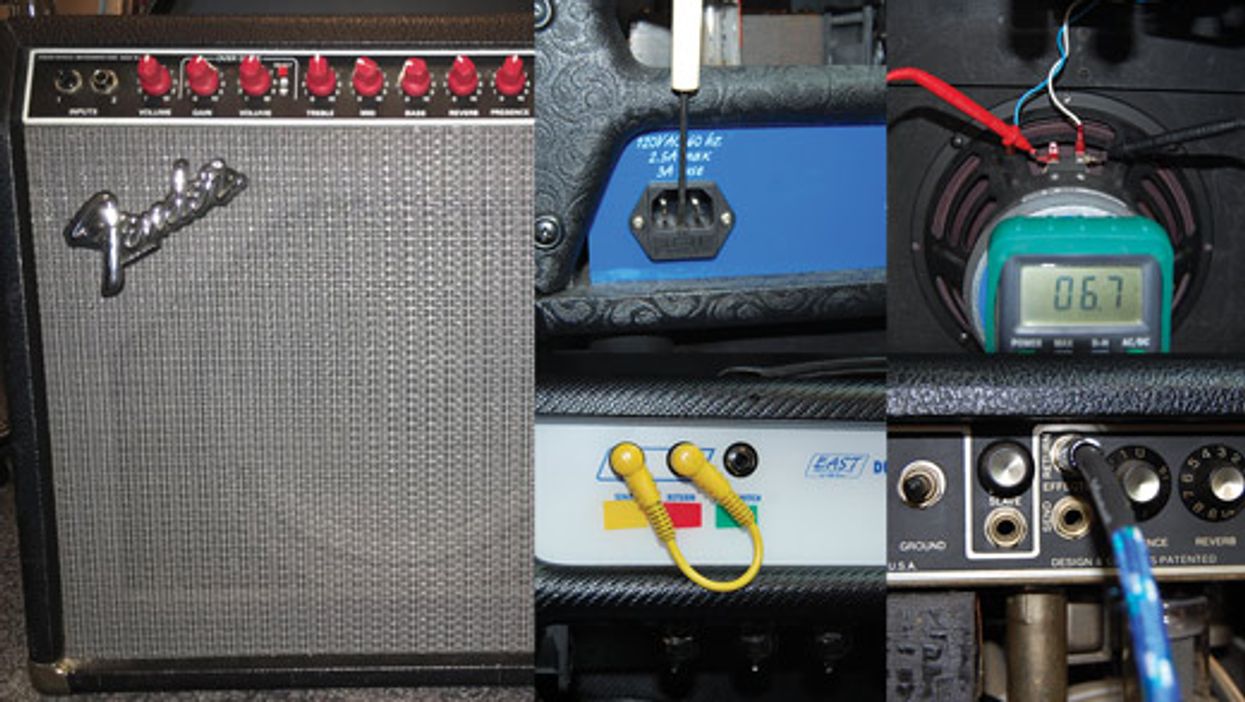
To get started, you’ll most likely need to pull the chassis and place it in a stable work environment. Insert the bias probe device between one of the tubes and the socket (Fig. 2). Make sure all the volume controls are set to zero, turn the amp on, and let the tubes warm up. It’s also good to try to have a load on the speaker jack—whether a speaker or an appropriate resistor or load box. This is not 100 percent necessary for just setting the bias to a particular number, but sound checking is one of the ways I like to make the final adjustments, so being able to connect the speaker to the chassis while it’s on the bench is certainly a necessity for me.
Now, where to set the numbers? There are certainly more than a few opinions floating around on the interwebs about what optimal bias settings are. Some engineering types will tout 50 percent maximum plate dissipation or 70 percent maximum dissipation, and while it may look good or make sense on paper, I’ve heard the result of guitar amplifiers designed by the book to optimal specifications … and to me they sound, well, less than optimal. It may work in the hi-fi world, where perfect sound reproduction is the goal, but guitar amplifiers are in the sound production business, so it’s a bit different. (In the most basic terms, maximum plate dissipation is the amount of power the plate of the tube is designed to deliver.)
Different types of output tubes have their own acceptable range of bias current. There are so many variables at play that there is no “correct” number. The plate voltage in the amplifier, the output transformer’s primary impedance, and the country of origin of a tube all factor into how it interacts with the voltage and output transformer to define what the optimal bias current will be. Below are the average ranges for some typical octal output tubes:
• 6L6: 25–35 mA
• EL34: 30–40 mA
• 6V6: 18–25 mA
• 6550: 35–45 mA
• KT66: 30–40 mA
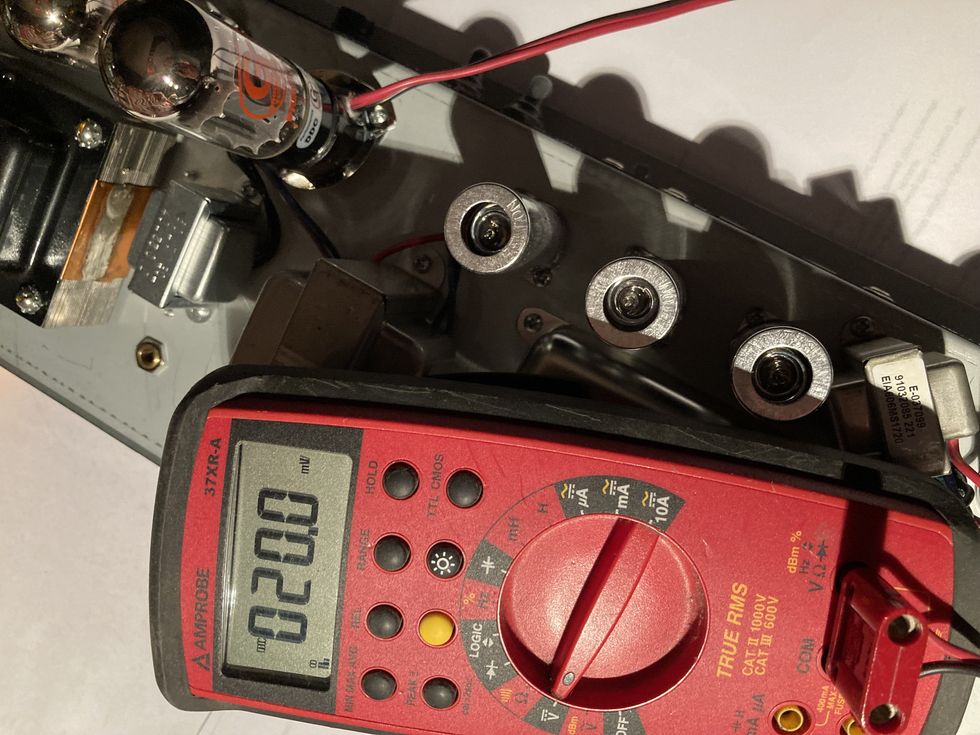
Fig. 3
These should be the ranges in which these tubes will perform and sound the best, and they can be accurately measured with a digital multimeter. The best way for you to decide what setting is best for you is a combination of the reading on the meter and your ears! Using the bias control, set the bias to somewhere in the ranges given above (Fig. 3) and play the amp. Note: Some amps will act funny and develop horrible noises (parasitic oscillations) when a bias probe is in place while the amp is being played. If this is the case, you’ll need to remove the bias probe each time you play the amp.)
Move the setting a couple mA in one direction or the other and play again. Don’t expect extreme changes; that’s not what we’re looking for. Listen for subtle differences. Is one setting a little more or less harsh? Is the bottom end too soft or flubby? Is the amp as clean as you want it? Sometimes these little subtleties are what make one amp sound and feel better than another!
Most older Fenders have a pot with a slot for a screwdriver mounted to the chassis in the area of the power or mains transformer, while most older Marshalls have their bias pot mounted on the circuit board.
Also, you should be doing this at the volume you would typically use onstage or in the studio. You may not notice much change if your volume is at 1, but you want to optimize the amp for the way you will be using it.
Eyes Wide Open
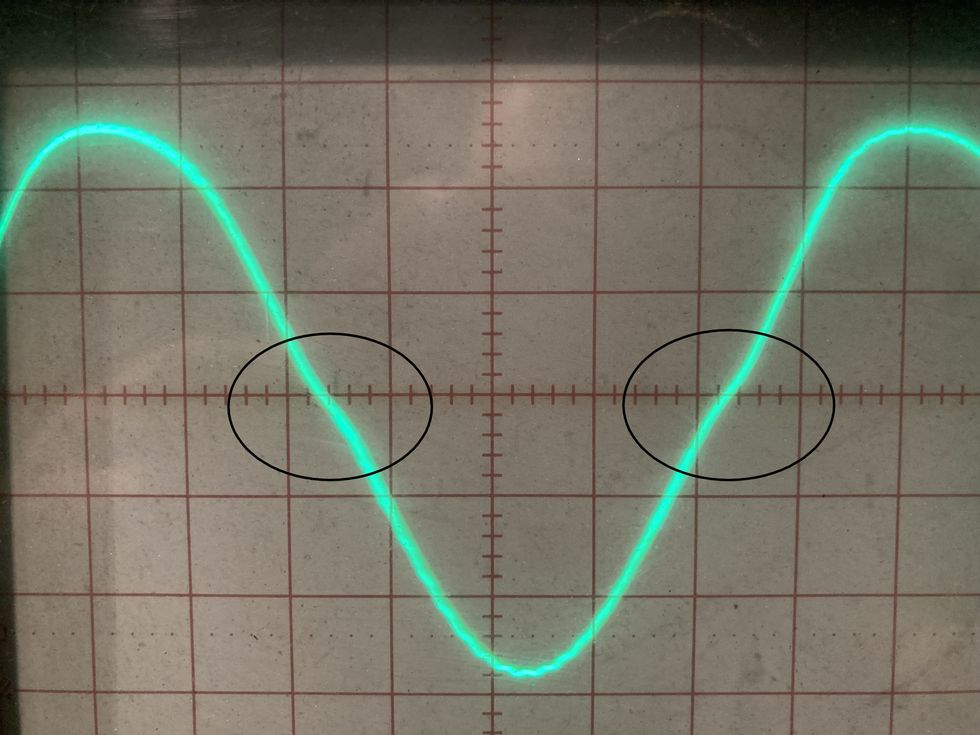
Fig. 4
Knowing the ballpark bias numbers is good, and adding your ears is even better, but I also like to see what I’m hearing, so I always incorporate an oscilloscope when I’m setting the bias on an amp. I mentioned crossover distortion above, and when it comes to setting up amps for today’s pedal-hungry players, I find that setting the bias to where there is just a hint of crossover distortion at full output is what works best. Fig. 4 is what that looks like on the oscilloscope. This keeps the amp very clean and makes most pedal users happy.
By the way, here’s a mini primer in crossover distortion. In a push-pull output stage, which is found in most amplifiers with two or more output tubes, each tube (or pair of tubes) is responsible for amplifying at least half of the audio signal. If the tubes are not biased properly, one tube (or pair) will stop amplifying before the other tube (or pair) start amplifying. This will create crossover distortion. Proper biasing will allow the two halves to interact correctly. It’s like a nice firm handshake between both halves.
Beware These Old-School Methods
Let’s look at a couple popular methods that I do not recommend, but are worth discussing because they are, nonetheless, common. The first is: With the amp off and output tubes removed, use a multimeter to measure the resistance of each half of the primary side of the output transformer. This would typically be from the center tap to each side of the primary winding.
In the most basic terms, a transformer is a bunch of wire wound around a steel core. On the primary side of an output transformer, the center tap is the electrical “middle” of this long length of wire. This is typically where the high voltage is applied. The ends of this length of wire are connected to the plates of the tube, thereby applying the high voltage to the tubes. As an example, typically in most Fender amps, the center tap is red, and the ends of the primary windings are blue and brown.
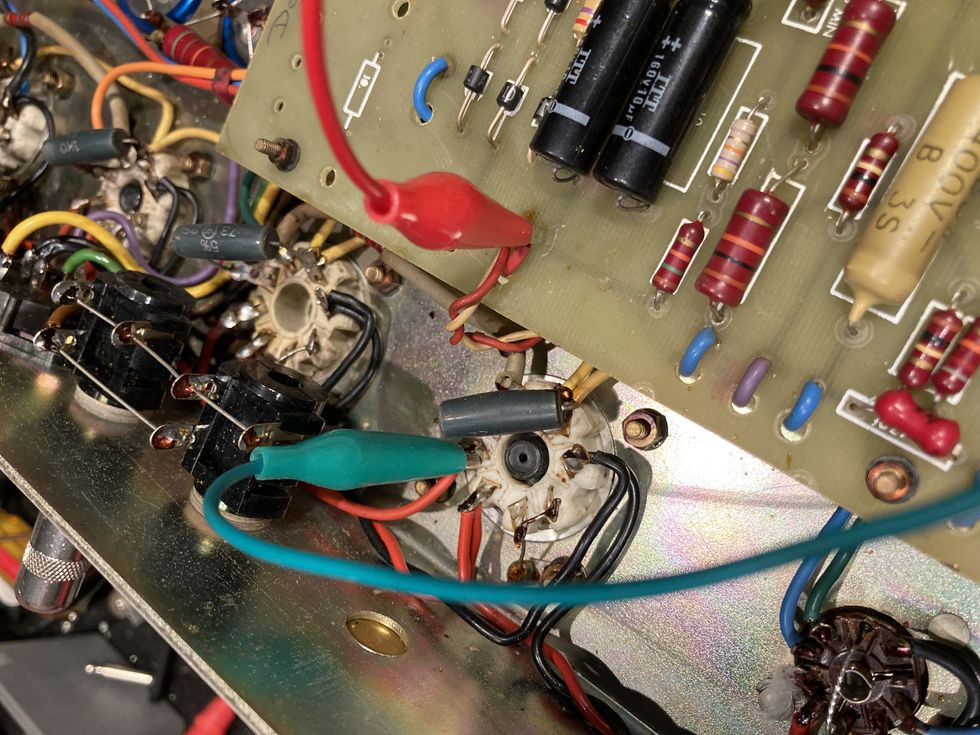
Fig. 5
Next, install the output tubes, turn the amp on, and measure the voltage drop across each half of the output transformer with the amp at idle in operational mode (Fig. 5). Voltage divided by resistance will give you the DC current through the tubes. For example, 1.17V / 15.8R = 0.074, or 74 mA. The numbers I used here were actual measurements in one side (one half) of a 100W amp using four output tubes (two per side). So, divide the 74 mA by two, and you get an average of 37 mA per tube.
Next, you can try the shunt method. This requires a multimeter that can read DC current in milliamps (mA). Connect one meter lead to the center tap of the output transformer and the other lead to the output transformer’s primary side. Typically, in most amps using octal tubes (6L6, 6V6, EL34, 6550, KT88, etc.), this will be pin 3 on any output tube socket. Turn the amp on and, in operating mode at idle (i.e., volume off), measure the current across that half of the output transformer. For example, if your measurement is 72 mA and it’s an amp that utilizes four output tubes, the current measured is for two of those tubes, so once again divide by two to arrive at 36 mA per tube.
I’ve heard the result of guitar amplifiers designed by the book to optimal specifications … and to me they sound, well, less than optimal.
Both of those methods are very old school and still in practice, but I wouldn’t use either for two reasons: 1) I don’t believe they’re very accurate, and 2) they’re dangerous! You’re probing around inside the high voltage area of the amp, and one slip will either take out a fuse, take out a tube, take out your meter, or, worse case, let you know exactly what 450V DC feels like! So, although these methods are used, let’s just say no here.
Some Personal Insights
I’d also like to add a little personal experience to this procedure, based on decades in the biz. Back in the day, when I began servicing and modifying gear, guitarists were regularly playing 50- and 100-watt amps. (Everybody looked at me like I had three heads when I came out with the 18-watt Budda Twinmaster, but that’s a whole other story.) There were some overdrive and distortion pedals around (now all vintage), but certainly not the pedal proliferation we have now, so players were pretty much guitar, cable, amp … go! In these situations, I would most times run the tubes with a pretty hot bias so the amp would be fatter and overdrive a bit earlier and easier, as a decent percentage of the overdrive was developed by pushing the output tubes. As time went on, output attenuators became more popular, so amps could be pushed hard, but at more manageable volume levels. That was still a good scenario for a hotter bias of the output tubes in high-power amps. Eventually, players started playing lower-power amps, so they could open them up and get great output-tube distortion at lesser volumes. The problem is that hotter-biased low-power amps tend to get mushy and have less definition when pushed hard, so a more moderate bias setting is preferred here—just enough so there is no crossover distortion. Move up to today’s scenario and you’ll find that almost all overdrive and/or distortion is typically coming from a pedal. In that case, an amp is nothing more than an amplification device for pedals.
So, that’s what I’ve learned about tube-biasing from my decades of experience. But the bottom line is, there is no absolute right or wrong settings when it comes to biasing an amp. Keep your ears open and go with what sounds best to you.
- Ask Amp Man: A Fond Farewell ›
- Ask Amp Man: A Vintage Showman, Not Ready for Prime Time ›
- Ask Amp Man: Add Some Marshall Grit to a Fender Bassman ›
Well-designed pickups. Extremely comfortable contours. Smooth, playable neck.
Middle position could use a bit more mids. Price could scare off some.
$2,999
Ernie Ball Music Man StingRay II
A surprise 6-string collaboration with Cory Wong moves effortlessly between ’70s George Benson and Blink-182 tones.
Announced at the 2025 NAMM show, Cory Wong’s new collaboration with Ernie Ball Music Man scratched an itch—namely, the itch for a humbucker-loaded guitar that could appease Wong’s rock-and-R&B alter ego and serve as complement to his signature Fender Strat. Inspiration came from no further than a bandmate’s namesake instrument. Vulfpeck bassist Joe Dart has a line of signature model EBMM basses, one of which uses the classic StingRay bass body profile. So, when Wong went looking for something distinctive, he wondered if EBMM could create a 6-string guitar using the classic StingRay bass body and headstock profile.
Double the Fun
Wong is, by his own admission, a single-coil devotee. That’s where the core of his sound lives and it feels like home to him. However, Wong is as inspired by classic Earth, Wind & Fire tones and the pop-punk of the early ’90s as he is by Prince and the Minneapolis funk that he grew up with. The StingRay II is a guitar that can cover all those bases.
Ernie Ball has a history of designing fast-feeling, comfortable necks. And I can’t remember ever struggling to move around an EBMM fretboard. The roasted maple C-shaped neck here is slightly thicker in profile than I expected, but still very comfortable. (I must also mention that the back of the neck has a dazzling, almost holographic look to the grain that morphs in the light). By any measure, the StingRay II’s curves seemed designed for comfort and speed. Now, let’s talk about those pickups.Hot or Not?
A few years ago EBMM introduced a line of HT (heat-treated) pickups. The pickups are built with technology the company used to develop their Cobalt and M-Series strings. A fair amount of the process is shrouded in secrecy and must be taken on faith, but EBMM says treating elements of the pickup with heat increases clarity and dynamic response.
To find out for myself, I plugged the StingRay II into a Fender Vibroverb, Mesa/Boogie Mark VII, and a Neural DSP Quad Cortex (Wong’s preferred live rig). Right away, it was easy to hear the tight low end and warm highs. Often, I feel like the low end from neck humbuckers can feel too loose or lack definition. Neither was the case here. The HT pickup is beautifully balanced with a bounce that’s rich with ES-335 vibes. Clean tones are punchy and bright—especially with the Vibroverb—and dirty tones have more room for air. Individual notes were clear and articulate, too.
Any guitar associated with Wong needs a strong middle-position or combined pickup tone, and the StingRay II delivers. I never felt any significant signal loss in the blended signal from the two humbuckers, even if I could use a bit more midrange presence in the voicing. The midrange gap is nothing an EQ or Tube Screamer couldn’t fix, though. And not surprisingly, very Strat-like sounds were easy to achieve for having less midrange bump.
Knowing Wong’s love for ’90s alt-rock, I expected the bridge pickup to have real bite, and it does, demonstrating exceptional dynamic range and exceptional high-end response that never approached shrill. Nearly every type of distortion and overdrive I threw at it sounded great, but especially anything with a scooped-mid flavor and plenty of low end.
The Verdict
By any measure, the StingRay II is a top-notch, professional instrument. The fit and finish are immaculate and the feel of the neck makes me wonder if EBMM stashes some kind of secret sandpaper, because I don’t think I’ve ever felt a smoother, more playable neck. Kudos are also due to EBMM and Wong for finding an instrument that can move between ’70s George Benson tones and the hammering power chords of ’90s Blink-182. Admittedly, the nearly $3K price could give some players pause, but considering the overall quality of the instrument, it’s not out of line. Wong’s involvement and search for distinct sounds makes the StingRay II more than a tired redux of a classic model—an admirable accomplishment considering EBMM’s long and storied history.
Ernie Ball Music Man StingRay II Cory Wong Signature Electric Guitar - Charcoal Blue with Rosewood Fingerboard
StingRay II Cory Wong - Charcoal BlueThe Melvins' Buzz Osborne joins the party to talk about how he helped Kurt Cobain find the right sounds.
Growing up in the small town of Montesano, Washington, Kurt Cobain turned to his older pal Buzz Osborne for musical direction. So on this episode, we’re talking with the Melvins leader about their friendship, from taking Cobain to see Black Flag in ’84 to their shared guitar journey and how they both thought about gear. And in case you’ve heard otherwise, Kurt was never a Melvins roadie!
Osborne’s latest project is Thunderball from Melvins 1983, something of a side trajectory for the band, which harkens back to this time in Osborne’s life. We dig into that and how it all relates and much more.
In challenging times, sometimes elemental music, like the late Jessie Mae Hemphill’s raucous Mississippi hill country blues, is the best salve. It reminds us of what’s truly essential––musically, culturally, and emotionally. And provides a restorative and safe place, where we can open up, listen, and experience without judgement. And smile.
I’ve been prowling the backroads, juke joints, urban canyons, and VFW halls for more than 40 years, in search of the rawest, most powerful and authentic American music. And among the many things I’ve learned is that what’s more interesting than the music itself is the people who make it.
One of the most interesting people I’ve met is the late Jessie Mae Hemphill. By the time my wife, Laurie Hoffma, and I met Jessie Mae, on a visit to her trailer in Senatobia, Mississippi, she’d had a stroke and retired from performing, but we’d been fortunate to see her years before at the New Orleans Jazz & Heritage festival, where she brought a blues style that was like quiet thunder, rumbling with portent and joy and ache, and all the other stuff that makes us human, sung to her own droning, rocking accompaniment on an old Gibson ES-120T.
To say she was from a musical family is an understatement. Her grandfather, Sid, was twice recorded by Alan Lomax for the Library of Congress. While Sid played fiddle, banjo, guitar, harmonica, keyboards, and more, he was best known as the leader of a fife-and-drum band that made music that spilled directly from Africa’s main artery. Sid was Jessie Mae’s teacher, and she learned well. In fact, you can see her leading her own fife-and-drum group in Robert Mugge’s wonderful documentary Deep Blues(with the late musician and journalist Robert Palmer as on-screen narrator), where she also performs a mournful-but-hypnotic song about betrayal—solo, on guitar—in Junior Kimbrough’s juke joint.
That movie, a 1982 episode of Mr. Rogers’ Neighborhood (on YouTube) where she appears as part of Othar Turner’s Gravel Springs fife-and-drum band, and worldwide festival appearances are as close as Jessie Mae ever got to fame, although that was enough to make her important and influential to Bonnie Raitt, Cat Power, and others. And she made two exceptional albums during her lifetime: 1981’s She-Wolf and 1990’s Feelin’ Good. If you’re unfamiliar with North Mississippi blues, their sound will be a revelation. The style, as Jessie Mae essayed it, is a droning, hypnotic joy that bumps along like a freight train full of happily rattling box cars populated by carefree hobos. Often the songs ride on one chord, but that chord is the only one that’s needed to put the music’s joy and conviction across. Feelin’ Good, in particular, is essential Jessie Mae. Even the songs about heartbreak, like “Go Back To Your Used To Be” and “Shame on You,” have a propulsion dappled with little bends and other 6-string inflections that wrap the listener in a hypnotic web. Listening to Feelin’ Good, it’s easy to disappear in the music and to have all your troubles vanish as well—for at least as long as its 14 songs last.“She made it clear that she had a gun—a .44 with a pearl handle that took up the entire length of her handbag.”
The challenge I’ve long issued to people unfamiliar with Jessie Mae’s music is: “Listen to Feelin’ Good and then tell me if you’re not feeling happier, more cheerful, and relaxed.” It truly does, as the old cliché would have it, make your backbone slip and your troubles along with it. Especially uptempo songs like the scrappy title track and the charging “Streamline Train.” There’s also an appealing live 1984 performance of the latter on YouTube, with Jessie Mae decked out in leopard-print pants and vest, playing a tambourine wedged onto her left high-heel shoe––one of her stylish signatures.
Jessie Mae was a complex person, caught between the old-school dilemma of playing “the Devil’s music” and yearning for a spiritual life, sweet as pecan pie with extra molasses but quick to turn mean at any perceived slight. She also spent much of her later years in poverty, in a small trailer with a hole in the floor where mice and other critters got in. And she was as mistrustful of strangers as she was warm once she accepted you into her heart. But watch your step before she did. On our first visit to her home, she made it clear that she had a gun—a .44 with a pearl handle that took up the entire length of her handbag and would make Dirty Harry envious.
Happily, she took us into her heart and we took her into ours, helping as much as we could and talking often. She was inspiring, and I wrote a song about her, and even got to perform it for her in her trailer, which was just a little terrifying, since I knew she would not hold back her criticism if she didn't like it. Instead, she giggled like a kid and blushed, and asked if I’d write one more verse about the artifacts she’d gathered while touring around the world.
Jessie Mae died in 2006, at age 82, and, as happens when every great folk artist dies, we lost many songs and stories, and the wisdom of her experience. But you can still get a whiff of all that––if you listen to Feelin’ Good.
Intermediate
Intermediate
How David Gilmour masterully employs target notes to make his solos sing.
When I was an undergraduate jazz performance major struggling to get a handle on bebop improvisation, I remember my professor Dave LaLama admonishing me, “If you think playing over the fast tunes is hard, wait until you try playing over the ballads. What Dr. Lalama was trying to impart was that playing fast scales over fast changes could get you by, but playing melodically over slow tempos, when your note choices are much more exposed, would really test how well you could create meaningful phrases.
Although getting past the “this scale works over these chords” approach to improvisation generally requires hours of shedding, aiming for particular target notes (specific notes over specific chords) is an optimum strategy to maximize your practice time. In the realm of rock guitar, I can think of no greater master of the melodic target note technique while playing ballads than David Gilmour.
For the unfamiliar few, Gilmour was first enlisted by fledgling psychedelic rockers Pink Floyd in 1967, when original guitarist/vocalist Syd Barrett began having drug-induced struggles with mental health. The band experimented with various artistic approaches for several years before refining them into a cohesive “art rock” sound by the early ’70s. The result was an unbroken streak of classic, genre-defining conceptual albums that included Meddle, The Dark Side of the Moon, Wish You Were Here, Animals, and The Wall. Although bassist/vocalist Roger Waters assumed the role of de facto bandleader and primary songwriter, Gilmour was a significant contributor who was praised for his soulful singing and expertly phrased lead playing that seemed to magically rework pedestrian blues phrases into sublimely evocative melodies. His focus on musicality over excessive displays of technique made him a musician’s musician of sorts and earned him a stellar reputation in guitar circles. When Roger Waters left Pink Floyd in the mid ’80s, Gilmour surprised many by calmly assuming the leadership mantle, leading the band through another decade of chart-topping albums and stadium tours. Although Pink Floyd are not officially broken up (keyboardist and founding member Richard Wright died in 2008 while Gilmour and drummer Nick Mason joined forces with Ukrainian singer Andriy Khlyvnyuk on the one-off single “Hey Hey Rise Up” in 2022), Gilmour has mostly spent the last few decades concentrating on his solo career. His latest release, Luck and Strange, features his wife, novelist Polly Sampson, as primary lyricist and daughter Romany Gilmour as vocalist on several tracks. His recent tour filled arenas around the world.
Let’s take a page from Gilmour’s hallowed playbook and see how incorporating a few well-chosen target notes can give our playing more melody and structure.
For the sake of simplicity, all the examples use the Gm/Bb major pentatonic scale forms. In my experience as a teacher, I find that most students can get a pretty solid handle on the root-position, Form-I minor pentatonic scale but struggle to incorporate the other four shapes while playing lead. One suggestion I give them is to work on playing the scales from the top notes down and focus on the four highest strings only. I believe this is a more logical and useful approach to incorporating these forms into your vocabulary. Try playing through Ex. 1, Ex. 2, Ex. 3, and Ex. 4, which are based on the top-down approach of the Form I, Form II, Form IV, and Form I (up an octave) shapes respectively.
Ex. 1
Ex. 2
Ex. 3
Ex. 4
Once you’ve gotten a handle on the scales, try playing Ex. 5, which is loosely based on the extended introduction to Pink Floyd’s “Shine On You Crazy Diamond.” We begin by soloing over a static Gm chord for four measures. As target notes, I’ve chosen the root and 5th of the G minor chord ( the notes G and D, respectively). In the first measure, we’re starting in a minor pentatonic Form I with a bend up to the root of the Gm chord. A flurry of notes on beat 4 sets us up for the bend to the D in the second measure. The D note is again targeted in measure three—this time up an octave via a shift into the minor pentatonic Form II shape. Measure four aims for the G tonic up an octave, but ends with a bend that targets a C—the root of the IVm (Cm) chord in the final measure. By focusing on target notes and connecting them with embellishing licks, your lead lines will have a much better sense of direction and melodic narrative. Also, by only targeting the root and 5th of the chord, the target note approach will be easily transferrable to songs in a G blues context (G pentatonic minor over a G major or G dominant tonality).
Ex. 5
A further exploration of this approach, Ex. 6 begins with a two-beat pickup that resolves to the scale tonic G. This time however, the G isn’t serving as the root of the Im chord. Instead, it’s the 5th of Cm—the IVm chord. Employing the root of the pentatonic scale as the fifth of the IVm chord is a textbook Gilmour-ism and you can hear him use it to good effect on the extended intro to “Echoes” from Live in Gdansk. When approaching the C on beat 2 of the second full measure, bend up from the Bb on the 6th fret of the 1st string then slide up to the C on the 8th fret without releasing the bend or picking again. In the final measure, I’ve introduced two Db notes, which serve as the b5 “blue note” of the scale and provide melodically compelling passing tones on the way to the G target note on beat 4.
Ex. 6
Exclusively positioned in the Form-IV G minor pentatonic shape, Ex. 7 is based on a bluesy lick over the I chord in the first and third measures that alternately targets a resolution to the root of the IV chord (C ) and the root of the V chord (D7#9) in the second and fourth measures. Being able to resolve your lead phrases to the roots of the I, IV, and V chords on the fly is an essential skill ace improvisers like Gilmour have mastered.
Ex. 7
Now let’s turn our attention to the Bb major pentatonic scale, which is the relative major of G minor. Play through the Form I and Form II shapes detailed in Ex. 8 and Ex. 9 below. You’ll see I’ve added an Eb to the scale (technically making them hexatonic scales). This allows us a bit more melodic freedom and—most importantly—gives us the root note of the IV chord.
Ex. 8
Ex. 9
Channeling the melodic mojo of Gilmour’s lead jaunts on Pink Floyd’s “Mother” and “Comfortably Numb,” Ex. 10 targets chord tones from the I, IV, and V (Bb, Eb, and F) chords.
The muted-string rake in first measure helps “sting” the F note, which is the 5th of the Bb. Measure two targets a G note which is the 3rd of the Eb. This same chord/target note pairing is repeated in the third and fourth measures, although the G is now down an octave. For the F and Eb chords of measures five and six, I’ve mirrored a favorite Gilmour go-to: bending up to the 3rd of a chord then releasing and resolving to the root (an A resolving to an F for the F chord and a G resolving to an Eb for the Eb chord.) The final measure follows a melodic run down the Bb scale that ultimately resolves on the tonic. Be sure to pay attention to the intonation of all your bends, especially the half-step bend on the first beat of measure seven.
As a takeaway from this lesson, let’s strive to “Be Like Dave” and pay closer attention to target notes when soloing. Identify the roots of all the chords you’re playing over in your scales and aim for them as the beginning and/or ending notes of your phrases. Think of these target notes as support beams that will provide structure to your lead lines and ultimately make them more melodically compelling.