Our much-loved former columnist Jeff Bober returns to explain how to check and reset the bias of your amp’s output tubes—and delivers some potentially shocking warnings about a few common but dangerous techniques.
Hello again, Premier Guitar readers! It’s your old bud Jeff here, author of the once popular Ask Amp Man column. Editorial Director Ted Drozdowski asked me if I would be interested in writing about bias, and, of course, I said, “Sure, I know a thing or two about that!” So here I am, temporarily returning to these pages. Now, let’s get started.
What exactly is bias? Bias is prejudice in favor of or against … oh wait, wrong kind of bias. I think he wanted me to write about bias in a tube amplifier, which is far less polarizing.
Bias, as defined in the RCA Radiotron Designers Handbook, is “voltage applied to the grid [of a tube] to obtain a desired operating point.” Well, that is the most basic explanation, but for the most part it is good enough and pertains to the majority of tube output stages in our favorite tube guitar amps.
Setting the bias adjustment controls to these listed voltages in no way guarantees that your amp is properly biased.
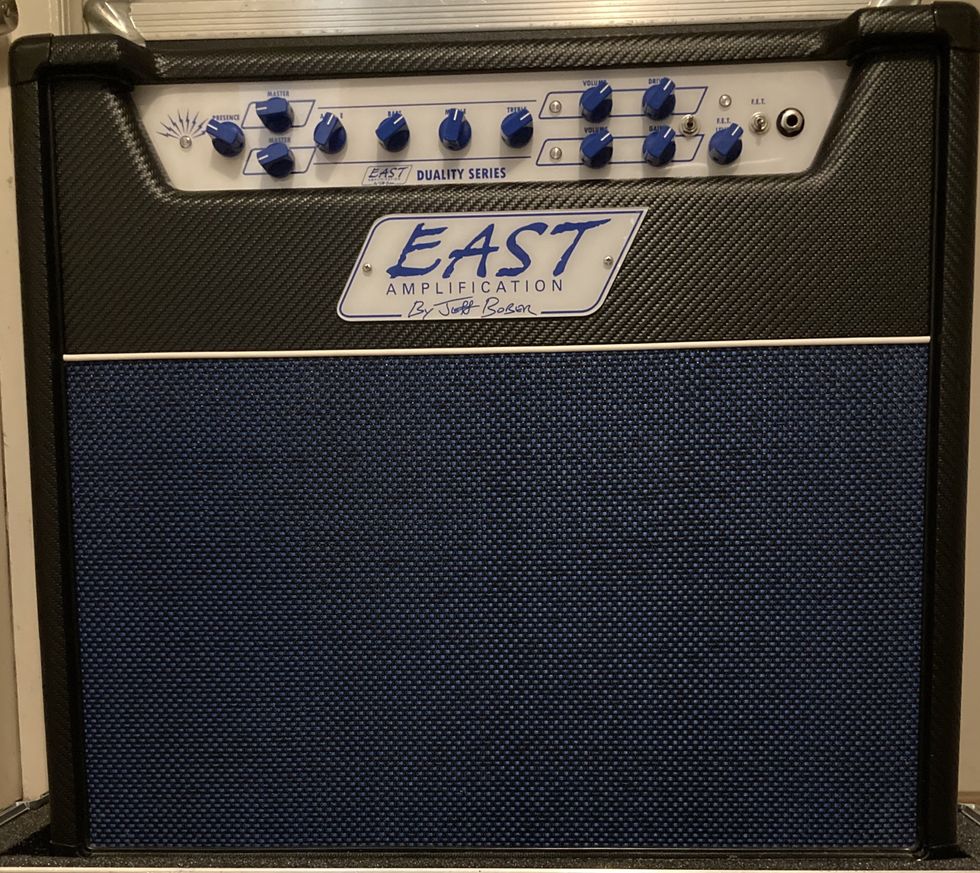
Besides “applying” a voltage to a vacuum tube, however, biasing can occur in another way as well. There are quite a few amplifiers, such as a Vox AC15 and AC30, any of my Budda and EAST designs, and even most of the early, low-wattage amplifiers of the tweed era that use what’s known as a “cathode bias” design. This is where the current flowing through the tube (which attains the aforementioned “desired operating point”) is not set by the voltage “applied” to the grid of the tube, but is instead set by the resistor in the cathode leg of the tube. It’s a bit more complicated than that, but the result is an amplifier whose output stage is “self-biasing.”
Most amplification devices, including transistors and even preamp tubes, need to be “biased” in order to perform properly, but this type of biasing is fixed in the design parameters of the circuit. In the case of the preamp tubes in your guitar amp, bias is based on the value of the cathode resistor, among other things. But that’s enough design theory for today. Let’s get back to the core task of biasing the output tubes in most guitar amplifiers.
First, the bias voltages you see listed on many schematics, such as 52V on a black-panel Fender Twin Reverb or 51V on a Marshall 100W Super Lead schematic, are merely approximations of the voltages that should be expected in that area of the circuit. Setting the bias adjustment controls to these listed voltages in no way guarantees that your amp is properly biased. Tube bias is also dependent on the high voltage (or B+) applied to the plate of the output tube, which can vary within tolerances of the transformers as well as in the AC line voltage fed to the amp. (This is why amps can sometimes sound better in one room or club than others.)
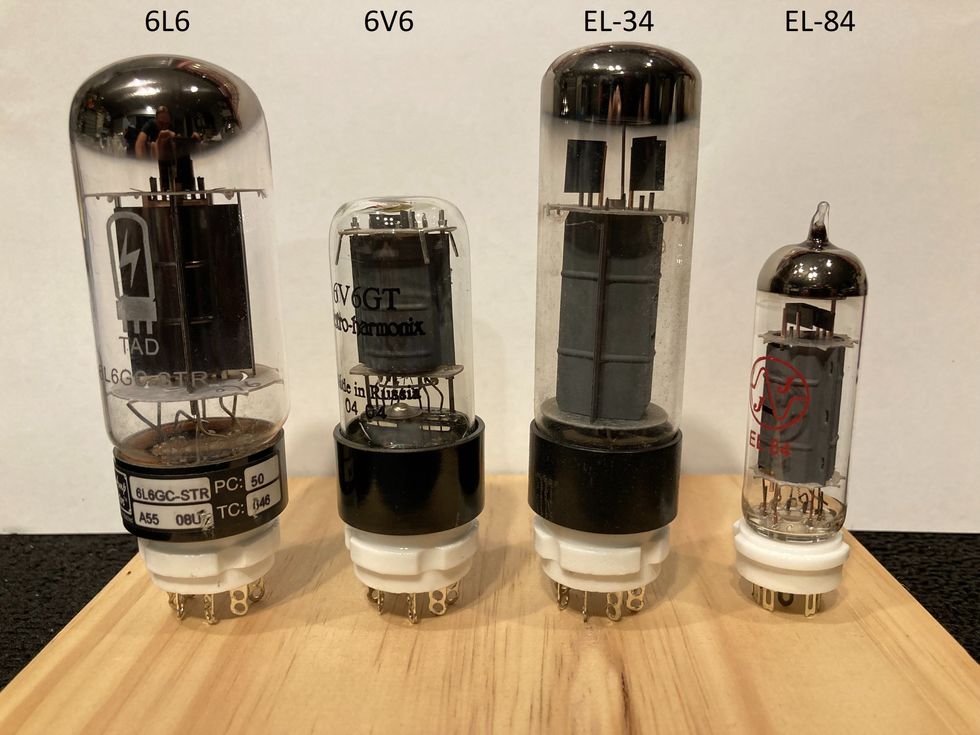
But even more important to understand is that tubes produced in different factories across the globe will bias up differently! What I mean by this is, if you properly bias a set of output tubes—let’s say 6L6s made in Russia—and then you swap them out with a set made in China, in the same amplifier without changing the setting of the bias control, the end result will almost always be a different bias reading. This is why it’s always best to have checked and reset the bias whenever output tubes are replaced. Now, how do we do that?
The Preferred Method
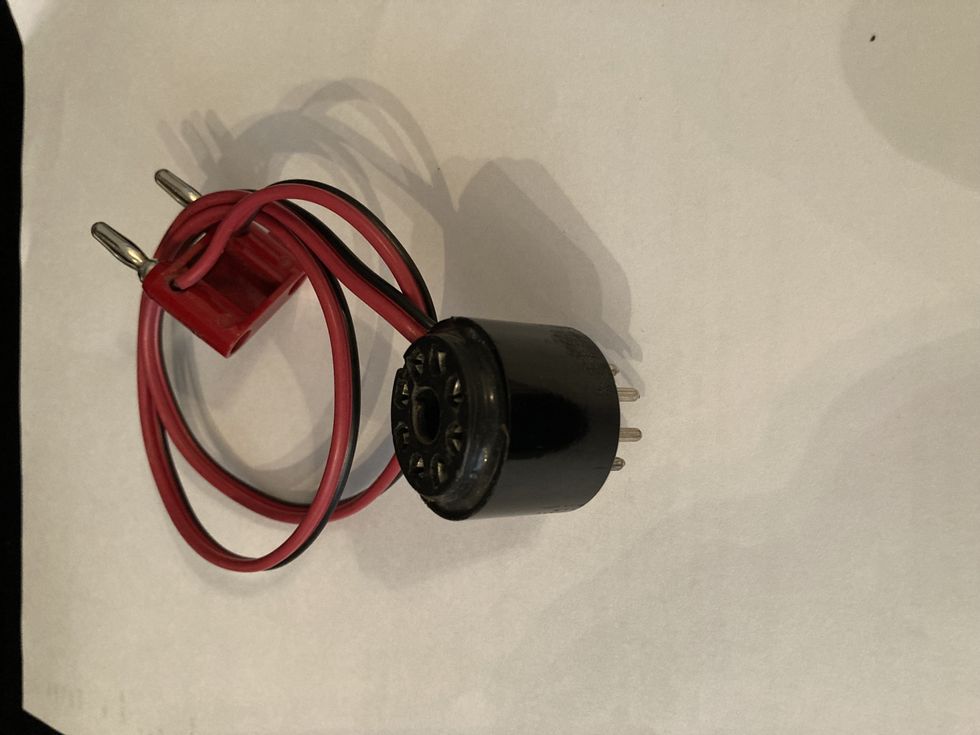
Fig. 1
There are several different ways to measure output-tube bias current at idle. The safest method is to use what is commonly called a bias probe (Fig. 1). This is a device that is inserted between an output tube and its socket. (I typically make my own bias probes, but if you simply search “bias probe” online, you’ll find plenty to choose from. If you already own a multimeter, you can simply purchase the probes, but there are also options to purchase a full system with either a digital or analog meter, should you need it.) This device breaks the connection between the cathode (which is the metallic electrode from which electrons are emitted into the tube) of the tube and its ground connection, and inserts a small value resistor in between. It then allows the voltage across the resistor to be read. The resistor is typically 1 ohm and the resulting voltage drop across it is in millivolts (mV), so no chance of shock here. This provides a true and accurate measurement of the actual current flowing through one tube. Then, you set your bias and you’re done!
But even more important to understand is that tubes produced in different factories across the globe will bias up differently!
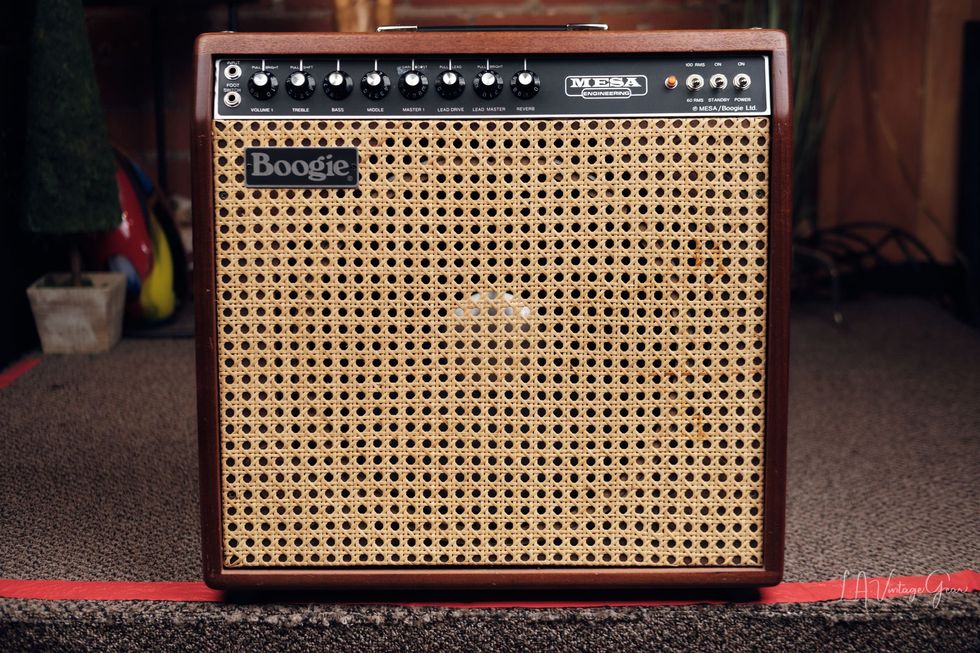
Ah, but wait! How do you set your bias? Let’s learn a bit more. Most tube amplifiers, if they are not cathode-biased designs, have some way to adjust the output-tube bias. One longstanding exception to this are most Mesa/Boogie amps. The bias voltage in these amps is not adjustable, which is why Mesa suggests only purchasing their tubes for their amps, because they are designed to fall within the acceptable bias range for their amps. This adds a certain degree of confidence for owner servicing, although, of course, it limits your options.
Let’s take a look, however, at a typical Fender or Marshall bias control. Most older Fenders have a pot with a slot for a screwdriver mounted to the chassis in the area of the power or mains transformer, while most older Marshalls have their bias pot mounted on the circuit board. (You might want to go online to look at schematics for your amp to help you find it.) Either way, this is where you’ll make your adjustment.
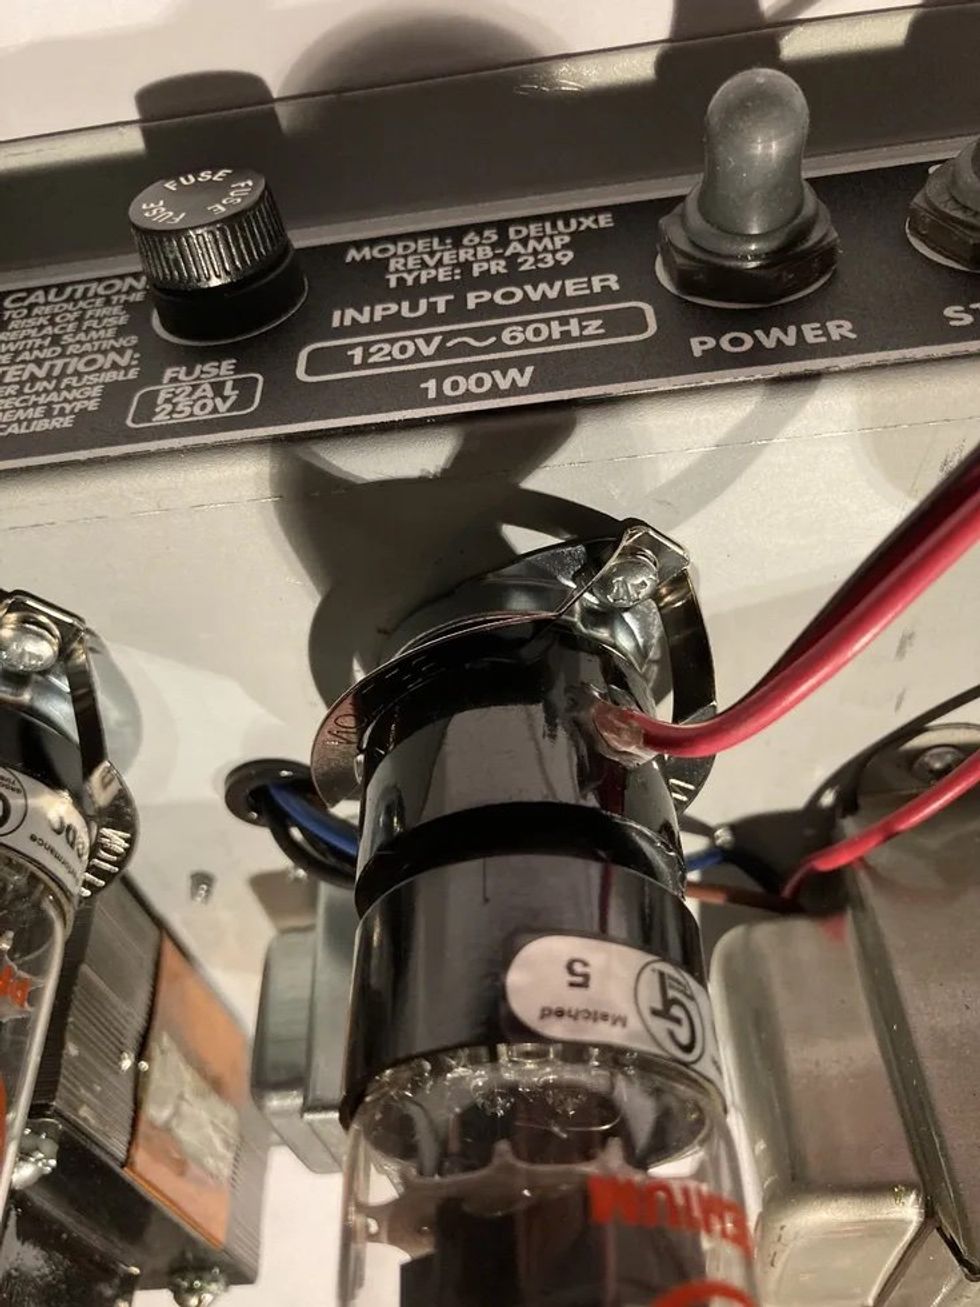
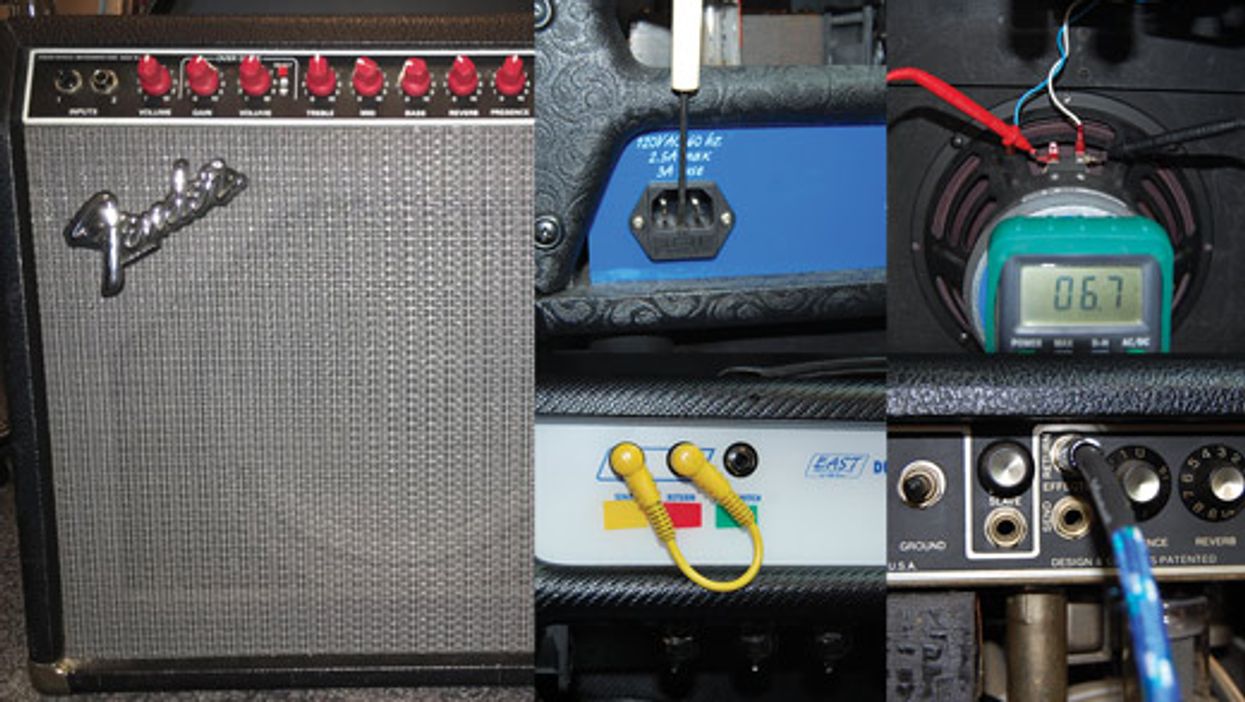
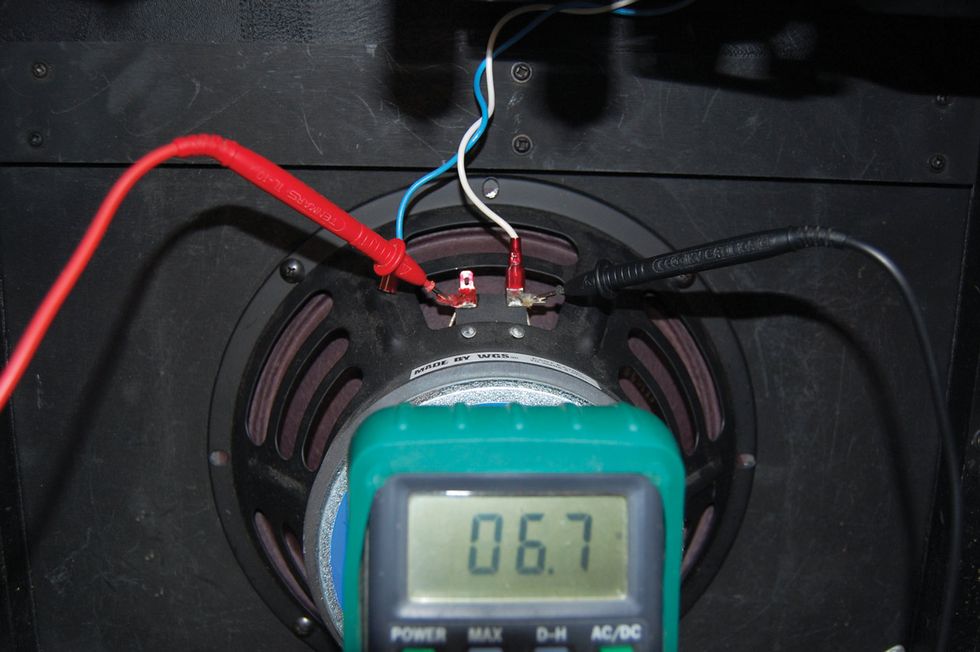
To get started, you’ll most likely need to pull the chassis and place it in a stable work environment. Insert the bias probe device between one of the tubes and the socket (Fig. 2). Make sure all the volume controls are set to zero, turn the amp on, and let the tubes warm up. It’s also good to try to have a load on the speaker jack—whether a speaker or an appropriate resistor or load box. This is not 100 percent necessary for just setting the bias to a particular number, but sound checking is one of the ways I like to make the final adjustments, so being able to connect the speaker to the chassis while it’s on the bench is certainly a necessity for me.
Now, where to set the numbers? There are certainly more than a few opinions floating around on the interwebs about what optimal bias settings are. Some engineering types will tout 50 percent maximum plate dissipation or 70 percent maximum dissipation, and while it may look good or make sense on paper, I’ve heard the result of guitar amplifiers designed by the book to optimal specifications … and to me they sound, well, less than optimal. It may work in the hi-fi world, where perfect sound reproduction is the goal, but guitar amplifiers are in the sound production business, so it’s a bit different. (In the most basic terms, maximum plate dissipation is the amount of power the plate of the tube is designed to deliver.)
Different types of output tubes have their own acceptable range of bias current. There are so many variables at play that there is no “correct” number. The plate voltage in the amplifier, the output transformer’s primary impedance, and the country of origin of a tube all factor into how it interacts with the voltage and output transformer to define what the optimal bias current will be. Below are the average ranges for some typical octal output tubes:
• 6L6: 25–35 mA
• EL34: 30–40 mA
• 6V6: 18–25 mA
• 6550: 35–45 mA
• KT66: 30–40 mA
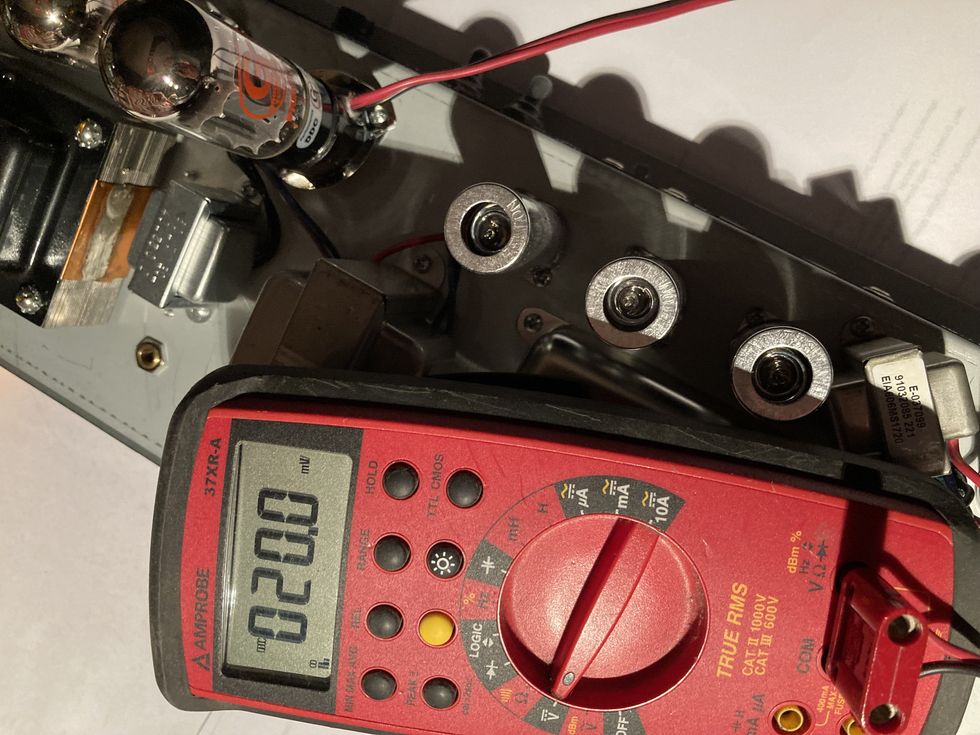
Fig. 3
These should be the ranges in which these tubes will perform and sound the best, and they can be accurately measured with a digital multimeter. The best way for you to decide what setting is best for you is a combination of the reading on the meter and your ears! Using the bias control, set the bias to somewhere in the ranges given above (Fig. 3) and play the amp. Note: Some amps will act funny and develop horrible noises (parasitic oscillations) when a bias probe is in place while the amp is being played. If this is the case, you’ll need to remove the bias probe each time you play the amp.)
Move the setting a couple mA in one direction or the other and play again. Don’t expect extreme changes; that’s not what we’re looking for. Listen for subtle differences. Is one setting a little more or less harsh? Is the bottom end too soft or flubby? Is the amp as clean as you want it? Sometimes these little subtleties are what make one amp sound and feel better than another!
Most older Fenders have a pot with a slot for a screwdriver mounted to the chassis in the area of the power or mains transformer, while most older Marshalls have their bias pot mounted on the circuit board.
Also, you should be doing this at the volume you would typically use onstage or in the studio. You may not notice much change if your volume is at 1, but you want to optimize the amp for the way you will be using it.
Eyes Wide Open
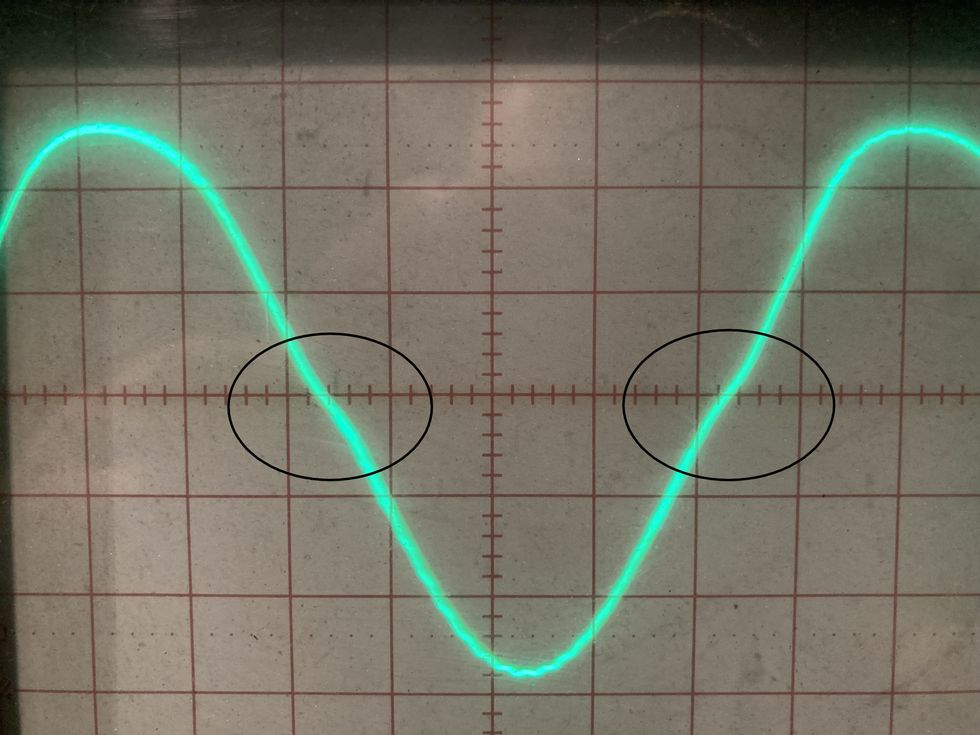
Fig. 4
Knowing the ballpark bias numbers is good, and adding your ears is even better, but I also like to see what I’m hearing, so I always incorporate an oscilloscope when I’m setting the bias on an amp. I mentioned crossover distortion above, and when it comes to setting up amps for today’s pedal-hungry players, I find that setting the bias to where there is just a hint of crossover distortion at full output is what works best. Fig. 4 is what that looks like on the oscilloscope. This keeps the amp very clean and makes most pedal users happy.
By the way, here’s a mini primer in crossover distortion. In a push-pull output stage, which is found in most amplifiers with two or more output tubes, each tube (or pair of tubes) is responsible for amplifying at least half of the audio signal. If the tubes are not biased properly, one tube (or pair) will stop amplifying before the other tube (or pair) start amplifying. This will create crossover distortion. Proper biasing will allow the two halves to interact correctly. It’s like a nice firm handshake between both halves.
Beware These Old-School Methods
Let’s look at a couple popular methods that I do not recommend, but are worth discussing because they are, nonetheless, common. The first is: With the amp off and output tubes removed, use a multimeter to measure the resistance of each half of the primary side of the output transformer. This would typically be from the center tap to each side of the primary winding.
In the most basic terms, a transformer is a bunch of wire wound around a steel core. On the primary side of an output transformer, the center tap is the electrical “middle” of this long length of wire. This is typically where the high voltage is applied. The ends of this length of wire are connected to the plates of the tube, thereby applying the high voltage to the tubes. As an example, typically in most Fender amps, the center tap is red, and the ends of the primary windings are blue and brown.
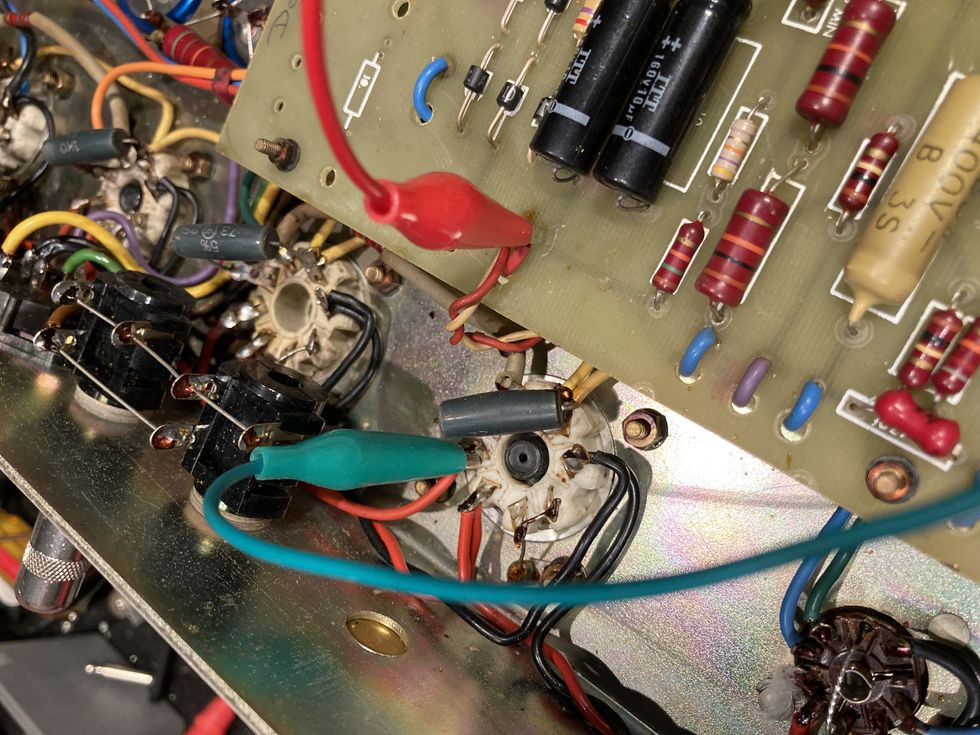
Fig. 5
Next, install the output tubes, turn the amp on, and measure the voltage drop across each half of the output transformer with the amp at idle in operational mode (Fig. 5). Voltage divided by resistance will give you the DC current through the tubes. For example, 1.17V / 15.8R = 0.074, or 74 mA. The numbers I used here were actual measurements in one side (one half) of a 100W amp using four output tubes (two per side). So, divide the 74 mA by two, and you get an average of 37 mA per tube.
Next, you can try the shunt method. This requires a multimeter that can read DC current in milliamps (mA). Connect one meter lead to the center tap of the output transformer and the other lead to the output transformer’s primary side. Typically, in most amps using octal tubes (6L6, 6V6, EL34, 6550, KT88, etc.), this will be pin 3 on any output tube socket. Turn the amp on and, in operating mode at idle (i.e., volume off), measure the current across that half of the output transformer. For example, if your measurement is 72 mA and it’s an amp that utilizes four output tubes, the current measured is for two of those tubes, so once again divide by two to arrive at 36 mA per tube.
I’ve heard the result of guitar amplifiers designed by the book to optimal specifications … and to me they sound, well, less than optimal.
Both of those methods are very old school and still in practice, but I wouldn’t use either for two reasons: 1) I don’t believe they’re very accurate, and 2) they’re dangerous! You’re probing around inside the high voltage area of the amp, and one slip will either take out a fuse, take out a tube, take out your meter, or, worse case, let you know exactly what 450V DC feels like! So, although these methods are used, let’s just say no here.
Some Personal Insights
I’d also like to add a little personal experience to this procedure, based on decades in the biz. Back in the day, when I began servicing and modifying gear, guitarists were regularly playing 50- and 100-watt amps. (Everybody looked at me like I had three heads when I came out with the 18-watt Budda Twinmaster, but that’s a whole other story.) There were some overdrive and distortion pedals around (now all vintage), but certainly not the pedal proliferation we have now, so players were pretty much guitar, cable, amp … go! In these situations, I would most times run the tubes with a pretty hot bias so the amp would be fatter and overdrive a bit earlier and easier, as a decent percentage of the overdrive was developed by pushing the output tubes. As time went on, output attenuators became more popular, so amps could be pushed hard, but at more manageable volume levels. That was still a good scenario for a hotter bias of the output tubes in high-power amps. Eventually, players started playing lower-power amps, so they could open them up and get great output-tube distortion at lesser volumes. The problem is that hotter-biased low-power amps tend to get mushy and have less definition when pushed hard, so a more moderate bias setting is preferred here—just enough so there is no crossover distortion. Move up to today’s scenario and you’ll find that almost all overdrive and/or distortion is typically coming from a pedal. In that case, an amp is nothing more than an amplification device for pedals.
So, that’s what I’ve learned about tube-biasing from my decades of experience. But the bottom line is, there is no absolute right or wrong settings when it comes to biasing an amp. Keep your ears open and go with what sounds best to you.
- Ask Amp Man: A Fond Farewell ›
- Ask Amp Man: A Vintage Showman, Not Ready for Prime Time ›
- Ask Amp Man: Add Some Marshall Grit to a Fender Bassman ›
“Practice Loud”! How Duane Denison Preps for a New Jesus Lizard Record
After 26 years, the seminal noisy rockers return to the studio to create Rack, a master class of pummeling, machine-like grooves, raving vocals, and knotty, dissonant, and incisive guitar mayhem.
The last time the Jesus Lizard released an album, the world was different. The year was 1998: Most people counted themselves lucky to have a cell phone, Seinfeld finished its final season, Total Request Live was just hitting MTV, and among the year’s No. 1 albums were Dave Matthews Band’s Before These Crowded Streets, Beastie Boys’ Hello Nasty, The Miseducation of Lauryn Hill, Korn’s Follow the Leader, and the Armageddonsoundtrack. These were the early days of mp3 culture—Napster didn’t come along until 1999—so if you wanted to hear those albums, you’d have to go to the store and buy a copy.
The Jesus Lizard’s sixth album, Blue, served as the band’s final statement from the frontlines of noisy rock for the next 26 years. By the time of their dissolution in 1999, they’d earned a reputation for extreme performances chock full of hard-hitting, machine-like grooves delivered by bassist David Wm. Sims and, at their conclusion, drummer Mac McNeilly, at times aided and at other times punctured by the frontline of guitarist Duane Denison’s incisive, dissonant riffing, and presided over by the cantankerous howl of vocalist David Yow. In the years since, performative, thrilling bands such as Pissed Jeans, METZ, and Idles have built upon the Lizard’s musical foundation.
Denison has kept himself plenty busy over the last couple decades, forming the avant-rock supergroup Tomahawk—with vocalist Mike Patton, bassist Trevor Dunn (both from Mr. Bungle), and drummer John Stanier of Helmet—and alongside various other projects including Th’ Legendary Shack Shakers and Hank Williams III. The Jesus Lizard eventually reunited, but until now have only celebrated their catalog, never releasing new jams.
The Jesus Lizard, from left: bassist David Wm. Sims, singer David Yow, drummer Mac McNeilly, and guitarist Duane Denison.
Photo by Joshua Black Wilkins
Back in 2018, Denison, hanging in a hotel room with Yow, played a riff on his unplugged electric guitar that caught the singer’s ear. That song, called “West Side,” will remain unreleased for now, but Denison explains: “He said, ‘Wow, that’s really good. What is that?’ And I said, ‘It’s just some new thing. Why don’t we do an album?’” From those unassuming beginnings, the Jesus Lizard’s creative juices started flowing.
So, how does a band—especially one who so indelibly captured the ineffable energy of live rock performance—prepare to get a new record together 26 years after their last? Back in their earlier days, the members all lived together in a band house, collectively tending to the creative fire when inspiration struck. All these years later, they reside in different cities, so their process requires sending files back and forth and only meeting up for occasional demo sessions over the course of “three or four years.”
“When the time comes to get more in performance mode, I have a practice space. I go there by myself and crank it up. I turn that amp up and turn the metronome up and play loud.” —Duane Denison
the Jesus Lizard "Alexis Feels Sick"
Distance creates an obstacle to striking while the proverbial iron is hot, but Denison has a method to keep things energized: “Practice loud.” The guitarist professes the importance of practice, in general, and especially with a metronome. “We keep very detailed records of what the beats per minute of these songs are,” he explains. “To me, the way to do it is to run it to a Bluetooth speaker and crank it, and then crank your amp. I play a little at home, but when the time comes to get more in performance mode, I have a practice space. I go there by myself and crank it up. I turn that amp up and turn the metronome up and play loud.”
It’s a proven solution. On Rack—recorded at Patrick Carney’s Audio Eagle studio with producer Paul Allen—the band sound as vigorous as ever, proving they’ve not only remained in step with their younger selves, but they may have surpassed it with faders cranked. “Duane’s approach, both as a guitarist and writer, has an angular and menacing fingerprint that is his own unique style,” explains Allen. “The conviction in his playing that he is known for from his recordings in the ’80s and ’90s is still 100-percent intact and still driving full throttle today.”
“I try to be really, really precise,” he says. “I think we all do when it comes to the basic tracks, especially the rhythm parts. The band has always been this machine-like thing.” Together, they build a tension with Yow’s careening voice. “The vocals tend to be all over the place—in and out of tune, in and out of time,” he points out. “You’ve got this very free thing moving around in the foreground, and then you’ve got this very precise, detailed band playing behind it. That’s why it works.”
Before Rack, the Jesus Lizard hadn’t released a new record since 1998’s Blue.
Denison’s guitar also serves as the foreground foil to Yow’s unhinged raving, as on “Alexis Feels Sick,” where they form a demented harmony, or on the midnight creep of “What If,” where his vibrato-laden melodies bolster the singer’s unsettled, maniacal display. As precise as his riffs might be, his playing doesn’t stay strictly on the grid. On the slow, skulking “Armistice Day,” his percussive chording goes off the rails, giving way to a solo that slices that groove like a chef’s knife through warm butter as he reorganizes rock ’n’ roll histrionics into his own cut-up vocabulary.
“During recording sessions, his first solo takes are usually what we decide to keep,” explains Allen. “Listen to Duane’s guitar solos on Jack White’s ‘Morning, Noon, and Night,’ Tomahawk’s ‘Fatback,’ and ‘Grind’ off Rack. There’s a common ‘contained chaos’ thread among them that sounds like a harmonic Rubik’s cube that could only be solved by Duane.”
“Duane’s approach, both as a guitarist and writer, has an angular and menacing fingerprint that is his own unique style.” —Rack producer Paul Allen
To encapsulate just the right amount of intensity, “I don’t over practice everything,” the guitarist says. Instead, once he’s created a part, “I set it aside and don’t wear it out.” On Rack, it’s obvious not a single kilowatt of musical energy was lost in the rehearsal process.
Denison issues his noisy masterclass with assertive, overdriven tones supporting his dissonant voicings like barbed wire on top of an electric fence. The occasional application of slapback delay adds a threatening aura to his exacting riffage. His tones were just as carefully crafted as the parts he plays, and he relied mostly on his signature Electrical Guitar Company Chessie for the sessions, though a Fender Uptown Strat also appears, as well as a Taylor T5Z, which he chose for its “cleaner, hyper-articulated sound” on “Swan the Dog.” Though he’s been spotted at recent Jesus Lizard shows with a brand-new Powers Electric—he points out he played a demo model and says, “I just couldn’t let go of it,” so he ordered his own—that wasn’t until tracking was complete.
Duane Denison's Gear
Denison wields his Powers Electric at the Blue Room in Nashville last June.
Photo by Doug Coombe
Guitars
- Electrical Guitar Company Chessie
- Fender Uptown Strat
- Taylor T5Z
- Gibson ES-135
- Powers Electric
Amps
- Hiwatt Little J
- Hiwatt 2x12 cab with Fane F75 speakers
- Fender Super-Sonic combo
- Early ’60s Fender Bassman
- Marshall 1987X Plexi Reissue
- Victory Super Sheriff head
- Blackstar HT Stage 60—2 combos in stereo with Celestion Neo Creamback speakers and Mullard tubes
Effects
- Line 6 Helix
- Mantic Flex Pro
- TC Electronic G-Force
- Menatone Red Snapper
Strings and Picks
- Stringjoy Orbiters .0105 and .011 sets
- Dunlop celluloid white medium
- Sun Studios yellow picks
He ran through various amps—Marshalls, a Fender Bassman, two Fender Super-Sonic combos, and a Hiwatt Little J—at Audio Eagle. Live, if he’s not on backline gear, you’ll catch him mostly using 60-watt Blackstar HT Stage 60s loaded with Celestion Neo Creambacks. And while some boxes were stomped, he got most of his effects from a Line 6 Helix. “All of those sounds [in the Helix] are modeled on analog sounds, and you can tweak them endlessly,” he explains. “It’s just so practical and easy.”
The tools have only changed slightly since the band’s earlier days, when he favored Travis Beans and Hiwatts. Though he’s started to prefer higher gain sounds, Allen points out that “his guitar sound has always had teeth with a slightly bright sheen, and still does.”
“Honestly, I don’t think my tone has changed much over the past 30-something years,” Denison says. “I tend to favor a brighter, sharper sound with articulation. Someone sent me a video I had never seen of myself playing in the ’80s. I had a band called Cargo Cult in Austin, Texas. What struck me about it is it didn’t sound terribly different than what I sound like right now as far as the guitar sound and the approach. I don’t know what that tells you—I’m consistent?”
YouTube It
The Jesus Lizard take off at Nashville’s Blue Room this past June with “Hide & Seek” from Rack.
PG contributor Tom Butwin takes a deep dive into LR Baggs' HiFi Duet system.
LR Baggs HiFi Duet High-fidelity Pickup and Microphone Mixing System
HiFi Duet Mic/Pickup System"When a guitar is “the one,” you know it. It feels right in your hands and delivers the sounds you hear in your head. It becomes your faithful companion, musical soulmate, and muse. It helps you express your artistic vision. We designed the Les Paul Studio to be precisely the type of guitar: the perfect musical companion, the guitar you won’t be able to put down. The one guitar you’ll be able to rely on every time and will find yourself reaching for again and again. For years, the Les Paul Studio has been the choice of countless guitarists who appreciate the combination of the essential Les Paul features–humbucking pickups, a glued-in, set neck, and a mahogany body with a maple cap–at an accessible price and without some of the flashier and more costly cosmetic features of higher-end Les Paul models."
Now, the Les Paul Studio has been reimagined. It features an Ultra-Modern weight-relieved mahogany body, making it lighter and more comfortable to play, no matter how long the gig or jam session runs. The carved, plain maple cap adds brightness and definition to the overall tone and combines perfectly with the warmth and midrange punch from the mahogany body for that legendary Les Paul sound that has been featured on countless hit recordings and on concert stages worldwide. The glued-in mahogany neck provides rock-solid coupling between the neck and body for increased resonance and sustain. The neck features a traditional heel and a fast-playing SlimTaper profile, and it is capped with an abound rosewood fretboard that is equipped with acrylic trapezoid inlays and 22 medium jumbo frets. The 12” fretboard radius makes both rhythm chording and lead string bending equally effortless, andyou’re going to love how this instrument feels in your hands. The Vintage Deluxe tuners with Keystone buttons add to the guitar’s classic visual appeal, and together with the fully adjustable aluminum Nashville Tune-O-Matic bridge, lightweight aluminum Stop Bar tailpiece, andGraph Tech® nut, help to keep the tuning stability nice and solid so you can spend more time playing and less time tuning. The Gibson Les Paul Studio is offered in an Ebony, BlueberryBurst, Wine Red, and CherrySunburst gloss nitrocellulose lacquer finishes and arrives with an included soft-shell guitar case.
It packs a pair of Gibson’s Burstbucker Pro pickups and a three-way pickup selector switch that allows you to use either pickup individually or run them together. Each of the two pickups is wired to its own volume control, so you can blend the sound from the pickups together in any amount you choose. Each volume control is equipped with a push/pull switch for coil tapping, giving you two different sounds from each pickup, and each pickup also has its own individual tone control for even more sonic options. The endless tonal possibilities, exceptional sustain, resonance, and comfortable playability make the Les Paul Studio the one guitar you can rely on for any musical genre or scenario.
For more information, please visit gibson.com.
Introducing the Reimagined Gibson Les Paul Studio - YouTube
The two pedals mark the debut of the company’s new Street Series, aimed at bringing boutique tone to the gigging musician at affordable prices.
The Phat Machine
The Phat Machine is designed to deliver the tone and responsiveness of a vintage germanium fuzz with improved temperature stability with no weird powering issues. Loaded with both a germanium and a silicon transistor, the Phat Machine offers the warmth and cleanup of a germanium fuzz but with the bite of a silicon pedal. It utilizes classic Volume and Fuzz control knobs, as well as a four-position Thickness control to dial-in any guitar and amp combo. Also included is a Bias trim pot and a Kill switch that allows battery lovers to shut off the battery without pulling the input cord.
Silk Worm Deluxe Overdrive
The Silk Worm Deluxe -- along with its standard Volume/Gain/Tone controls -- has a Bottom trim pot to dial in "just the right amount of thud with no mud at all: it’s felt more than heard." It also offers a Studio/Stage diode switch that allows you to select three levels of compression.
Both pedals offer the following features:
- 9-volt operation via standard DC external supply or internal battery compartment
- True bypass switching with LED indicator
- Pedalboard-friendly top mount jacks
- Rugged, tour-ready construction and super durable powder coated finish
- Made in the USA
Static Effectors’ Street Series pedals carry a street price of $149 each. They are available at select retailers and can also be purchased directly from the Static Effectors online store at www.staticeffectors.com.