
Photo 1
Got a finicky selector on your dual-pickup guitar? No worries—it’s an easy fix.
Given the popularity of Les Pauls, SGs, Explorers, Flying Vs—and the thousands of other two-pickup axes inspired by these iconic models—it's no surprise I've replaced many failing 3-way switches over the years. Switches get used a lot and eventually they can wear out. When this happens, you'll hear loud popping sounds or scratchy noises, and the signal may even cut out when you're switching pickups.
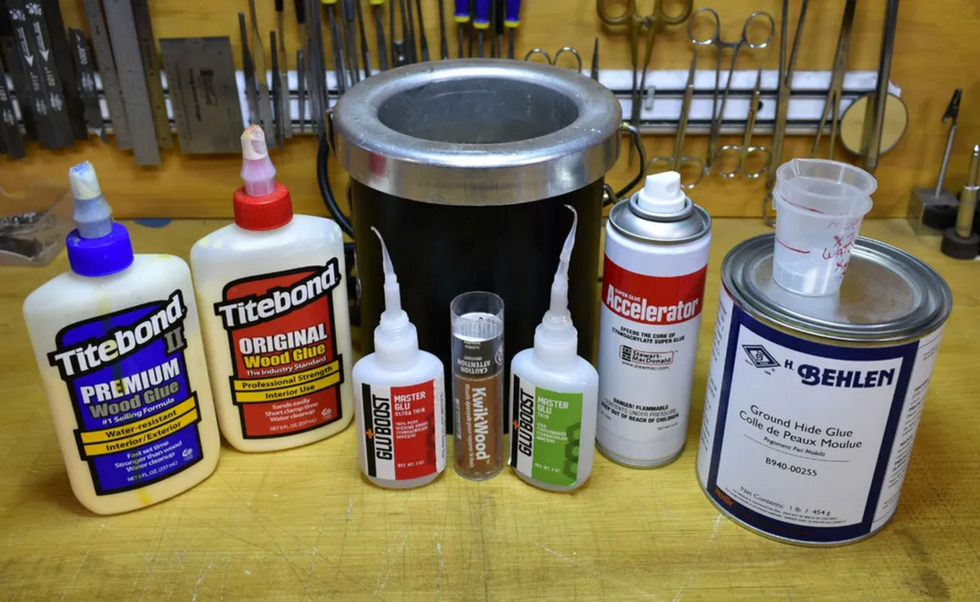
Fortunately, 3-way toggle switches are easy to replace, and you can do it yourself with just a few tools and a bit of patience. It only takes a few minutes to cover the process, so let's get started.
The project.
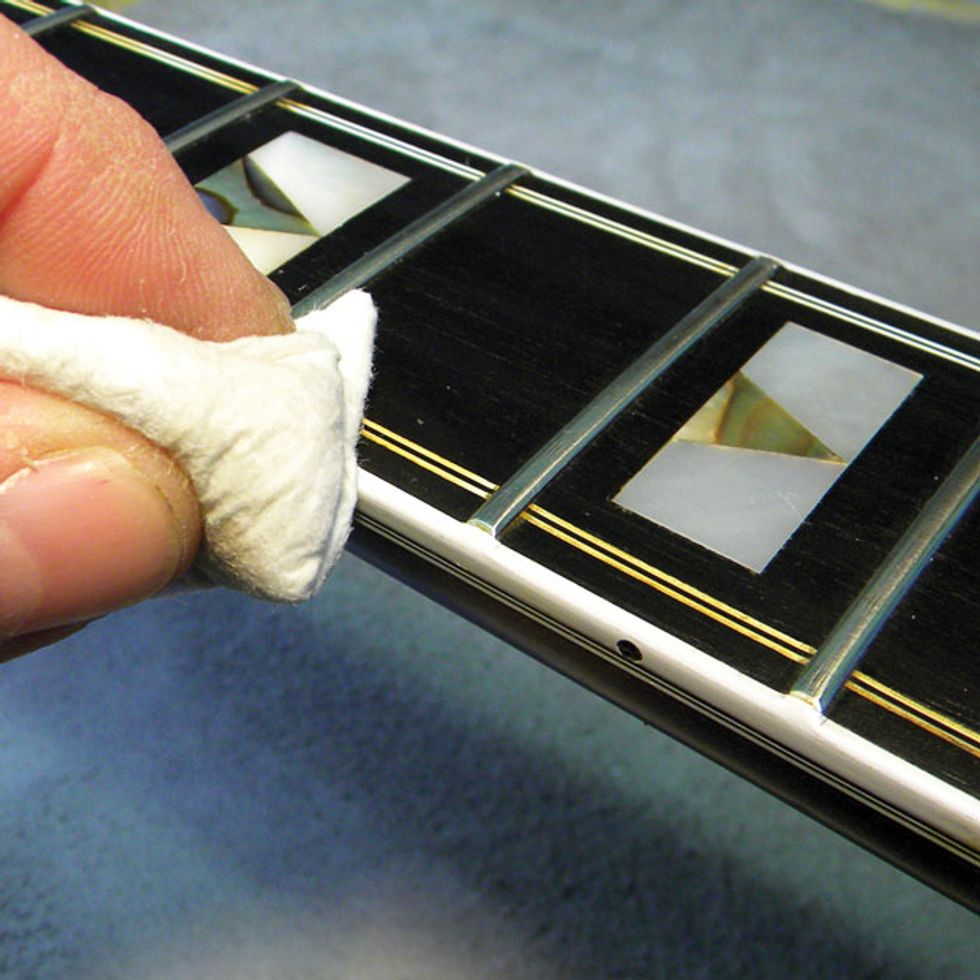
To illustrate the steps, I'll use a 1983 Ibanez Les Paul copy that has a standard 3-way pickup selector: neck only, neck-plus-bridge, bridge only (Photo 1). Charmingly, Ibanez kept the arcane "Rhythm" and "Treble" designations for the neck and bridge pickups.
This is a cool guitar and it plays great, but the toggle switch is shot. Like many imported guitars, it has a cheap switch. I'm going to upgrade the guitar with a Switchcraft model, one of several options preferred by discerning players and professionals who are willing to pay a bit extra for reliability. Let's take a closer look.
Types of toggle switches.
On most guitars, you'll find one of two different types of 3-way toggle switches: the box style and the open style. In a box toggle switch, the internal parts are enclosed—typically in plastic—and they can fail if the prongs get overheated, especially when the switch has been re-soldered too many times. As a result, box switches tend to have a short life.
The internal parts are exposed on an open toggle switch, but open switches are usually made from better materials. Switchcraft double-pole 3-way switches boast solid construction and last a long time, which explains why they're used on so many high-quality instruments.
Open toggle switches come in three styles: short straight, tall straight, and right-angle. The short and tall straight switches have their switching apparatus below the toggle, while the switching mechanism on the right-angle switch is perpendicular to the toggle. All three are wired identically, they simply differ in depth and width. For example, guitars with shallow electronics cavities, such as the SG and many thin ES-style hollowbodies, use the right-angle switch. Gibson Les Pauls take the tall switch.
Here's an easy way to tell which type of replacement switch you need: Check out the minimum cavity size for all three Switchcraft styles at stewmac.com, and then compare these dimensions to your guitar's switch cavity.
Removing the old switch.
Using a Phillips screwdriver, remove the cover plate on the back of the guitar to access the switch cavity. If you already have an open switch and you're simply replacing it with a new one, draw a diagram of the old switch or label each wire to help you remember the connections.
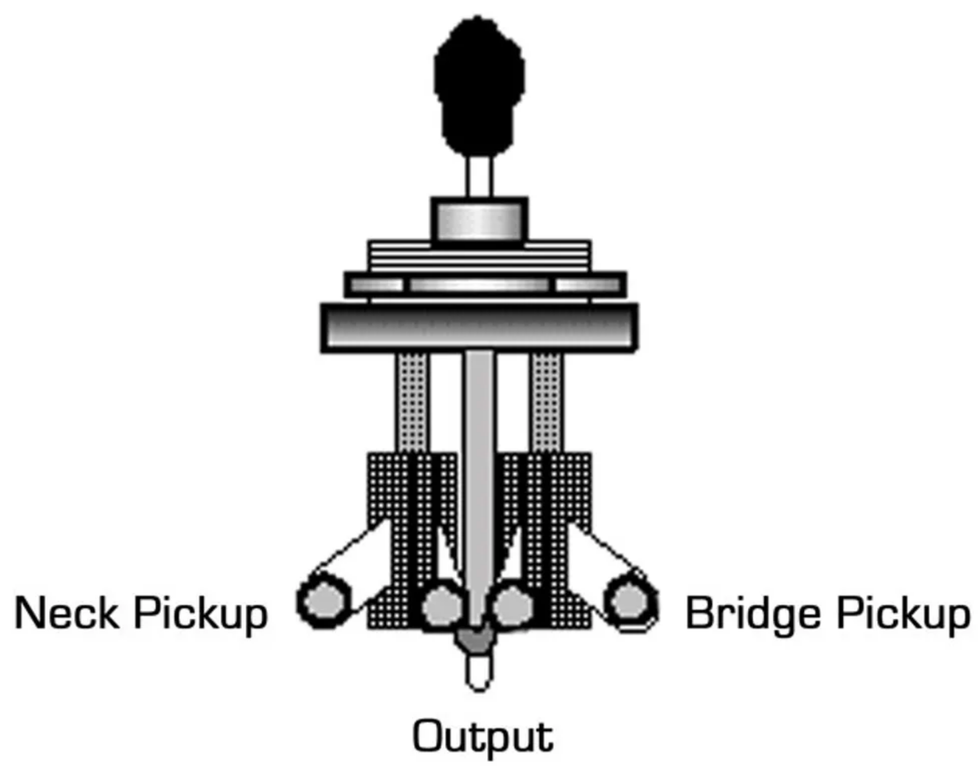
Image 1
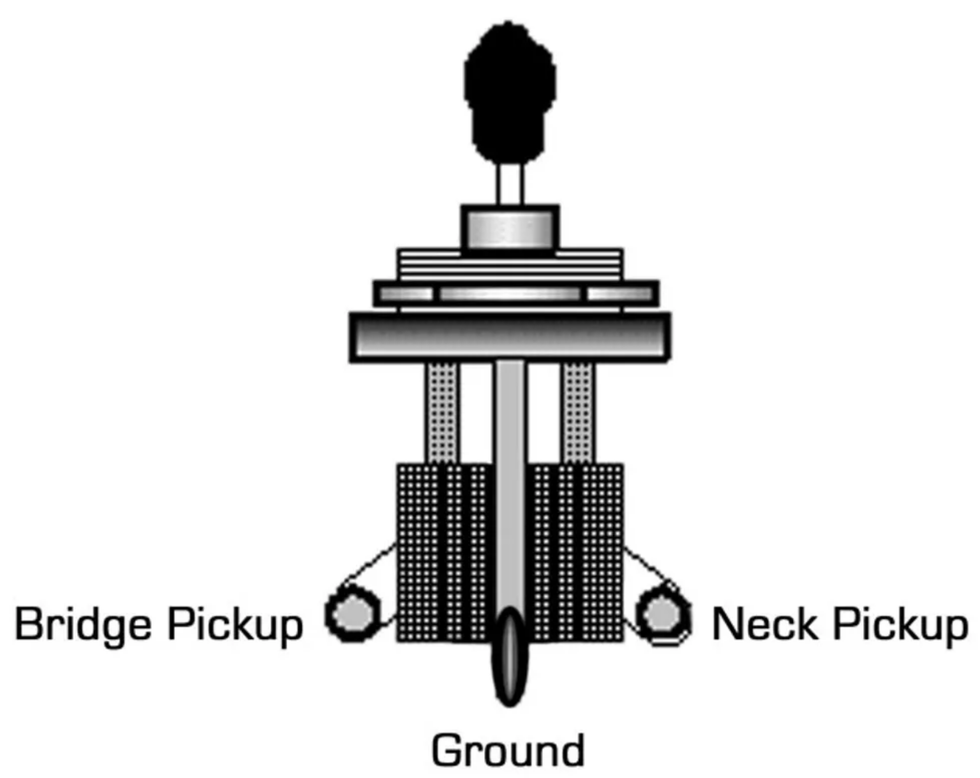
If you're replacing a budget box switch with an open toggle switch, you can use the simple diagrams I've provided as a guide. Image 1 (above) shows a common 3-way toggle as seen from the front and Image 2 (below) shows the back view.
Unsolder each wire and then remove the switch by turning the mounting nut counter-clockwise. Some toggle switches have a hex nut and require a deep well socket wrench, others have a knurled collar nut that can be loosened or tightened using an adjustable toggle switch wrench.
Tip: Don't use a pair of pliers to remove the nut collar! Pliers will mar the knurled nut and if you slip, you'll also damage the top of your guitar.
Installing the new switch.
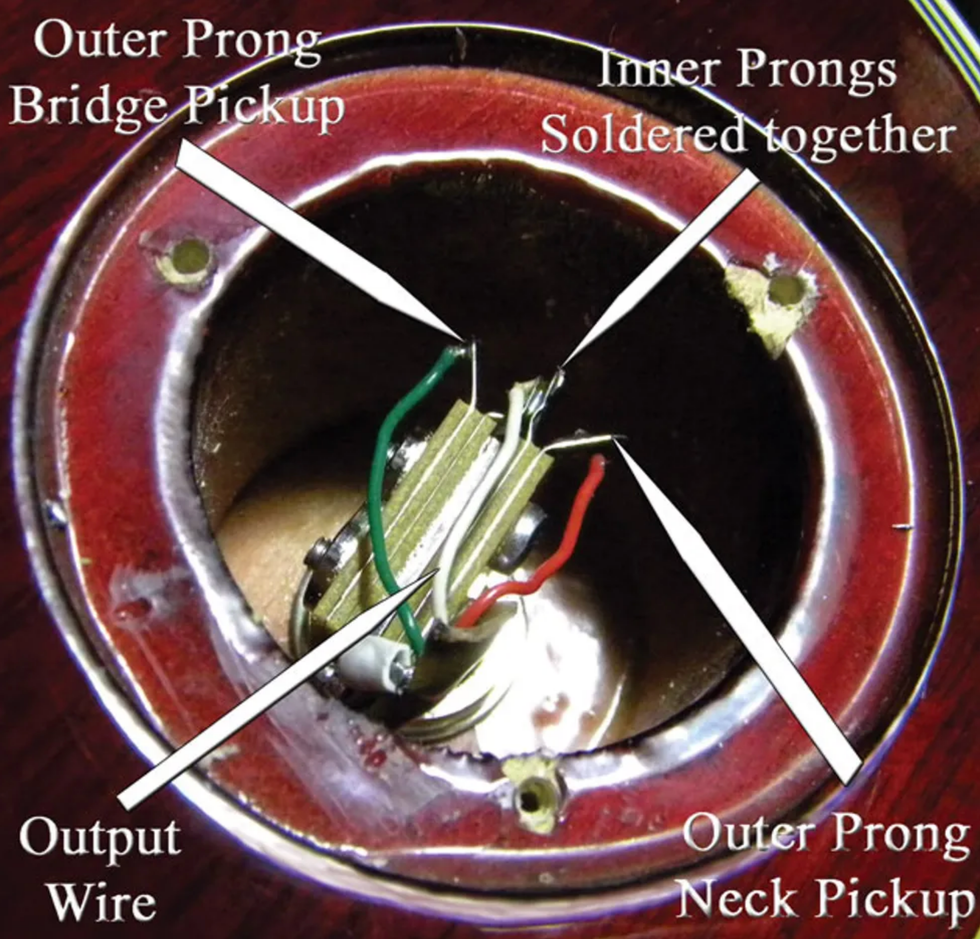
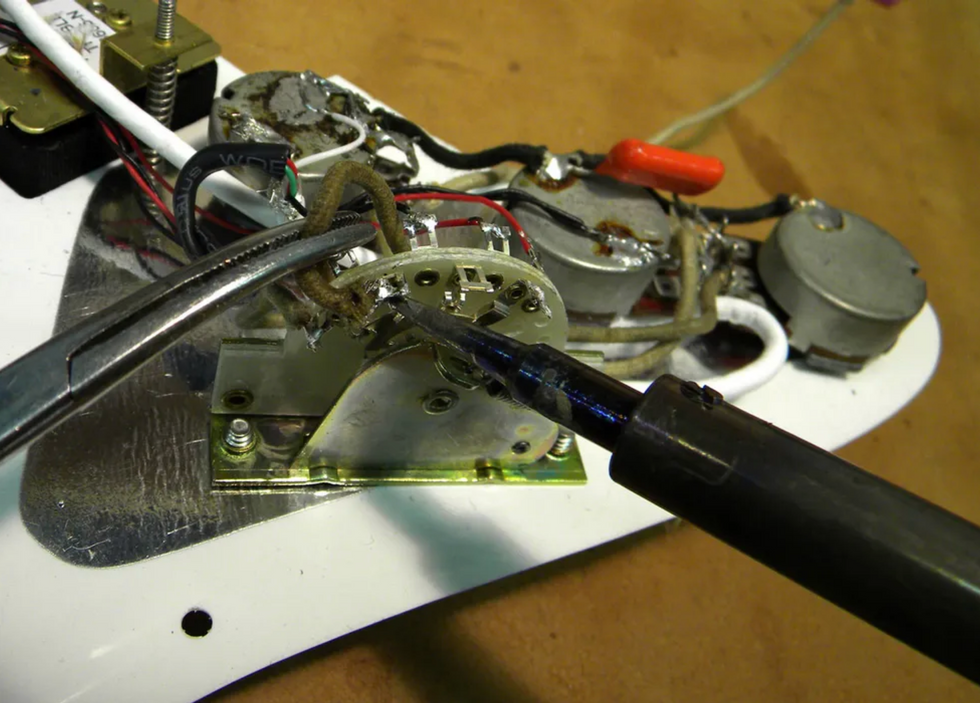
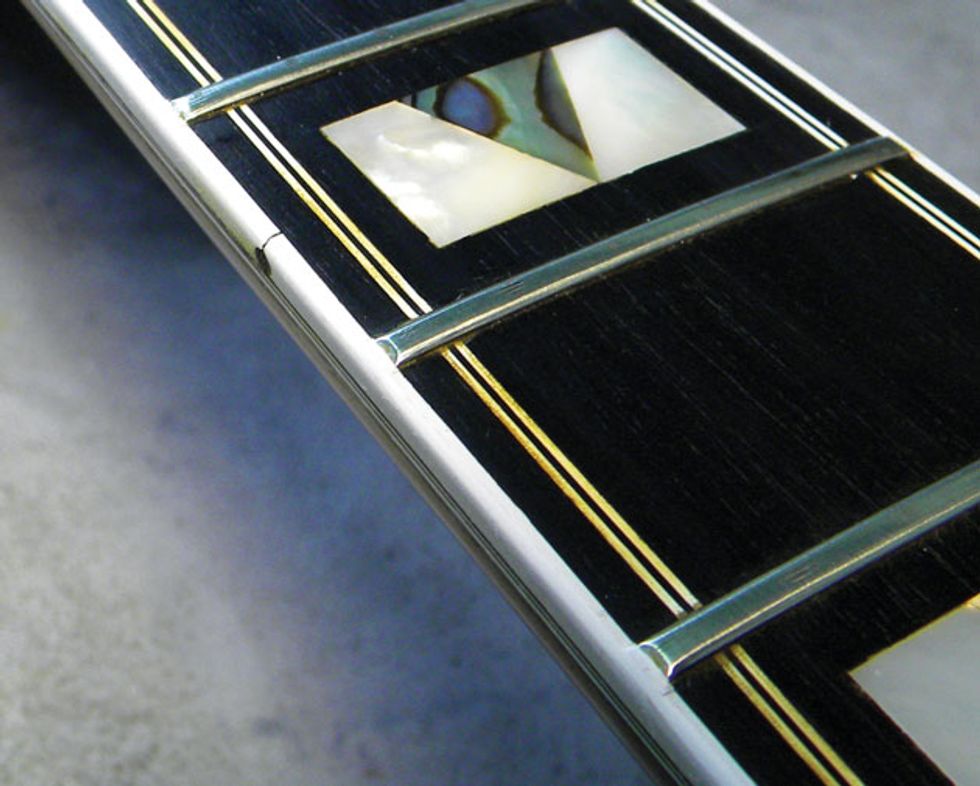
Photo 2
On the open switch I'm installing in this Ibanez, there are four prongs at one end and one prong on the opposite side (Photo 2). The four grouped prongs are the switch's inputs and output, and the single prong on the opposite side is the ground. In the group of four prongs, the two outer prongs are the inputs for the pickups and the two in the center are the outputs.
Before soldering, I use hemostats to gently bend the outer prongs (these connect to the pickups) away from the two output prongs between them. Then I crimp the two inner prongs together, because they'll share one wire from the switch's output to the output jack.
Note: Open 3-way toggles may differ physically. On a right-angle switch, for example, the ground prong and the input and output prongs are stacked vertically, and on some straight switches the ground prong is located between the two inputs, while the outputs are on the opposite side. But regardless of the layout, the principle is the same, and once you understand it you'll be able to confidently wire up your guitar. Study the wiring diagram that came with your new switch to confirm how it's configured, or use a multimeter to test and identify the input and output prongs.
Slide the new switch into the switch cavity, thread on the collar or nut, and then tighten it. Be careful when tightening the collar—it only needs to be "finger tight." If you torque it too much, you'll strip the threads. Also be sure to orient the switch so the toggle throw matches the original.
Switches get used a lot and eventually they can wear out. When this happens, you'll hear loud popping sounds or scratchy noises, and the signal may even cut out when you're switching pickups.
Solder up.
There are typically four wires to solder: the neck pickup, the bridge pickup, the output (this connects to the output lug on the jack), and the ground. Select a wire and clamp it to its respective prong with the hemostats, then briefly touch the tip of your soldering iron to preheat the prong and wire, and finally touch the solder to the connection just long enough to let a small amount of solder flow over the wire and prong. For detailed soldering tips, see "Tips for Replacing a Strat-style 5-way Switch."
Tip: When soldering, be careful not to heat up the prongs too much. Excessive heat can damage the switch.
Once you've soldered the four wires to their prongs, it's time to check your work. Gently tap the pickups with your hemostats for each position of the switch. You should get neck and bridge alone when the toggle is pointed up or down, respectively, as viewed from the playing position, and both when the toggle is in the center position.
If the neck and bridge toggle positions are working in reverse (i.e., the bridge pickup engages when the switch is up), then reverse the leads on the outer prongs. If the pickups are working correctly, reinstall the cover plate and you're done!
[Updated 11/10/21]
- Guitar Shop 101: Tips for Replacing a Tele-Style 3-Way Switch ... ›
- Mod Garage: How to Wire Alternative Tele 3-Way Switches - Premier ... ›
- Mod Garage: Inside the 3-way Telecaster Pickup Switch - Premier ... ›
Lutefish, the real-time music collaboration device and platform, is excited to announce a suite of new features designed to simplify setup, streamline collaboration, and offer more flexible subscription options for Lutefish Stream users. These latest updates, Audio Presets, Automatic Session Recall, Improved Scheduling with Contact Visibility, and a new Yearly Subscription Plan, are all about making it easier than ever for musicians to jam together, no matter where they’re based.
Save Time and Stay in the Flow with Audio Presets & Session Recall
Musicians can now save and reuse their exact audio settings, reducing setup time and ensuring every session sounds exactly as they want.
- Automatic Session Recall: When users leave a session, their current audio levels are automatically saved and restored when they rejoin.
- User-Defined Audio Presets: Each user can create and name up to five custom presets, like “Band Practice,” “Studio Mic Setup,” or “Quick Jam,” making it effortless to jump back in with the perfect sound.
“These tools are all about saving time and hassle,” said Patrick Finn, Business Manager at Lutefish. “Musicians want to make music, not spend time rebalancing levels every session. With presets and recall, we’re giving them time back and helping them sound their best, every time.”
Smarter Scheduling and Contact Visibility
The latest update to Lutefish also made it easier to find collaborators and book sessions. Users can now:- View all their contacts at a glance when scheduling a session.
- Instantly identify which contacts own a Lutefish Stream device—so they will always know who’s ready to jam.
Go Yearly and Save 20%
Lutefish now offers a Yearly Subscription Plan, providing users with the same great access as the monthly plan at a 20% discount.
This option is now available within the Lutefish app and web platform, and current monthly users are eligible for a discount with an upgrade to a yearly subscription.
Lutefish’s mission has always been to empower musicians to connect and collaborate without boundaries. With these new updates, Lutefish Stream continues to break down barriers—whether you’re jamming with a friend across town or collaborating with a bandmate 500 miles away.
For more information and to start jamming today, visitlutefish.com.
The veteran Florida-born metalcore outfit proves that you don’t need humbuckers to pull off high gain.
Last August, metalcore giants Poison the Well gave the world a gift: They announced they were working on their first studio album in 15 years. They unleashed the first taste, single “Trembling Level,” back in January, and set off on a spring North American tour during which they played their debut record, The Opposite of December… A Season of Separation, in full every night.
PG’s Perry Bean caught up with guitarists Ryan Primack and Vadim Taver, and bassist Noah Harmon, ahead of the band’s show at Nashville’s Brooklyn Bowl for this new Rig Rundown.
Brought to you by D’Addario.Not-So-Quiet As a Mouse
Primack started his playing career on Telecasters, then switched to Les Pauls, but when his prized LPs were stolen, he jumped back to Teles, and now owns nine of them.
His No. 1 is this white one (left). Seymour Duncan made him a JB Model pickup in a single-coil size for the bridge position, while the neck is a Seymour Duncan Quarter Pound Staggered. He ripped out all the electronics, added a Gibson-style toggle switch, flipped the control plate orientation thanks to an obsession with Danny Gatton, and included just one steel knob to control tone. Primack also installed string trees with foam to control extra noise.
This one has Ernie Ball Papa Het’s Hardwired strings, .011–.050.
Here, Kitty, Kitty
Primack runs both a PRS Archon and a Bad Cat Lynx at the same time, covering both 6L6 and EL34 territories. The Lynx goes into a Friedman 4x12 cab that’s been rebadged in honor of its nickname, “Donkey,” while the Archon, which is like a “refined 5150,” runs through an Orange 4x12.
Ryan Primack’s Pedalboard
Primack’s board sports a Saturnworks True Bypass Multi Looper, plus two Saturnworks boost pedals. The rest includes a Boss TU-3w, DOD Bifet Boost 410, Caroline Electronics Hawaiian Pizza, Fortin ZUUL +, MXR Phase 100, JHS Series 3 Tremolo, Boss DM-2w, DOD Rubberneck, MXR Carbon Copy Deluxe, Walrus Slo, and SolidGoldFX Surf Rider III.
Taver’s Teles
Vadim Taver’s go-to is this cherryburst Fender Telecaster, which he scored in the early 2000s and has been upgraded to Seymour Duncan pickups on Primack’s recommendation. His white Balaguer T-style has been treated to the same upgrade. The Balaguer is tuned to drop C, and the Fender stays in D standard. Both have D’Addario strings, with a slightly heavier gauge on the Balaguer.
Dual-Channel Chugger
Taver loves his 2-channel Orange Rockerverb 100s, one of which lives in a case made right in Nashville.
Vadim Taver’s Pedalboard
Taver’s board includes an MXR Joshua, MXR Carbon Copy Deluxe, Empress Tremolo, Walrus ARP-87, Old Blood Noise Endeavors Reflector, MXR Phase 90, Boss CE-2w, and Sonic Research Turbo Tuner ST-200, all powered by a Voodoo Lab Pedal Power 2 Plus.
Big Duff
Harmon’s favorite these days is this Fender Duff McKagan Deluxe Precision Bass, which he’s outfitted with a Leo Quan Badass bridge. His backup is a Mexico-made Fender Classic Series ’70s Jazz Bass. This one also sports Primack-picked pickups.
Rental Rockers
Harmon rented this Orange AD200B MK III head, which runs through a 1x15 cab on top and a 4x10 on the bottom.
Noah Harmon’s Pedalboard
Harmon’s board carries a Boss TU-2, Boss ODB-3, MXR Dyna Comp, Darkglass Electronics Vintage Ultra, and a Voodoo Lab Pedal Power 2 Plus. His signal from the Vintage Ultra runs right to the front-of-house, and Harmon estimates that that signal accounts for about half of what people hear on any given night.
Kiesel Guitars has introduced their newest solid body electric guitar: the Kyber.
With its modern performance specs and competitive pricing, the Kyber is Kiesel's most forward-thinking design yet, engineered for comfort, quick playing, and precision with every note.
Introducing the Kiesel Kyber Guitar
- Engineered with a lightweight body to reduce fatigue during long performances without sacrificing tone. Six-string Kybers, configured with the standard woods and a fixed bridge, weigh in at 6 pounds or under on average
- Unique shape made for ergonomic comfort in any playing position and enhanced classical position
- The Kyber features Kiesel's most extreme arm contour and a uniquely shaped body that enhances classical position support while still excelling in standard position.
- The new minimalist yet aggressive headstock pairs perfectly with the body's sleek lines, giving the Kyber a balanced, modern silhouette.
- Hidden strap buttons mounted on rear for excellent balance while giving a clean, ultra-modern look to the front
- Lower horn cutaway design for maximum access to the upper frets
- Sculpted neck heel for seamless playing
- Available in 6 or 7 strings, fixed or tremolo in both standard and multiscale configurations Choose between fixed bridges, tremolos, or multiscale configurations for your perfect setup.
Pricing for the Kyber starts at $1599 and will vary depending on options and features. Learn more about Kiesel’s new Kyber model at kieselguitars.com
The Sunset is a fully analog, zero latency bass amplifier simulator. It features a ¼” input, XLR and ¼” outputs, gain and volume controls and extensive equalization. It’s intended to replace your bass amp both live and in the studio.
If you need a full sounding amp simulator with a lot of EQ, the Sunset is for you. It features a five band equalizer with Treble, Bass, Parametric Midrange (with frequency and level controls), Resonance (for ultra lows), and Presence (for ultra highs). All are carefully tuned for bass guitar. But don’t let that hold you back if you’re a keyboard player. Pianos and synthesizers sound great with the Sunset!
The Sunset includes Gain and master Volume controls which allow you to add compression and classic tube amp growl. It has both ¼” phone and balanced XLR outputs - which lets you use it as a high quality active direct box. Finally, the Sunset features zero latency all analog circuitry – important for the instrument most responsible for the band’s groove.
Introducing the Sunset Bass Amp Simulator
- Zero Latency bass amp simulator.
- Go direct into the PA or DAW.
- Five Band EQ:
- Treble and Bass controls.
- Parametric midrange with level and frequency controls.
- Presence control for extreme highs.
- Resonance control for extreme lows.
- Gain control to add compression and harmonics.
- Master Volume.
- XLR and 1/4" outputs.
- Full bypass.
- 9VDC, 200mA.
Artwork by Aaron Cheney
MAP price: $210 USD ($299 CAD).