
Dojo Columnist Bryran Clark at the helm.
A few small organizational tricks can set your digital workspace up for success.
Hi, and welcome to another Dojo. This time, I’m going to give you ways to cut the clutter from your sessions and help make your recording process more efficient—in short, more kaizen. This compound Japanese word is usually translated as “good change” but has morphed over the years to mean something closer to “continual improvement.” The concept is applied in multiple industries from auto manufacturing to healthcare, and it can certainly be effectively applied on an individual level.
The idea is that multiple small improvements over time will produce big results. Legendary British cycling coach Dave Brailsford called this “the aggregation of marginal gains.” His strategy was simple: Focus on getting one percent better in every area related to riding a bike. Within 10 years, the British cycling team went on 178 World Championship races and won five Tour de France victories and over 60 Olympic gold medals. Kaizen, indeed! I’m still amazed when I get sessions from other engineers who have no color-coded recording session tracks, haphazard organization within the session itself, and haven’t saved multiple versions. These are three problems that are easily solved with a bit of kaizen. Tighten up your belts, the Dojo is now open.
Color differentiation reduces your cognitive load and allows for faster, more efficient recording, editing, mixing, and overall session management.
Diversify Your Color Palette
Color-coding recording session tracks is a powerful tool for visual organization. It’s an essential, non-technical practice that can significantly enhance workflow efficiency and track management. In a typical modern recording session, there can be between 30 and 100 tracks, each representing different instruments, vocals, effects, and other elements. Without a clear organizational strategy, navigating through these tracks can become overwhelming and time-consuming.
By assigning specific colors to different types of tracks, producers and engineers can quickly identify and locate the tracks they need to work on, so establish a consistent color scheme for types of instruments.
Here’s mine:
• Drums are always slate blue.
• Guitars are various shades of green because they’re made from trees (of course, almost everything else is, too, but both guitar and green share the same first letter).
• Bass instruments are always brown (because they’re powerful and can make you brown your trousers).
• Synths and keys are various hues of purple (I think of Prince and “Purple Rain”).
• Vocals are always yellow because when you get lost in the stifling dark caverns of your mix and can’t find your way out, focus on the vocals—they will lead you toward the light.
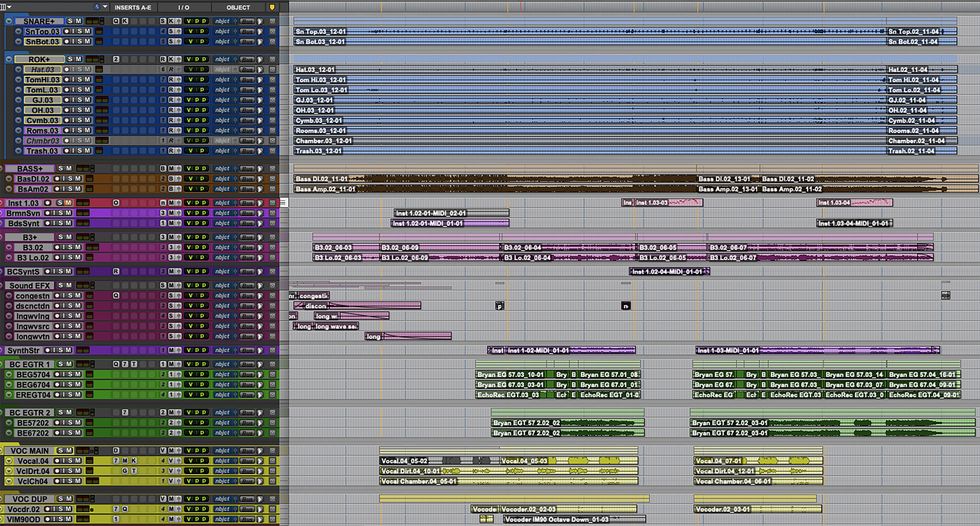
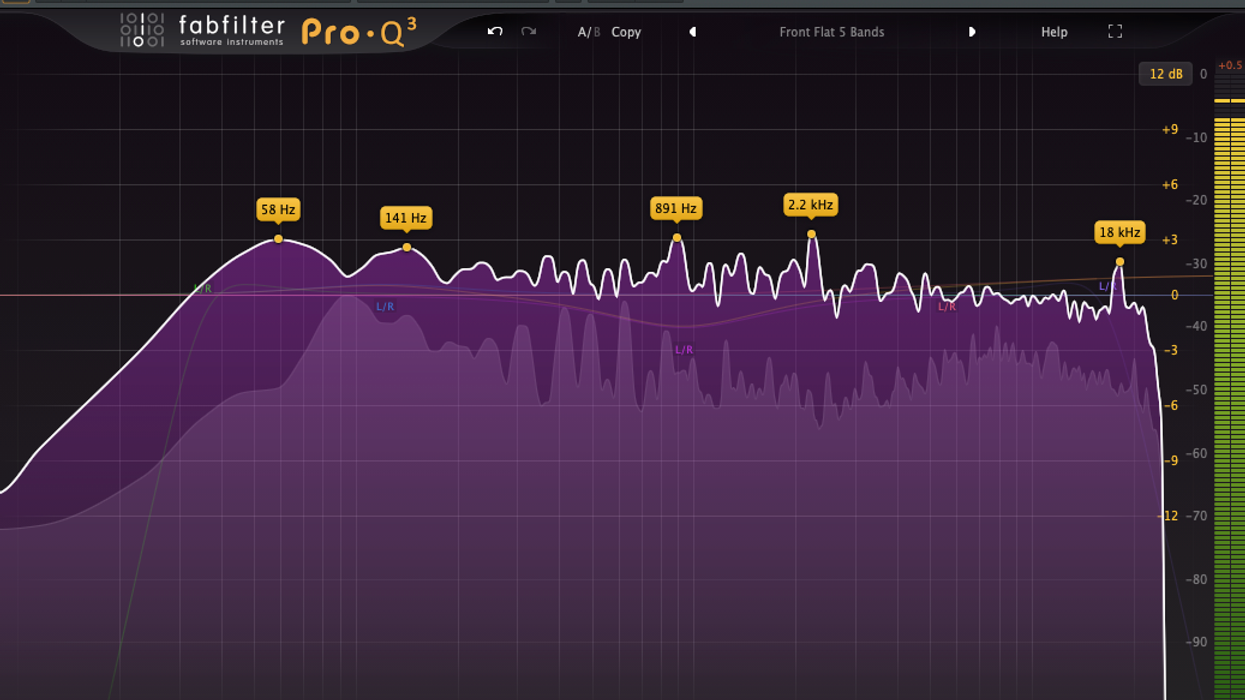
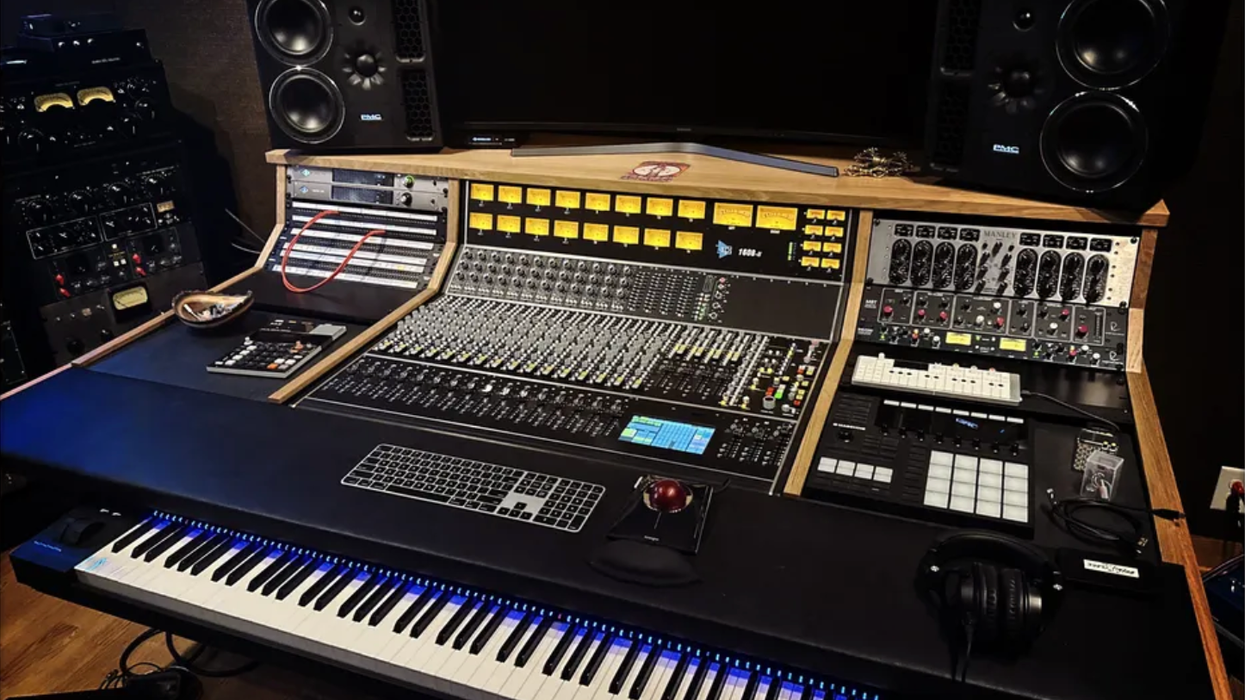
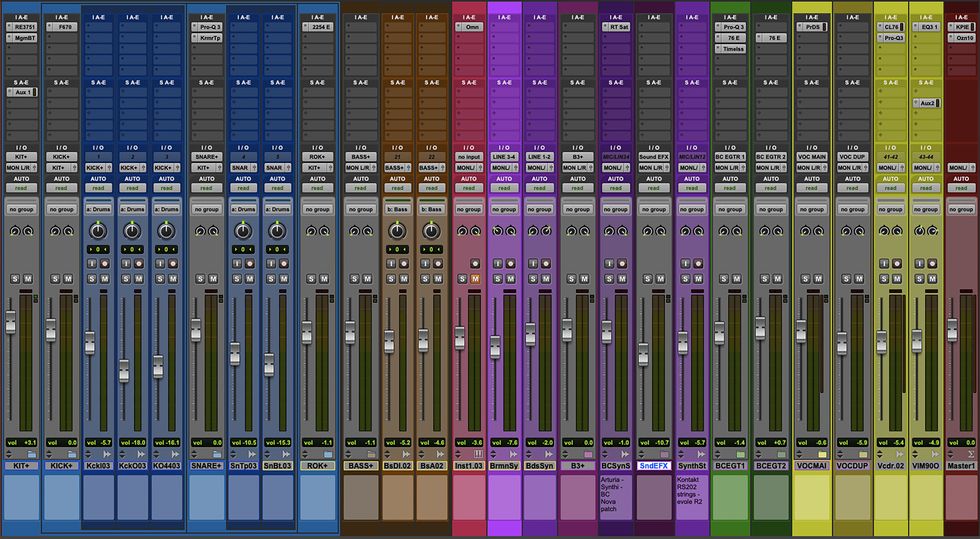
An example of our columnist’s strict session color coding in his DAW.
Regardless of your choices, color differentiation reduces your cognitive load and allows for faster, more efficient recording, editing, mixing, and overall session management. Moreover, color coding helps in identifying groups of tracks that need to be processed together, such as a drum bus or background vocals, thus making it easier to apply group processing and adjustments.
Your layout of a recording session is another critical factor for maintaining organized and productive workflows. A well-structured session layout ensures that all elements of the recording are easily accessible and logically arranged. My tracks have a consistent order: drums at the top, followed by bass, guitars, keyboards, vocals, and effects. There’s no right way to do this, but whatever you do, be consistent.
“I have an existential map. It has 'You are here' written all over it.” – Steven Wright
Consistency helps individual producers and engineers to work more efficiently, but also facilitates collaboration with others. When multiple people are involved in a project, establish a standardized layout that will allow everyone to quickly understand the session structure, find specific tracks, and contribute without confusion. Also, a clear layout helps minimize mistakes during recording, editing, and mixing, like possibly overlooking important tracks or processing the wrong ones.
Your layout of a recording session is another critical factor for maintaining organized and productive workflows. A well-structured session layout ensures that all elements of the recording are easily accessible and logically arranged. My tracks have a consistent order: drums at the top, followed by bass, guitars, keyboards, vocals, and effects. There’s no right way to do this, but whatever you do, be consistent.
Consistency helps individual producers and engineers to work more efficiently, but also facilitates collaboration with others. When multiple people are involved in a project, establish a standardized layout that will allow everyone to quickly understand the session structure, find specific tracks, and contribute without confusion. Also, a clear layout helps minimize mistakes during recording, editing, and mixing, like possibly overlooking important tracks or processing the wrong ones.
“Waste Not, Want Not”
One of the most important things to always remember is to immediately save a new version the very first time you open a project or session. That way, if something happens, and it will eventually (I’ve even had session data get corrupted on that specific sector of the hard drive), you’ve left the original session alone. Every time you work on the song, or project, save a new version. This practice safeguards the process and ensures project security.
This is also important during the creative phase when trying out different ideas and arrangements. If a new idea doesn't work out, it's easy to revert to a previous version without losing valuable progress. Furthermore, saving versions at critical milestones—such as after recording, editing, and mixing—provides fallback options in case of technical issues or unexpected problems. And lastly, saving versions creates a chronological historical record of the session's development, which is invaluable for reviewing the evolution of the track, project, or entire record!
- Tone Tips: The Power of Plug-Ins ›
- Hello, Hi! Welcome to Ty Segall’s Harmonizer Studio ›
- Tone Tips: Make Your Creative Space Rock ›
- A Guide to Essential Effects Plugins for Your Home Studio ›
- Home Studio Ergonomics ›
- Welcome to My Home Atelier ›
- Home Recording Guitars ›
- Building a Pro-Level Home-Studio Mic Closet ›
- The Working Guitarist: The Home Studio ›
This month’s mod Dan’s uses a 500k linear pot, a 1.5H inductor (L) with a 0.039 µF (39nF) cap (C), and a 220k resistor (R) in parallel.
This simple passive mod will boost your guitar’s sweet-spot tones.
Hello and welcome back to Mod Garage. In this column, we’ll be taking a closer look at the “mid boost and scoop mod” for electric guitars from longtime California-based tech Dan Torres, whose Torres Engineering seems to be closed, at least on the internet. This mod is in the same family with the Gibson Varitone, Bill Lawrence’s Q-Filter, the Gresco Tone Qube (said to be used by SRV), John “Dawk” Stillwells’ MTC (used by Ritchie Blackmore), the Yamaha Focus Switch, and the Epiphone Tone Expressor, as well as many others. So, while it’s just one of the many variations of tone-shaping mods, I chose the Torres because this one sounds best to me, which simply has to do with the part values he chose.
Don’t let the name fool you, this is a purely passive device—nothing is going to be boosted. In general, you can’t increase anything with passive electronics that isn’t already there. Period. But you can reshape the tone by deemphasizing certain frequencies and making others more prominent (so … “boost” in guitar marketing language). Removing highs makes lows more apparent, and vice versa. In addition, the use of inductors (which create the magnetic field in a guitar circuit) and capacitors will create resonant peaks and valleys (bandpasses and notches), further coloring the overall tone. This type of bandpass filter only allows certain frequencies to pass through, while others are blocked, and it all works at unity gain.
“You can’t increase anything with passive electronics that isn’t already there … but you can reshape the tone by deemphasizing certain frequencies and making others more prominent.”
All the systems I mentioned above are doing more or less the same thing, using different approaches and slightly different component values. They are all meant to be updated tone controls. Our common tone circuit is usually a variable low-pass filter (aka treble-cut filter), which only allows the low frequencies to pass through, while the high frequencies get sent to ground via the tone cap. Most of these systems are LCR networks, which means that there is not only a capacitor (C), like on our standard tone controls, but also an inductor (L) and a resistor (R).
In general, all these systems are meant to control the midrange in order to scoop the mids, creating a mid-cut. This can be a cool sounding option, e.g. on a Strat for that mid-scooped neck and middle tone.
Dan Torres offered his “midrange kit” via an internet shop that is no longer online, same with his business website. The Torres design is a typical LCR network and looks like the illustration at the top of this column.
Dan’s design uses a 500k linear pot, a 1.5H inductor (L) with a 0.039 µF (39nF) cap (C), and a 220k resistor (R) in parallel. Let’s break down the parts piece by piece:
Any 500k linear pot will do the trick, in one of the rare scenarios where a linear pot works better in a passive guitar system than an audio pot.
(C) 0.039µF cap: This is kind of an odd value. Keeping production tolerances of up to 20 percent in mind, any value that is close will do, so you can use any small cap you want for this. I would prefer a small metallized film cap, and any voltage rating will do. If you want to stay as close as possible to the original design, use any 0.039 µF low-tolerance film cap.
(L) 1.5H inductor: The original design uses a Xicon 42TL021 inductor, which is easy to find and fairly priced. This one is also used in the Bill Lawrence Q-Filter design, the Gibson standard Varitone, and many other systems like this. It’s very small, so it will fit in virtually every electronic compartment of a guitar. It has a frequency range of 300 Hz up to 3.4 kHz, with a primary impedance of 4k ohms (that’s the one we want to use) and a secondary impedance of 600 ohms. Snip off the three secondary leads and the center tap of the primary side and use the two remaining outer primary leads; the primary side is marked with a “P.” On the pic, you can see the two leads you need marked in red, all other leads can be snipped off. You can connect the two remaining leads to the pot either way; it doesn’t matter which of them is going to ground when using it this way.
Drawing courtesy of singlecoil.com
(R) 220k: use a small axial metal film resistor (0.25 W), which is easy to find and is the quasi-standard.
Other designs use slightly different part values—the Bill Lawrence Q-filter has a 1.8H L, 0.02 µF C and 8k R, while the old RA Gresco Tone Qube from the ’80s has a 1.5H L, 0.0033 µF C, and a 180k R, so this is a wide field for experimentation to tweak it for your personal tone.
This mid-cut system can be put into any electric guitar not only as a master tone, but also together with a regular tone control or something like the Fender Greasebucket, or it can be assigned only to a certain pickup. It can be a great way to enhance your sonic palette, so give it a try.
That’s it! Next month, we’ll take a deeper look into how to fight feedback on a Telecaster. It’s a common issue, so stay tuned!
Until then ... keep on modding!
Kemper and Zilla announce the immediate availability of Zilla 2x12“ guitar cabs loaded with the acclaimed Kemper Kone speaker.
Zilla offers a variety of customization to the customers. On the dedicated Website, customers can choose material, color/tolex, size, and much more.
The sensation and joy of playing a guitar cabinet
Sometimes, when there’s no PA, there’s just a drumkit and a bass amp. When the creative juices flow and the riffs have to bounce back off the wall - that’s the moment when you long for a powerful guitar cabinet.
A guitar cabinet that provides „that“ well-known feel and gives you that kick-in-the-back experience. Because guitar cabinets can move some serious air. But these days cabinets also have to be comprehensive and modern in terms of being capable of delivering the dynamic and tonal nuances of the KEMPER PROFILER. So here it is: The ZILLA 2 x 12“ upright slant KONE cabinet.
These cabinets are designed in cooperation with the KEMPER sound designers and the great people from Zilla. Beauty is created out of decades of experience in building the finest guitar cabinets for the biggest guitar masters in the UK and the world over, combined with the digital guitar tone wizardry from the KEMPER labs. Loaded with the exquisit Kemper Kone speakers.
Now Kemper and Zilla bring this beautiful and powerful dream team for playing, rehearsing, and performing to the guitar players!
ABOUT THE KEMPER KONE SPEAKERS
The Kemper Kone is a 12“ full range speaker which is exclusively designed by Celestion for KEMPER. By simply activating the PROFILER’s well-known Monitor CabOff function the KEMPER Kone is switched from full-range mode to the Speaker Imprint Mode, which then exactly mimics one of 19 classic guitar speakers.
Since the intelligence of the speaker lies in the DSP of the PROFILER, you will be able to switch individual speaker imprints along with your favorite rigs, without needing to do extensive editing.
The Zilla KEMPER KONE loaded 2x12“ cabinets can be custom designed and ordered for an EU price of £675,- UK price of £775,- and US price of £800,- - all including shipping (excluding taxes outside of the UK).
For more information, please visit kemper-amps.com or zillacabs.com.
Featuring a preamp and Dynamic Expansion circuit for punch and attack, plus switchable amp simulations.
"Like a missile seeking its target, Heatseeker will give you the explosive sound of rock! Inspired directly from the gear setup used by Angus Young,it features the most important sonic elements to match the tone of the short-pants-rock-God.
It’s no secret that a major role to his sound, along with the Marshall-brick walls, played one of the first wireless systems for guitar that quickly became a classic among guitar greats, the Schaffer Vega Diversity System."
The preamp along with the Dynamic Expansion circuit found in the wireless transmitter/receiver gave it its distinct sound. Besides boosting the signal, the preamp tightens up lower frequencies and slightly accentuates mid frequencies while the Dynamic Expansion circuit enhances the dynamic response and harmonics of the signal giving punch and attack to ensure that it will cut through the mix. Instead of opting for a prefix setting for the Dynamic Expansion circuit as found in the original unit, we have re-imagined our version with the enhanced knob on the Heatseeker to have more control over the guitar tone’s dynamic response. Setting it around 10 o‘clock is a good starting point to add some extra sparkle. Max it out to bring back to life even the most dull and colorless sounds.
Utilizing an all-analog JFET circuit, running on 27 volts via an internal voltage boost (DO NOT plug higher than 9V DC power supply), we have captured the tone and feel of three British tube amplifiers, synonymous with the sound of rock and roll, with an excellent clean-to-mean dynamic response. With the flip of a toggle switch, you can capture the sound and feel of a JTM45, 1959 Super Lead, or JMP 2203. A smart switching circuit follows the signal path and respective gain stages tuned for each amp and combines them with an actual Marshall style EQ and power amp simula-tion circuit for thundering rock tones. Angus Young usually plugs into Channel 1 or High Treble input of his JTM45s and Super Leads so we opted for that sound when we started visualizing Heatseeker on the drawing board. We have also extended the range of the presence control beyond the original so that the user will be able to match the pedal to any amp or gear setup. The master volume offers plenty of output so that you can also use the pedal as a preamp and plug it into a clean power amp or straight to your DAW. Note that the pedal doesn’t feature any speaker simulation circuit so we recommend using a separate hardware or software guitar speaker simulation when going direct to DAW or a full-range speaker.
A new feature to our booster/drive + amp-in-a-box line of pedals, recreating legendary sounds, is the switchable WoS (Wall of Sound) circuit. We have carefully tuned this circuit at the output of the AMP section of the Heatseeker to open up the soundstage by increasing the output, adding thundering lows, and thickening high mid frequencies. Imagine standing in front of a wall loaded with Marshall amp heads and 4x12 speaker cabinets, grabbing your SG, and hitting a chord. You will be blown away by the sound projection! In combination with the tube power amp simulation and the enhanced circuit of the right section, we’ve made sure that the pick attack will be as dynamic as it gets, so¥er picking will produce clean and slightly crunchy sounds, and hard picking will give explosive distorted sounds! While primarily designed for Angus Young sounds, Heatseeker will definitely open the door to countless other guitar-great tones that use these Marshall amps and/or the Schaffer Vega Diversity System. Think of KISS, Peter Frampton, and Van Halen to name a few.
Like our other dual overdrive/amp-in-a-box designs, Heatseeker features a passive effects loop to give you the option to connect your beloved pedals between the preamp/enhancer and amp-in-a-box circuit or use the two sections as separate and independent effects when using an external bypass switcher/looper. SND is the output of the BOOST/ENHANCE section, RTN is the input of the AMP section. SND is connected to RTN when no instrument jacks are inserted in the effects loop. Note that all pedals inserted in the passive effects loop are still in the signal chain when any or both sections of the Heatseeker are in bypass mode.
Heatseeker features a power-up bypass/engage pre-set function for the footswitches. You can change the default function by holding down the footswitch(es) during power-up. That way you can select which state your pedal will go to when you plug the power supply. This function comes in especially handy to people who use remote pedal switchers/loopers as they only set the state of the pedal once and then operate from the controller.
Street/MAP Price: $279
For more information, please visit crazytubecircuits.com.
On the road with the history-making engineer, producer, and artist, this guitarist keeps it simple.
Jeff Kollman is a lifelong gigging guitarist whose resume stretches from Deep Purple’s Glenn Hughes to Chad Smith’s Bombastic Meatbats. Since 2017, he’s been performing with famed engineer, producer, and songwriter Alan Parsons, who worked on Abbey Road, Dark Side of the Moon, and a host of other records that you’ve probably owned for decades. It should come as no surprise, then, that as a member of the Alan Parsons Project, Kollman’s gig is to sound great. And he does so with a quick-and-easy rig.
After getting into Nashville’s Ryman Auditorium from a sweaty gig from the night before in Georgia, the band got set up and PG’s John Bohlinger rolled in to catch up with Kollman about his simple road setup.
Brought to you by D’Addario.
Inspiring and Practical
Kollman has a pair of No. 1’s he takes on the road. The first is this all-stock SG Faded Special he picked up used for $560, which he points out is “really resonant” and “really woody,” with great sustain. “It inspires me,” he says, “and it’s inspiring, I think, to kids to know they don’t have to spend five grand on a guitar.”
The SG stays in Kollman’s drop tuning with the low E dropped to C and the A dropped to G. He keeps all his guitars strung with Ernie Ball Super Slinkys (.009–.046).
Surfy Strat
Kollman’s other No. 1 is a ’59 reissue Strat from Wildwood Guitars in Colorado. It features a Brazilian rosewood fretboard and John Cruz custom-wound pickups in the neck and middle. The guitarist isn’t entirely sure what humbucker is in the bridge position, but it’s low output, coil tapped, and he loves it. This Strat stays in standard tuning.
A Lucky Les Paul
Kollman received a tip from pal Greg Koch that this Les Paul, from a limited edition run of featherweight LPs built for Wildwood Guitars, is a “tone beast,” so he jumped on it. At 7.98 pounds, it came as advertised. Kollman loaded it up with an original vintage set of PAFs.
Easy Amp Recipe
Since the Parsons Project does lots of fly dates, Kollman needs a tone recipe for an amp he can find anywhere. He requests a Marshall JCM2000, uses both the clean and dirty channels, and says, “I can flop and go in 5 minutes and have my sound,” while showing off the EVH-style dirt and “ethereal cleans” he can dial-up.
Functional and Fun
Kollman rolls with a pair of pedalboards built by Japan’s Free the Tone. The first is his practical board that is loaded up with an Xotic EP Booster, SP Compressor, and a pair of RC Boosters; some signature gear he co-designed with Tim Jauernig that includes his F-Bomb 3, Kollmanation distortion, and a Zhingh-Whundh (which he says is on the down-low currently);
an Ibanez Tube Screamer TS-808, and a Vemuram Jan Ray dirt box. They’re complemented with a Free the Tone Flight Time Digital Delay and Ambi Space Digital Reverb, and it’s all kept in tune with a TC Electronic PolyTune. Kollman only steps on his Free the Tone Direct Volume and his Free the Tone ARC-3 Audio Routing Controller.
His second board is “just toys” and includes a DigiTech Digidelay, a signature Tim Jauernig Bombastortion, another TS808, a Free the Tone Tri Avatar Multi-Dimensional Chorus, Boss OC-2 Octave, an Octavia clone prototype built by Tim Jauernig, a DigiTech EX-7 Expression Factory, and an MXR Custom Audio Electronics buffer.