
Drew Berlin, left, and Alexander Dumble, right, first met in the early ’70s through luthier Jim Foote. “Within an hour or so, I went and got one of my amps from home, and he modded it for me. And that started the relationship,” remembers Berlin.
Drew Berlin talks about what it takes to preserve the legacy of Dumble—and how that might involve building a few new amps.
For guitarists, the name Dumble conjures awe, wonder, critique, devotion, myth, and plenty of conjecture—all of it understandable. The late Howard “Alexander” Dumble’s namesake amps are akin to the vaults of Fort Knox: We know they exist, we’ve heard tales of their unimaginable treasure, but few have, or ever will, experience them firsthand.
The mystery stems from how Mr. Dumble kept a tight-knit circle of friends he trusted with his amplifiers. That’s why, when he passed in 2022, many wondered what would become of his builds, designs, and company. Fortunately, Dumble had a plan and entrusted the keys to his kingdom to two of his closest friends: Drew Berlin and Matt Swanson.
Judging by Berlin’s résumé, the brand is in good hands. An early adopter of the amplifiers as a professional guitarist, he even helped Dumble voice many of them. But beyond the Dumble sphere, he is a titan of the vintage guitar gear community. As one half of the famed “Burst Brothers,” he was key in shaping Guitar Center’s early vintage program and still deals in some of history’s most priceless, sought-after, and collectible guitars and amps.
Berlin’s connection to Dumble was far more personal. From the day they first met until Dumble’s passing, their friendship centered on caring for each other, whether that meant amp modifications or healthcare. Berlin was a constant presence.
“I even had a deal with my wife where, if I wasn’t home by midnight, she’d call Mr. Dumble,” he said with a chuckle. “He was so charming. He’d sweet-talk her: ‘Oh yes, Diane. Drew’s here, and we’re getting a lot done. He’s really helping, so I’ll need him a bit longer.’ And she’d say, ‘Okay.’ [laughs] That went on for 20 years.”
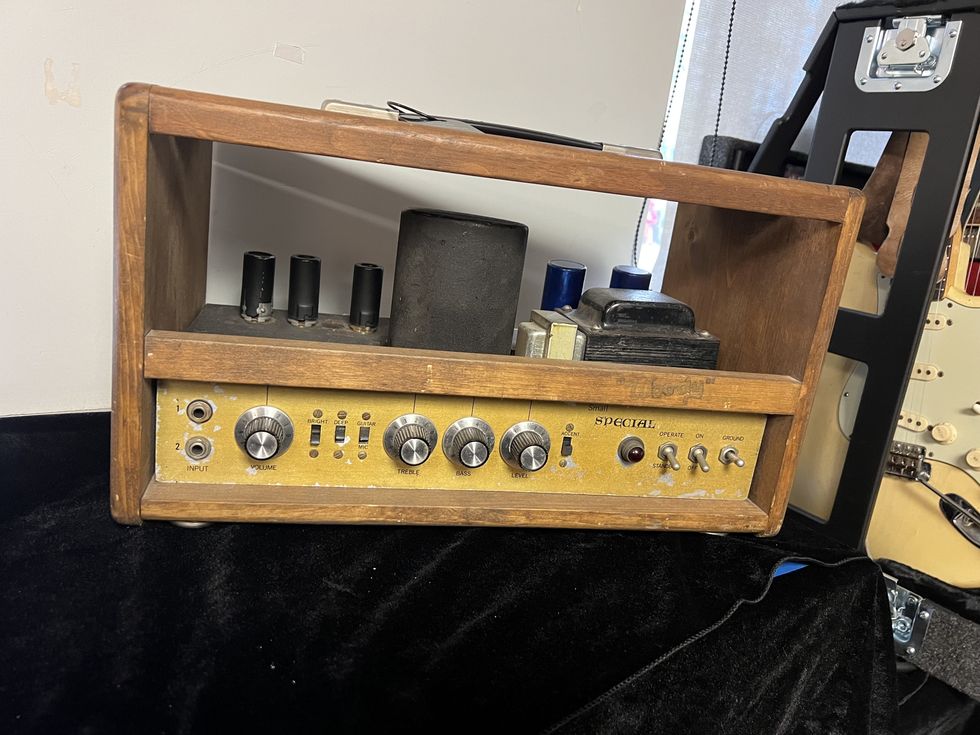
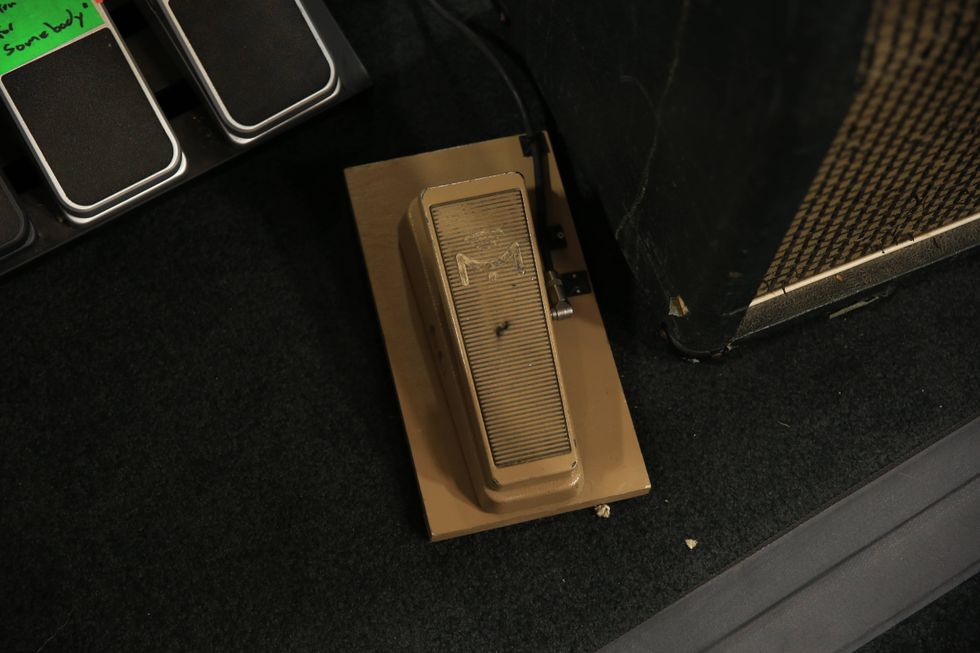
Here’s “Woody,” a Dumble Special that was often used to “audition” potential customers. It’s a single-channel design that has beautiful, smooth compression. And like many of Dumble’s amp designs, there’s nowhere to hide.
At 74, Berlin’s love and devotion to Dumble and his amps remain unwavering. While many are lucky to glimpse one in person, he owns several, still gigging them regularly. More crucially, he and Swanson own the brand’s name and trademark, a job he takes very seriously setting up the Dumble Preservation Society to safeguard everything, service existing Dumble amplifiers, and, though he didn’t know it at the time, build new ones.
But before anyone questions his motives, it’s vital to understand where Berlin is coming from. His passion for the amps and profound devotion to his friend and the legacy he left was even visible over our video call from his California recording studio. Every decision he makes balances protecting the legacy with navigating the future, and is always guided by the question, “What would Mr. Dumble have wanted?”
Thankfully, if anyone can answer that, it’s Berlin. And he was generous enough to share why that is with us.
How did you and Mr. Dumble first meet?
I knew about Dumble and the tone in the early ’70s, and I started becoming more and more familiar with it, of course, through Jackson Browne, David Lindley, and Stevie Ray Vaughan. Because of that, and being that I was “the vintage guy,” a mutual friend, Jim Foote, thought that it would be interesting for Mr. Dumble to meet me.
He set up an appointment, and Dumble came in with a small Special called “Woody,” which we actually just displayed at NAMM. I plugged into the amp and started playing, and we started talking. Within an hour or so, I went and got one of my amps from home, and he modded it for me. And that started the relationship.
It began with gear, but it seems your friendship grew into something much deeper.
You know, it absolutely did. He was brilliant, and we had a lot in common beyond music. So, I started trying to be there for him as much as possible, sometimes like eight or 10 hours at a time, day after day after day.
Pretty soon, it was hard for him to get around, so I found a vehicle for him and was able to help him out. I felt really honored to be able to do that, because I was getting such great advice from him, and he was really intelligent on so many levels. My family even did a lot of outings together where we included him as part of the family. He loved my children, so they grew up knowing him as Uncle Alexander.
Given your close connection to both the man and his amplifiers, what would you say defines the “magic” of his amplifiers?
He liked to say that the frequencies were enhanced, and there were more highs, more lows, more mids. It was a blossoming of frequencies. Most of his amps were touch-sensitive, so if you dug in harder, it would change the tone. You could express more, and notes would do different things.
But as far as for me, it's more than just something that you hear. When you're playing it, the expression that you're able to create, it's something you feel in your chest, in your heart. And I like that they never hurt. Some amp tones are irritating and hurt your ears, especially if it's too loud. Dumbles never did. The louder, the better.
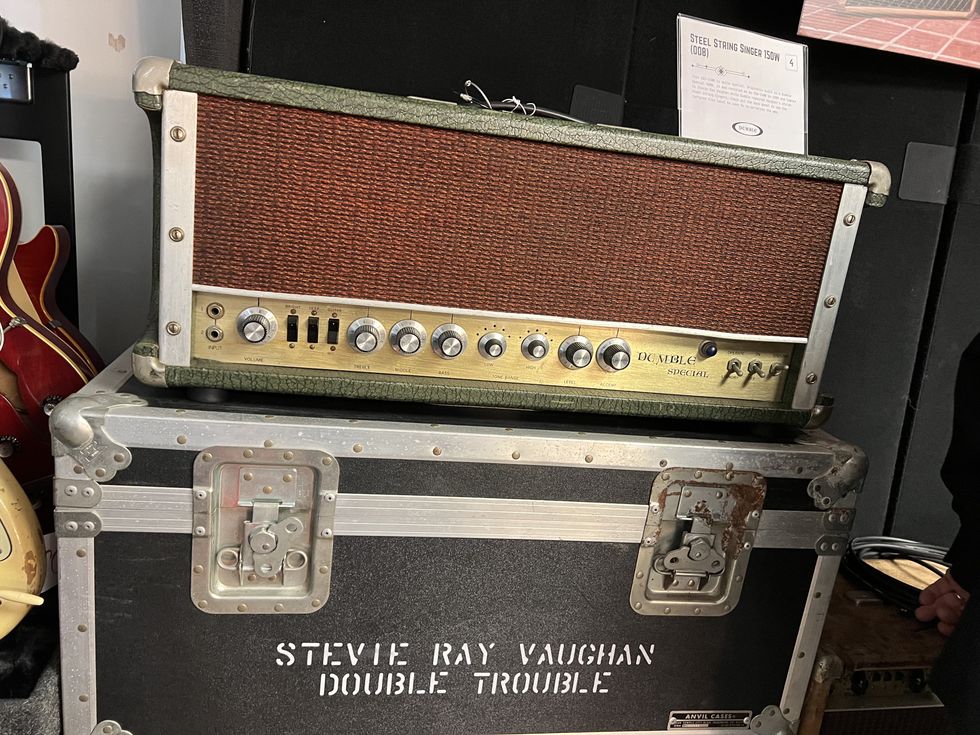
At first glance, this would appear to be a Special, but in 1989 Dumble modified it to be a 150-watt Steel String Singer for Stevie Ray Vaughan while his SSS was in for repairs.
Players often point to the Steel String Singer’s cleans and the Overdrive Special’s distortion. Did Dumble approach those as separate designs, or did he see a unifying thread in his creations?
It was very important for him to be really happy with the way the amp sounded in the clean, lush mode before you kick in the overdrive.
The way he explained it, it starts in the power section of an amplifier. It needs to be clean, powerful, and warm. Then you get a really warm, clean, lush sound and add the overdrive section to that. Getting that right is more challenging than the overdrive section. The overdrive was a balance of how much crunch you wanted and how much sustain. So that was secondary.
There are rumors of the incredible time he took building each amp and how particular he was about every detail. Are they true?
Yes. And he liked to do everything himself. He never let anyone even touch a build that he was working on. I understand now more than I did, as far as how difficult and how time-consuming that was.
He would change out 20, 30, 40, or 50 parts on an amp. It would take forever. And then after he finally came up with the right combination, the artists would come over and play it. If it wasn’t quite what they wanted, he’d go back to the drawing board. And it took several tries, in some cases, to get the amp exactly where the artist and Mr. Dumble both agreed was the right sound.
Then he’d have to make sure that it was roadworthy before he would send it out on the road.
“Some amp tones are irritating and hurt your ears, especially if it's too loud. Dumbles never did. The louder, the better.”
How did he sustain that level of commitment and detail throughout his career?
Well, the amps were so complex, there were so many stages, and there’s so many different variances that it did become overwhelming towards the end of his life. He stopped making Steel String Singers and Overdrive Reverbs a long time ago because they were too much work. There were 11 Steel String Singers, and I think 12 Overdrive Reverbs were made. But he stuck with the Overdrive Specials. He had some health issues on and off through the years, so he did the best he could.
Did you and Dumble ever discuss your role in the future of his brand?
Well, we talked about it. My partner, Matt Swanson, and I were left to protect Dumble, his legacy, and his intellectual property. And a lot of people showed interest in wanting to take the Dumble name. The trademark was expiring and we had to act.
That’s when we started the Dumble Preservation Society. We offer amp service with the right schematics and parts. We have two techs. One was a close friend of Dumble’s that he personally approved, and the other is incredibly passionate and skilled. Since Dumble passed, we’ve serviced over 50 of his amps.
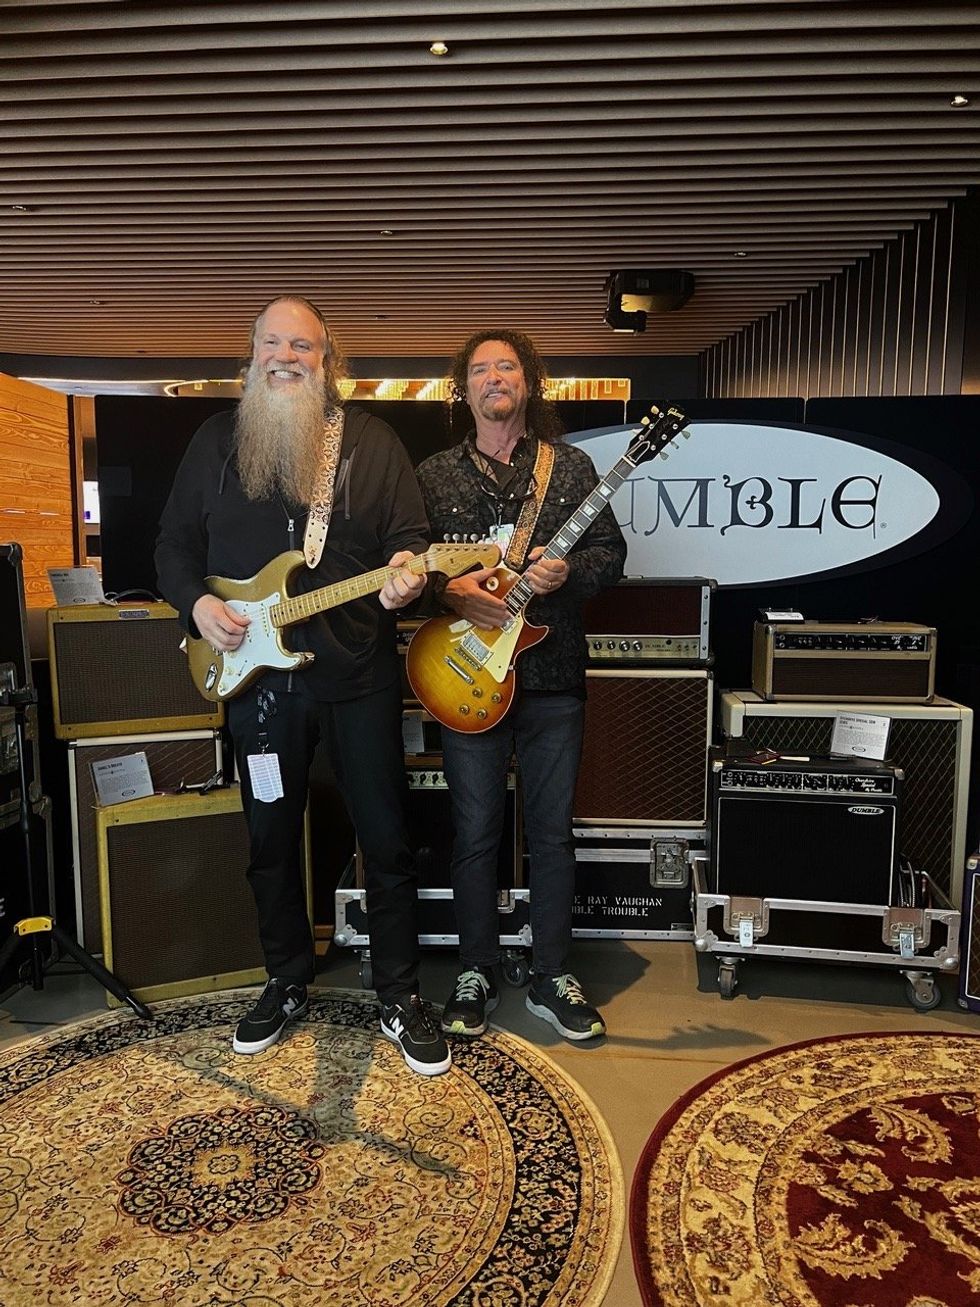
Matt Swanson (left) and Drew Berlin set up the Dumble Preservation Society to safeguard the brand, service existing Dumble amplifiers, and, though they didn’t know it at the time, build new ones.
Was your initial focus just to maintain the amps he’d already built?
That, and honoring his legacy. There’s so much he created that you hear all the time on records, in movies, on the radio. His sound is everywhere. It’s important for people to understand what he did. The Preservation Society stems from that: keeping awareness of his tone and his genius, servicing amps, and secondarily, building them.
What led you to start building new Dumble amps?About six to eight months into his passing, we found out that in order to keep the trademark, we had to actually manufacture and sell something. That’s when I made the decision. It wasn’t about profit. It was either do it ourselves or let someone else take it. He left us in charge for a reason, and he trusted our judgment.
Who’s building the new amps?
There are two guys, who don't want recognition. They don’t think it’s important, and I respect that. One is someone I’ve known and trusted for 35 years. He’s an incredible technician who was very close to Dumble. He told me he had promised Dumble he wouldn’t use any of the knowledge Dumble had shared with him to build amps. I said, “I understand that, but would you rather have people who didn’t know Dumble, weren’t connected to him, and aren’t trying to preserve his legacy do this? Or would you rather help us do what’s necessary?” He agreed.
Another is a friend who I’ve known for at least 20 to 25 years. He’s an amp repair tech who’s incredibly knowledgeable and passionate about Dumble amps. When things needed to be done and Dumble couldn’t do them himself, this was one of the only guys he ever trusted with anything.
You’ve mentioned several close associates deeply connected to and influenced by Dumble. It’s like he was building his company the whole time.
You’re right. He kind of was. I don’t think it was chance that he put us together.
I had been taking care of him for years, and he and Matt became great friends. One day, Dumble pulled him and me aside and said, “Drew, I really appreciate everything you’ve done, but I think moving forward, you’re going to need Matt’s help.”
I think he understood that we would need to work together to keep his legacy alive. I’m really grateful because I couldn’t have accomplished a lot without Matt. Together, we’ve kept the Dumble name alive and treasured, and that’s what we wanted to do.
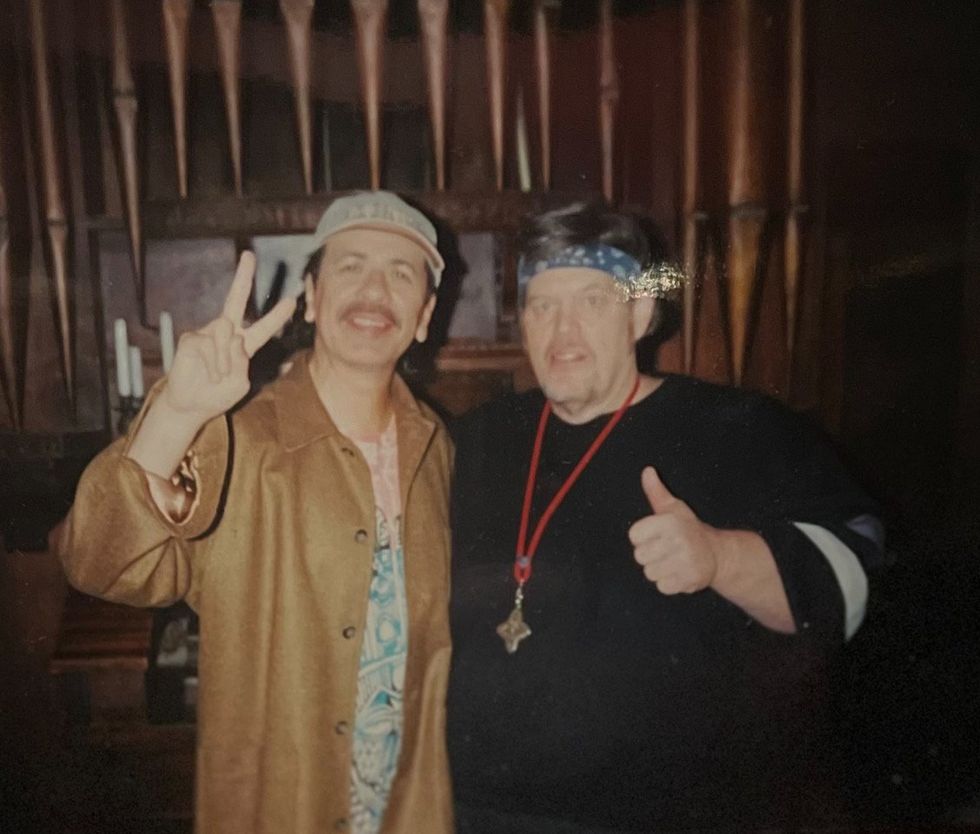
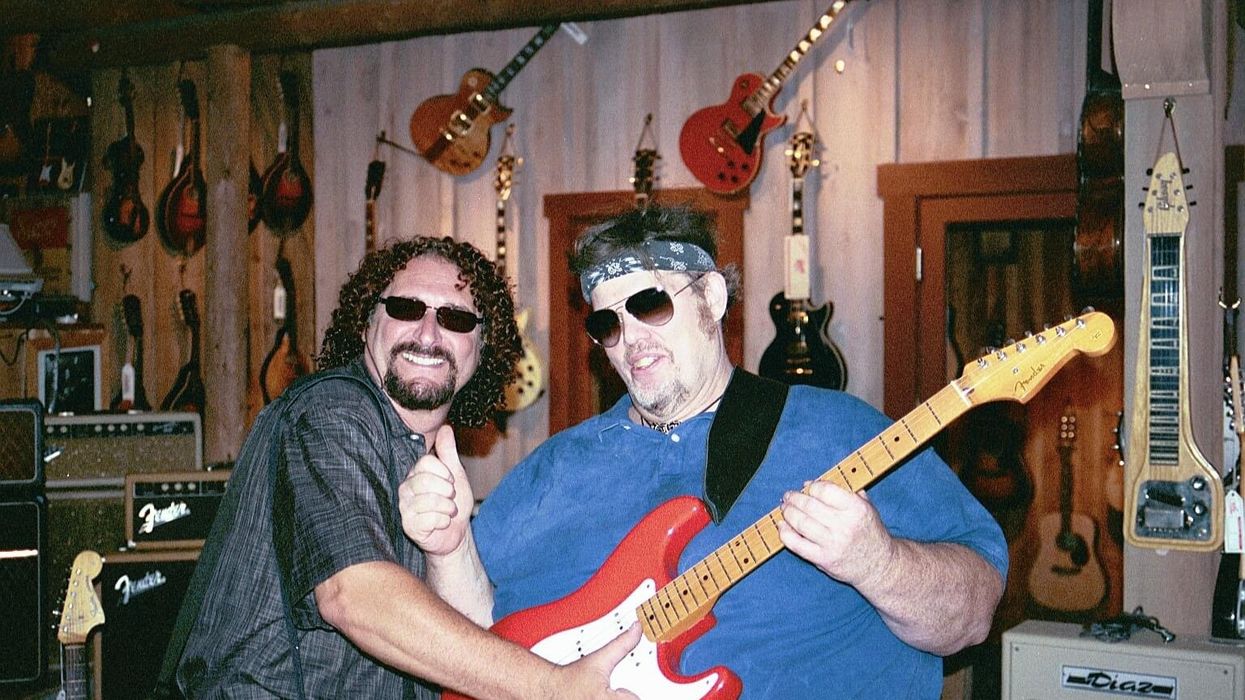
One of Dumble’s biggest supporters was Carlos Santana, who owned several Dumble amps over the years.
With the new amps now emerging, what can players anticipate from this next chapter?
I wish I could answer that, but I’m not sure where we’re going in the future or how we’re doing it. I can tell you, the few that we’ve made were very time consuming, as if Mr. Dumble did it himself: hand-cutting the boards, everything done by hand, the parts being as close as possible to what Mr. Dumble was using. We’re trying to get the sound as close as possible, to where you don’t just hear it, you feel it.
Right now, it’s just a handful of players, the Dumble family, in a way. I helped screen people for Mr. Dumble that I thought were great players and great people, people worthy of his amps. It’s still got to be like that. So, right now, we’re working with a few of Mr. Dumble’s favorite players, giving them some amplifiers and trying to tweak them the way he would have.
Are you adhering closely to Dumble’s original designs with these new builds?
We’re not trying to reinvent the wheel right now. We’re happy if we can get our amps sounding really close to what Mr. Dumble did. We're not trying to enhance or come up with new ideas for them, at least not at this point.
For those who’ve played the new amps, what’s been their reaction so far?
Well, the first one we did has already been on a couple of sessions. It went to a really talented pro player, and we’ve heard nothing but good things. And, a couple of weeks ago, I had a session where I brought one of the amps we had at NAMM. I have several Dumbles I use, and I kind of forgot that it wasn’t one of mine.
It’s exciting to have people playing them, wanting them, and wanting to take them on the road and record with them. Seeing guys I really respect, players, producers, and people making records really like it gives me confidence. The magic that Mr. Dumble had, his ears, his musical talent, his experience in electronics, I don’t see anyone else having that combination.
You stayed out of the design and building process during his lifetime. How do you think that shapes your perspective for what you’re doing now?
Now that we’ve done this, I feel like maybe it would have been better for him if I had pushed a little harder to let people help him when he was alive. He just wanted to do everything himself. I really appreciate that about him, but I never pushed him to say, “Let me help you.” I helped him in other ways, but I never got involved in building amps or letting others help him.
As both a fan and a friend, where do you hope to see the Dumble brand head in the future?
I wish I could give you an exact response, but I don’t know fully right now. This is still new for me, and I’m not sure where it’s going or how I’m going to feel about it.
I do know that as long as the brand is respected, I’ll be okay with it. If people could understand that Dumble did this from his heart. He had the magic to give people something to create with, and that’s what he lived for. He wanted to give artists a tool to help them become better musicians. As long as I can help carry that forward, I feel like I’m doing something useful.
- Dumble Amps: 10 Guitarists on the Late Legend’s Designs ›
- Remembering Alexander Dumble ›
- The House Where Dumble Built ›
Neutrik’s Timbre plug, made for toggling between capacitors.
This follow-up to May 2025’s column shows you a few basic techniques to inject some capacitance into your rig.
Hello, and welcome back to Mod Garage. This month, we will dive into the details of how to add additional guitar-cable capacitance—the right way. Time to get started!
Let’s begin with some typical additional capacitance values that certain lengths of cable (or capacitors) can bring to your system:
• 10’ vintage coiled cable (approx. 3 meters) -> 1 nF
• 15’ vintage coiled cable (approx. 4.5 meters) -> 1.5 nF
• 20’ vintage coiled cable (approx. 6 meters) -> 2.2 nF
• 30’ vintage coiled cable (approx. 9 meters) -> 3.3 nF
• Ritchie Blackmore-style, ultra-long vintage coiled cable -> 4.7 nF
I listed standard values here, so you should have no problem getting caps to match them in any local electronics store or online; the type of cap doesn’t really matter and will mostly be dominated by size, but I’ll share more about this in a minute.
Let’s quickly summarize the first installment of this column from last month’s issue: From a technical point of view, added capacitance shifts down the resonance frequency of the pickups, so they sound fatter, especially when using overdrive. This is exactly the reason why a lot of distortion and fuzz boxes with a vintage voicing use an additional cap at the input section; the resulting overdriven tone is fat and warm.
This month’s mod, which involves adding a capacitor to your signal, works best with vintage-flavored single-coil pickups (approximately 2.4 H inductance) or a typical old-school PAF-style pickup (approximately 3.8 H inductance). Modern high-output pickups are often sporting inductances of 6 H to 8 H, and don’t sound very good with this mod—when adding more cable capacitance to such pickups, the result is a dull and wooly tone without any clearness and definition. If you want to make your single-coil guitar sound more Les Paul-ish, you should try a 4.7n capacitor. It will shift the resonance frequency of your single-coil pickups down to the typical PAF ballpark, making for a very cool and usable old-fashioned guitar tone. It might feel a little muffled when playing clean, but ultra fat and punchy when using overdrive! In general, values higher than 4.7n are not recommended.
We have two options for where to install our cap.
On the Guitar Cable
This is the easiest location to add additional capacitance to your system, with several mod options:
1. The lightest mod ever isn’t a mod at all—it’s to simply buy a vintage guitar cable and plug it in whenever you need it! I don’t know of any company that offers modern guitar cables with intentionally high capacitance.
2. The Neutrik company offers a special angled plug, called the Timbre Plug, that you can solder to any guitar cable of your choice. The plug has a 4-way rotary knob on top to toggle between different capacitors. In addition to a bypass setting, the plug offers capacitances of 1nF, 2.2nF, and 3.3nF, letting you simulate different cable lengths on the fly.
3. You can add an additional capacitor to any guitar cable of your choice to convert it into a “longer-sounding” cable. You simply open one of the plugs to solder the cap between the hot and ground—that’s it. Small, 2.5 mm contact spacing ceramic caps are easy to put into a standard plug and are your weapon of choice here. It’s essential to only add the additional cap to one of the two plugs, but it doesn’t matter if you plug this side into your guitar, an effect, or your amp. This method allows you to build yourself some cables that simulate their older, longer relatives.
You can add an additional capacitor to any guitar cable of your choice to convert it into a “longer-sounding” cable.
Photo courtesy SINGLECOIL (https://singlecoil.com)
Inside the Guitar
You can also add a cap (or several) inside your guitar if you only need this mod for one instrument. If you’re looking for added capacitance with all your guitars, you’d be better off choosing one of the techniques mentioned above.
1. The easiest way is to solder your additional capacitor directly to your volume pot; this way it has a fixed value that can’t be changed and is always engaged. This operation is very simple to do, and you can use regular-sized caps for this.
You can add a cap (or several) inside your guitar if you only need this mod for one instrument.
Illustration courtesy SINGLECOIL (https://singlecoil.com)
2. If you want to make the cap switchable, such that you can run it either bypassed or engaged, you can install a SPST mini toggle switch or use half of a push-pull or push-push pot, which usually sport a DPDT switch underneath.
This drawing shows how to make your additional cap switchable.
Illustration courtesy SINGLECOIL (https://singlecoil.com)
3. If you want to use more than one cap to simulate different cable lengths, your weapon of choice is a rotary switch, setting up a kind of Gibson Varitone wiring without the inductor. Because we are switching capacitances, it is essential to run an additional 10 meg resistor in parallel to each of the caps, and to use a make-before-break, not a break-before-make, rotary switch to prevent loud popping noises when using the switch while your guitar is plugged into an amp. Leave the first lug of the rotary switch open for the bypass position without an additional cap.
If you want to use more than one cap to simulate different cable lengths, use a rotary switch.
Illustration courtesy SINGLECOIL (https://singlecoil.com)
4. If you want to make this mod even more flexible, you can add an additional “cable simulator pot” to your system. The pot should have the same resistance as your volume pot, and should be wired to your volume pot. This way, for example, you can add a 3.3nF or 4.7nF cap to the extra pot, and dial in as much cable capacitance as you like.
On the Pedalboard
The idea of putting a rotary switch or cable-simulator-pot solution into an external unit to create a kind of extra-capacitance stompbox to use with all of your instruments is just around the corner, and yes, it’s possible! However, I don’t recommend this, because it’s physically located after the volume pot in the guitar, which means less volume (no unity gain) and less high end. But don’t worry: If you are looking for a pedalboard solution to simulate different cable lengths (which, as we defined earlier, means to shift the resonance frequency of the pickups), there are some active solutions on the market offering such a feature, usually in combination with a boost or buffer functionality. To name just a few, you should look into the Seymour Duncan Pickup Booster, Stellartone Micro Pedal, or the i2e Audio AG1.0 The PURR. Along with some other brands, these pedals will do the trick, and they’re not difficult to build if you are looking for a DIY solution.
So far, I’ve received several emails from readers asking for some more DIY guitar tools, so next month, we will look into some sustainable and environmentally friendly DIY guitar helpers—all of which you can build yourself easily by upcycling things you already have at home. Stay tuned!
Until then... keep on modding!
Vox’s Valvenergy Tone Sculptor
Two new pedals from the Valvenergy series use a Nutube valve to generate unique dynamics and tone ranges that can be used to radical ends.
When tracking in a studio or DAW, you’re likely to use compression and EQ on most things. Many enduringly amazing and powerful records were made using little else. And though many musicians regard both effects as a bit unglamorous and utilitarian, EQs and comps are as capable of radical sounds as more overtly “weird” effects—particularly when they are used in tandem.
I spent a day workshopping ideas in my studio using just the Vox Valvenergy Smooth Impact compressor and Tone Sculptor EQ, and a dash of amp tremolo and reverb to taste. In the process, I produced more arresting sounds than I had heard from my guitars in many days. There were radical direct-to-desk-style Jimmy Page/Beatles distortion tones, sun-sized, cosmic electric 12-string, Bakersfield twang that could burn through crude, and many other sweet and nasty colors. Most decent EQ and compressor combinations can achieve variations on all those themes. But the Smooth Impact and Tone Sculptor also reveal interesting personalities in unexpected places.
The individuality and energy in the Vox Valvenergy pedals is attributable, in part, to the Nutube vacuum tube used in the circuit. Though it looks little like a vacuum tube as most guitarists know them, the thin, wafer-like Nutube is, in fact, a real vacuum tube like those used in fluorescent displays. Fluorescent display tubes have limitations. A maximum operating voltage of around 40 volts means they aren’t useful for bigger power tube applications like a 6L6, which has an operating voltage of about 400 volts. But it can work quite well as a preamp tube in concert with an op amp power section, which is how the Nutube is used in the new Valvenergy pedals, as well as older Vox products like the Vox MV50 and Superbeetle amps.
Valvenergy Tone Sculptor
When you think about “cinematic” effects, you likely imagine big reverb or modulation sounds that create a vivid picture and feeling of space or motion. But narrow, hyper-focused EQ profiles can evoke very different and equally powerful images. Radical EQ settings can add aggression, claustrophobic intimacy, and stark, explosive dark-and-light contrasts more evocative of Hitchcock’s Psycho than Ridley Scott’s Blade Runner.
Any of these moods can be summoned from the Valvenergy Tone Sculptor. Six sliders cut or boost 10 dB frequency bands spanning 100 Hz to 5.6 kHz. A seventh slider cuts or boosts the master output by 12 dB. This platter of options might not sound like much. But you can use these seven controls together to very specific ends.
“Radical EQ settings can add aggression, near-claustrophobic intimacy, and stark, explosive dark-and-light contrasts.”
For example, bumping the high-midrange and the master output produces narrow cocked-wah-like filter sounds with enough push to produce extra amp overdrive—effectively turning the Tone Sculptor into a buzzy, almost fuzz-like filter effect. But unlike a wah, you can carefully scoop high end or add a spoonful of bass to blunt harsh frequencies or give the tone a bit more weight. You can also broaden the palette of an amp/guitar pairing. I matched a particularly trebly Jazzmaster bridge pickup with a very hot and toppy Vox AC15-flavored amp for this test—a recipe that can be spiky on the best days. But with the Tone Sculptor in the line, I could utilize the same sharp, fuzzy, and filtered Mick Ronson wah tones while shaving some of the most piercing frequencies.
EQ pedals exist on many points along the cost spectrum. And at $219, the Tone Sculptor lives on the high side of the affordable range. Does it offer something less expensive models can’t deliver? Well, for one thing, I found it relatively quiet, which is nice whether you’re shaping toppy high-contrast effects or performing more surgical adjustments. And the sliders feel nuanced and nicely tapered rather than like a dull axe with a few basic frequency notches. But in many situations I also liked the color imparted by the circuit—generated, presumably, by the Nutube. “Color,” in audio terms, is a broad and subjective thing, and one should not necessarily expect the warm, tube-y glow of a vintage tube Pultec. Still, the Tone Sculptor has many forgiving, flattering qualities—typical of studio EQs—that enable fine tuning and experimentation with more radical and creative applications of the effect.
Valvenergy Smooth Impact
As with the Tone Sculptor, the Smooth Impact’s use of Nutube engenders certain expectations. It’s easy to surmise that because Smooth Impact has a vacuum tube in the circuit that it will behave like a little Teletronix LA-2A leveling amplifier. That’s a big ask for a $219 stompbox. On the other hand, the Smooth Impact exhibits some appealing characteristics of studio tube compression. At lower compression levels, it works well as a thickening agent—adding mass without much additional noise. And at higher compression levels it can sound snappy, crisp, and tight without feeling like you’ve bled every trace of overtone from your signal.
The Smooth Impact’s controls aren’t totally atypical. But because it lacks some familiar features like variable attack and release, yet is more complicated than a 1-knob DynaComp, you have to trust your ear to navigate interactions among the controls. The most unfamiliar of these is the 3-way vintage/natural/sag toggle. The first two are defined by preset attack and release settings: Vintage is slow attack and long release, and natural is the opposite. The sag mode’s compression is more like what you get from tube saturation, and it’s useful for adding thickness and complexity to a thin amp tone at modest compression levels.
Though the vintage and natural modes certainly have a different feel, they don’t always sound worlds apart. And like the sag mode, the thing they have in common is the way they enrich lifeless amp output at low to medium compression, with a bit of grind from the tube gain and a little extra makeup gain from the output. At the most aggressive settings, the tube gain can get a little crispy. And really crushing the compression can flatline your tone without adding much in the way of extra sustain. These are limitations common to many compressors with similar features. But unless I was chasing very ultra-snappy Prince and Nile Rodgers fast-funk caricatures, I enjoyed the Smooth Impact most in its in-between ranges, where mass, mild, harmonious drive, and low noise showcase the pedal’s sometimes studio-like personality.
The Cars’ self-titled 1978 debut record changed the world of power pop forever. Guitarist and co-vocalist Ric Ocasek penned all the tunes, but lead guitarist Elliott Easton transformed them with his tasteful 6-string stylings. This time on Shred With Shifty, Easton sits down with Chris Shiflett to show him how to play the solo from “My Best Friend’s Girl.”
The Cars’ self-titled 1978 debut record changed the world of power pop forever. Guitarist and co-vocalist Ric Ocasek penned all the tunes, but lead guitarist Elliot Easton transformed them with his tasteful 6-string stylings. This time on Shred With Shifty, Easton sits down with Chris Shiflett to show him how to play the solo from “My Best Friend’s Girl.”
Born in Brooklyn before winding up in Long Island, Easton washed dishes to save up for his first 1971 Fender Telecaster, and after high school he studied at Berklee College of Music in Boston, where he picked up key theory and technique that he still holds dear. Reared on country and rockabilly players like Roy Buchanan, Jesse Ed Davis, Gram Parsons, James Burton, and Roy Nichols, Easton brought a slick twang to Ocasek’s new-wave gems.
Easton tells Shifty how the band came to work with producer Roy Thomas Baker in London, while crashing at a label-provided mansion nearby and driving a loaned Jaguar and Land Rover to the sessions. Easton’s celebrated leads didn’t take long to come together. “On my mother’s memory, I did all my guitar parts in a day and a half,” he says. All he had with him was a 1978 or ’77 Telecaster with a Bartolini Firebird-style mini humbucker in it, a red Les Paul, a Martin acoustic, and two effects: the brand-new Boss CE-1 and a Morley EVO-1 Echo Volume pedal. His amp of choice in those days? An Ampeg VT-22 or VT-40.
After running down his giddy-up guitar parts from “Best Friend’s Girl,” Easton talks about which modern players impress him, why he doesn’t consider himself a shredder, and the experience of working with Mutt Lange: “I spent as much time tuning with him as playing!”
If you’re able to help, here are some charities aimed at assisting musicians affected by the fires in L.A:
https://guitarcenterfoundation.org
https://www.cciarts.org/relief.html
https://www.musiciansfoundation.org
https://fireaidla.org
https://www.musicares.org
https://www.sweetrelief.org
Credits
Producer: Jason Shadrick
Executive Producers: Brady Sadler and Jake Brennan for Double Elvis
Engineering Support by Matt Tahaney and Matt Beaudion
Video Editor: Addison Sauvan
Graphic Design: Megan Pralle
Special thanks to Chris Peterson, Greg Nacron, and the entire Volume.com crew.
Significantly smaller and lighter than original TAE. Easy to configure and operate. Great value. Streamlined control set.
Air Feel Level control takes the place of more surgical and realistic resonance controls. Seventy watts less power in onboard power amp. No Bluetooth connectivity with desktop app.
$699
Boss Waza Tube Amp Expander Core
Boss streamlines the size, features, and price of the already excellent Waza Tube Expander with little sacrifice in functionality.
Many of our younger selves would struggle to understand the urge—indeed, the need—to play quieter. My first real confrontation with this ever-more-present reality arrived when Covid came to town. For many months, I could only sneak into my studio space late at night to jam or review anything loud. Ultimately, the thing that made it possible to create and do my job in my little apartment was a reactive load box (in this case, a Universal Audio OX). I set up a Bassman head next to my desk and, with the help of the OX, did the work of a gear editor as well as recorded several very cathartic heavy jams, with the Bassman up to 10, that left my neighbors none the wiser.
Boss’ firstWaza Tube Amp Expander, built with an integrated power amp that enables boosted signal as well as attenuated sounds, was and remains the OX’s main competition. Both products have copious merits but, at $1,299 (Boss) and $1,499 (Universal Audio), each is expensive. And while both units are relatively compact, they aren’t gear most folks casually toss in a backpack on the way out the door. The new Waza Tube Expander Core, however, just might be. And though it sacrifices some refinements for smaller size, its much-more accessible price and strong, streamlined fundamental capabilities make it a load-box alternative that could sway skeptics.
Micro Manager
The TAE Core is around 7 1/2" wide, just over 7 " long, and fewer than 4 " tall, including the rubber feet. That’s about half the width of an original TAE or OX. The practical upside of this size reduction is obvious and will probably compel a lot of players to use the unit in situations in which they’d leave a full-size TAE at home. The streamlined design is another source of comfort. With just five knobs on its face, the TAE Core has fewer controls and is easier to use than many stompboxes. In fact, the most complicated part of integrating the TAE Core to your rig might be downloading the necessary drivers and related apps.
Connectivity is straightforward, though there are some limitations. You can use TAE Core wirelessly with an iOS or Windows tablet or smartphone, as long as you have the BT-DUAL adaptor (which is not included and sets you back around 40 bucks). However, while desktop computers recognize the TAE Core as a Bluetooth-enabled device, you cannot use the unit wirelessly with those machines. Instead, you have to connect the TAE Core via USB. In a perfectly ordered world, that’s not a big problem. But if you use the TAE Core in a small studio—where one less cable is one less headache—or you prefer to interface with the TAE Core app on a desktop where you can toggle fast and easily between large, multi-track sessions and the app, the inability to work wirelessly on a desktop can be a distraction. The upside is that the TAE Core app itself is, functionally and visually, almost identical in mobile and desktop versions, enabling you to select and drag and drop virtual microphones into position, add delay, reverb, compression, and EQ effects, choose various cabinets with different speaker configurations and sizes, and introduce new rigs and impulse responses to a tone recipe in a flash. And though the TAE Core app lacks some of the photorealistic panache and configuration options in the OX app, the TAE Core’s app is just as intuitive.Less Is More
One nice thing about the TAE Core’s more approachable $699 price is that you don’t have to feel too bad on nights that you “underutilize” the unit and employ it as an attenuator alone. In this role, the TAE Core excels. Even significantly attenuated sounds retain the color and essence of the source tone. Like any attenuator-type device, you will sacrifice touch sensitivity and dynamics at a certain volume level, yielding a sense of disconnection between fingers, gut, guitar, and amp. But if you’re tracking “big” sounds in a small space, you can generate massive-sounding ones without interfacing with an amp modeler and flat-response monitors, which is a joy in my book. And again, there’s the TAE Core’s ability to “expand” as well as attenuate, which means you can use the TAE Core’s 30-watt onboard power amp to amplify the signal from, say, a 5-watt Fender Champion 600 with a 6" speaker, route it to a 2x12, 4x12, or virtual equivalent in the app, and leave your bandmate with the Twin Reverb and bad attitude utterly perplexed.
The Verdict
Opting for the simpler, thriftier TAE Core requires a few sacrifices. Power users that grew accustomed to the original TAE’s super-tunable “resonance-Z” and “presence-Z” controls, which aped signal-chain impedance relationships with sharp precision, will have to make do with the simpler but still very effective stack and combo options and the “air feel level” spatial ambience control.The DC power jack is less robust. It features only MIDI-in rather than MIDI-in/-through/-out jacks, and, significantly, 70 watts less power in the onboard power amp. But from my perspective, the Core is no less “professional” in terms of what it can achieve on a stage or in a studio of any size. Its more modest feature set and dimensions are, in my estimation, utility enhancements as much as limitations. If greater power and MIDI connectivity are essentials, then the extra 600 bones for the original TAE will be worth the price. For many of us, though, the mix of value, operational efficiencies, and the less-encumbered path to sound creation built into the TAE Core will represent a welcome sweet spot that makes dabbling in this very useful technology an appealing, practical proposition.