Tom Petersson—conceptualizer of the 12-string bass and original low-end man for Cheap Trick—gives Premier Guitar a glimpse at some of the rare gems in his vast collection of vintage guitars and basses
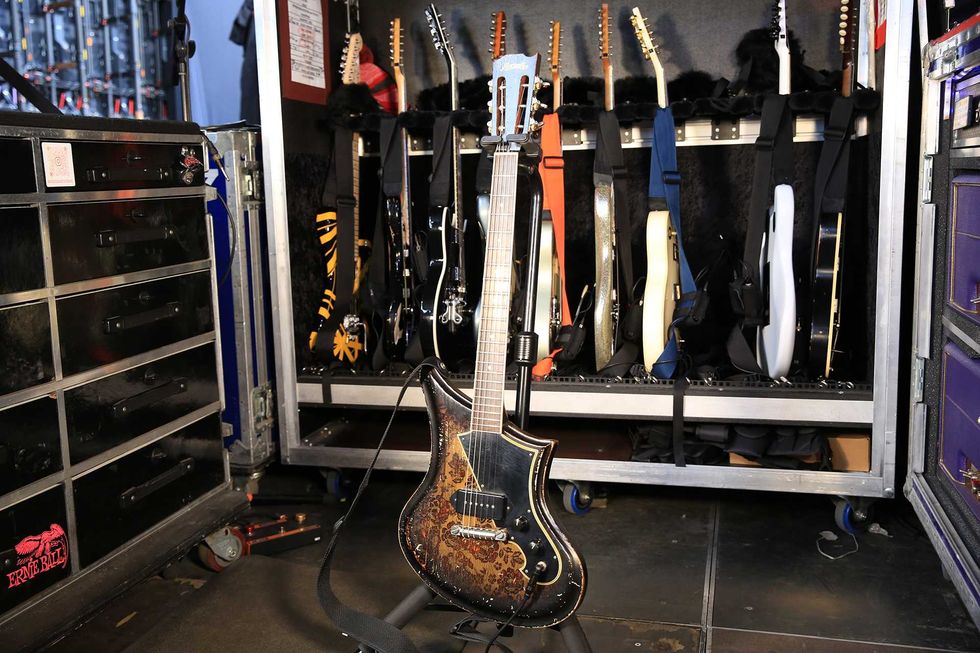
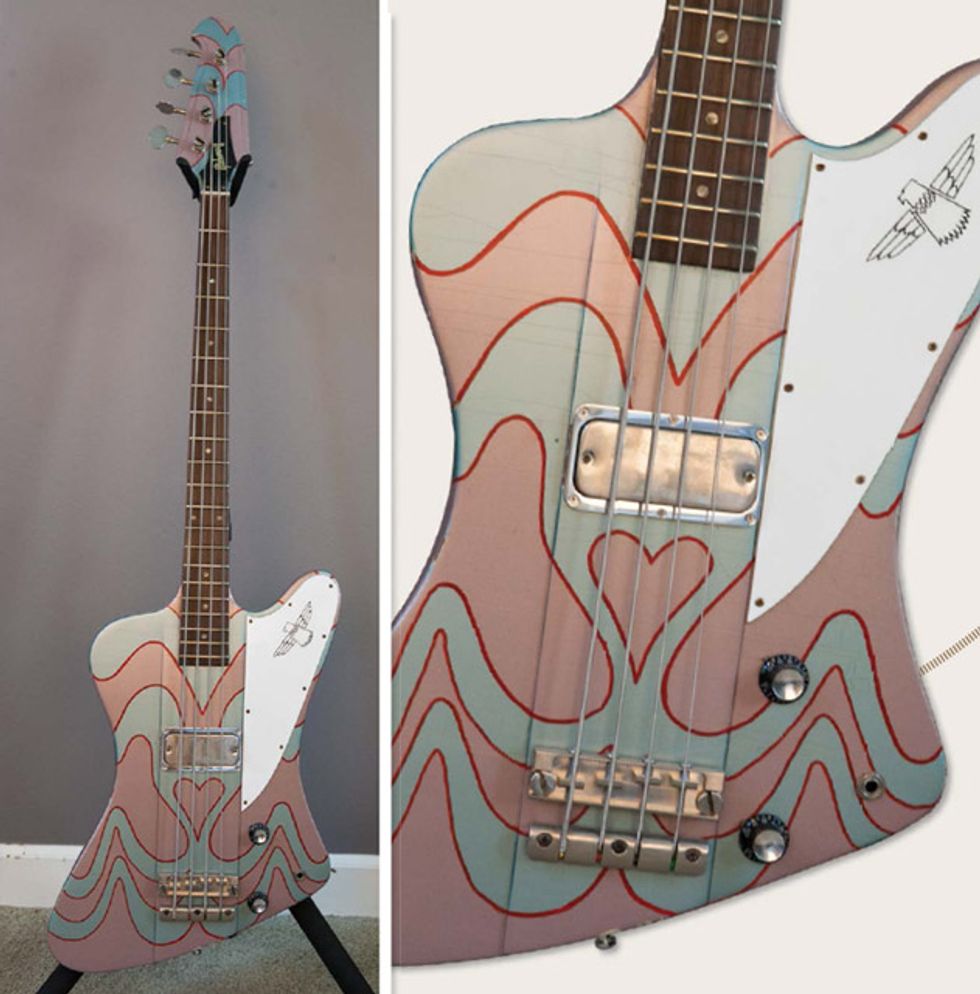
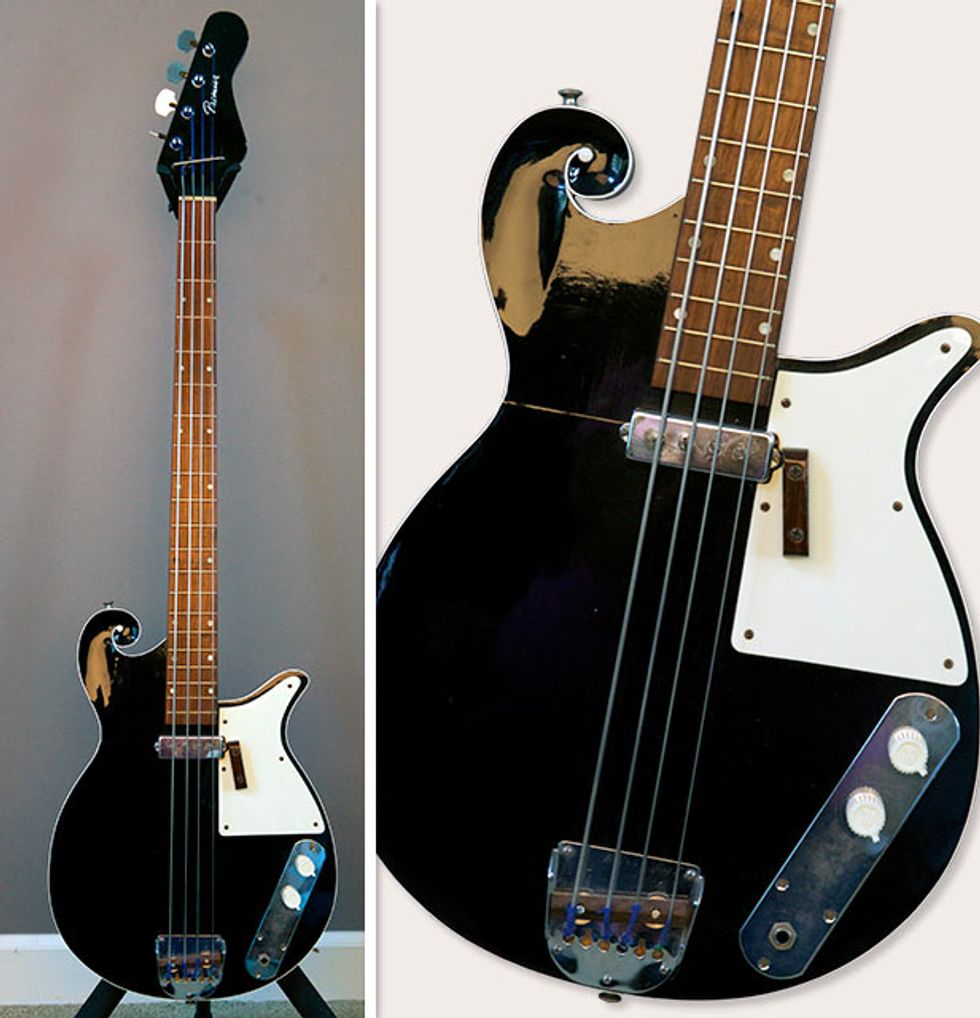
1964 Harvey Thomas Teardrop Bass
With a top profile reminiscent of an oud, this bass is a one-of-a-kind creation from eclectic builder Harvey Thomas, who originally made the instrument in the early '60s for his band's bassist. "Ian Hunter's Maltese Cross guitar was also made by Harvey," Petersson notes.
An easy guide to re-anchoring a loose tuning machine, restoring a “lost” input jack, refinishing dinged frets, and staunching a dinged surface. Result: no repair fees!
Pardon my French, but I’m about to misethe hell out of some en scenein this article about do-it-yourself guitar repair. Buckle-vous up.
The Guitarist is in the middle of double-tracking a solo. It’s not quite right. Creative juices are flowing, but at any moment, the gate could slam shut. Their social media feed is stagnant, and the algorithm thirsts for content. The studio is 80 bucks an hour. That new boutique fuzz pedal would sound great on this track, surely? It would, of course, as these things are the cure for all problems, but it rests just out of reach.
Desperate for a solution, the Guitarist rests their perfect new guitar against the warm tube amp–only for a moment … but a horrible amplified bwaang from wood, string, and concrete’s violent meeting breaks the temporary silence as gravity muscles potential into the kinetic. The Guitarist breathes a defeated “aw, man,” like a loosened balloon farting hopelessly across an empty room. The gate closes, juices no longer loose, locked, impenetrable by any transistor-based effect. And it’s time to assess the damage.”
I bet you saw yourself in the opening scene of Twenty-Four-and-Three-Quarter-Inches of Woe, which may be the title of the screenplay I just started to write, most likely due to the fact that you’ve made a similarly boneheaded mistake with your instrument.
Unfortunately, my storytelling skills didn’t save a nice new Epiphone Casino from sliding off my amp, meeting the floor, and earning some damage on the way down. Yeah, that’s a true story, and I’m sure something similar has happened to you as well. It can happen to anyone who plays guitar for long enough, but there’s no need for despair yet.
If you’ve been victimized by gravity like I have, as long as the damage isn’t major, you can fix a lot of things yourself. I’ll use my felled Casino as an example. It suffered a loosened tuner, an input jack that fell inside the guitar, a damaged fret, and a few dents in the finish. While I work, I’ll provide some suggestions for supplies and tools to keep in your home repair kit, just in case you ever need them.
Tools for the Tasks
We ordered all of the tools we used in these repairs, excluding the painter’s tape and the toothpicks, which we picked up during lunch at Jack’s Bar-B-Que, from StewMac.
The essentials:
• ESP Multi Spanner
• Archtop Guitar Helping Hand
• Guitar Tech Screwdriver Set
• 3 Corner Fret Dressing Files
• Ultra Thin Master Glue
• GluBoost Fill n’ Finish
• Rectangular Sanding Kit
Can’t Tune It like That
First, let’s take care of the loose tuner, since it’s currently in no shape to reliably hold string tension. The tumble knocked it sideways, which loosened the screws holding in the key, which caused the wood around the screws to strip. It’s alarming to see, but this is a very simple fix.
Add to Repair Kit: Round toothpicks, water-thin CA glue, glue applicator tips, safety goggles
[Note: For the unfamiliar, CA is short for cyanoacrylate. It’s commonly referred to as “Super Glue,” but since that is a brand name, not the generic, I’ll refer to it here as “CA glue.”]
First, remove the tuner by backing the screws out, then pull the tuner from the headstock. My Casino’s tuning keys use a press-in bushing to hold the post straight in the headstock, so no further disassembly is required. However, if you experience this issue with a guitar with more modern-styled tuning keys, you’ll need to use an appropriately sized wrench or socket to remove the screw-in bushing before removing the key.
Next, break a toothpick in half, insert the thicker end into the hole where your mounting screw used to be. Break it off flush with the surface, and repeat the process with the other hole.
Safety goggles on: It’s CA glue time. Trust me, you do not want to squirt this stuff into your eye. Fit an applicator tip to the glue bottle and practice your squeeze on a scrap piece of paper or wood, far away from anything you don’t want glued to your guitar or yourself. This stuff is magic—it will bond things you never intended if you aren’t careful.
All you need is a very small drop, so practice until you can confidently flow out just a small controlled amount. Once you’ve mastered that, drop a small amount of water-thin CA glue into each filled hole. It will soak through the toothpick into the surrounding wood just enough for this quick fix. Let it cure for at least 15 minutes, but longer is even better.
Pop the tuner back in and drive the screws straight into the toothpick-filled holes. The screw will compress the toothpick into the existing wood and create new threads strong enough to hold your tuner in place.
Congratulations! You fixed it well enough to at least make it through a session. I’ve done this on several guitars that lasted years with no issues, so you should be confident in your work.
Hit the Road, Jack
Look, there’s no way to sugarcoat this. Fishing an output jack out of a hollowbody guitar is a pain. You can do this. All you need is patience and a few handy gadgets.
Add to Repair Kit: flashlight, multi-spanner, small drywall anchor, “helping hand,” small screwdriver
Your first task is to locate the jack inside the guitar. Odds are it didn’t fall far away from where it needs to be, since it’s probably wired to one of your control potentiometers. Use your flashlight to shine some light inside the f-hole to help find it.
I found mine wedged against the treble side of the rim, a little farther away than I can reach with my fingers. This is not zesty. I am unhappy but equipped and determined.
The tool I described as a “helping hand” becomes useful here. It’s essentially just a bent hook at the end of a handle made out of pliable heavy wire. Several guitar parts suppliers sell something similar. I got mine from StewMac for a reasonable price, but if you want to be thrifty about it, there’s no reason why you can’t cut and bend a wire coat hanger.
Take a few deep breaths, and working through the f-hole, use the hook end of your helping hand to gently pull the output jack back toward where it was mounted. Bend the helping hand however needed to reach the jack as easily as possible.
I managed to pull the jack back enough to put a small screwdriver through the jack’s mounting hole and then through the jack itself. That screwdriver will act as a guide while I lift the jack back into place with the helping hand.
You should expect this will take several attempts. Try not to get frustrated. With enough patience, you’ll be able to get the jack back where it belongs. Once you have the jack in place, carefully thread the washer and nut back onto the jack. It shouldn’t take much effort to thread it back on. Just be careful not to cross-thread the nut.
Now that the nut is threaded on enough so it won’t fall back in, the challenge is to tighten it without twisting the jack itself to avoid breaking any wires. I’ve seen and used a few different methods to accomplish this, but I came across one recently that I really like.
This is where you’ll use your drywall anchor. Get one small enough to fit inside the jack without using too much force, then tighten the screw in the anchor so that it spreads to fit tightly inside the jack. This will hold it steady enough to tighten the nut with a multi-spanner tool or an appropriately-sized wrench.
I like a multi-spanner for this job, because it’s always the right size and is slim enough to not be clumsy for operations like this. Like the helping hand, lots of suppliers sell something similar using different names. Mine is made by ESP and also arrived in my StewMac tool box. I use it all the time for all sorts of tasks.
Once the nut is tightened, unscrew the drywall anchor, remove it, and test the jack for sound by plugging your guitar into an amp. A positive result should be obvious at this point, but if you don’t hear any signal, or an excessive consistent buzz, get in touch with your local repair tech.
Got a Dent In My Fret, Man
Honestly, face-first is probably the best way a guitar like my Casino could have hit the ground. The damage could’ve been far worse. Check any forum for endless complaints about Gibson/Epiphone headstock breaks. But I do need to address some damage to a fret caused during the fall.
The issue here is that plain steel electric guitar strings—like your G, B, and E strings—are considerably harder than most frets (my stainless steel fret contingency, put your hands down and let me finish), so it’s possible for a string to leave a small sharp dent in a fret if you hit it with enough force. This specific issue might go unnoticed until it’s time to bend a note at that fret, then you’ll feel and hear the string catch it. No good.
Before we get started: Having allof your frets carefully levelled, recrowned, and polished is alwaysa better solution than partially levelling just a few frets. But considering the entire premise we’ve constructed, which is a situation where we just want the guitar back in action relatively quickly, a partial fret level on the upper frets is perfectly fine as long as it’s done carefully.
Add to Repair Kit: Crowning file (three-corner or rounded), assortment of sandpaper (400 grit to 800 should be fine), 0000 extra-fine steel wool (optional), fretboard conditioner, permanent marker.
First thing we need to do is identify which frets need the work. Let’s say you have a nick in your 17th fret on the treble side under the B string. The goal is to bring the height of that damaged fret and all the frets past it down until the nick disappears. After that, remove the strings before you begin working.
To accomplish this, mark the damaged frets and all frets past it with a permanent marker. A trusty black Sharpie works great for this, but any darker color works fine. For this repair, we only need to work on the treble side of the frets, so that’s all you need to focus on. Also, use some blue painter’s marking tape to protect the area of the guitar near where you will be working. Small slips of a file or sandpaper can cause some nasty injuries to the guitar’s surface.
Next, level the damaged fret and all frets past it (moving toward the bridge) with something stiff enough to not flex under pressure. I keep an old credit card—a nice sturdy one—with a bit of 400-grit sandpaper glued to one side along the shorter edge, 800 grit on the other side. Start with the 400 and work your way down, being careful not to use too much pressure. Let the sandpaper do the work.
You’ll notice the ink is removed as you sand. The way to make sure you’re keeping everything level is to stop frequently and observe the new clean areas on top of each fret. Each one should be about the same width.
This will take a while. A 400-grit sandpaper does not remove material quickly, 800 grit even less so. I’m suggesting this technique because working slowly makes it more difficult to get yourself in trouble. Several suppliers sell mini files for spot leveling, but I don’t recommend starting there because they remove fret material pretty aggressively.
Eventually you’ll notice the little divot in your 17th fret is almost gone. Now’s time to switch to 800 grit to finish the job. You guessed correctly: This will take even longer, but it’ll leave a nice finish without removing any more material than necessary.
Great! Now you have five flat-topped frets. That won’t sound very good, so now you need to re-crown them, giving them a rounded profile to match the other frets. I like to use a 3-corner file to slowly round over each side of the fret, working from the fretboard up, but if you feel like dropping some serious flow on a specialized crowning file, this job can be a lot easier. Be sure to get the marker back out, ink up each fret, and stop filing when just a tiny sliver of ink is left on top of each fret.
Use a piece of 800 grit paper to remove any file marks and smooth out each fret. If you have finer grits, you could work your way up to 1200 or so, but don’t go too hard or you could undo your work. You just want the frets clean and smooth. At this point, I like the way frets feel after a quick buff with 0000 steel wool, but the mess left behind does rightfully deter a lot of repair techs. If you opt in for this, be sure to tape off your pickups and consider finding a second location for this step.
Work in some fretboard conditioner if you like (skip it if you have a maple or synthetic board; no need for that here), put some new strings on, and check your work. Play every note on these frets, to make sure they ring out without any buzzes. It may not look perfect, but as long as the guitar sounds good, you’re okay until it’s time for a full level/crown/polish job.
Not Finished Until It’s, Uh, Finished
Now for the last souvenir from my Casino’s short journey to the floor. I noticed a few spots along the rim of the guitar where the finish was damaged. Specifically, it looks like the guitar hit something with an edge on the way down hard enough to put a couple of jagged dents in it, right along the binding.
Funny, that’s actually what binding is intended for–protecting edges and corners from damage. Anyway, we need to discuss a few things about guitar finishes.
For the purpose of this article, I’m only going to discuss repairs to the clear coat, since that’s where my damage is. Most guitars now are finished using polyurethane or lacquer for the top clear-coat layer.
Speaking verygenerally, lacquer finishes are softer and less durable, which makes hiding repairs a lot easier if you have the skills and patience. Polyurethane finishes are hard and tough in every way: hard to damage and tough to hide repairs regardless of skills or patience.
I happen to know that my formerly mint-condition Casino has a polyurethane finish, which means I’m going to lower my expectations with this repair. Instead of trying to make it look like it never happened, which will take a lot of work, I’ll just try to keep it from getting worse over time, which will take considerably less work.
It also means I won’t be discussing how to repair lacquer finishes, which is a bit more in-depth, requires a lot more patience and practice, and is therefore not really recommended for the average DIY’er—at least not in the scope of this piece. So if your guitar has a lacquer finish, I don’t think this part applies. Let someone else take care of it, or maybe skip this part and learn to love your guitar as is. The latter is still an admirable move.
Add to Repair Kit: Nothing! You already have what you need from the previous repairs. Feel good about that.
Since the damage is a pronounced dent with sharp edges in the clear coat, all I really need to do is seal it with an appropriate material. And the material appropriate for repairing polyurethane finishes is—you guessed it—CA glue, because it dries hard, clear, and quickly, much like polyurethane.
Step one: Use painter’s masking tape around the area of the damage, just in case the glue runs when applied. Step two: Put glue on the dented finish. CA glue will fill in all the small cracks within the damage and seal the existing finish. Be careful; use the smallest-drop-possible technique you perfected when fixing the tuning peg, and give it plenty of time to dry.
That’s it. That’s all I need to keep the finish from continuing to chip the more I play it. Yes, I saved the easiest one for last, as a little treat.
Obviously, this isn’t a particularly beautiful repair, so I could go above and beyond by using thicker CA glue—for example, GluBoost Fill n’ Finish—to fill it in completely, sand it level, and polish the area back to the original mirror gloss. Dan Erlewine has a few excellent YouTube videos outlining this exact method that are easy to find, and I encourage you to try if you’re so inclined. But for my purposes, this will do.
Accidents will happen if you’re actually playing your guitar, but they’re no cause for panic when they do. Even though the guitar isn’t perfect anymore, it’s perfectly playable, and I can get by with it for now. I broke it, so I fixed it, which is something I hope you feel empowered to do should you break yours.
Next time, I’ll use a good guitar stand.
Growing up in Australia, guitarist Jedd Hughes tells us he dreamed of playing in Vince Gill’s band as far back as elementary school. Now, he lives in Nashville and stands next to the man himself on stage night after night. We’ve invited Jedd to join us on this episode of 100 Guitarists to talk about just what makes Vince’s playing so special.
Jedd tells us how his dream came true and how he first started playing with Vince. We dig deep into how everybody’s favorite country guitarist raises the bar every time he picks up the guitar, how he gets his amazing clean tone, and we take time to appreciate all aspects of his solos—including how he builds them and how he plays such clean bends. As for why his concerts are so long? “He loves to play.”
In our current listening segment, we’re covering the Black Crowes and Jimmy Page’s Live at the Greek box set and a live recording from Burlington, Vermont’s Breathwork.
This episode is sponsored by EMG Pickups.
Martin Guitar is celebrating 30 years of collaboration with Eric Clapton with the release of two special anniversary guitars—the 000-42EC 30th Anniversary and the 000-EC 30th Anniversary.
Eric’s legendary 1992 MTV Unplugged performance sparked a resurgence in acoustic music and inspired the creation of Martin’s first Eric Clapton signature model, the 000-42EC, in 1995. Over the past three decades, his partnership with Martin has produced some of the most sought-after signature guitars in the company’s history.
000-42EC 30th Anniversary
Inspired by the 1939 000-42 he played during Unplugged, the 000-42EC 30th Anniversary is limited to just 300 instruments. It features a solid Adirondack spruce top with antique toner and solid Guatemalan rosewood back and sides for rich, vintage-inspired tone. Golden Era-inspired Adirondack spruce X-bracing enhances resonance and projection, while the Authentic 1939 neck shape with a 1 11/16" nut width provides a comfortable, pre-war feel.
Details like Golden Era 42-style snowflake inlays, Waverly open-gear tuners, and a vintage gloss finish complete the look. Each guitar includes a paper label hand-signed by Eric, a printed certificate of authenticity, and a premium embroidered Harptone case with a matching shroud exclusive to this model.
Price: $10,999.
000-EC 30th Anniversary
For players seeking a more understated nod to Eric’s sound, the 000-EC 30th Anniversary is available only through March 2026. It features a solid spruce top and solid East Indian rosewood back and sides for a balanced, resonant tone. The same Authentic 1939 neck shape and 1 11/16" nut width provide a comfortable feel, while the herringbone-trimmed top, antique white binding, and Golden Era 42-style snowflake inlays deliver a refined look.
Each 000-EC 30th Anniversary guitar includes a paper label with Eric’s pre-printed signature and a certificate of authenticity. It also comes in a premium embroidered case.
Price: $3,999.
Eric’s relationship with Martin began in 1995 with the introduction of the original 000-42EC, which sold out almost immediately. The 000-28EC, introduced in 1996, remains one of Martin’s best-selling models. Over the years, he and Martin have collaborated on a range of limited editions, most recently a trio of Dreadnoughts released in 2023 to benefit the Crossroads Centre, the addiction recovery center he founded in 1998.
In addition to his signature guitars, Eric also personally endorses Clapton’s Choice Signature Strings—his go-to acoustic strings for both stage and studio. Designed to resist corrosion and deliver the legendary sound he demands, they’re available in light and medium gauges.
“If I could choose what to come back as, it would be a Martin OM-45,” Eric has said, underscoring his deep connection to Martin guitars and their enduring sound.
Learn more about these guitars and other new Martin guitars, strings, accessories, lifestyle products, and parts at martinguitar.com.
The least exciting piece of your rig can impact your tone in a big way. Here’s what you need to know.
Hello, and welcome back to Mod Garage. This month, we will have a closer look at an often overlooked part of our guitar signal chain: the guitar cable. We’ll work out what really counts and how your cable’s tonal imprint differs from your guitar’s tone-control function.
Today, the choice of guitar cables is better than it’s ever been, and you can choose between countless options regarding color, stability, plug style, length, diameter, bending strength, shielding, etc. A lot of companies offer high-quality cables in any imaginable configuration, and there are also cables promising special advantages for specific instruments or music styles, from rock to blues to jazz.
Appearance, stability, longevity, bending stiffness, and plug configuration are matters of personal preference, and every guitarist has their own philosophy here, which I think is a great thing. While one player likes standard black soft cables with two straight plugs, their buddy prefers red cables that are stiff as hell with two angled plugs, and another friend swears by see-through coiled cables with golden plugs.
“We often want to come as close as possible to sounding like our personal heroes, but we fail because we’re using the wrong cable for a passive guitar.”
Regarding reliability, all these parameters are important. Who wants a guitar cable making problems every time you are on stage or in the studio? There are also technical parameters like resistance, capacitance, transfer resistance on the plugs, and more. Without making it too technical, we can summarize that, sound-wise, the only important technical parameter for a passive guitar circuit is the capacitance of the cable. Sadly, this information is often missing in the manufacturer’s description of a guitar cable, and there’s another thing we have to keep in mind: Most manufacturers try to offer cables with the smallest possible capacitance so the guitar can be heard “unaltered” and with a “pure” tone. While these are honourable intentions, they are self-defeating when it comes to making a guitar sound right.
Let’s take a trip back to the past and see what cables players used. Until the early 1980s, no one really cared about guitar cables—players simply used whatever was available. In the ’60s and ’70s, you could see a lot of ultra-long coiled cables on stage with players like Clapton, Hendrix, May, Townshend, Santana, and Knopfler, to name just a few. They used whatever was available, plugged in, and played without thinking about it. Ritchie Blackmore, for example, was famous for notoriously using incredibly long cables on stage so he could walk around. Joe Walsh and many other famous players did the same. Many of us have these players’ trademark sounds in our heads, and we often want to come as close as possible to sounding like our personal heroes, but we fail because we’re using the wrong cable for a passive guitar. So what are we talking about, technically?
It’s important not to look at the guitar cable, with its electrical parameters, as a stand-alone device. The guitar cable has to be seen as part of the passive signal chain together with the pickups, the resistance of the guitar’s pots (usually 250k or 500k), the capacitance of the wires inside the guitar, and, of course, the input impedance of the amp, which is usually 1M. The interaction of all these in a passive system results in the resonance frequency of your pickups. If you change one of the parameters, you are also changing the resonance frequency.
”Ritchie Blackmore, for example, was famous for notoriously using incredibly long cables on stage so he could walk around.“
You all know the basic formulation: The longer the cable, the warmer the tone, with “warmer” meaning less high-end frequencies. While this is true, in a few moments you will see that this is only half the truth. Modern guitar cables are sporting a capacitance of around 100 pF each meter, which is very low and allows for long cable runs without killing all the top end. Some ultra-low-capacitance cables even measure down to only 60 pF each meter or less.
Now let’s have a look at guitar cables of the past. Here, capacitances of up to 400 pF or more each meter were the standard, especially on the famous coiled cables. See the difference? No wonder it’s hard to nail an old-school sound from the past, or that sometimes guitars sound too trebly (especially Telecasters), with our modern guitar cables. This logic only applies to our standard passive guitar circuits, like those in our Strats, Teles, Les Pauls, SGs, and most other iconic guitar models. Active guitars are a completely different ballpark. With a guitar cable, you can fine-tune your tone, and tame a shrill-sounding guitar.
“No problem,” some will say. “I simply use my passive tone control to compensate, and that’s it. Come on, capacitance is capacitance!” While this logic seems solid, in reality this reaction produces a different tone. “Why is this?” you will ask. Thankfully, it’s simple to explain. You might be familiar with the typical diagrams showing a coordinate system with "Gain/dB" on the Y-axis and "Frequency/kHz" on the X-axis. Additional cable capacitance will shift the resonance frequency on the X-axis, with possible differences of more than one octave depending on the cable. A cable with a higher capacitance will shift the resonance frequency towards the left and vice versa.
Diagram courtesy Professor Manfred Zollner (https://www.gitarrenphysik.de)
Now let’s see what happens if you use your standard passive tone control. If you close the tone control, the resonance frequency will be shifted downwards mostly on the Y-axis, losing the resonance peak, which means the high frequencies are gone. This is a completely different effect compared to the additional cable capacitance.
Diagram courtesy Professor Manfred Zollner (https://www.gitarrenphysik.de)
To summarize, we can say that with different cable capacitances, you can mimic a lot of different pickups by simply shifting the resonance frequency on the X-axis. This is something our passive tone control can’t do, and that’s exactly the difference you will have to keep in mind.
So, let’s see what can be done and where you can add additional cable capacitance to your system to simulate longer guitar cables.
1. On the cable itself
2. Inside the guitar
3. Externally
In next month’s follow-up to this column, we will talk about different capacitances and how you can add them to your signal chain with some easy-to-moderate modding, so stay tuned!
Until then ... keep on modding!