
The Foo Fighters’ frontman once took my Les Paul at a Halloween gig and played it onstage, with glee, for 90 minutes. But his new autobiography is full of better stories and plenty of wisdom.
“Life is just too damn short to let someone else’s opinion steer the wheel.”
—Dave Grohl, The Storyteller
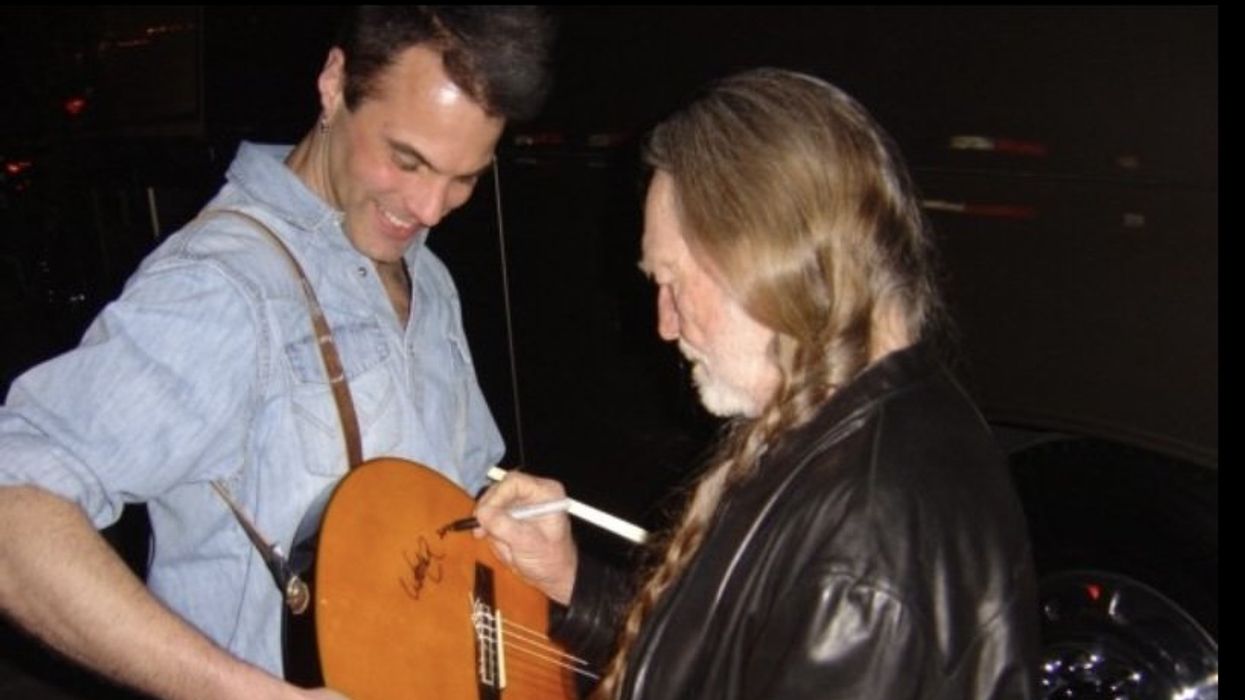
In 2013, I was playing a Halloween party at Paul Allen’s Beverly Hills home/studio. It was a surreal gig, playing “Season of the Witch” with Donovan while supermodels, musicians, titans of industry, and celebrities like Sacha Baron Cohen, Dan Aykroyd, and Gina Gershon weaved around the packed yet spacious and spooky dance floor. Right in front of me, dressed like an Amish farmer, was Dave Grohl bobbing his head to the music. I held out my guitar to him and shouted, “DO YOU WANT TO PLAY?” He shrugged his shoulders like, “why not,” jumped onstage, took my Les Paul, and proceeded to play for 90 minutes, pretty much nailing every cover song requested by the crowd.
It was an impromptu jam at a party, but Grohl turned it into an epic performance, putting everything into every song, hitting the high notes by screaming like his life depended on it while beating my guitar like it owed him money. I remember thinking, “Man, no wonder this guy is a two-time Rock and Roll Hall of Famer. He gets it.”
I hadn’t thought about that for years until last week, when Dave Grohl told me his life story over the course of 10.5 hours as he read the audio version of his autobiography, The Storyteller.
Right in front of me, dressed like an Amish farmer, was Dave Grohl bobbing his head to the music. I held out my guitar to him and shouted, “DO YOU WANT TO PLAY?”
If you’re a musician, you know people like the young, pre-Nirvana Grohl: the seemingly misguided who dropped out of high school to tour with a bunch of grown men in a dodgy van, sleep in abandoned squats, and survive on a diet of gas station corn dogs, generic cigarettes, and whatever else a $7 per diem can get you. Most professional musicians go through a similar rite of passage when they first forsake all common sense, security, and comfort to play music full time. Check back with those friends 10 to 30 years later and you’ll hear a lot of stories—some sad, some triumphant, but few more inspiring than Grohl’s. Consider these differences between Grohl’s experience and other sadder versions of parallel musicians’ lives.
Grohl put in the work.
Before he had drums, Grohl learned to play by hitting pillows in his small childhood home and making drumbeats with his mouth when no kit or pillows were available. He played and listened all the time, learning every song by his favorite bands. So, when Scream auditioned drummers, he already knew the entire catalog, proving that success is when preparedness and opportunity intersect.
Grohl had the humility to listen and learn along the way.
Like many young drummers, Grohl was shoehorning fills into every space, thinking he was killing it. One day, Scream bassist Skeeter Thompson forced Grohl to get very high and play one simple groove without any fills for 30 minutes. Grohl described it as “breaking a wild pony.” I know a lot of young drummers who could not or would not do this. Consequently, they never get to the next level.
Grohl puts everything into every performance.
When Nirvana saw this skinny kid playing the shit out of his drums for the tiny crowd at a Scream show, they knew he was the guy. I see guys onstage checking their texts between songs or looking bored. If you’re going to play, be in it. Every gig is not just a performance. It’s an audition for the next gig.
Grohl said, “It’s hard to put into words the belief I have in music. To me, it is God. A divine mystery in whose power I will forever hold an unconditional trust.” We’ve all met wild-eyed Law of Attraction zealots who look at the universe as a divine vending machine, where you say the magic words, believe with all your might, and then get the shining prize you crave. It’s not about the prize; it’s about the journey: the rejection, embarrassment, discomfort, and lessons you learn along the way. The reward is that you become the person you’re supposed to be. I suspect the trick to manifesting your destiny is to move forward trusting that what’s happening to you is happening for you. Big dreams remain an empty distraction from real life unless you put in the work, sacrifice, and hustle to make it happen.
Honestly, if, like Grohl, you steadfastly work, keep your mind/soul open, say yes, be grateful, and put your whole heart into it, eventually, amazing things will happen to you. It will be a wild ride full of soul-crushing and soul-expanding experiences that will lead you where you’re supposed to be. That may be rich and famous or poor and anonymous, but if you can find happiness in one, you will have it in the other as well.
Billy Corgan and The Machines of God announce 'A Return to Zero Tour' kicking off on June 7th, featuring classic tracks and deep cuts from iconic albums. Tickets available for presale on April 1st. Don't miss this unforgettable experience! Tour dates include Baltimore, Boston, New York, and more.
Today, Billy Corgan, the frontman of the iconic rock band, The Smashing Pumpkins, has announced a new solo project titled ‘Billy Corgan and The Machines of God’ who will commemorate the anniversaries of the legendary albums with sets drawn from Mellon Collie and The Infinite Sadness and the double album Machina/The Machines of God & Machina II/The Friends & Enemies of Modern Music as well as the 2024 release, Aghori Mhori Mei with a national US tour set to kick off this summer. The tour, titled A Return To Zero, will launch on June 7th and feature the four piece group also embarking on previously-confirmed festival shows.
The A Return to Zero Tour will reintroduce a four-piece, two set guitar lineup in which music from these seminal Pumpkins albums were created. The shows will feature classic tracks and deep cuts from the highly acclaimed records. In addition to Corgan, The Machines of God will feature recently recruited Smashing Pumpkins guitarist Kiki Wong, drummer Jake Hayden and bassist Kid Tigrrr (Jenna Fournier).
Tickets for the upcoming tour will be available for artist presale beginning Tuesday, April 1st at 10:00AM local time through Thursday, April 3rd at 10:00PM local time. Following the presale, the general onsale will begin Friday, April 4th at 10:00AM local time. Please see tour dates below and purchase tickets at ticketmaster.com.
Along with this touring announcement, The Smashing Pumpkins have revealed the details of the long-awaited and reconstituted release of the 2000 concept albums Machina/The Machines of God and its companion Machina II/The Friends & Enemies of Modern Music which have been extensively remixed and remastered. Corgan's Madame Zuzu’s tea shop in Highland Park, IL will exclusively offer this expansive 80-song box set; featuring a 48-track ‘MACHINA’ plus an additional 32 bonus tracks of demos, outtakes, and live performances, marking the first time these two records will officially be united. Additionally, the rock band will release a 16-song reissue of the original Machina/The Machines of God vinyl on August 22nd, and pre-orders will begin on June 27th.
This year will also celebrate the 30th anniversary of The Smashing Pumpkins era-defining acclaimed album, Mellon Collie and The Infinite Sadnesswhich set the sound for a generation. To commemorate the album, Corgan has partnered with Chicago’s Lyric Opera to world-premiere A Night of Mellon Collie and Infinite Sadness, a seven series performance taking place November 21–30, 2025.
These noteworthy music announcements follow on the heels of an already exciting 2025 for Billy Corgan; earlier this year the rock legend also launched his applauded podcast series “The Magnificent Others.”
Beyond these accomplishments, the GRAMMY® Award-winning musician, versatile producer, songwriter, poet, also serves as the President of the National Wrestling Alliance, owns Madame Zuzu’s, a beloved tea shop in Highland, IL, and remains a devout philanthropist through varying initiatives focusing on animal advocacy and NO KILL shelters.
Billy Corgan and The Machines of God - YouTube
Enjoy the videos and music you love, upload original content, and share it all with friends, family, and the world on YouTube.Tour Dates
- June 7 - Baltimore, MD // Baltimore Soundstage
- June 9 - Boston, MA // Paradise Rock Club
- June 11 - Muskoka, ON // Kee to Bala
- June 12 - Toronto, ON // HISTORY
- June 13 - Montreal QC // Beanfield Theatre
- June 15 - New York, NY // Irving Plaza
- June 16 - Philadelphia, PA // Theatre of Living Arts
- June 17 - Allentown, PA // Archer Music Hall
- June 19 - Detroit, MI // St. Andrew’s Hall
- June 20 - Joliet, IL // Taste of Joliet (Festival Performance)
- June 21 - Grand Rapids, MI // Intersection
- June 23 - Pittsburgh, PA // Roxian Theatre
- June 25 - Cleveland, OH // House of Blues Cleveland
- June 26 - Cincinnati, OH // Bogart’s
- June 27 - Milwaukee, WI // Summerfest*
- June 29 - Minneapolis, MN // Varsity Theater
An easy guide to re-anchoring a loose tuning machine, restoring a “lost” input jack, refinishing dinged frets, and staunching a dinged surface. Result: no repair fees!
Pardon my French, but I’m about to misethe hell out of some en scenein this article about do-it-yourself guitar repair. Buckle-vous up.
The Guitarist is in the middle of double-tracking a solo. It’s not quite right. Creative juices are flowing, but at any moment, the gate could slam shut. Their social media feed is stagnant, and the algorithm thirsts for content. The studio is 80 bucks an hour. That new boutique fuzz pedal would sound great on this track, surely? It would, of course, as these things are the cure for all problems, but it rests just out of reach.
Desperate for a solution, the Guitarist rests their perfect new guitar against the warm tube amp–only for a moment … but a horrible amplified bwaang from wood, string, and concrete’s violent meeting breaks the temporary silence as gravity muscles potential into the kinetic. The Guitarist breathes a defeated “aw, man,” like a loosened balloon farting hopelessly across an empty room. The gate closes, juices no longer loose, locked, impenetrable by any transistor-based effect. And it’s time to assess the damage.”
I bet you saw yourself in the opening scene of Twenty-Four-and-Three-Quarter-Inches of Woe, which may be the title of the screenplay I just started to write, most likely due to the fact that you’ve made a similarly boneheaded mistake with your instrument.
Unfortunately, my storytelling skills didn’t save a nice new Epiphone Casino from sliding off my amp, meeting the floor, and earning some damage on the way down. Yeah, that’s a true story, and I’m sure something similar has happened to you as well. It can happen to anyone who plays guitar for long enough, but there’s no need for despair yet.
If you’ve been victimized by gravity like I have, as long as the damage isn’t major, you can fix a lot of things yourself. I’ll use my felled Casino as an example. It suffered a loosened tuner, an input jack that fell inside the guitar, a damaged fret, and a few dents in the finish. While I work, I’ll provide some suggestions for supplies and tools to keep in your home repair kit, just in case you ever need them.
Tools for the Tasks
We ordered all of the tools we used in these repairs, excluding the painter’s tape and the toothpicks, which we picked up during lunch at Jack’s Bar-B-Que, from StewMac.
The essentials:
• ESP Multi Spanner
• Archtop Guitar Helping Hand
• Guitar Tech Screwdriver Set
• 3 Corner Fret Dressing Files
• Ultra Thin Master Glue
• GluBoost Fill n’ Finish
• Rectangular Sanding Kit
Can’t Tune It like That
First, let’s take care of the loose tuner, since it’s currently in no shape to reliably hold string tension. The tumble knocked it sideways, which loosened the screws holding in the key, which caused the wood around the screws to strip. It’s alarming to see, but this is a very simple fix.
Add to Repair Kit: Round toothpicks, water-thin CA glue, glue applicator tips, safety goggles
[Note: For the unfamiliar, CA is short for cyanoacrylate. It’s commonly referred to as “Super Glue,” but since that is a brand name, not the generic, I’ll refer to it here as “CA glue.”]
First, remove the tuner by backing the screws out, then pull the tuner from the headstock. My Casino’s tuning keys use a press-in bushing to hold the post straight in the headstock, so no further disassembly is required. However, if you experience this issue with a guitar with more modern-styled tuning keys, you’ll need to use an appropriately sized wrench or socket to remove the screw-in bushing before removing the key.
Next, break a toothpick in half, insert the thicker end into the hole where your mounting screw used to be. Break it off flush with the surface, and repeat the process with the other hole.
Safety goggles on: It’s CA glue time. Trust me, you do not want to squirt this stuff into your eye. Fit an applicator tip to the glue bottle and practice your squeeze on a scrap piece of paper or wood, far away from anything you don’t want glued to your guitar or yourself. This stuff is magic—it will bond things you never intended if you aren’t careful.
All you need is a very small drop, so practice until you can confidently flow out just a small controlled amount. Once you’ve mastered that, drop a small amount of water-thin CA glue into each filled hole. It will soak through the toothpick into the surrounding wood just enough for this quick fix. Let it cure for at least 15 minutes, but longer is even better.
Pop the tuner back in and drive the screws straight into the toothpick-filled holes. The screw will compress the toothpick into the existing wood and create new threads strong enough to hold your tuner in place.
Congratulations! You fixed it well enough to at least make it through a session. I’ve done this on several guitars that lasted years with no issues, so you should be confident in your work.
Hit the Road, Jack
Look, there’s no way to sugarcoat this. Fishing an output jack out of a hollowbody guitar is a pain. You can do this. All you need is patience and a few handy gadgets.
Add to Repair Kit: flashlight, multi-spanner, small drywall anchor, “helping hand,” small screwdriver
Your first task is to locate the jack inside the guitar. Odds are it didn’t fall far away from where it needs to be, since it’s probably wired to one of your control potentiometers. Use your flashlight to shine some light inside the f-hole to help find it.
I found mine wedged against the treble side of the rim, a little farther away than I can reach with my fingers. This is not zesty. I am unhappy but equipped and determined.
The tool I described as a “helping hand” becomes useful here. It’s essentially just a bent hook at the end of a handle made out of pliable heavy wire. Several guitar parts suppliers sell something similar. I got mine from StewMac for a reasonable price, but if you want to be thrifty about it, there’s no reason why you can’t cut and bend a wire coat hanger.
Take a few deep breaths, and working through the f-hole, use the hook end of your helping hand to gently pull the output jack back toward where it was mounted. Bend the helping hand however needed to reach the jack as easily as possible.
I managed to pull the jack back enough to put a small screwdriver through the jack’s mounting hole and then through the jack itself. That screwdriver will act as a guide while I lift the jack back into place with the helping hand.
You should expect this will take several attempts. Try not to get frustrated. With enough patience, you’ll be able to get the jack back where it belongs. Once you have the jack in place, carefully thread the washer and nut back onto the jack. It shouldn’t take much effort to thread it back on. Just be careful not to cross-thread the nut.
Now that the nut is threaded on enough so it won’t fall back in, the challenge is to tighten it without twisting the jack itself to avoid breaking any wires. I’ve seen and used a few different methods to accomplish this, but I came across one recently that I really like.
This is where you’ll use your drywall anchor. Get one small enough to fit inside the jack without using too much force, then tighten the screw in the anchor so that it spreads to fit tightly inside the jack. This will hold it steady enough to tighten the nut with a multi-spanner tool or an appropriately-sized wrench.
I like a multi-spanner for this job, because it’s always the right size and is slim enough to not be clumsy for operations like this. Like the helping hand, lots of suppliers sell something similar using different names. Mine is made by ESP and also arrived in my StewMac tool box. I use it all the time for all sorts of tasks.
Once the nut is tightened, unscrew the drywall anchor, remove it, and test the jack for sound by plugging your guitar into an amp. A positive result should be obvious at this point, but if you don’t hear any signal, or an excessive consistent buzz, get in touch with your local repair tech.
Got a Dent In My Fret, Man
Honestly, face-first is probably the best way a guitar like my Casino could have hit the ground. The damage could’ve been far worse. Check any forum for endless complaints about Gibson/Epiphone headstock breaks. But I do need to address some damage to a fret caused during the fall.
The issue here is that plain steel electric guitar strings—like your G, B, and E strings—are considerably harder than most frets (my stainless steel fret contingency, put your hands down and let me finish), so it’s possible for a string to leave a small sharp dent in a fret if you hit it with enough force. This specific issue might go unnoticed until it’s time to bend a note at that fret, then you’ll feel and hear the string catch it. No good.
Before we get started: Having allof your frets carefully levelled, recrowned, and polished is alwaysa better solution than partially levelling just a few frets. But considering the entire premise we’ve constructed, which is a situation where we just want the guitar back in action relatively quickly, a partial fret level on the upper frets is perfectly fine as long as it’s done carefully.
Add to Repair Kit: Crowning file (three-corner or rounded), assortment of sandpaper (400 grit to 800 should be fine), 0000 extra-fine steel wool (optional), fretboard conditioner, permanent marker.
First thing we need to do is identify which frets need the work. Let’s say you have a nick in your 17th fret on the treble side under the B string. The goal is to bring the height of that damaged fret and all the frets past it down until the nick disappears. After that, remove the strings before you begin working.
To accomplish this, mark the damaged frets and all frets past it with a permanent marker. A trusty black Sharpie works great for this, but any darker color works fine. For this repair, we only need to work on the treble side of the frets, so that’s all you need to focus on. Also, use some blue painter’s marking tape to protect the area of the guitar near where you will be working. Small slips of a file or sandpaper can cause some nasty injuries to the guitar’s surface.
Next, level the damaged fret and all frets past it (moving toward the bridge) with something stiff enough to not flex under pressure. I keep an old credit card—a nice sturdy one—with a bit of 400-grit sandpaper glued to one side along the shorter edge, 800 grit on the other side. Start with the 400 and work your way down, being careful not to use too much pressure. Let the sandpaper do the work.
You’ll notice the ink is removed as you sand. The way to make sure you’re keeping everything level is to stop frequently and observe the new clean areas on top of each fret. Each one should be about the same width.
This will take a while. A 400-grit sandpaper does not remove material quickly, 800 grit even less so. I’m suggesting this technique because working slowly makes it more difficult to get yourself in trouble. Several suppliers sell mini files for spot leveling, but I don’t recommend starting there because they remove fret material pretty aggressively.
Eventually you’ll notice the little divot in your 17th fret is almost gone. Now’s time to switch to 800 grit to finish the job. You guessed correctly: This will take even longer, but it’ll leave a nice finish without removing any more material than necessary.
Great! Now you have five flat-topped frets. That won’t sound very good, so now you need to re-crown them, giving them a rounded profile to match the other frets. I like to use a 3-corner file to slowly round over each side of the fret, working from the fretboard up, but if you feel like dropping some serious flow on a specialized crowning file, this job can be a lot easier. Be sure to get the marker back out, ink up each fret, and stop filing when just a tiny sliver of ink is left on top of each fret.
Use a piece of 800 grit paper to remove any file marks and smooth out each fret. If you have finer grits, you could work your way up to 1200 or so, but don’t go too hard or you could undo your work. You just want the frets clean and smooth. At this point, I like the way frets feel after a quick buff with 0000 steel wool, but the mess left behind does rightfully deter a lot of repair techs. If you opt in for this, be sure to tape off your pickups and consider finding a second location for this step.
Work in some fretboard conditioner if you like (skip it if you have a maple or synthetic board; no need for that here), put some new strings on, and check your work. Play every note on these frets, to make sure they ring out without any buzzes. It may not look perfect, but as long as the guitar sounds good, you’re okay until it’s time for a full level/crown/polish job.
Not Finished Until It’s, Uh, Finished
Now for the last souvenir from my Casino’s short journey to the floor. I noticed a few spots along the rim of the guitar where the finish was damaged. Specifically, it looks like the guitar hit something with an edge on the way down hard enough to put a couple of jagged dents in it, right along the binding.
Funny, that’s actually what binding is intended for–protecting edges and corners from damage. Anyway, we need to discuss a few things about guitar finishes.
For the purpose of this article, I’m only going to discuss repairs to the clear coat, since that’s where my damage is. Most guitars now are finished using polyurethane or lacquer for the top clear-coat layer.
Speaking verygenerally, lacquer finishes are softer and less durable, which makes hiding repairs a lot easier if you have the skills and patience. Polyurethane finishes are hard and tough in every way: hard to damage and tough to hide repairs regardless of skills or patience.
I happen to know that my formerly mint-condition Casino has a polyurethane finish, which means I’m going to lower my expectations with this repair. Instead of trying to make it look like it never happened, which will take a lot of work, I’ll just try to keep it from getting worse over time, which will take considerably less work.
It also means I won’t be discussing how to repair lacquer finishes, which is a bit more in-depth, requires a lot more patience and practice, and is therefore not really recommended for the average DIY’er—at least not in the scope of this piece. So if your guitar has a lacquer finish, I don’t think this part applies. Let someone else take care of it, or maybe skip this part and learn to love your guitar as is. The latter is still an admirable move.
Add to Repair Kit: Nothing! You already have what you need from the previous repairs. Feel good about that.
Since the damage is a pronounced dent with sharp edges in the clear coat, all I really need to do is seal it with an appropriate material. And the material appropriate for repairing polyurethane finishes is—you guessed it—CA glue, because it dries hard, clear, and quickly, much like polyurethane.
Step one: Use painter’s masking tape around the area of the damage, just in case the glue runs when applied. Step two: Put glue on the dented finish. CA glue will fill in all the small cracks within the damage and seal the existing finish. Be careful; use the smallest-drop-possible technique you perfected when fixing the tuning peg, and give it plenty of time to dry.
That’s it. That’s all I need to keep the finish from continuing to chip the more I play it. Yes, I saved the easiest one for last, as a little treat.
Obviously, this isn’t a particularly beautiful repair, so I could go above and beyond by using thicker CA glue—for example, GluBoost Fill n’ Finish—to fill it in completely, sand it level, and polish the area back to the original mirror gloss. Dan Erlewine has a few excellent YouTube videos outlining this exact method that are easy to find, and I encourage you to try if you’re so inclined. But for my purposes, this will do.
Accidents will happen if you’re actually playing your guitar, but they’re no cause for panic when they do. Even though the guitar isn’t perfect anymore, it’s perfectly playable, and I can get by with it for now. I broke it, so I fixed it, which is something I hope you feel empowered to do should you break yours.
Next time, I’ll use a good guitar stand.
The typical controls on a compressor can be confusing and often misunderstood. At the heart of the MXR Studio Compressor is the ratio control, which offers up four levels of squish.
Compression might be the most misunderstood effect on your board—until now.
I was recently listening to three accomplished guitar players discuss the how, when, and where to use compressors in their guitar rigs. All three players had wildly different views on all aspects of compressordom, from where they should be used in a signal chain to whether they are even worth the hardware that holds them together.
Their conversation made me reflect on compressors more generally, and their standing as probably the least understood guitar pedal effect. There is a long-running joke about the guitar player who spends 30 minutes dialing in his compressor before the sudden realization that, for all the knob twisting, the pedal itself has never turned on. Most players have put on the compressor dunce cap for at least 30 seconds—if not 30 minutes.
When compared to effects like distortion and delay, compression can be as esoteric, nuanced, and arcane as a clandestine funk-guitar society’s secret handshake. In my experience, a large swath of guitar players cannot even detect compression until they are sonically beaten over the head with it. And of those who can discern the bludgeoning, many don’t know which knob to turn to achieve a more subtle effect. We guitar players should have known we were in trouble when many professional compressors came with buttons labeled “auto.” If even our know-it-all, front-of-house cousins need a crutch, what hope do we have?
Compression originated in the recording studio, where professional engineers were both its inventors and primary users, so its controls tend to be more technical than your amp’s bass, middle, and treble knobs. Let’s break down some controls in the simplest terms possible.
Introduced in 1972, the Dyna Comp had two simple controls: output and sensitivity. It’s far from transparent, but added a musical coloration that made fans out of Bonnie Raitt and Lowell George.
Threshold: This setting determines what gets squished and what doesn’t. Everything below the threshold passes through unchanged. Everything above the threshold gets squished. This is often labeled “sustain” on many guitar pedals. Sometimes, as the sustain is turned up, the compressor’s threshold point goes down, lowering the bar for what gets compressed, and more effect gets applied to your dry signal.
Ratio: How much compression is applied to signals above the threshold. A 1:1 ratio would mean no compression. At 2:1, for every 2 dB over the threshold, the compressor will only let 1 dB through. Some classic compressors have a ratio around 30:1. This means that above the threshold, you can increase the input signal significantly but receive only a small increase in output. Boom, you’re chickin’ pickin’.
Attack: This adjusts how fast it takes the compressor to get to work. A shorter attack means the clamping action happens immediately, while a longer attack time lets a brief burst of signal through before they start applying the aforementioned compression ratio.
Release: After the signal drops below the threshold, the compressor takes a certain amount of time to stop compressing or release. A longer release lazily hangs on and stops compressing when it gets around to it. Shorter releases get out of the way faster, and the next transient can get through uncompressed before being re-attacked.
Makeup Gain (or Output Level): The compression process naturally limits gain. To match the energy level of your uncompressed signal, you may need to boost the compressor’s output. Compression evens out the peaks, and makeup gain can compensate for any perceived differences in level.
Threshold and ratio are the heart of the compressor’s function. Threshold decides what gets compressed and ratio determines how much it’s compressed. Attack and release are about how fast compression is applied and how quickly it stops being applied. By controlling these, you are controlling how quickly transients are attacked and how slowly transients are released. Every guitar compressor has an attack and release time, but many designs hide these controls via internal, fixed component values. The designer has benevolently dictated what setting you should use. Output level lets you make up for all that crushing by adding level to compensate.
This is just the beginning of compression. We’ve got the knobs, we know the function, and next time we’ll discuss how we can use this dynamic darling
The least exciting piece of your rig can impact your tone in a big way. Here’s what you need to know.
Hello, and welcome back to Mod Garage. This month, we will have a closer look at an often overlooked part of our guitar signal chain: the guitar cable. We’ll work out what really counts and how your cable’s tonal imprint differs from your guitar’s tone-control function.
Today, the choice of guitar cables is better than it’s ever been, and you can choose between countless options regarding color, stability, plug style, length, diameter, bending strength, shielding, etc. A lot of companies offer high-quality cables in any imaginable configuration, and there are also cables promising special advantages for specific instruments or music styles, from rock to blues to jazz.
Appearance, stability, longevity, bending stiffness, and plug configuration are matters of personal preference, and every guitarist has their own philosophy here, which I think is a great thing. While one player likes standard black soft cables with two straight plugs, their buddy prefers red cables that are stiff as hell with two angled plugs, and another friend swears by see-through coiled cables with golden plugs.
“We often want to come as close as possible to sounding like our personal heroes, but we fail because we’re using the wrong cable for a passive guitar.”
Regarding reliability, all these parameters are important. Who wants a guitar cable making problems every time you are on stage or in the studio? There are also technical parameters like resistance, capacitance, transfer resistance on the plugs, and more. Without making it too technical, we can summarize that, sound-wise, the only important technical parameter for a passive guitar circuit is the capacitance of the cable. Sadly, this information is often missing in the manufacturer’s description of a guitar cable, and there’s another thing we have to keep in mind: Most manufacturers try to offer cables with the smallest possible capacitance so the guitar can be heard “unaltered” and with a “pure” tone. While these are honourable intentions, they are self-defeating when it comes to making a guitar sound right.
Let’s take a trip back to the past and see what cables players used. Until the early 1980s, no one really cared about guitar cables—players simply used whatever was available. In the ’60s and ’70s, you could see a lot of ultra-long coiled cables on stage with players like Clapton, Hendrix, May, Townshend, Santana, and Knopfler, to name just a few. They used whatever was available, plugged in, and played without thinking about it. Ritchie Blackmore, for example, was famous for notoriously using incredibly long cables on stage so he could walk around. Joe Walsh and many other famous players did the same. Many of us have these players’ trademark sounds in our heads, and we often want to come as close as possible to sounding like our personal heroes, but we fail because we’re using the wrong cable for a passive guitar. So what are we talking about, technically?
It’s important not to look at the guitar cable, with its electrical parameters, as a stand-alone device. The guitar cable has to be seen as part of the passive signal chain together with the pickups, the resistance of the guitar’s pots (usually 250k or 500k), the capacitance of the wires inside the guitar, and, of course, the input impedance of the amp, which is usually 1M. The interaction of all these in a passive system results in the resonance frequency of your pickups. If you change one of the parameters, you are also changing the resonance frequency.
”Ritchie Blackmore, for example, was famous for notoriously using incredibly long cables on stage so he could walk around.“
You all know the basic formulation: The longer the cable, the warmer the tone, with “warmer” meaning less high-end frequencies. While this is true, in a few moments you will see that this is only half the truth. Modern guitar cables are sporting a capacitance of around 100 pF each meter, which is very low and allows for long cable runs without killing all the top end. Some ultra-low-capacitance cables even measure down to only 60 pF each meter or less.
Now let’s have a look at guitar cables of the past. Here, capacitances of up to 400 pF or more each meter were the standard, especially on the famous coiled cables. See the difference? No wonder it’s hard to nail an old-school sound from the past, or that sometimes guitars sound too trebly (especially Telecasters), with our modern guitar cables. This logic only applies to our standard passive guitar circuits, like those in our Strats, Teles, Les Pauls, SGs, and most other iconic guitar models. Active guitars are a completely different ballpark. With a guitar cable, you can fine-tune your tone, and tame a shrill-sounding guitar.
“No problem,” some will say. “I simply use my passive tone control to compensate, and that’s it. Come on, capacitance is capacitance!” While this logic seems solid, in reality this reaction produces a different tone. “Why is this?” you will ask. Thankfully, it’s simple to explain. You might be familiar with the typical diagrams showing a coordinate system with "Gain/dB" on the Y-axis and "Frequency/kHz" on the X-axis. Additional cable capacitance will shift the resonance frequency on the X-axis, with possible differences of more than one octave depending on the cable. A cable with a higher capacitance will shift the resonance frequency towards the left and vice versa.
Diagram courtesy Professor Manfred Zollner (https://www.gitarrenphysik.de)
Now let’s see what happens if you use your standard passive tone control. If you close the tone control, the resonance frequency will be shifted downwards mostly on the Y-axis, losing the resonance peak, which means the high frequencies are gone. This is a completely different effect compared to the additional cable capacitance.
Diagram courtesy Professor Manfred Zollner (https://www.gitarrenphysik.de)
To summarize, we can say that with different cable capacitances, you can mimic a lot of different pickups by simply shifting the resonance frequency on the X-axis. This is something our passive tone control can’t do, and that’s exactly the difference you will have to keep in mind.
So, let’s see what can be done and where you can add additional cable capacitance to your system to simulate longer guitar cables.
1. On the cable itself
2. Inside the guitar
3. Externally
In next month’s follow-up to this column, we will talk about different capacitances and how you can add them to your signal chain with some easy-to-moderate modding, so stay tuned!
Until then ... keep on modding!