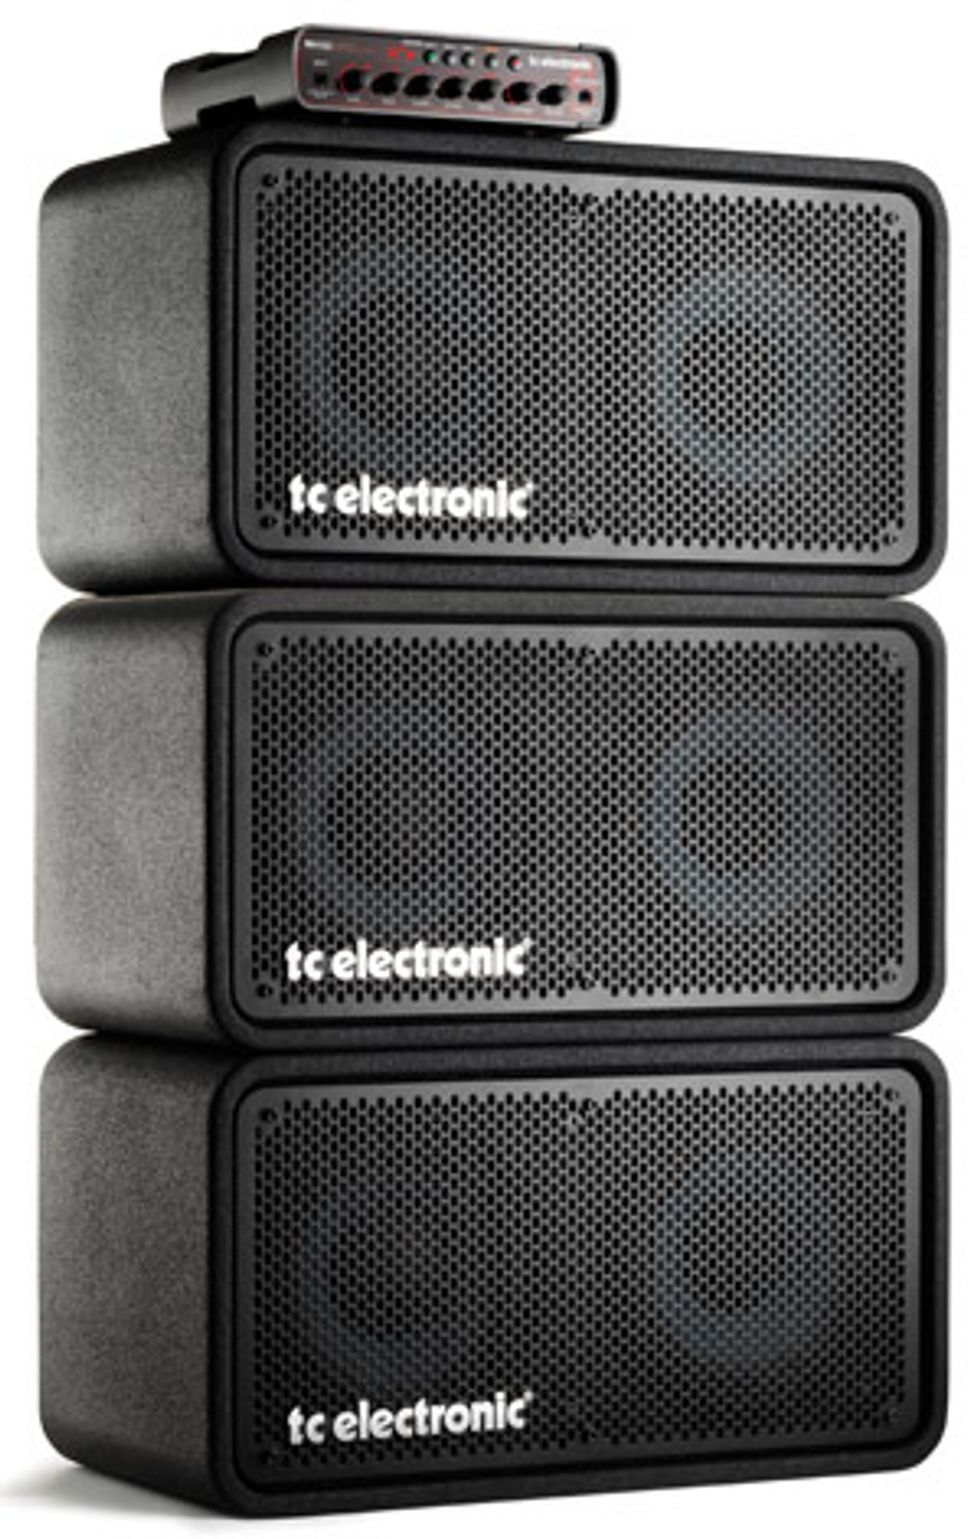
TC Electronic''s new bass amp packs power, innovation and portability
Download Example 1 First cut is with amp set flat, no compression. Second cut uses compression plus boosted bass and treble. Third cut uses TubeTone distortion. | |
Recorded with a 1981 G&L L-1000 into the TC Electronic RH450 then the TC Electronic RS210. Cab is mic’d on the top speaker that contains the horn. Run into GarageBand via Blue Icicle. |
With the RH450 bass amp, TC Electronic—a Danish company long known for quality guitar effects and studio gear—has succeeded in that mission. To do so, the RH450 packs just about everything a working bassist could want into an 8.8 pound, 450-watt head. And it’s surprisingly easy to use, too.
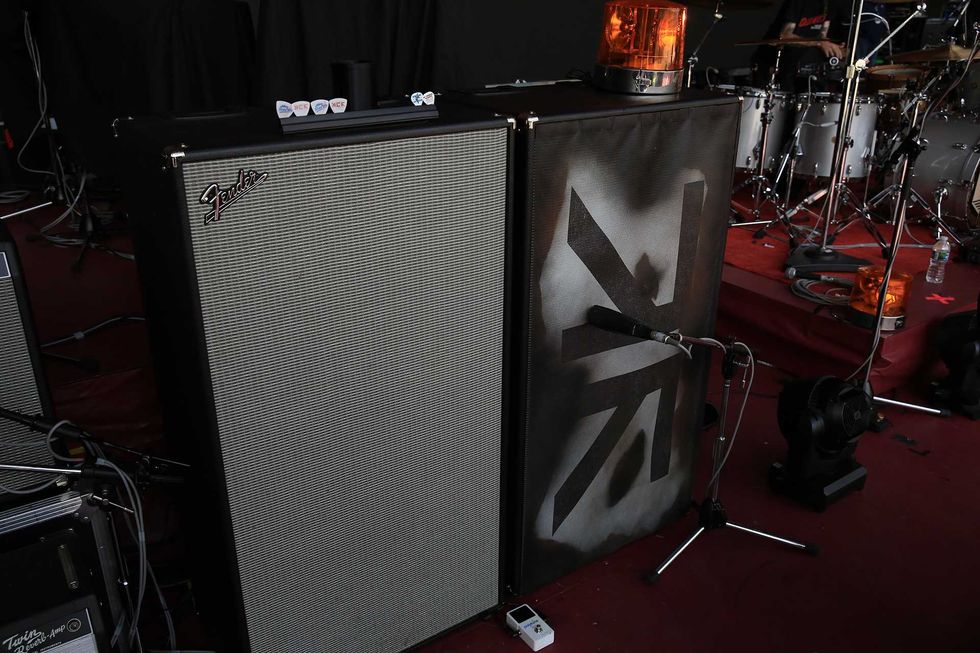
Adding to that, TC Electronic has come up with a pair of cabs—a 2x10 and a 2x12—that are easy to manage and put out plenty of sound… a total package. In case you’re wondering, yes, this is the same rig that was originally introduced as the RebelHead and RebelStack. Right before introduction, TC Electronic learned there were US trademark problems and had to drop that moniker (I prefer model numbers over names anyhow!).
So What’s the Diff?
TC Electronic bills this rig as “bass amp 2.0,” suggesting a new take on what a bass amp is all about. In a lot of ways, I’d have to agree— they’ve come up with a new way of packaging familiar tools, and they’ve made those tools work more easily and sound better than most I’ve run across. And while most of these little, new-generation amps shoot for sonic transparency, the RH450 takes the spirit of a tube amp and recreates that sound and feel via lightweight solid-state design in both the preamp and the Class D power amp sections.
What’s included in the RH450 head? Four bands of EQ, a tweakable compressor, a tube amp emulator, a tuner, a headphone amp, a direct out and three user-defined presets. Those are the big things. Standard stuff, but each with a twist that takes it to the uncommon. And it all seems to be high quality, durable and without noticeable quirks. Frankly, when an amp maker tries to do something different, there’s a risk that it’ll flop. Settings might not be intuitive, a built-in effect might sound hokey, or a knob can look ready to break right out of the box. I ran the RH450 and a pair of RS210 cabs through all of their paces and couldn’t find anything that would disappoint even a picky gearhead like me.
Getting Started
I want to tell you that I set things up, plugged in my bass and it roared—but that would be getting ahead of myself. Let me tell you about the cabs first. At 38 lbs each (44 for their RS212 cab), these are relatively easy to haul around by the sturdy metal handles on each side. Rather than the common “rat fur” carpeting, these plywood cabs are coated with a skidproof substance like you might find on an outdoor stairway. The heavy gauge metal grilles are recessed and should withstand a lot of use while doing their job effectively. I thought the covering was a little rough on my hands, but it’s a functional design choice because TC Electronic recommends stacking their cabs twohigh on ends, but doesn’t use the usual locking plastic corners. The speakers in these cabs are, like many bass cabs these days, designed by Eminence for TC Electronic. The cabs themselves have a “Made in Malaysia” sticker on the crossover plate (the amp is tagged “Made in Thailand”).
To keep these rear-ported cabs more compact, a tweeter is located behind the top of the two woofers in each cab. And yes, the tweeter has a fully adjustable level control, not just an on/ off switch. By stacking the cabs on end, you get the focus of a line array setup while also bringing part of the stack up closer to your ears than is possible with the usual 4x10-on-thefloor setup. And it really works. With the vertical stack, I heard a clean, focused sound with a smooth middle and tight bottom. Stacking them like a 4x10 cab provided more bottom but less focus. If you’re on a wobbly, bouncy stage, I’d use a conventional arrangement so that the tower of cabs doesn’t come tumbling down. But with a decent stage, I’d say go for it! Everything lines up really neatly, and the head fits atop with grace and style.
Time To Face The Music!
Enough about the cabs. On the back of the RH450 amp is a Speakon combo jack that lets you use either a quarter-inch or Speakon plug for your speaker cable. I connected the head to the top cab, ran a cable from that cab to the cab on the bottom and started putting the rig through its paces. I quickly decided that you can use the RH450 two ways. If you’re the no-nonsense, don’t-confuse-me-with-thedetails kind of player, you can plug in, turn up the input level, tweak the four bands of EQ and you’re jamming. But most likely, if you’re attracted to the RH450 in the first place, you have a bit of gear-for-gear-sake attitude in you (c’mon… confession time!), and you’ll want to take advantage of what this rig can do.
One of the nicest features on the RH450 is its preset ability. Dial in a sound you like, hold one of the three preset buttons for a couple of seconds—you’re locked in. Imagine a scenario like this. MEM1: flat EQ for your basic sound. MEM2: scooped EQ for slapping. MEM3: tubey grind for driving rock. It’s easy to set up and easy to switch from one to the next with just the tap of a button. Or you could set up for two basses of vastly different character, tonality and output level. Tweak MEM1 for a five-string bass that has a high-gain preamp, then set MEM2 for a passive fretless bass with lower gain. Once you’re in action on stage, just push the Mute button and unplug. Plug in the other bass, pick the appropriate preset and unmute. There you go.
Pushing The “Tubes”
But how do you get that tubey grind for your preset? That’s the TubeTone knob. Even though there are no tubes, you can get the RH450 to do an excellent impersonation. I’ve found that some tube drive pedals for bass lose their bottom as the grind moves to overdrive and on to full-blown distortion. I was pleased to find this isn’t the case for the RH450. TC Electronic describes this feature as “tube attitude,” where you get the sound and feel of both the preamp and power amp sections being pushed by your bass. Happily, the volume doesn’t start screaming when the TubeTone knob goes higher— something I was worried about. Turn up the TubeTone knob and you get both the sound and response of a tube head. It reminded me of pushing my silverface Bassman 50 into distortion, only a lot louder. Before I forget, one of the RH450’s ultra-helpful features is a lighted ring of red dots around each knob that advances as you turn the knob up or down. No squinting at pointers and small numbers on a dark stage; all your settings can be viewed at a glance (except for the Master Volume knob) in any light.
Doing Double Duty
TC Electronic came up with a clever way to create even more adjustability without adding more knobs: a Shift button that gives all the knobs (except the Master) a second function. The four EQ knobs can then move their center frequencies across a broad range. The Bass knob, for example, has a default center of 280Hz, but you can sweep it clear down to 71Hz or as high up as 1120Hz (which is actually into the upper midrange!). With the Shift button off (it lights up when on), each EQ knob can boost up to 15dB or cut a frequency band up to 24dB. The lighted red ring of dots lets you see how much above or below center you’ve adjusted the frequency center in Shift mode (but doesn’t display the exact frequency), and indicates the amount of boost or cut in the normal mode.
In Shift mode, the TubeTone knob becomes the level control for your preset. If you tweak this setting, or the EQ centers, just remember to hold down your preset button again to capture the change into memory. Otherwise it goes away when you change presets (but presets stay in memory when the power goes off).
SprectraComp is, in my opinion, the coolest, most useful feature in Shift mode. Sure, most bass amps have a limiter or compressor of some sort, and most work with just a single knob, but most of these have a natural flaw: they knock down the low notes more than the high notes. This is natural with a singleband compressor that treats all notes at the same threshold. Most simply, low notes have more oomph than high notes and hit the threshold sooner. In contrast, SpectraComp has independent compression for low, mid and high bands. If you slap an E string, the low band kicks in. Pop the G string and the mid or upper bands of compression treat it likewise. For fingerstyle or pick playing, SpectraComp helps even things out nicely. Listening to the RH450’s compressor, I did indeed feel a smoothness to its treatment of note attacks. Heavier doses of compression were audible, but still very useful.
A nice touch is that when SpectraComp level is set (and again, stored in memory), going out of Shift mode provides a visible indicator of compression. Hit a string hard and the ring of red dots around the Gain knob drops down, oozing back up as the note decays, and finally stopping back at the actual gain level you’ve set. I compliment TC Electronic on the finesse it built into this compressor.
But Wait - There’s More!
There’s no way within the length of this article to detail all the thoughtful, quality features that TC Electronics has put into the RH450. After all, this little gem has the option of a remote pedalboard (switches memory, mutes, tuner display), a digital out for going right into a recording rig, an effects loop, and a transformer- balanced DI (with switchable pre/post). But before I’m done here, I must talk about two more features—and then discuss tone, what we’re ultimately after.
First, I have to mention the tuner—it’s built in, always on, and super easy to read. I found that the tuner picked up notes quickly and the up and down arrows got me to quickly home in on the in-tune dot. If you hit the mute button, the tuner goes one step further and uses the ring of dots around the bass EQ knob to provide higher resolution visual guidance. If you need to shift the reference pitch, the tuner can be adjusted when the amp boots up.
A second feature I need to mention is the headphone amp. Sure, you could laugh at the thought of a $1000 headphone amp, but I sometimes need to practice silently and work with a recording to learn a new part. But I dread the headphone sound I get from most amps—noisy, brittle, sort of warbly. Happily, that’s not the case with the headphone amp on the RH450. I plugged in my studio monitor ‘phones to the jack on the front—which cuts off the speakers—and heard a very highquality sound. Full tone, no hiss. TC Electronic has included a pair of RCA jacks on the back and even provided a cable with a mini-jack on one end for an MP3 player. I’m a fan of using iTunes on my laptop to play the songs I’m learning. The RH450 lets me plug in the laptop and go to it.
Tone: The Bottom Line
Yes, most of this review has discussed features without hitting on what’s most important— your sound. As a basic threshold, I’d have to say that the RH450 combined with a pair of RS210 cabs should be plenty loud for most gigs, especially since larger venues routinely provide PA support and the sound tech is always struggling to keep stage volume from bleeding into the house.
As far as tone, I really discovered the character of the RH450 while A/B’ing with another brand of mini-amp. One note and I was struck with the transparency of that other amp—nearly to the point of sounding sterile. In contrast, the RH450 had a warmth and tonal character that were very pleasant, yet assertive. Besides the TubeTone effect, the RH450 has Active Power Management (APM), a circuit that kicks in when the amp gets close to maximum performance, compressing and limiting peaks of the bass signal much like a tube amp would. TC Electronic explains that APM makes its solid state watts sound more like tube watts.
Soundwise, the RS210 cabs are focused and punchy, especially in the vertical stack configuration. Plenty of clarity, but not harsh in any way. Knobs, you ask? Sturdy and wiggle free, yet easy to turn with precision. And with all these features, it’s good that the manual can be understood by non tech-heads—good job there, too.
Finally, one small quibble. Because of their location just under the upper lip of the amp case, the preset and mute buttons can be difficult to see in lower light. Going to buttons that shift from red to green when activated might be an easy way around this problem. And the problem would be resolved if you added the optional footswitch.
Buy if...
You need an innovative, high-quality, lightweight, powerful amp with a great set of built-in features.
Skip if...
You're a tube die-hard, prefer a no-frills rig, and have a modest gear budget.
Rating...
MSRP RH450 $999; MSRP RS210 $499 - TC Electronic - tcelectronic.com |
Day 6 of Stompboxtober is here! Today’s prize? A pedal from Revv Amplification! Enter now and check back tomorrow for the next one!
Revv G3 Purple Channel Preamp/Overdrive/Distortion Pedal - Anniversary Edition
The Revv G3 revolutionized high gain pedals in 2018 with its tube-like response & tight, clear high gain tones. Suddenly the same boutique tones used by metal artists & producers worldwide were available to anyone in a compact pedal. Now the G3 returns with a new V2 circuit revision that raises the bar again.
Beauty and sweet sonority elevate a simple-to-use, streamlined acoustic and vocal amplifier.
An EQ curve that trades accuracy for warmth. Easy-to-learn, simple-to-use controls. It’s pretty!
Still exhibits some classic acoustic-amplification problems, like brash, unforgiving midrange if you’re not careful.
$1,199
Taylor Circa 74
taylorguitars.com
Save for a few notable (usually expensive) exceptions, acoustic amplifiers are rarely beautiful in a way that matches the intrinsic loveliness of an acoustic flattop. I’ve certainly seen companies try—usually by using brown-colored vinyl to convey … earthiness? Don’t get me wrong, a lot of these amps sound great and even look okay. But the bar for aesthetics, in my admittedly snotty opinion, remains rather low. So, my hat’s off to Taylor for clearing that bar so decisively and with such style. The Circa 74 is, indeed, a pretty piece of work that’s forgiving to work with, ease to use, streamlined, and sharp.
Boxing Beyond Utility
Any discussion of trees or wood with Bob Taylor is a gas, and highly instructive. He loves the stuff and has dabbled before in amplifier designs that made wood an integral feature, rather than just trim. But the Circa 74 is more than just an aesthetic exercise. Because the Taylor gang started to think in a relatively unorthodox way about acoustic sound amplification—eschewing the notion that flat frequency response is the only path to attractive acoustic tone.
I completely get this. I kind of hate flat-response speakers. I hate nice monitors. We used to have a joke at a studio I frequented about a pair of monitors that often made us feel angry and agitated. Except that they really did. Flat sound can be flat-out exhausting and lame. What brings me happiness is listening to Lee “Scratch” Perry—loud—on a lazy Sunday on my secondhand ’70s Klipsch speakers. One kind of listening is like staring at a sun-dappled summer garden gone to riot with flowers. The other sometimes feels like a stale cheese sandwich delivered by robot.
The idea that live acoustic music—and all its best, earthy nuances—can be successfully communicated via a system that imparts its own color is naturally at odds with acoustic culture’s ethos of organic-ness, authenticity, and directness. But where does purity end and begin in an amplified acoustic signal? An undersaddle pickup isn’t made of wood. A PA with flat-response speakers didn’t grow in a forest. So why not build an amp with color—the kind of color that makes listening to music a pleasure and not a chore?
To some extent, that question became the design brief that drove the evolution of the Circa 74. Not coincidentally, the Circa 74 feels as effortless to use as a familiar old hi-fi. It has none of the little buttons for phase correction that make me anxious every time I see one. There’s two channels: one with an XLR/1/4" combo input, which serves as the vocal channel if you are a singer; another with a 1/4" input for your instrument. Each channel consists of just five controls—level, bass, middle, and treble EQ, and a reverb. An 11th chickenhead knob just beneath the jewel lamp governs the master output. That’s it, if you don’t include the Bluetooth pairing button and 1/8" jacks for auxiliary sound sources and headphones. Power, by the way, is rated at 150 watts. That pours forth through a 10" speaker.Pretty in Practice
I don’t want to get carried away with the experiential and aesthetic aspects of the Circa 74. It’s an amplifier with a job to do, after all. But I had fun setting it up—finding a visually harmonious place among a few old black-panel Fender amps and tweed cabinets, where it looked very much at home, and in many respects equally timeless.
Plugging in a vocal mic and getting a balance with my guitar happened in what felt like 60 seconds. Better still, the sound that came from the Circa 74, including an exceedingly croaky, flu-addled human voice, sounded natural and un-abrasive. The Circa 74 isn’t beyond needing an assist. Getting the most accurate picture of a J-45 with a dual-source pickup meant using both the treble and midrange in the lower third of their range. Anything brighter sounded brash. A darker, all-mahogany 00, however, preferred a scooped EQ profile with the treble well into the middle of its range. You still have to do the work of overcoming classic amplification problems like extra-present high mids and boxiness. But the fixes come fast, easily, and intuitively. The sound may not suggest listening to an audiophile copy of Abbey Road, as some discussions of the amp would lead you to expect. But there is a cohesiveness, particularly in the low midrange, that does give it the feel of something mixed, even produced, but still quite organic.
The Verdict
Taylor got one thing right: The aesthetic appeal of the Circa 74 has a way of compelling you to play and sing. Well, actually, they got a bunch of things right. The EQ is responsive and makes it easy to achieve a warm representation of your acoustic, no matter what its tone signature. It’s also genuinely attractive. It’s not perfectly accurate. Instead, it’s rich in low-mid resonance and responsive to treble-frequency tweaks—lending a glow not a million miles away from a soothing home stereo. I think that approach to acoustic amplification is as valid as the quest for transparency. I’m excited to see how that thinking evolves, and how Taylor responds to their discoveries.
The evolution of Electro-Harmonix’s very first effect yields a powerful boost and equalization machine at a rock-bottom price.
A handy and versatile preamp/booster that goes well beyond the average basic booster’s range. Powerful EQ section.
Can sound a little harsh at more extreme EQ ranges.
$129
Electro-Harmonix LPB-3
ehx.com
Descended from the first Electro-Harmonix pedal ever released, the LPB-1 Linear Power Booster, the new LPB-3 has come a long way from the simple, one-knob unit in a folded-metal enclosure that plugged straight into your amplifier. Now living in Electro-Harmonix’s compact Nano chassis, the LPB-3 Linear Power Booster and EQ boasts six control knobs, two switches, and more gain than ever before.
If 3 Were 6
With six times the controls found on the 1 and 2 versions (if you discount the original’s on/off slider switch,) the LPB-3’s control complement offers pre-gain, boost, mid freq, bass, treble, and mid knobs, with a center detent on the latter three so you can find the midpoint easily. A mini-toggle labeled “max” selects between 20 dB and 33 dB of maximum gain, and another labeled “Q” flips the resonance of the mid EQ between high and low. Obviously, this represents a significant expansion of the LPB’s capabilities.
More than just a booster with a passive tone, the LPB-3 boasts a genuine active EQ stage plus parametric midrange section, comprising the two knobs with shaded legends, mid freq and mid level. The gain stages have also been reimagined to include a pre-gain stage before the EQ, which enables up to 20 dB of input gain. The boost stage that follows the EQ is essentially a level control with gain to allow for up to 33 dB of gain through the LPB-3 when the “max” mini toggle is set to 33dB
A slider switch accessible inside the pedal selects between buffered or true bypass for the hard-latch footswitch. An AC adapter is included, which supplies 200mA of DC at 9.6 volts to the center-negative power input, and EHX specifies that nothing supplying less than 120mA or more than 12 volts should be used. There’s no space for an internal battery.
Power-Boosted
The LPB-3 reveals boatloads of range that betters many linear boosts on the market. There’s lots of tone-shaping power here. Uncolored boost is available when you want it, and the preamp gain knob colors and fattens your signal as you crank it up—even before you tap into the massive flexibility in the EQ stage.
“The preamp gain knob colors and fattens your signal as you crank it up—even before you tap into the massive flexibility in the EQ stage.”
I found the two mid controls work best when used judiciously, and my guitars and amps preferred subtle changes pretty close to the midpoint on each. However, there are still tremendous variations in your mid boost (or scoop, for that matter) within just 15 or 20 percent range in either direction from the center detent. Pushing the boost and pre-gain too far, particularly with the 33 dB setting engaged, can lead to some harsh sounds, but they are easy to avoid and might even be desirable for some users that like to work at more creative extremes.
The Verdict
The new LPB-3 has much, much more range than its predecessors, providing flexible preamp, boost, and overdrive sounds that can be reshaped in significant ways via the powerful EQ. It gives precise tone-tuning flexibility to sticklers that like to match a guitar and amp to a song in a very precise way, but also opens up more radical paths for experimentalists. That it does all this at a $129 price is beyond reasonable.
Electro-Harmonix Lpb-3 Linear Power Booster & Eq Effect Pedal Silver And Blue
Intermediate
Intermediate
• Learn classic turnarounds.
• Add depth and interest to common progressions.
• Stretch out harmonically with hip substitutions.
Get back to center in musical and ear-catching ways.
A turnaround chord progression has one mission: It allows the music to continue seamlessly back to the beginning of the form while reinforcing the key center in a musically interesting way. Consider the last four measures of a 12-bar blues in F, where the bare-bones harmony would be C7-Bb7-F7-F7 (one chord per measure). With no turn around in the last two measures, you would go back to the top of the form, landing on another F7. That’s a lot of F7, both at the end of the form, and then again in the first four bars of the blues. Without a turnaround, you run the risk of obscuring the form of the song. It would be like writing a novel without using paragraphs or punctuation.
The most common turnaround is the I-VI-ii-V chord progression, which can be applied to the end of the blues and is frequently used when playing jazz standards. Our first four turnarounds are based on this chord progression. Furthermore, by using substitutions and chord quality changes, you get more mileage out of the I-VI-ii-V without changing the basic functionality of the turnaround itself. The second group of four turnarounds features unique progressions that have been borrowed from songs or were created from a theoretical idea.
In each example, I added extensions and alterations to each chord and stayed away from the pure R-3-5-7 voicings. This will give each chord sequence more color and interesting voice leading. Each turnaround has a companion solo line that reflects the sound of the changes. Shell voicings (root, 3rd, 7th) are played underneath so that the line carries the sound of the written chord changes, making it easier to hear the sound of the extensions and alterations. All examples are in the key of C. Let’s hit it.
The first turnaround is the tried and true I-VI-ii-V progression, played as Cmaj7-A7-Dm7-G7. Ex. 1 begins with C6/9, to A7(#5), to Dm9, to G7(#5), and resolves to Cmaj7(#11). By using these extensions and alterations, I get a smoother, mostly chromatic melodic line at the top of the chord progression.
Ex. 2 shows one possible line that you can create. As for scale choices, I used C major pentatonic over C6/9, A whole tone for A7(#5), D Dorian for Dm9, G whole tone for G7(#5), and C Lydian for Cmaj7(#11) to get a more modern sound.
The next turnaround is the iii-VI-ii-V progression, played as Em7-A7-Dm7-G7 where the Em7 is substituted for Cmaj7. The more elaborate version in Ex. 3 shows Em9 to A7(#9)/C#, to Dm6/9, to G9/B, resolving to Cmaj7(add6). A common way to substitute chords is to use the diatonic chord that is a 3rd above the written chord. So, to sub out the I chord (Cmaj7) you would use the iii chord (Em7). By spelling Cmaj7 = C-E-G-B and Em7 = E-G-B-D, you can see that these two chords have three notes in common, and will sound similar over the fundamental bass note, C. The dominant 7ths are in first inversion, but serve the same function while having a more interesting bass line.
The line in Ex. 4 uses E Dorian over Em9, A half-whole diminished over A7(#9)/C#, D Dorian over Dm6/9, G Mixolydian over G9/B, and C major pentatonic over Cmaj7(add6). The chord qualities we deal with most are major 7, dominant 7, and minor 7. A quality change is just that… changing the quality of the written chord to another one. You could take a major 7 and change it to a dominant 7, or even a minor 7. Hence the III-VI-II-V turnaround, where the III and the VI have both been changed to a dominant 7, and the basic changes would be E7-A7-D7-G7.
See Ex. 5, where E7(b9) moves to A7(#11), to D7(#9) to G7(#5) to Cmaj9. My scale choices for the line in Ex. 6 are E half-whole diminished over E7(#9), A Lydian Dominant for A7(#11), D half-whole diminished for D7(#9), G whole tone for G7(#5), and C Ionian for Cmaj9.
Ex. 7 is last example in the I-VI-ii-V category. Here, the VI and V are replaced with their tritone substitutes. Specifically, A7 is replaced with Eb7, and G7 is replaced with Db7, and the basic progression becomes Cmaj7-Eb7-Dm7-Db7. Instead of altering the tritone subs, I used a suspended 4th sound that helped to achieve a diatonic, step-wise melody in the top voice of the chord progression.
The usual scales can be found an Ex. 8, where are use a C major pentatonic over C6/9, Eb Mixolydian over Eb7sus4, D Dorian over Dm11, Db Mixolydian over Db7sus4, and once again, C Lydian over Cmaj7(#11). You might notice that the shapes created by the two Mixolydian modes look eerily similar to minor pentatonic shapes. That is by design, since a Bb minor pentatonic contains the notes of an Eb7sus4 chord. Similarly, you would use an Ab minor pentatonic for Db7sus4.
The next four turnarounds are not based on the I-VI-ii-V chord progression, but have been adapted from other songs or theoretical ideas. Ex. 9 is called the “Backdoor” turnaround, and uses a iv-bVII-I chord progression, played as Fm7-Bb7-Cmaj7. In order to keep the two-bar phrase intact, a full measure of C precedes the actual turnaround. I was able to compose a descending whole-step melodic line in the top voice by using Cmaj13 and Cadd9/E in the first bar, Fm6 and Ab/Bb in the second bar, and then resolving to G/C. The slash chords have a more open sound, and are being used as substitutes for the original changes. They have the same function, and they share notes with their full 7th chord counterparts.
Creating the line in Ex. 10 is no more complicated than the other examples since the function of the chords determines which mode or scale to use. The first measure employs the C Ionian mode over the two Cmaj chord sounds. F Dorian is used over Fm6 in bar two. Since Ab/Bb is a substitute for Bb7, I used Bb Mixolydian. In the last measure, C Ionian is used over the top of G/C.
The progression in Ex. 11 is the called the “Lady Bird” turnaround because it is lifted verbatim from the Tadd Dameron song of the same name. It is a I-bIII-bVI-bII chord progression usually played as Cmaj7-Eb7-Abmaj7-Db7. Depending on the recording or the book that you check out, there are slight variations in the last chord but Db7 seems to be the most used. Dressing up this progression, I started with a different G/C voicing, to Eb9(#11), to Eb/Ab (subbing for Abmaj7), to Db9(#11), resolving to C(add#11). In this example, the slash chords are functioning as major seventh chords.
As a result, my scale choices for the line in Ex. 12 are C Ionian over G/C, Eb Lydian Dominant over Eb9(#11), Ab Ionian over Eb/Ab, Db Lydian Dominant over Db9(#11), and C Lydian over C(add#11).
The progression in Ex. 13 is called an “equal interval” turnaround, where the interval between the chords is the same in each measure. Here, the interval is a descending major 3rd that creates a I-bVI-IV-bII sequence, played as Cmaj7-Abmaj7-Fmaj7-Dbmaj7, and will resolve a half-step down to Cmaj7 at the top of the form. Since the interval structure and chord type is the same in both measures, it’s easy to plane sets of voicings up or down the neck. I chose to plane up the neck by using G/C to Abmaj13, then C/F to Dbmaj13, resolving on Cmaj7/E.
The line in Ex. 14 was composed by using the notes of the triad for the slash chord and the Lydian mode for the maj13 chords. For G/C, the notes of the G triad (G-B-D) were used to get an angular line that moves to Ab Lydian over Abmaj13. In the next measure, C/F is represented by the notes of the C triad (C-E-G) along with the root note, F. Db Lydian was used over Dbmaj13, finally resolving to C Ionian over Cmaj7/E. Since this chord progression is not considered “functional” and all the chord sounds are essentially the same, you could use Lydian over each chord as a way to tie the sound of the line together. So, use C Lydian, Ab Lydian, F Lydian, Db Lydian, resolving back to C Lydian.
The last example is the “Radiohead” turnaround since it is based off the chord progression from their song “Creep.” This would be a I-III-IV-iv progression, and played Cmaj7-E7-Fmaj7-Fm7. Dressing this one up, I use a couple of voicings that had an hourglass shape, where close intervals were in the middle of the stack.
In Ex. 15 C6/9 moves to E7(#5), then to Fmaj13, to Fm6 and resolving to G/C. Another potential name for the Fmaj13 would be Fmaj7(add6) since the note D is within the first octave. This chord would function the same way, regardless of which name you used.
Soloing over this progression in Ex. 16, I used the C major pentatonic over C6/9, E whole tone over E7(#5), F Lydian over Fmaj13, and F Dorian over Fm6. Again, for G/C, the notes of the G triad were used with the note E, the 3rd of a Cmaj7 chord.
The main thing to remember about the I-VI-ii-V turnaround is that it is very adaptable. If you learn how to use extensions and alterations, chord substitutions, and quality changes, you can create some fairly unique chord progressions. It may seem like there are many different turnarounds, but they’re really just an adaptation of the basic I-VI-ii-V progression.
Regarding other types of turnarounds, see if you can steal a short chord progression from a pop tune and make it work. Or, experiment with other types of intervals that would move the chord changes further apart, or even closer together. Could you create a turnaround that uses all minor seventh chords? There are plenty of crazy ideas out there to work with, and if it sounds good to you, use it!