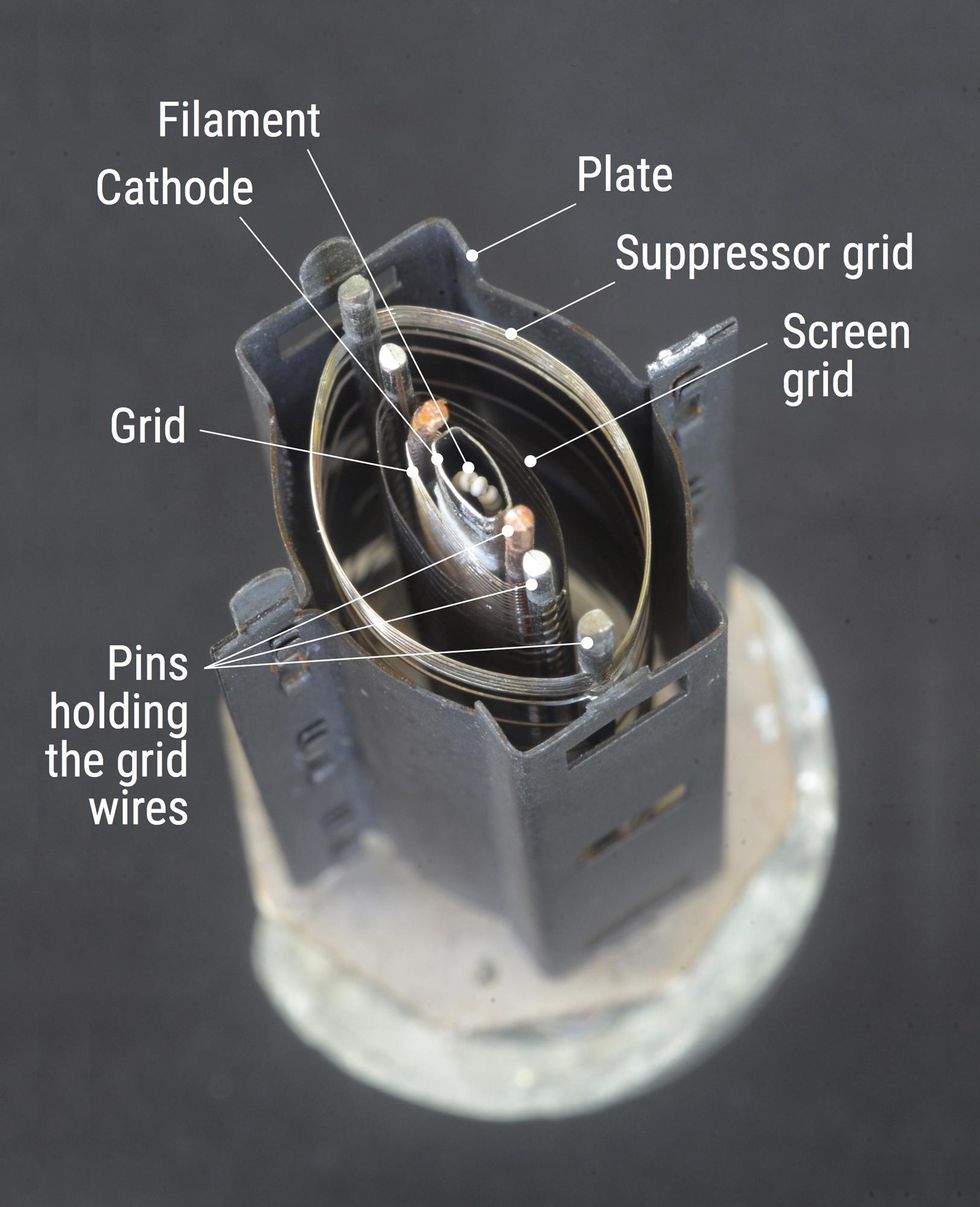
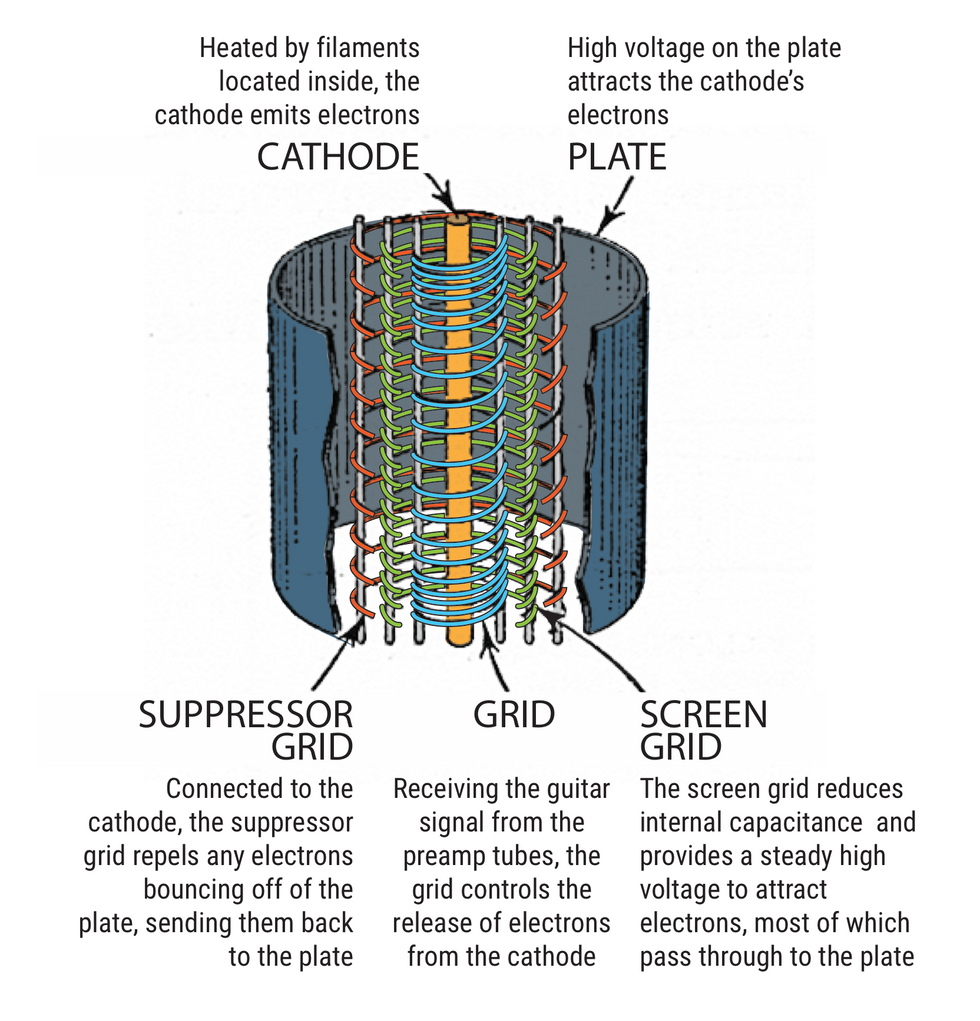
Take a deep look inside this ubiquitous little workhorse, and consider a few easy mods that can make it sound and perform even better.
There are a lot of mods that can be done on a Blues Junior—the affordable, lightweight, and smallest member of Fender’s 12" combo family. These include replacing tone caps, swapping out the transformer, electrolytic cap upgrades, reverb tank mods, and more. Just google “Fender Blues Junior Mods” and prepare to be overwhelmed.
But how many of these mods are really necessary? It’s fair to assume that if you own a Blues Junior you were attracted to both its price of $749 street and at least some elements of its sound, which falls into the range of classic Fender voices, with clarity and punch. So, as PG’s “Silver and Black” columnist and resident guru of fenderguru.com, let me wade through some of the popular mods and make some recommendations about a few I think are actually beneficial, affordable, and easy to accomplish—resulting in more punch, volume, and warmth in your tone. Specifically, I’m talking about using extension cabinets, adjusting the bias by changing the resistors, replacing those electrolytic caps, and adding a resistor to tame and darken the reverb.
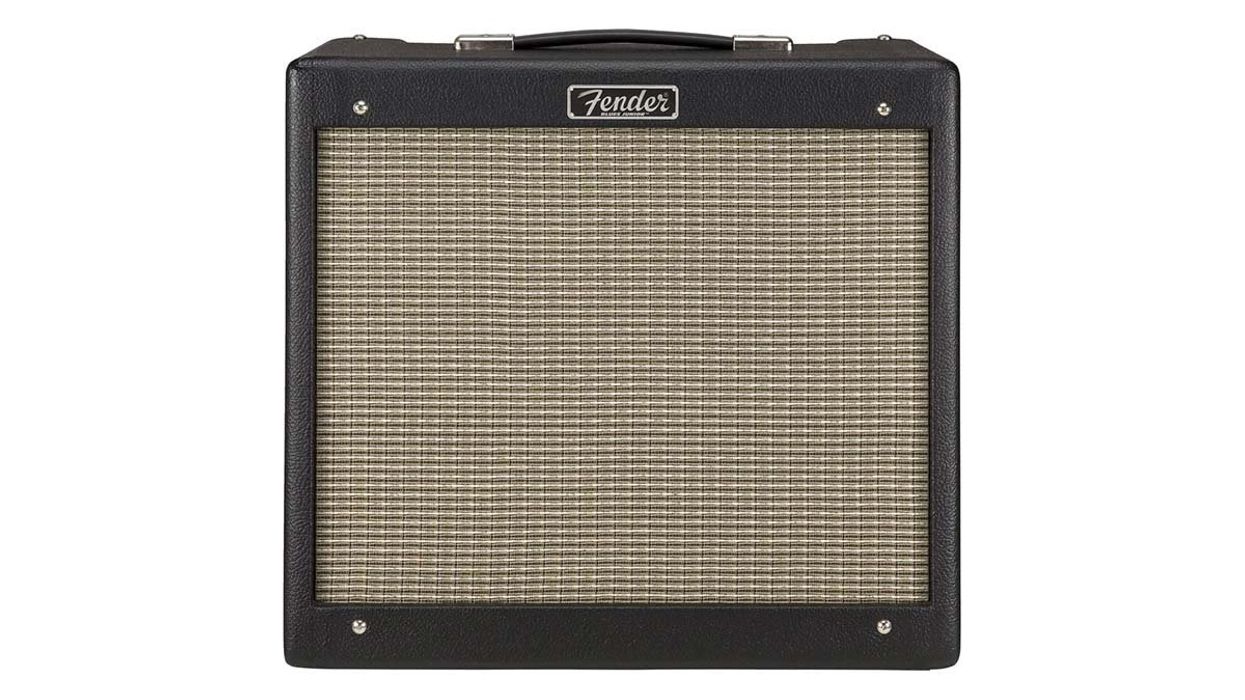
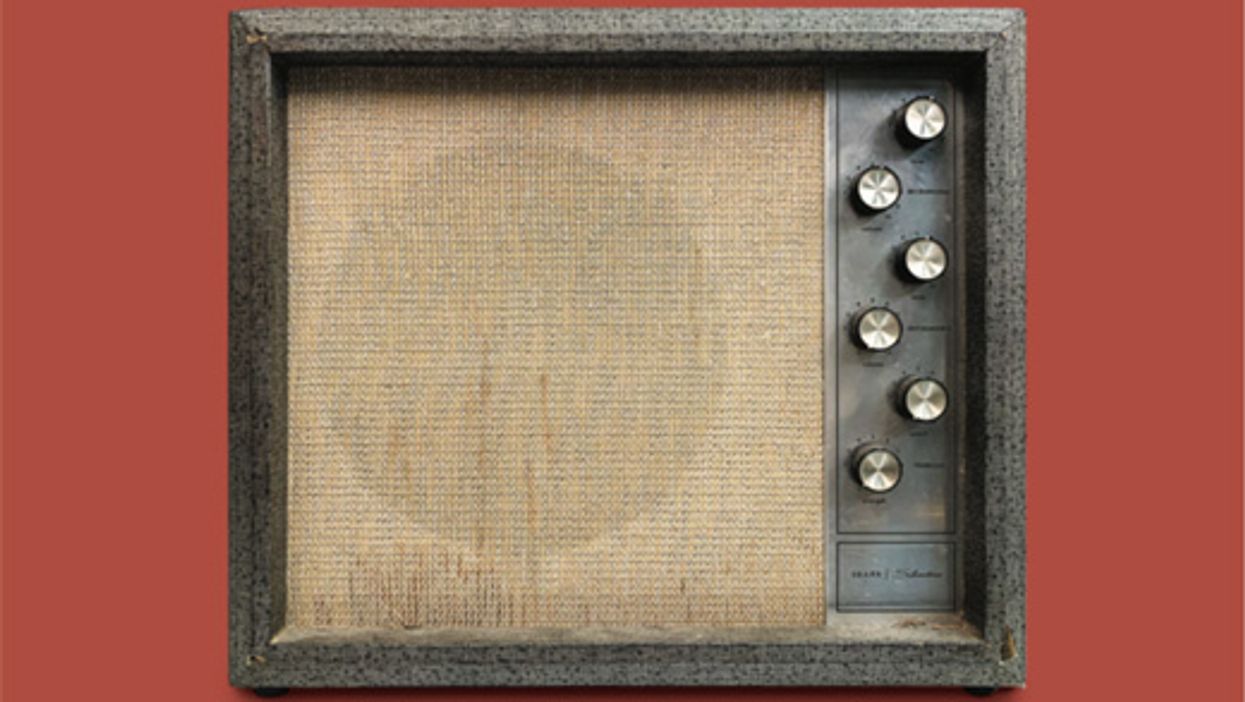
Before we get there, however, let’s take a look under the hood of this humble working-player’s Fender. The 15-watt, all-tube Blues Junior was introduced in 1995. It weighs only 30 pounds and measures 16" x 18" x 9", making it smaller and lighter than a Princeton, although it holds a larger 12" speaker.
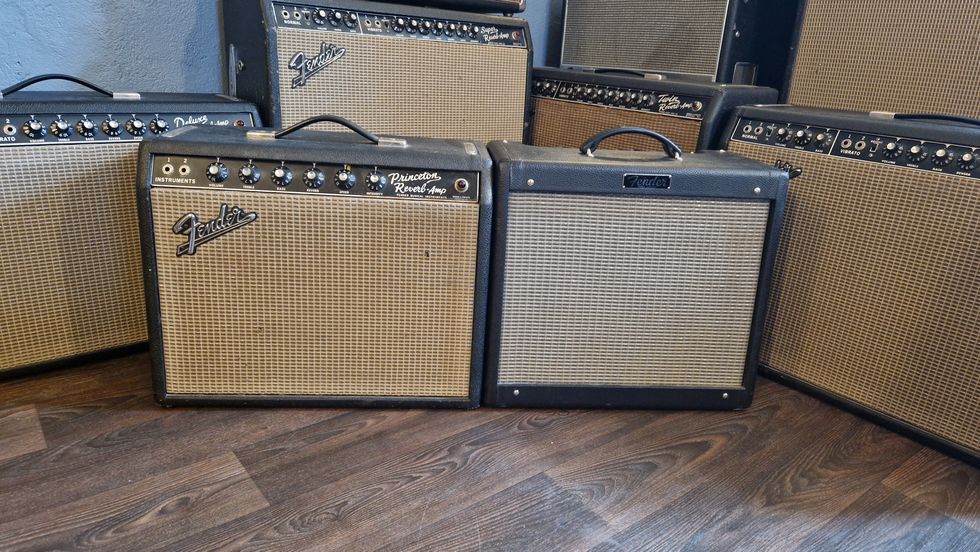
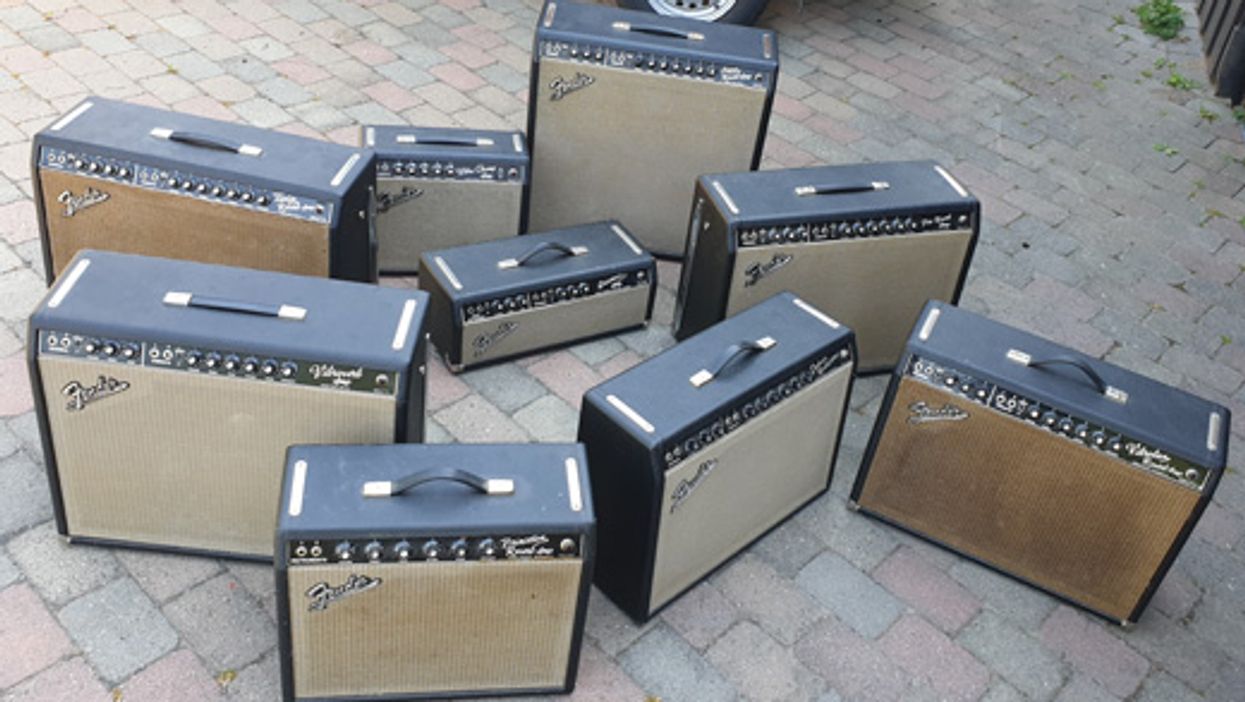
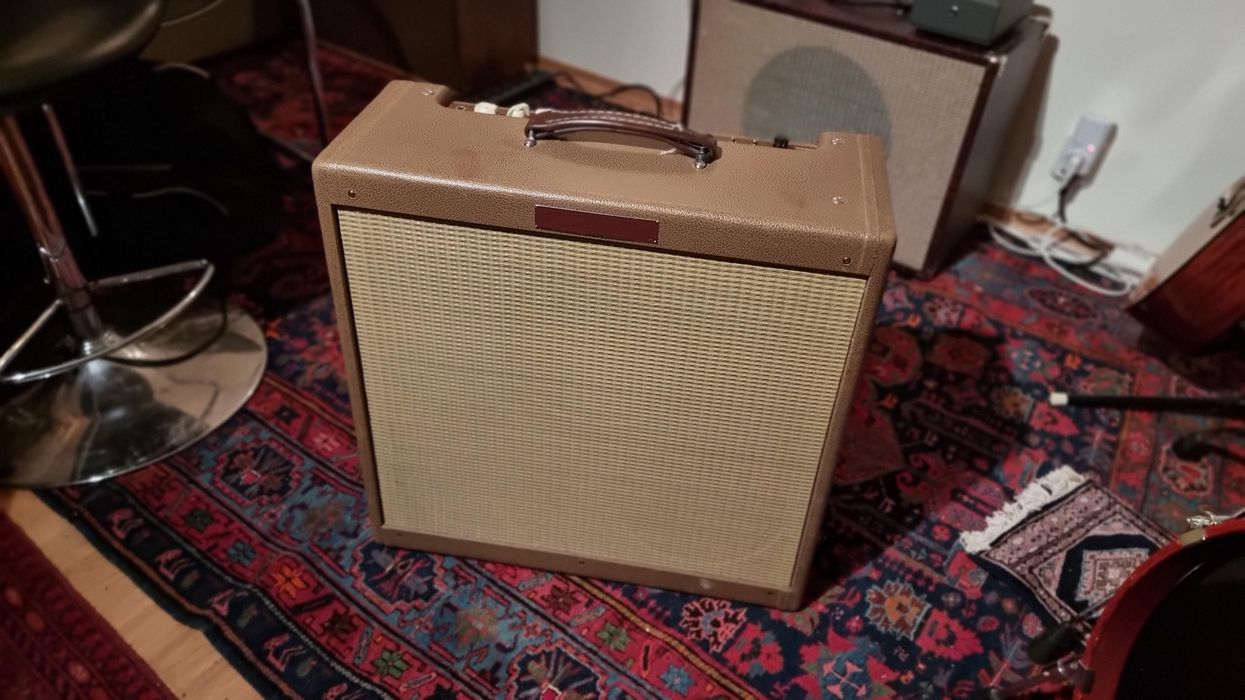
Although smaller than the Princeton, the Fender Blues Junior has a larger speaker and more wattage, with a 12" speaker compared to the Princeton’s 10", and 12 watts compared to the Junior’s 15.
How Low Can We Go?
The Blues Junior was introduced before the trendy low-wattage-amp era began, and even in the digital era, players still appreciate the Junior’s printed circuit board (PCB), manual knobs, and tubes in its preamp and power amp sections. There have been many revisions over the years, including minor changes in circuitry and components, different speakers, and the addition of a fat switch that boosts the mids and pushes the preamp stage into quicker distortion.
There are three models in the current Blues Junior IV lineup. The black Tolex amp has a Celestion A type speaker, the racing green model has a Jensen C12Q, and the lacquered tweed model comes with a Jensen C12N. They all share the same circuitry. There’s also a tube in the phase inverter, while there is a transistor-driven reverb and diode rectifier. The early Blues Juniors with green circuit boards were made in the U.S., until Fender moved production to Mexico in 2001. The Mexico-made amps have a cream-colored circuit board.
PCB amps are a little more complicated to work on than handwired amps. You must be gentle and careful with wire cutters and soldering irons to not damage the small connections. It is easy to break the board’s connection traces and pins, or accidentally touch a high voltage point in the circuit. Be careful should you venture inside.
The Tale of the Tubes
So, what can we draw from inspecting the amp and reading the schematic of a Blues Junior? The control panel has volume, master, treble, middle, bass, reverb, and fat switch controls. Reading the schematic, I find that the tube layout and circuit functions are:
V1 12AX7: The first half of the tube handles preamp gain stage one before the volume and fat functions, and the second half powers preamp gain stage two, after volume and before the EQ/tone stack.
V2 12AX7: The first half powers preamp gain stage three, after the EQ/tone stack and before the master volume, and then the phase inverter. The second half of the tube’s output is not in use.
V3 12AX7: The first half juices the phase inverter’s phase one; the second half handles the phase inverter’s phase two.
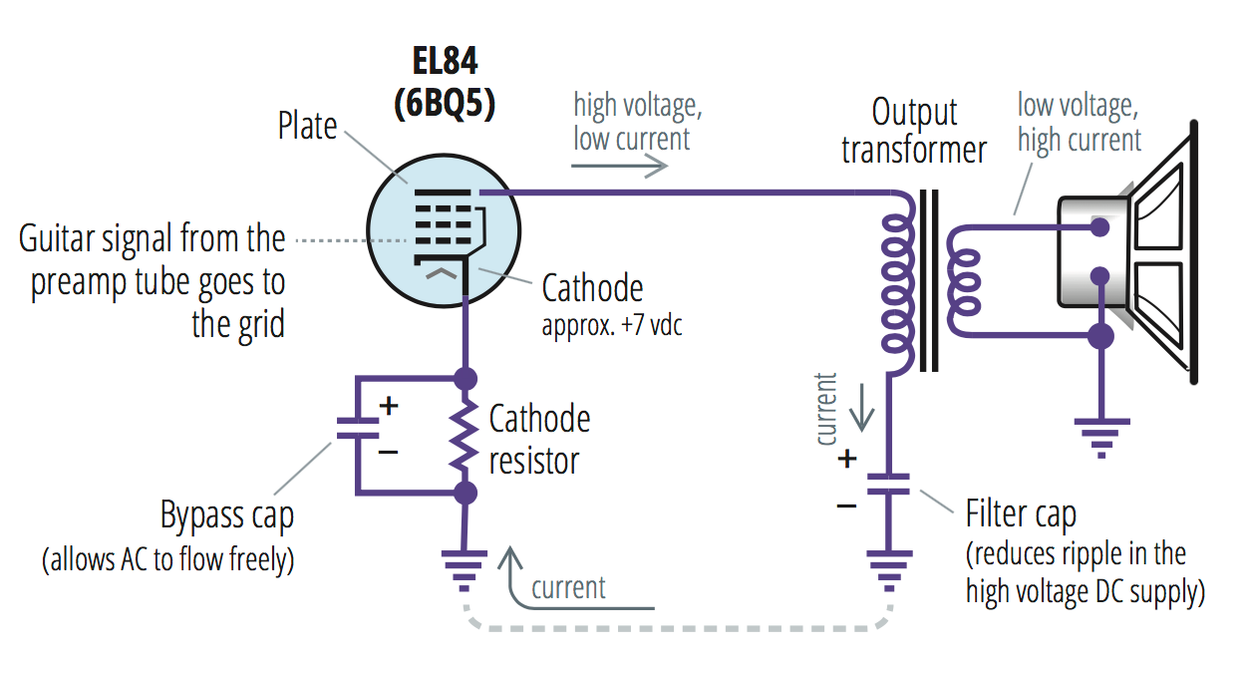
V4 and V5: That’s the home of the EL84 power tubes.
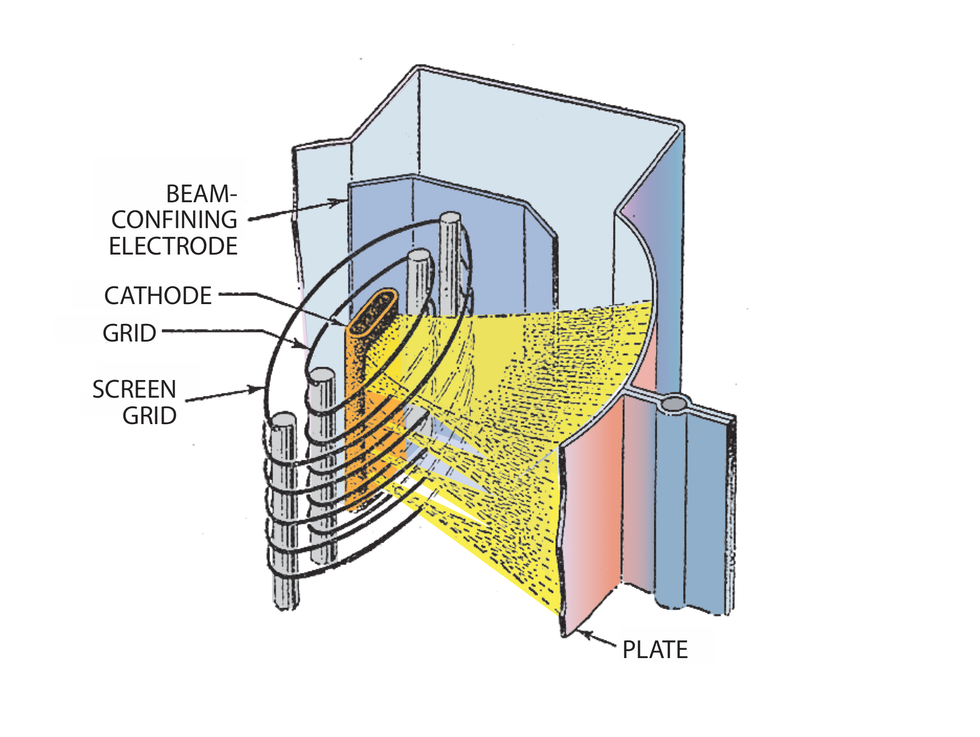
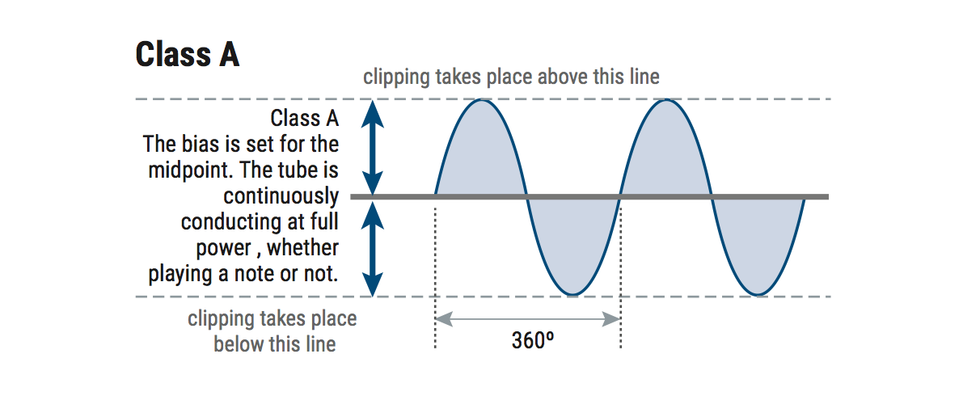
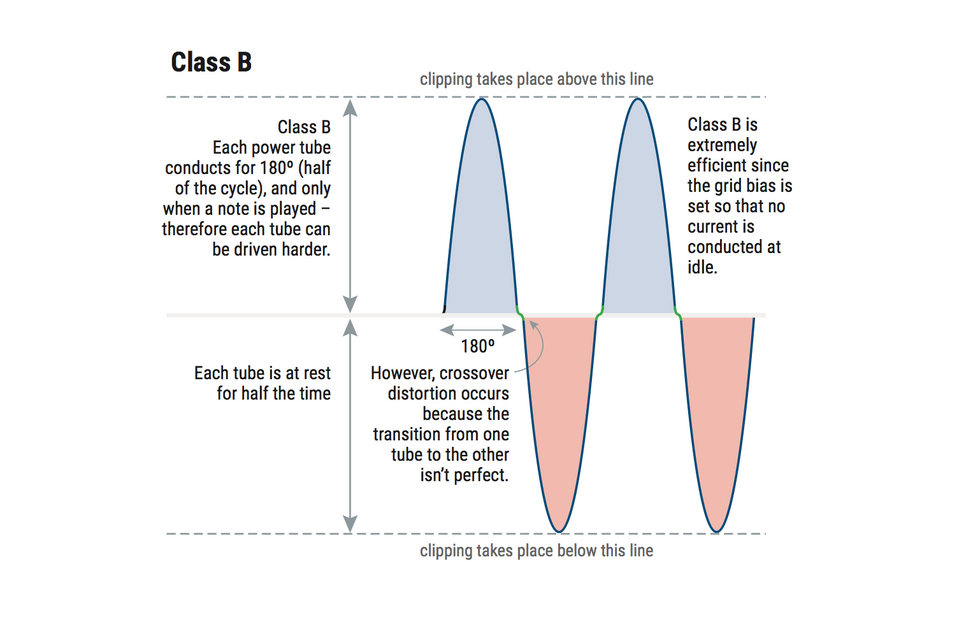
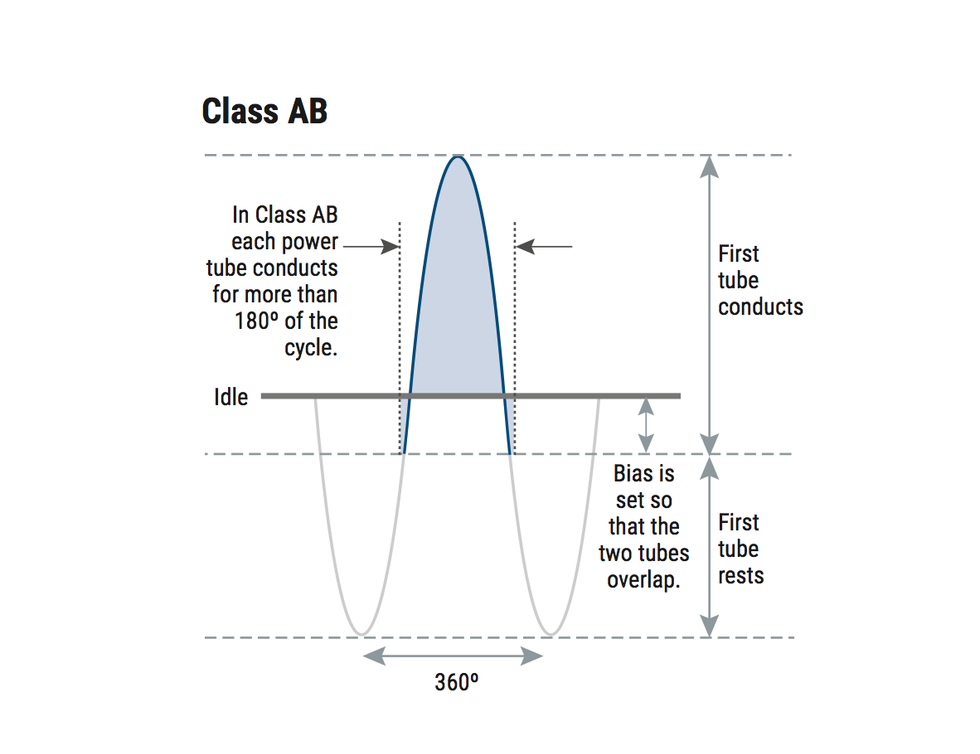
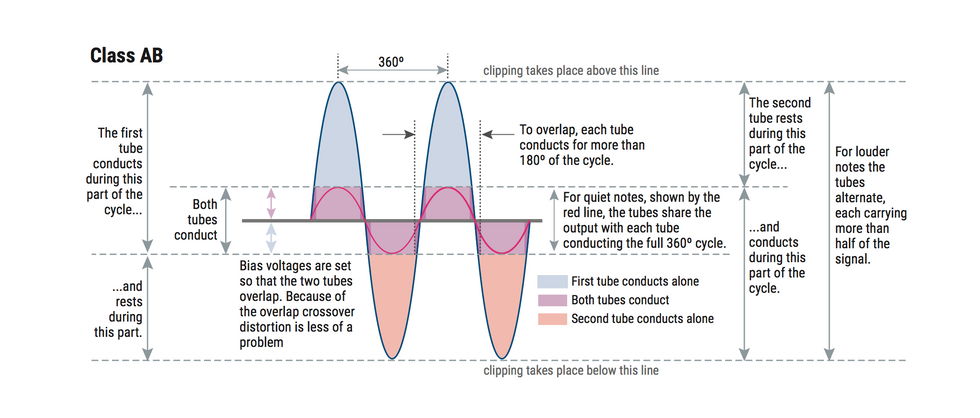
Just like the Princeton Reverb, there are three gain stages in the preamp circuit. The power amp circuit design is also based on a classic Fender black- and silver-panel-era recipe. It has dual EL84 power tubes in a push-pull Class AB configuration with fixed bias and a negative feedback loop. This means we should expect a nice, clean black-panel-style tone before the amp breaks up.
Before the power tubes sits a proper, high-performing, long-tail phase inverter based on the two available amplifier functions in the single V3 12AX7 tube. All Class AB push-pull amps need a phase inverter that splits one sine wave signal into two signals with opposite phase that are fed into each power tube. The Princeton Reverb has a weaker phase inverter than the Blues Junior, and the Blues Junior has a bigger loudspeaker but a smaller speaker cabinet, which we will get back to in a moment.
The small cabinet is the most significant bottleneck with the Blues Junior. At home, it works well for me, but onstage it gets too boxy and thin. The 12" speaker doesn’t have room to breathe in that small cabinet and would benefit greatly from a bigger space. You can change the tone by swapping the loudspeaker, but you won’t get more punch and bass response.
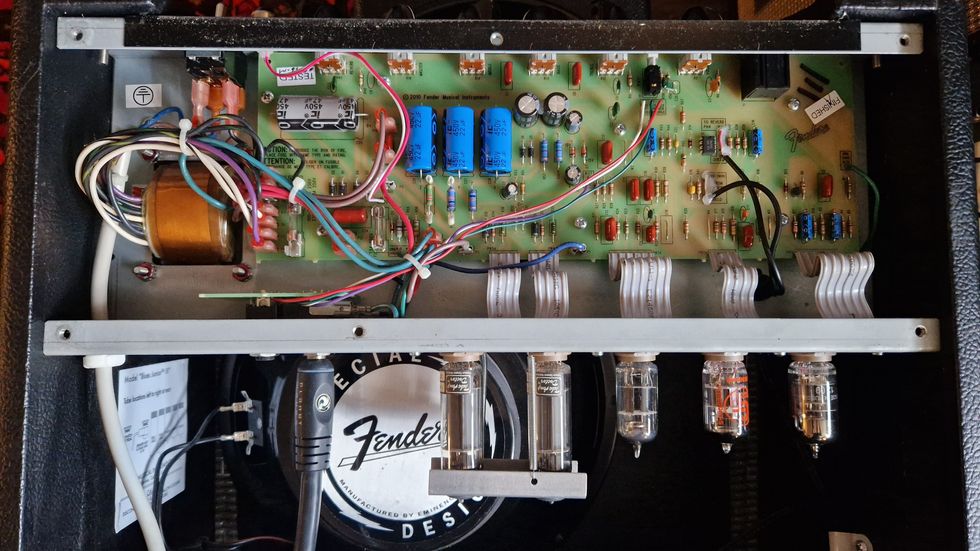
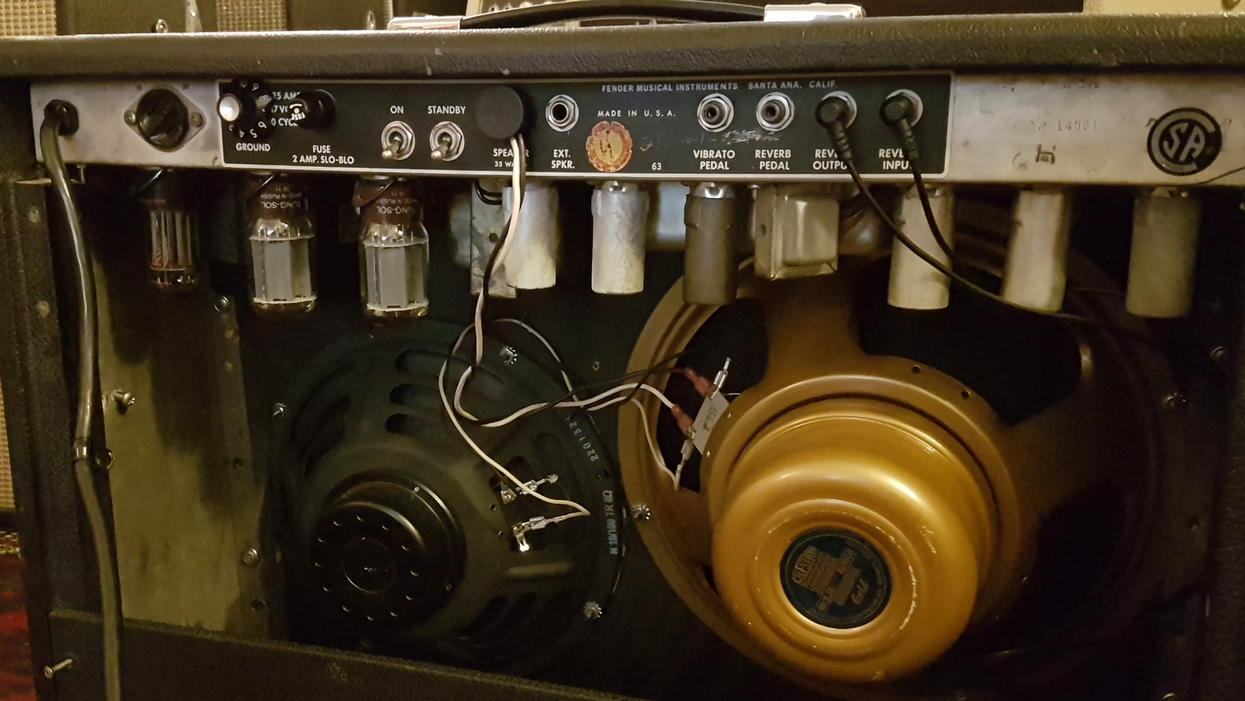
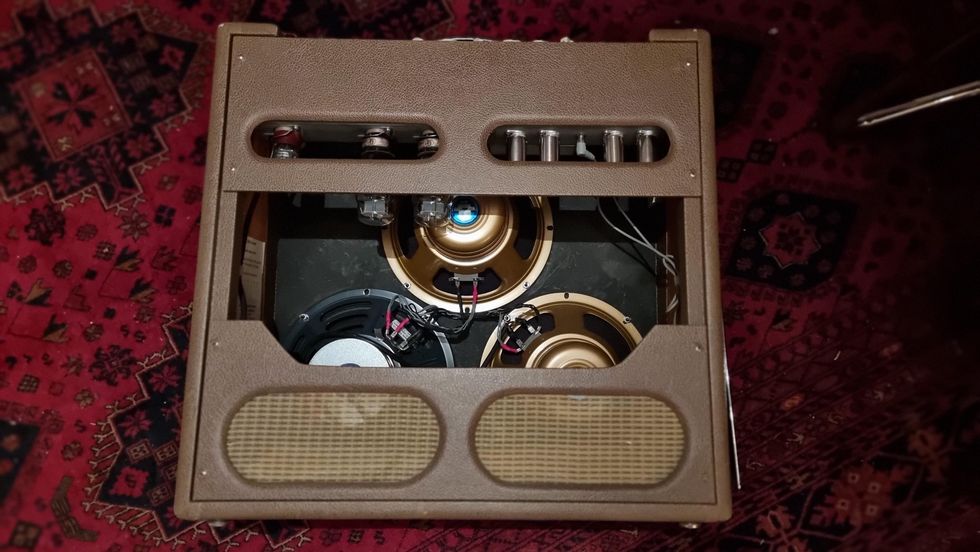
Here’s an interior look at Jens’ own Fender Blues Junior. Space is of the essence in this mighty mite of an amp.
Extended and Amended
Bigger extension cabinets are by far the easiest way to increase the spread and punch of a Blues Junior. Good speaker combinations are closed or semi-closed 1x12, 1x15, or 2x10 cabs. The Blues Junior expects an 8-ohm speaker load but will handle anything between 4 and 16 ohms. Since 8 ohms give you the most headroom, I recommend disabling the built-in speaker entirely and sending all the power to the bigger extension cabinet for a bigger tone.
If a bigger extension cabinet isn’t enough, you could consider upgrading the output transformer to a larger one. Some will argue that the Junior’s small output transformer is a weak point, limiting fullness and bass response. I, however, think the modest power transformer is properly sized for this small amp. It is, after all, supposed to be a low-wattage amp with early breakup. A bigger OT is not the right medicine in such a small combo, in my opinion, unless you’re always driving an extension cabinet.
Fixing the Fixed Bias
Before we leave the power amp section, I must mention that the Blues Junior is famously known for having a too-hot fixed bias setting on the EL84s. Juniors benefit from a cooler bias, which also increases tube lifetime. Since there is no available bias pot, you have to adjust the bias by changing the values of the two resistors—a 22k/R31 and 33k/R37, or a R52 and R51 in more recent models. This is especially helpful if your amp wears out EL84 tubes fast. The good news is that Fender has improved the latest model IV with a cooler bias setting.
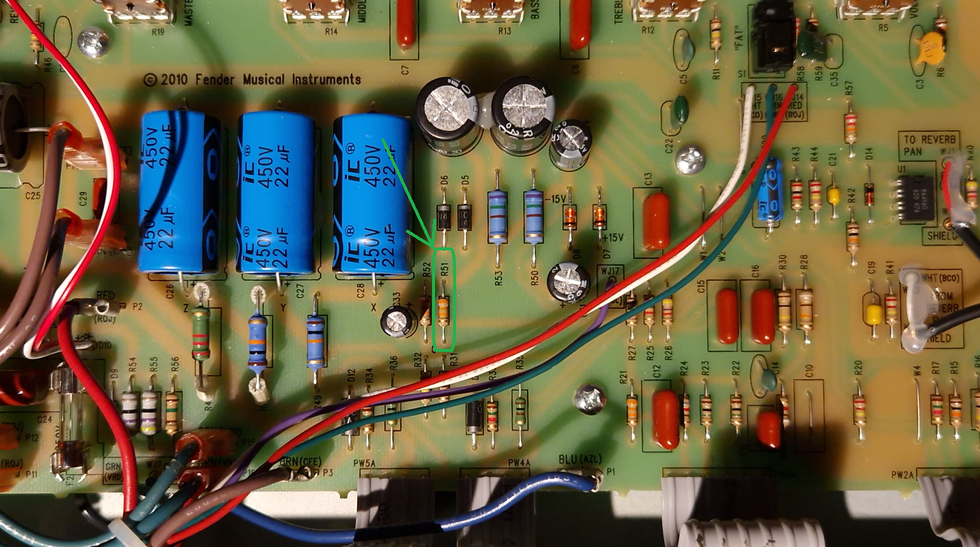
This photo shows the location of the R51 resistor in the Blues Junior circuit, important in recontouring the bias.
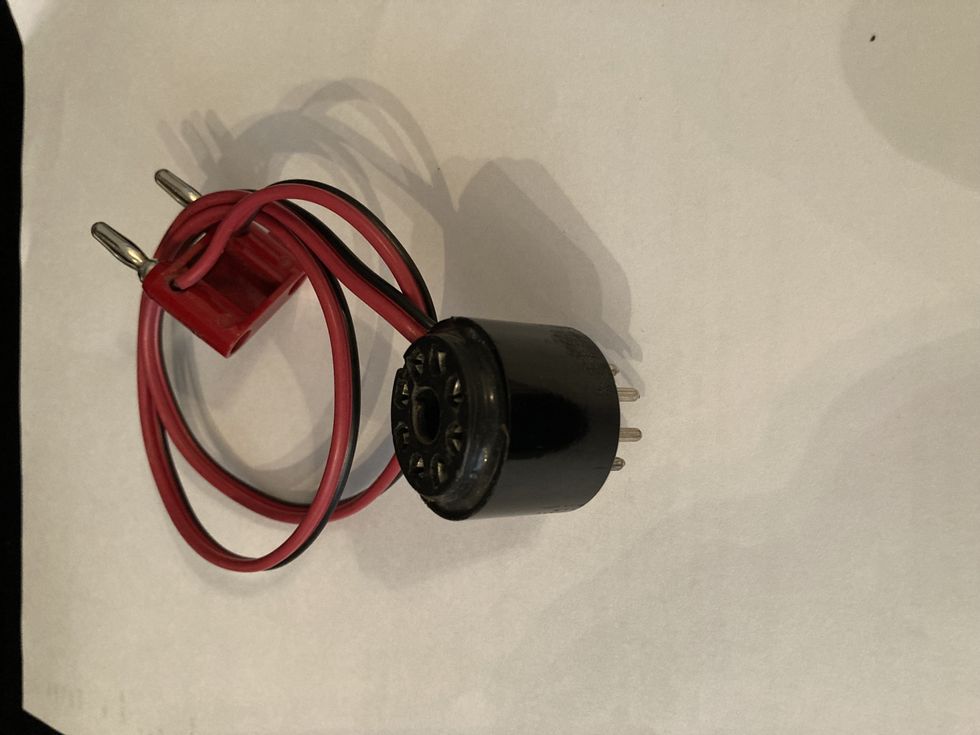
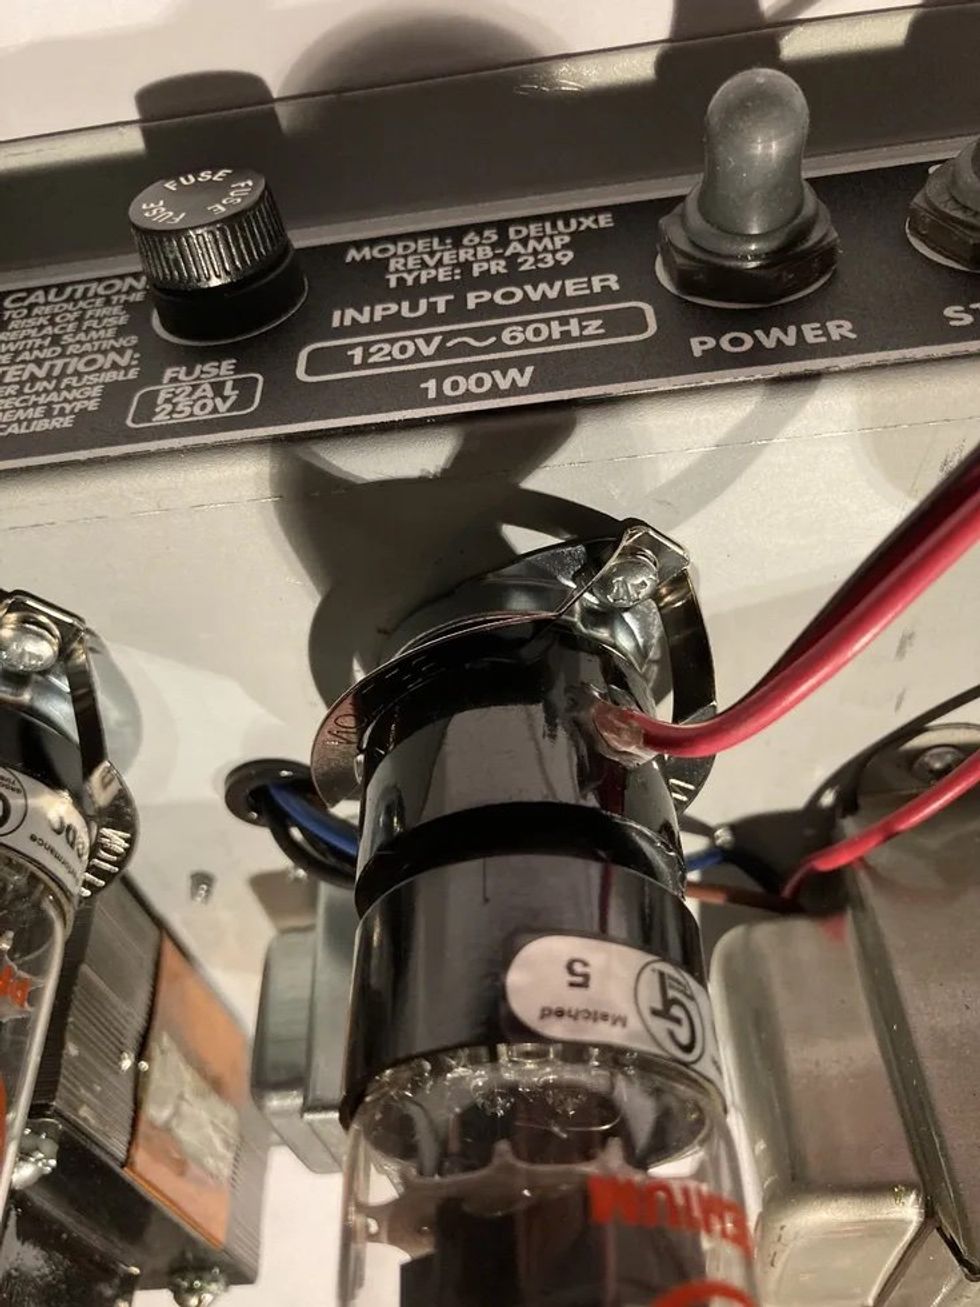
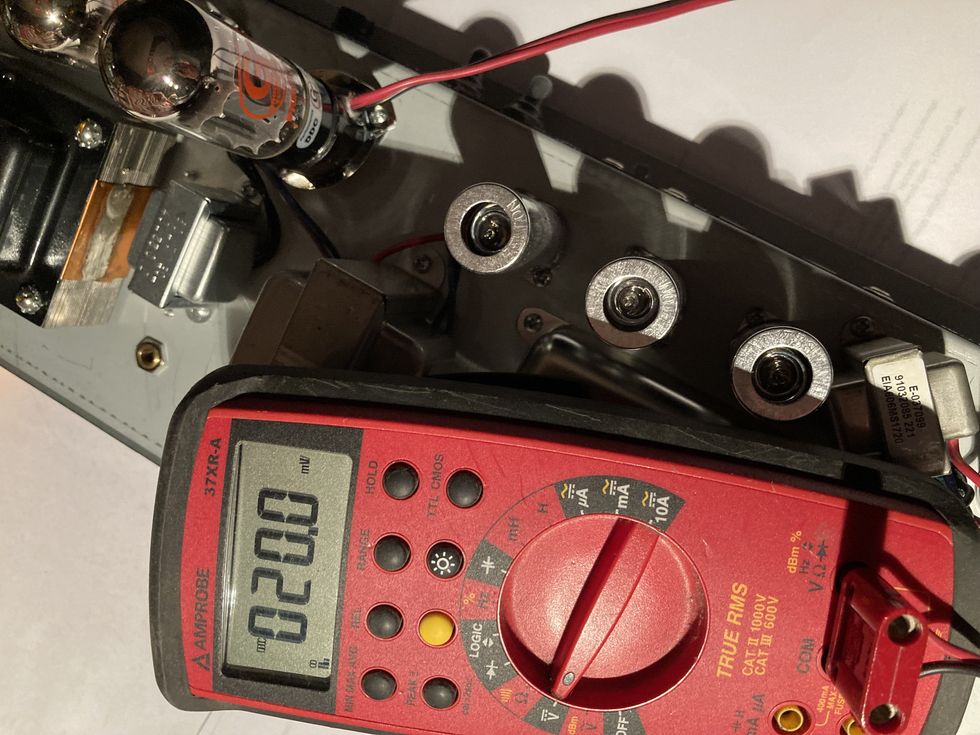
So, you’ll need to reduce the amp’s bias current to between 25 mA and 30 mA, from the factory-set 42 mA. (You’ll need a bias probe to measure the bias. To learn more about using a bias probe, see Jeff Bober’s story “Amp Man Returns, to Explain Tube Bias” in Premier Guitar’s June 2023 issue or online at premierguitar.com.) The simplest way to accomplish this via reducing the value of a resistor is to add another resistor in parallel. You simply solder a resistor on top of the existing one on the front side of the circuit. Twist the legs of the new resistor around the old ones a couple of times so it stays in place. That way, you don’t have to remove the original resistor. Then, warm up and apply the soldering tin to the legs. It’s that easy. I recommend adding a 220k resistor in parallel with the original 33k to see where that leads you. If you need to reduce more, use a smaller resistor or add another one in parallel until you are between 25 mA and 30 mA.
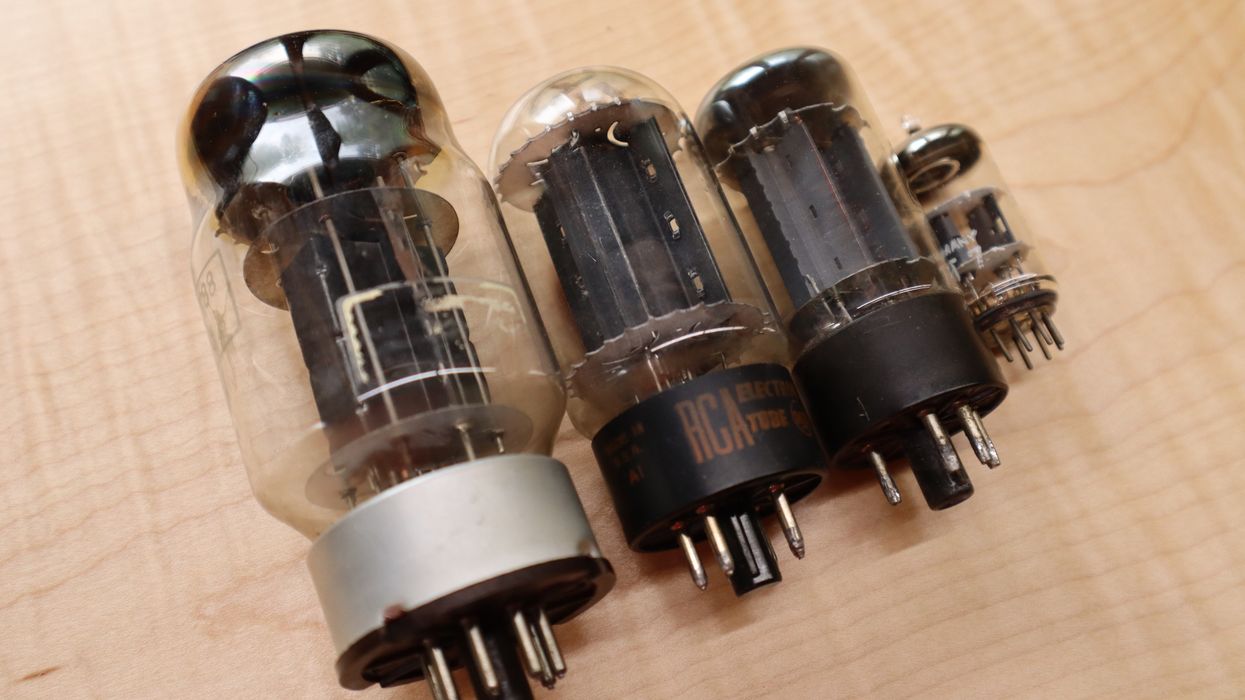
As far as tubes go, the circuit design will allow lower gain tubes—such as a 5751 or a 12AU7—in the preamp V1 and V2 positions. But you’d lose volume and break-up. I find that the amp’s sweet spot, meaning the transition between clean and distortion, is already pretty much where I want it, and I like the usable range between the volume and master volume controls, so I would advise against inserting low-gain tubes.
The tone stack and EQ balance is well-designed, too, with a nice, usable range in the bass, mid, and treble controls. The Junior can do both sparkling cleans and crunchy distortion. The mid control offers more mids than the scooped Princeton. With the mid knob set at max, I’m able to get some British-style distortion. If you think that your Blues Junior sounds a little glassy, you should experiment with other loudspeakers. Inserting a broken-in Celestion Greenback or a Jensen P12Q would easily make cranked tones smoother or the clean sound more authentic-vintage Fender. The Blues Junior III I’ve been playing lately comes with a Fender-labeled speaker made by Eminence—a good, all-round speaker with nice sparkle and a firm bottom end.
Doffing the Caps
Next up: a highly recommended maintenance mod. Electrolytic filter caps are important components in terms of noise, loudness, and clean headroom. The cheap, low-quality caps that come in blue or grey are a well-known problem with the Hot Rod Deluxe and Blues Junior. The good news is, they are quite easy to swap out. I recommend replacing these if you hear any 50Hz hum or see any signs of cap leakage. There are several cap replacement kits available online for the Blues Junior, running from about $60 to $100.
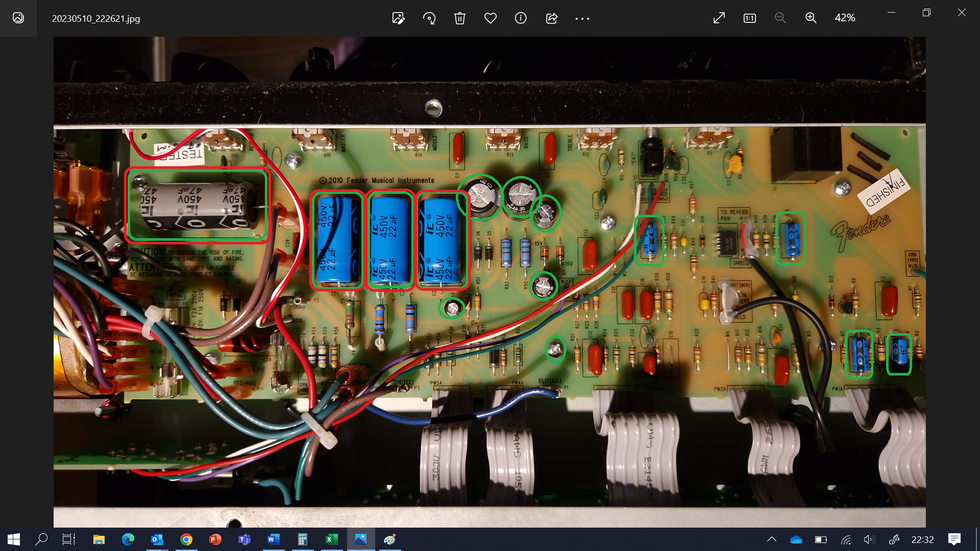
Note the 14 circled electrolytic capacitors in this photo. Filter cap replacement kits are affordable and widely available online.
Start by replacing the four largest capacitors: three with a value of 22 uF and one with a 47 uF value. Again, it’s simple. Just clip the legs off the factory-installed capacitors as close to the caps’ bodies as possible, and remove them. Then, twist the new caps’ legs around the old ones and solder them in place. Just be careful with both your clippers and soldering iron around the PCB. If that doesn’t get the results you want, replace the smaller caps, too.
Moving on to the reverb, I can understand the cost-efficiency decision that Fender made with the simplified, transistor-based circuitry. Not having a tube-and-transformer-based reverb lowers expense and weight, and there are fewer things that can fail. Luckily, there is a proper spring reverb tank in the back of the amp. In fact, the Blues Junior I, II, and III are famously known for having too much reverb. Anything above 2.5 on the reverb dial and the amp swims in overwhelming and bright ’verb.
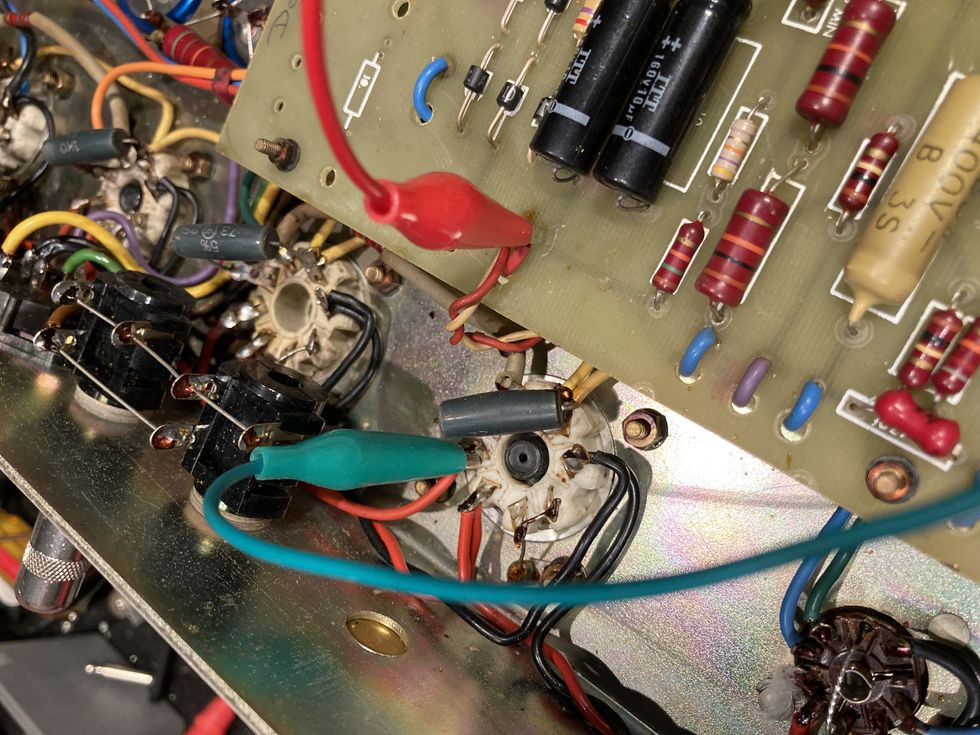
Another recommended, and cheap, mod is to add an 82k resistor in parallel with the original 220k/330k in the reverb circuit, to tame and darken the reverb. This goes parallel to the R44 (220k) resistor on the made-in-Mexico board or the R50 (330k) resistor on the made-in-U.S. green PCB. Once again, an easy fix. As in the bias adjustment mod we covered earlier, we solder a new 82k resistor on top of the existing 220k on the front side of the circuit. How? By twisting the leg of the new resistor around the old one a couple of times so that it stays in place, and then applying the soldering tin. Voilà!
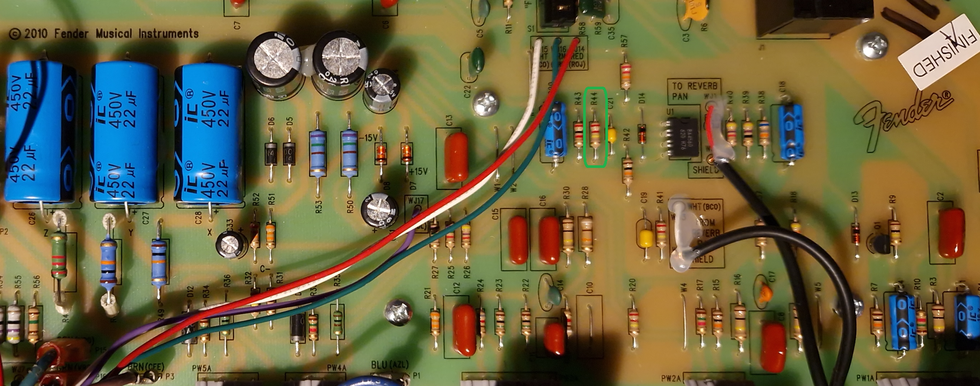
To restore the Junior’s classic Fender reverb sound, a new resistor should be wired in place atop the R44 factory resistor, circled in green.
With this mod, the reverb sounds more like the classic black- and silver-panel ’verbs, but with a wider knob-control span. I have read that the early made-in-the-States models have a darker reverb tone and might not require this move. But if you do this and find change isn’t enough, you may want to experiment with replacement reverb tanks with different decays.
So, that’s my take on this popular little warrior tube amp, and some easy mods. Even without changing the circuitry at all, with the Blues Junior, for a little money you get a lot of vintage Fender tone with a modern twist.
- Recording Dojo: How to Get Big Sounds from Little Amps ›
- Tube Amp Troubleshooting 101 ›
- Ask Amp Man: Diagnosing an Ailing Blues Junior ›
- DIY: How to Level, Crown & Dress Guitar Frets - Premier Guitar ›
Day 6 of Stompboxtober is here! Today’s prize? A pedal from Revv Amplification! Enter now and check back tomorrow for the next one!
Revv G3 Purple Channel Preamp/Overdrive/Distortion Pedal - Anniversary Edition
The Revv G3 revolutionized high gain pedals in 2018 with its tube-like response & tight, clear high gain tones. Suddenly the same boutique tones used by metal artists & producers worldwide were available to anyone in a compact pedal. Now the G3 returns with a new V2 circuit revision that raises the bar again.
A twist on the hard-to-find Ibanez MT10 that captures the low-gain responsiveness of the original and adds a dollop of more aggressive sounds too.
Excellent alternative to pricey, hard-to-find, vintage Mostortions. Flexible EQ. Great headroom. Silky low-gain sounds.
None.
$199
Wampler Mofetta
wamplerpedals.com
Wampler’s new Mofetta is a riff on Ibanez’s MT10 Mostortion, a long-ago discontinued pedal that’s now an in-demand cult classic. If you look at online listings for the MT10, you’ll see that asking prices have climbed up to $1k in extreme cases.
It would have been easy for Wampler to simply make a Mostortion clone and call it a day, but they added some unique twists to the Mofetta pedal. While the original Mostortion had a MOSFET-based op amp, it actually used clipping diodes to create its overdrive. The Mofetta is a fairly accurate replica and includes that circuitry, but also has a toggle switch for texture, which lets you choose between the original-style diode-based clipping in the down position and multi-cascaded MOSFET gain stages in the up position.
Luscious Low Gain and Meaty Mid-Gain
The Mofetta’s control panel is very straightforward and conventional with knobs for bass, mids, treble, level, and gain. The original Mostortion was revered for its low-gain tone and is now popular among Nashville session guitarists. Wampler’s tribute captures that edge-of-breakup vibe perfectly. I enjoyed using the pedal with the gain on the lower side, around 9 o’clock, where I heard and felt slight compression that gave single notes a smooth and silky feel. I particularly enjoyed the tone-thickening the Mofetta lent to my Ernie Ball Music Man Axis Sport’s split-coil sound as I played pop melodies and rootsy, triadic rhythm guitar figures. The Mofetta has expansive headroom, and as a result there’s a lot of space in which you can find really bold, cutting tones without muddying the waters too much. Even turning the gain all the way off yields a pleasing volume bump that would work well in a clean boost setting.
There’s a lot of space in which you can find really bold, cutting tones without muddying the waters too much.
Switching the texture switch up engages the MOSFET section, introducing cascading gain stages that elevate the heat and add flavor the original Mostortion didn’t really offer. Classic rock and early metal are readily available via the MOSFET setting. If you need to stretch out to modern metal sounds, the Mofetta probably isn’t the pedal for you. Again, the original Mostortion was, first and foremost, a low-to-mid-gain affair, so unless you’re using it as a boost with a high-gain amp, the Mofetta is not really a vehicle for extreme sounds.
One of the Mofetta’s real treats is its responsiveness. Even at higher gain settings the Mofetta is very touch sensitive. You can tap into a wide range of dynamic shading just by varying the strength of your pick attack. I enjoyed playing fast, ascending scalar passages, picking with a medium attack then really slamming it hard when I hit a high climactic note, to get the guitar to really scream.
The Verdict
Wampler is a reliably great builder who creates pedals with a purpose. I own two of his pedals, the Dual Fusion and the Pinnacle, and both are really exceptional units. The Mofetta captures the essence of the Mostortion and makes it available at an accessible price. But even if you’ve never heard or played an original Mostortion, you’ll appreciate the truly versatile EQ, touch sensitivity, and the bonus texture switch, which expands the Mofetta’s range into more aggressive spaces. The wealth of dirt boxes on the market today can make a player jaded. But Wampler pushed into a relatively unique, satisfying, and interesting place with the Mofetta.
Although inspired by the classic Fuzz Face, this stomp brings more to the hair-growth game with wide-ranging bias and low-cut controls.
One-ups the Fuzz Face in tonal versatility and pure, sustained filth, with the ability to preserve most of the natural sonic thumbprint of your guitar or take your tone to lower, delightfully nasty places.
Pushing the bias hard can create compromising note decay. Difficult to control at extreme settings.
$144
Catalinbread StarCrash
catalinbread.com
Filthy, saturated fuzz is a glorious thing, whether it’s the writ-large solos of Big Brother and the Holding Company’s live “Ball and Chain,” the soaring feedback and pure crush of Jimi Hendrix’s “Foxy Lady,” or the sandblasted rhythm textures of Queens of the Stone Age’s “Paper Machete.” It’s also a Wayback Machine. Step on a fuzz pedal and your tone is transported to the ’60s or early ’70s, which, when it comes to classic guitar sounds, is not a bad place to be.
Catalinbread’s StarCrash is from their new ’70s collection, so the company is laying its Six Million Dollar Man trading cards on the table—upping the ante on traditional fuzz with more controls and, according to the company’s website, a little more volume than the average fuzz pedal, while still staying in the traditional Fuzz Face lane.
The Howler’s Viscera
Arbiter Electronics made the first Fuzz Face in 1966. The StarCrash is inspired by that 2-transistor pedal, but benefits from evolution, as did almost all fuzz pedals in the ’70s, when the standard shifted from germanium to silicon circuitry to improve the consistency of the effect’s performance. The downside is that germanium is gnarlier to some ears, and silicon transistors don’t respond as well to adjustments made via a guitar’s volume control.
While Fuzz Faces have only two knobs, volume and fuzz, the silicon StarCrash has three: volume, bias, and low-cut. Catalinbread’s website explains: “We got rid of that goofy fuzz knob. We know that 95 percent of all players run it dimed, and the remaining 5 percent use their guitar’s volume knob to rein it in.”
I suspect there are plenty of players who, like me, do adjust the fuzz control on their pedals, but the most important thing is that the core fuzz sound here is excellent—bristly and snarling, with a far girthier tone than my reissue Fuzz Face. It’s also, with the bias and low-cut controls, far more flexible. The low-cut control allows you to range from a traditional, comparatively thinner Fuzz Face sound (past noon and further) to the StarCrash’s authentic, beefier voice (noon and lower). Essentially, it cuts bass frequencies from 40 Hz to 500 Hz, resulting in an aural menu that runs from lush and lowdown to buzzy and slicing. And the bias control is a direct route to the spitty, fragmented, so-called Velcro-sound that’s become a staple of the stoner-rock/Jack White school of tone. The company calls this dial a “dying battery simulator,” and it starves the second transistor to achieve that effect.
Sweet Song of the Tribbles
Playing with the StarCrash is a lot of fun. I ran it through a pair of Carr amps in stereo, adding some delay and reverb to mood, and used a variety of single-coil- and humbucker-outfitted guitars. While both pickup types interacted well with the pedal, the humbuckers were most pleasing to my ears with the bias cranked to about 2 o’clock or higher, since the ’buckers higher output allowed me to let notes sustain longer before sputtering out. Keeping the low-cut filter at 9 o’clock or lower also helped sustain and depth in the Velcro-fuzz zone, while letting more of the instruments’ natural voices come through, of course.
With the low-cut filter turned up full and the bias at 10 o’clock, I got the StarCrash to be the perfect doppelganger of my Hendrix reissue Fuzz Face. But that’s such a small part of the pedal’s overall tone profile. It was more fun to roll off just a bit of bass and set the bias knob to about 2 or 3 o’clock. Around these settings, the sound is huge and grinding, and yet barre chords hold their character while playing rhythm, and single-note runs, especially on the low strings, are a filthy delight, with just the right schmear of buttery sustain plus a hint of decay lurking behind every note. It’s such a ripe tone—the sonic equivalent of a delicious, stinky cheese—that I could hang with it all day.
Regarding Catalinbread’s claims about the volume control? Yes, it gets very loud without losing the essence of the notes or chords you’re playing, or the character of the fuzz, which is a distinct advantage when you’re in a band and need to stand out. And it’s a tad louder than my Fuzz Face but doesn’t really bark up to the level of most Tone Bender or Buzzaround clones I’ve heard. In my experience, these germanium-chipped critters of similar vintage can practically slam you through the wall when their volume levels are cranked.
The Verdict
Catalinbread’s StarCrash—with its sturdy enclosure, smooth on/off switch and easy-to-manipulate dials—can compete with any Fuzz Face variant in both price and performance, scoring high points on the latter count. The bias and low-cut dials provide access to a wider-than-usual variety of fuzz tones, and are especially delightful for long, playful solos dappled with gristle, flutter, and sustain. Kudos to Catalinbread for making this pedal not just a reflection of the past, but an improvement on it.
Catalinbread Starcrash 70 Fuzz Pedal - Starcrash 70 Collection
StarCrash 70 Fuzz PedalIntrepid knob-tweakers can blend between ring mod and frequency shifting and shoot for the stars.
Unique, bold, and daring sounds great for guitarists and producers. For how complex it is, it’s easy to find your way around.
Players who don’t have the time to invest might find the scope of this pedal intimidating.
$349
Red Panda Radius
redpandalab.com
The release of a newRed Panda pedal is something to be celebrated. Each of the company’s devices lets us crack into our signal chains and tweak its inner properties in unique, forward-thinking ways, encouraging us to be daring, create something new, and think about sound differently. In essence, they take us to the sonic frontier, where the most intrepid among us seek thrills.
Last January, I got my first glimpse of the Radius at NAMM and knew that Red Panda mastermind Curt Malouin had, once again, concocted something fresh. The pedal offers ring modulation and frequency shifting with pitch tracking and an LFO, and I heard classic ring-mod tones as the jumping off point for oodles of bold sounds generated by envelope and waveform-controlled modulation and interaction. I had to get my hands on one.
Enjoy the Process
I’ve heard some musicians talk about how the functionality of Red Panda’s pedals are deep to a point that they can be hard to follow. If that’s the case, it’s by design, simply because each Red Panda device opens access to an untrodden path. As such, it can feel heady to get into the details of the Radius, which blends between ring modulation and frequency shifting, offering control of the balance and shift ratios of the upper and lower sidebands to create effects including phasing, tremolo, and far less-natural sounds.
As complex as that all might seem, Red Panda’s pedals always make it easy to strip the controls down to their most essential form. The firmest ground for a guitarist to stand with the Radius is a simple ring-mod sound. To get that, I selected the ring mod function, turned off the modulation section by zeroing the rate and amount knobs, kept the shift switch off and the range switch on its lowest setting. With the mix at noon and the frequency knob cranked, I found my sound.
From there, by lowering the frequency range, the Radius will yield percussive tremolo tones, and the track knob helped me dial that in before opening up a host of phaser sounds below noon. By going the other direction and kicking the rate switch into its higher setting, a world of ring-mod tweaking opens up. There are some uniquely warped effects in these higher settings that include dial-up modem sounds and lo-fi dial tones. Exploring the ring mod/frequency shift knob widens the possibilities further to high-pitched, filtered white noise and glitchy digital artifacts at its extremes.
There are wild, active sounds within each knob movement on the Radius, and the modulation section naturally brings those to life in more ways than a simple knob tweak ever could, delivering four LFO waveforms, a step modulator, two x-mod waveforms, and an envelope follower. It’s within these settings that I found rayguns, sirens, Shepard tones, and futuristic sounds that were even harder to describe.
It’s easy to imagine the Radius at the forefront of sonic experiments, where it would be right at home. But this pedal could easily be a studio device when applied in low doses to give a track something special that pops. The possible applications go way beyond guitars.
The Verdict
The Radius isn’t easy to plug and play, but it’s also not hard to use if you keep an open mind. That’s necessary, too: The Radius is not for guitar players who prefer to stay grounded; this pedal is for sonic-stargazers and producers.
I enjoyed pairing the Radius with various guitar instruments—12-string, baritone, bass—and it kept getting me more and more excited about sonic experimentation. That feeling is a big part of what’s special about this pedal. It’s so open-ended and controllable, continuing to reveal more of its capabilities with use. Once you feel like you’ve gotten something down, there are often more sounds to explore, whether that’s putting a new instrument or pedal next to it or exploring the Radius’ stereo, MIDI, or expression-pedal functionality. Like many great instruments, it only takes a few minutes to get started, but it could keep you exploring for years.