
Six common tube-amp ailments every guitarist can cure.
For a good percentage of 6-string guitarists out there, a tube amp isn’t just the preferred way to achieve the ultimate tone—it’s heresy to consider playing anything that doesn’t have glowing valves around back. And the longer you play, the more likely it is that you’ve been through a bunch of brands, models, and output-tube types in effort to find the sound(s) in your head. We all tend to start out with what we can afford, and gradually we graduate to something better—and better again—all to achieve the next degree of tonal satisfaction.
But at some point, most of us tube-amp fans also experience some sort of failure related to this arcane—yet fantastic and sonically satisfying— technology from the 1950s, and it’s often at the worst possible time. Unfortunately, there’s no practical or accurate way to predict when or where this will occur. But, as someone who has been in the repair and modification business for more than 25 years, I can tell you there’s a very good chance it’ll happen to you sometime if it hasn’t already. Sans a crystal ball and the ability to see into the future, the best way to prepare is to practice preventive maintenance and be prepared for the inevitable with a little bit of basic knowledge and the proper contingent of tools and parts to back it up. To that end, this article will furnish you with must-know information that will help save the gig and allow you to execute basic troubleshooting and repair on your amplifier.
Tube-Amp First-Aid Kit Essentials
Every guitarist who plays a tube amp, whether it’s a combo or a head and cab, should have the following tools and spare parts on hand to address low level first-aid needs:
- LED flashlight
- Small, inexpensive multimeter
- 1/4" female-to-female mono adapter
- Extra speaker cable
- Small flat-blade screwdriver
- Standard-size flat-blade screwdriver
- Philips screwdriver (for removing rear panel)
- Spare fuses
- Spare rectifier tube (if applicable)
- Spare set of matched power tubes
- At least one spare of each type of preamp-type tube in your amp
- Oven mitt or ‘Ove’ Glove
- Electronic contact cleaner without lubricant (for cleaning tube sockets)
- Electronic contact cleaner with lubricant (for cleaning 1/4" jacks)
- Spare amp, head, or power-amp pedal (for emergency gig triage)
- 1' speaker-extension cable with 1/4" male and female
- 1/4" connectors OR a 1/4" female-to-female mono adapter
Gig-Meltdown Triage
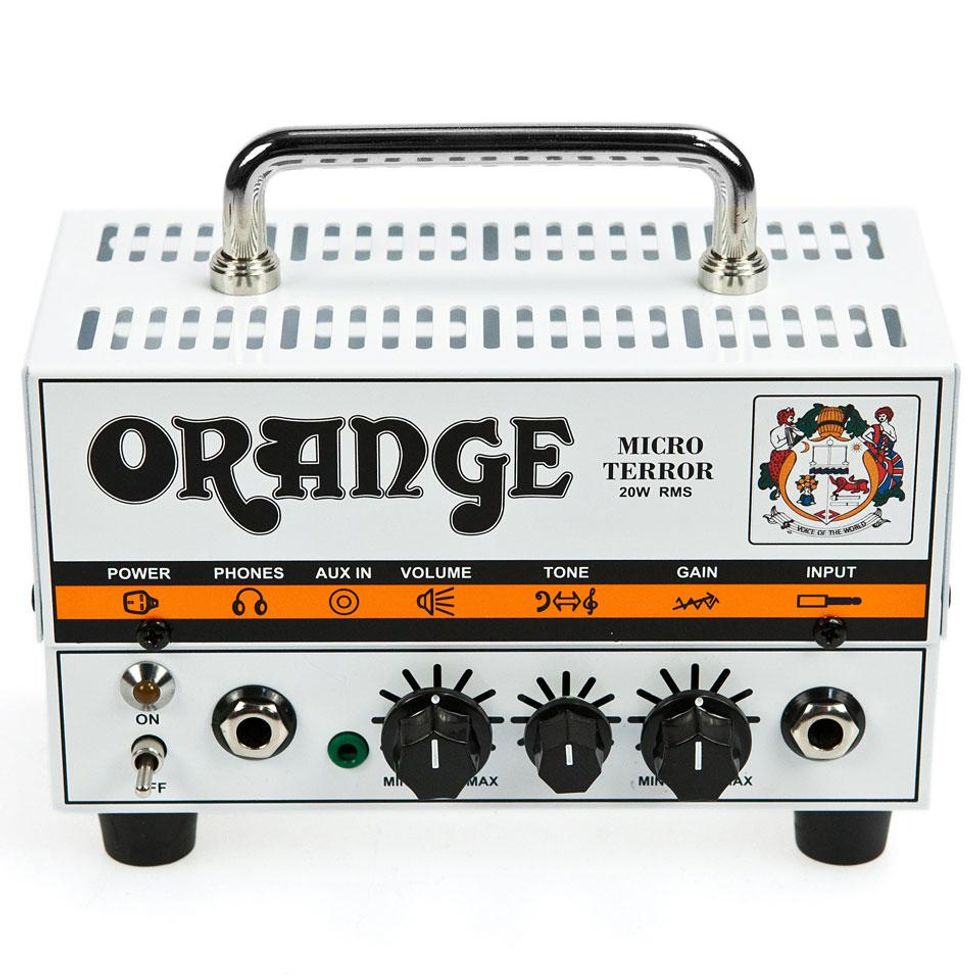
If your tube combo dies on a gig, a pint-sized solid-state head like the Orange Micro Terror or a small, mic-able solid-state amp such as the Roland CUBE-80XL—perhaps paired with your favorite overdrive/distortion pedal—will get you through the gig and avoid the embarrassment of cancelling mid-show.
The first and most important tip I can give is to bring a spare amp to every gig. If you notice, quite a few of the players you see in television performances have two amps of the same make. This is generally not for increased volume, tonal variety, or to look cool—it’s life insurance. There’s no time to change out or troubleshoot an amp in that situation, and it would certainly be an epic fail if you were performing on a latenight talk show and your one and only amp failed during the performance of a lifetime.
I know some of you will say you either can’t afford or don’t have room for another amp in your car, band van, or on your stage, but your backup doesn’t have to be the same model you normally prefer. If you don’t have another tube amp that’ll suffice, many solid-state options on the market offer an affordable solution. Remember, your backup doesn’t have to blow minds with its peerless tonal ecstasy—it just has to get you through the gig.
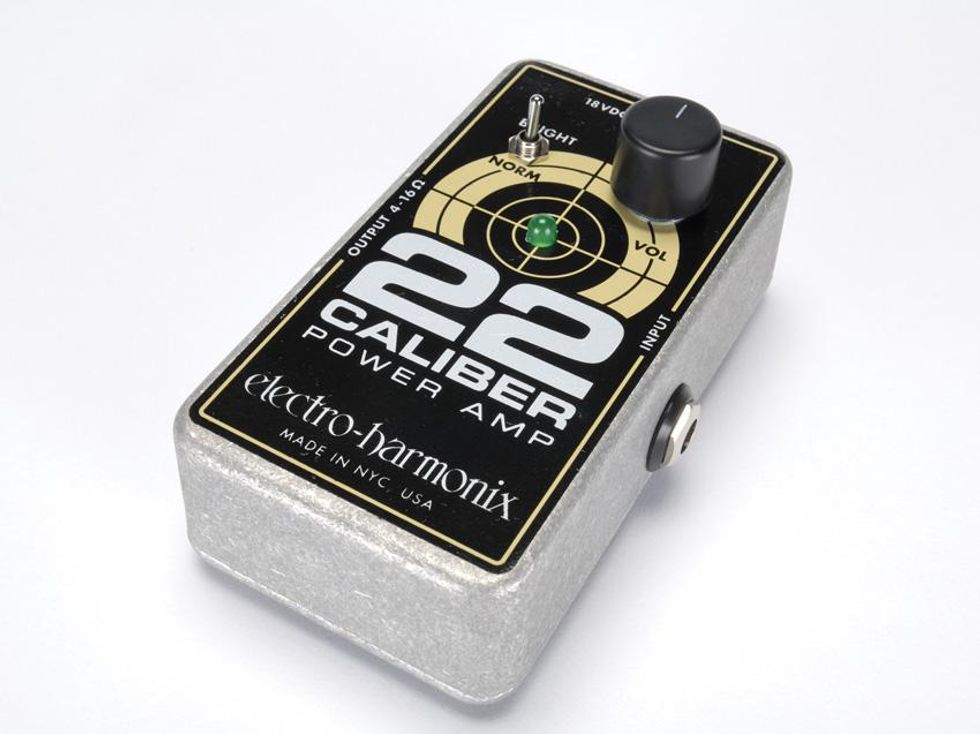
Stompbox-sized amps like the Electro-Harmonix Caliber 22 (above) and Diago Little Smasher (below) are an easy-as-pie lifesaver when your tube amp melts down on the go.
Whether you play a combo or a stack, you just need a spare head or combo with a speaker out. Something like an Orange Micro Terror head ($149 street) or a Roland CUBE- 80XL combo ($379 street) and an overdrive pedal will do—and if the volume isn’t raging, you can just mic the cab. Or, if most of your tone shaping comes from pedals and outboard gear, something like the überportable Electro-Harmonix Magnum 44 ($150 street) or Diago Little Smasher ($190 street) can be a godsend—even if you still need to mic your cab.
With most tube combos, you can use a 1/4" male-tofemale speaker cable or female-to-female mono adapter (which costs approximately $2 street) and another speaker cable to connect the internal speaker to your backup power amp. (Note: Because most cable adapters, whether male-to-female or female-to-female, aren’t up to the same specs as quality speaker cable, you should only resort to using them for short periods such as during an emergency onstage meltdown.) All of the aforementioned options are light, portable solutions that can be kept on hand with minimal inconvenience so you can do a quick swap and troubleshoot your main amp during a break or after your gig—when you’re not under performance pressure. That’s much more expedient than troubleshooting onstage—and it will keep your bandmates and audience happy.
Troubleshooting After the Gig
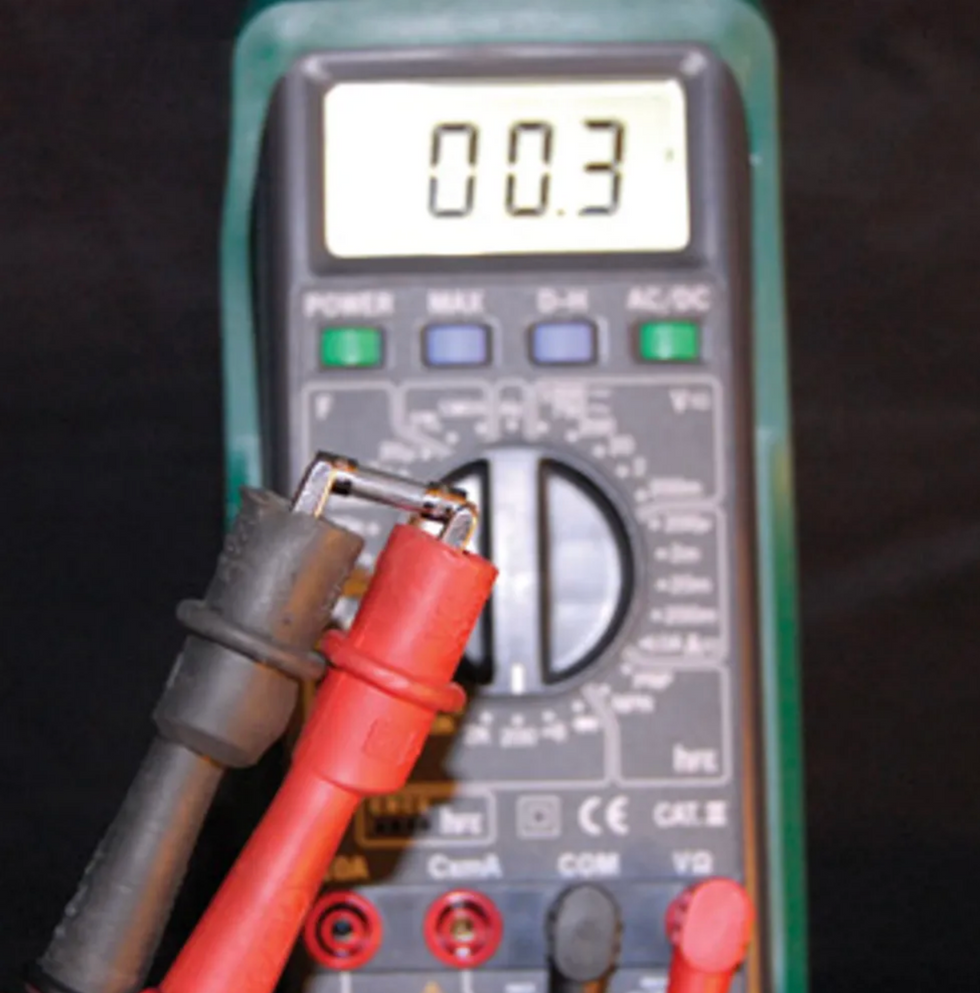
Because fuses can often appear good to the naked eye, it’s best to test them with a multimeter set to read continuity in ohms.
Now let’s move on to actual first-aid measures. It goes without saying, that if you think your amp may have issues, it’s probably either because it doesn’t sound right or isn’t making sound at all. Although it’s a bummer to deal with this at all, hopefully it happens at home or during a rehearsal, so it doesn’t interrupt a gig.
The first step to take when you think there’s something wrong with your amp is to make sure it’s actually the amp that’s faulty. To do so, first, plug directly into your amp, bypassing any pedals or effects gear. If the amp functions properly, look elsewhere in the signal chain to pinpoint the problem. If it still won’t work, try a different 1/4" cable, and if that doesn’t fix the problem, use a different guitar. If the problem persists, it’s probably your amp. The following sections detail some of the most common issues that the average guitarist should feel comfortable detecting and rectifying (forgive the pun) without going to an experienced amp-repair tech.
Is the Indicator Lamp Illuminated?
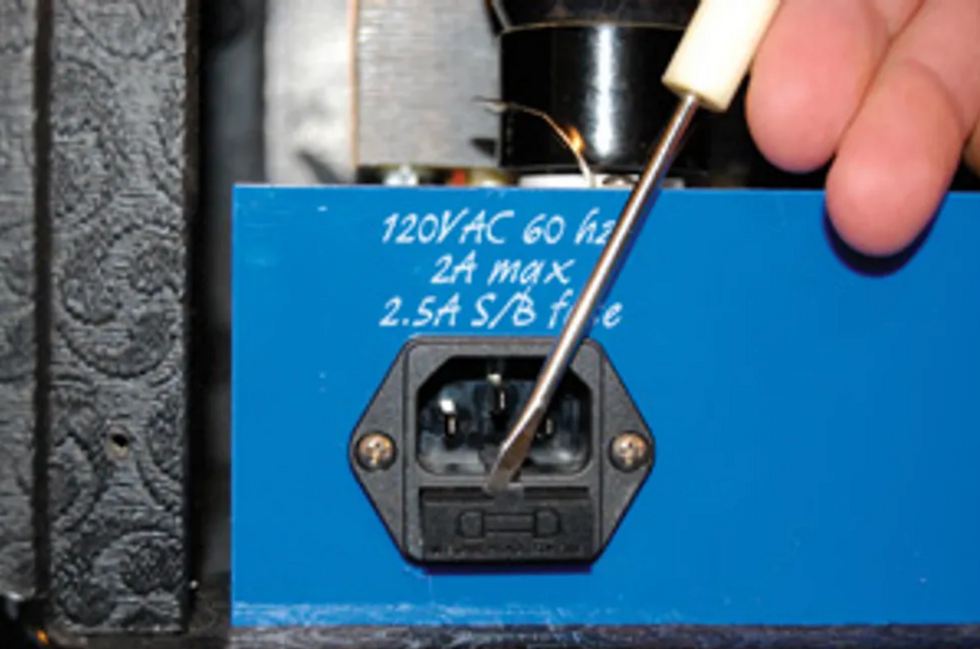
Some fuse holders are integrated with the line-cord receptacle and require a small flathead screwdriver.
If not, it’s probably because of a blown fuse. Usually a fuse blows due to a failure in the amp, but occasionally it’s due to something as simple as a power surge. Because fuses can sometimes look good to the naked eye even when they’re blown, the best way to check is to use a multimeter. Set the meter to read continuity in ohms (Ω) and measure across the fuse. If the meter indicates continuity or an almost zero reading, the fuse is good. If not, you’ll need to replace it.
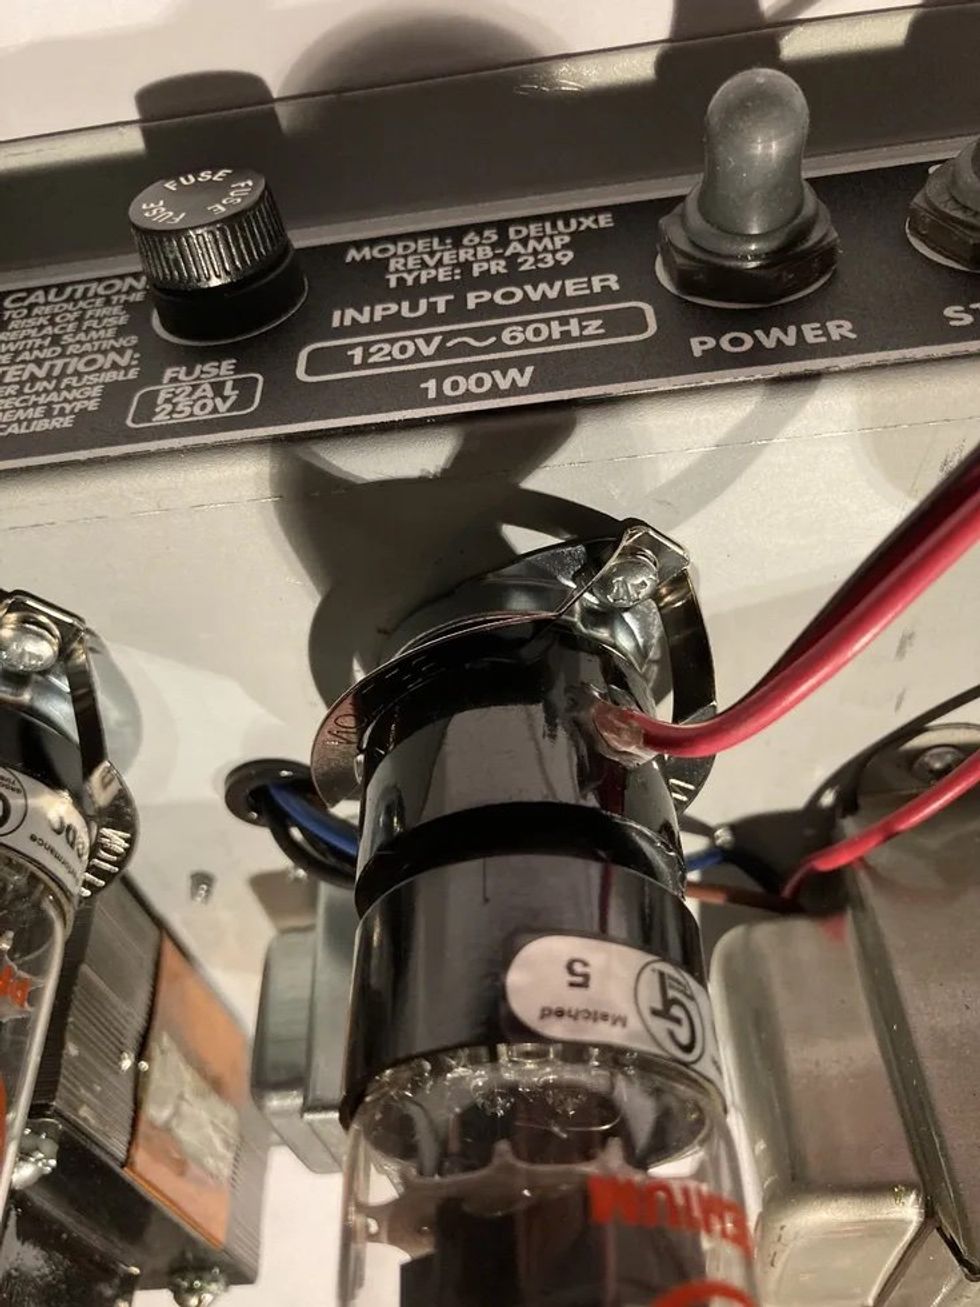
To avoid buzzkill during a productive home jam session or band rehearsal, I recommend you get to know the fuses in all your amps and carry extras so you can pop them in and keep rocking. Some fuse holders are easy to find and as easy to operate as a push and a turn. Some require use of a flat-blade screwdriver. Others are an integral part of the line-cord receptacle and require you to remove the cord and use a small flat-blade screwdriver to pry out the fuse holder. Whichever type your amp uses, check the value of the fuse currently installed—especially if you’re not the original owner—and make sure it’s correct. If your amp has multiple fuses, such as a high-tension (aka “high-voltage” or “HT”) or output fuse, make sure you have multiple replacements for each.
One point that’s crucial to keep in mind is that you should never replace the fuse with a substantially higher current rating just to keep the amp running. If a fuse of the correct value continues to fail, the amp has a problem that needs to be addressed.
In such a scenario, possible causes for repeated fuse failure could be:
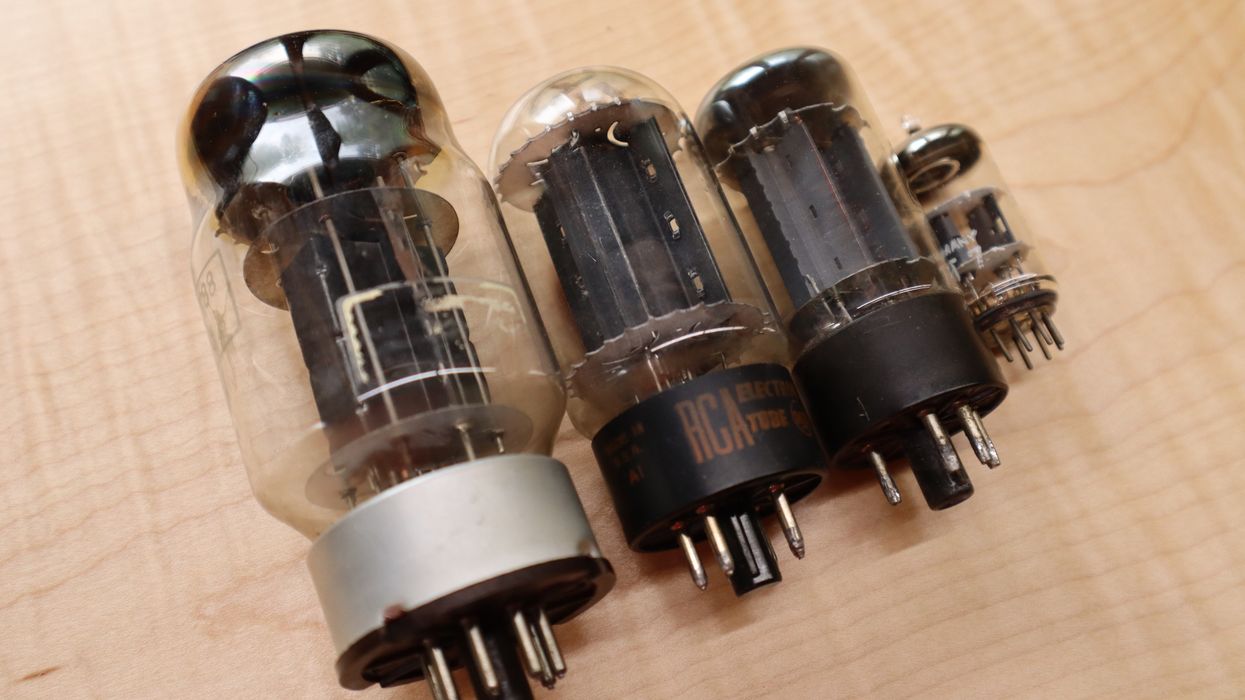
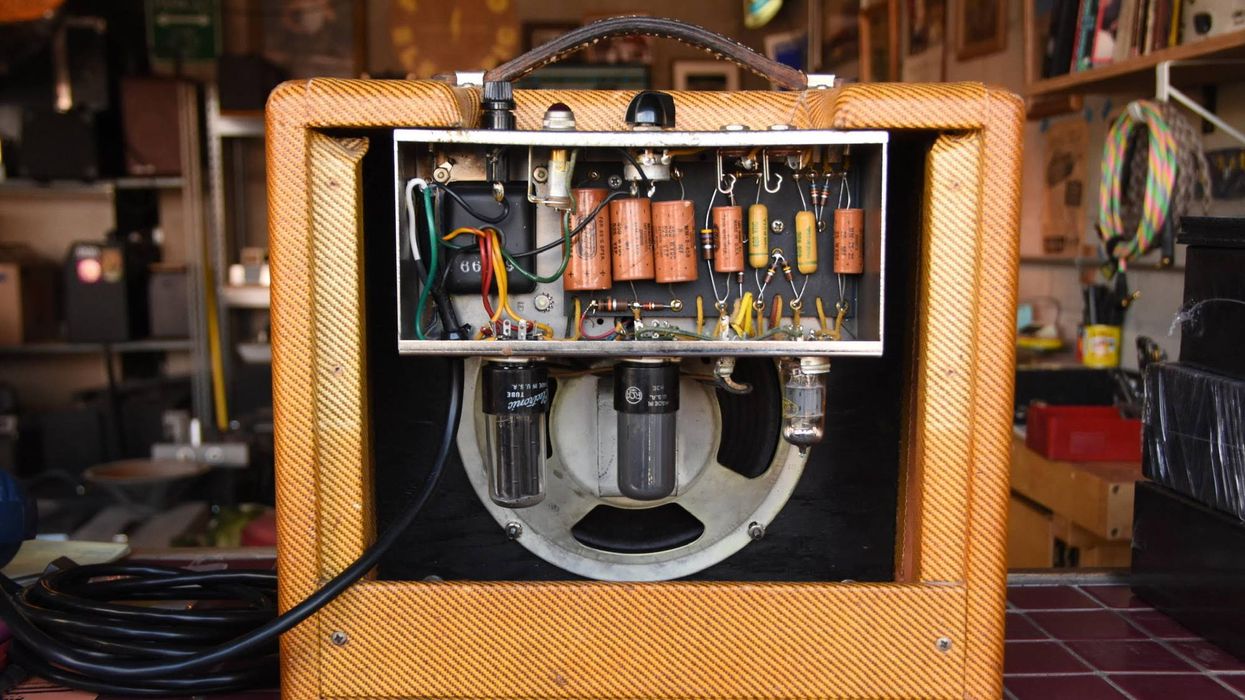
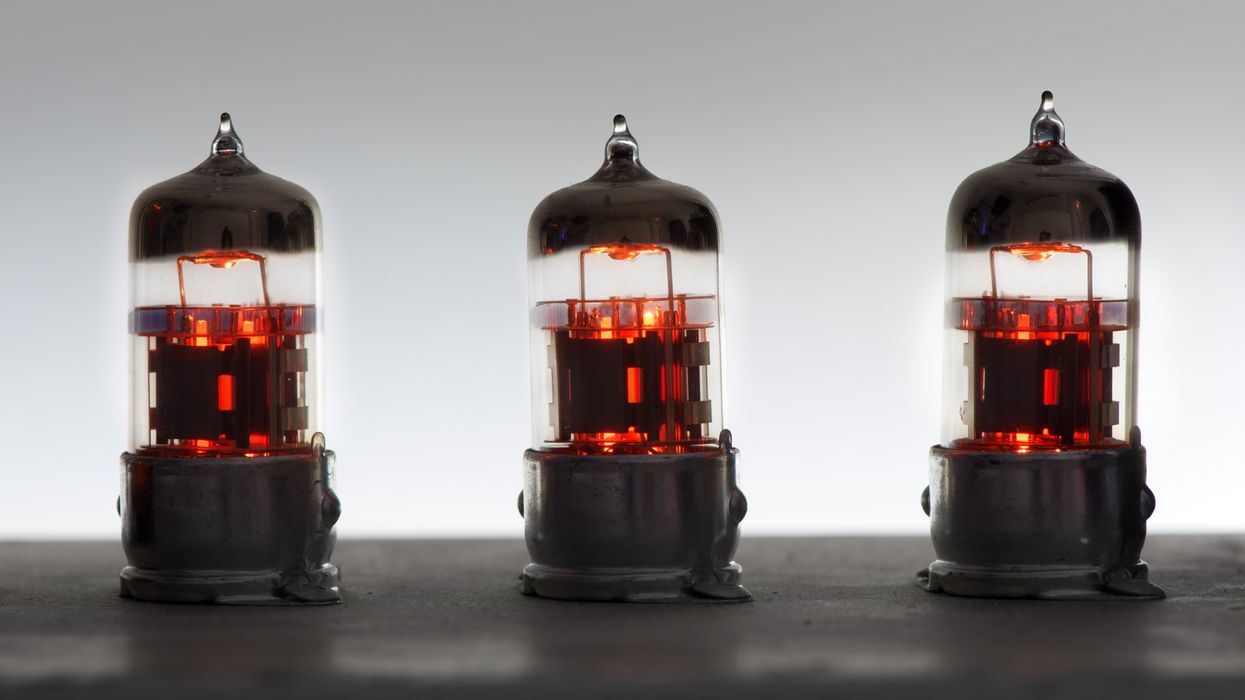
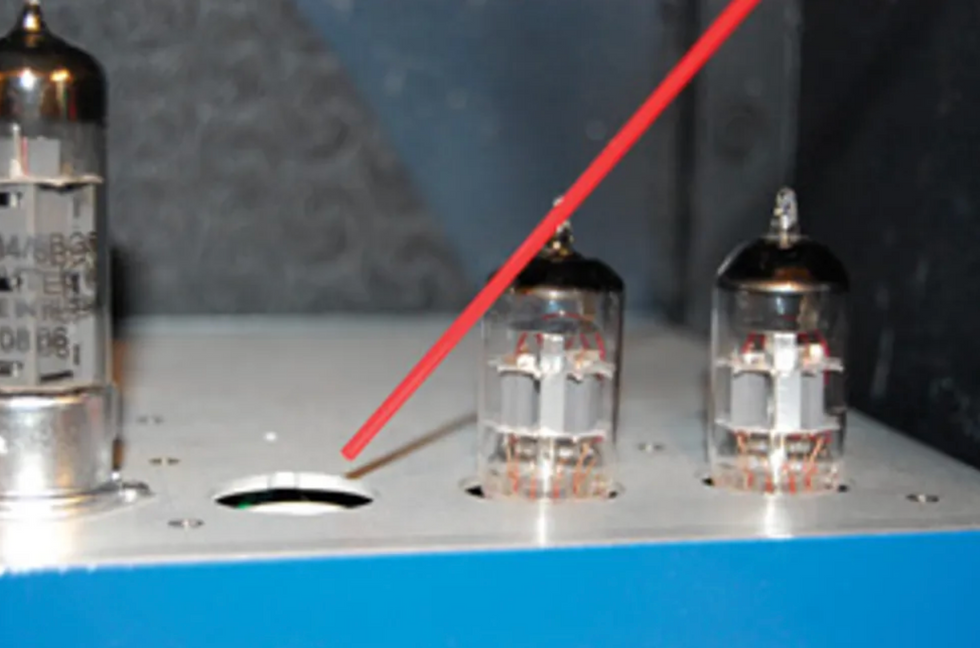
- A faulty rectifier tube. If your amp uses tube rectification in its power supply, a shorted rectifier tube can cause a fuse to repeatedly blow. To see if this is the case, locate the rectifier tube in the amp—it’s usually the tube closest to the mains (AC) transformer, and it’s typically a 5U4, 5Y3, 5AR4, GZ34, or 6X4. (Side note: It’s a good idea to know what kind of rectifiers are used in all your amps and to keep one of each necessary type in your spares kit.) After you’ve located the rectifier, install a new fuse and a new rectifier tube and try the amp again. If it now functions properly, you’ve found the cause of the failure. If not, replace the original rectifier tube and continue troubleshooting.
- A faulty output tube. This is an especially likely culprit if the fuse(s) failing is an HT or output fuse. If you suspect this is a problem, install the new fuse(s) and replace the full set of matched power tubes. If this corrects the fuse-blowing issue, you’ve found the cause of the failure. However, this unfortunately does not mean the amp has a clean bill of health. Some tube failure can cause internal components to fail. If you replace the power tubes and notice lackluster performance, an increase in hum, or one or more tubes glowing exceptionally red, the amp will need to be serviced by an experienced tech, because more than likely the grid or screen-grid resistor(s) have failed. If replacing the output tubes has not alleviated the problem, re-install the original tubes and have the amp serviced by an experienced tech.
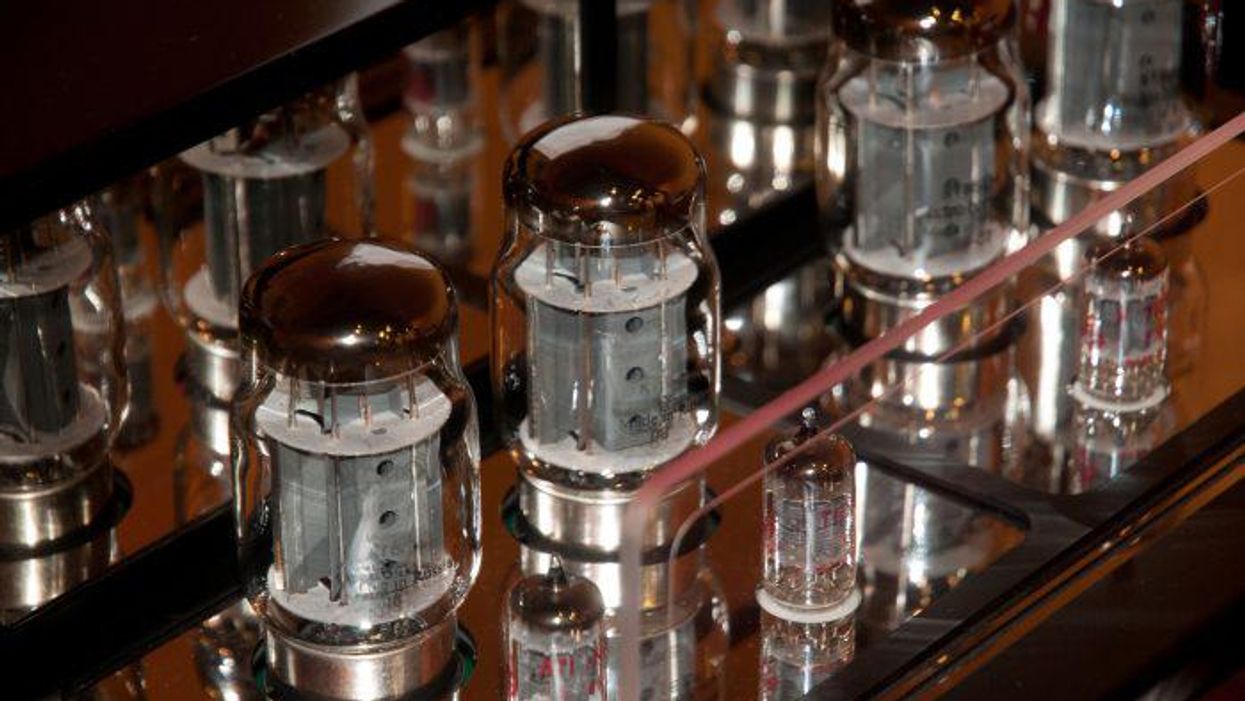
Tube Tip
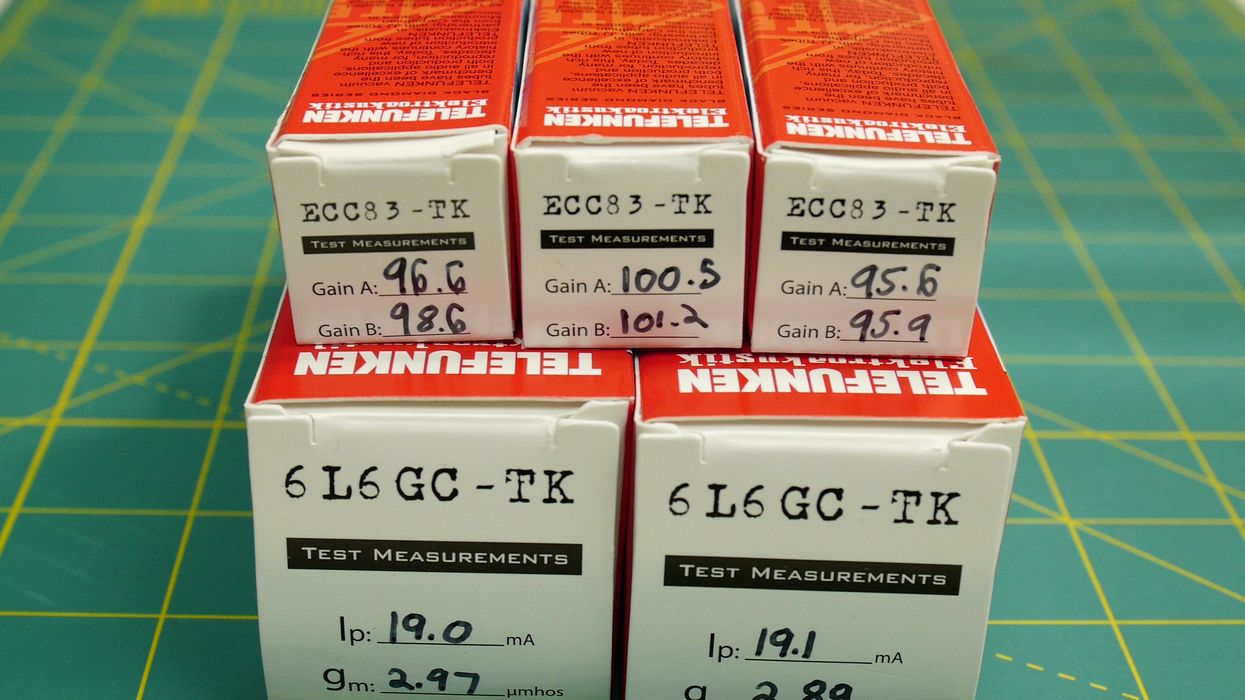
Whether they’re preamp or output tubes, valves of the same type (e.g., EL84, EL34, GZ34, or 12AX7) from different manufacturers do sound different. Whenever possible, make sure the tubes in your spares kit are from the same manufacturer as those currently installed in your amp. This is especially true with regard to output tubes: While preamp tubes from different companies can result in differences in tone and gain, output tubes from different manufacturers tend to bias up quite differently. So staying with the same manufacturer—and, if the tubes are graded, replacing with the same grade—should avoid having to get the amp re-biased.
In a pinch, you can replace power tubes of different brands or grades to get through a gig, but be sure to have the bias checked and/or set as soon as you can for optimal performance, tone, and lifespan.
Is the amp making rumbling or glassy, high-pitched noises?
An ‘Ove’ Glove or an everyday oven mitt is a handy tool for dampening hot preamp and power tubes to determine which is bad, as well as for removing them once you’ve isolated the offending valve.
If so, narrow down the source of the noise by turning down any internal effects such as reverb or tremolo, as well as all volume controls. With the amp in operating mode, hit the top of the amp with your hand or fist using moderate force. If this produces the noise in question, read the steps below:- If the noise is of a rumbling nature: It could indicate a faulty output tube. For a quick fix, replace the amp’s power tubes with a full set of matched output tubes. If this alleviates the noise, you’ve isolated and repaired the problem. If the problem persists, replace the original tubes and continue troubleshooting.
- If the noise is of a glassy or highpitched nature: It is likely due to a faulty preamp-type tube. Starting with the preamp-type tubes closest to the output tubes, tap each one with your fingernail or the end of a pencil. If one in particular produces the noise in question, replace that tube. If this alleviates the noise, you’ve found the problem. If not, replace the original and continue this process with the remaining preamp tubes. If more than one tube produces the noise during the tapping process, a trick to narrowing down the possible offender is to attempt to dampen the adjoining tubes while tapping. This can usually be done by placing your hand on as many of the tubes as possible except the one you’re tapping on. If they’re too hot to perform this barehanded, use an oven mitt or ‘Ove’ Glove. This same technique can be used to find an offending output tube.
If tapping on the amp with all the volume controls set to minimum produces no noise, set all the volume controls to your typical settings and try again. If the noise in question is now present, go through the preamp-tube tap test once again, starting with the tubes closest to the input(s) of the amp—you’ve most likely narrowed it down to the first couple of gain stages.
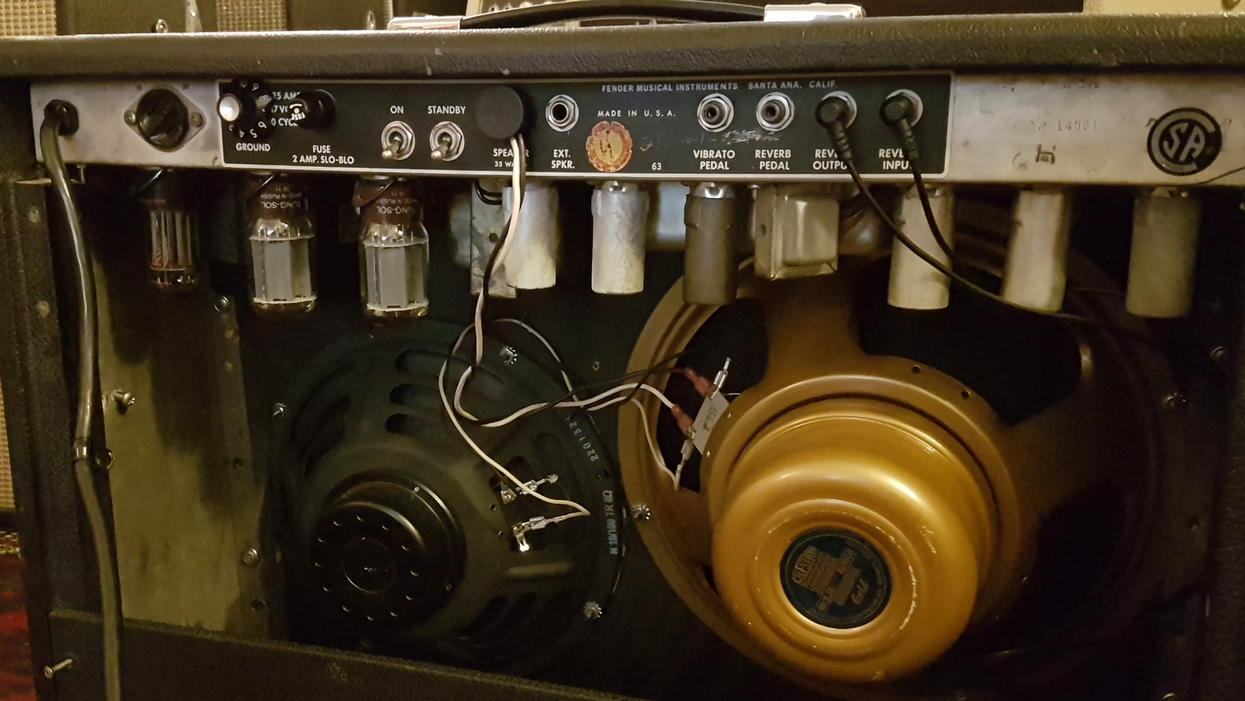
If none of the above troubleshooting techniques produce the noise in question and your amp has a mechanical type reverb (i.e., a spring unit), turn up the reverb control. If the noise is now present, the reverb drive and/or recovery tube could be the cause. Unless you know the specific location of these tubes, you may need to go through the tap test one more time to find exactly which tube is at fault. (If your amp is a blackface or silverface Fender style, looking at the amp from the rear, the reverb-driver tube is generally a 12AT7 and it’s usually third from the right, while the 12AX7 reverb recovery tube is fourth from the right, just past the small transformer.)
Is the amp making crackling or popping noises when you’re not playing?
If so, this is can be caused by faulty preamp or power tubes. The best course of action here is pure substitution. One by one, replace each preamp tube and see if it alleviates the noise. If none of the preamp tubes seem to be the cause, try replacing the full set of output tubes with your set of matched spares. If no tube substitution alleviates the problem, the amp will need to be serviced, because there’s a good chance it has a failing plate or cathode resistor in the preamp.
Is the amp making loud, static- like noises when you play?
If your amp is making loud, static-y sounds when you play, you may need to clean its tube sockets with electronic contact cleaner.
This could be due to dirty, oxidized, or compromised connections in the tube sockets. To find out, while the amp is in operate mode, wiggle each tube, starting with the output tubes— which are usually the biggest offender. In order to avoid blurting out expletives in front of children or others with sensitive ears, be prepared for the amp to make a loud crackling noise. If it does, there’s a good chance the sockets are dirty or oxidized. More times than not, the fix is a good cleaning—and that’s something anyone can do.
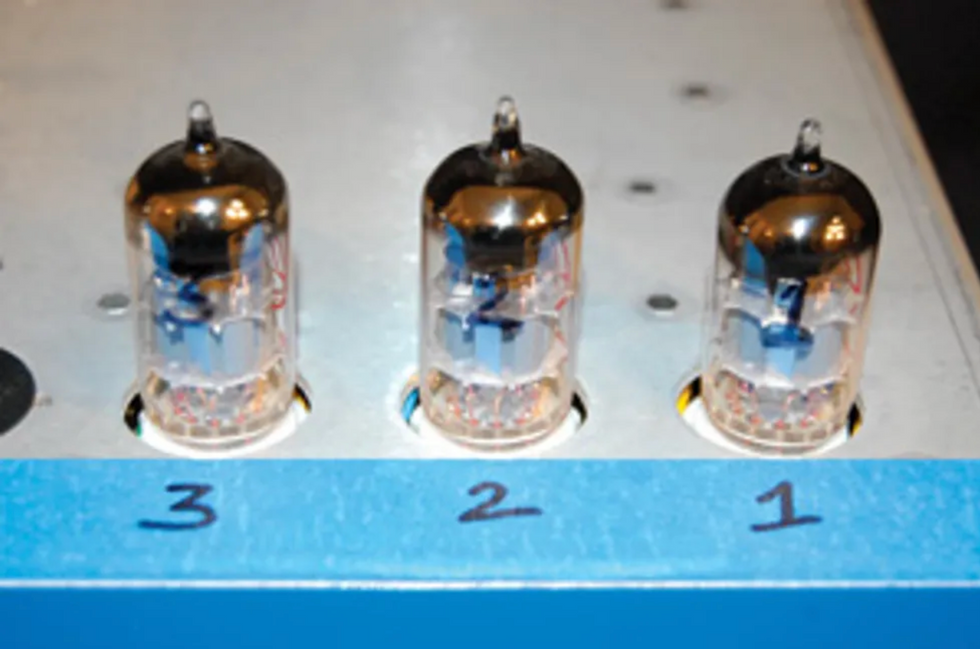
Before removing tubes to clean their sockets, label the tubes and their sockets to ensure you replace them in the spots that were producing satisfactory results prior to the static problem.
To clean the sockets, turn the amp off and remove the tubes once they’re cool, being sure to take note of their locations in the amp. I recommend marking each tube and its associated socket with a Sharpie (“1,” “2,” etc.) while you’re removing them. One by one, spray a couple of shots of electronic contact cleaner, and then insert and remove each tube in the socket 8 to 10 times. (Note: Be sure your electronic contact cleaner is the type without lubricant— lubricant can attract dust and debris, which can become conductive.) Once you’ve cleaned all the sockets, leave all of the tubes out for 5 to 10 minutes so that the cleaner can evaporate. After the sockets are dry, replace the tubes and try the amp again. If the symptom has cleared up, you’ve taken care of the issue. If not, try the socketcleaning procedure again—sometimes it can take more than one cleaning to get the job done. If the problem still persists after a couple of cleanings, the sockets may need to be re-tensioned or replaced, which is probably best left to a professional.
Does sound from the amp cut in and out while you play?
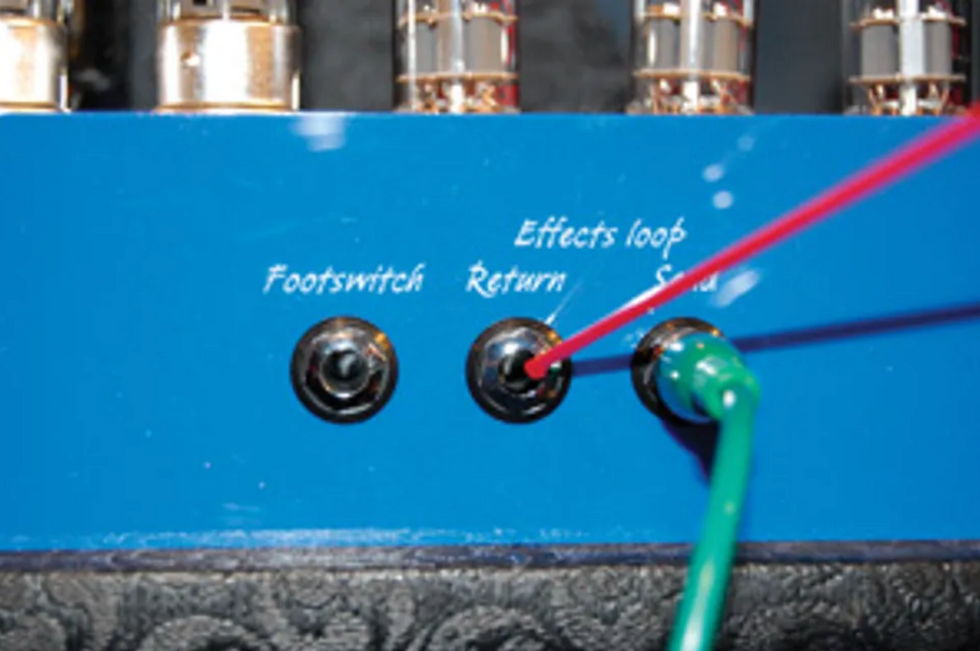
If your amp cuts in and out during play, your effects-loop jacks may need cleaning with an electronic contact cleaner that has lubricant.
This can be due to quite a few things, one of which can be related to the tube sockets (see the previous section on cleaning tube sockets).
If your amp has an effects loop, the problem could also be that the contacts in its 1/4" jacks are dirty or oxidized—especially if you don’t use the loop. To remedy this, spray electronic contact cleaner—only this time use the type that does have lubricant— into each jack, and then insert and remove a cable 8 to 10 times. Afterward, leave the plugs inserted for 15–30 minutes— or even overnight, if possible. This will leave the jacks’ switching contacts open and give the cleaner a chance to dry. You can then remove the cable and try the amp again. (Note: As a preventive measure, it’s not a bad idea to perform this type of jack cleaning on your input and speaker jacks.)
Does the amp not make sound at all?
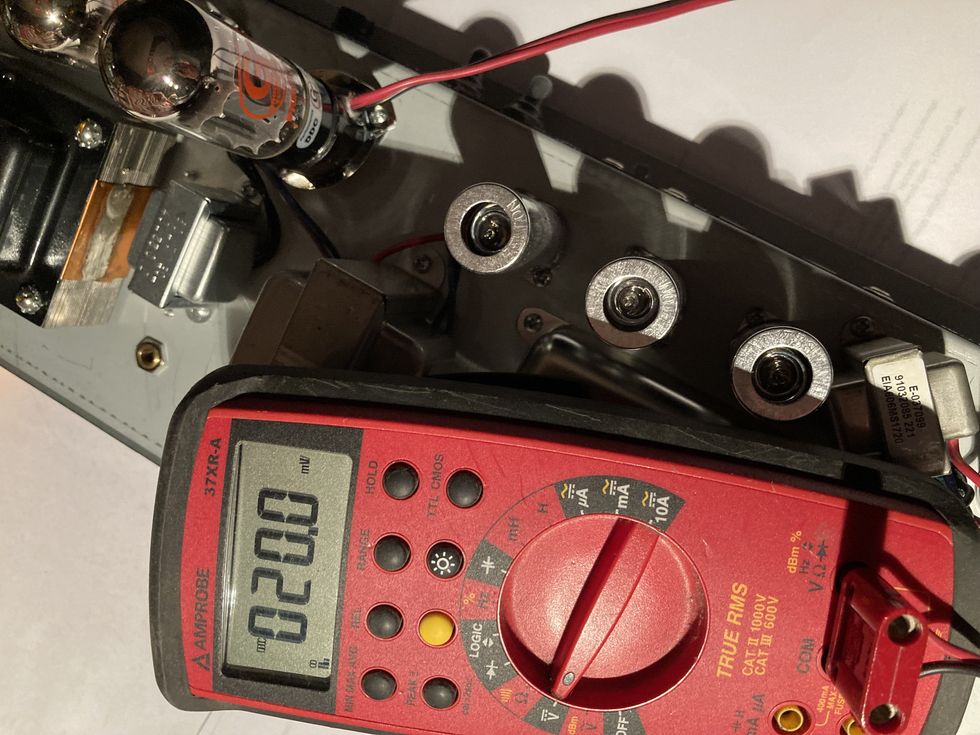
If your amp isn’t making any sound, it may have a bad speaker connection. You can test whether the speaker is getting a proper signal by connecting one multimeter lead to the sleeve (as shown with the black lead above) and the other to the tip.
This can be due to an open speaker connection. To check for this, unplug the speaker cable from the head (leaving the other end connected to the cab), and use your multimeter to measure the resistance of the speaker load. Set the meter to read resistance in ohms, connect one lead of the meter to the body (sleeve) of the plug, and then connect the other to the tip. A typical 16 Ω load will measure approximately 12–14 ohms, an 8 Ω load will measure approximately 6–7 Ω, and a 4 Ω load will measure approximately 3 Ω DC resistance with the meter. If you can’t get a resistance measurement, try again with a spare speaker cable. (Note: For testing purposes, a 1/4" instrument cable can be used, but you should not use one as a permanent substitute for a proper speaker cable.)
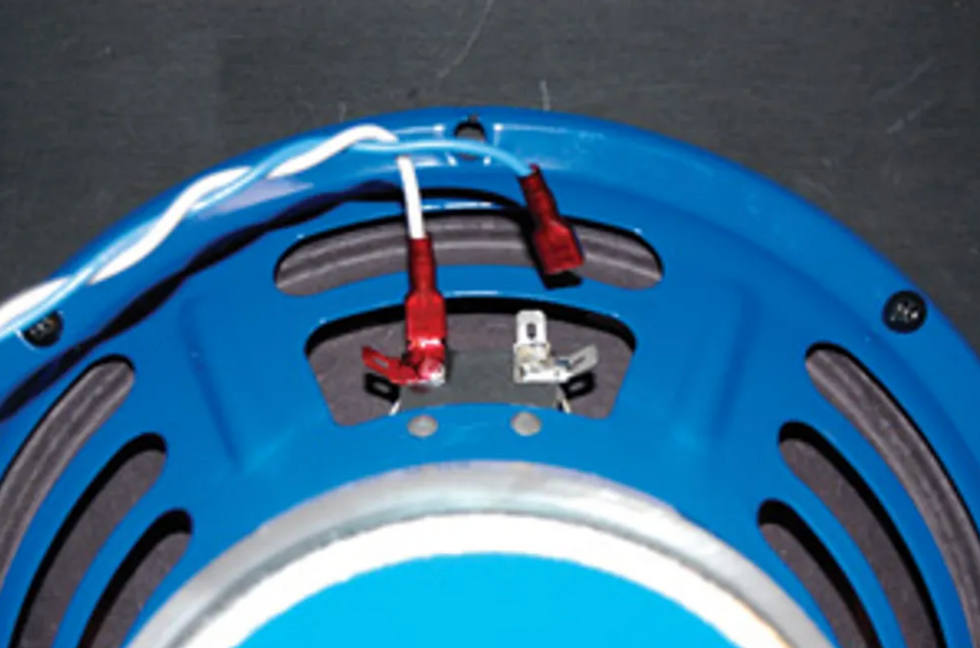
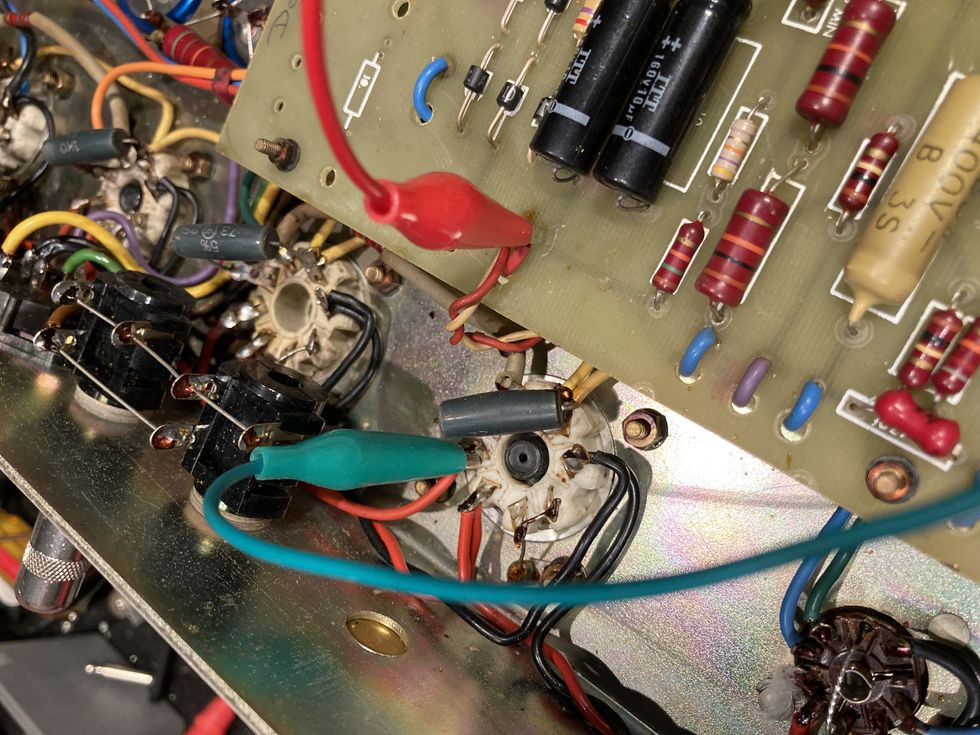
Although they may require a bit of a tug, the quick connects on many combo speakers can be removed to facilitate testing of the speaker’s resistance—which can help you determine whether the speaker cable has gone bad.
If you have a combo and you can’t get a reading at the end of the combo speaker cable, perform the resistance test right at the terminals on the speaker itself. I have seen numerous instances where inexpensive combo speaker cables with the molded plastic ends have failed, so it’s not a bad idea to replace these with an upgraded cable as a preventive measure—because an open speaker cable can cause substantial damage to a tube amp. If you happen to have a combo where the speaker is hardwired (i.e., it does not have a 1/4" jack you can disconnect from the chassis) and you still wish to check the speaker resistance, you will need to disconnect one of the leads coming from the chassis to the speaker(s). Luckily some amps use quick connects to attach the speaker leads. If this is the case, simply remove one connector from the speaker (this may take some force, but it will come off) and measure the speaker resistance by connecting the meter leads directly to the speaker terminals. If your hardwired speaker doesn’t have quick connects, you’ll need to unsolder one of the leads. (Note: Checking speaker resistance with the speakers still connected to the amplifier will result in a false reading. Because the amp’s output-transformer resistance is extremely low, it will cause your reading to look like the speaker(s) are shorted, which is almost never the case.)
Be Prepared—and Don’t Get in Too Deep
A number of issues with tube amps can be alleviated by even the most risk-averse and electrically un-inclined guitarist using the tools and methods discussed here. The most important thing is to have the proper instruments and supplies on hand and to follow the right processes. We recommend keeping this story handy (you can access it for free online or get the Premier Guitar app for Android or iPhone) so you can follow the steps outlined here precisely every time.
Hopefully your amp woes never become so great that these fixes don’t solve the problem, but if they do, be sure to document the problem well and get in touch with a qualified amp-repair person so they can help you get up and wailing again with minimal downtime.
[Updated 12/1/21]
- Ask Amp Man: Upping the Gain on a Super Reverb - Premier Guitar ›
- Ask Amp Man: Beefing Up a Vintage Fender Vibrolux Reverb ... ›
- 8 Guitar-Amp Mods for Newbies - Premier Guitar ›
Here’s how 21 killer players from the past year of Rig Rundowns—including Justin Chancellor, Zakk Wylde, MonoNeon, Carmen Vandenberg, Sturgill Simpson, Jason Isbell, and Grace Bowers—use stomps to take their sounds outside the box.
TOOL'S JUSTIN CHANCELLOR
Justin Chancellor’s Pedalboard
If you ever catch yourself playing air guitar to Tool, you’re probably mimicking Justin Chancellor’s parts. “Schism,” “The Pot,” “Forty Six & 2,” “H.,” “Fear Inoculum,” “Descending,” “The Grudge,” and plenty of others feature his buoyant bass riffs.
What stomps does he run his Wal, StingRay, and Fender basses through? Glad you asked. His setup is either a bass player’s dream or nightmare, but for someone as adventurous as Chancellor, this is where the party starts.
You’ll notice many of his pedals are available at your favorite guitar store, including six Boss boxes, an Ernie Ball Volume Pedal, and MXR Micro Amp. Crucial foot-operated pedals are in blue: the Dunlop JCT95 Justin Chancellor Cry Baby Wah with a Tone Bender-style fuzz circuit (far left) and DigiTech Bass Whammy (middle). He really likes using the Tech 21 SansAmp GT2 for distortion and feedback when the Whammy is engaged or he’s playing up the neck. Covering delays are three pedals—he has the pink Providence DLY-4 Chrono Delay programmed to match drummer Danny Carey’s BPMs in “Pneuma,” which slightly increase during the song from 113 ms to 115 ms. The Boss DD-3s are set for different speeds with the one labeled “Faster” handling “The Grudge” and the other one doing more steady repeats. There’s a pair of vintage Guyatone pedals—the Guyatone VT-X Vintage Tremolo Pedal (Flip Series) and Guyatone BR2 Bottom Wah Rocker (a gift from guitarist Adam Jones). The Gamechanger Audio Plus pedal is used to freeze moments and allow Justin to grab onto feedback or play over something. The Boss GEB-7 Bass Equalizer and Pro Co Turbo RAT help reinforce his resounding, beefy backbone of bass tone, while the MXR Micro Amp helps goose his grimy rumbles. The Boss LS-2 Line Selector is a one-kick escape hatch out of the complicated signal chain for parts of “Schism.” The Wal and Music Man stay in check with the TU-3S tuner, a pair of Voodoo Lab Pedal Power 2 Pluses help bring things to life, and everything is wired up with EBS patch cables.
STURGILL SIMPSON AND LAUR JOAMETS
Sturgill Simpson’s Pedalboard
Alt-country veteran Sturgill Simpson packed light for his latest run. His board bears just a Peterson Stomp Classic tuner running into a Fulltone True-Path ABY-ST, which splits his signal to his two Magnatone Panoramic Stereo amps. “I wouldn’t use a tuner if I didn’t have to,” he chuckles. The LILY P4D beside the splitter lets him control his mic signal to cut interference from onstage noise.
Laur Joamets’ Pedalboard
For his main board, Laur Joamets packs a little heavier than his boss. The platform, made by West Coast Pedal Board, carries a Peterson StroboStomp, Greer Amps Arbuckle Trem, sRossFX fuzz/overdrive, MXR Booster, T-Rex Replica, sRossFX germanium octave pedal, TC Electronic Viscous Vibe, Dunlop EP103 Echoplex, and Source Audio True Spring Reverb. An MXR Tap lets him tap in delay tempos. He has a second pedalboard, as well, for his Stage One steel guitar. It goes into a Peterson StroboStomp HD, then on to a Greer Black Tiger and Goodrich Sound Company volume pedal, before hitting his Magnatone Varsity Reverb and a custom-built Fender brown-panel Deluxe clone he calls “the Charmer.”
PANTERA’S ZAKK WYLDE AND REX BROWN
Zakk Wylde’s Pedalboard
When Pantera’s bassist Rex Brown and singer Phil Anselmo decided to fire the band up again, the choice of fellow road dog Zakk Wylde on guitar seemed perfect. Here’s what Wylde had on the floor and in the racks for the band’s February date at Nashville’s Bridgestone Arena.
His signature arsenal of effects seen here includes a MXR Wylde Audio Overdrive, MXR Wylde Audio Phase, Wylde Audio Cry Baby wah, and a Dunlop ZW357 Zakk Wylde Signature Rotovibe. The lone box that isn’t branded Wylde is a standard fare MXR Carbon Copy. Offstage, his rack is home to a MXR Smart Gate and MXR Wylde Audio Chorus that’s always on. Both are powered by a Voodoo Lab Pedal Power 3 Plus. Another drawer holds a Radial BigShot I/O True-bypass Instrument Selector, Lehle Little Dual II Amp Switcher, and a Radial BigShot EFX Effects Loop Switcher.
Rex Brown’s Pedalboard
This tour was the first time Rex Brown used a switching system. His stage board sported a Dunlop JCT95 Justin Chancellor Cry Baby Wah, a 2000s Morley Pro Series II Bass Wah, Origin Effects DCX Bass Tone Shaper & Drive, a MXR M287 Sub Octave Bass Fuzz, and a Peterson StroboStomp HD. The brain of everything in the rack and onstage is the RJM Mastermind GT. And to help “move mountains,” Rex has a Moog Taurus III.
MSSV’S MIKE BAGGETTA AND MIKE WATT
Mike Baggetta’s Pedalboard
Mike Baggetta has some core pedals in MSSV, his indie supergroup with legendary bassist Mike Watt and drummer Stephen Hodges. His arsenal includes a Creepy Fingers Hold Tight fuzz, an Electro-Harmonix Ring Thing, a Wilson Effects Freaker Wah V2, an EHX Deluxe Memory Man, and a Red Panda Tensor. The signal flows from his Benson amp into the Tensor, which he uses for glitch sounds, harmonizing, and overdub mode, among other feats. His Memory Man adds space—the final frontier.
Mike Watt’s Pedalboard
Mike Watt puts his signature Reverend Wattplower bass into a Broughton Audio high-pass filter, an EarthQuaker Devices The Warden optical compressor, and a Sushi Box Effects Finally tube DI that functions as a preamp. There’s also a TC Electronic PolyTune.
MONONEON
MonoNeon’s Pedalboard
The Memphis-born avant-funk bassist keeps it simple on the road with a signature 5-string, a tried-and-true Ampeg stack, and just four stomps. Almost all of his stomps have been zhuzhed up in his eye-popping palette. He’d used a pitch shifting DigiTech Whammy for a while, but after working with Paisley Park royalty, the pedal became a bigger part of his playing. “When I started playing with Prince, he put the Whammy on my pedalboard,” Thomas explains. “After he passed, I realized how special that moment was.” MonoNeon also uses a Fairfield Circuitry Randy’s Revenge, a Fart Pedal (in case the Fairfield ring mod isn’t weird enough, we guess), and a JAM Pedals Red Muck covers fuzz and dirt needs. A CIOKS SOL powers the whole affair.
GRACE BOWERS
Grace Bowers’ Pedalboard
Grace Bowers is one of the freshest new guitar stars to emerge in the past year. She has the essential fixin’s for her classic rock tones: a Dunlop Crybaby Wah, Grindstone Audio Solutions Night Shade Drive, EarthQuaker Devices Tone Job, MXR Phase 90, MXR Phase 95, and Boss DD-2. Bowers powers them with a Voodoo Labs Pedal Power ISO-5.
GREEN DAY’S JASON WHITE
Photo by Raph Pour-Hashemi
Jason White’s Pedalboard
Long-time touring member Jason White’s stable is dominated by his Gibson Les Pauls and ES-335s. A Shure wireless system sends his signal to a rack set-up with an ISP noise gate, just in case White’s P-90s are picking up a lot of noise. From there, it hits a Dunlop Cry Baby and DVP1XL, then a MIDI-controllable RJM Effect Gizmo, which handles White’s effects: an MXR Reverb and Poly Blue Octave, Strymon TimeLine and Mobius, API Select TranZformer GTR, and a Custom Audio Electronics 3+SE Guitar Preamp, which gets engaged for clean tones and small combo sounds. A Lehle Dual SGoS Switcher and Fishman Aura DI Preamp handle changes with the piezo-equipped guitars. A Strymon Zuma provides the juice.
BONES UK’S CARMEN VANDENBERG
Carmen Vandenberg’s Pedalboard
Carmen Vandenberg covers a lot of ground with her Bones UK guitar sounds, and she’s got a carefully curated collection of stomps to span the territory. Her guitar first hits an Ernie Ball Cry Baby before running through the rest of the pedals: a Boss TU-3, Fulltone OCD, Supro Drive, Pigtronix Octava, EHX Micro POG, Supro Chorus, Blackstar Dept. 10 Boost, EarthQuaker Devices Dispatch Master, MXR Carbon Copy Deluxe, Catalinbread Belle Epoch, and Boss NS-2. A Live Wire Solutions ABY manages the signals on their way to her signature Blackstar CV30s.
BLACK PUMAS’ ADRIAN QUESADA, BRENDAN BOND, AND ERIC BURTON
Adrian Quesada’s Pedalboards
Adrian Quesada loves tremolo and reverb, and uses a Strymon Flint for both. His other main stomp is the Electro-Harmonix Holy Grail that provides a healthy dose of spring reverb. Also along for the tour: a Line 6 Echo Park, a Catalinbread Echorec, a Boss GE-7 Equalizer, a Catalinbread Belle Epoch, and an EarthQuaker Devices. The Fulltone Clyde Wah Deluxe has stepped in for a different filter sweeper. There’s also a JAM Pedals Ripple two-stage phaser, and a TC Electronic PolyTune2 Noir keeps his guitars in check. That’s all on board one.
His second board includes a JHS 3 Series Delay, a JHS Crayon, and an Electro-Harmonix Nano POG. Utility boxes on here—Strymon Ojai, JHS Mini A/B, and TC Electronic PolyTune—handle switching, tuning, and power.Brendan Bond’s Pedalboard
Three pedals get the job done for Mr. Bond: an Acme Audio Motown D.I. WB-3 passive D.I., a JHS Colour Box, and a Boss TU-3 Chromatic Tuner.
Eric Burton’s Pedalboard
Frontman and guitarist Eric Burton is the band’s lone wireless member. To accommodate his onstage prowling, tech Bryan Wilkinson uses a Radial JDI passive direct box that takes in the XLR from the audio subsnake wireless rackmount and routes it into the first pedal: a Boss TU-3 Chromatic Tuner. From there, Burton only has a couple pedals—a DigiTech Mosaic to mimic a 12-string for “OCT 33” and a JHS Colour Box for any required heat. A Strymon Ojai turns everything on.
JASON ISBELL AND SADLER VADEN
Jason Isbell’s Pedalboards
Jason Isbell could open a huge gear shop just by clearing off his boards and racks. First off, he has a complex wet/dry/wet setup that is parsed out via a RJM Mastermind, with two Magnatone Twilight Stereo combos carrying the all-wet effects. There’s also a Radial JX44v2, which serves as the core signal manager. Above it, on the rack, is an Echo Fix Chorus Echo EF-X3R. Moving up the rack, one drawer includes an Ibanez DML10 Modulation Delay II, EarthQuaker Devices Tentacle, and a trio of stereo-field-only effects: a Boss MD-500, Strymon Volante, and Hologram Electronics Microcosm. Another level up, you’ll find a Chase Bliss Preamp Mk II, Chase Bliss Tonal Recall Delay, Chase Bliss Dark World Reverb, Chase Bliss Condor EQ/Filter, Chase Bliss Gravitas Tremolo, Chase Bliss CXM-1978 Reverb (stereo-field only), Keeley 30ms Automatic Double Tracker, gold Klon Centaur, Analog Man Sun Lion Fuzz/Treble Booster, Analog Man King of Tone with 4-jack mod, Keeley 4-knob CompROSSor, Pete Cornish OC-1 Optical Compressor, EHX Micro POG, Analog Man ARDX20 Delay, and a trio of Fishman Aura Spectrum DIs.
Sadler Vaden’s Pedalboard
Isbell’s 6-string sparring partner Sadler Vaden’s pedalboard chain starts with a Dunlop Clyde McCoy Wah, then a Lehle volume pedal, which feeds the Gig Rig. He uses a Line 6 M5 with a Dunlop expression pedal for a lot of modulation effects. Other pedals include a Crowther Prunes & Custard, Nordvang No.1, an Analog Man Dual Analog Delay, Comp, and King of Tone, a Strymon BlueSky, and a Greer Lightspeed. Every effect is isolated into the Gig Rig. The board has four outputs, two for each side of his 3rd Power British Dream, one for a Marshall plexi, and one that goes to an aux line and splits to a Vox Pacemaker. The auxiliary line is as a backup in case Sadler’s amps go down. It consists of a Strymon Iridium into a Seymour Duncan Power Stage that goes to FOH. And finally, his acoustic pedalboard sports a Shure wireless running into an ART Tube MP/C preamp into a L.R. Baggs Venue DI, with a Radial Engineering Bigshot selector.
MICHAEL LEMMO
Michael Lemmo’s Pedalboard
Rising star player Michael Lemmo relies on his stomps for tone sculpting, but he doesn’t need much to get the job done. His signal hits a Korg tuner, followed by an Xotic EP Booster, Bearfoot FX Honey Bee OD, Red Panda Context, Boss DD-7, and TC Electronic Ditto. They’re all juiced by a Truetone 1 Spot Pro CS7.
HELMET’S PAGE HAMILTON
Page Hamilton’s Pedalboard
Page Hamilton used to travel with a full Bradshaw rig with rack gear, but he’s reduced things to a pair of Eventide H9 units and a handful of Boss boxes—a PS-5 Super Shifter, a MT-2W Metal Zone Waza Craft, a TS-2 Turbo Distortion, a NS-2 Noise Suppressor, and a FB-2 Feedbacker/Booster. A couple of Peterson Stomp Classic tuners keep his ESP Horizons ready, and a Boss ES-5 Effects Switching System organizes all his sounds and settings.
BARONESS’ JOHN BAIZLEY, GINA GLEASON, AND NICK JOST
John Baizley’s Pedalboard
The Baroness frontman’s board is packed with staged dirt boxes and tasteful mod stomps, all held in check with a GigRig G2, Peterson StroboStomp, and Ernie Ball Volume Pedal. The crown drive jewels are a heavily modded EHX Big Muff and Crowther Double Hot Cake, but a Beetronics FX Overhive and Pro Co RAT add sizzle, too. A Boss DD-3, DM-2W, and TR-2, EarthQuaker Devices Dispatch Master and Tentacle, MXR Phase 90 and Dyna Comp, and EHX Deluxe Memory Man handle the rest, while a DigiTech Whammy lurks for its moment to blast off.
Gina Gleason’s Pedalboard
Gleason’s favorite drive these days is the EQD Zoar. Piling on top of that are a MXR Super Badass Distortion, MXR Timmy, modded EHX Big Muff, and a touchy Philly Fuzz Infidel prototype; an Xotic SP Compressor and UAFX 1176 Studio Compressor tighten things up when needed. Three time machines—the Strymon TimeLine, EQD Space Spiral, and Boss DD-3—handle delay, and a Walrus Slo dishes out reverb. The MXR EVH Phase 90 adds some color along with another DigiTech Whammy. The Ernie Ball Volume Pedal, Peterson StroboStomp, and GigRig G2 finish the line-up.
Nick Jost’s Pedalboard
The bassist’s board is powered by an MXR Iso-Brick, with an Ernie Ball Volume Pedal and Boss TU-3 pulling utility duties before an Xotic Bass BB Preamp, Boss ODB-3, DOD FX69B Grunge, MXR Stereo Chorus, and Tech 21 SansAmp Bass Driver DI.
WOLFMOTHER’S ANDREW STOCKDALE
Andrew Stockdale’s Pedalboard
When we walked into Nashville’s Eastside Bowl for this Rig Rundown with Wolfmother’s alpha canine, Andrew Stockdale, it sounded like he was playing his SG through a Marshall stack at head-ripping volume. Nope! Stockdale was blasting skulls apart with a Line 6 HX Stomp doing the heavy tonal lifting. The rest of his board’s layout is a Snark floor tuner, an EHX Micro Synth (a Wolfmother staple), an Xotic AC Booster, an EHX Micro POG, a Dunlop Cry Baby 535Q Multi-Wah, a Boss TR-2 tremolo, a CIOKS DC5 power supply, and Shure GLXDC+ wireless.
FEARLESS FLYERS' CORY WONG AND MARK LETTIERI
Cory Wong’s Pedalboard
Through a Shure GLXD16 wireless system, Cory Wong flows his guitar into his Neural DSP Quad Cortex, which runs a beta version of his Archetype: Cory Wong plugin, based off of a melding of a Dumble and a Fender Twin. The signal hits an onboard envelope filter and rarely used pitch shifter, then exits out the effects loop into a Wampler Cory Wong Compressor, Jackson Audio The Optimist, and a Hotone Wong Press. The signal goes back into the Quad Cortex, where there’s a preset phaser, stereo tape delay, and modulated reverb, plus a freeze effect. Two XLR outs run to front of house, while two run to Wong’s Mission Engineering Gemini 2 stereo cabinet.
Mark Lettieri’s Pedalboard
Mark Lettieri’s signal first hits a Keeley Monterey Custom Shop Edition, followed by an MXR Deep Phase, J. Rockett HRM, J. Rockett Melody OD (Lettieri’s signature), Pigtronix Octava, and a Dunlop DVP4, all powered by a Strymon Ojai. A TC Electronic TonePrint Plethora X5 pedalboard handles coordination and switching between the devices.
SLASH’S BLUES BALL BAND
Slash’s Pedalboard
“I haven’t had a pedalboard in front of my feet since the ’80s,” Slash told us. But with the Blues Ball tour, he kept it simple, stomping his own boxes. His chain includes a Peterson StroboStomp, Dunlop Cry Baby, MXR CAE Boost/Line Driver, Ibanez TS9 Tube Screamer, MXR EVH90, BBE Soul Vibe Rotary Simulator, Boss DD-3 Digital Delay, and MXR Uni-Vibe, with everything powered by a Voodoo Lab Pedal Power 2 Plus. All pedals are taped down with their settings dialed in. When his signal leaves the board, it hits a Whirlwind Selector A/B box, where it splits off between his amps and his Talk Box rig.
Tash Neal’s Pedalboard
Tash Neal keeps a modest pedalboard at his feet: a D’Addario Chromatic Pedal Tuner, Dunlop Cry Baby, XTS Custom Pedals Precision Multi-Drive, EHX Green Russian Big Muff, and a Fender Waylon Jennings Phaser, powered by a T-Rex Fuel Tank.
RANCID’S MATT FREEMAN
Matt Freeman’s Pedalboard
Bassist Matt Freeman’s signal goes wireless into one of his Avalon U5 Class A Active Instrument DI and Preamps, and then through a Way Huge Pork Loin Overdrive, set to give his Bassman a good push.
CHRISTONE “KINGFISH” INGRAM
Kingfish’s Pedalboard
Kingfish’s signal starts with a Shure Wireless BLX4, which hits a Boss TU-3w Chromatic Tuner. From there, the route is a Dunlop Cry Baby Mini Wah, a Marshall ShredMaster, and a Boss DD-3 Delay. The pedals live on a Pedaltrain Nano board and were assembled by Barry O’Neal at XAct Tone Solutions.
DIXIE DREGS’ STEVE MORSE
Steve Morse’s Pedalboard
Steve plays through a pair of 3-channel Engl Steve Morse signature 100-watt amps—one wet, one dry—but his pedal chain is relatively simple: a Keeley Compressor, two Ernie Ball volume pedals, two TC Flashbacks, a TC Electronic Polytune, and a foot controller for his Engls.
Stretching the boundaries of reverb’s realm through dynamic and pitch control.
Nice core reverb sounds. Invites cool compositional and arrangement directions. High quality.
If you lack patience, it will be hard to unlock its coolest secrets.
$329
Gamechanger Audio Auto Reverb
gamechangeraudio.com
When the first Moog synthesizer appeared, it freaked out a lot of musicians—not least for the way it blurred the divisions between instruments and their roles. Was it percussion? A keyboard? A reed instrument? Many effects makers build from this philosophical foundation. The Latvian company Gamechanger often seems to revel in it—an attitude that’s manifest in the company’s Auto Series pedals, which includes the Auto Reverb.
There’s no reason you can’t use the Auto Reverb in a very straightforward fashion. The plate, spring, and hall settings are all very nice digital representations of their analog inspirations—and I’d be perfectly happy playing an instrumental surf set with the spring mode, for instance. But because you can control the parameters like the reverb’s level, decay, tone, and the filter with changes in pitch and dynamics, the Auto Reverb can function in highly orchestral ways, transforming itself from subtle to outlandish as a musical piece shifts in intensity or rises from low to high keys toward a blurred, hyper-spacious climax. While these attributes make the Auto Reverb a great fit for prepared guitar and conceptual pieces—and invites many themes and compositional ideas within those forms—it can just as easily be configured to create an especially dynamic and dramatic pop song arrangement on stage or in the studio that might otherwise be relegated to automations within a DAW. It’s fun to use, if not always intuitive. But knowing its ways can expand your musical options significantly.
Black Sabbath to Reunite for First Time in 20 Years—Ozzy Osbourne’s Final Performance
The original Sabbath lineup will reunite on July 5 in Birmingham, England, and be joined by Metallica, Pantera, Slayer, and more.
The concert will feature founding members Tony Iommi on guitar, bassist Geezer Butler, drummer Bill Ward, and singer Ozzy Osbourne. Profits from the show, called "Back to the Beginning," will be donated to charities including Cure Parkinson's.
On future Black Sabbath plans, Ozzy's wife, music manager, and TV personality Sharon Osbourne had this to say (via Reuters) about Ozzy: “While other bandmembers might continue to make records and perform, Black Sabbath's gig at the birthplace of the band will certainly be the 76-year-old's final performance.
"For Ozzy right now, it's definitely: 'I love you and good night'," she said.
The shredder and son of legendary artist Frank Zappa gives a tour of his up-to-date gear, including a complex stereo switching system, four racks of pedals, and some of his father’s favorite guitars.
Dweezil Zappa was always going to end up being an incredible guitarist. His dad, Frank Zappa, is celebrated as one of the most talented and creative guitarists in history, and by age 12, Dweezil was recording music produced by Eddie Van Halen. (Little surprise that he’s covering Van Halen’s 1981 stunner “Push Comes to Shove” lately.) He’s been a bona fide guitar star ever since, releasing seven original solo records, six tribute records, two LPs with his brother Ahmet Zappa, and guesting on recordings across the music universe.
Ahead of his gig at Memphis’ Minglewood Hall on his 2024 Rox(postroph)y tour, which celebrated the 50th anniversary of Frank Zappa’s Apostrophe (') and Roxy & Elsewhere records, Dweezil gave PG’s John Bohlinger a boot-to-bonnet look at his current road setup. There’s a lot of ground to cover between his and his father’s catalogues, and Dweezil loves the challenge, which he meets with a mix of his own gear and some special vintage assists courtesy of his dad.
Brought to you by D’Addario.Shut Up ’n Play Yer Les Paul
This coveted Gibson Les Paul Custom, featured on the cover of Frank’s 1981 record Shut Up ’n Play Yer Guitar, came out on the road this tour. Dweezil says that around 1986, his dad swapped in Dan Armstrong-made ceramic pickups. At one point, Frank installed a second input to try to use the guitar as a synth controller, but it didn’t track well enough to continue the experiment.
Along with the standard controls, the guitar includes switches to turn on different parts of the onboard preamp, which boosts the signal and adds plenty of gain. A rotary knob controls a wired-in parametric EQ set up to emulate different settings along the sweep of a wah pedal. Dweezil didn’t get much of the lowdown from his father on the complex operations; it was more trial-and-error. “You just have to turn knobs until you find something that you like,” he says. He connects to his rig with ZZYZX SnapJack magnetic cable connectors.
Rockin' with Roxy
Also out on the Rox(postroph)y tour is Frank’s iconic Roxy & Elsewhere-era Gibson SG. Like the Les Paul, it’s got a preamp circuit to boost the signal, a sweepable EQ, and can achieve acoustic, piezo-adjacent sounds. The preamp configuration in this one is red-hot; it dishes out tons of gain.
Signature Shabat
For Strat-style tones, Dweezil calls on his signature Shabat Lynx DZ, which has been used to dial in his cover of “Push Comes to Shove.” Per Shabat, it has a “body-mounted HSS configuration with a push/pull phase shift on the middle pickup, simplified single-knob layout, custom-cut 3-ply parchment/gold pickguard, and … a Vega-Trem VT1 tremolo."
The Lynx DZ is constructed with an alder body and a quartersawn hard maple, medium-C-profile neck with a 25.5" scale length. It’s loaded with Lollar Special S and Lollar El Rayo pickups, and the middle Special S is wired for phase shift. The Lynx, as well as the SG and Les Paul, are strung with Optima Gold-Plated 2028 FZ Frank Zappa strings (.008–.046), and struck with D’Addario .50 mm celluloid picks. (Dweezil likes them for pick slides.)
On the Ground
Zappa keeps a significant board at his feet, which he controls with a Fractal FC-12 controller. He runs his sound in stereo, with different effects going to each side, so he keeps volume pedals for each side in front of him, plus a wah and expression pedal.
The row of pedals perched atop the pedalboard includes a TC Electronic Polytune 3 Noir, a Marshall-style prototype pedal, J. Rockett Audio Designs PXO, Union Tube and Transistor Lab, SoloDallas Orbiter, a Jext Telez White Pedal (to nab a specific tone for playing “Nanook Rubs It”), and a 29 Pedals FLWR.
In the Rack
On our 2013 Rig Rundown, Dweezil was using the Fractal Axe-Fx II, and this time around, he’s upgraded to the Axe-Fx III as the basis of his sound. Given the sonic territory covered in his shows, it simply became too unwieldy and expensive to tour an analog rig.
The brains of his show are held in a rack system. A couple of out-of-sight splitter boxes help with the complex stereo signal paths, as do a pair of Voodoo Lab HEX audio switchers. The Axe-Fx III lives on the top shelf, and just below it are an Eventide H90 and TC Electronic TC 2290 that go to both sides.
The next rack down runs only to the left side, and includes a BK Butler Tube Driver, DigiTech FreqOut, Red Panda Radius and Raster, Krozz Devices Airborn Analog Flanger, and a Paul Trombetta Design Tornita! fuzz.
The level below it runs to the right side, with a “Clown Vomit” fuzz, Chase Bliss Warped Vinyl, Korg FLG-1 Flanger, Chase Bliss Generation Loss, Goochfx Holy Cow, and another Red Panda Raster.
Wrapping up the rig is the bottom rack, which again runs to both sides. It carries most of Zappa’s exquisite dirt sounds, thanks to a Union Tube and Transistor Tsar Bomba, Chase Bliss Automatone Preamp MKII, Goochfx Dirty Hippie, Tru-Fi Two Face, Foxrox Electronics Paradox TZF2, and a Paul Trombetta Design Rotobone that … somewhat reasonably apes a trombone sound. Paul Trombetta, we salute you.