
Savvy studio guitarists are hip to an old but rarely used electric guitar recording technique: capturing the acoustic sound of the instrument while simultaneously recording through an amp. We'll begin with the “traditional" approach, and then take it to other places, including ones where the sun don't shine.
But first: Why fuss with two mics when a miked amp sounds awesome on its own?
When Bright Bite is Right
Acoustic miking expands the electric guitar's frequency range. Amps and speakers siphon off highs—everything above 5 kHz or so. Your guitar produces overtones an octave or two higher, though you seldom hear them.
Sometimes aggressive high-end sizzle is exactly what a guitar needs to cut through a mix.
Usually we don't want those highs. They're not present in most electric guitar sounds we know and love. Also, electric guitar's limited frequency range is generally a blessing at mix time, leaving the top end free for voice, cymbals, piano, or anything else with lots of high-end action.
But sometimes, aggressive high-end sizzle is exactly what a guitar needs to cut through a mix. It can add mass and impact, especially on recordings with sparse instrumentation (one guitar and drums, for example). Also, dual signals permit processing tricks that can yield unique, hypnotic, and generally bitchin' tones.
Outside Looking In
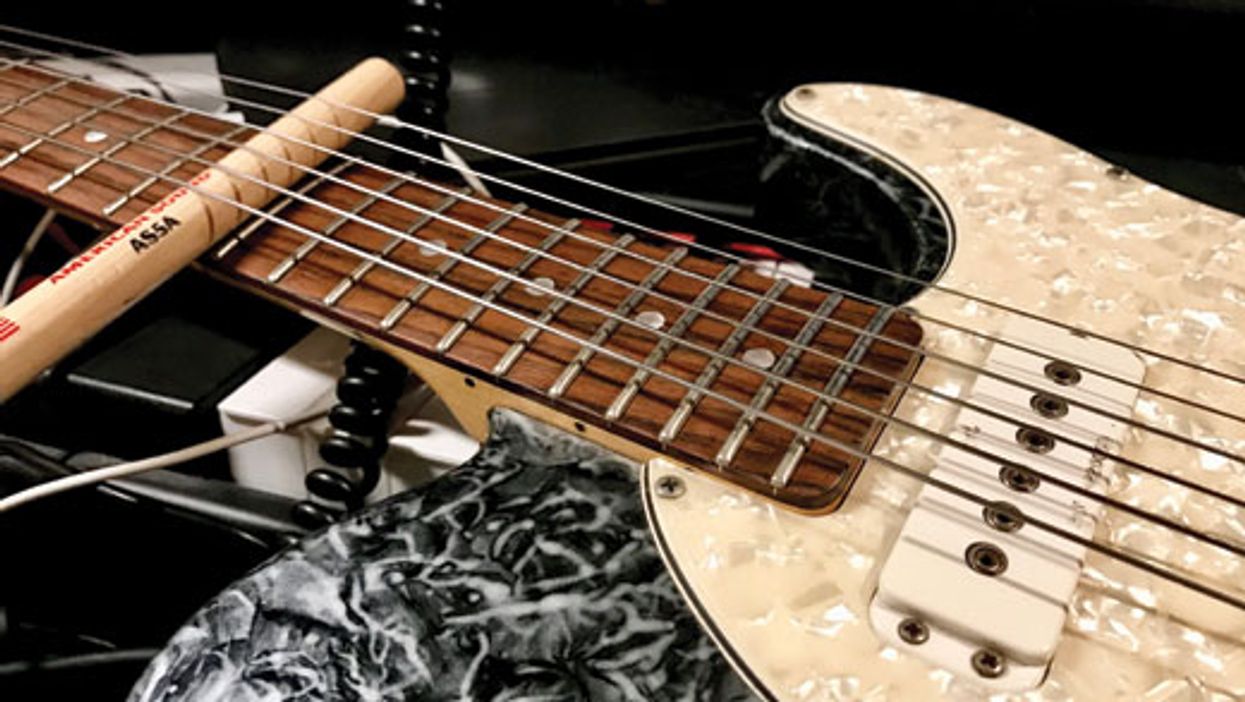
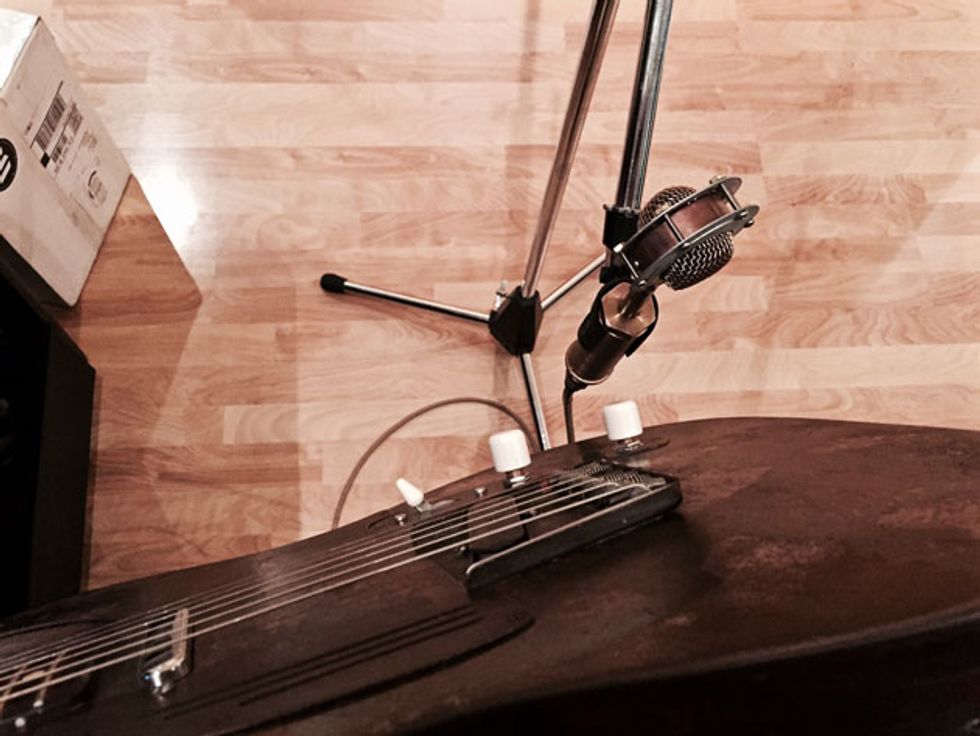
Most players who use this technique simply aim a mic at the guitar's body. (Audition locations by monitoring through headphones, playing as you shift the mic around.) Ex. 1 features a Trussart Steelcaster, whose metal body generates odd rattles and resonance (Photo 1).
Ex. 1
First you hear the mic alone (an Ear Trumpet Edna, a small-diaphragm condenser), and then the same signal mixed with an amp sound. I used amp simulators for the non-miked tones in all these examples—specifically, Amp Designer from Apple's Logic Pro. [Disclosure: I'm a Logic developer.] If you use analog amps, it's best to isolate them. Amp bleed through the acoustic mic can produce unpleasant phase cancellation.
The miked tone is thin and brittle—but dig how it adds edge when blended with the darker amp sound. (It's a weird tone, but weird is good.) I applied contrasting processing to the two tracks: The amp sound has heavy tremolo and a hint of plate reverb. The mic has no trem, but heavy vibrato. The two parts are slightly panned, and there's compression and EQ on the master bus where the two parts meet.
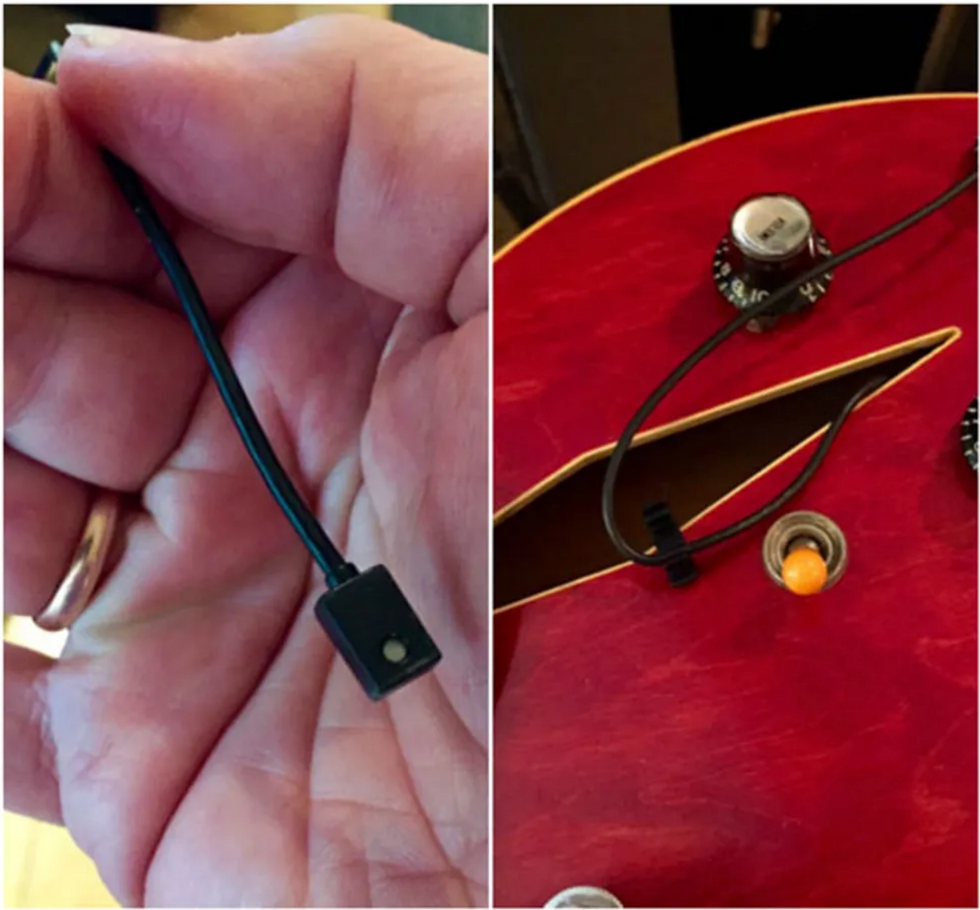
Photo 2 (left) and photo 3 (right)
Let's go deeper—literally! For the remaining examples, I used a tiny lavalier mic like broadcasters clip to their lapels. Mine is a nice Shure SM93 (Photo 2), but you can get cool results with ultra-cheap lav mics—a hi-fi effect, this ain't. For Ex. 2, I inserted the mic through the diamond soundhole on a Gibson Trini Lopez (Photo 3). Again, you hear mic first, then mic and amp simulation together.
Ex. 2
It sounds surreal. There's reverb on the mic signal, while the faux-amps are bone-dry. Since low notes disproportionately drive the amp, low chords seem to come from the sides, while the center-panned mic signal predominates when low notes are absent. There's no panning automation, yet the sound seems to oscillate between the center and sides. The "not found in nature" dirty/clean blend adds more weirdness. You know how fat distorted tones can vanish in a mix? This composite won't.
Take It to the Bridge
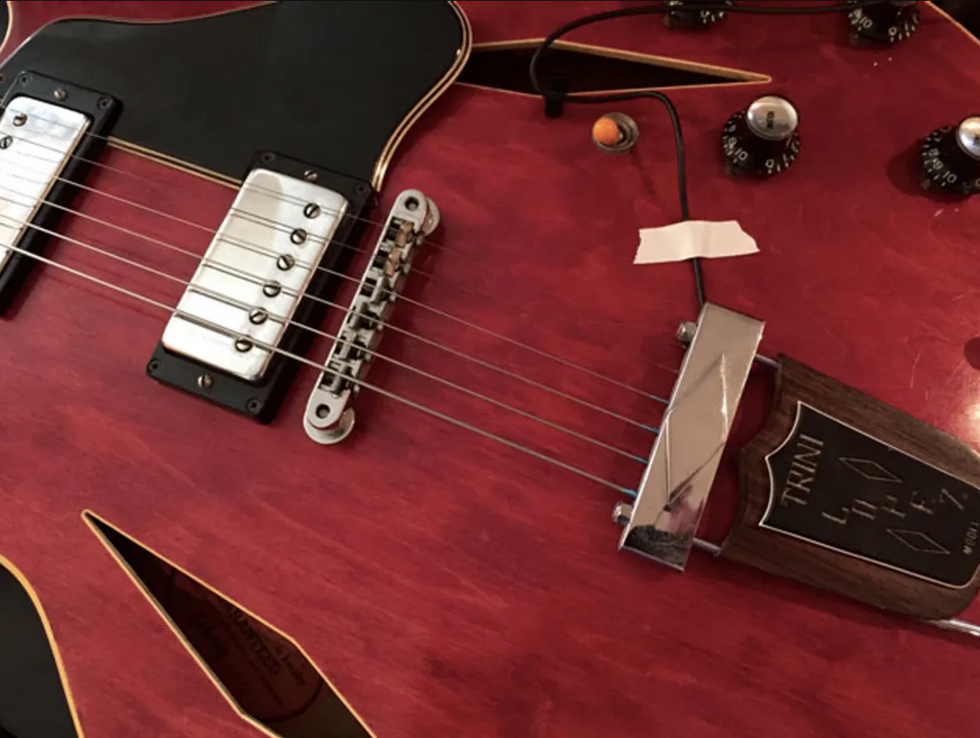
Photo 4
Another place only lav mics can go is beneath bridge hardware. For Ex. 3 I slid the mic under the metal hardware of the Trini's tailpiece, securing it with tape (Photo 4). (Use painter's tape, which leaves no sticky residue.)
Ex. 3
Yow—that vibrating metal is super-bright! Yet it sounds cool combined with two amp simulators panned left and right. The right-channel amp has delay, also panned right, while the other amp is dry. The mic sound is panned center, but its delay is panned hard left, opposite the amp delay. It's a compelling sonic soup.

Photo 5
A Bigsby tailpiece sounds quite different. For Ex. 4 I switched to a homemade Bigsby-equipped "parts" guitar, aiming the mic toward the strings behind the tension bar (Photo 5).
Ex. 4
Here the mic tone meshes nicely with a pawnshop combo simulation. I've processed the amp tone with stereo chorus/vibrato (from Universal Audio's Boss CE-1 plug-in) for a fun "rubber band" tone. The mic adds a hard percussive edge to a rather soft amp sound.
Nuts to You
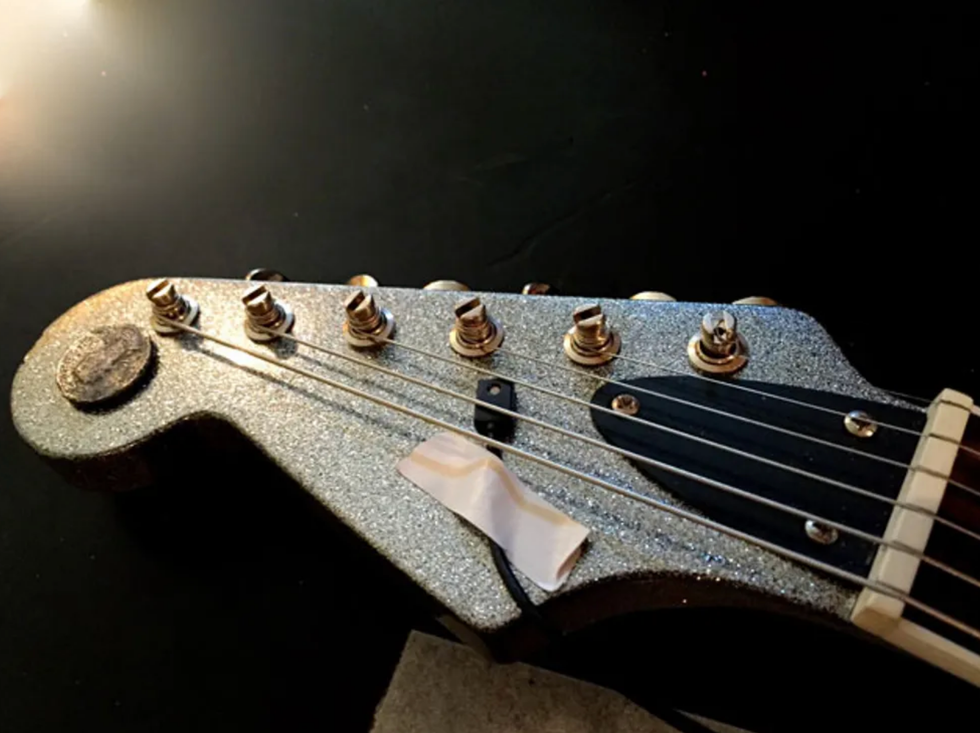
Photo 6
For Ex. 5 I inserted the lav mic under the strings behind the nut (Photo 6). It was a tight fit on this guitar—some strings lightly touch the mic, creating a hard thwap that reminds me of an aggressively plucked upright bass (minus any actual bass frequencies).
Ex. 5
For the composite sound, I sent the mic signal to a short plate reverb, choosing the pre-fader send option so the reverb overshadows the dry signal. The amp tone is warm and dry. Result: a clip-clopping, horse's hooves effect. Both mic and amp are panned dead center, but the mic's reverb provides stereo animation. Only the highest highs get reverb—another surreal effect.
Sounds like these aren't for all occasions—god forbid! But the extended treble and snappy attack of mic tones sometimes add welcome edge, animation, and just plain weirdness. These composite sounds won't disappear in a mix—or a listener's memory.
[Updated 10/11/21]