Hello, and welcome back to Mod Garage. Last month, we finished up work on the body of our Harley Benton guitar, so this time, we’ll proceed with the neck and see what can be done to enhance it.
The first thought that crossed my mind when removing the neck was, “Oh god, not another one!” The screws were still tight to the body, and had to be taken out. If you loosen the screws, take the neck off, and still have to continue unscrewing the screws to remove them from the body, that can create problems. There should be two different sized holes: a thread hole in the neck heel, and a through or body hole in the body. The thread hole should accept the recommended percentage of the screw’s thread. The through/body hole is to allow the screw to pass through and enter the thread hole, but lots of companies only want to drill one, slightly too-large thread hole; they drill the same size hole in the body and neck, which causes the neck screw to tighten to the body before it can properly snug up in the neck.
This building quirk is easy to repair, but it does require some tools, namely a thickness gauge and high-quality wood drill sets in both U.S.-inch and metric measurements. Measure the threaded area of the screw, and choose a drill bit the same size or just slightly larger. (I suggest drilling a test hole in a scrap piece of wood to test the length.) You should be able to slide the screw through the hole with your fingers without having to twist or thread it, but you should feel a bit of resistance. I solved this blip within a few minutes on our Harley Benton guitar, but you can find this problem on a lot of guitars—even very expensive ones.
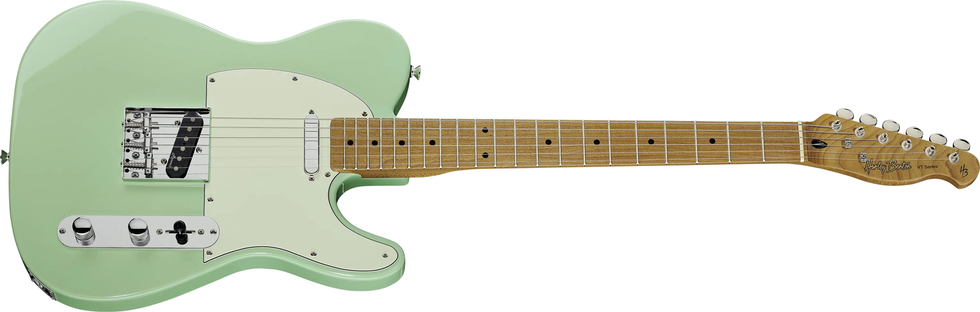
Considering our guitar’s sticker price, I was really impressed with the quality of its neck. It’s made from “caramelized maple,” which is simply marketing language for roasted maple. It’s not a typical one-piece maple construction, but a so-called maple “cap neck,” which means it has a glued-on maple fretboard. Interestingly, the back of the neck sports the iconic skunk stripe typical of one-piece maple necks. There’s no real reason why a maple cap neck should have a skunk stripe: The truss rod is inserted from the top before gluing on the fretboard, so there’s no need to route the neck from the backside, as is done on solid maple necks. The stripe section is made of roseacer wood, which is another marketing-language plant species. It, too, is simply roasted maple, made using a process that darkens the wood.
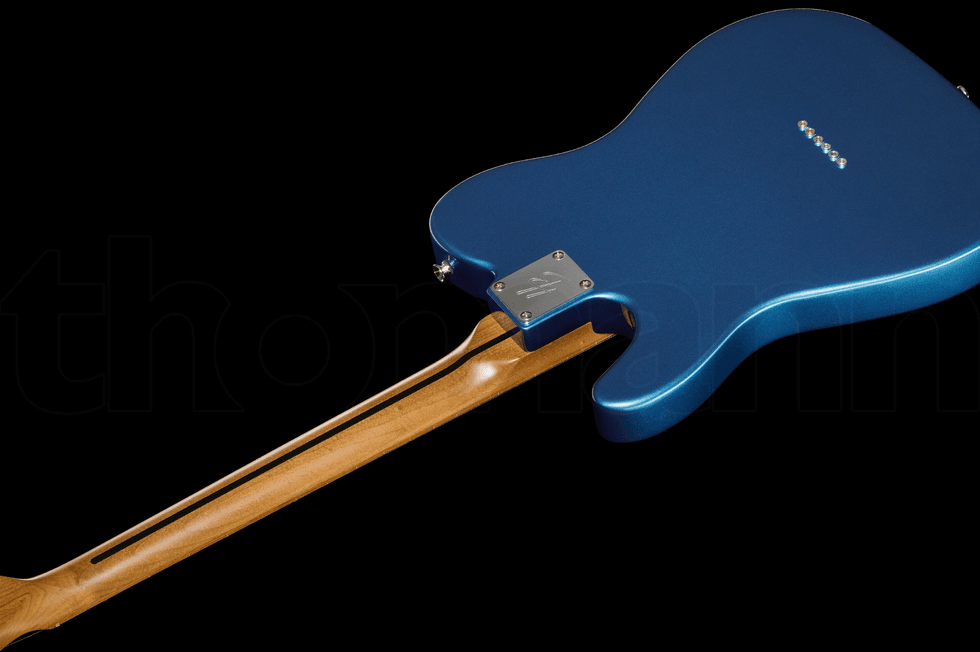
Photo courtesy Thomann Music/Harley Benton (https://harleybenton.com)
Roasted maple is a popular construction choice thanks to its stability and richer color; Harley Benton simply calls it “caramelized maple.” Our neck has some nice bird’s-eye figuring on the back, and I dig the deeper brown palette, but naturally, this is a matter of individual taste. The access opening on the headstock for the truss rod looks like walnut or roasted maple, too, but is, in fact, plastic.
The 25.5"-scale neck is flatsawn and has a modern D-profile, with 21 medium-jumbo frets and a 12" radius that make it comfortable for playing open or barre chords, soloing, and bending strings cleanly, with low action all the way up the neck. The neck is sealed with a thin coat of semi-clear gloss, which feels silky and comfortable. It’s also equipped with a dual-action truss rod, a nice touch in this price range that gives you access to truss-rod adjustments from the headstock. Black standard dots are inlayed across the fretboard and on its edge, and behind the headstock’s plastic nut we have two butterfly string-trees, as well as vintage, Kluson-style tuners. The shape of the headstock is unmistakably Telecaster, complete with the Harley Benton logo in a familiar-feeling font. Well done, Harley Benton. I’m impressed.
I usually start by inspecting the neck heel to make sure it’s completely square, and expose the bare wood so I have a super-tight wood-to-wood connection when the neck is installed. Our guitar’s neck heel is perfectly even, and the layer of lacquer on it is so thin that removing it seems like a waste of time. But because I want to use standard-sized stainless-steel neck screws, I have to slightly enlarge the four thread holes to accept these new screws. It took me just a few minutes to do this using a drill press and some sharp drill bits.
That’s all for now. We didn’t spend any more money this month, so our remaining $196 budget is ready for future investments. Next month, we’ll make some moves to improve our guitar’s neck, so stay tuned.
Until then ... keep on modding!