
Maybe because they can significantly improve your sound on the cheap, pedals have become perhaps the single hottest commodity among gearheads. And here at Premier Guitar, the last couple of months have illustrated that more conclusively than ever before: We gave away a pedal every day during our Stompboxtober contest. Our November 2010 "Pedal Issue" included reviews of 30 pedals in five of the most common categories, profiles of five boutique stompbox builders, and a feature on Electro-Harmonix. Still, we were inundated with requests for more pedal action. So we decided to set up online galleries of pedalboards from both readers and pros. The latter gallery quickly went on to become our most popular ever.
In a nutshell, it's clear we're all pedal junkies. But though trying out and collecting stompboxes is the fun part of this addiction, there's one area in which many of us could probably use a primer/refresher course: what exactly is the best way to patch them all together?
Although a few cynics might question the need for a pedalboard—after all, you could just carry all your pedals in a knapsack or your gig bag pouch—most of us agree they're good for a lot more than just transporting pedals. First and foremost, they keep your pedals wired up and plugged in so you can plug in and play instead of having to connect and power each pedal one at a time. This makes a huge difference when you're sandwiched between other acts on a gig and you have to set up and unpack as quickly as possible, or when you're at a recording studio and are continually fighting the clock.
Essentials
If you're not sure which pedals to start with when you're planning out a board that'll meet your needs, guitar tech Scott Appleton (who has worked with guitar gods like Alex Lifeson, Neal Schon, and Slash) has a few suggestions regarding gear that facilitates a versatile tonal palette. "Typically, I'll see a wah-wah, a distortion or overdrive (or two), a chorus, a delay, and sometimes a volume pedal." As for gear that's roadworthy and tone-worthy enough to satisfy a lot of big names, Appleton says, "I see a lot of Tube Screamer-type variations, Dunlop wahs, and delays like the Line 6 DL4, Boss DD-20, and the Eventide TimeFactor. Also the TC Electronic chorus is very common."
That said, there are innumerable worthy options on the market. Appleton says one of the most important things to keep in mind when you're choosing new pedals is that some pedals may sound great on one amp, and poor on the next—it can be a matter of trial and error to find which ones work best.
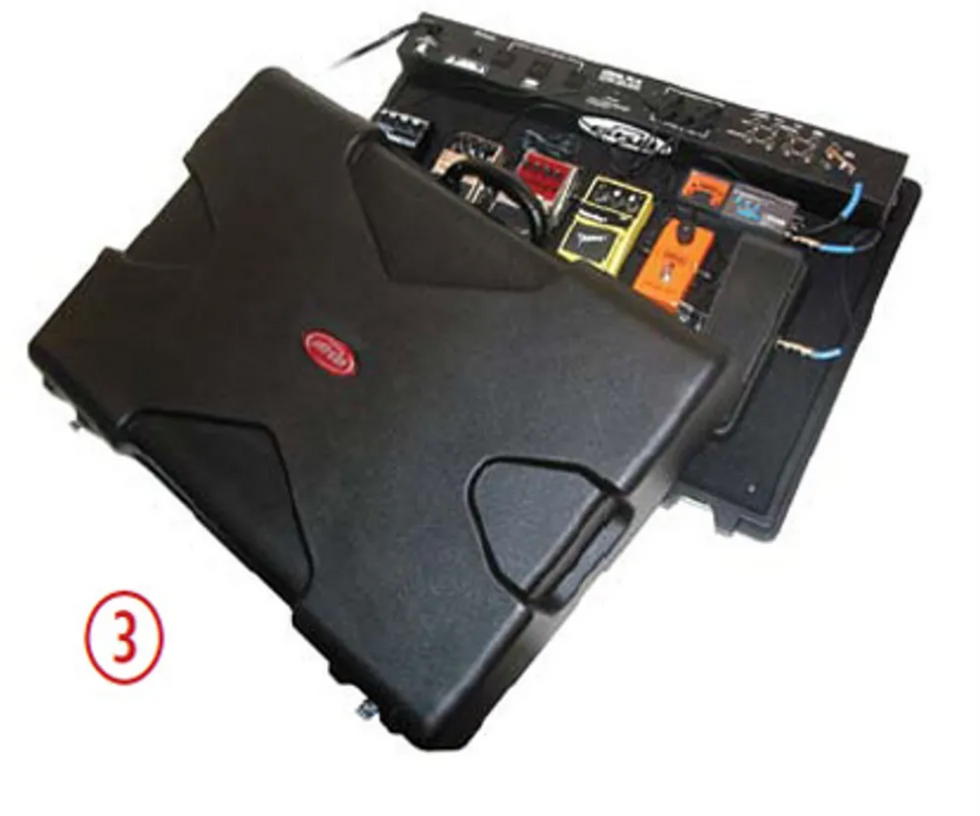
Order of Effects
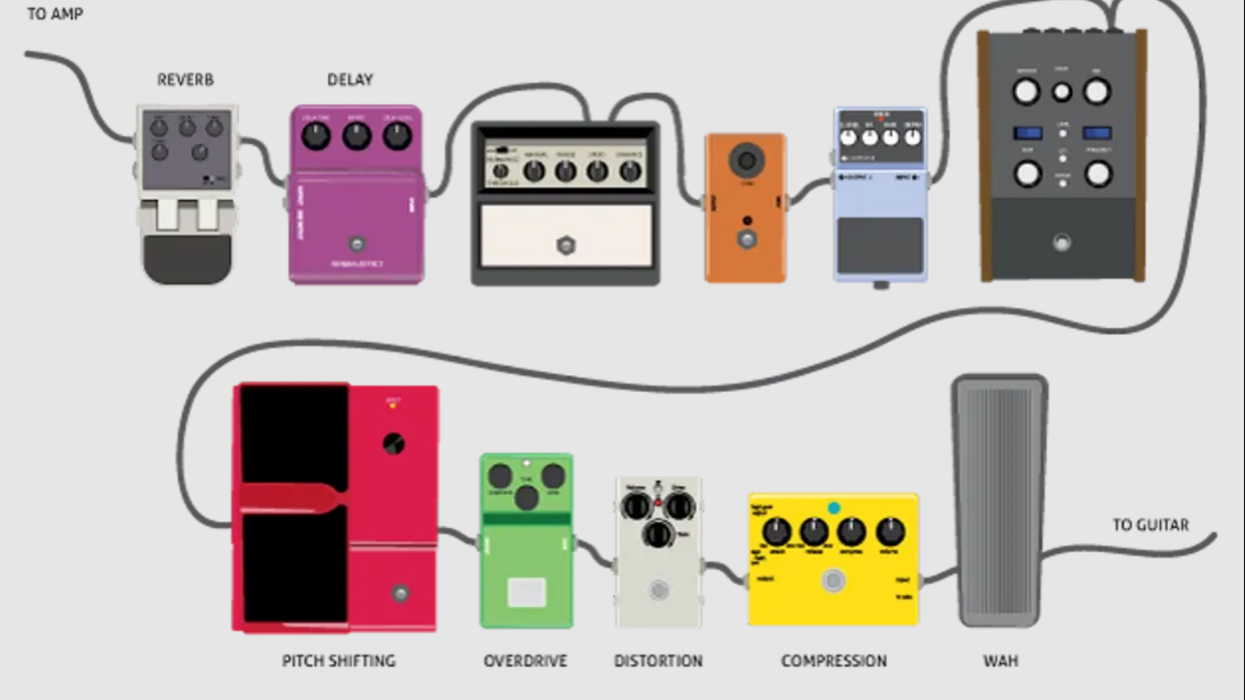
Once you've got a bunch of pedals, the next step is to decide what goes where. A typical order of effects is shown above. But there are no hard-and-fast rules: If you like the way a particular "unusual" configuration sounds, then—by all means—go for it.
Analogman Mike Piera (aka AnalogMike), who is considered by many to be a leading authority on effects pedals, offers the following example. "The order of a clean boost and a distortion pedal determines what the clean boost will do. A clean boost into a distortion pedal will add more distortion, because the distortion pedal is already clipping and will clip more when you hit it harder. That's also why a small amp cranked up does not get louder when you hit it with a louder signal—it's already out of headroom, so it can only distort more. A clean boost after a dirt pedal will increase the volume, without adding more distortion."
Planning and Layout
Physically positioning your pedals requires some logistical planning that can be pretty aggravating, depending on the shape of your pedals and the amount of real estate on your pedalboard. But, naturally, where you place things depends on a lot more than where you're able to fit everything on your board. There are practical considerations to be made, too. For instance, if you have two distortions or overdrives (say, for lead and rhythm), you're probably going to have to turn one on and the other off simultaneously with one big stomp across both pedals—unless you have them both plugged into an A/B box. For this reason, it's practical to place the two pedals right next to each other.
John Chandler from pedalboard manufacturer Pedaltrain suggests, "Before even considering a pedalboard size or layout, line all the pedals out in a straight-line signal path and use whatever power source you plan to use on the board. Experiment by trying the various pedals out and seeing how they interact with each other. The goal is to try to get the cleanest signal path with every pedal off, and then on, in the order that sounds good to you." Chandler says to be sure to write down the ideal signal path so it's not lost once you inadvertently move something in the arrangement.
"Next, lay the pedals out in an imaginary pedalboard on the floor or on a tabletop," Chandler continues. "Keep in mind the pedals you will be switching on and off more than others—you'll want to keep tap-tempo pedals close to your feet and spacey weird things you may not use as much further from your toes."
The Pedalboard Landscape
Once you've laid the stompboxes out in an optimal arrangement, you can search for a board that will accommodate that configuration. A good resource for getting a visual sense of how things will fit on a board is pedalboardplanner.com. This useful site features virtual pedals that you can layout on virtual boards—and all for free. Chandler has a useful analog method, too. "Cut a piece of cardboard that will fit everything, and then research which boards have dimensions that may work for your pedal setup."
Boss BCB-30
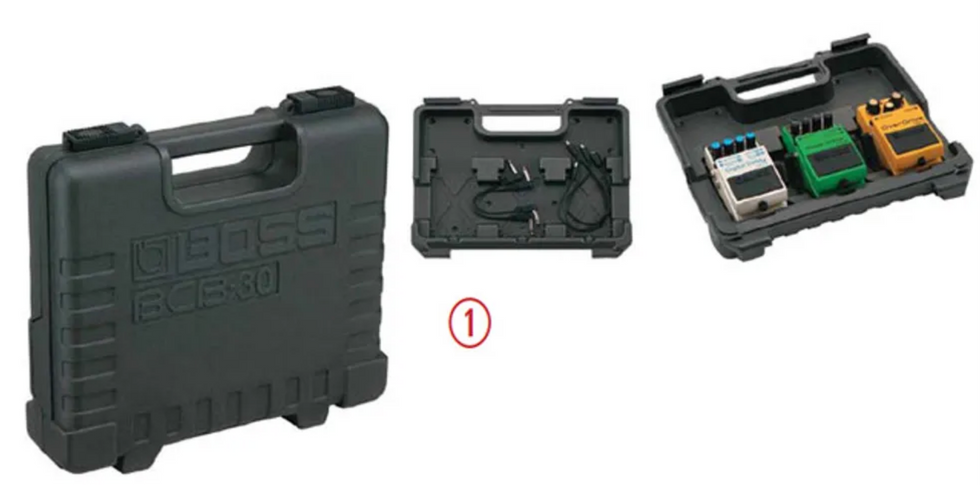
The Boss BCB-30 is a molded-resin case with a built-in handle and slots for three Boss Compact pedals or similar-sized stompboxes.
If you're not a total pedal junkie but still crave a pedalboard's conveniences, the Boss BCB-30 (Street $39, bossus.com) offers three pre-sized slots for Boss compact pedals (or those with an equally diminutive footprint) and comes in a self-contained, molded-resin case.
Road Runner Pedalboard All-in-1 Gig Bag
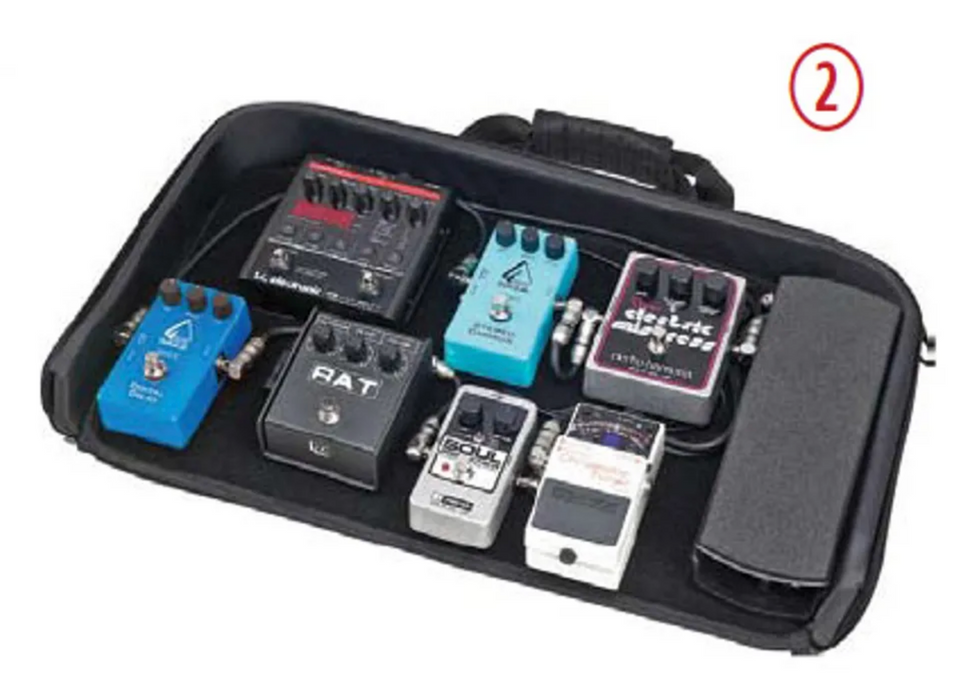
The Road Runner Pedalboard All-in-1 Gig Bag measures 21 3/4" x 12" and features zippered utility pockets and a top cover that folds under to act as a nonslip pedalboard bottom.
However, the most common pedalboards consist of a flat surface covered with the "loop" material used in Velcro-style hook-and-loop fastening systems. The most basic examples of this type of pedalboard include the Road Runner Pedalboard All-in-1 Gig Bag (above—Street $39.99, roadrunnercases.com) and Gator GPT Pedal Tote Pedalboard with Carry Bag (below—Street $59.99, gatorcases.com).
Gator GPT Pedal Tote Pedalboard with Carry Bag
The Gator GPT Pedal Tote Pedalboard with Carry Bag measures 16.5" x 12" and features a built-in handle.
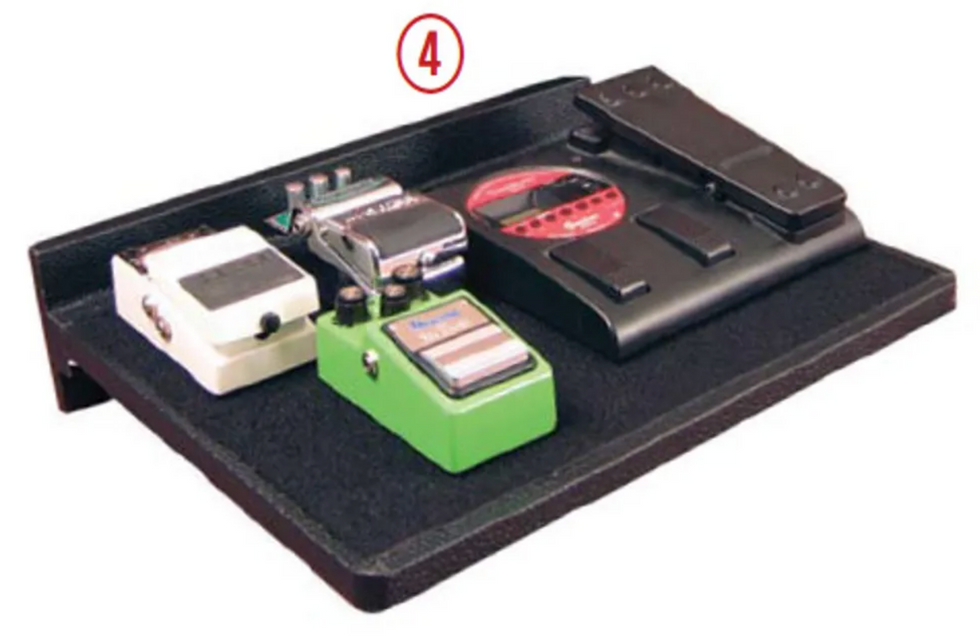
SKB PS-45
The SKB PS-45 measures 27" x 15" and features 11 power jacks (eight 9-volt DC and three 120-volt AC) and a hardshell case.
As you move up in price, you get features such as a power supply and effects-loop patch bays. The SKB PS-45 (Street $249, skbcases.com) features eight 9-volt DC jacks, three 120-volt AC plugs for "wall-wart" adapters, and a hardshell case.
Furman SPB-8C
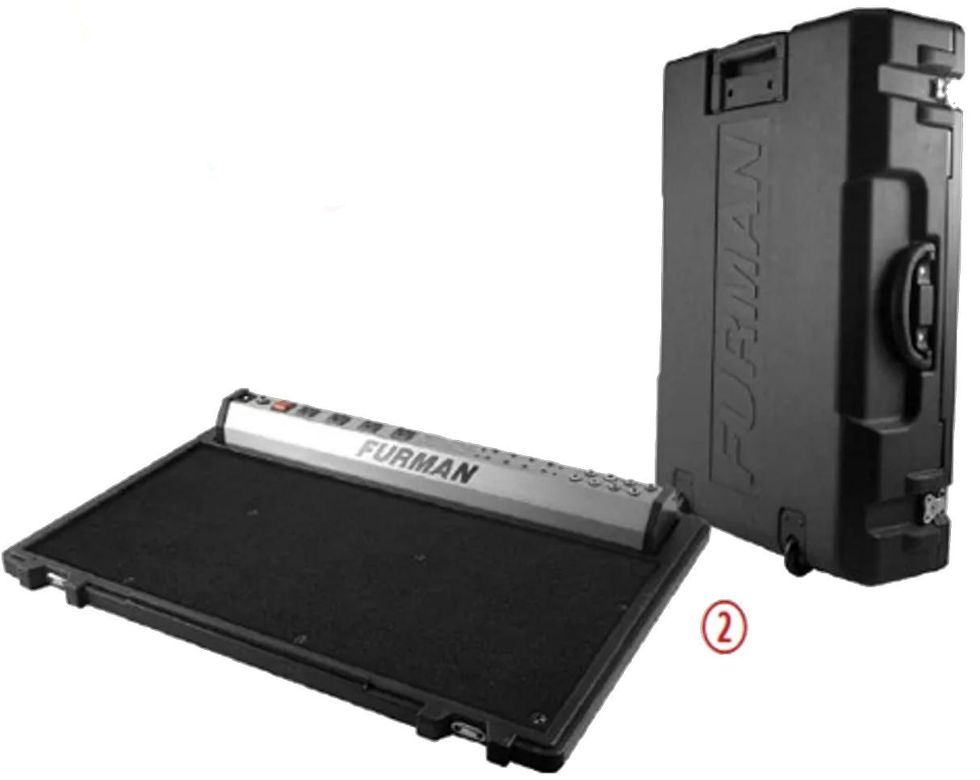
The Furman SPB-8C measures 28.5" x 20.125" and features a hardshell case with wheels and an extendable handle, as well as 12 power outlets (eight 9-volt DC and four 120-volt AC).
While the Furman SPB-8C (Street $349, furmansound.com) includes eight 9-volt DC jacks, four 120-volt AC plugs, a stereo effects loop with amp outputs, and a wheeled hardshell case with an extendable handle.
StageTrix Pedal Riser
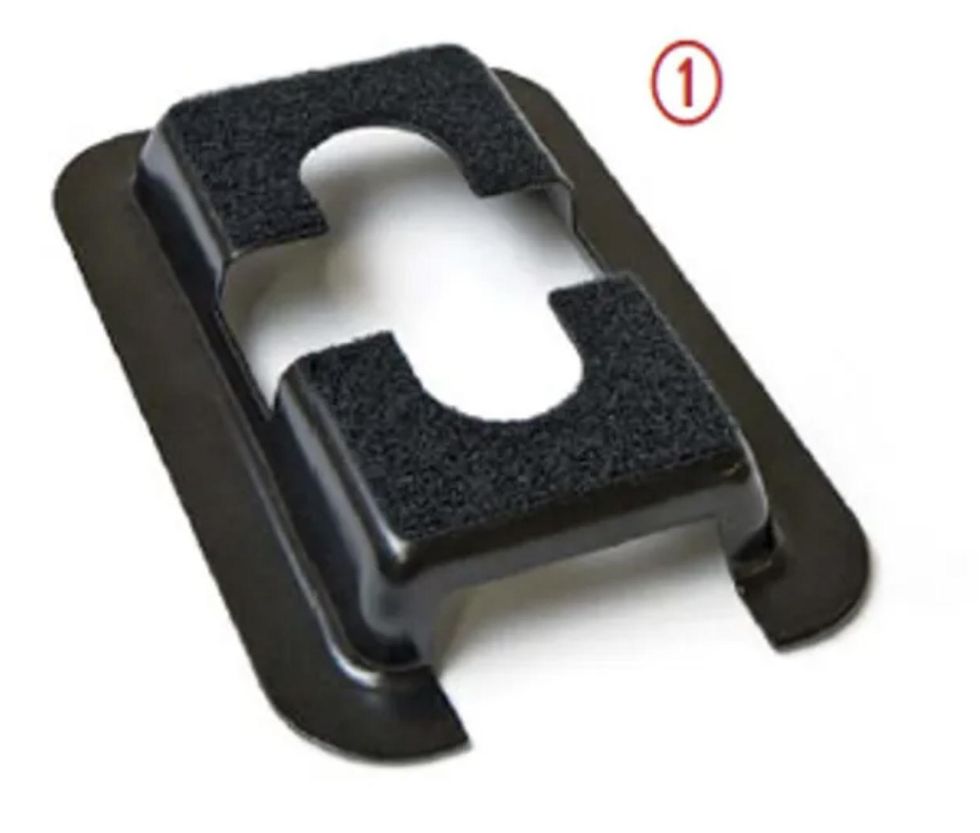
The StageTrix Pedal Riser units let you raise stompboxes in the second row of your pedalboard for easier activation, and they also feature a center channel for neater cable routing.
The tricky thing with these types of pedalboards is that, because everything must fit onto one flat surface, it can be hard to keep things tidy and ergonomically practical. This is because the more pedals you use, the more real estate you can lose to unwieldy wires or alternate power supplies. In addition, footswitches on the devices in that row of pedals furthest from your feet can be difficult to activate without hitting the knobs of pedals in the first row. Recently StageTrix addressed this issue with its Pedal Riser (Street $11.99, stagetrixproducts.com), which creates an elevated surface for pedals to create room underneath for wires.
Pedaltrain PT-JR
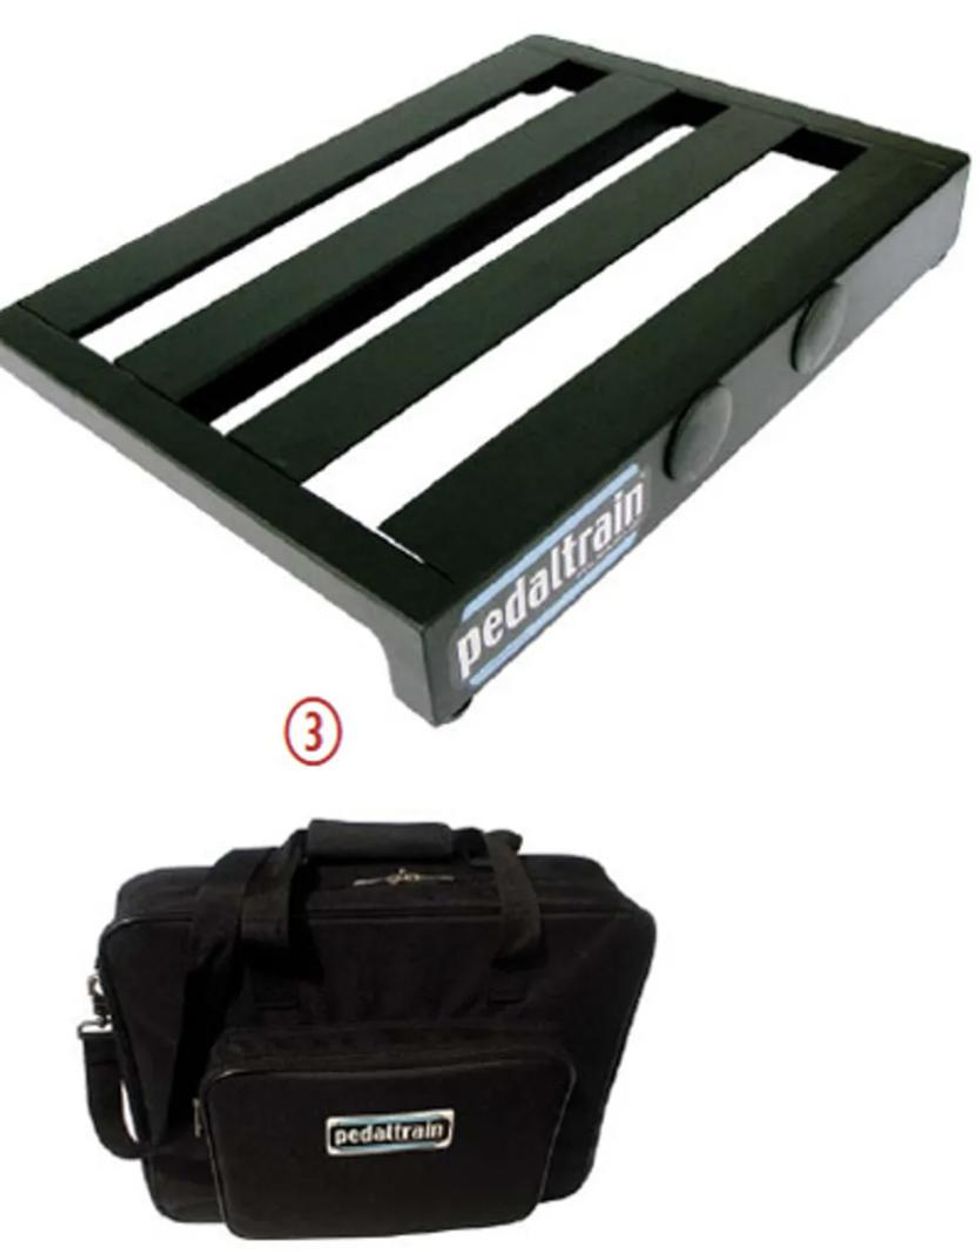
The Pedaltrain PT-JR measures 17" x 12.5" and features a lightweight metal frame that facilitates neat cable routing and is angled for easier activation of second-row pedals. It's also available with an ATA flight case.
Pedalboard manufacturers aren't unaware of these issues, and many take cable-routing considerations into their designs. Pedaltrain offer pedalboards in various sizes—including the PT-JR (Street $99, prostagegear.com)—and all feature an open-framed, angled construction that facilitates both easier activation of second-row pedals and unobtrusive routing of cables and power supplies.
MKS Professional Stage Products Pedal Pad MPS II Tour Series Boards
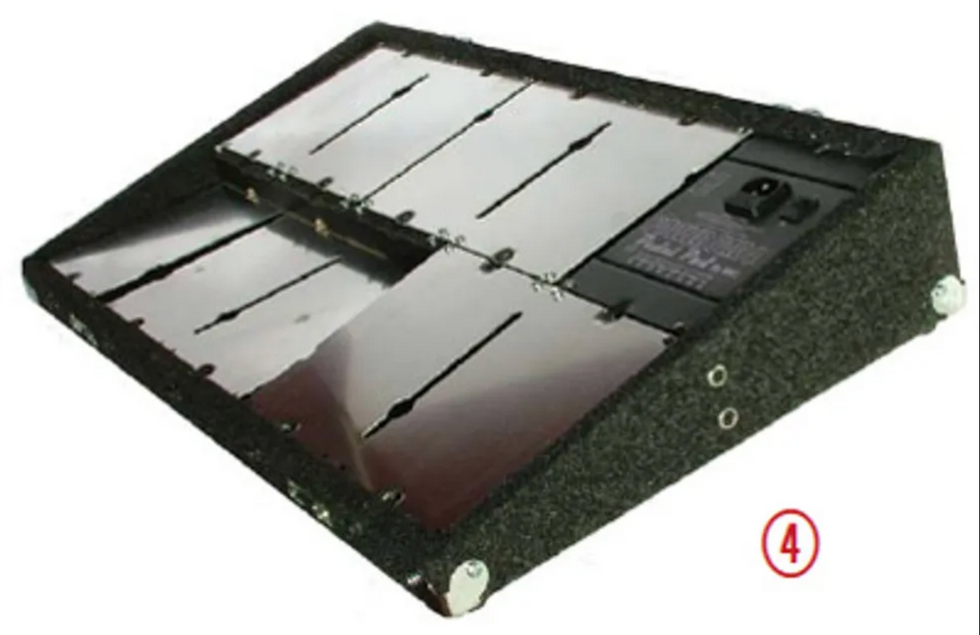
The Pedal Pad Pro Series MPS II Tour Series Pedalboard's two-tiered design lets you attach your pedals (with Velcro) to individual metal plates that can be set flat or angled. Its hardshell, carpet-covered case also includes the Power Pad II power supply, which has eight 9-volt DC jacks and one 110-volt AC plug.
MKS Professional Stage Products takes a slightly different tack with its Pedal Pad MPS II Tour Series boards (Street $299.95–$349.95, pedalpad.com), which have a modular, stair-steplike design that uses interchangeable metal panels to let you arrange and fasten pedals in just about any configuration—including flat or angled.
Many pedalboards, including most of those discussed here, come with an option for a gigbag or hardshell case. A hardshell case virtually guarantees pedal safety, and it's the only real option if you're, flying to a gig and need to check your pedalboard as baggage. However, keep in mind that a large board loaded with pedals can rival an amp's weight once you factor in the case itself. If you rely on public transportation to transport your whole rig, then a gigbag is the more practical option.
Attaching the Pedals
Once you choose the right pedalboard you need to make sure your stompboxes stay in place. Otherwise, you risk damaging your precious investments. And for guys who obsess over tone, it's not just pedals that cost a chunk 'o change— it's also the specialized power supplies, patch cords, and cables.
Although Velcro and generic hook-and-loop fasteners have been ubiquitous on pedalboards for a long time now, other solutions are coming on the scene, too. Some players have moved on to 3M's Dual Lock, while products like Godlyke's Power-Grip pedalboard tape (Street $19.95 for one meter, godlyke.com) are made specifically for keeping pedals in place. Each method has its pros and cons, but when you consider them all, which is the best way to keep pedals on a board?
Godlyke's Power-Grip
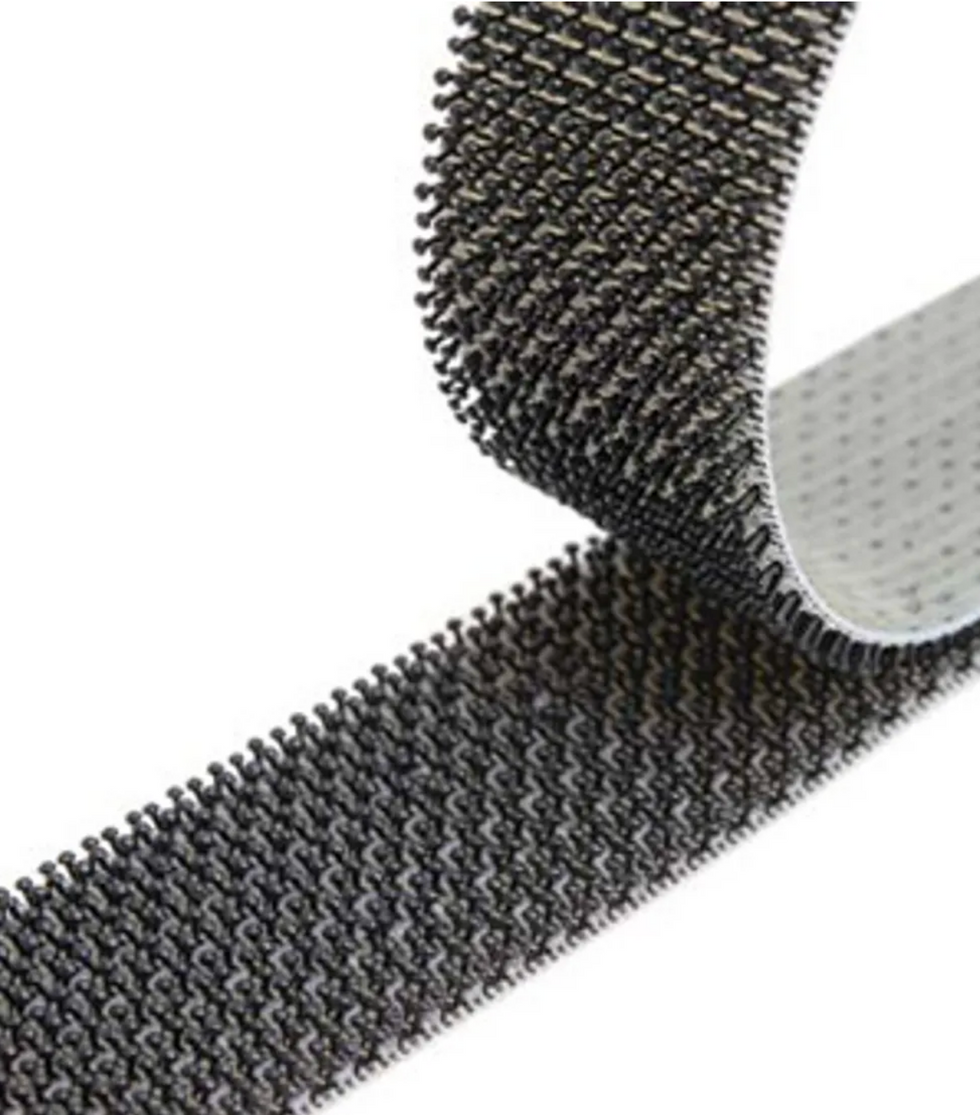
Godlyke's Power-Grip features multiple rows of mushroom-shaped posts that interlock to create a bond the company says is stronger than other hook-and-loop attachment materials.
"That's a question that I get and wrestle with almost daily," says Pedaltrain's John Chandler. "For years, I have searched for the new holy grail of pedal attachment. I've tried lots of materials and different grades of almost every type of Velcro and Dual Lock adhesive-based methods out there—and some other space-aged things that ultimately led me full circle back to the original hook and loop."
"While Dual Lock and other materials like it tend to hold pedals in place stronger, the ease of use, ease of removal and wide availability of Velcro has made it the preferred method. The adhesives used on most Velcro products are usually not as permanent and, therefore, are easier to remove with minimal residue or damage to a pedal. A lot of folks I've seen over the years have chosen to use Dual Lock and later regretted the decision when it came time to reconfigure their board or sell a pedal. I recommend Dual Lock only when someone knows exactly what pedals they want and the order they want them in—and they don't plan on changing them for a long time. There are very few people I've ever met who are so satisfied with their pedal setup that they will leave it alone for more than six months."
Once you've settled on an attachment mechanism, Chandler has a few basic steps he follows. "As a rule, try to get the bottom as flat as possible—remove rubber feet, pads, etc.—then apply the Velcro to the bare metal or painted surface. Many folks refuse to take the stock rubber pads off the bottom of pedals. For example, Boss pedals all come with that thick rubber pad that folks are reluctant to remove. This will make a huge difference in how well the adhesive works—especially when it's exposed to heat, say, in the hot trunk of a car or trailer. The Velcro's adhesive applied to a rubber pad will have the reverse effect when it gets hot and actually reject its bond."
Once you've applied the adhesive, Chandler says to lay the pedal on the board to see where you can get the most surface-area contact while still having the footswitch accessible.
Pedal Power
With all due respect to Eric Johnson and his views on the tonal differences among battery types, running all your pedals on any kind of battery will cost a fortune over time. Plus, changing batteries in a pedal that's attached to a pedalboard can be a real pain—especially if the compartment is on the bottom of the unit. Some pedalboards come with built-in power supplies that can adequately power most conventional pedals.
Voodoo Lab Pedal Power ISO-5

The Voodoo Lab ISO-5 (reviewed November 2010) features isolated DC outputs for 9-, 12-, and 18-volt devices.
However, not all pedals use DC power, and not all pedalboards come equipped with a power supply. In these cases, an isolated power supply is the solution. Worthy units include the Voodoo Lab Pedal Power ISO-5 (Street $109, voodoolab.com)— which includes four 9-volt, one 12-volt, and one 18-volt outputs—and the Visual Sound 1 SPOT (Street $19.95, visualsound.net), which can power up to twenty 9-volt pedals using an optional daisy-chain cable.
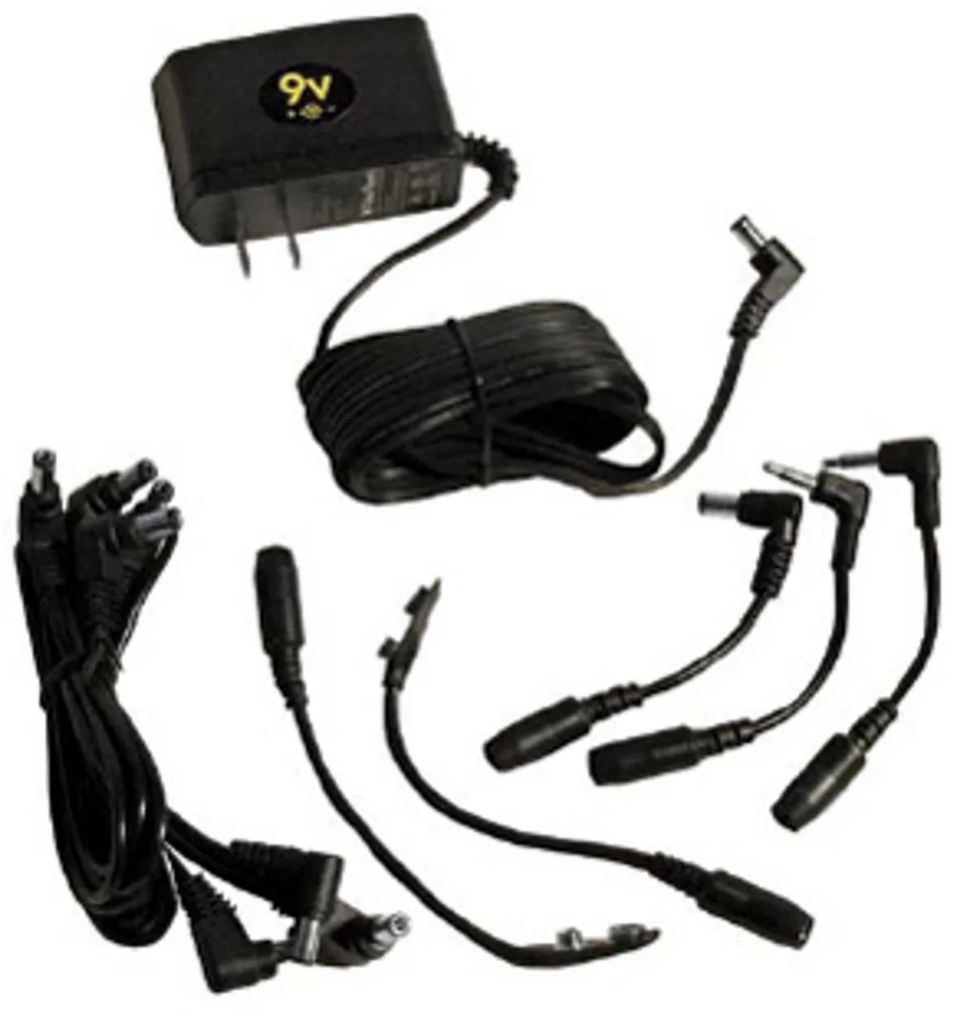
The Visual Sound 1 SPOT (top) can power up to eight pedals from one outlet, and it includes an eight-plug cable (left), two battery-clip converters (middle), an L6 converter for Line 6 modeling pedals (third from right), and two 1/8" converter plugs (far right).
"It's okay to share a few analog pedals with one of the outputs from a good power supply," says AnalogMike, "so you don't really need one output for each pedal. But a digital pedal—such as a tuner or digital delay—should not share power with any other pedals."
Noise and Signal Degradation
Most guitarists would probably not be surprised to hear that, the more pedals you add to your pedalboard, the greater the chances of problems. Even if you have relatively noise-free pedals, the extraneous noise from a bunch of them is going to add up. Sometimes it only takes one very cool—but very unruly—pedal to throw your signal chain into turmoil. And tone-robbing pedals can wreak havoc on your sound even when they're turned off.
One solution you hear bandied about a lot is to use true-bypass pedals. When turned off, a true-bypass pedal sends the signal straight from the input jack to the output jack without any connection to the pedal's circuitry, thus bypassing any tone-damaging properties of the pedal. Pedals that don't use true-bypass circuitry send your signal through a buffered section of the circuit even when the pedal is off—it just doesn't go through the effect section of the circuit.
Radial Engineering BigShot EFX True-Bypass Effects Loop Switcher

The Radial Engineering BigShot EFX True-Bypass Effects Loop Switcher features two footswitchable effects loops, allowing you to remove signal-degrading stompboxes from the path and create a true-bypass signal chain.
But Radial Engineering's Peter Janis says it's not as simple as always selecting true-bypass pedals. "There are pluses and minuses to truebypass, just as there are with buffered signals. The problem with true-bypass setups is that they tend to pop' hen the pedal is activated, and if many pedals are being used, noise can often creep into the system. Buffers are often used as a means to circumvent the problem altogether, but this too has a cost. A Stratocaster connected directly to a Marshall will sound different when the signal is buffered."
Radial Engineering Loopbone
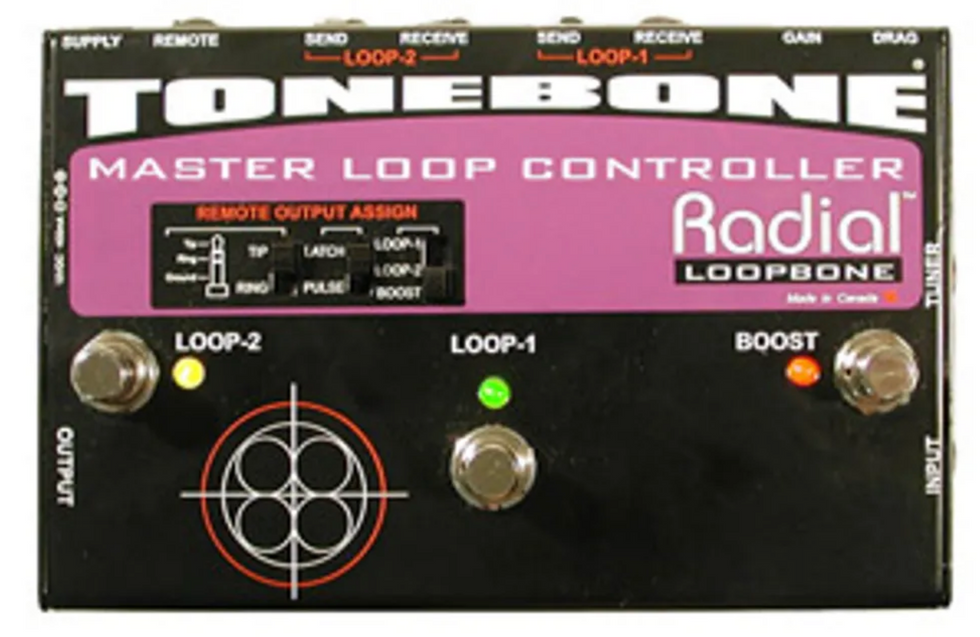
The Radial Engineering Loopbone features class-A circuitry, two footswitchable effects loops, a footswitchable VariBoost function, a pickup-load-correction circuit, Slingshot amp-switching capabilities, and a tuner out.
AnalogMike says, "I prefer true-bypass pedals whenever possible, but if you go through several true-bypass pedals and they're all off, you may lose some high end due to all the cabling. However, if you keep one pedal on, like a delay, that should provide enough buffering. A buffered-bypass pedal that is off will often be a good enough buffer. If you often run all your pedals off, a buffer on your pedalboard would be a good idea."
Cusack Pedal Board Tamer
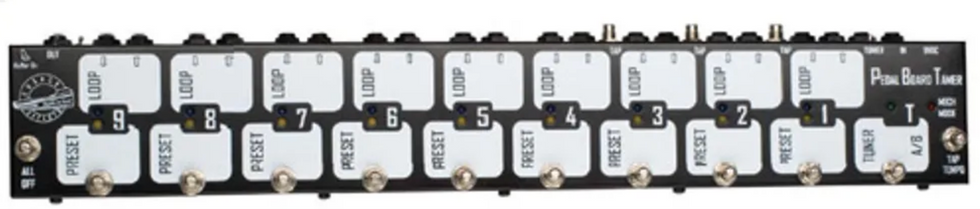
The Cusack Pedal Board Tamer (reviewed November 2010) offers nine effects loops—three of which may be operated in stereo—and has two guitar inputs that can be switched between truebypass and buffered, a mutable tuner output, three tap-tempo outputs, a Mech Mode mechanical looping mode, a Preset Mode with nine programmable presets, and an All Off switch.
If the sounds you seek aren't always available in true-bypass designs, there are still steps you can take to combat noise and improve sound quality. "First, test with batteries to see if the noise is from the power supply," says AnalogMike, "and also disconnect all other pedals when testing one pedal for noise. To test for noise, you have to set the pedal so that it's at the same volume when it's on as it is when it's off—that is, at unity gain. When you turn it up higher, it will amplify any noise that is already there, making it more apparent. If you turn the guitar all the way down, you can hear what's coming from the pedal. A little bit of white noise is normal when it's set at unity gain. There are a million things that can cause noise, so plug in, open up the pedal, and probe around with a chopstick or something and see if you can locate the cause—like a bad solder joint, a failing switch contact, a jack, a pot, etc."
If you have any pedals that just can't be tamed, another solution is to incorporate a loop controller like the Radial BigShot EFX True- Bypass Effects Loop Switcher (Street $79.95, radialeng.com) or the buffered Radial Loopbone Dual Effects Loop (Street $259.99), or the Cusack Pedal Board Tamer (Street $500, cusackeffects.com) to keep them out of the circuit until needed.
Cables

1: George L's Effects Pedal Cable Kit includes 10' of cable and 10 right-angle plugs for creating patch cables at any length you wish—without any tools. 2: The Planet Waves Cable Station Pedalboard Cable Kit includes 10' of cable, 10 gold-plated right-angle plugs, and a cable cutter. 3: The Lava Mini Pedalboard Cable Kit includes 10' of cable, 10 straight solderless plugs, and a wire stripper. 4: The Core X2 Pedalboard Cable Connector Kit includes 20' of cable, gold-plated plugs (two straight and eight right-angle), a cable cutter, and a hex wrench.
Quality cables are also important. "You'd be shocked at the difference in sound quality if you sat down and A/B'd different cables," says guitar-tech Scott Appleton. "If you use great cables, noise really shouldn't be an issue—provided you have everything wired correctly." Many companies offer low-capacitance pedalboard cable kits that seek to minimize signal loss. George L's Effects Pedal Cable Kit (Street $73.47, georgels.com) includes 10' of cable and 10 solderless, right-angle plugs for tool-free creation of patch cables in custom lengths. Planet Waves Cable Station Pedalboard Cable Kit (Street $47.46, planetwaves.com) includes 10' of cable and 10 gold-plated right-angle plugs, and a cable cutter. The Core X2 Pedalboard Cable Connector Kit (Street $49.95, coreoneproduct.com) includes 20' of shielded cable, two straight and eight right-angle gold-plated plugs, a cable cutter, and a hex wrench for assembly. Another option is the Lava Mini Pedalboard Cable Kit (Street $79.95, lavacable.com), which includes 10' of cable, 10 straight solderless plugs that have a 360-degree ground connection, and a wire stripper.
Fingers Trump Feet
At the end of the day, no matter how deckedout your pedalboard is, the most important part of your tonal equation is your fingers and how they interact with what's in your rig. "A common thing I see is that a lot of players are always trying to chase someone else's sound," says hired-gun Joe Augello (Jennifer Hudson, Robin Thicke, Backstreet Boys). "Getting a Univibe and a Fuzz Face because Jimi Hendrix used them isn't going to make you sound like him. Guys like Jimi and Eddie Van Halen were innovators and always experimented with their gear. They weren't using what everyone else was using at that time. It's important to develop your own voice and set yourself apart from everyone else."
[Updated 7/22/21]
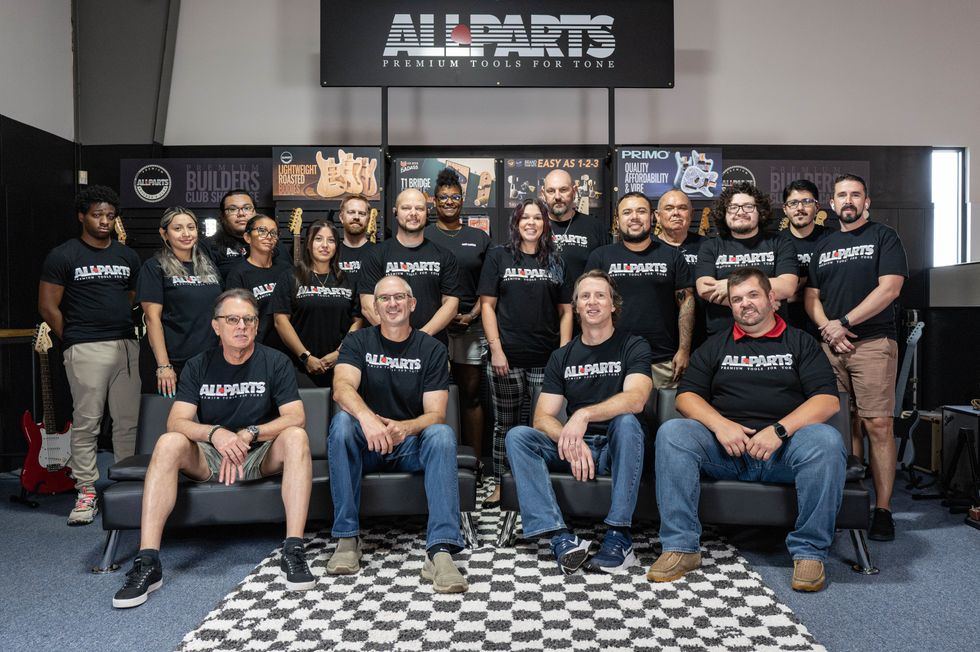 The Allparts team at their Houston warehouse, with Dean Herman in the front row, second from right.Photo by Enrique Rodriguez
![Devon Eisenbarger [Katy Perry] Rig Rundown](https://www.premierguitar.com/media-library/youtube.jpg?id=61774583&width=1245&height=700&quality=70&coordinates=0%2C0%2C0%2C0)