We guitarists have a long tradition of changing the electric guitar’s inherent tone by experimenting, inventing, and developing new tones and timbres through effects. More specifically, effect pedals. I believe our continued open-mindedness has kept our instrument relevant throughout the many decades and proven just how limitless a musical chameleon it truly is.
There is also a parallel tradition, almost as long, of using guitar pedals in unintended ways on other musical material. This time, in honor of our all-things-pedal issue, I’m going to show you how to set up and use your existing pedals on other audio sources besides your guitar. Before we get too far into the woods and try to connect our pedals to and from our audio interface, I want to briefly address two subjects—“levels” and “balanced/unbalanced signal cables”—that are important to understand, so you’ll get the best results.
Listed from weakest to strongest, there are four types of signal levels in the audio world: mic, instrument, line, and speaker level.
Mic level is the signal voltage generated by a microphone and is so weak, it requires using a preamplifier (preamp) to bring it up to line level.
Instrument level is the inherent signal output level (impedance varies) put out by an instrument, like the electric guitar or bass. It also requires a preamp to bring it up to line level.
Line level is the highest of the three levels but still needs a preamp and comes in two varieties: consumer (-10 dBV) and professional (+4 dBu). The latter is what your audio interface will boost everything up to before sending the signal to your monitor speakers.
Speaker level comes after all the signals (any of the previous three) are collectively boosted to line level and is then (post-amplification) output to your monitors. Because of the comparatively high voltage, this is why we use dedicated speaker cables and not instrument cables to connect the output of your interface to your monitors.
Now, let me quickly define the difference between balanced and unbalanced signal cables.
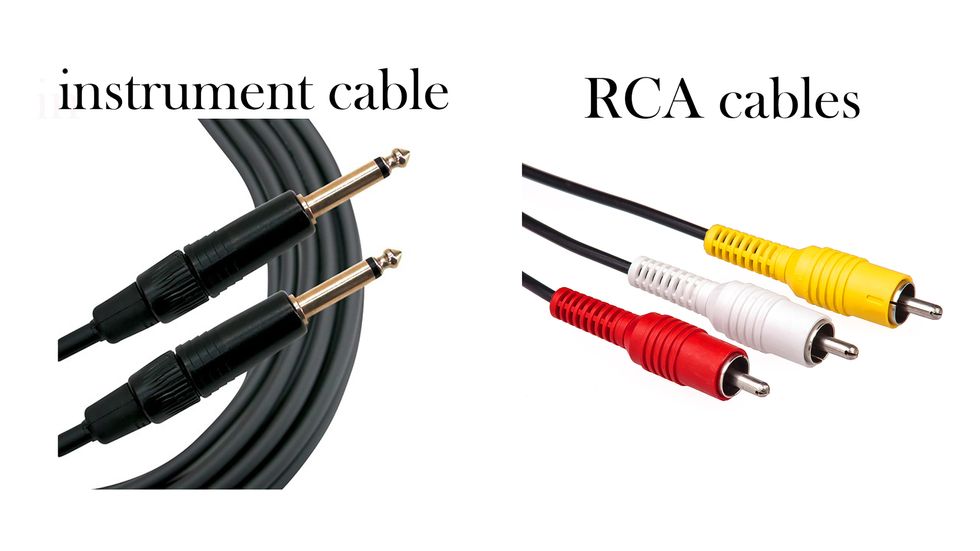
Fig. 1
• Unbalanced signal cables: The two most common are our standard, high impedance 1/4" TS (tip, sleeve) instrument cables and RCA cables [Fig.1].
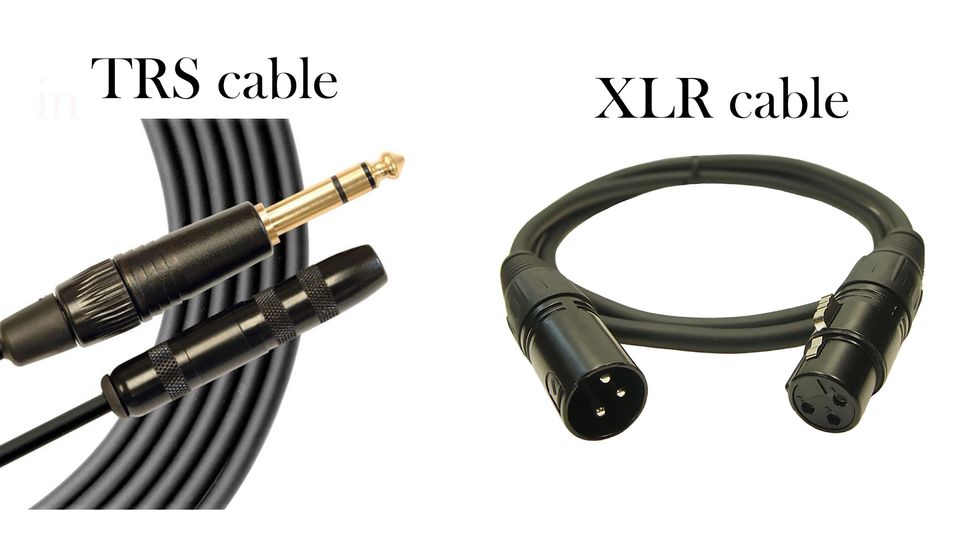
Fig. 2
• Balanced cables: The two most common are XLR cables and TRS 1/4" cables [Fig. 2].
Using this knowledge, we can get started making some musical mayhem and connecting our pedals.
Step 1: Connect a balanced XLR or 1/4" TRS cable from a line output of your audio interface and to the input of your reamp box. I highly recommend the Radial EXTC Effects Reamper Class A Guitar Effects Router ($329 street), which further offers the possibility of combining two different effects loops. The reason why we need a reamp box (there are many on the market) is because it will convert the balanced, line level output of your audio interface to an unbalanced, instrument levelsignal that guitar pedals are designed to accept. A good reamp box can also match the impedance of your particular instrument for even better signal fidelity.
Step 2: Connect a standard 1/4" instrument cable from the output of the reamp box to your pedal(s).
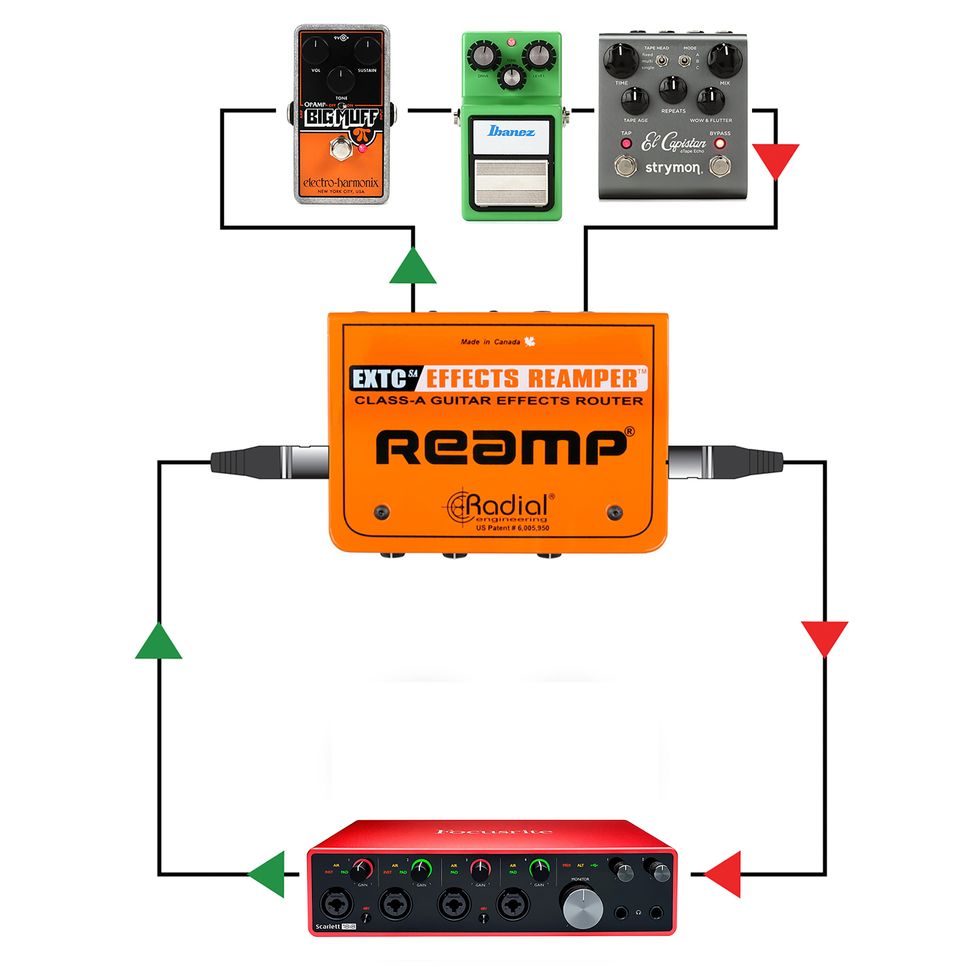
Fig. 3
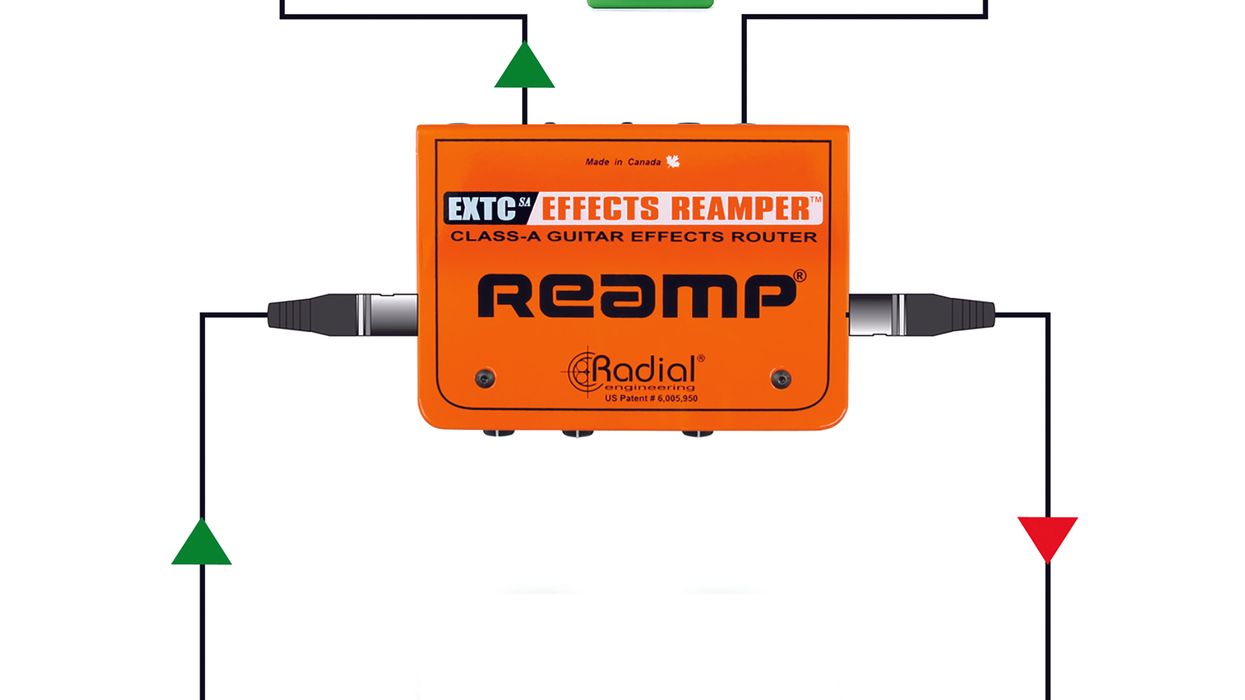
Step 3: Connect another 1/4" instrument cable from the output of your last pedal to either your guitar amp and record your new tracks through your guitar amp, or plug into a regular DI box (which will convert the signal back to a balanced, line-level stage) and take that output to the input of your audio interface. If you have the Radial EXTC Effects reamper, you can do this all in one box [Fig. 3]!
Once this is set up, you can start sending any track you wish from your DAW/audio interface to all your pedals and go crazy! Soak your vocals in pitch-shifted, distorted reverb. Flange your synths and add delayed chorus. Or bit crush your drum tracks.
What I particularly love to do is play with various delay pedals’ feedback amounts and delay times as I record and get all of those quirky pitch-shifted pings and pongs from adjusting those values on the fly. You can also consider adding distortion and harmonies to a vocal on key words or phrases within your song. Your imagination is the only limit!
Finally, I encourage you to drop me a line at recordingdojo@premierguitar.com if you have questions and requests for future topics to cover. Until next time, namaste!

![Devon Eisenbarger [Katy Perry] Rig Rundown](https://www.premierguitar.com/media-library/youtube.jpg?id=61774583&width=1245&height=700&quality=70&coordinates=0%2C0%2C0%2C0)


