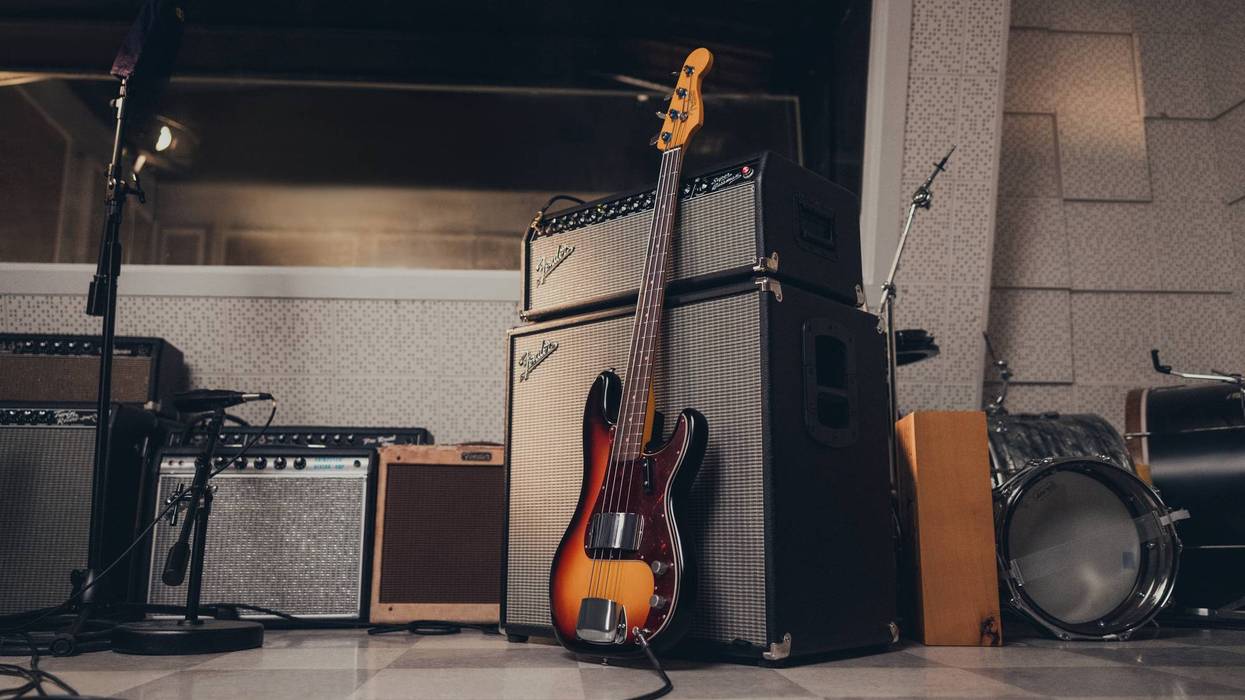
“When in doubt, don’t.” It’s a pearl of wisdom that offends risk takers and guides more than a few tortoises to the finish line ahead of the rabbits. But in the tone-chasing world this dictum carries extra weight, because depending on your aims, anything you situate between guitar and amplifier can subtract as much as it adds. Indeed, a little restraint can go a long way toward sweetening a sound.
And restraint is one of the things that makes the ZEQD-Pre, a preamp co-designed by EarthQuaker and Mike Zaite (aka Dr. Z), such an elegant piece of kit. The things they didn’t add make it easier to use. The streamlined design also makes the ZEQD-Pre feel truly additive. It can lend body and excitement to big tube amps that sound flat at low volume. And as an analog addition to digital signal chains, it adds real life and a tactile dimension to flat, drab, or spiky DAW and modeler tones.
Feel Free With The Help Of A Pre
Though the ZEQD-Pre is a beautifully integrated whole, it’s effectively made up of two sections. There’s a passive EQ that can do a lot on its own to recast or fine tune the sound of a tube amp or modeler. It also features a boost. Switching on the boost disengages the EQ. But both sections use the level control as an output volume control.
In my first experiments with the ZEQD-Pre, I situated it in front of a 50-watt Fender Bassman and 2x12 cabinet. And though I suspect more potential customers will be interested in the EarthQuaker’s potential in digital environments, it can transform conventional tube amplifiers. I rarely get to turn my Bassman up much past 2 in my house. But the ZEQD-Pre’s EQ section made those modest volumes sound much fuller. The boost is not a high-gain affair, but it adds weight and excites overtones that might otherwise lay dormant at low volume. At higher amp volumes it can add a just-right nudge into the dirty zone that almost always sounds silky rather than harsh.
EarthQuaker Devices ZEQD-Pre Preamp Demo
“It is zingy, responsive, and does much to take away the uncanny valley sense of lifelessness you can feel when interacting with a modeler.”
Use of the EF86 in a preamp is not common—at least relative to the ubiquitous 12AX7. But Dr. Z’s choice of the EF86 for the boost is an inspired one. It is zingy, responsive, and does much to take away the uncanny valley sense of lifelessness you can feel when interacting with a modeler. Those that know the EF86 by its too-hot-to-tame reputation needn’t fear that it will be a handful though. The ZEQD-Pre boost voice is balanced and lively in all the right ways, and these attributes are especially apparent when the pedal is paired with a digital end destination.
When testing the ZEQD-Pre in this capacity—by running a cable from the headphone output straight into the Hi-Z input of my Universal Apollo Twin—I did not make it easy on the EarthQuaker. My main instruments are Jaguars and Jazzmasters, and the relatively thin and trebly output from both of them rarely flatters modeled and DI sounds. But I really liked the tones that I tracked with just the ZEQD-Pre and the DAW—especially without a modeled amp in the mix. The EQ adds body and tone-shaping versatility, and the boost lends real character and color, inhabiting a sweet space that is neither Fender Princeton nor Vox AC15, but which possess some of the smooth richness of the former and the sparkle of the latter. I enjoyed the sound of the ZEQD-Pre direct into the Apollo so much that it ceased to feel like a compromise between amp and modeler. Instead, it felt like something unique—an amp with its own very appealing flavor that I would use for its sonic virtues as much as its convenience.
The Verdict
Though I’ll opt for a tube amp in almost any situation where there is a choice, I’ve warmed to some of our faux-amp friends in the digital domain. That said, I think I would choose the ZEQD-Pre and my pedals over almost any modeler. In direct-to-DAW situations, the ZEQD-Pre is warm, alive, and sounds, well, a lot like a real amp. It also feels like it was designed by people that know how a tube amp should feel under the fingers and in a room.
The ZEQD-Pre makes distortion and fuzz units sound like their real selves. And even without a simulated power amp, the cab sim makes rigs sound great through flat response monitors. The ZEQD is nearly $400, and for most of us, that’s a hefty enough sum to give pause. But the U.S.-made ZEQD-Pre is designed by gifted builders that have poked around the innards of amps and stompboxes for years and built classics in their respective fields. So, you can rest assured that the bars this pedal needed to clear in sonic and quality terms are high ones. I was pleasantly surprised and impressed—to the point where $399 seemed a very reasonable price to pay. And if you’re a tube amp loyalist navigating the worlds of backline-free gigging and digital recording, you may end up similarly smitten.
When Japanese engineer Susumu Tamura designed the Maxon OD808 overdrive, he could hardly have known that it and its export twin, the Ibanez TS808 Tube Screamer, would become perhaps the most influential and, probably, imitated pedals in stomp box history. In fact, upon its introduction in 1979, the Tube Screamer, whose smooth sound is characterized by a bass roll off, midrange bump, and slight high-end attenuation, was not an instant success. But as the pedal was adopted by players as disparate as Stevie Ray Vaughan and Kirk Hammett, it gradually became a ubiquitous presence on pedalboards of all persuasions.
Tumura, a guitarist himself, spent several of the intervening decades working on wireless designs. In recent years, however, he began modifying Tube Screamers for Japanese guitar stores. But now in his seventies, he found the pace—almost 1,000 pedals annually—exhausting. Why not, he thought, just make a pedal that incorporated all his refinements? Enter the TWA SC-01 Source Code, which is exactly that. Handmade in the U.S., the SC-01 features improvements on the TS design, including 18V operation via an internal regulator, a +6 dB boost, anop amp that claims toinject “complex harmonics and an amp-like feel,” and, most importantly, a “Bite” control that can mix in asymmetrical, tube-like clipping to the symmetrical clipping-based sound of the original.
Source in Session
Using a Stratocaster and Fender Princeton Reverb as my test platform—a made-for-Tube Screamer rig if there ever was one—I first determined whether the Source Code could speak traditional Tube Screamer by A/B-ing it with a recent Ibanez TS-9 reissue. It does, producing tones indistinguishable from the traditional circuit when the bite control is at zero. That said, if your take on Tube Screamers has always been, “if it could only just…,” you’ll find that the bite knob opens up a whole new world. Goosing it adds the extra measure of sizzle, zing, and teeth that more common iterations of the design always lacked. And adjusting the balance of the drive and bite controls dials in an enhanced and expanded range of overdrive tones that truly transcend the original TS.
The Verdict
Whether you deploy Susumu Tamura’s latest refinement of the TS circuit to hit the input of an amp that’s already breaking up or as your primary source of overdrive, you won’t be disappointed. It offers all the essence of the original, but it’s the extra oomph and range that impresses.
The tweedDeluxe circuit sets the gold standard in tone for many of us. And for good reason. It’s simple and responsive, with a warm, compressed, midrange-forward voice that’s perfect for jazz and country lines at low to moderate volumes—and a distinctive, saturated gnarliness in the upper reaches of its output that’s hard to beat for rock. If that’s the sound you hear in your head, many would say a vintage model is still the one to have.
If anyone could top that with a true “tweed killer,” I’d put my money on George Alessandro. That’s not just because his clientele reads like a Mount Rushmore of guitar tone—David Gilmour, Derek Trucks, and Warren Haynes are just a few who’ve cited Alessandro in current gear lists in PG. It’s the combination of his deep firsthand knowledge of the history of guitar amp circuits and his tireless quest to source the finest components that not only land him those rock-star devotees, but easily place his name among mythical amp wizards like Alexander Dumble and Ken Fisher, and make him the guy for the job.
I’ve had the good fortune to play one of Alessandro’s 5E3 copies, and it was so familiar, it felt like what I imagine one of those amps must have sounded like fresh out of the factory in the late ’50s. With his new combo, The Dane, he’s used that circuit as a jumping off point—with a nod toward Dumble as well—and optimized it for a modern pedal-using player. Not only does the 14-watt The Dane deliver the same sonic hallmarks as the 5E3, it offers more headroom and an even wider range of touch-sensitive response.
Do the Evolution
Despite all the tweed Deluxe talk, the Dane is no clone. Instead, it’s inspired by the 5E3 circuit and a Dumble Tweedle Dee—that legendary amp builder’s own tweed Deluxe mod—that landed on Alessandro’s bench for service. From there, Alessandro evolved the design, creating a unique preamp circuit, which uses a pair of ECC83MG/12AX7s. On the user end, the most recognizable change might be the inclusion of a 3-band EQ. Alessandro paired his preamp with a ’50s-style output section that employs a pair of 6V6s. Together, and in conjunction with Alessandro’s signature Eminence GA-SC59, they evoke a vintage vibe, achieving the tube compression and harmonic complexity tweed Deluxe players know well, but with more clean volume.
As a tweed Deluxe player who also loves pedals, I’ve often found myself a little bit conflicted. There’s a weird imaginary line I feel like I cross every time I plug a fuzz—or even worse, a digital pedal—into my 1949 5A3. But if I want to use my prized amp on as many gigs as I do, it’s a necessity. With The Dane, not only is there no conflict, it actually feels more welcoming to pedals. That’s not just about headroom, though that certainly helps—the 3-band EQ really goes the distance when it comes to shaping your sound.
Much like the dynamic interplay between the tone and volume controls on a vintage Deluxe, each of The Dane’s EQ controls seems to shape the whole of the sound. I found this to be especially helpful with dialing in dirt tones. Over the course of a few sessions with The Dane, I plugged in a wide range of gritty pedals, including a Klon KTR, Analog Man King of Tone, EHX Ripped Speaker (there’s some comedy here in using a fuzz that’s supposed to sound a little broken), and an Analog Man Sun Fuzz. In each, I found that I was able to shape their tones with the EQ more than I would ever expect from other amps. And that goes for using those to push The Dane into overdrive as well, which, as ruthlessly delightful as it is to do on a tweed Deluxe, is not especially sculpt-able. With the KTR adding some gain and heading into cranked volume territory, the mid control alone added a heft to my Creston JM-style that felt resolutely heavy and thick—much more so than I would expect from JM-style pickups. And at more polite volumes, I could use the pedal alone to get my overdrive, while still preserving the character and voice of the amp.
Full Control at Your Fingertips
While reviewing The Dane, there’s a quote that kept coming back to me from when I interviewed Alessandro a few years ago: “If I can make it a limitless journey, then I did my job right.” With The Dane, he’s managed to take the tweed Deluxe sound and remove the limits.
I think there are a lot of ways Alessandro gets there, and one of those is through his next-level component sourcing. With the fervor of a hi-fi aficionado, Alessandro has most of his components custom built, with quality control that goes well beyond the consumer-grade level.
The result is that The Dane, like every Alessandro amp I’ve played, responds like a performance sports car: It runs silently, has an ultra wide dynamic range, a broad frequency range, and is fast and articulate, all of which keeps control in the player’s hands. That might be daunting if you’re used to an amp that heavily colors your phrasing by limiting the window of control (though pedals can help with that). But if you want to keep that window wide open, The Dane will get you there.
What, exactly, does that mean? The response, dynamics, and EQ keep the controls in your hands. Playing intensity and attack have more noticeable results. Sustain is there when you need it. In short, The Dane is a thrill to play.
The Verdict
As a devoted tweed Deluxe user, I’m genuinely taken by The Dane. Alessandro has preserved the character of the original while opening it up with more dynamic range, control, and possibility. But it goes beyond that, because The Dane isn’t just a 5E3-style amp—it’s a solution. Whether you’re playing clean articulate lines (I didn’t have an archtop handy, but I can assure you this amp would be the perfect transparent companion for jazz hits) or cranking with abandon, The Dane has the harmonic range and firepower for the gig. Its 14 watts are not only bold and powerful, this combo maintains its composure through its entire output, making it fully usable at all levels. At $3,000, The Dane, handmade by one of the ultimate legends of amp building, is an unrivaled feat.
Any effect can color a guitar’s personality and language. But Boss’ new XS-1 Poly Shifter literally stretches the instrument’s vocal range. With the ability to shift input by +/-3 octaves or semitones, it can turn your guitar into a bass, a synth, or a baritone, or function as a capo. It also seamlessly generates harmonies for single note leads and keeps up with quick picking without any apparent latency. Furthermore, the pedal is capable of stranger fare that stokes many out-of-the-box ideas. But if you’re a guitarist that plays more than one role in your band—or musical life in general—the XS-1 can be a utilitarian multitool, too. It’s a pedal that can live many lives.
- YouTube
The XS-1, which was released alongside its bigger, more intricate sibling, the XS-100, is an accessible route to exploring pitch shifting’s potential. Housed in a standard Boss enclosure, it doesn’t consume a lot of floor space like the XS-100 or DigiTech’s Whammy. And while it achieves this spatial economy in part by forgoing a built-in expression pedal (which could be a deal breaker for some potential customers) it’s still capable of +/- seven semitones and a +/- three-octave range that can be utilized in momentary or latching applications.
Slipping, Sliding, and Twitching
Though digital pitch shifters have always been capable of amazing things, early ones sounded very inorganic at times. High-octave sounds in particular could come across as artificial, like the yip of a robot chihuahua plagued by metal fleas. Some very creative players use these colors—as well as the most sonorous pitch shift tones—to great effect (Nels Cline and Johnny Greenwood’s alien tonalities come to mind). In other settings, though, these older pitch devices can be downright cringey.
“The pedal clearly represents several leaps forward from first-generation pitch shifters.”
The XS-1 belies digitalness in some octave-up situations. But the pedal clearly represents several leaps forward from first-generation pitch shifters. Tracking is excellent and shines in string bending situations. Semitone shifts can provide focused harmony or provocative dissonance depending on the wet/dry mix and which semitones clash or sing against the dry signal. At many settings the XS-1 feels alive and organic, too, with legato lines taking on many of the touch characteristics of a violin-family instrument. You get far less of a note-to-note “hiccup,” and glissandos take on a beautifully fluid feel—with or without a slide—letting the XS-1 deliver convincing pedal- and lap-steel-style textures when you add a single octave up. (Such applications sound especially convincing when you kick back on guitar tone and restrict your fretwork to the 3rd through 5th strings, which keeps digital artifacts at bay.)
Mixmaster Required
The most crucial XS-1 control is the mix. For the most convincing bass, baritone, and 12-string tones, you’ll want a fully wet signal. But composite sounds can be awesome, too. You can use the control’s excellent sensitivity and range to highlight or fine tune the prominence of a consonant harmony. But it’s sensitive enough to make blends with dissonant harmonies sound a lot more intentional and integrated. And many of these eerie, wonky, off-balance textures are extra effective when introduced in quick bursts via the momentary switch. (That switch can also deliver great flashes of drama with more consonant harmonies—like dropping in a 3rd or 5th above a resolving chord in a verse.)
You can get creative in other ways using dissonant blends. Droney open tunings can yield fields of overtones that sound extra fascinating with delay, reverb, or 12-string guitar… or all of them! Dialing in blends that really work takes some trial and error, and you’ll definitely hit a few awkward moments if you’re navigating by instinct alone. But those same experiments often uncover real gems—especially in the pitch-down modes, which tend to produce more mysteriously atmospheric textures than their pitch-up counterparts.
The Verdict
Boss’ most straightforward pitch shifter covers a lot of ground. If you play in a duo, trio, or small band, it can expand that collective’s stylistic and harmonic range. It’s small, at least relative to treadle-equipped pitch shifters, so if you’re not a pitch shift power user, you don’t sacrifice a lot of room for an effect you might only employ occasionally, and you can still use the expression pedal jack to hook up a pedal for dynamic pitch control. The $199 price puts it in line with competitors of similar size and feature sets, but the XS-1 is a great value compared to more elaborate, treadle-equipped pitch shifters. If you’re taking your first forays into pitch shifting, or know that you need only the most straightforward functions here, it will ably return the investment. And along the way, it might even unlock a whole cache of unexpected tonal discoveries.
Most people think of samplers as drum machines with delusions of grandeur—four-bar loops, predictable patterns, and neatly sliced bits living forever in the prison of the grid. But for me, samplers and loopers are something completely different. They’re instruments of disruption. They’re creative accelerants. They’re circuit breakers designed to shock me out of my comfort zone and force my compositions, productions, and performances into strange, exhilarating new shapes.
One of my favorite studio practices—and something I encourage my Recording Dojo readers to experiment with—is to sample your performances. Not a preset library, not a pack from somebody else, but use your own melodic lines, motifs, rhythms, textures, and half-formed ideas. There’s something magical about hearing your own musical DNA come back to you in an unfamiliar, mutated form. It’s like collaborating with a version of yourself from an alternate timeline.
The real thrill isn’t about capturing pristine performances. In fact, it’s often the opposite: I’ll grab a phrase that’s imperfect, or mid-gesture, or harmonically unresolved, and drop it into a sampler purely to see what it becomes. When you do this, your musical habits—your well-worn licks, default rhythms, and predictable choices—don’t stand a chance. The sampler shreds them, recontextualizes them, and hands them back as raw material for re-writing, re-arranging, or composing something that never would have emerged in a linear workflow.
Sometimes the transformation is subtle—a lick becomes a rhythmic ostinato, a sustain becomes a pad, a passing tone becomes a focal point. Other times the sampler just mangles it, spits it out sideways, and you think, ‘Oh… now that’s interesting.’ Either way, it becomes a tool for breaking patterns, both musically and psychologically.
My Process: Mutations, Not Replications
My approach to sampling isn’t any more complicated than anyone else’s. I’m not using some secret, elite technique. I’m simply collecting fragments—little melodic cells, rhythmic quirks, harmonic gestures—and giving them permission to misbehave.
I’ll chop up key licks into uneven slices, or isolate just the back half of a phrase, or extract a rhythmic hiccup that wouldn’t survive in a normal editing session. Then I reassemble these bits with the expectation that they won’t behave. I want mutations. I want the musical equivalent of genetic drift. I’m not trying to color within the lines; I’m trying to see what happens when I throw the coloring book across the room.
Once the sampler gives me something intriguing, I run these new creatures through chains of further processing: glitch delays that stutter and fold the sound into origami-like shapes, micro-loopers feeding into overdrives or fuzz pedals, shimmering reverbs that stretch a 200-millisecond blip into a widescreen texture. The result can be anything from a ghostly sustained pad to a snarling, percussive accent, to a completely alien harmonic bed.
You can use these elements as alternate melodic lines, counterpoint, ambient beds, transitions, ear candy, or even structural material for entire songs. And because the source is you, the end result stays connected to your musical identity—just bent, twisted, and refracted into something fresh.
Outcome Independence: The Spirit Behind the Process
If there’s one thing that makes this approach powerful, it’s letting go of the expectation that what you sample must “work.” This is pure experimentation, not product-driven crafting.
I’m outcome-independent when I do this. I’m not looking for a result so much as engaging in the joy of the unknown. Some days nothing meaningful emerges. Other days I strike gold. But either way, the process sharpens my creative instincts. It keeps me curious.
“There's something magical about hearing your own musical DNA come back to you in an unfamiliar, mutated form.”
I use this same strategy when producing artists or working on film and soundtrack material. Recently, I applied it to pedal steel—an instrument known for its lyrical beauty—and the resulting textures were … well, not beautiful in the traditional sense. They were fractured, shadowy, almost Jekyll-and-Hyde. Perfect for a track built around the duality of personality. The clients absolutely loved the unpredictable, emotive soundscape those mutated pedal steel lines created.
Some Favorite Tools for Sonic Mutation
You don’t need a million pieces of gear to do this. A single sampler and a single effects chain can take you far. But here are a few of my favorite “chaos engines,” all of which I own and use regularly:
• Teenage Engineering OP-1 Field – A sampler, synth, tape machine, and chaos generator disguised as a minimalist art object. Its sampling engine and tape modes are perfect for tonal mutations.
• Teenage Engineering EP-133 K.O. II – A quick, dirty, wonderfully immediate sampler for slicing, punching, and recombining your ideas without overthinking.
• Omnisphere 3 – The granular engine alone is a goldmine for turning simple samples into cinematic, evolving textures.
• NI Maschine – Still one of the fastest environments for grabbing a sound, flipping it, and building an idea around the unexpected.
• …and whatever else you have lying around. The point is exploration, not allegiance to any one workflow.
Final Thoughts
Sampling your own voice as an instrumentalist—and then breaking it—reminds you that creativity doesn’t live in the safe, predictable spaces. It lives in the moments where you lose control just enough to discover something new. Give your sampler permission to surprise you, confuse you, and sometimes even challenge your sense of what you sound like. That’s where the good stuff begins.