Usually I answer questions submitted by astute Premier Guitar readers, but this month I’m going to focus on a Supro Super 1606 (Photo 1) owned by a good friend of mine, Bobby. He brought it to me in non-functioning condition and asked if I could get it working again. “Well, of course,” was my reply, “but depending on what has failed, it may not come back as exactly the same amp you’ve come to know and love.” I say this to all my customers because changing any component in an amp has the potential to affect the way it sounds or feels. Sometimes it’s not noticeable and other times it can have a substantial impact.
I especially warn customers who want to have an amp’s filter caps changed just as a preventative measure. “I really, really love this amp,” they’ll say, “but it has a bunch of years on it and I think it’s time to have the filter caps replaced.” My response is always, “Well, if you really, really love this amp and it’s not giving you any problems related to the power supply, I suggest you continue to enjoy it the way it is.”
Now, there are arguments for changing the caps as a preventative measure, such as a touring situation where reliability is paramount, but in general my thinking is: If it ain’t broke, don’t break it. While a change may bring the amp closer to what it was when it was built, it’s more than likely that creature won’t be the amp you’re currently in love with.
But back to Bobby—he just wanted the amp repaired. His father had given him this ultra-portable combo, and it’s Bobby’s go-to amp when he needs to sit down and learn a new song. Best of all, he swears that with his Tele he gets a very cool Led Zeppelin sound. That’s entirely possible, since Pagey supposedly tracked most of the band’s debut album with a Tele and a Supro (albeit a markedly bigger model).
I asked Bobby if it would be okay to do a couple of minor tweaks once I’d repaired the amp. I explained I’d try to improve the amp’s sound a bit without taking away from its inherent character. He gave me the go-ahead, and in the process of doing these tweaks I made a couple of interesting discoveries. For the record, the cause of the failure was a simple broken connection, so the repair itself would in no way affect the amp’s sonic identity.
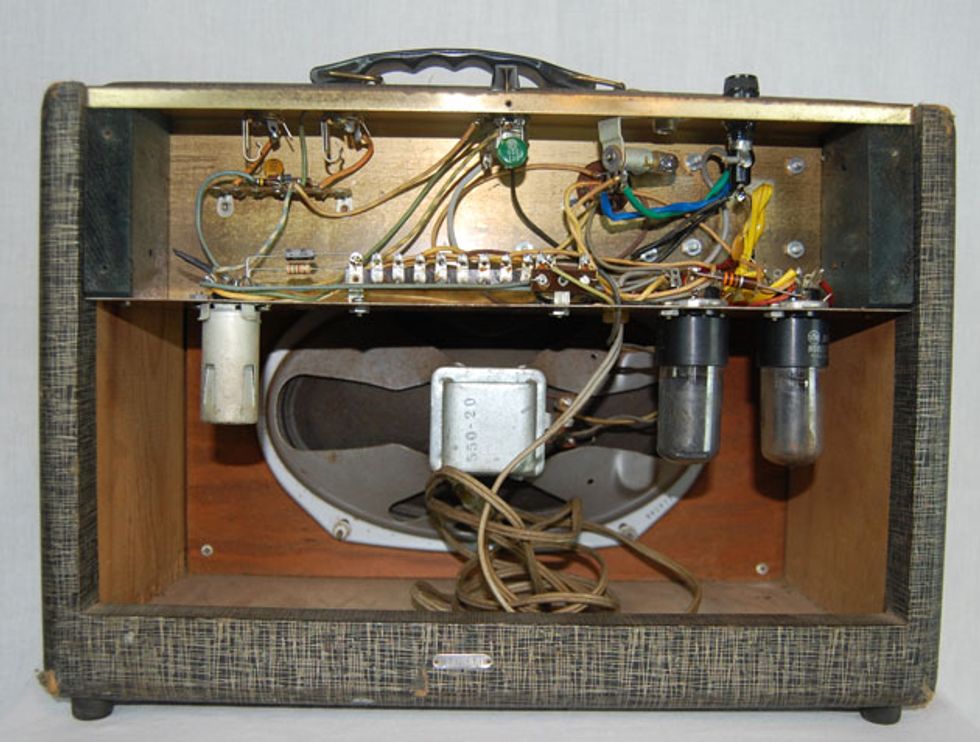
Photo 2
The 5-watt Super 1606 has a 5Y3, 6V6, and 12AX7 tube configuration, Magnetic Components transformers, and a 6x9" Rola speaker (Photo 2). And there are no tone controls—this is a one-knob affair (Photo 3).
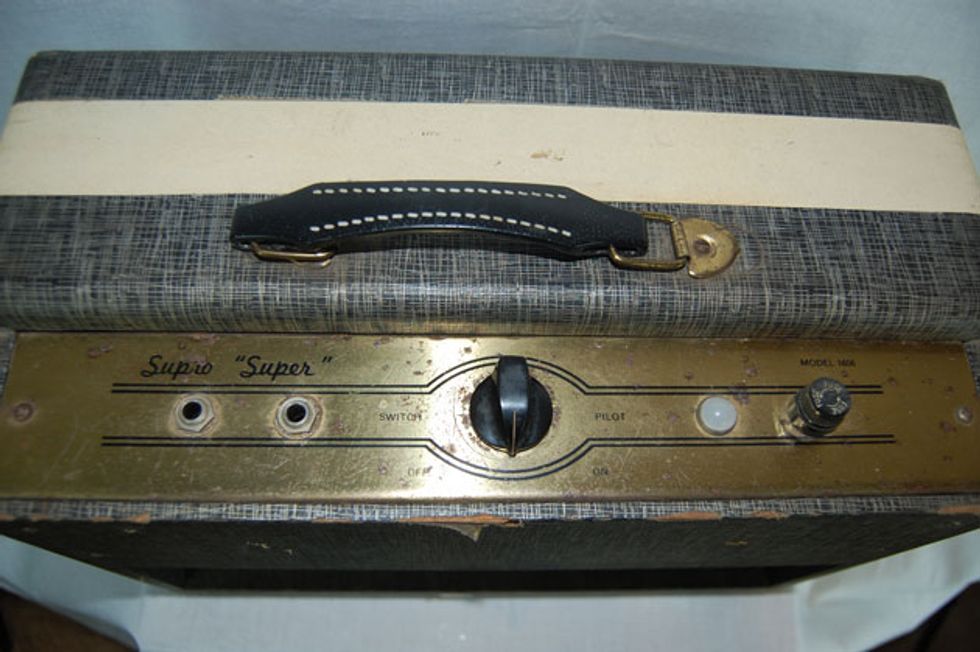
Photo 3
I went online to pull a quick schematic, but to my surprise there were none to be found for the Supro Super Model 1606. Granted, there were schematics for other amps that were very close, but none for this particular model, so I created one—complete with transformer and speaker part numbers (Fig. 1). It’s the only existing schematic for this little amp that I know of!
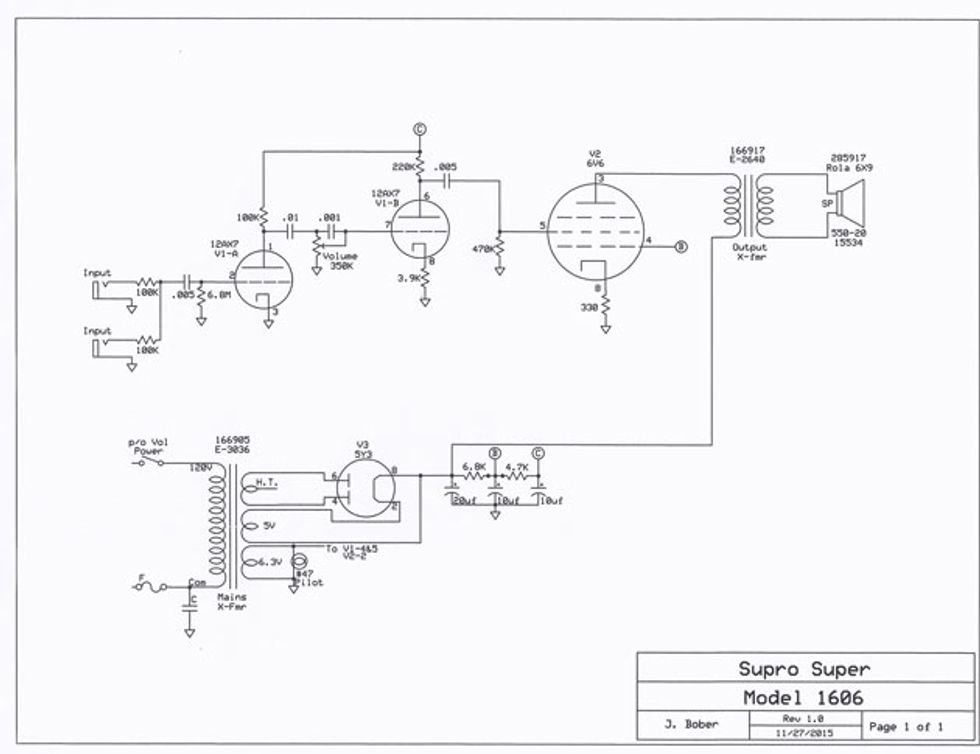
Fig. 1
What could I do for this Supro? Well, there’s certainly not a whole lot to this amp, and I didn’t want to do anything to it that would chance pushing the little Rola speaker into sonic meltdown. However, I did notice something atypical. The input stage on this amp was designed with a very old-style method using what is known as grid bias—probably a cost-cutting measure, as it eliminates one or two components. My thought was this could certainly be improved upon by implementing a more standard cathode bias type of input stage. To do this, I replace the 6.8M grid bias resistor with a more standard 1M, lifted the tube’s cathode connection from ground, and installed a typical cathode resistor and bypass capacitor configuration.
Surely, I thought, this would improve the sound just a bit and my customer would be happier with the amp than he had been before. I was wrong. While the amp did have a bit fuller bottom end, the overall feel became colder and more strident. In other words, it just wasn’t as much fun to play. There was something about the original design that was a bit softer or more compressed—more finger friendly, if you will.
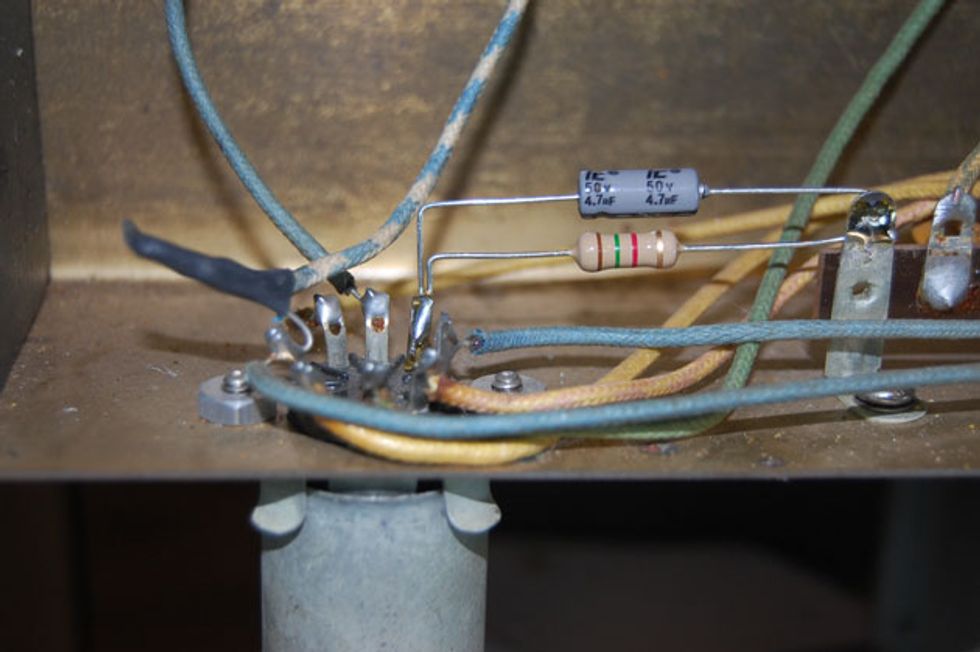
Photo 4
So back to stock configuration it went. But I did like the rounder bottom end the mod had created, so I tried one more experiment. Could I use a cathode bias configuration along with a grid bias to achieve the best of both worlds? The answer was yes, and Photo 4 shows what the mod looked like when I finished it. Adding the cathode bias resistor reduced the overall gain of the first stage a bit, which was not necessarily a bad thing since it helped to bring down a bit of the high-end spikiness. Adding in the cathode bypass cap helped bring the gain back up, focusing a bit more on the lower frequencies, giving the amp just a bit more fullness on the bottom end. Perfect!
Well, there you have it. Sometimes mods don’t do what we expect them to and an “improvement” isn’t. Now it’s time to give Bobby back his super Super.